This little structure that we call “Stellung Haselhuhn” was built by the Soviet 26th Rifle Division in cooperation with Sicherungs-Regiment 195 in 2019. It is on private property in western Massachusetts; the involvement of the extremely generous landowner and his family was of course crucial for this project. The design of the structure was chosen by the Soviet group, based on a “Zemlyanka” which was a type of shelter used for centuries by civilians, also built and used in WWII by Soviet soldiers and partisans. Many photos show Wehrmacht soldiers using simple field expedient dugouts like this as well, and wartime German guidelines stressed the importance of dug-in positions as protection from rifle fire and incendiary ammunition. This structure is built into a slope, and although we call it a “bunker,” we use this primarily as a shelter rather than a fighting position. Most of the building materials were salvaged, with some of the beams and the door taken from a ruined barn built around 1915. Some trees at the site were cut to provide logs, and an antique stove provides heat. We did use modern tools to make this; we had limited time and manpower, and we wouldn’t have been able to complete this with hand tools. As of this writing (2021) construction of a second bunker at this site is underway.
Ground was broken for this project in the spring of 2019. The majority of the work was done by members of the Soviet 26th Rifle Division reenactment group.
When the bunker was first completed, access was via a simple earthen trench.
Inside, the bunker features six bunks, a wood stove for heat, and some shelving with a small storage nook for firewood. The bunker is kept stocked with necessary supplies including lamps and lamp fuel for light, cooking equipment and tools.
The old wood stove provides heat and can also be used for cooking.
At one winter immersion event, the outside temperature at 4 AM was 13 degrees F (-10 degrees C), the inside temperature was 96 degrees F (35 degrees C)!
In 2020 the bunker entrance was improved, with wood floor and walls added to the trench.
If you would like to know more about this place or our private reenactment events in Massachusetts, please e-mail us.
Wilhelm Pfister was born in Bieswang in 1901. He was married and was employed as a stone worker. In March of 1941, when he was 40 years old, he was drafted and sent to a training unit, Landesschützen-Ersatz-Bataillon 13, in Prachatitz (Prachatice in the Czech Republic, annexed by the German Reich in 1938). After a couple of months he was sent to France, to Feldgendarmerie-Feld-Ersatz-Kompanie 7, where he spent two months on occupation duty before returning to his former training unit in Prachatitz. During his training, he was instructed on the use of the German K98 rifle, the French Berthier rifle Fusil 07/15 (Gewehr 302(f)) and the Czech ZB26 machine gun (MG 26(t)). In August 1941, he was assigned to Landesschützen-Bataillon 807, in Nuremberg, where he remained for over a year. After more than a year in the Army, he finally got a new rank, Oberschütze, in April 1942. Eventually, in February 1943, Pfister was deployed outside Germany once again, this time as part of Sicherungs-Bataillon 797. This unit was at that time in the occuped USSR, as part of Army Group Center. Pfister’s Wehrpass indicates that from February through November, 1943, he was engaged in combat against partisans in the area around Polozk and Witebsk, in what is now Belarus. In March, after 2 years of service, he was promoted to the rank of Gefreiter. In February 1944, Pfister became ill and was sent back to Germany to convalesce with Landesschützen-Ersatz und Ausbildungs-Bataillon 12. After a month, he had recovered and was sent back to his field unit, Sicherungs-Bataillon 797, now active as part of the 16th Army. The Red Army reached the border of Latvia on July 17, 1944. A week later, on July 21, Pfister was killed in action in Latvia. It’s not clear if his unit was at that time engaged again in combat with partisans, or (perhaps more likely) fighting defensive actions against Soviet regulars. Such details probably didn’t matter much to the family Pfister left behind. He was 43 years old.
The local Nazi Party district leader sent a letter of condolence to Pfister’s widow, full of patriotic jargon.
It may be easy to look at the desultory combat performance of Landesschützen units and conclude that they were completely ineffective. But as this document from the files of Sicherungs-Division 207 reveals, these units did serve an important role. Landesschützen units were trained to guard important objectives and, it seems, were better at this task, than units without this specialized training. The war demanded constant observation in the vast occupied lands.
Translated from “Hilfsbuch für den Hauptfeldwebel” by Hans Rödel, 1942.
On the March.
Every Kompanie wants to have as few people as possible drop out of the march due to injury. This can be achieved by: -Instructing the enlisted men on taking care of their feet; -Checking the fit of footwear; -Distributing powder and foot sweat salve.
On the march, the Hauptfeldwebel has a bicycle available to him, his place is with the field kitchen. In peacetime marches, though, he will always find the opportunity to march with his Kompanie. Here, he supports the Kompaniechef in inspecting the march discipline. If the unit is to rest, whenever possible he reconnoiters the resting place, which he travels to in advance on the bicycle. If the unit is to receive rations, he inquires at the right time and gives his instructions to the field kitchen. During the rest he takes care of the receipt of rations and checks that everything is in order with marching injuries.
In Camp.
In reconnoitering a camp place, it must be ensured: -That water is available for the horses to drink, for the enlisted men to wash up, and for filling the field kitchen; -That the ground is not too soft and damp, even when it rains; -That a latrine can be set up. Constructing the tents is mostly carried out by the Zugführer according to the instruction of the Kompaniechef. When orders are given out, which takes place as soon as possible, the following should be mentioned: -Additional duties (cleaning weapons, etc.); -Assignment of guards, the password; -Uniform and conduct in camp; -Location of the latrine, and the vehicles; -How far and for how long it is permitted to leave the camp; -Curfew; -Conduct during alarms; -Wakeup and departure on the next day: -Exact time.
Through proper conduct and good singing, the Kompanie can win over the heart of the cantonment host as soon as they enter the quarters. The person in charge of the quarters will almost always approach the Kompanie and report on the accommodations of the Kompanie and where they will be staying. It is practical, when the Kompanie arrives at the quarters for the first time. Here the rations and the packs of the enlisted men will be given out. The Hauptfeldwebel assigns the guards, gives the time and location of the foot inspection, the next location and exact time is made known. On rest days he proposes a weapon inspection to the Kompaniechef. Before he seeks out his own quarters, he inspects the accommodations of the Tross and a part of the Kompanie. Through the foot inspection, he determines the state of march injuries.
If there is to be a ball at the end of maneuvers, the Hauptfeldwebel is to attend and to check on the orderly conduct of his people.
In the field.
The tasks of the Hauptfeldwebel in wartime will be carried out under much more difficult circumstances. But if he has constantly worked to care for his Kompanie in peacetime, he will also master these difficulties.
What follows is translated from an original cookbook titled “Östliche Speisen nach deutscher Art” (Eastern Dishes in German Style), with recipes tested and compiled by the Oberkommando des Heeres. It was published during the war by Alfred H. Linde Verlag in Berlin and was intended to be used as a field cookbook for German soldiers in the East. This section entitled “Improvement of Cold Fare” is particularly interesting and useful for living historians, as it gives insight into some easy ways that German soldiers may have prepared canned meat and other field rations.
“Improvement of Cold Fare
To stimulate the appetite, and especially during the warm season, cold fare should be prepared in a flavorful way.
The following instructions can be combined with each other to be adapted in various ways.
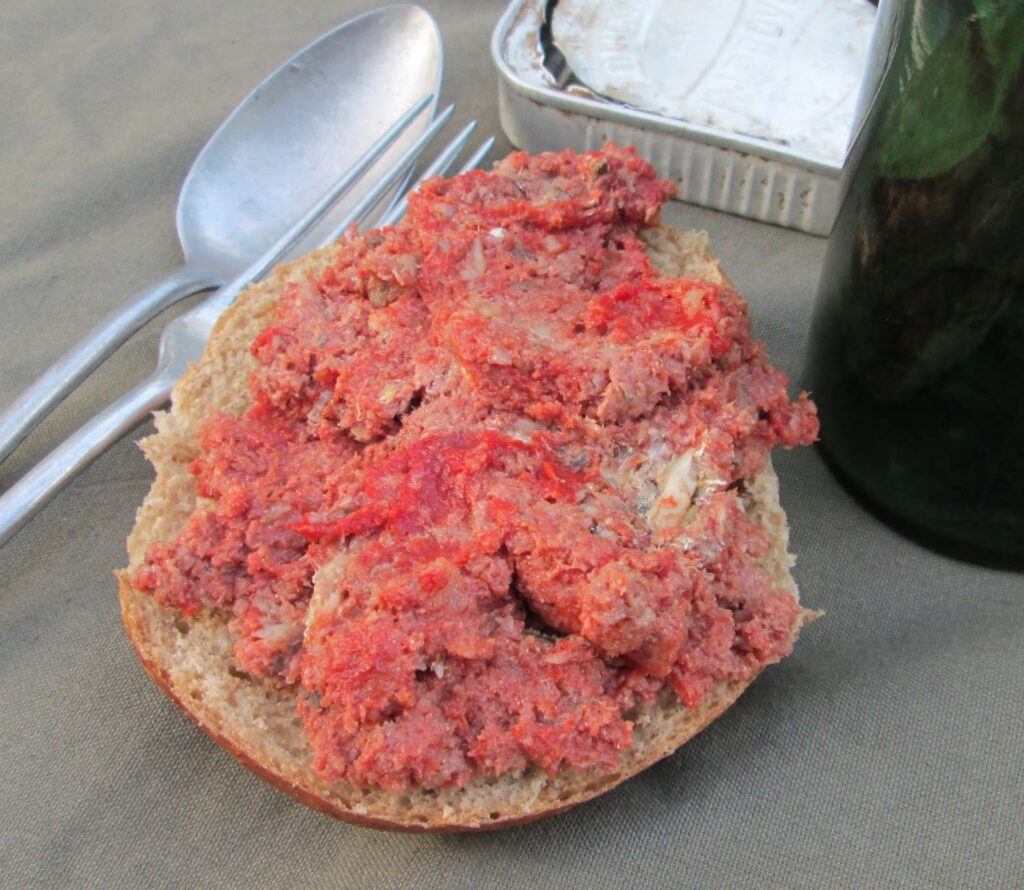
Bread spread from canned meat
300 g beef (canned) 100 g sardines 100 g tomato paste
Finely chop the beef and sardines, add the tomato paste and prepare as a pate.
Note: If the mixture is too dry, add some butter, margarine or oil.
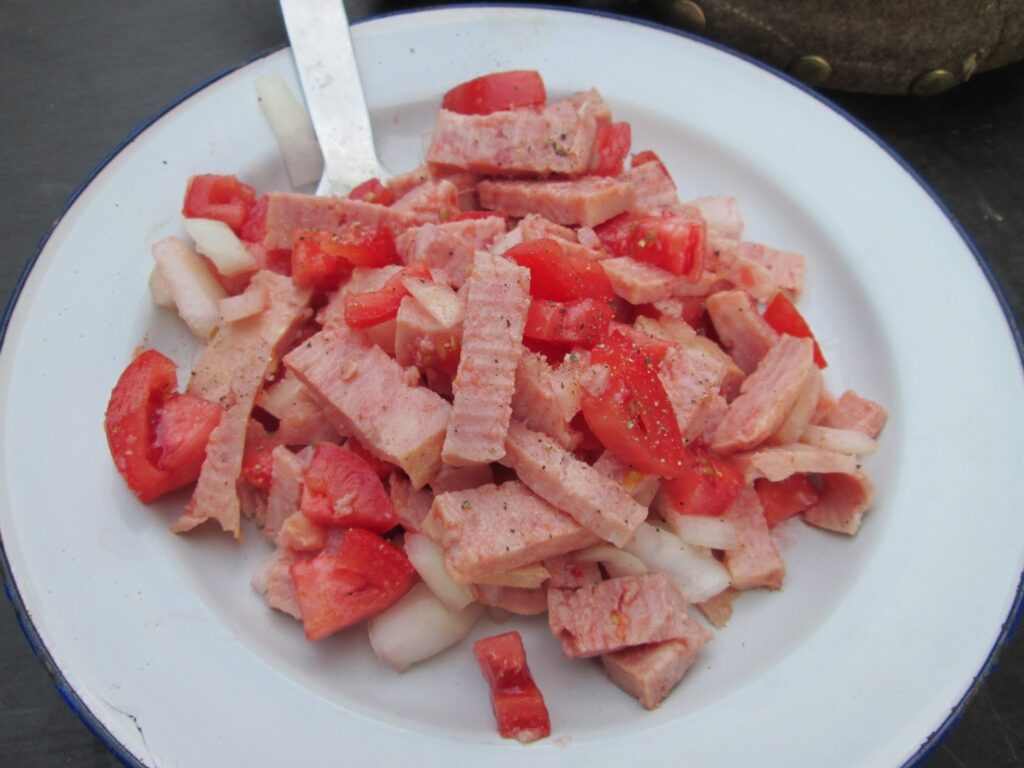
Fleischsalat (Meat Salad)
400 g canned meat 200 g diced tomatoes (fresh or canned) 100 g finely chopped onions Vinegar, oil, salt, pepper
Cut up the meat, gently combine with the tomatoes and onions. Mix with a marinade of the oil, vinegar, salt and pepper.
Note: Bell peppers can be used as a substitute for the tomatoes.
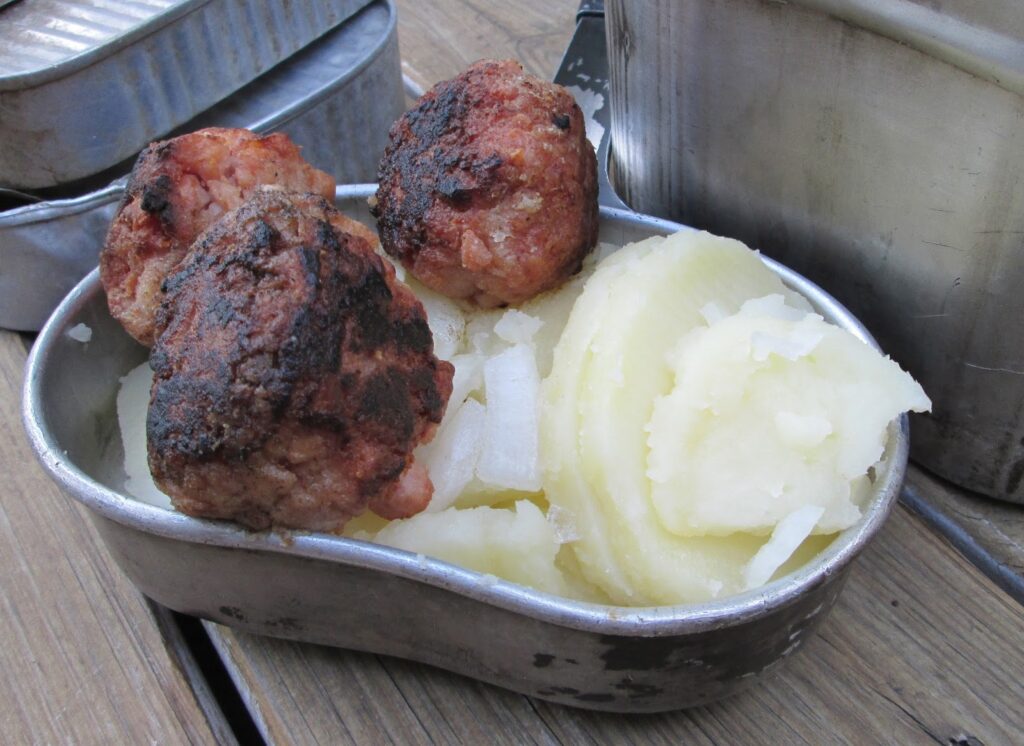
Cold Meatballs with Potato Salad
To make fried meatballs from canned meat, the meat must be finely chopped and then air dried for a time. The meat is then seasoned with salt and pepper and well-mixed with flour. This can also be mixed with bread crumbs, soaked bread, finely chopped onions, egg or only egg white, or egg substitute. Mix everything well together and form into meatballs. Coat with flour or bread crumbs and fry in hot oil until cooked through.
For the potato salad, boil the potatoes with the skin on, peel while hot and slice. Immediately mix with a marinade of water and vinegar brought to a boil and seasoned with salt, pepper and finely chopped onions. Pour this over the hot potato slices and either shake or carefully mix until the salad is bound together.
Note: The salad can be refined with oil, finely chopped herbs or diced pickles.
Canned meat and sausage
Canned meat and sausage are particularly appetizing when fried and roasted together with finely chopped onions and tomatoes.
Canned sardine salad
Mix sardines for five potions with 200 g sliced tomatoes. Marinate with the oil from the sardines, 200 g finely chopped onions and lemon juice.
Note: If tomato paste is used, it should be mixed in to the marinade.
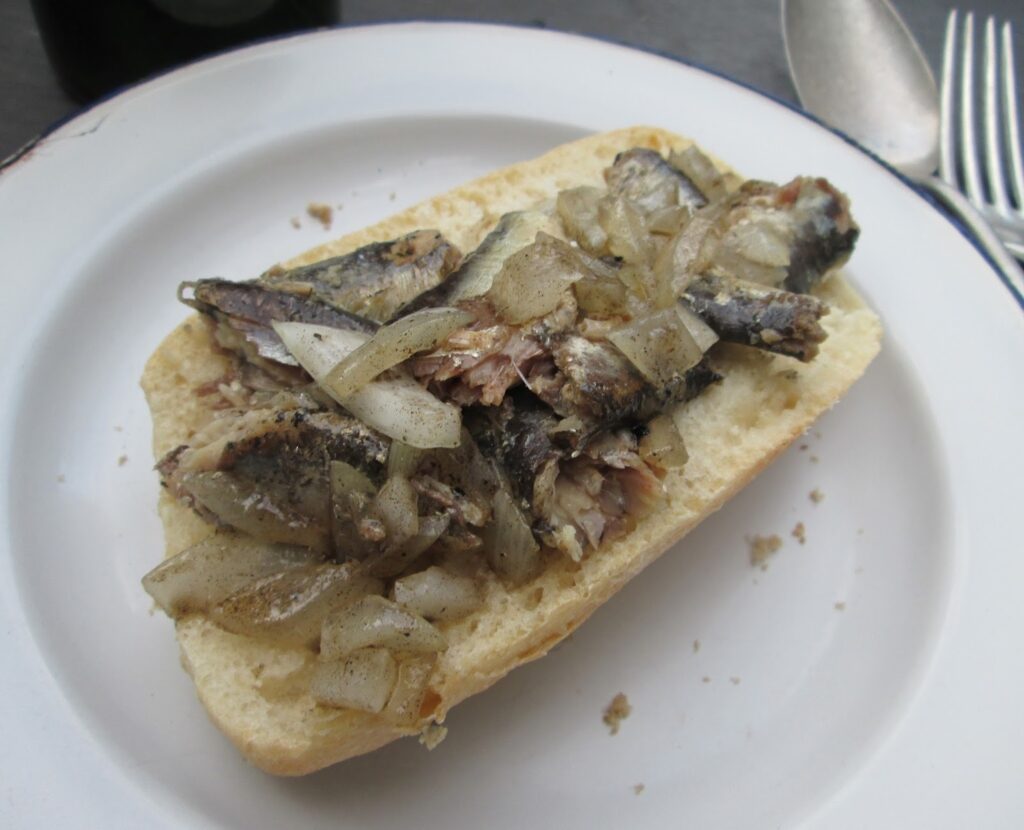
Ölsoldaten
Fry the sardines in their own oil while adding finely chopped onions. Drizzle with lemon juice as a dressing.
Canned sardines in the style of fried herring
Fry the sardines and lay them in a pot. Make a marinade from vinegar, onions, salt, pepper, bay leaf and allspice, allow to cool and pour over the sardines.
Tuna fish in oil
Tuna fish in oil can be prepared just as the canned sardines.”
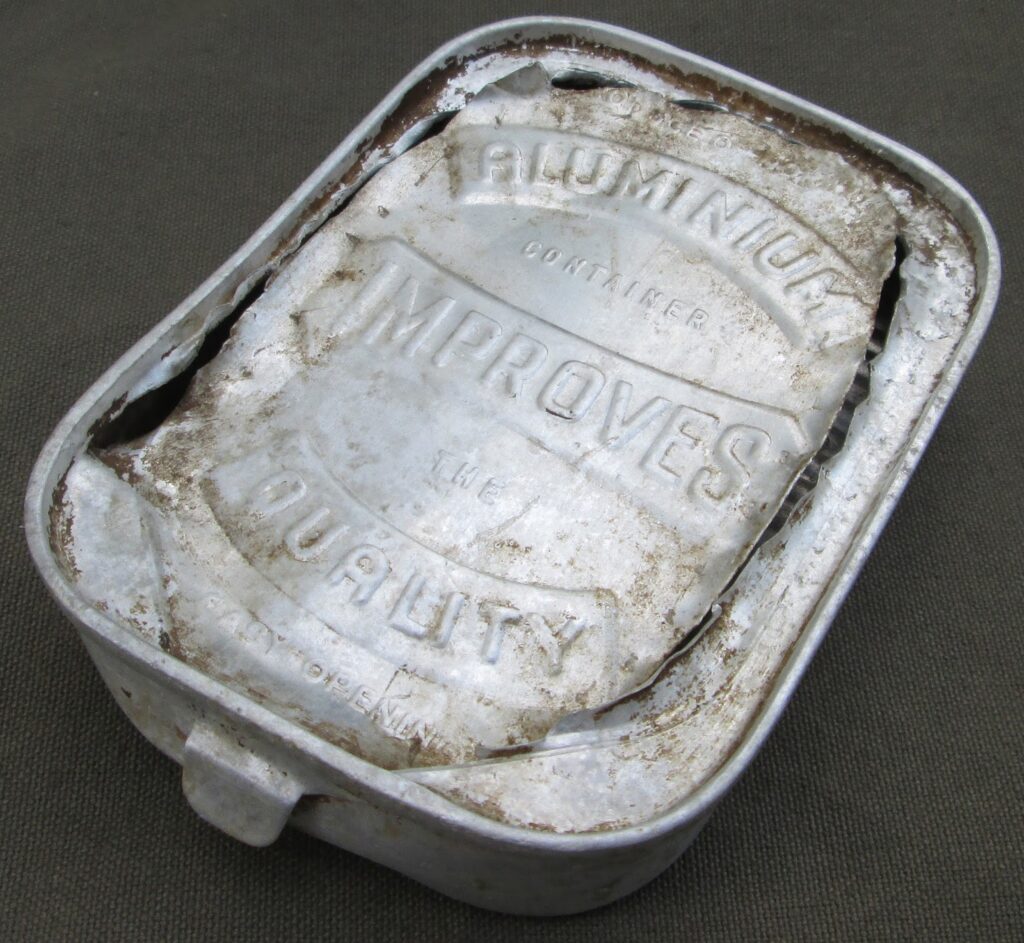
Note: For reference, a couple of pictures of original Wehrmacht-issue aluminum food cans. Here are two variations of a can that held fish or perhaps some other kind of meat. The one in front is stamped with a 1944 date code.
Here is a tin of Norwegian sardines, these are commonly recovered from former German positions. This one was found at Stalingrad.
For more information about steel and aluminum food cans issued to Wehrmacht soldiers, check out the fantastic reference “Rations of the German Wehrmacht in WWII” by Jim Pool and Tom Bock. Thanks to Peter Speiser for providing the original cookbook mentioned above.
The following six page document is from the files of the 285. Sicherungs-Division. This was disseminated to all units of the 4. Panzergruppe in July, 1941. It is part of a combat manual for Soviet partisans, translated into German (and then by me into English). This document contains information about how partisan groups were organized in 1941, and how they were instructed to fight.
These pictures are from the spring and summer of 1943. They are all from the same album, and document the training of a driver in a Panzerjäger unit, possibly Panzer-Abwehr-Ersatz-Abteilung 3. It’s my experience that private photos from this time are not easy to find, as film was growing scarce by 1943. A notable aspect of this set of photos is that this training unit was using large quantities of prewar and early war kit including M36 tunics, white shirts, white HBT, aluminum belt buckles, M34 caps and even 1934 pattern tunic and cap insignia. Some of the soldiers wear prewar shoulder straps with embroidered Panzerjäger cyphers, and the creator of the album is pictured in a Waffenrock, the use of which had been generally discontinued years before. The photos also show mismatched uniforms and insignia, a captured and reissued Czech tunic, and patch repaired trousers.
This photo and the 2 that follow: “4.3.43, Potsdam, Inspection of recruits”
“Room 66”
“7.3.43”
“Sunday visit”
“Epicurean delights”
“Alfred Schmidt”
“Locker order”
This photo and the two that follow: “On the firing range! 26.4.43”
“Marching off after completed work”
“Carefree Sunday morning, 16.5.43”
This image and the next: “Driving school. Pumping and more pumping!”
I took this set of photos each showing 10 basic German Army uniform and equipment items. I chose the items to be representative of original examples (for the most part). The photos are intended to show variation in original items side by side in the same lighting conditions.
The range of variation seen in the photos is a result of the following factors: -Changes in materials and construction as the war progressed -Wear and use -Modification by/for the wearer -Patina and toning from age -Manufacturer variation with regard to construction; variations in raw materials used
Ten German Army belts and bucklesTen pairs of ammunition pouches for the K98 rifleTen German Army bread bags and RG34 cleaning kits for the K98 rifleTen Wehrmacht canteensTen Wehrmacht mess kits and eating utensilsTen Zeltbahn shelter quartersTen bayonets for the K98 rifleTen Wehrmacht gas masks with carrying canistersTen late war German Army rucksacksTen Soldbücher, with ten ID disksTen German Army overcoatsTen Wehrmacht Tornister packsTen German Army helmetsTen German Army field capsTen German Army tunics
Disclaimer: Burning charcoal, wood or similar fuels releases carbon monoxide and other potentially deadly gases that can build up in enclosed spaces and become fatal. Hundreds of people perish every year in the USA alone from carbon monoxide poisoning. This article is about a historical practice and any attempt to replicate this must be done with extreme caution and with full consideration of associated risks and danger.
The use of steel food cans to make expedient cooking and warming devices probably arose spontaneously in many places after cans were introduced in the first half of the 19th century. An interesting description of European peasant use of food can ovens can be found in a novel by Polish author Jerzy Kosiński. Kosiński was born in 1933 and survived the German occupation with help from local villagers. “The Painted Bird,” published in 1965, is a fanciful account of a small boy wandering the Polish countryside during the war, that draws on Kosiński’s own childhood experiences. In the novel, Kosiński describes rural farmers and workers using a device he calls a “Comet,” which consisted of “a one-quart preserve can, open at one end and with a lot of small nail holes punched in the sides. A three-foot loop of wire was hooked to the top of the can by way of a handle, so that one could swing it… Such a small portable stove could serve as a constant source of heat and as a miniature kitchen.” Kosiński writes that “any kind of fuel available” was used including peat, damp leaves and moss, dry twigs, hay and potato stalks. “People always carried small sacks on their backs or at their belts for collecting fuel for the comets. In the daytime, peasants working in the fields baked vegetables, birds and fish in them.”
The 1933 booklet “Zeltbau” (Tent Construction), written by Hans Möser and published by Franckh’sche Verlagshandlung in Stuttgart, provides instruction and tips for how to build and live in tent camps, and was probably intended for use by members of the Hitlerjugend and other paramilitary organizations. This text suggests that the “simplest, most comfortable and safest” way to heat a tent is with a “Konservendosenholzkohlenzeltheizofen” (food can charcoal tent heating stove), illustrated below. (“Glücksklee” was a brand of milk.)
“Zeltbau” provides the following instructions for making and using the Konservendosenholzkohlenzeltheizofen: “The lid of an empty food can is completely cut away, the bottom and the lower third of the can are fitted with nail holes, and at the top, on the edge, a wire hanger is attached. We light small charcoal pieces and put them in the Konservendosenholzkohlenzeltheizofen. When the coals are glowing well, the oven is filled to the brim. Every one-and-a-half to two hours (depending on the size of the oven) it is refilled with fuel. The nice thing with this is, that the charcoal pieces burn without smoke and almost without ash (just like with a slow-combustion stove!). The charcoal must in any case be dry. Those with fearful minds fix two wire strips to the outside of the can (only with soldered cans!). In this way you also have the possibility to attach an empty shoe polish tin as a tray for the ash, though this will never fill up. Depending on the ground area of the tent, two to three Konservendosenholzkohlenzeltheizöfen can be hung up.”
The winter of 1941-42 was disastrous for German forces serving on the Eastern Front. The Wehrmacht was ill-prepared for the bitter cold temperatures of the Russian battlefields. In the battle for Moscow, there were more casualties from cold than from combat. About 250,000 German soldiers suffered frostbite in that freezing winter. As part of a plan to prevent a repeat disaster the following winter, in 1942 the Wehrmacht issued a handy little book called “Taschenbuch für den Winterkrieg” (Paperback for the Winter War) which featured extensive information about winter camouflage, clothing for keeping warm, maintenance of equipment in low temperatures and other subjects designed to help German soldiers live and fight in the Russian winter. The following excerpt from this manual discusses ideas for improvised heat sources.
“The ability of the soldier to resist the cold is considerably strengthened when as many as possible opportunities to get warm or to stay warm can be achieved, especially for the feet of sentries. Even field positions, bivouacs and emergency lodging can be sufficiently heated with simple equipment or self-made devices. Even a stopgap heater is better than none at all.
The following can serve for warmth: -Candles -Lamps -Cooking equipment (alcohol, benzene, petroleum) -Warming fires -Hot stones, etc. -Field ovens -Lodging ovens -Walled-up ovens
Tents, snow bivouacs, etc. can readily be heated with candles, lamps or cooking equipment to a reasonably tolerable temperature. Food cans or marmalade buckets poked through with holes and filled with glowing ashes or wood coals also provide a good, handy heat source (see illustrations). Development of harmful gases must be looked out for (follow operating rules exactly!). Through covering, the melting of snow over the candle etc. can be hindered.”
The text is accompanied by two illustrations that show improvised tin-can heaters. The first shows a hanging tent oven made from a marmalade bucket suspended from tent poles. The second illustration shows a food can, placed on stones, with charcoal as fuel, used as a heat source. Both cans have many holes poked in the sides and bottom.
“Tornister-Lexikon für den Frontsoldaten” by Gerhard Bönicke was a book of tips for life in the field that was published by the Wehrmacht for distribution to soldiers in 1943. This book includes instructions for the same type of tent charcoal oven in the section of the book dedicated to expedient oven construction. “For the combustion of charcoal, use a bucket without a lid, with air holes on the sides and bottom as shown. The bucket is placed on 3 or 4 stones or is hung on three tent poles.” This book also provides instructions on how to make charcoal for use as a heating fuel.
How big was a food can or marmalade bucket? Food cans came in various sizes, of course, but a common size of Wehrmacht issue food can is shown below, together with a circa 1930s German marmalade bucket that is the same size. Both the can and the bucket are about the same size, about 4 inches in diameter and about 4-7/8 inches tall. The straight sides (no ribs) are typical for steel food cans from that era.
To find out how well a food can stove of this size might heat a tent, I used this postwar (1950s or 1960s) West German plum jam bucket that is the same size as the cans shown above. I used a nail to poke the air holes in the sides and bottom, based on the illustrations in the texts. The round nail pokes square holes. I put a piece of round wood inside the can to support it while driving the nail through, and used the round surface of the hammer to push out any minor dents that occurred.
For fuel, I used lump charcoal. After the charcoal was burning I left the stove outside for a while until most of the paint was burned off the metal. I then placed the stove on rocks inside a four-panel pyramidal Zeltbahn tent, a small tent that would have housed four crowded soldiers in WWII. I used only four tent stakes to affix the stove to the ground, and it was a cool, very cloudy, breezy day, with light drizzle. I hung a thermometer in the tent on the opposite side of the stove. The stove burned well, the charcoal gives off a lot of heat and burns for a long time.
After 30 minutes I checked the thermometer. The outside temperature was a cool 53 degrees Fahrenheit. Inside the buttoned-up tent, the temperature had risen to a balmy 80 degrees Fahrenheit!
I let the stove burn out and cleaned off the paint residue. At a future time I might get a carbon monoxide monitor and run another test to learn just how deadly this thing might be.
It is easy to see how this useful little stove could have had myriad applications in the field. My test suggests that these little stoves could have kept fortunate soldiers reasonably warm even in the bitter cold.