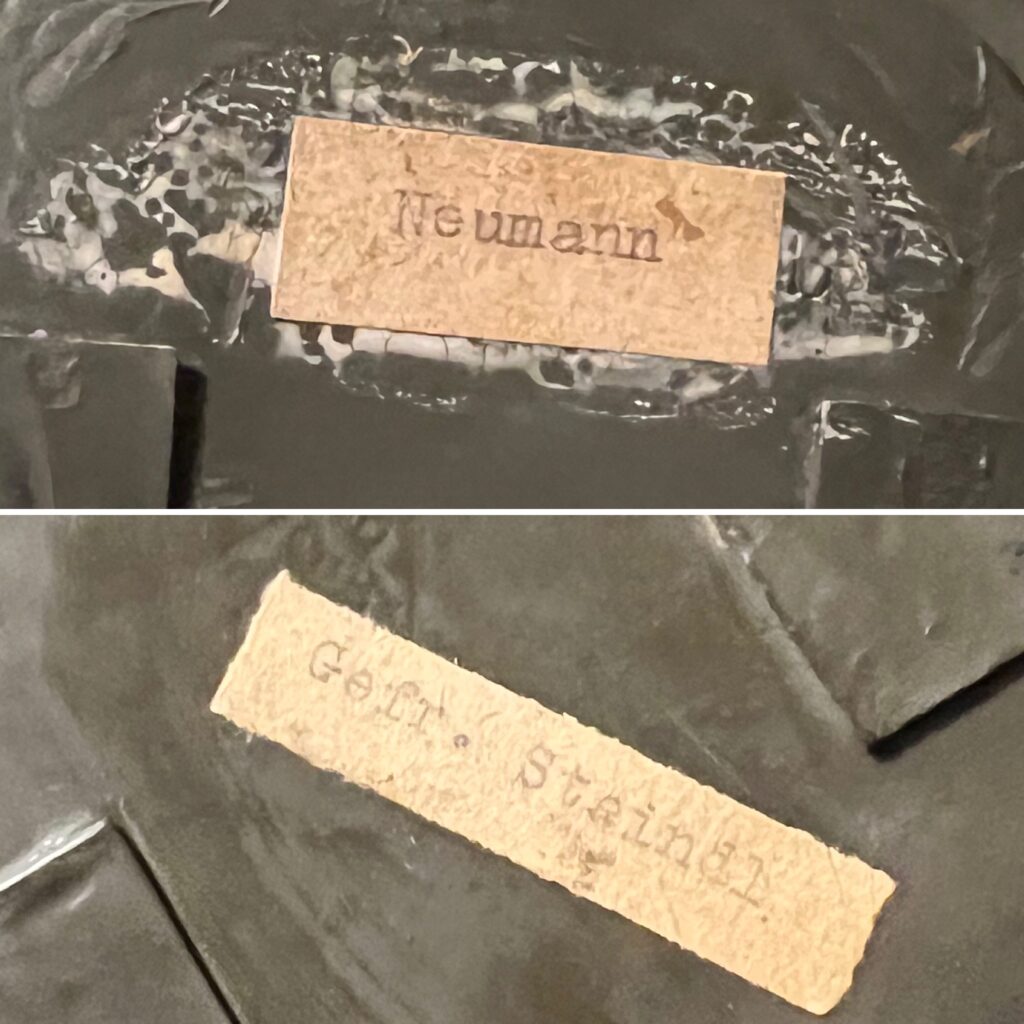
It was common for the inside of the gas mask canister to have a simple paper label on the anti-fog lens insert compartment, with the name of the soldier typed or hand written. These small typewritten labels are perhaps the most typical wartime style. For more information about how uniforms and equipment were marked with names, see this article.
Here is an example of a pre-printed label being used for this purpose. You can see that the unit is printed on the label here. Presumably, these unit-specific labels were printed at Bataillon level, for use by every Kompanie.
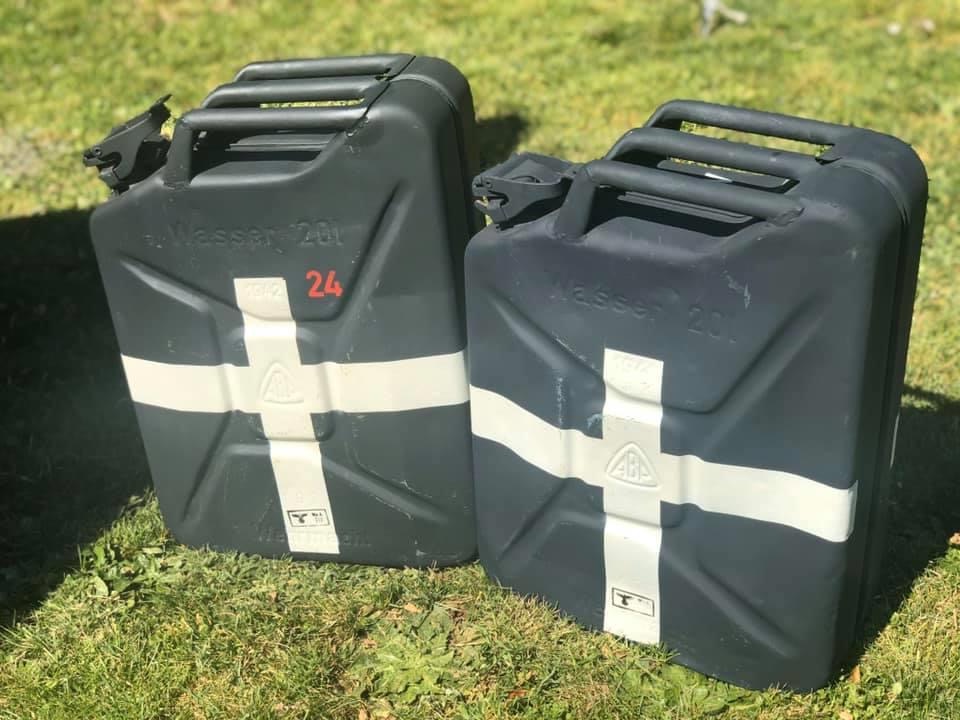
You can see that the old unit designation of this unit is crossed out and the new one inked in. This designation changed in April 1940. This can was made in 1942, so the obsolete labels remained in use for at least 2 years after the designation changed.
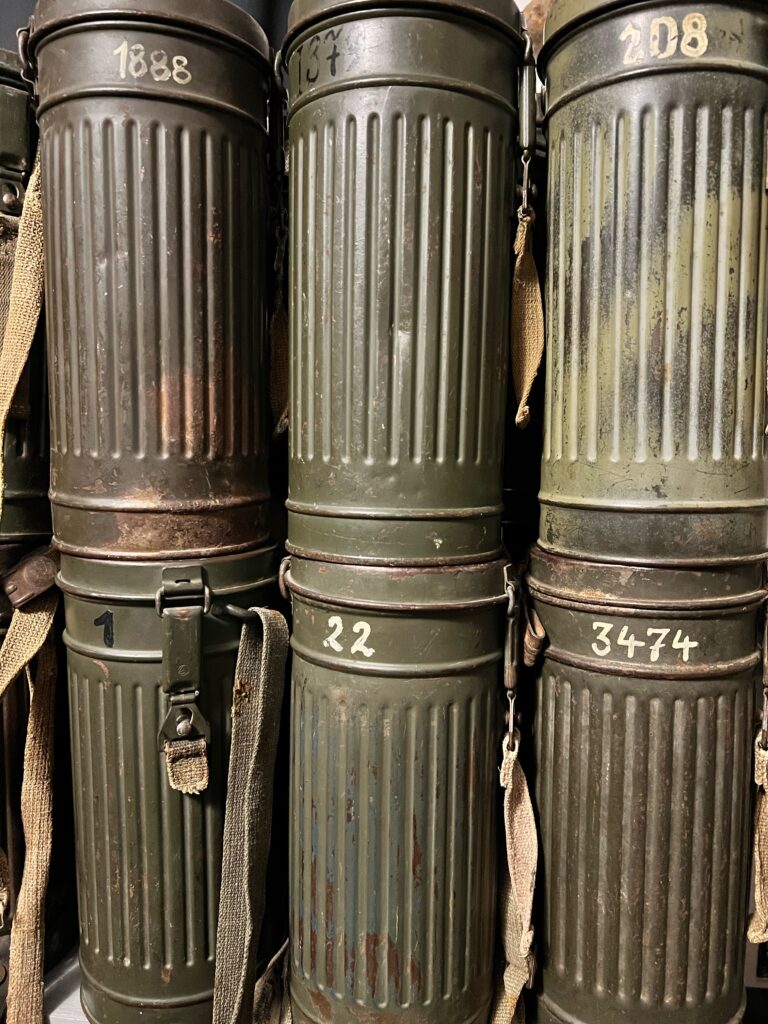
Note that the last line is for “number of the can” which is the unique number assigned by the gas protection NCO to keep track of the unit’s masks. The number of the can is not the ID disk number, the Soldbuch number, the Feldpost number or anything else. Typically this number would be painted on the outside of the can. Here are a few original examples.
I made a reproduction of this printed label with a dotted line for the unit so you can stamp, write or type any unit desired and use it for your own can as part of your living history impression. Here is a link.
To illustrate how we plan reenactment events based on historical documentation, I will use the example of an event we hosted in Bethel, Maine, in August 2020. The chosen historical scenario for the event was the struggle between 281. Sicherungs-Division and the 2nd Leningrad Partisan Brigade in northwest Russia (near the towns of Iasski and Kholm), August 1942. The scenario was chosen in part based on the easy availability of historical documentation pertaining to the events. Some of the combat actions between these two units are the focus of the Osprey book “Soviet Partisan versus German Security Soldier” which was published in 2019, and this book was recommended reading for all participants prior to the event. In addition, the war diary of the 281. Sich. Div. from this time is available free online as a scanned NARA microfilm roll (T315 R1871) and we were able to use this source for extremely detailed information. We chose a specific scenario that was a good match for the climate, terrain and setting at the site where the event would be held. We also chose to represent actions that would be well-suited for an event with a very small number of participants.
What follows is from the event primer, made available to all participants a month before the event.
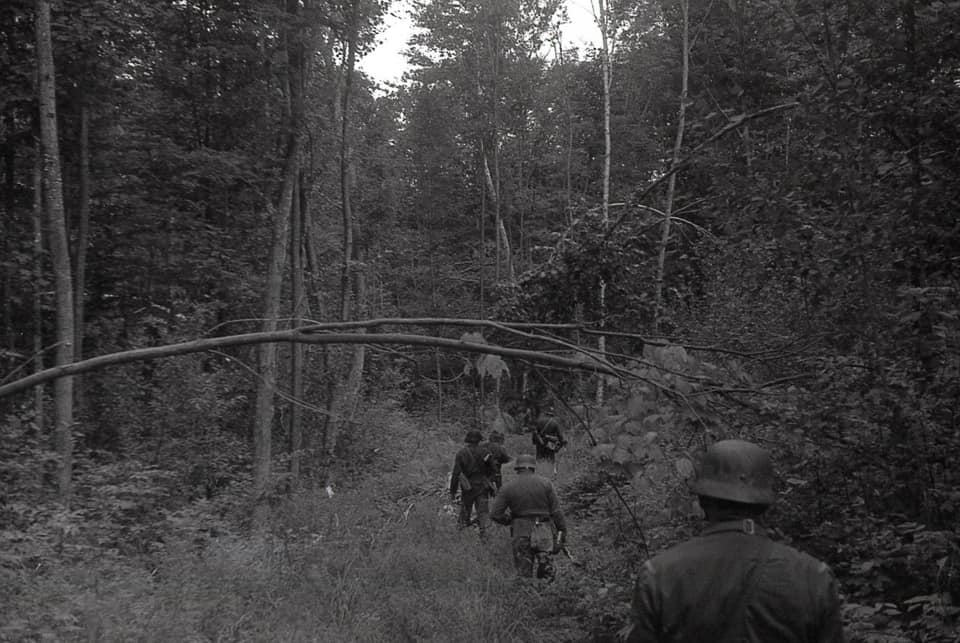
“What we will be portraying, specifically, will be the forest outside the town of Woronzowo, August 22, 1942.
Background: The terrain in north-western Russia features dense forests, lakes, and marshland, and is very difficult to traverse in any season. Between July and December 1941, a “Leningrad Partisan Zone” in the area of Lake Polisto grows to a strength of over 1,000 men. These partisans inflict significant casualties in the German rear area units of Army Group North. In response to this growing threat, the Germans undertake a series of anti-partisan operations in August and September 1942. These operations have varying degrees of success, but by the end of September the Leningrad Partisan Zone has been destroyed. In the days prior to August 22 there were numerous encounters between German troops and Partisans in the area of operations of the 281. Sich. Div.: -August 18: One action results in 2 dead partisans and the capture by the Germans of 1 light machine gun and 2 rifles. A scout troop encounters a band of 100 partisans. A factory is burned down by partisans. German units push into partisan controlled territory. -August 19: Germans chase a Partisan group that had waged a hand grenade battle against local security forces. A Partisan headquarters with 150 men is reportedly plundering the area. -August 20: Constant movement of small partisan groups is observed, larger partisan groups are reported. A clash between a German scout troop and 50 partisans results in 3 dead on each side. Local security does battle with partisans, with 6 partisans killed (2 of them women). One of the local security troops is killed, another defects to the partisans. A German force of over 200 men with 3 Flak guns undertakes an offensive operation against a band reported to have 120-150 partisans. -August 21: Hundreds of partisans surround local security forces. The German offensive of the previous day was not successful. Despite being surrounded, the Partisans slipped away. -August 22: a fight between German Polizei troops and partisans results in 8 dead partisans, 8 wounded Germans. Partisans attack and partially burn down an industrial building. Small partisan groups are reported.
Soviet overview: In 1941, the 2nd Leningrad Partisan Brigade was very irregularly equipped, but that was changing in 1942. By this stage of the war they were being supervised by an increasing number of officers and other uniformed personnel sent from Soviet lines. Entire detachments were sent by the Red Army, tasked with committing acts of sabotage and diversion. By August 1942 the Partisans were made up of Red Army troops who escaped POW camps or encirclement, mobilized young people from the area, and Red Army detachments. Weapons and equipment were being flown in, airdropped, or brought from Soviet lines. The numbers of light and heavy machine guns as well as mortars were increasing at this time. Soviet participants at this event will be portraying a small Partisan force recently separated from a larger band, having been pushed into a new area by German offensives. You know much larger German forces are active somewhere in the vicinity.
German overview: Sicherungs-Bataillon 869 has just arrived in the town of Woronzowo. Partisan activity in this sector is constant. Our Bataillon is stretched thin, our tiny force has been ordered to establish an outpost outside the town. The size and strength of Partisan bands in this forest is unknown. But we know they are there.
IMPORTANT FOR BOTH SIDES: This forest is vast and unfamiliar. The only thing you know about it for sure is that it is extremely dangerous. Your movements will be dictated by your command. You must obey all orders exactly. If you get separated or lost- you are as good as dead. Expect to remain close to roads and trails. Neither side has the capability for offensive actions of any scale, nor the ability to conduct a sustained defense.”
In addition to this event primer, specific uniform guidelines for German participants were also published well before the event, as well as logistical information about accommodations, food and water:
“-Uniform: We will be wearing the Drillichanzug (HBT uniform). Jackets should be the 2 pocket green M40 style without breast eagle/collar tabs/shoulder straps (rank insignia only). Trousers could be M40 or M42 pattern. -Equipment: We are going for a fairly uniform look. The belt should be set up with bread bag, canteen, mess kit, bayonet, gas mask canister, and 2 K98 style ammunition pouches. Bayonet can be German or Czech (German preferred). Entrenching tool in carrier is optional. Y-straps should not be worn. Use of a bread bag strap to support the weight of the suspenders (if desired) is preferred. -Headgear: M34 field cap without soutache, single decal M35 or M40 helmet. Mosquito nets are encouraged. -Weapon: K98 or Czech VZ24 (K98 preferred) -Footwear: if you have jackboots, wear them. Low boots only permitted if that’s all you have.
Tentage: We will be erecting a communal tent in which everyone can sleep. Bedding is on you. One or two blankets and/or an overcoat should suffice. No pillows or mattresses of any kind. If you desire, you can bring your own Zeltbahn tent and sleep in it. This is an authenticity compromise but will create the appearance of a larger outpost that will be occupied by more troops “coming later.”
Water: Bring one gallon of water and keep it in your car as a reserve in case we need this.
Food: There will be one communal meal on Saturday. All other meals are on you. Ideas for stuff to bring include unsliced bread, cheese or salami wrapped in wax paper, food in unlabeled cans/jars. You can fit quite a bit of food in your mess kit.
Forbidden: Anything modern, M43 anything. This is a 1942 scenario. Tropical equipment is not authorized. Taking of digital photos should be kept to a minimum. Be discrete or take photos at times when we are not in time travel mode.
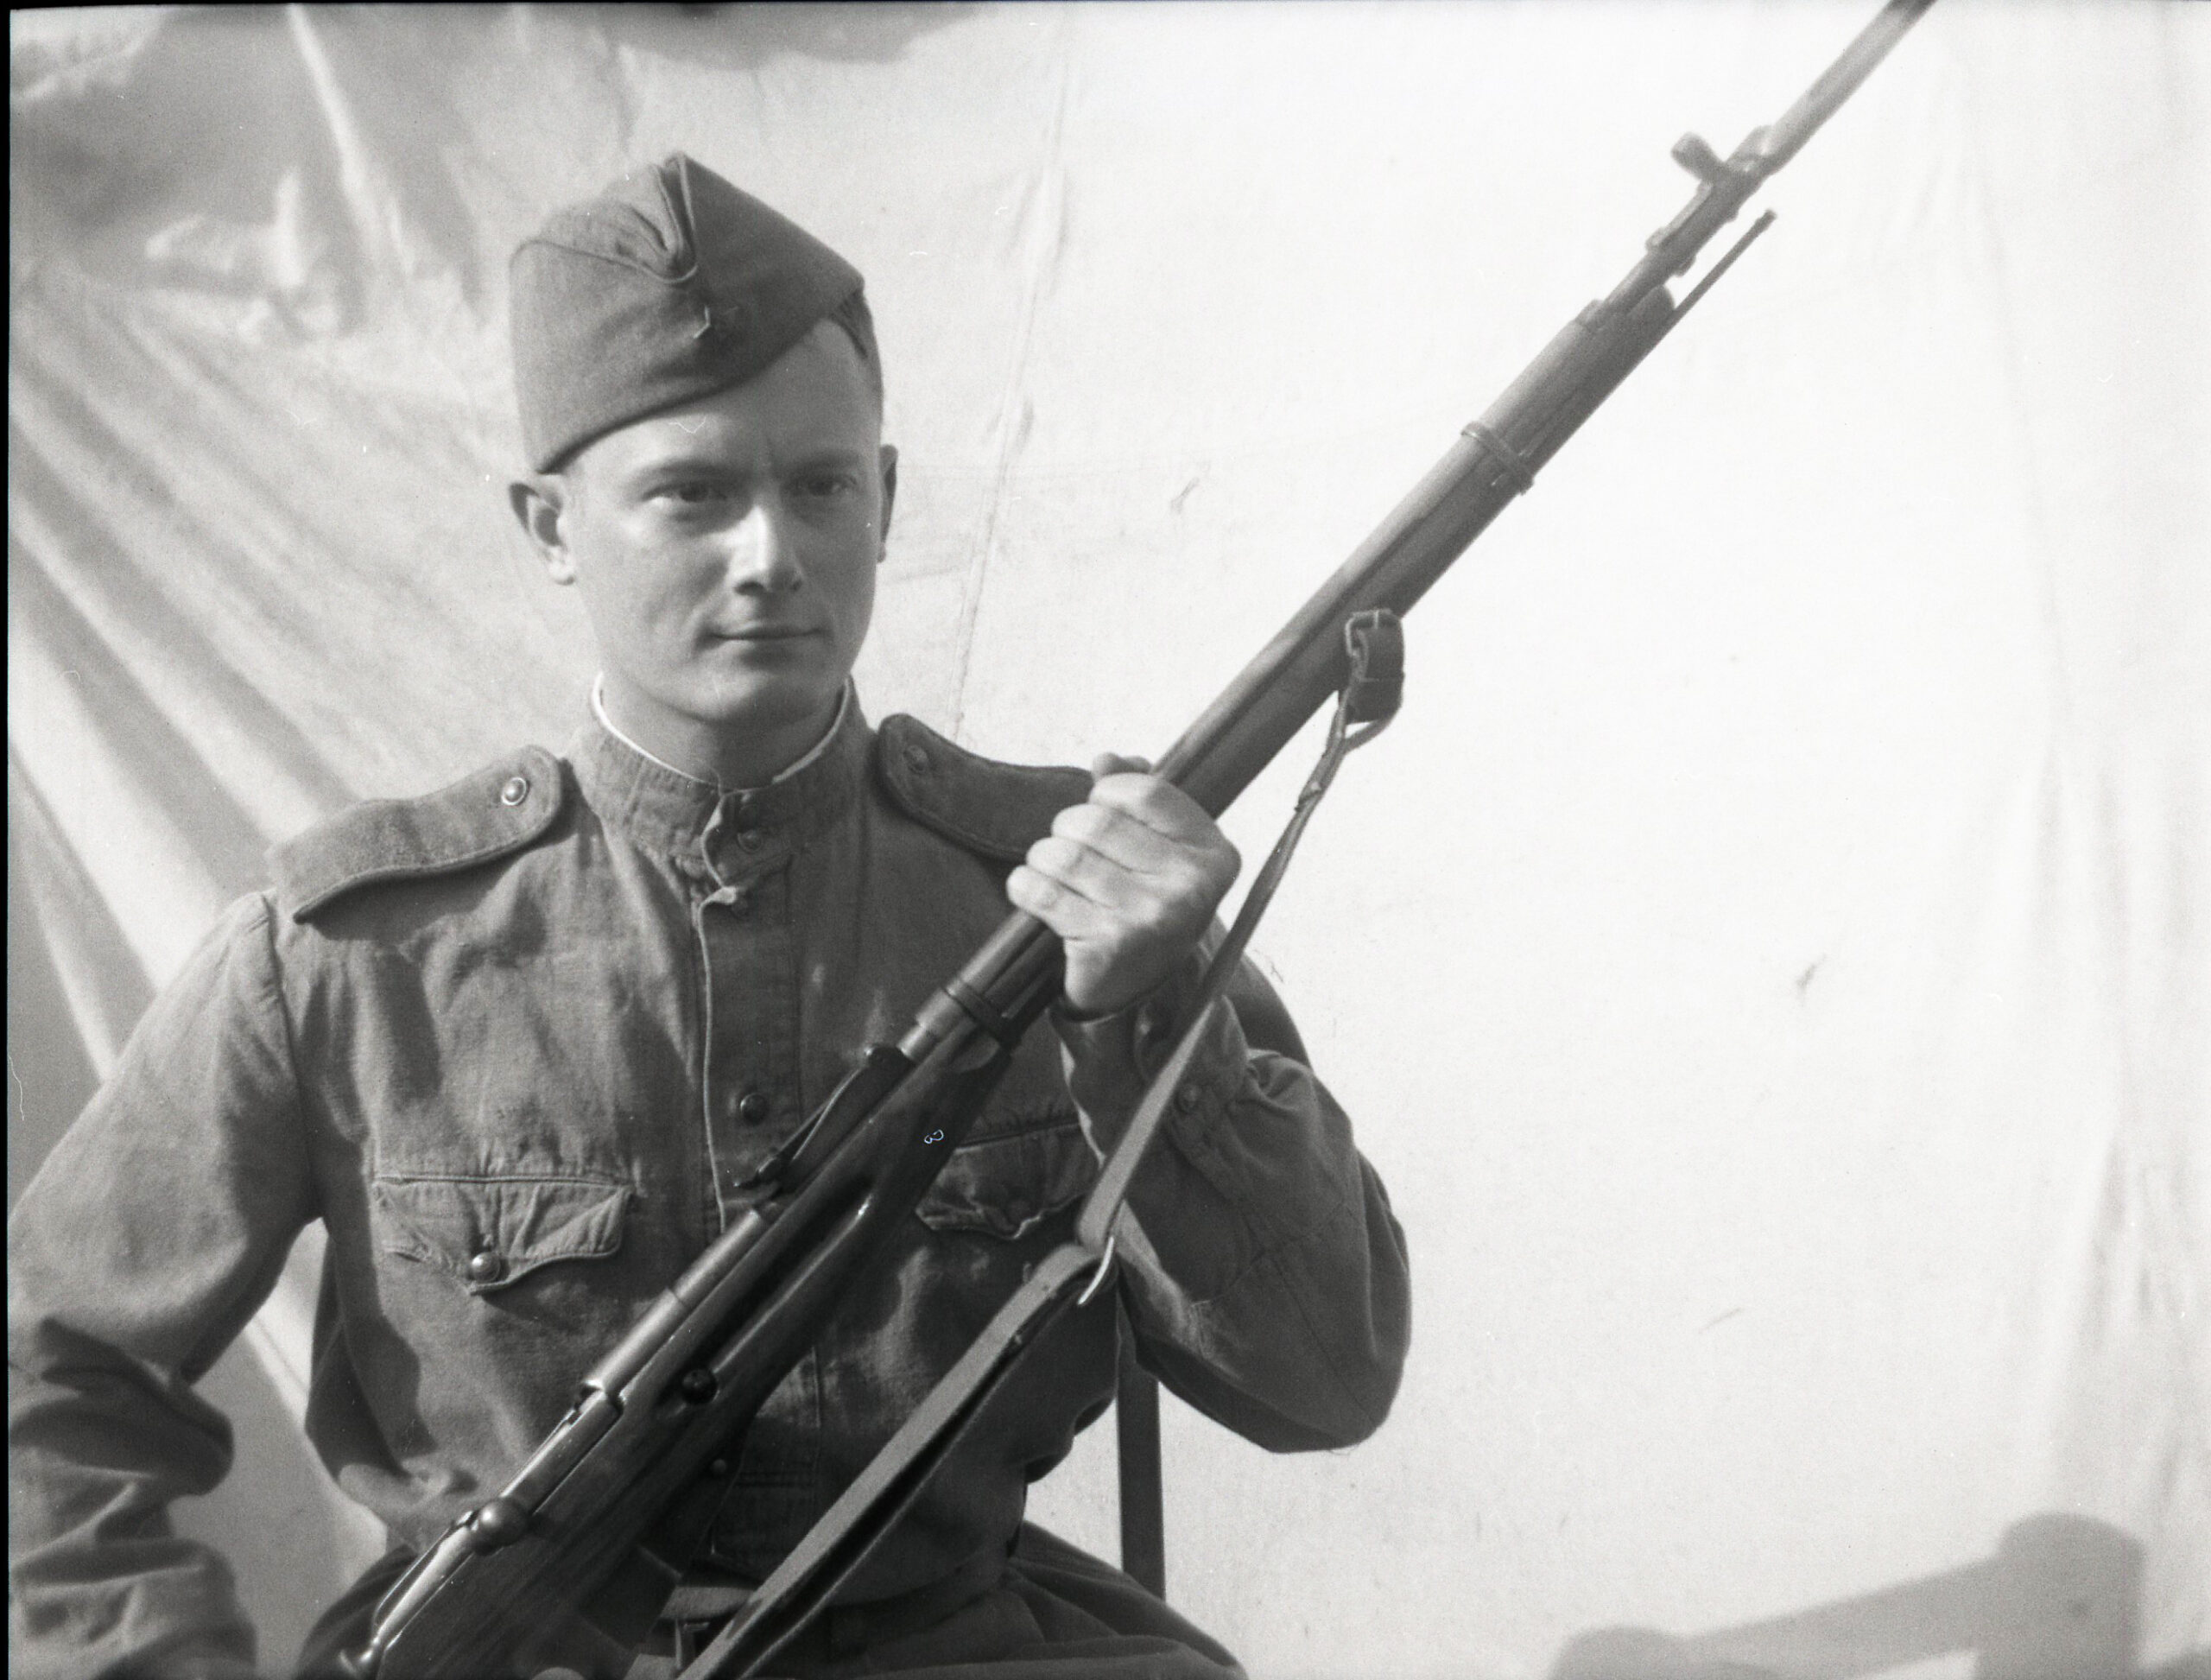
Historical note on the use of Czech weapons: This soldier was in the unit we will be portraying, he was initially trained on Czech weapons and later on the K98. https://festung.net/wehrpass-of-a-gefreiter-in…/“
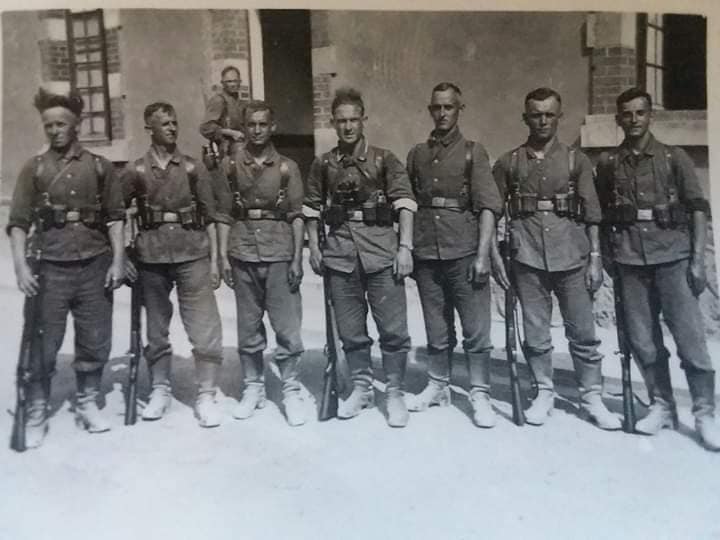
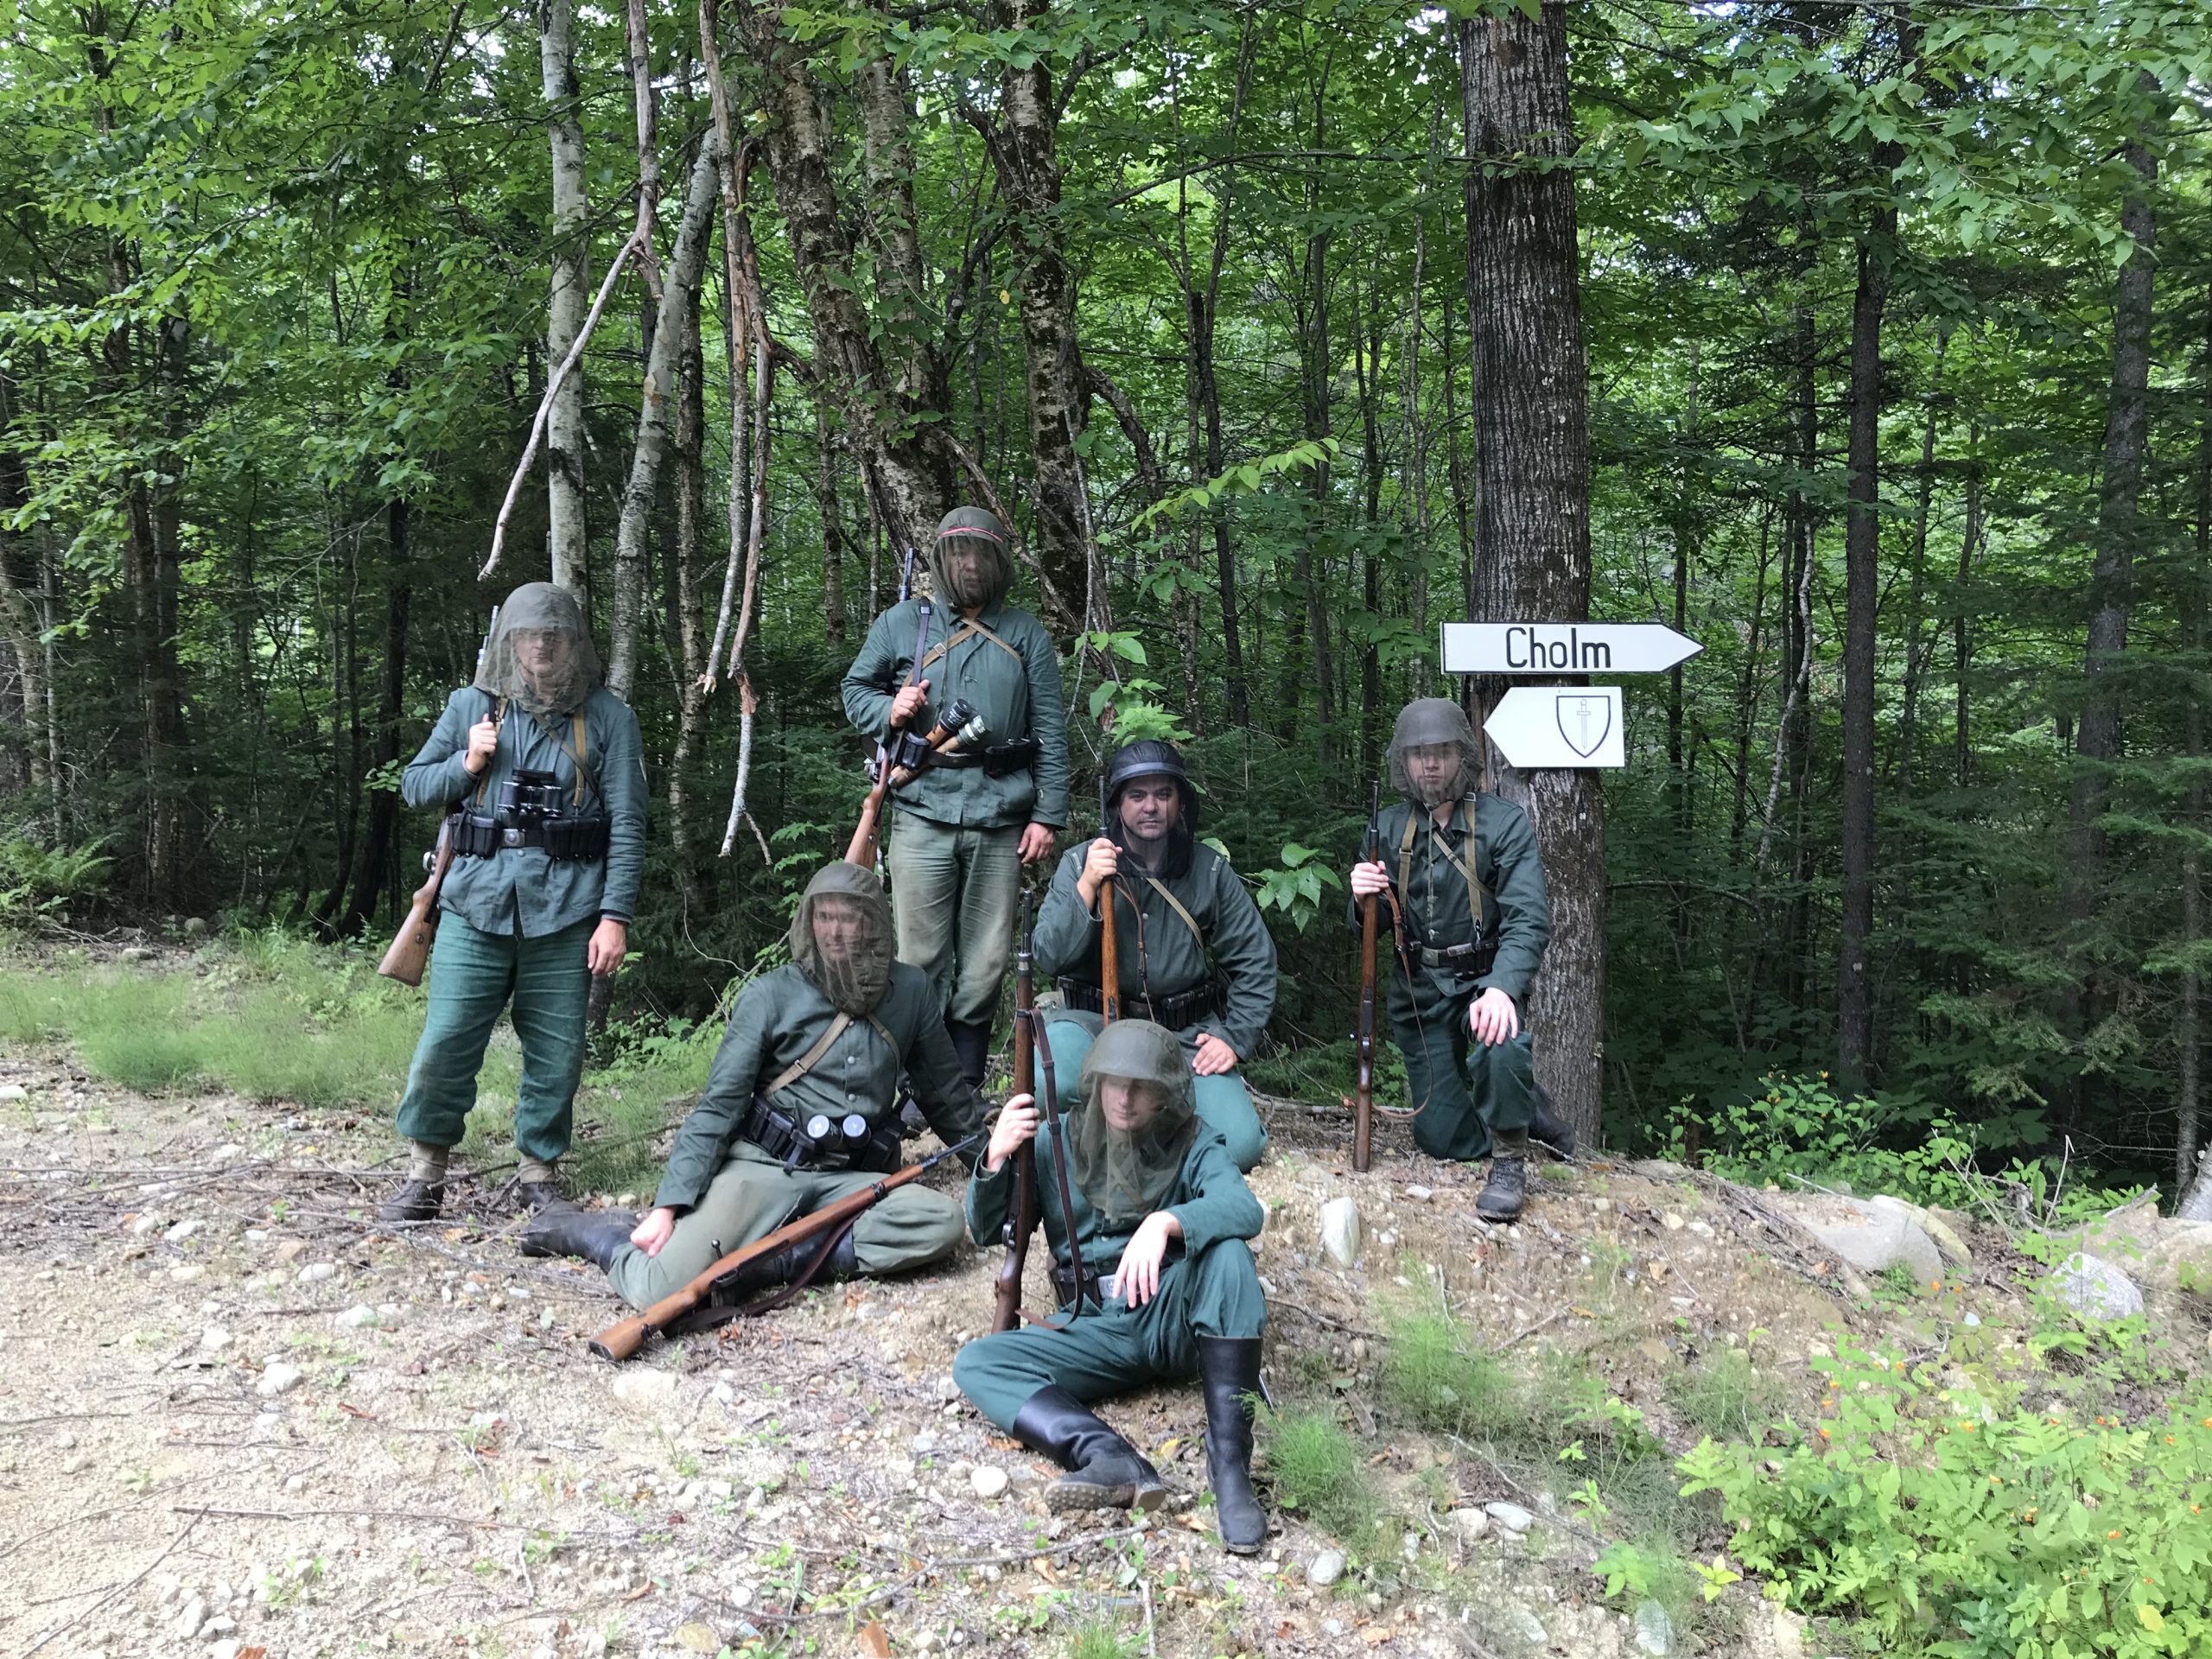
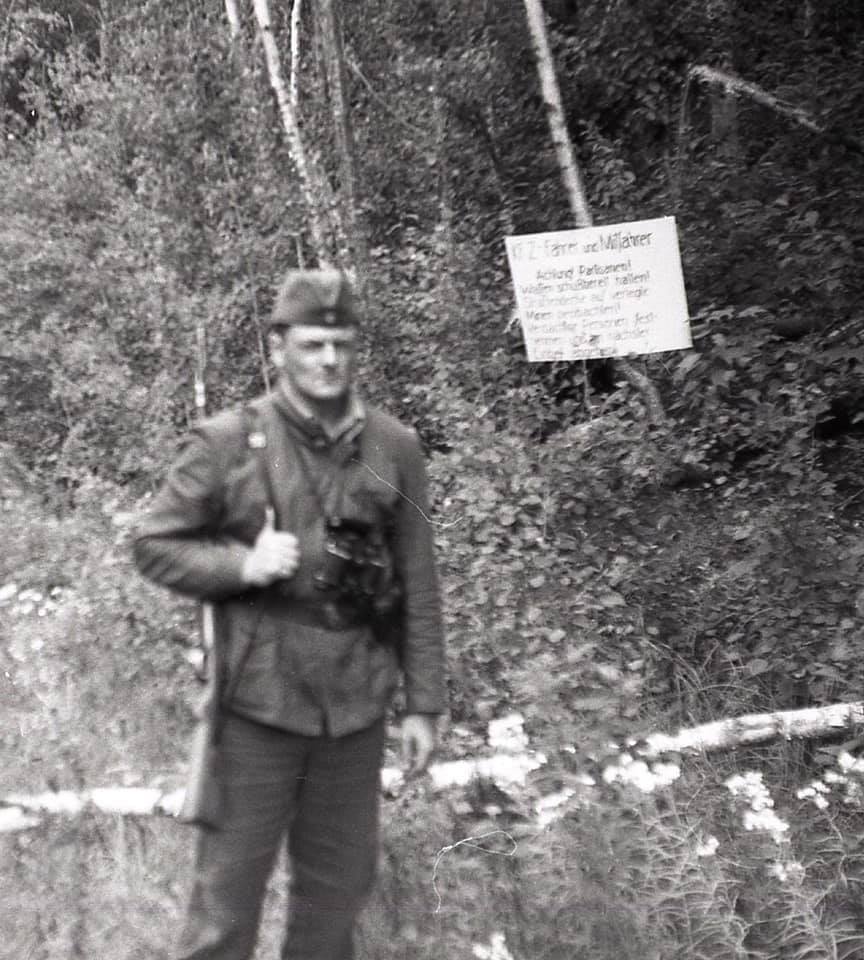
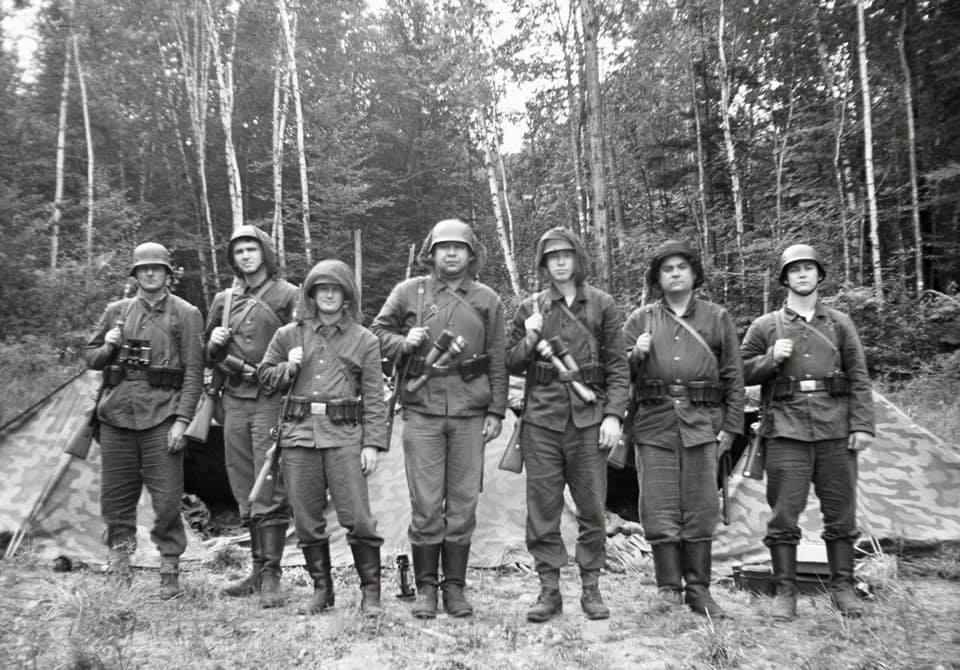
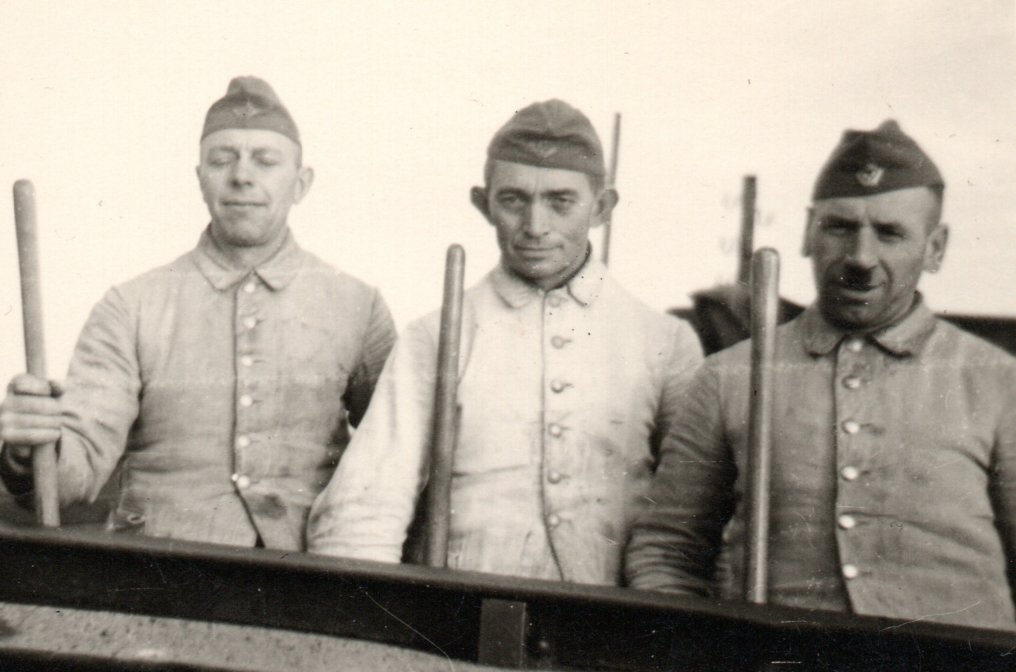
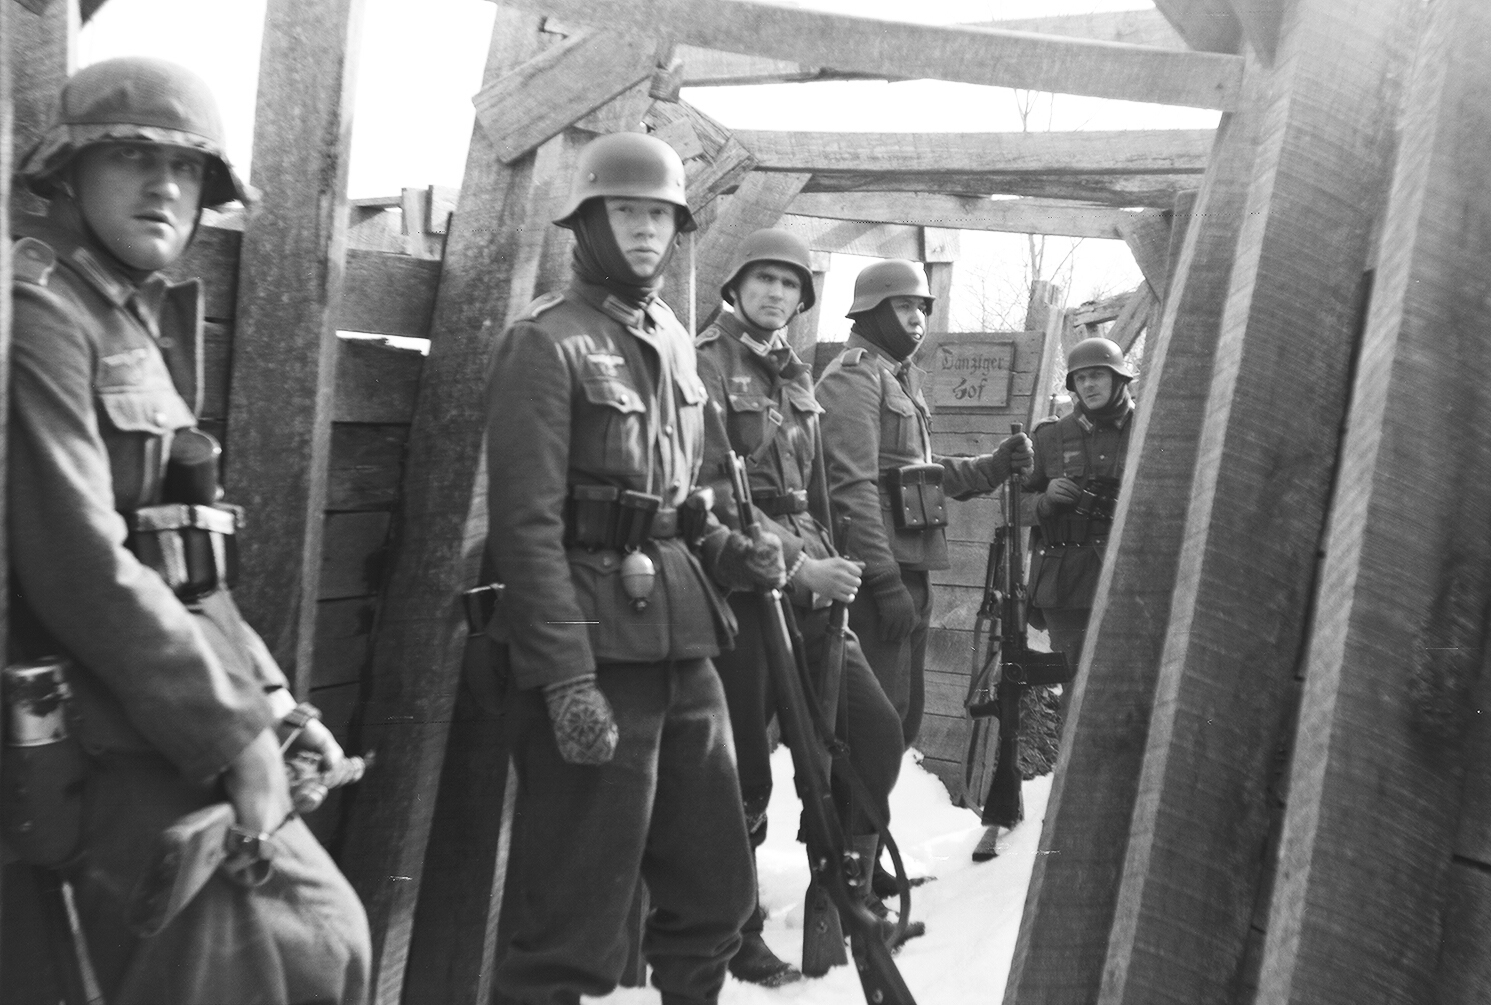
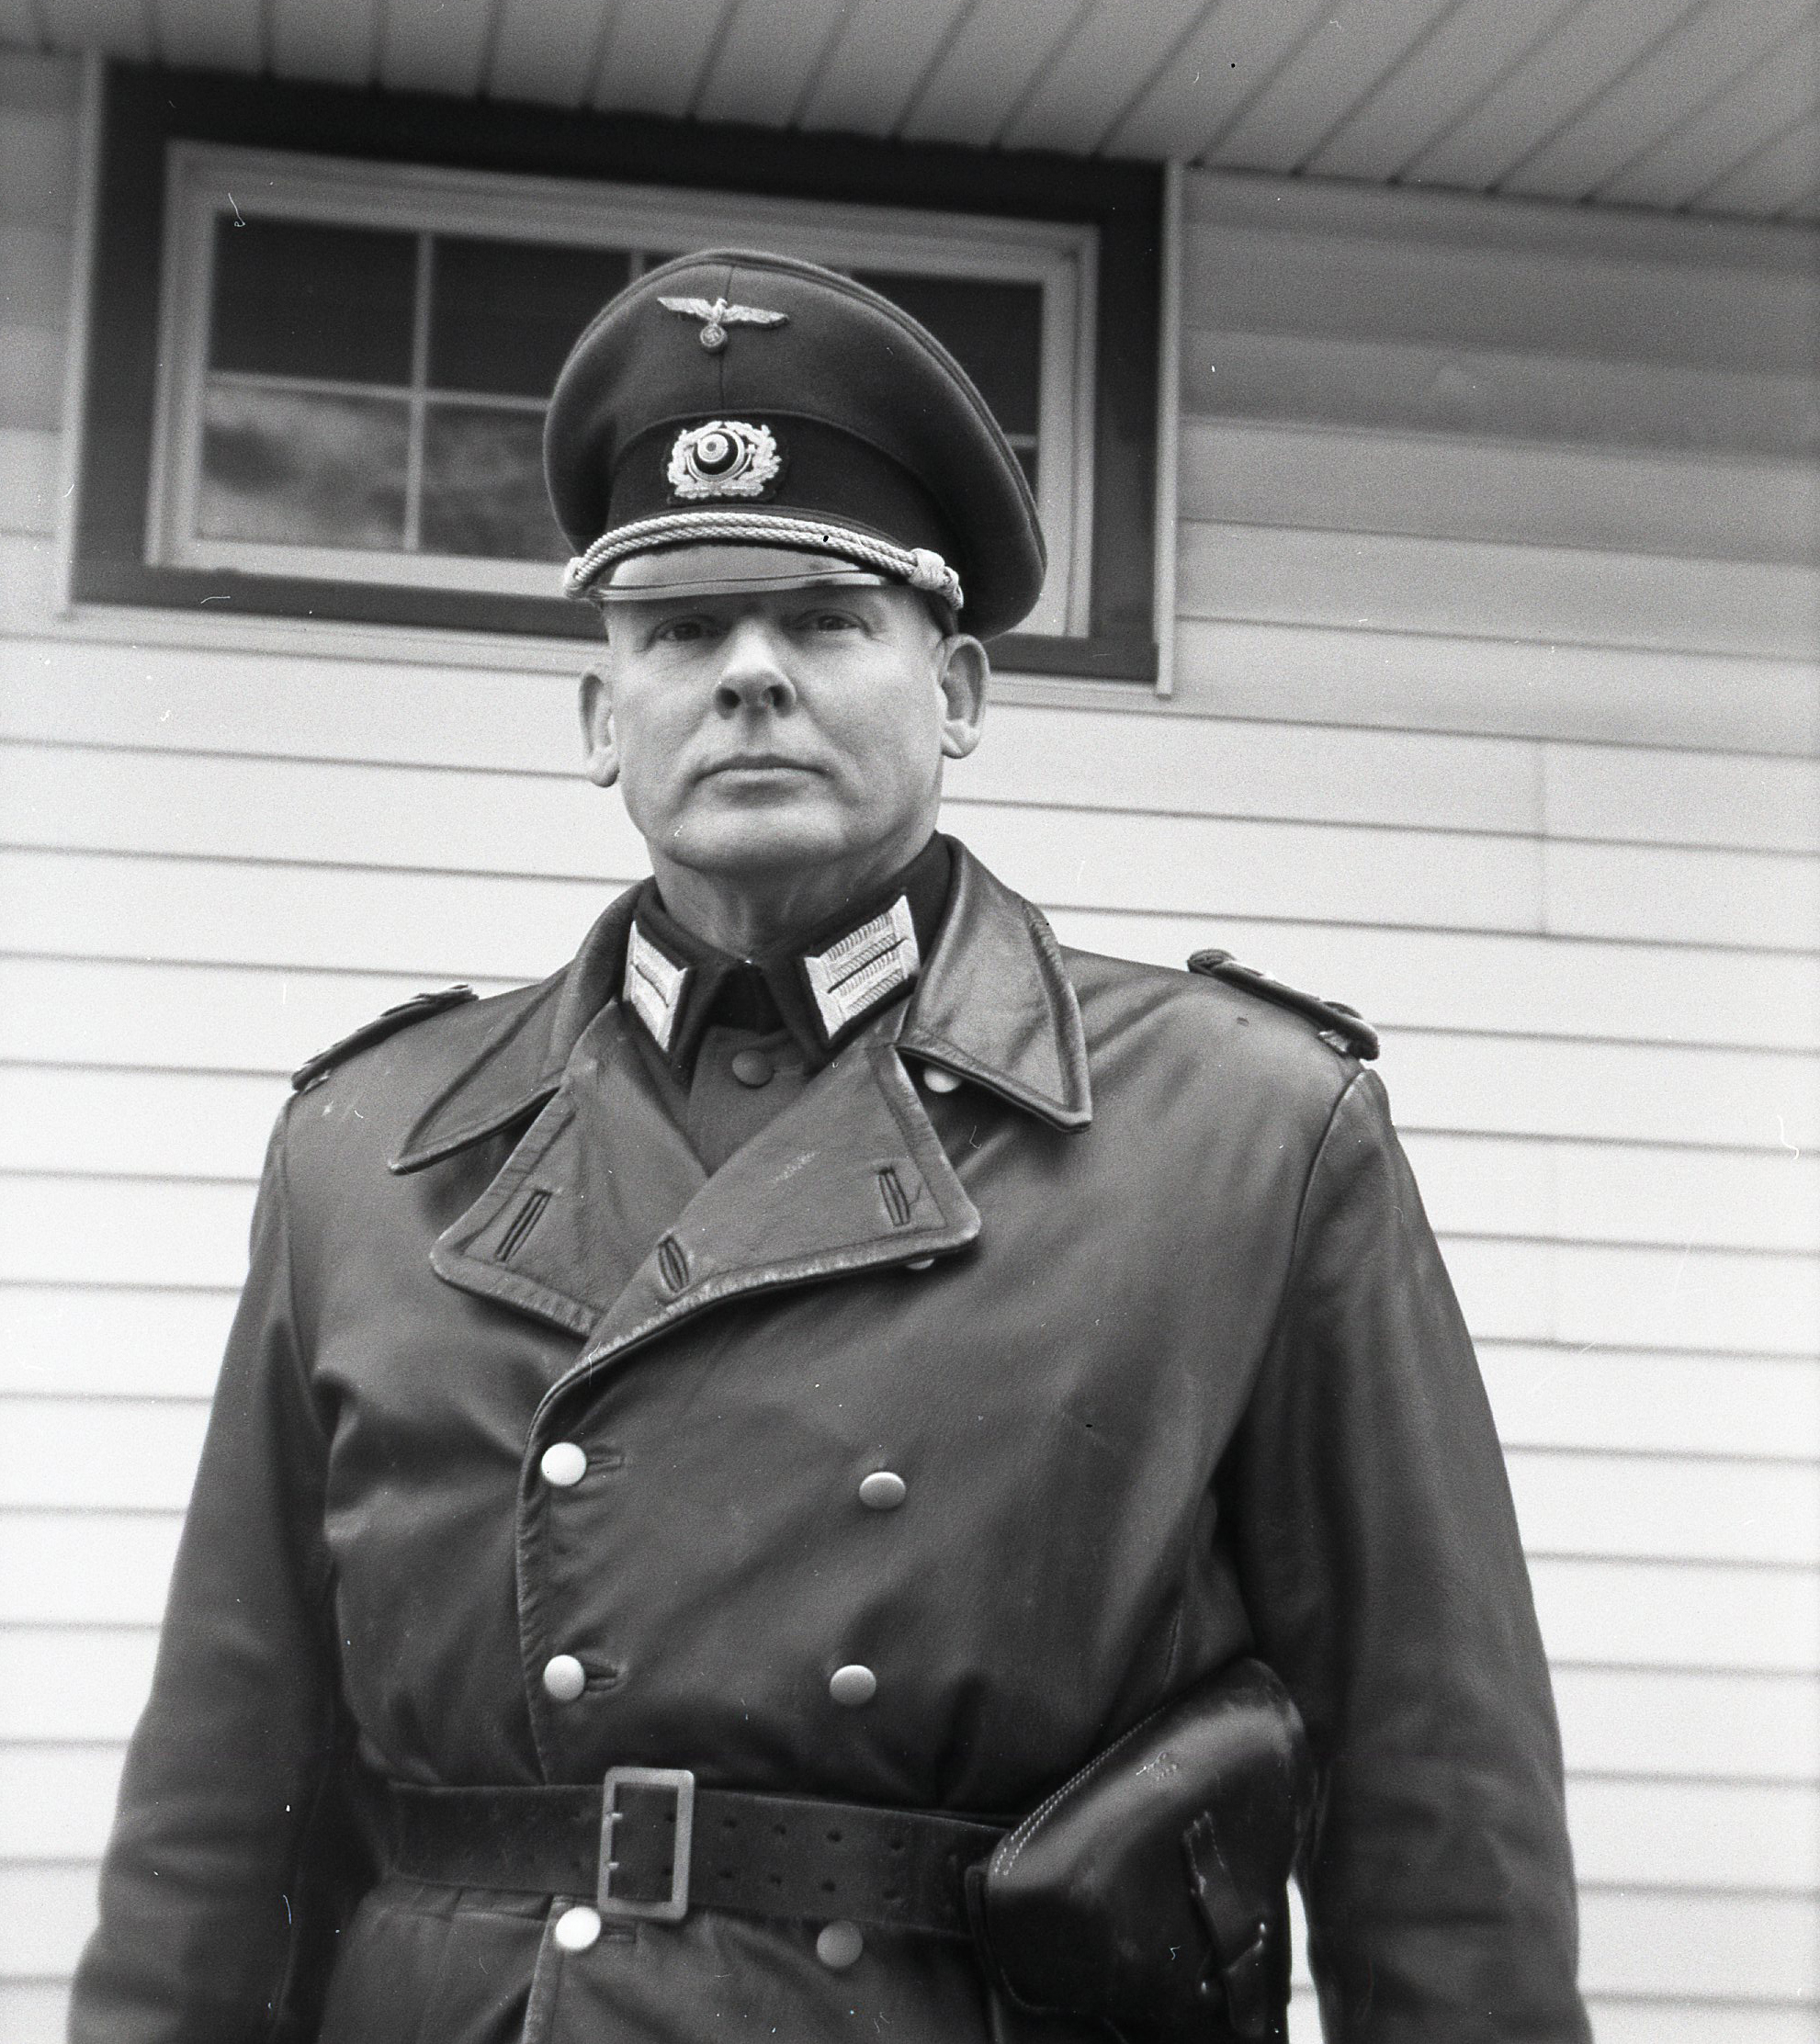
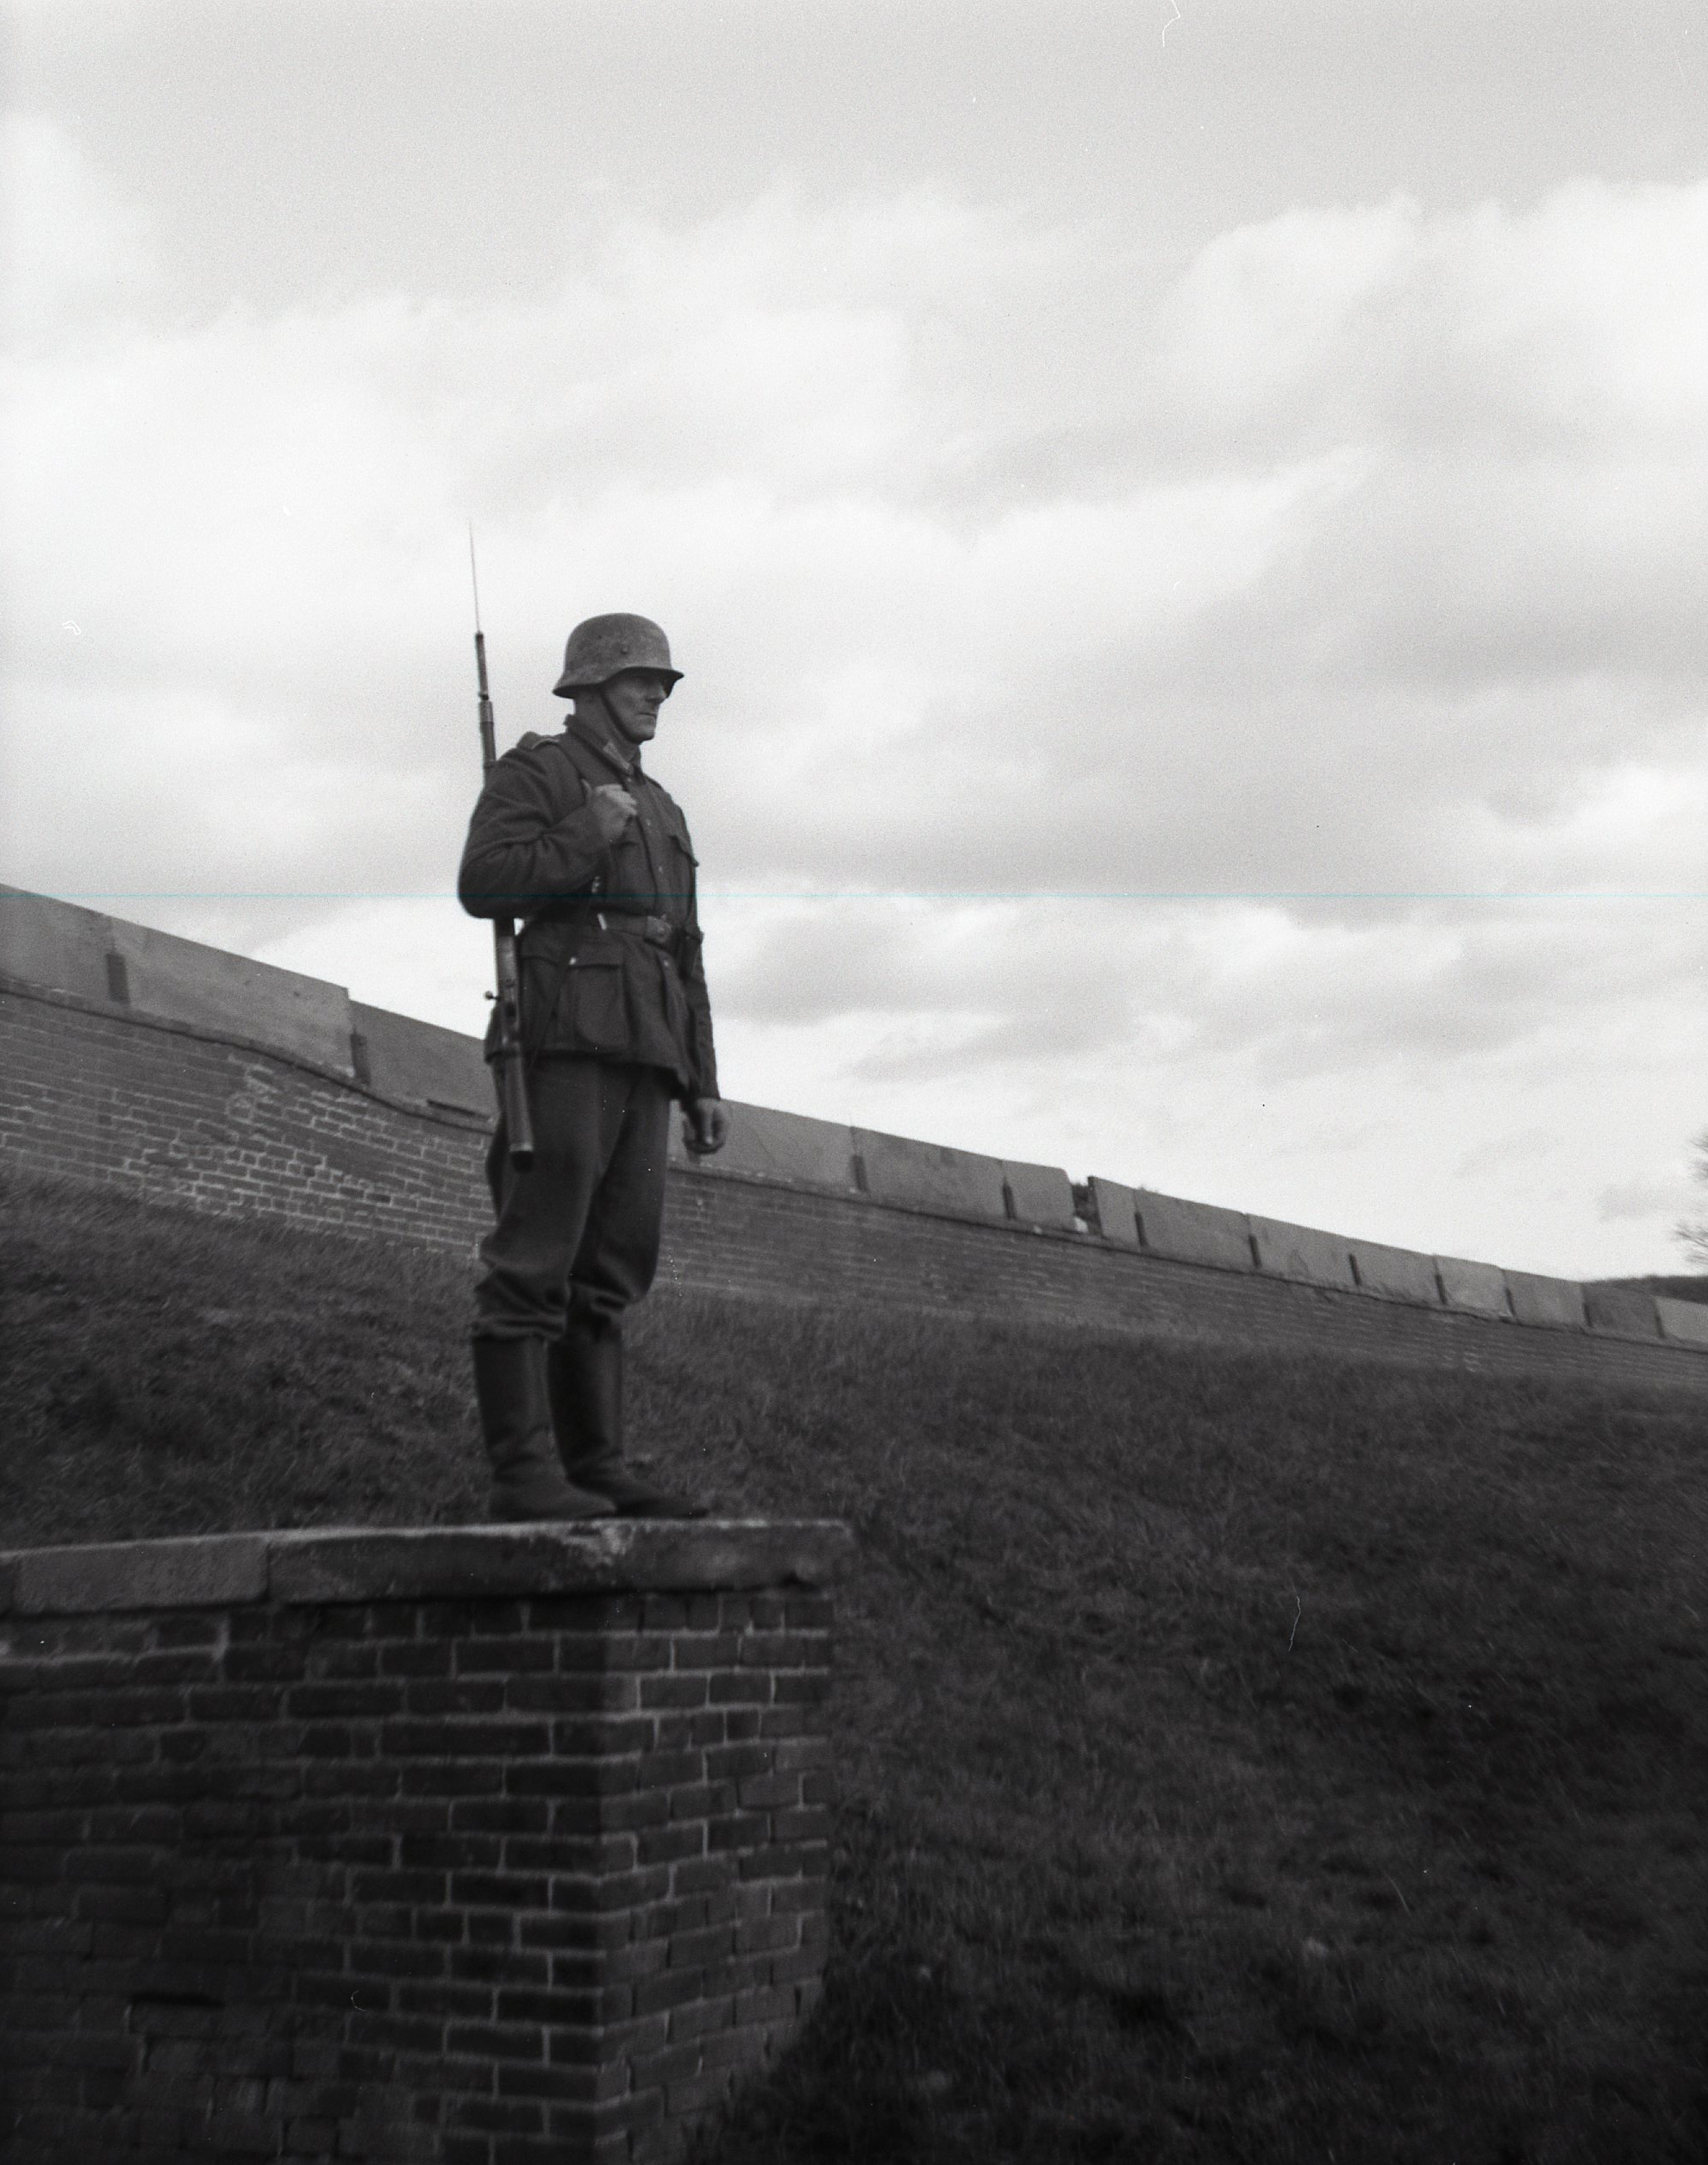
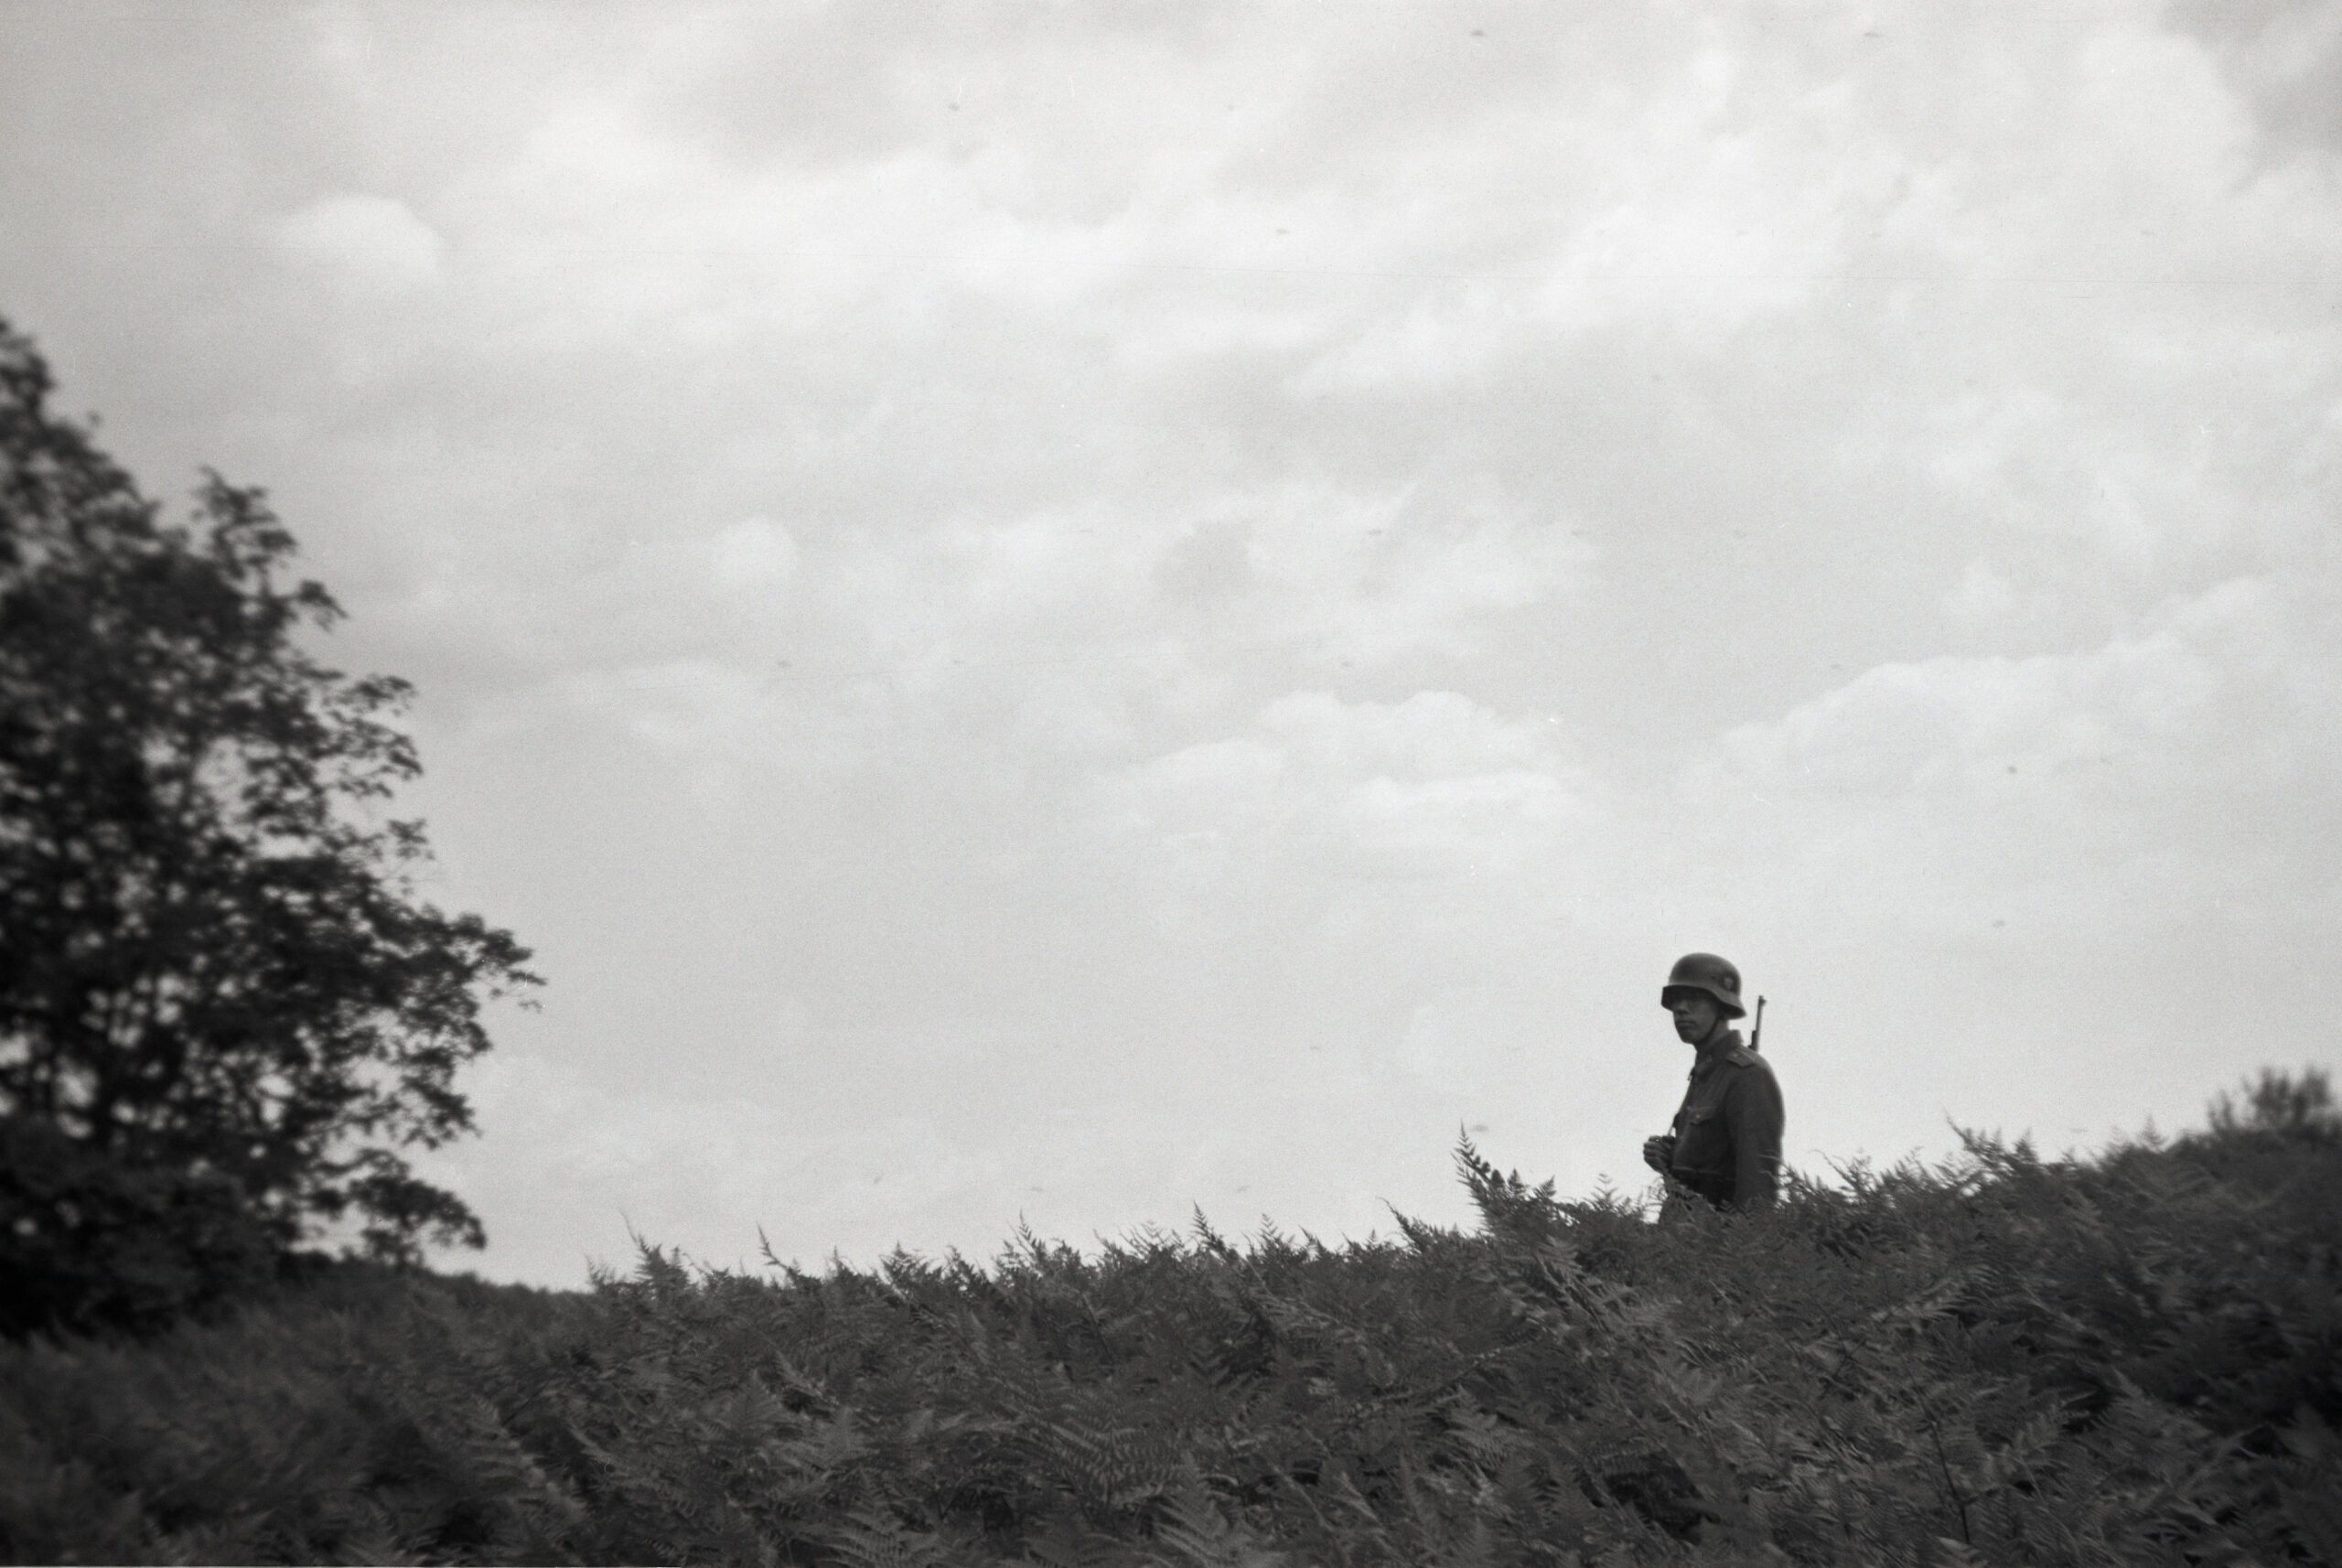
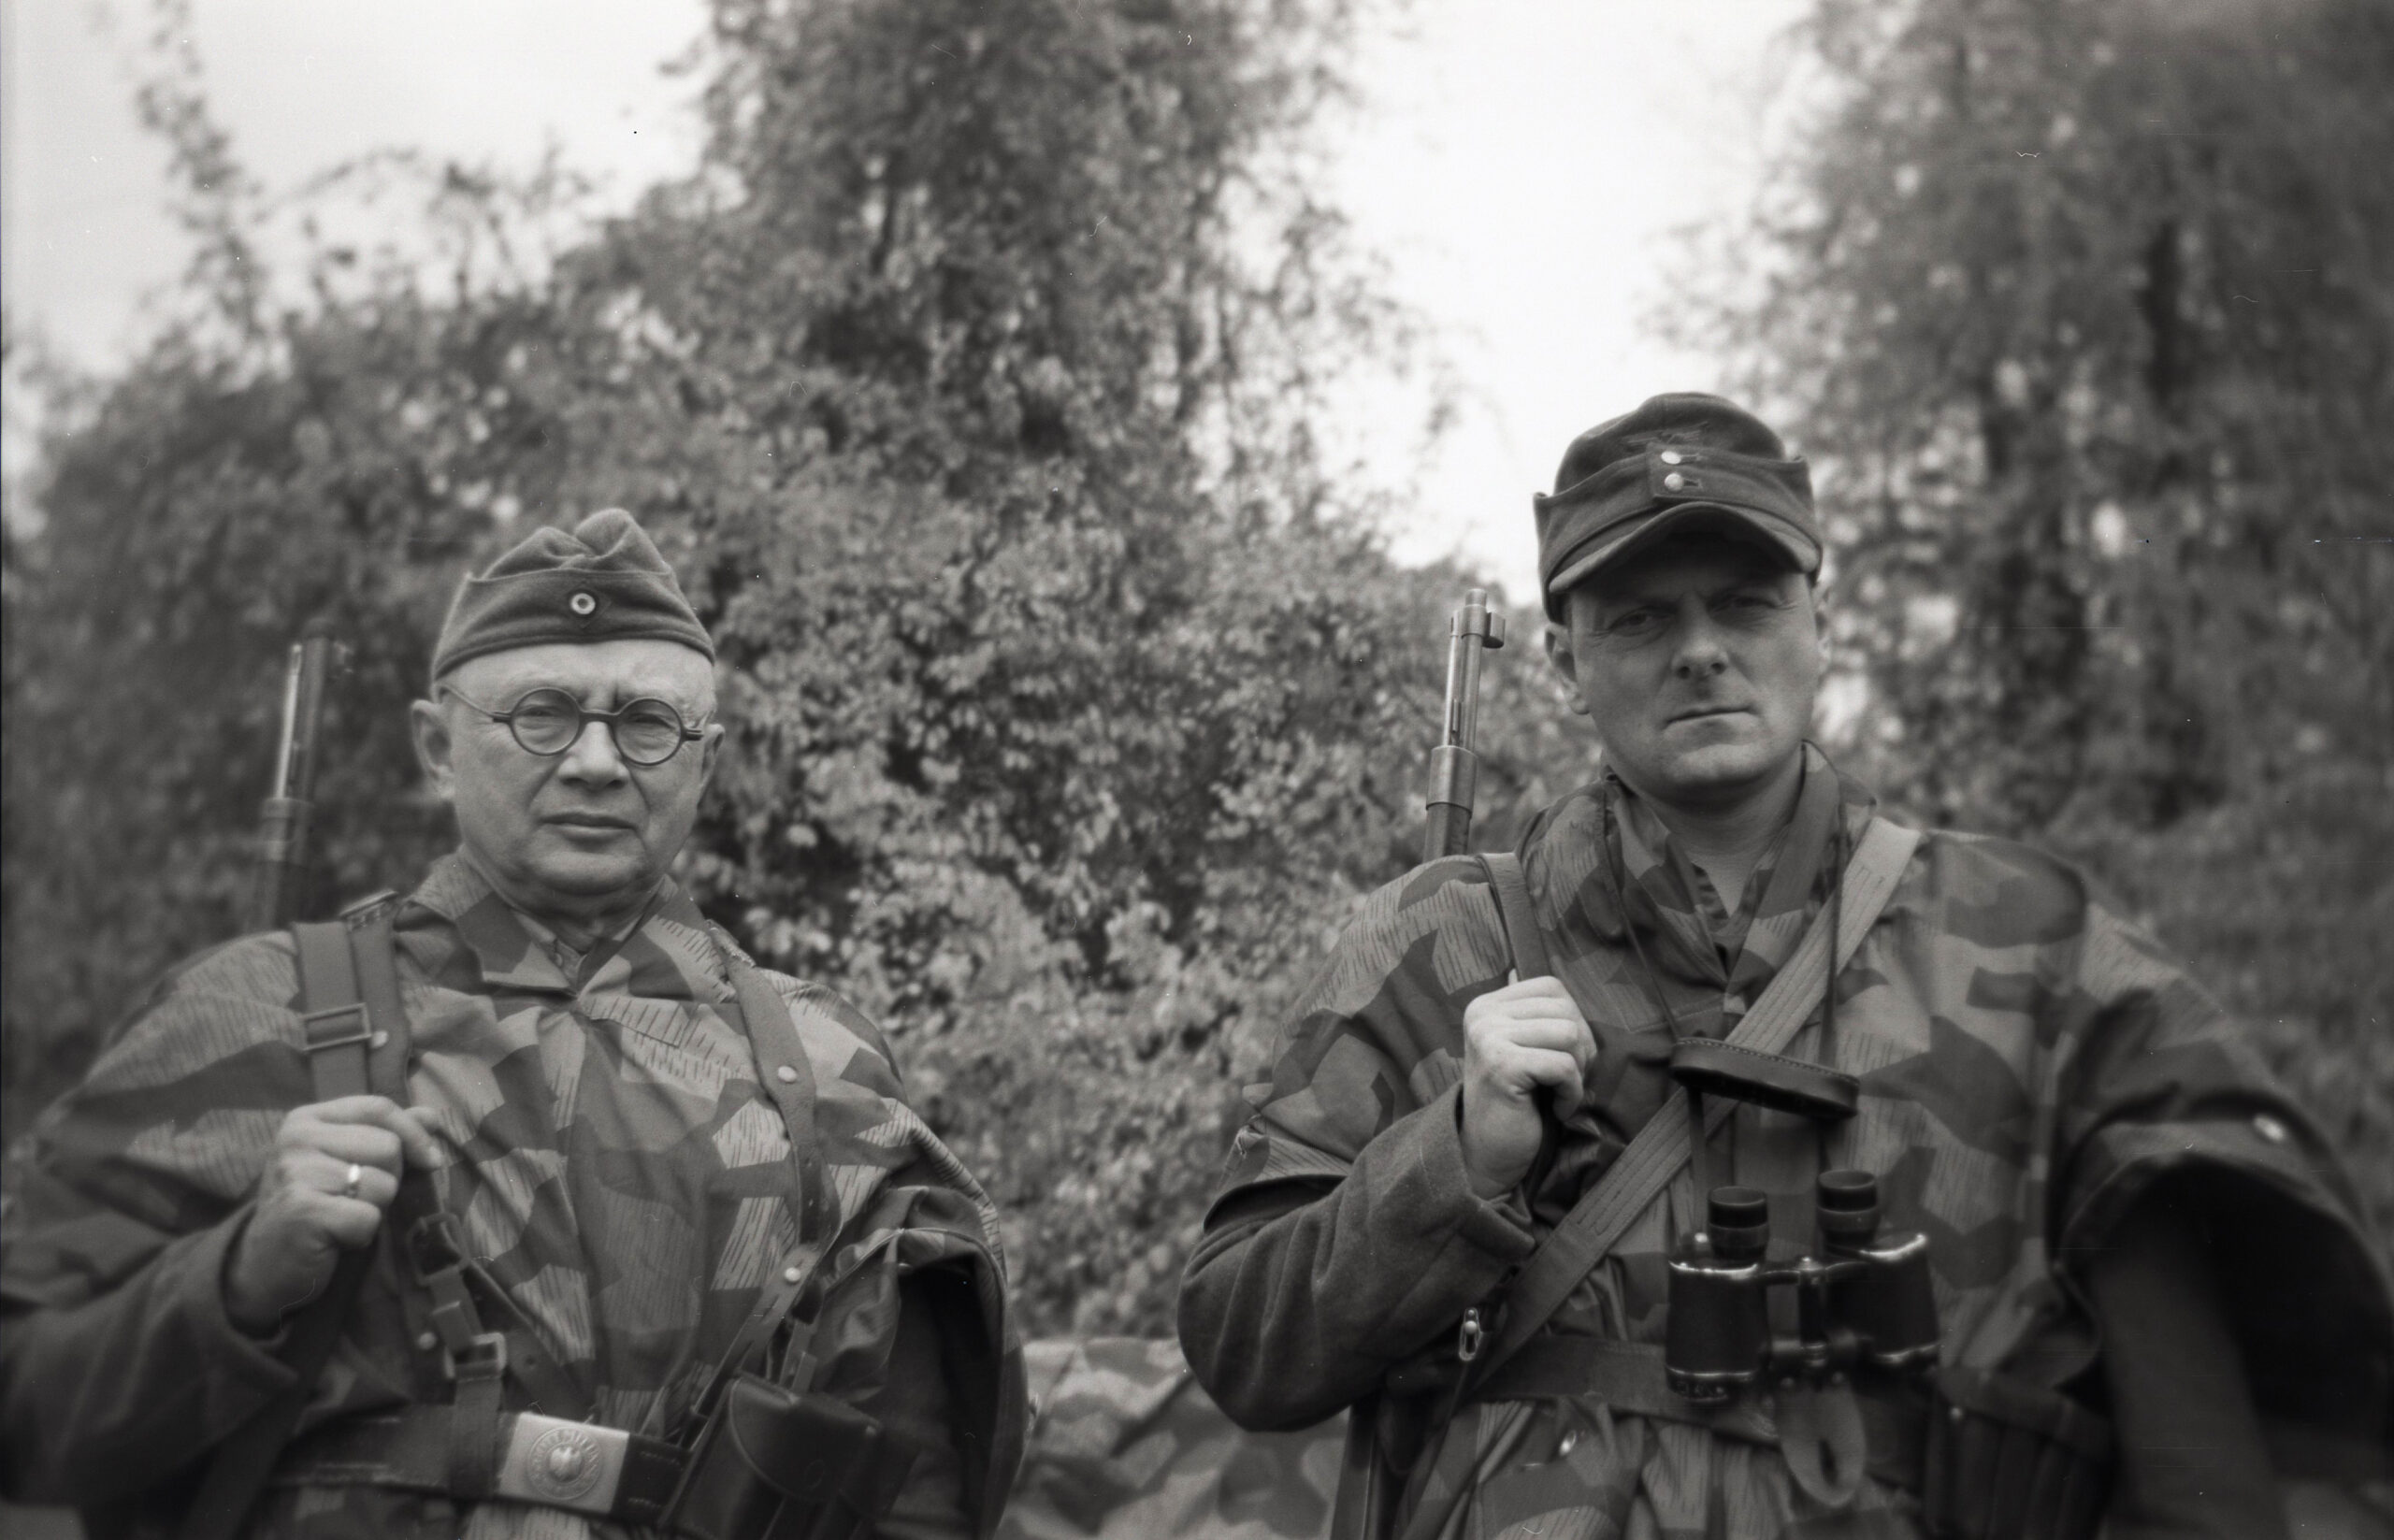
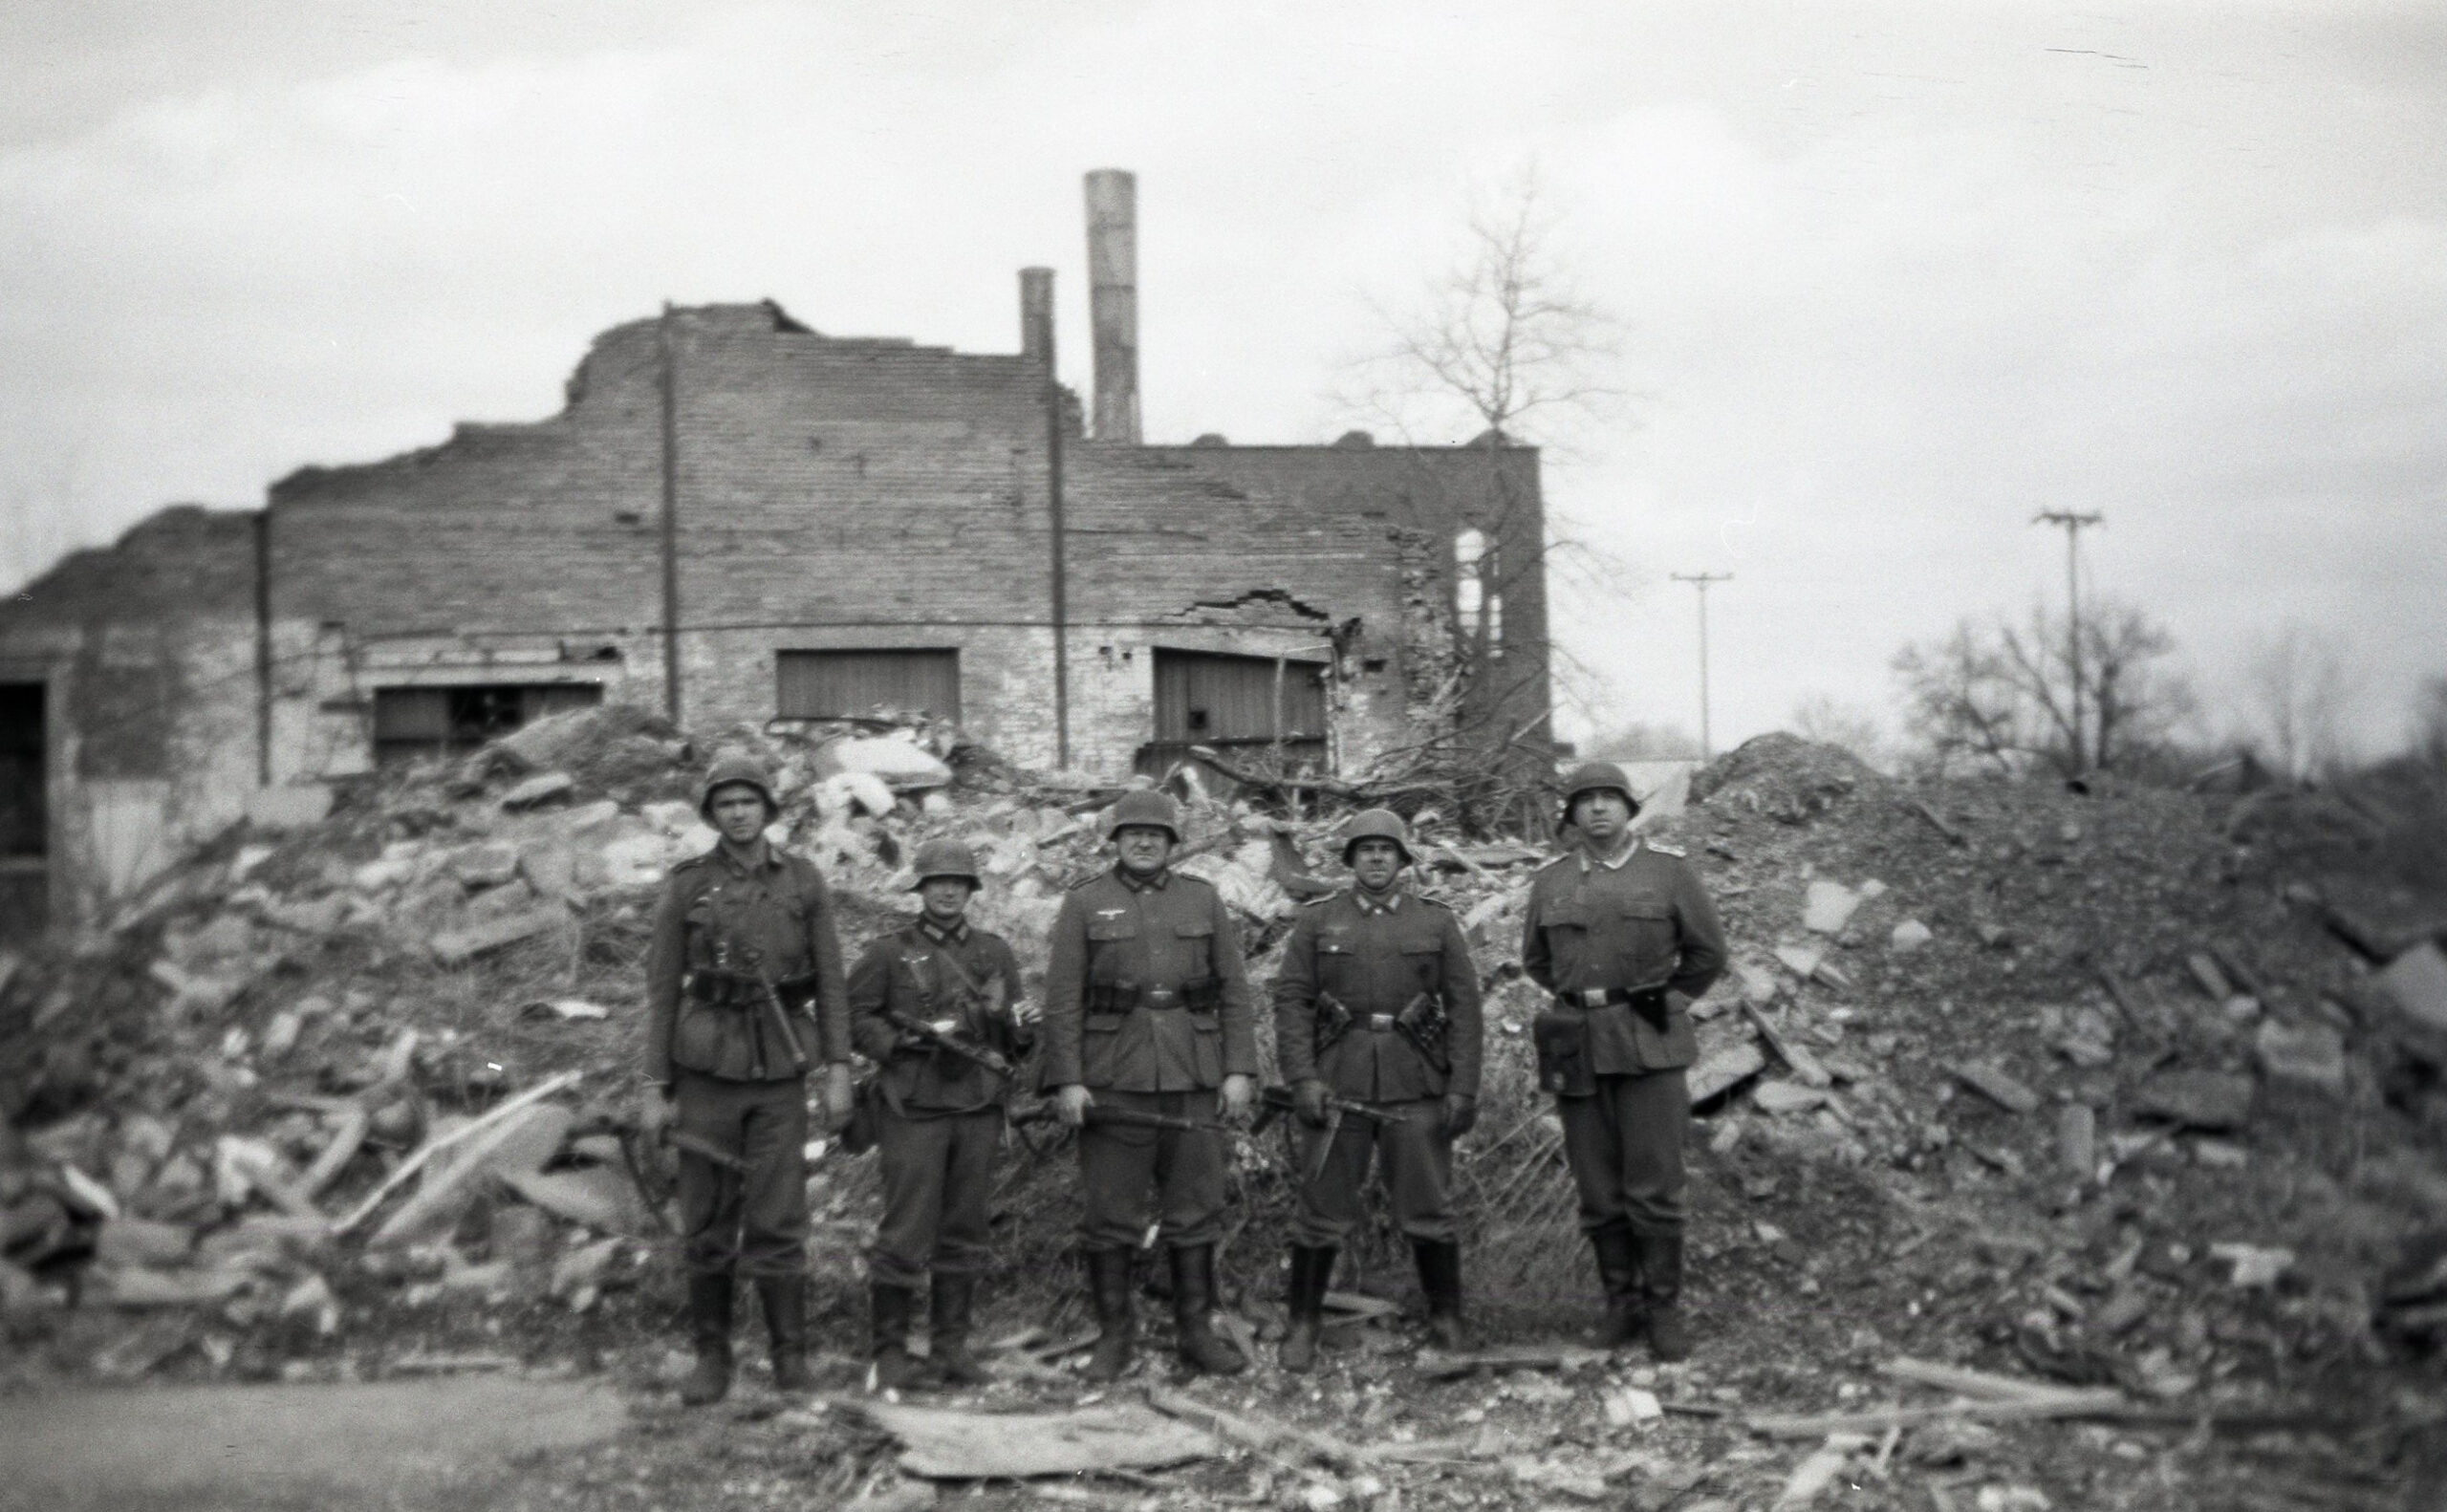
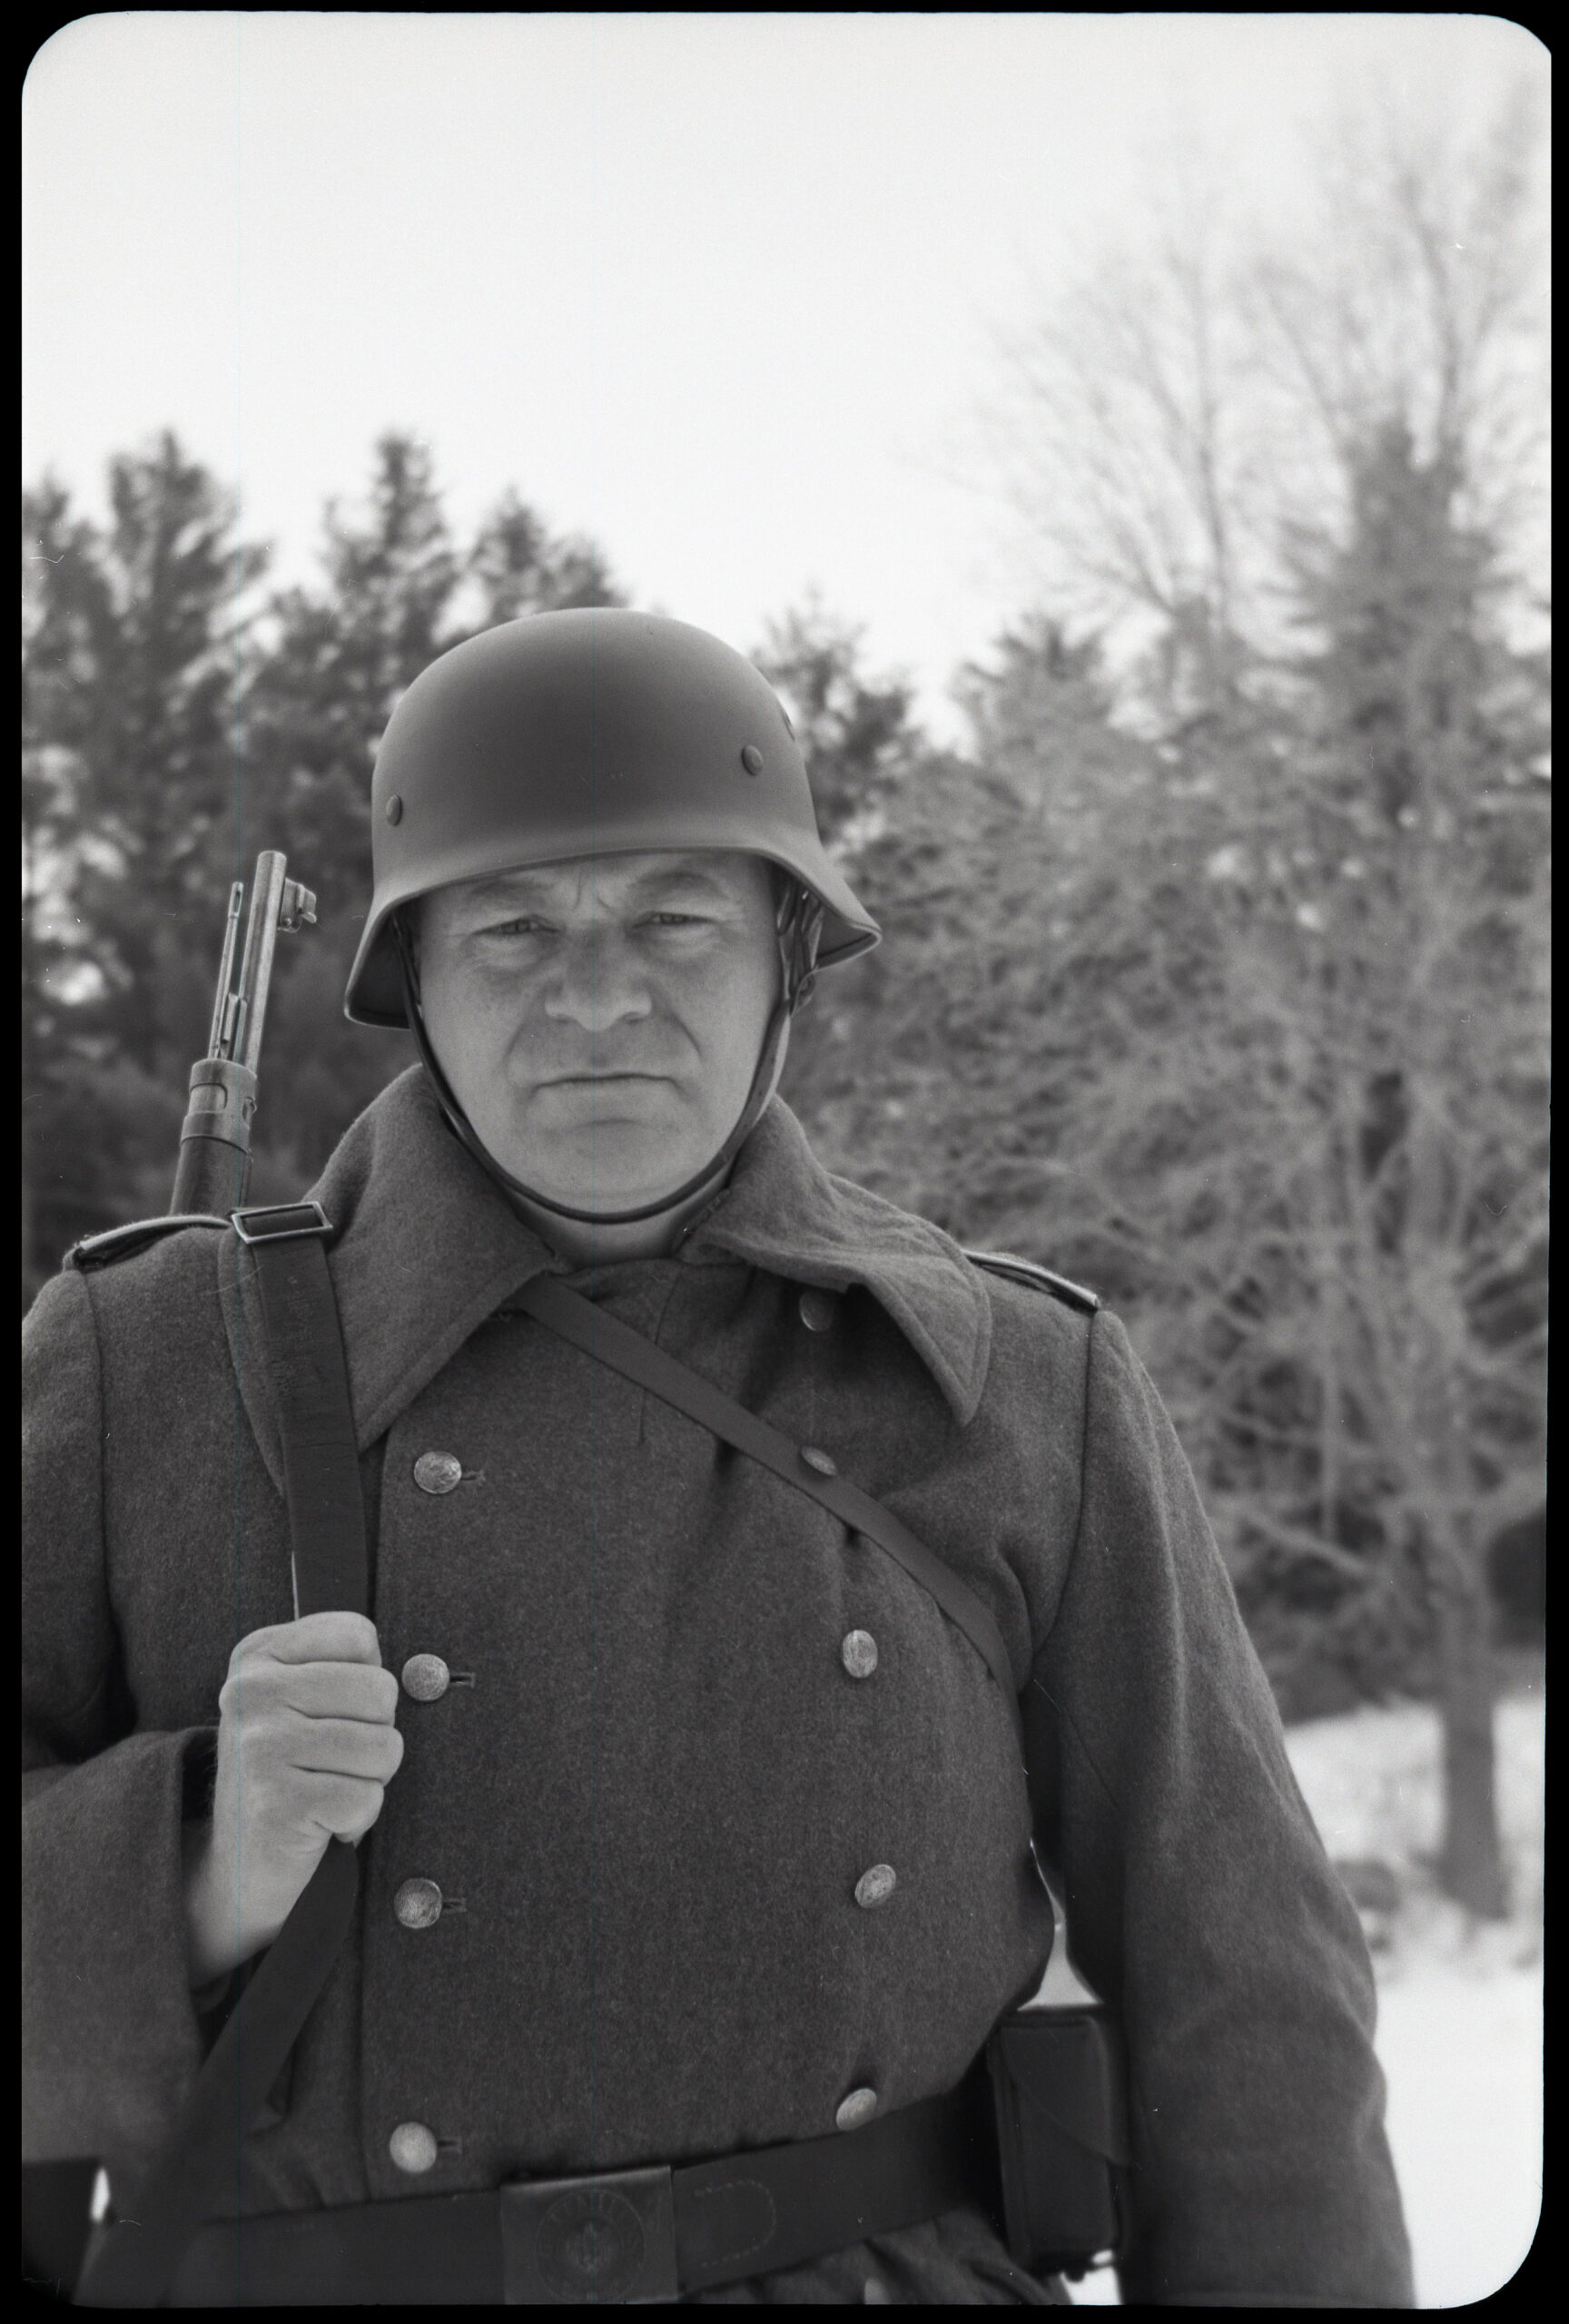
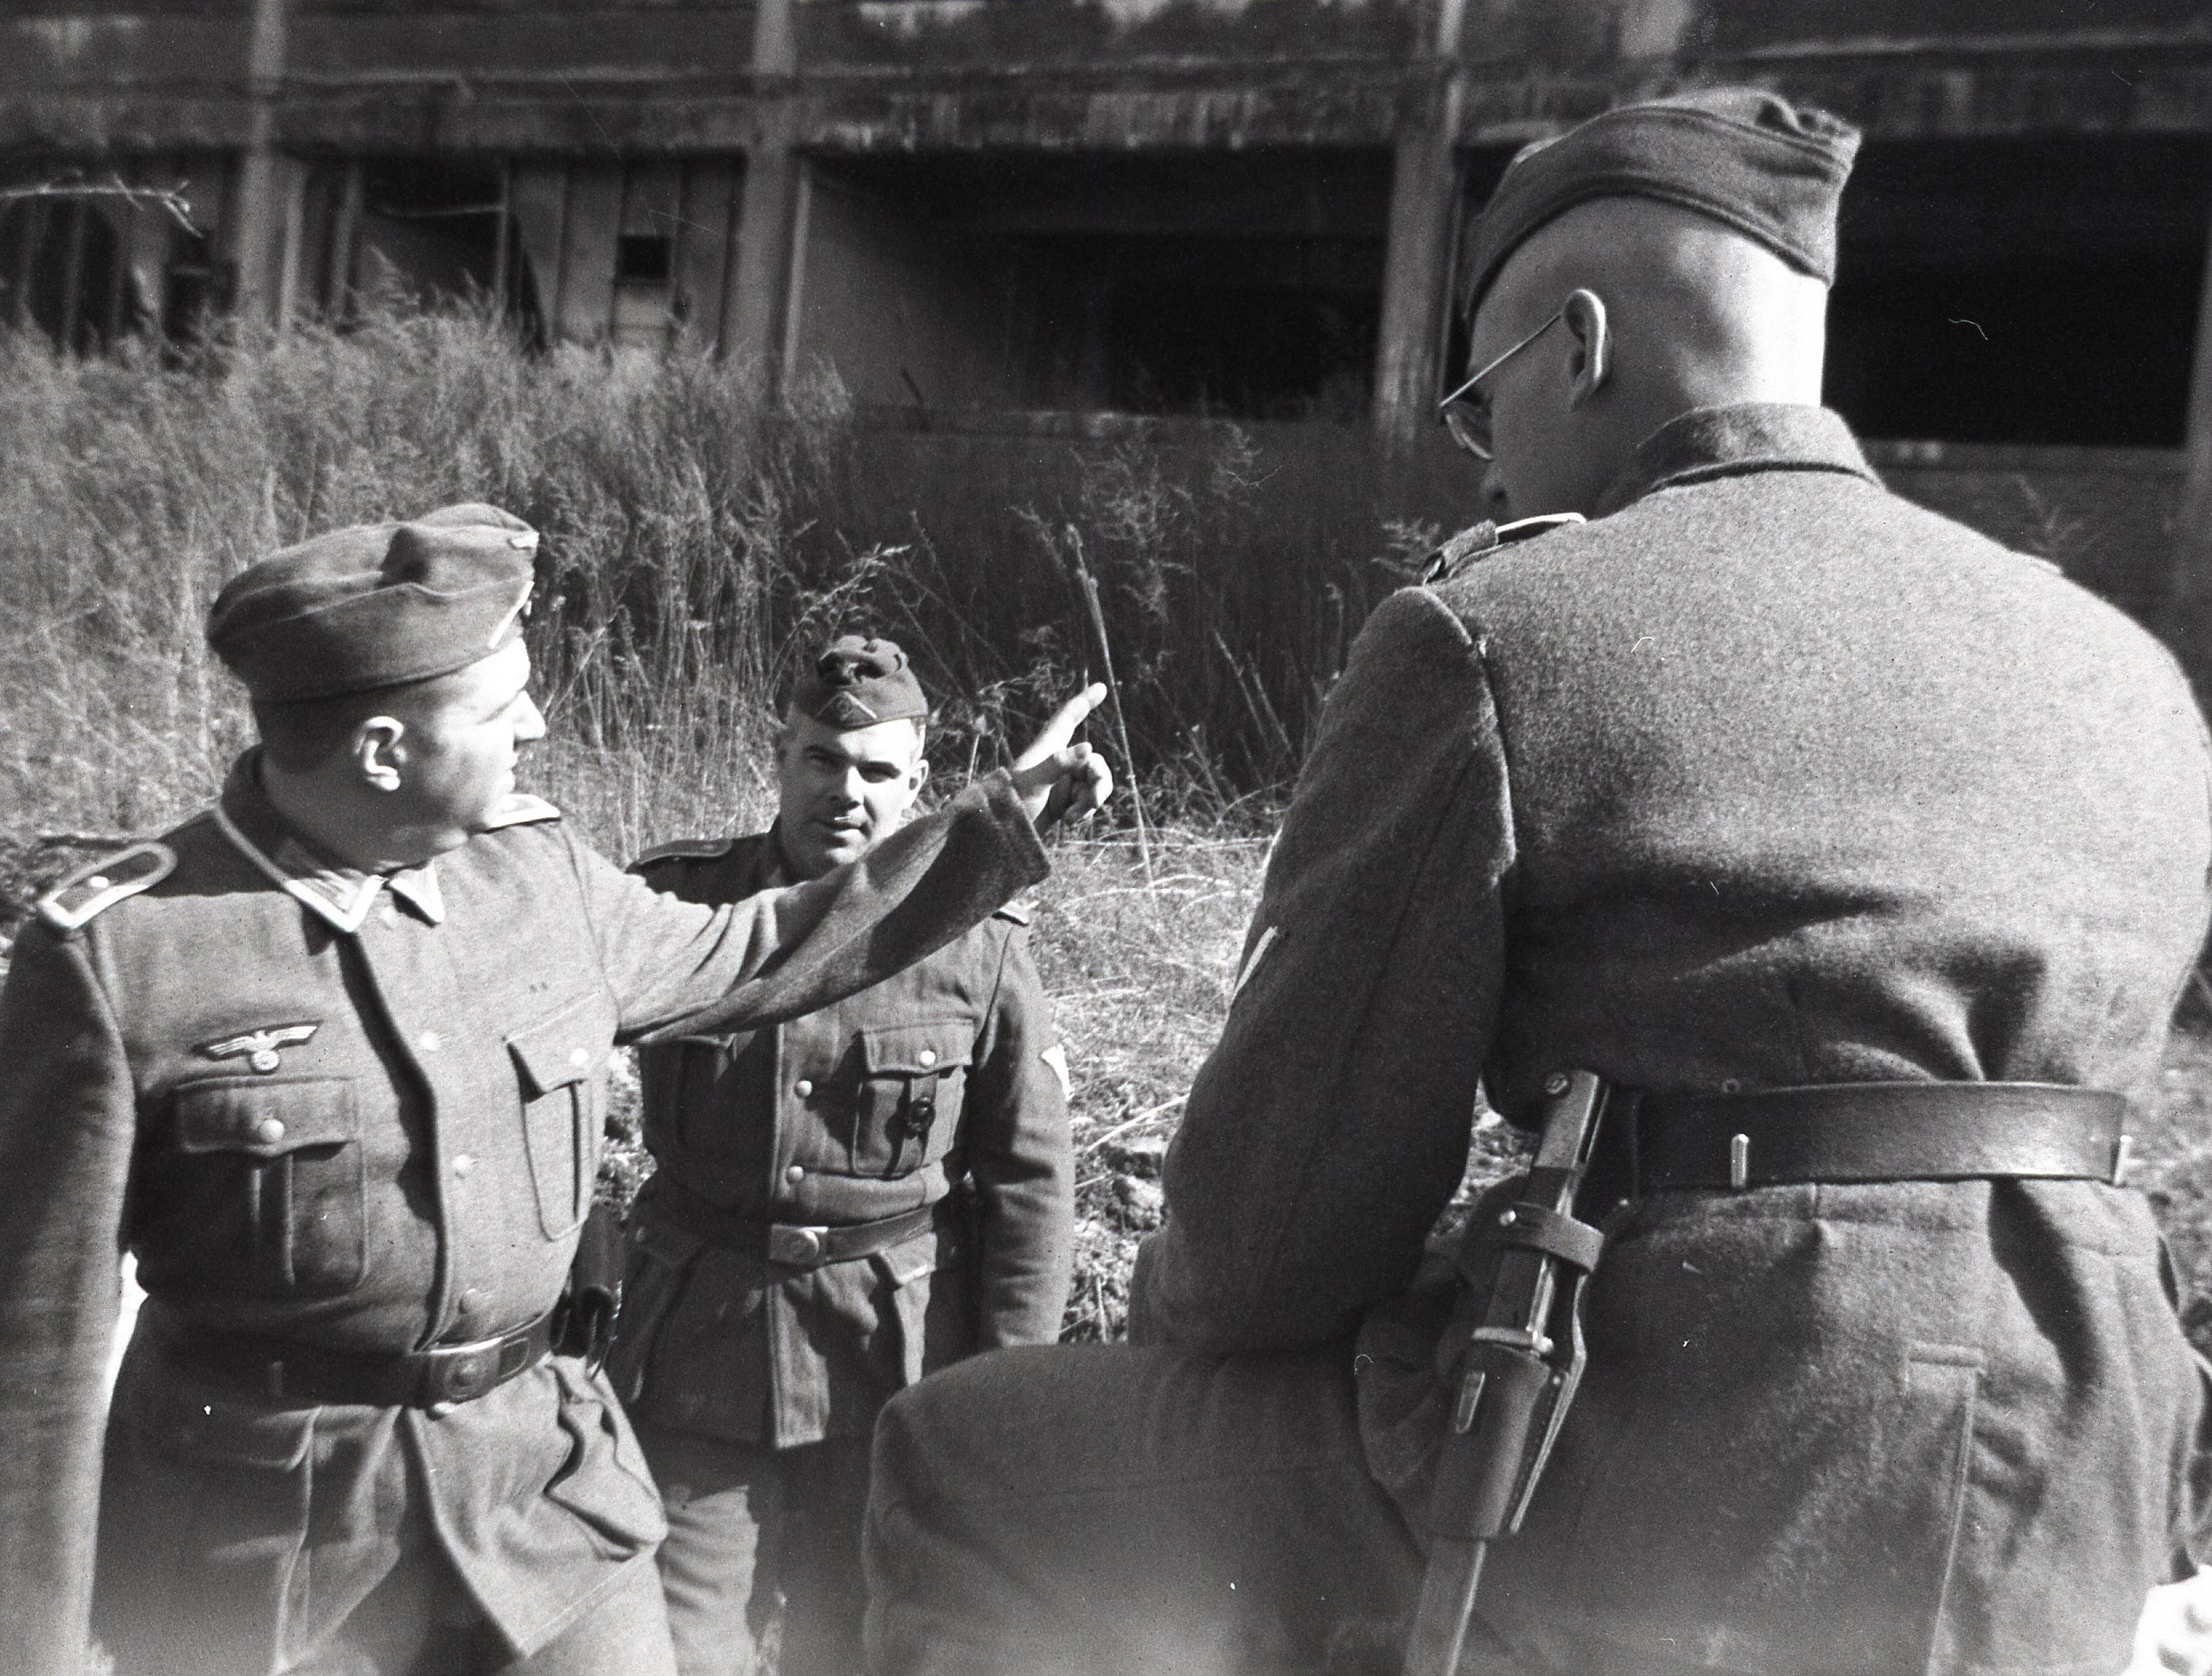
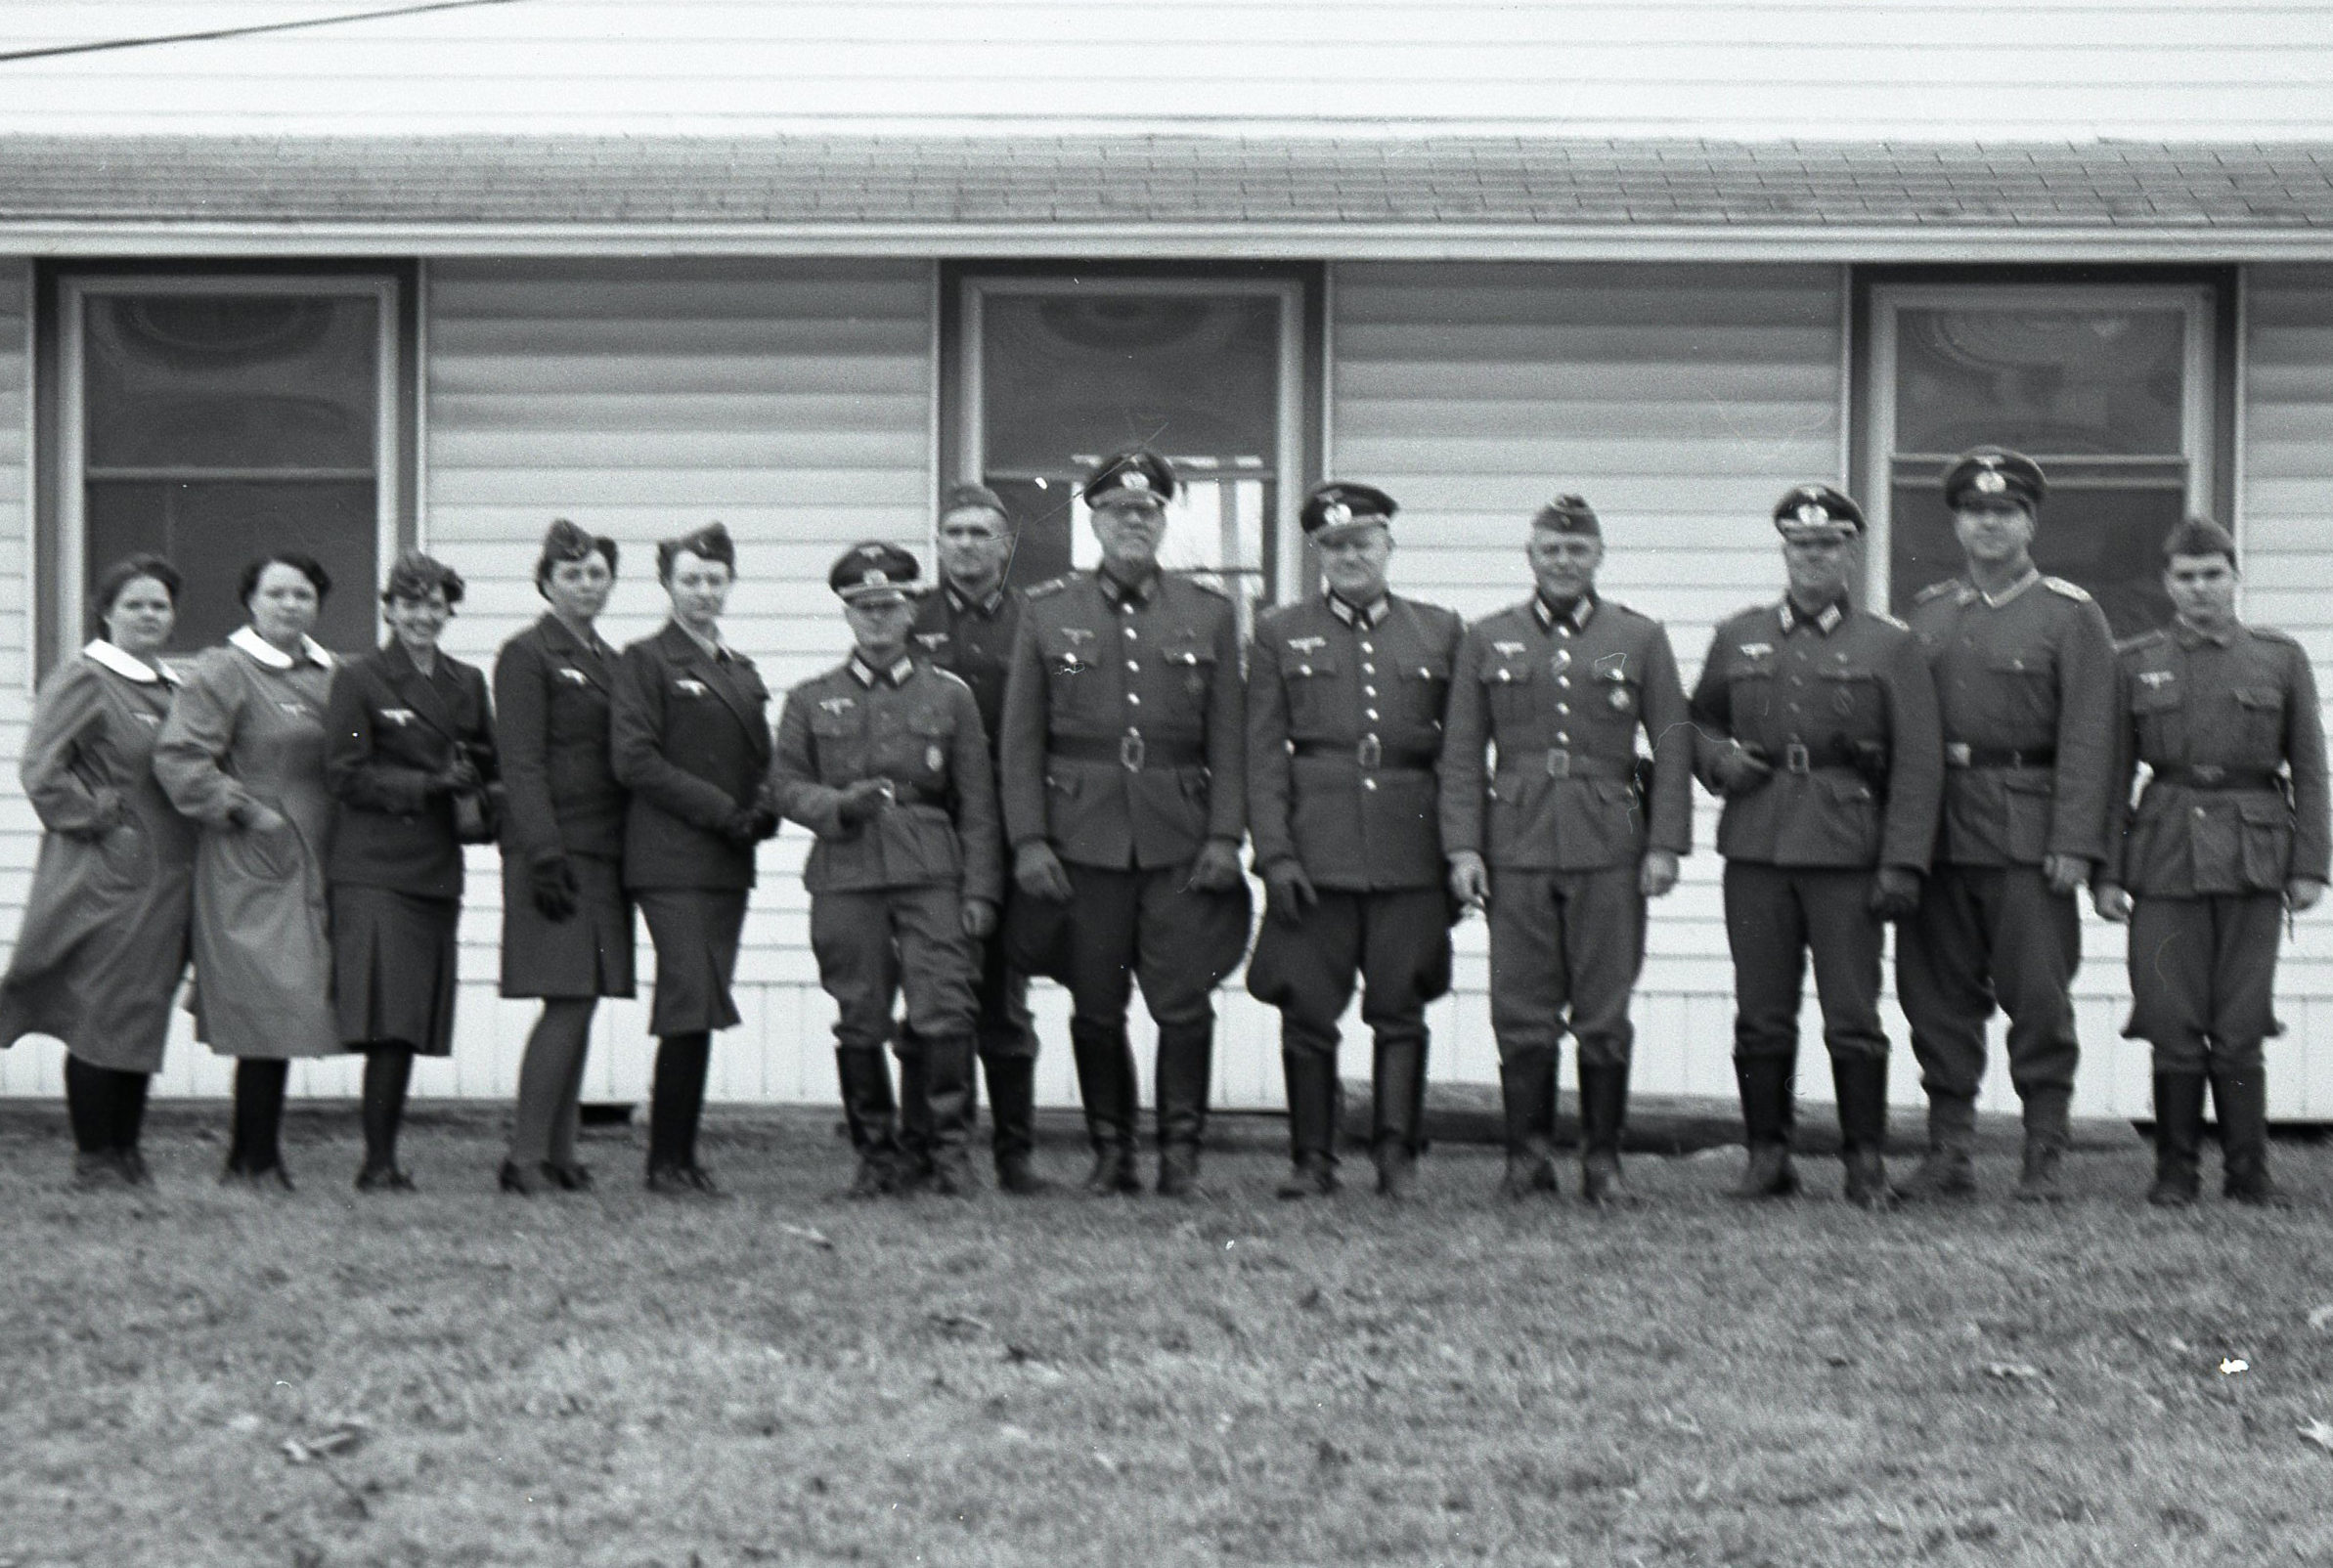
The guidelines were illustrated with this wartime image representative of the desired look for this event.
Uniform and equipment standards for partisans at the event were left to the discretion of the Soviet Partisan reenactment group that hosted and helped to organize the event, the 3rd Partisan Brigade.
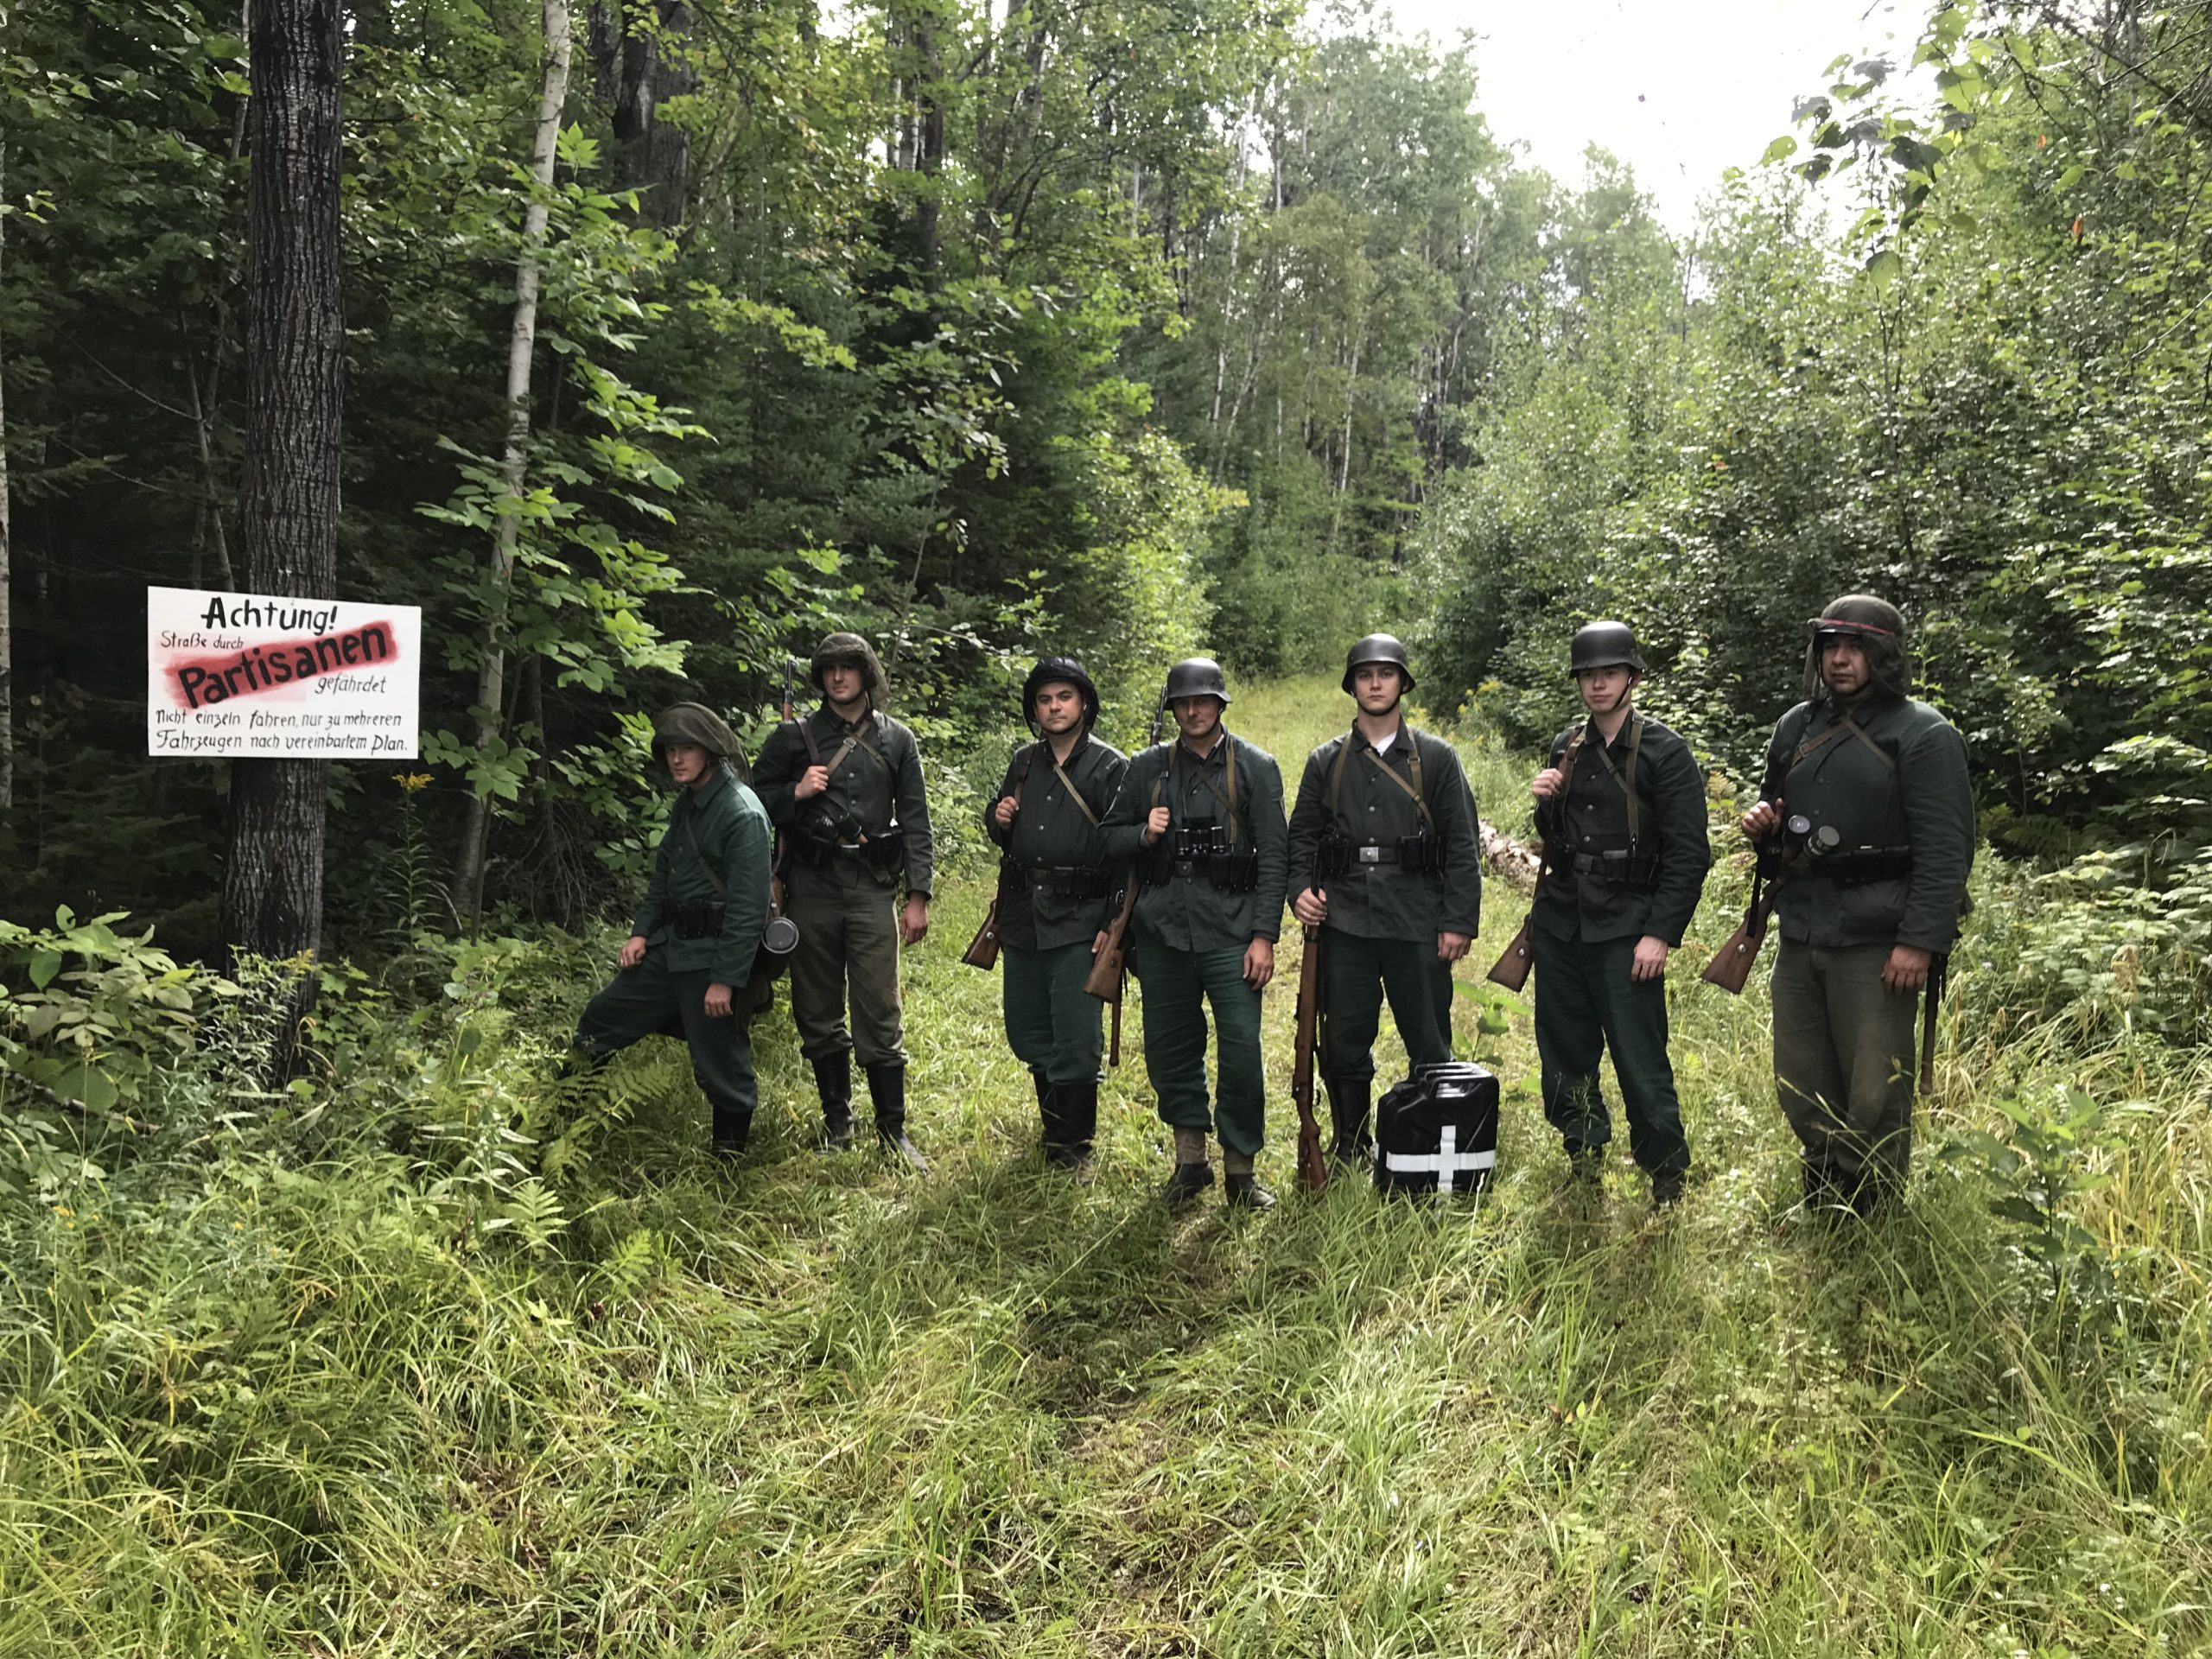
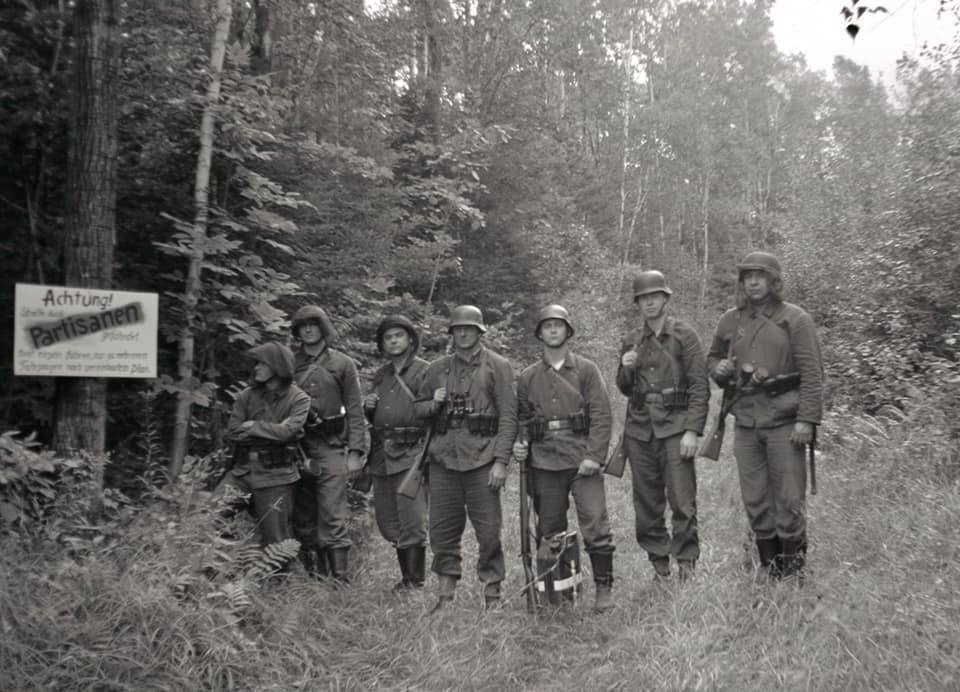
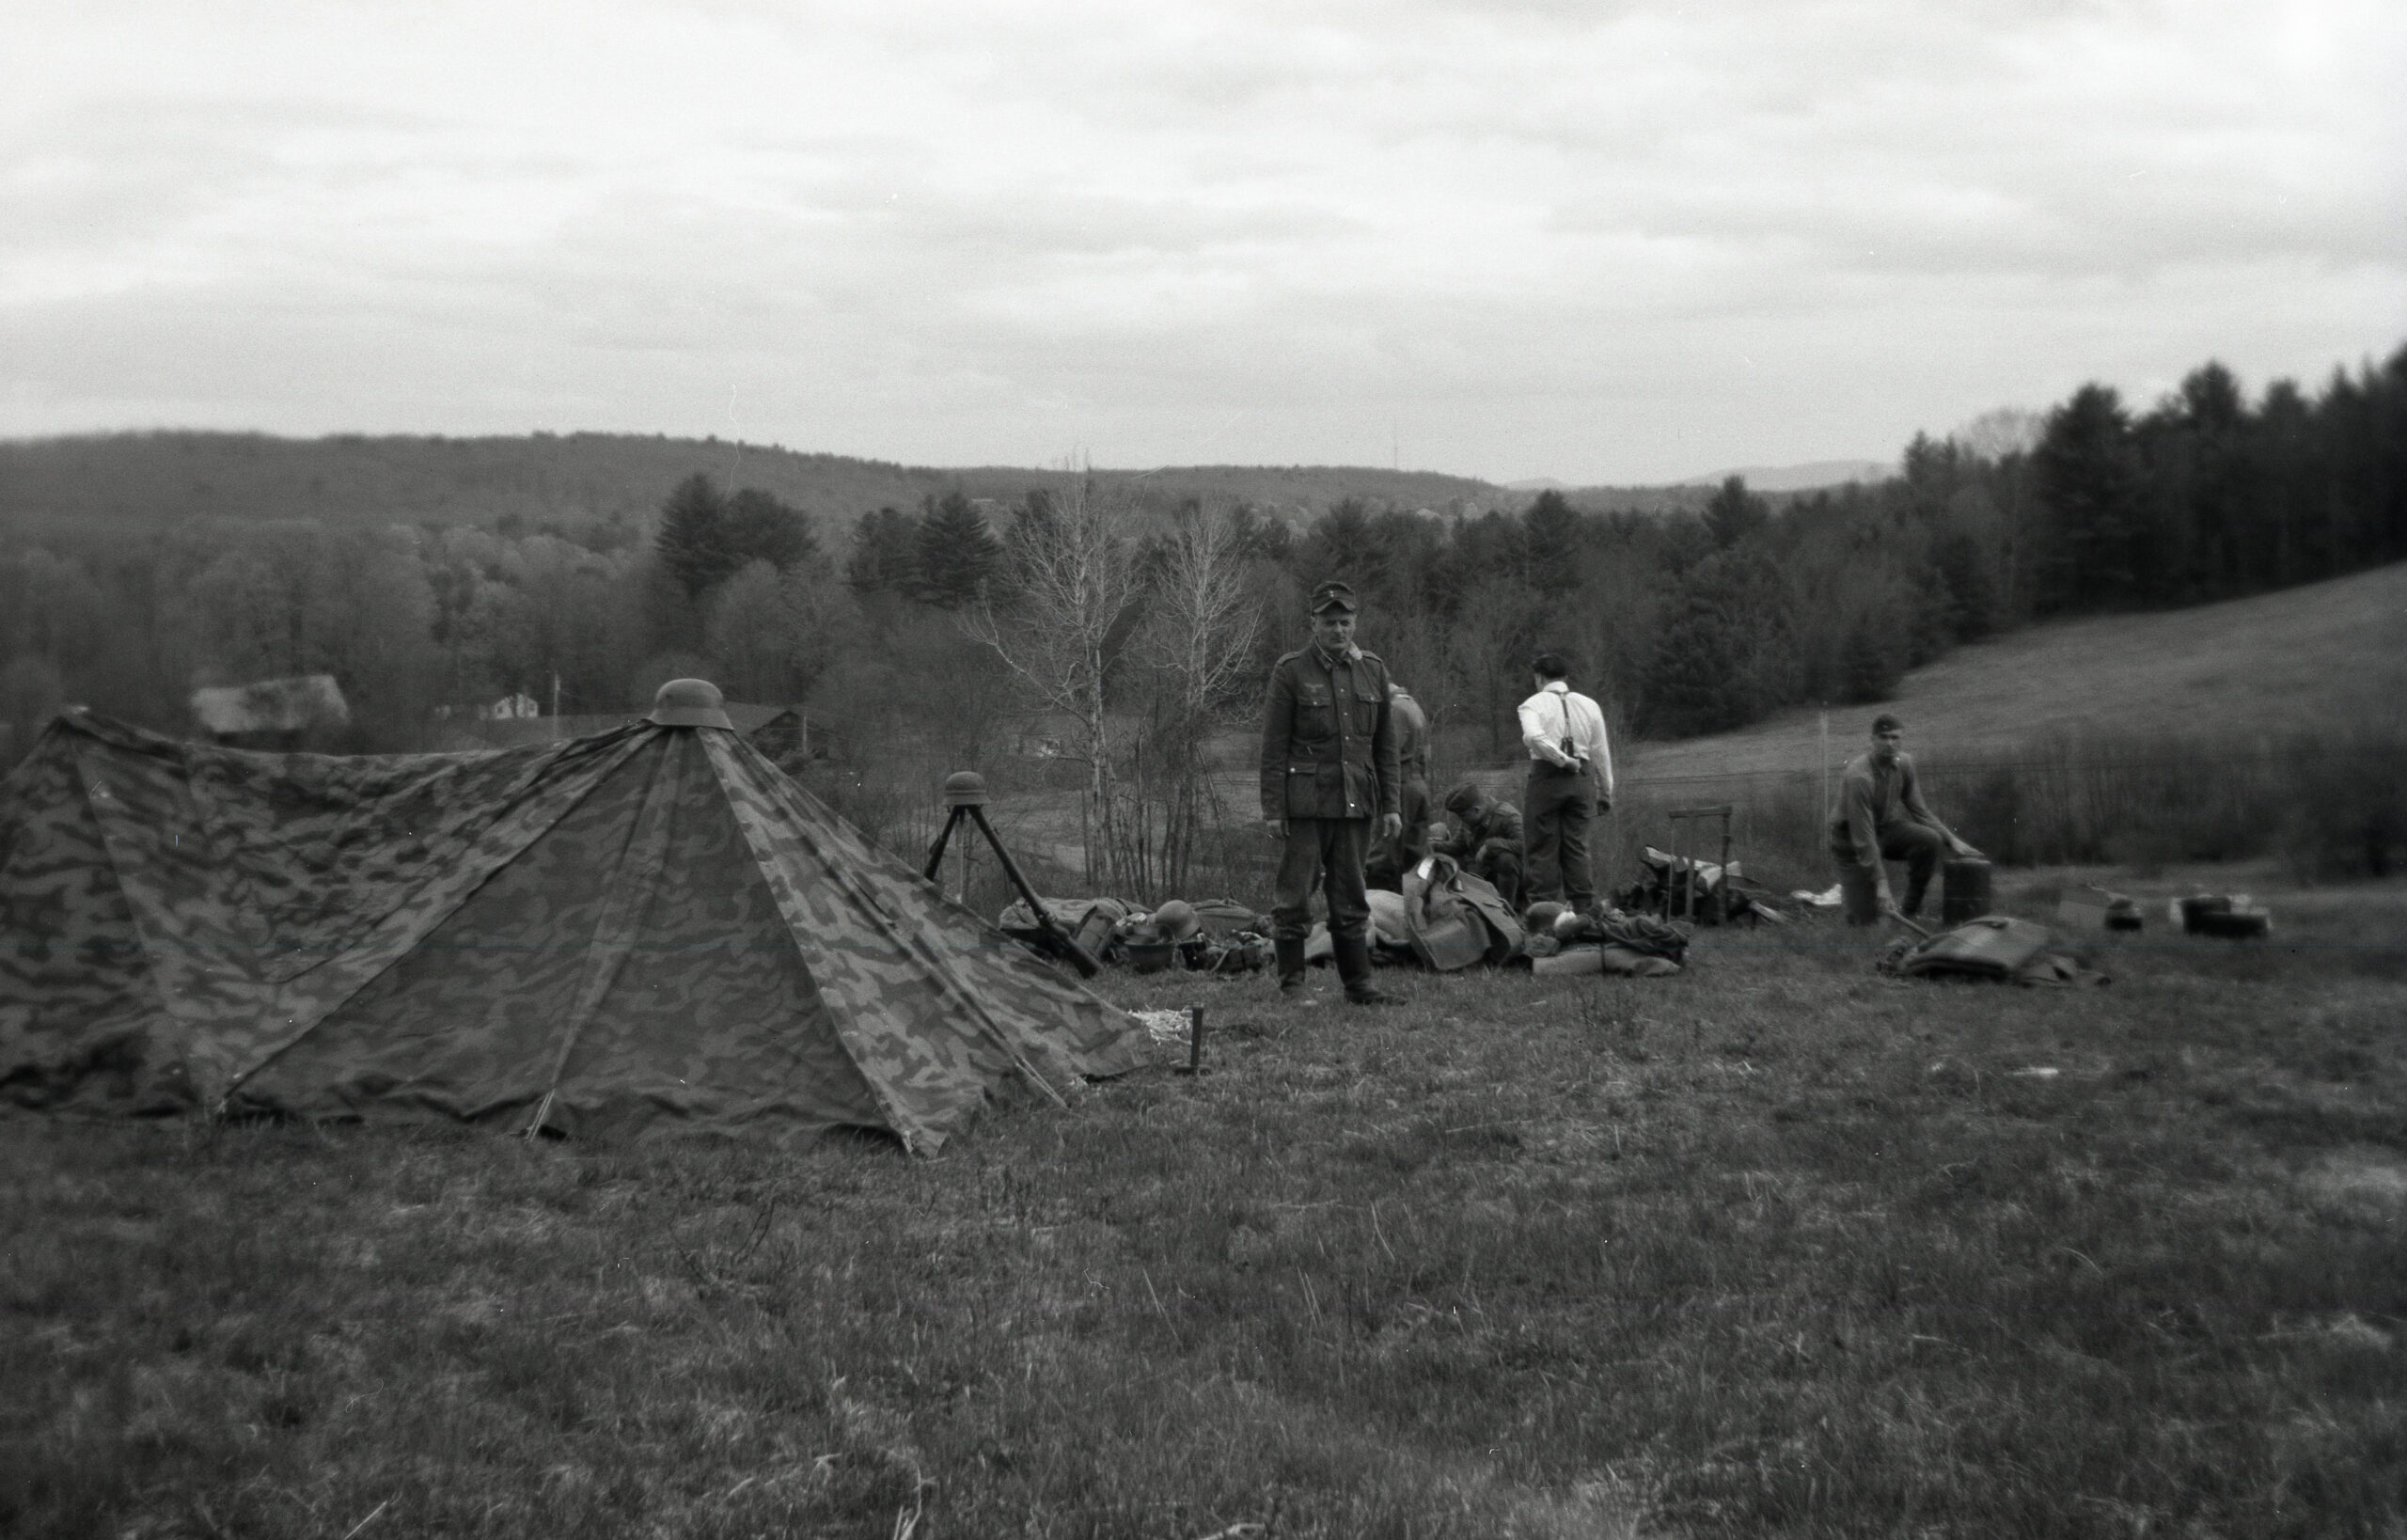
Signage related to partisans, the unit we were portraying, and the area of the scenario, was created in advance and installed at the site, as a form of visual prop to help set the stage.
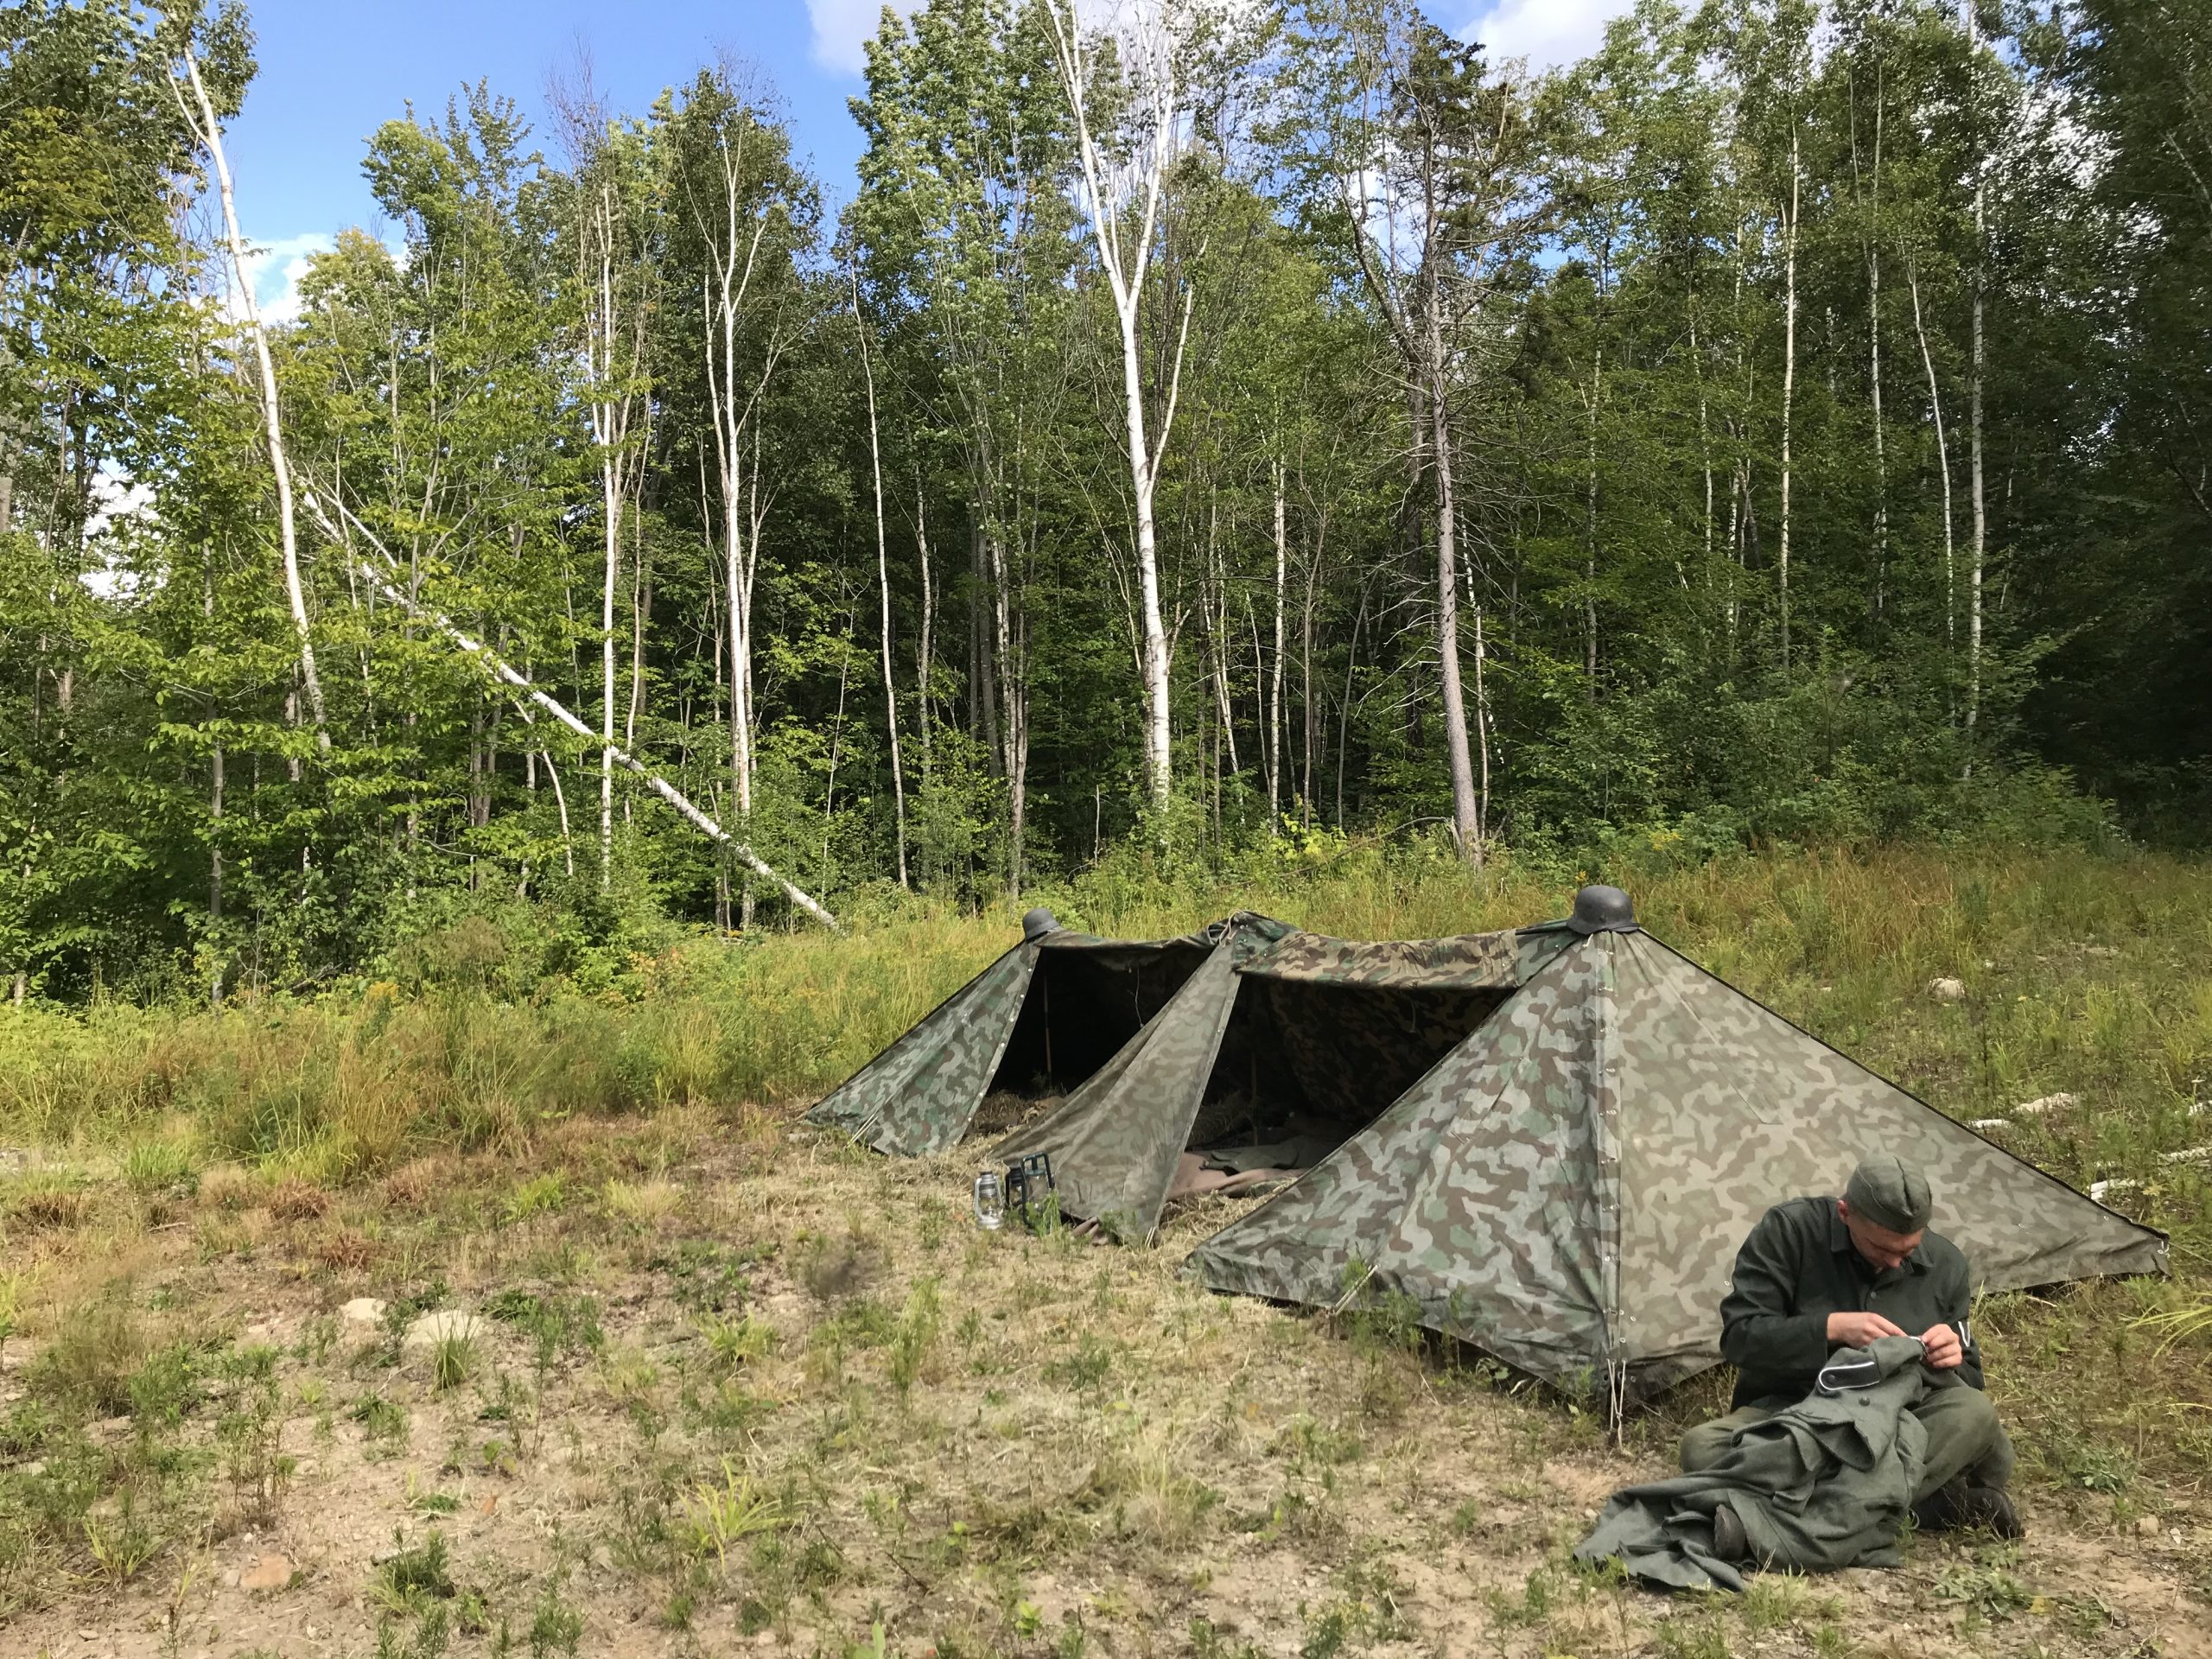
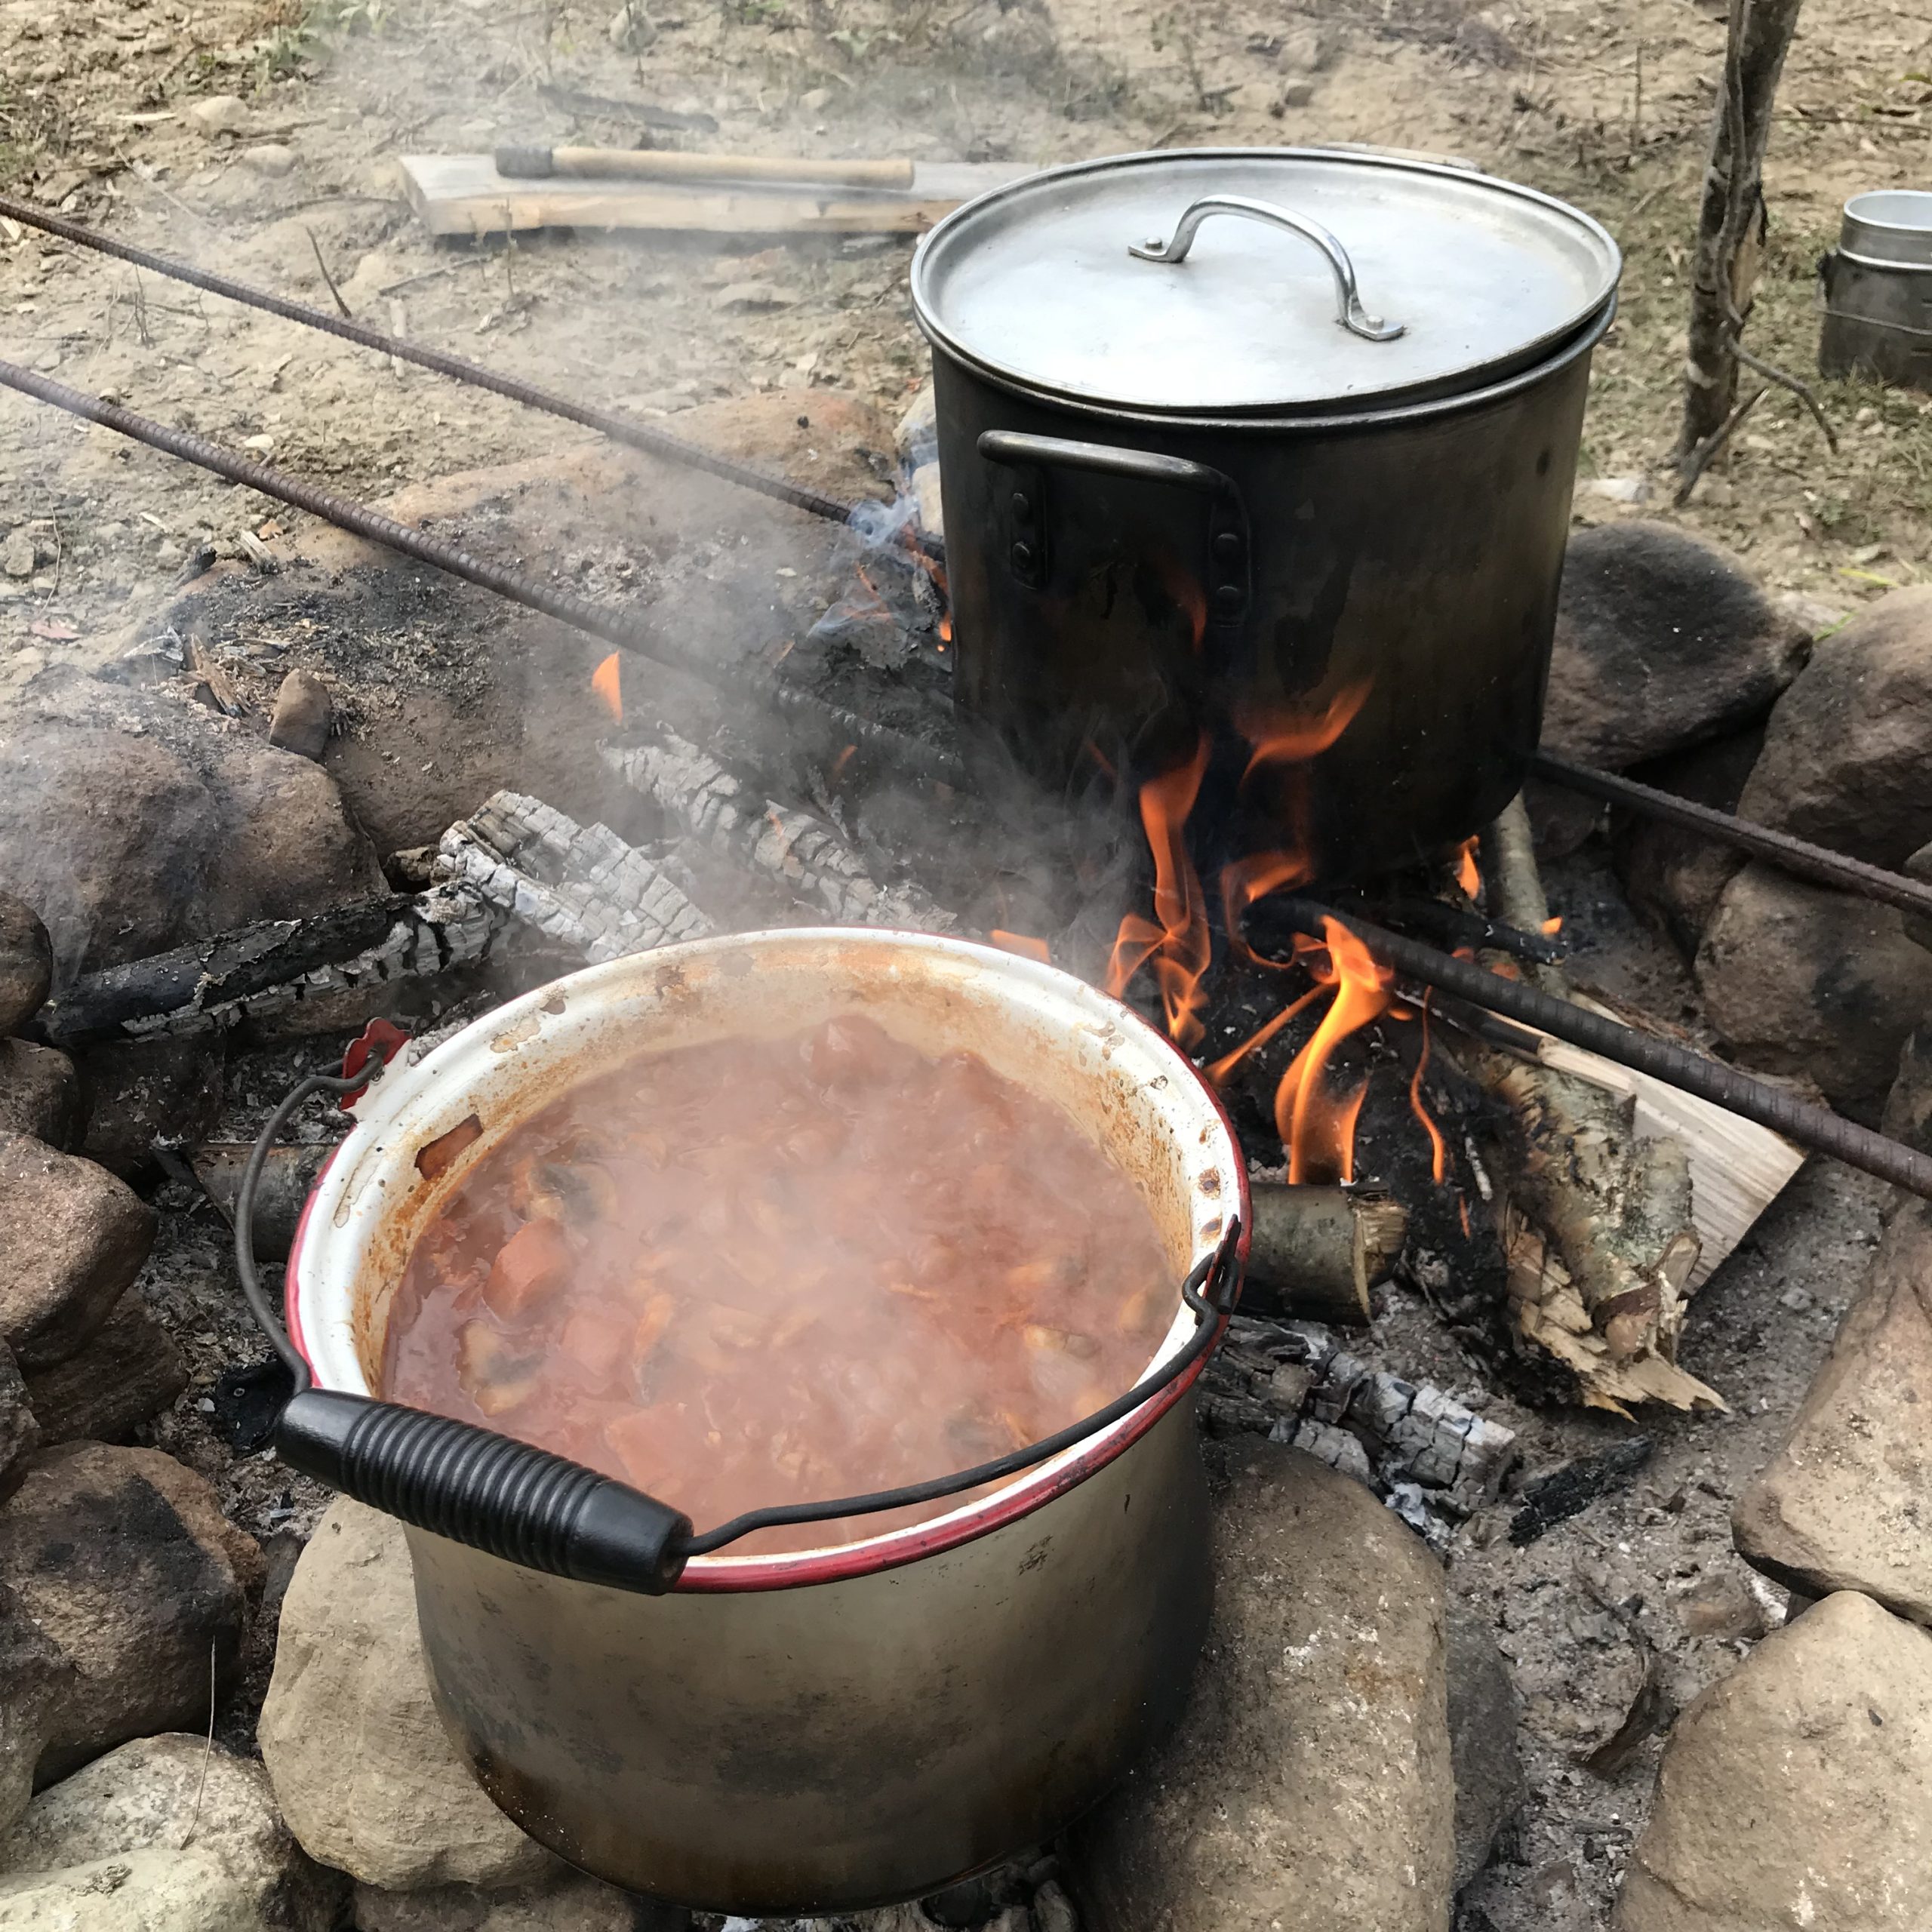
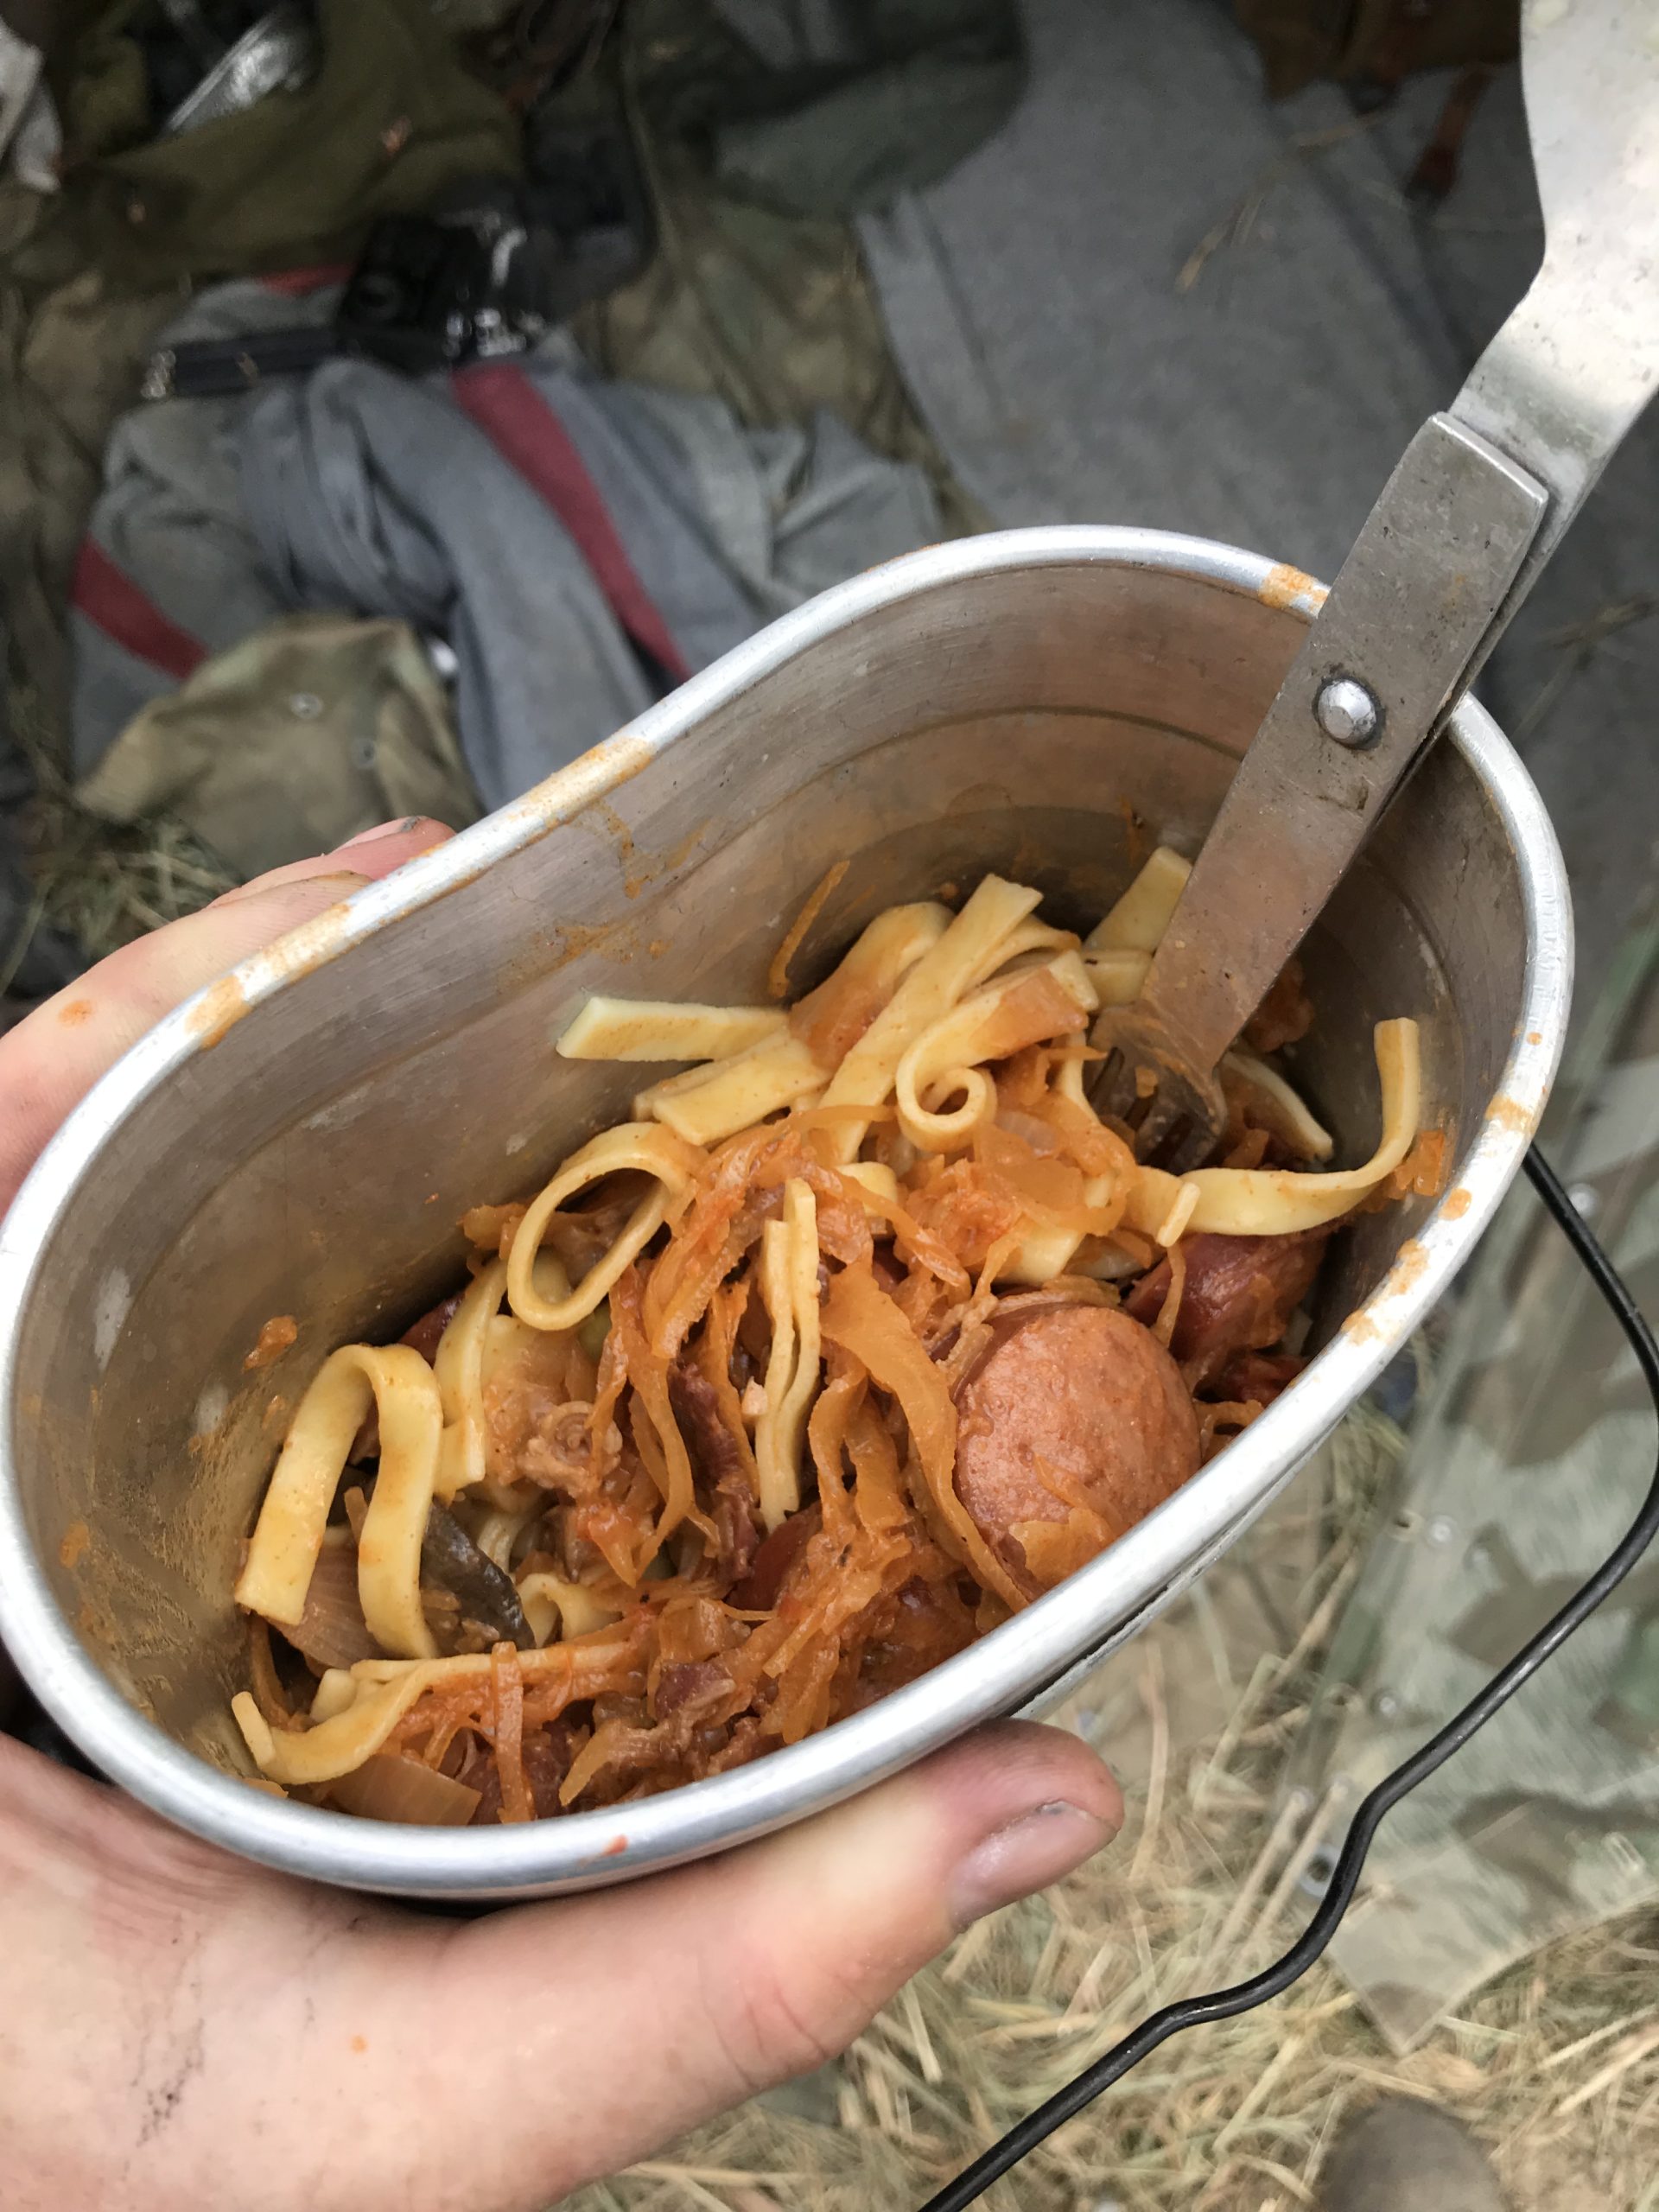
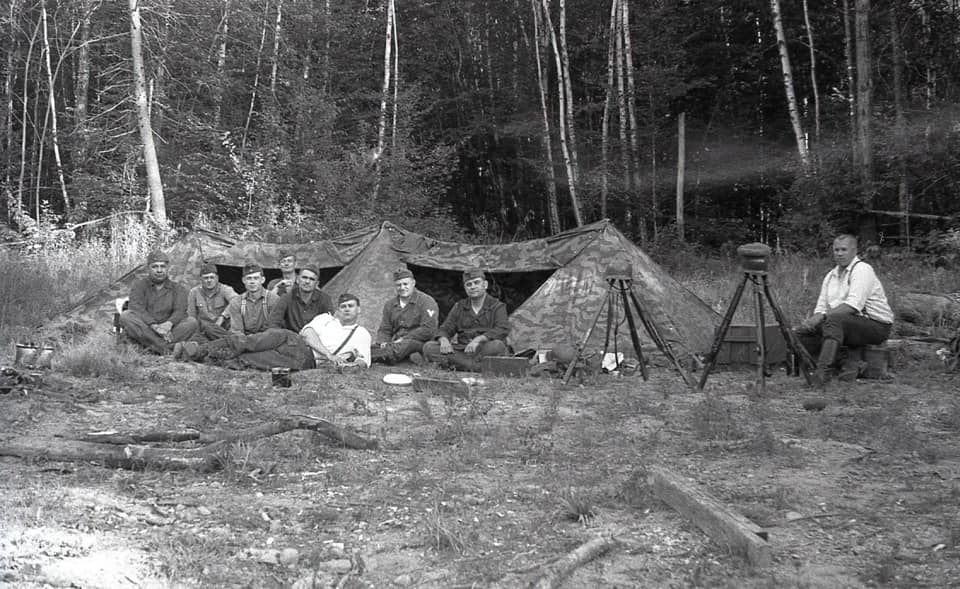
The tent erected at the site consisted of Zeltbahn shelter quarters. The communal meal prepared for the event was Szegediner Gulasch, based on this Wehrmacht recipe, and was prepared on site with period style equipment.
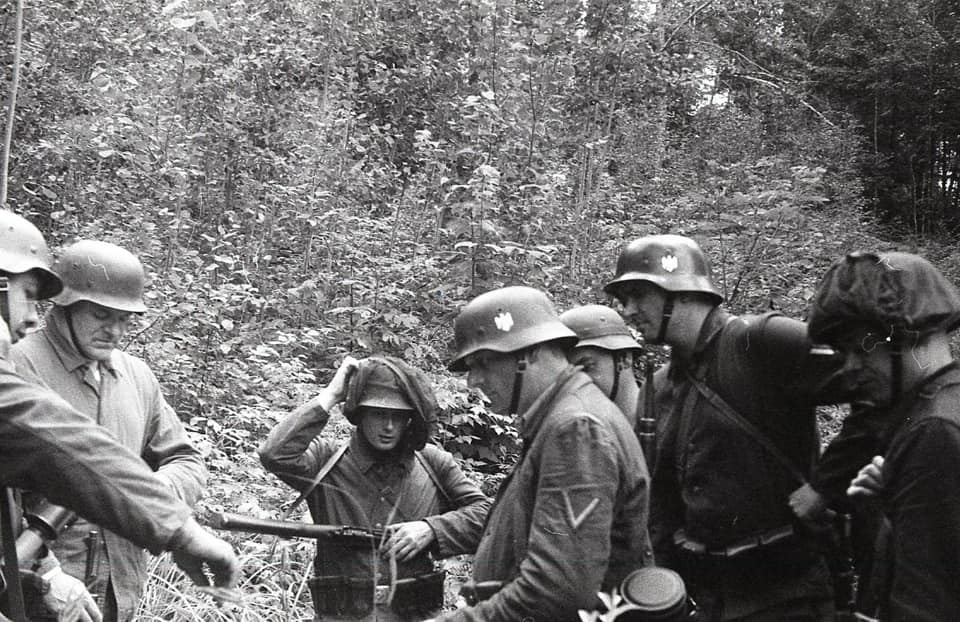
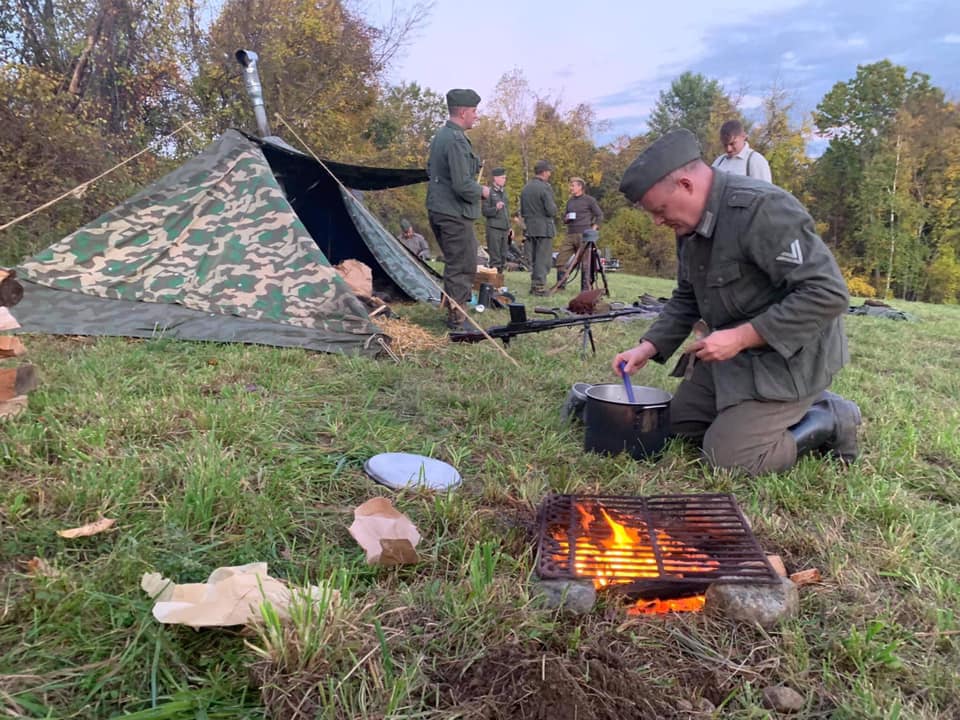
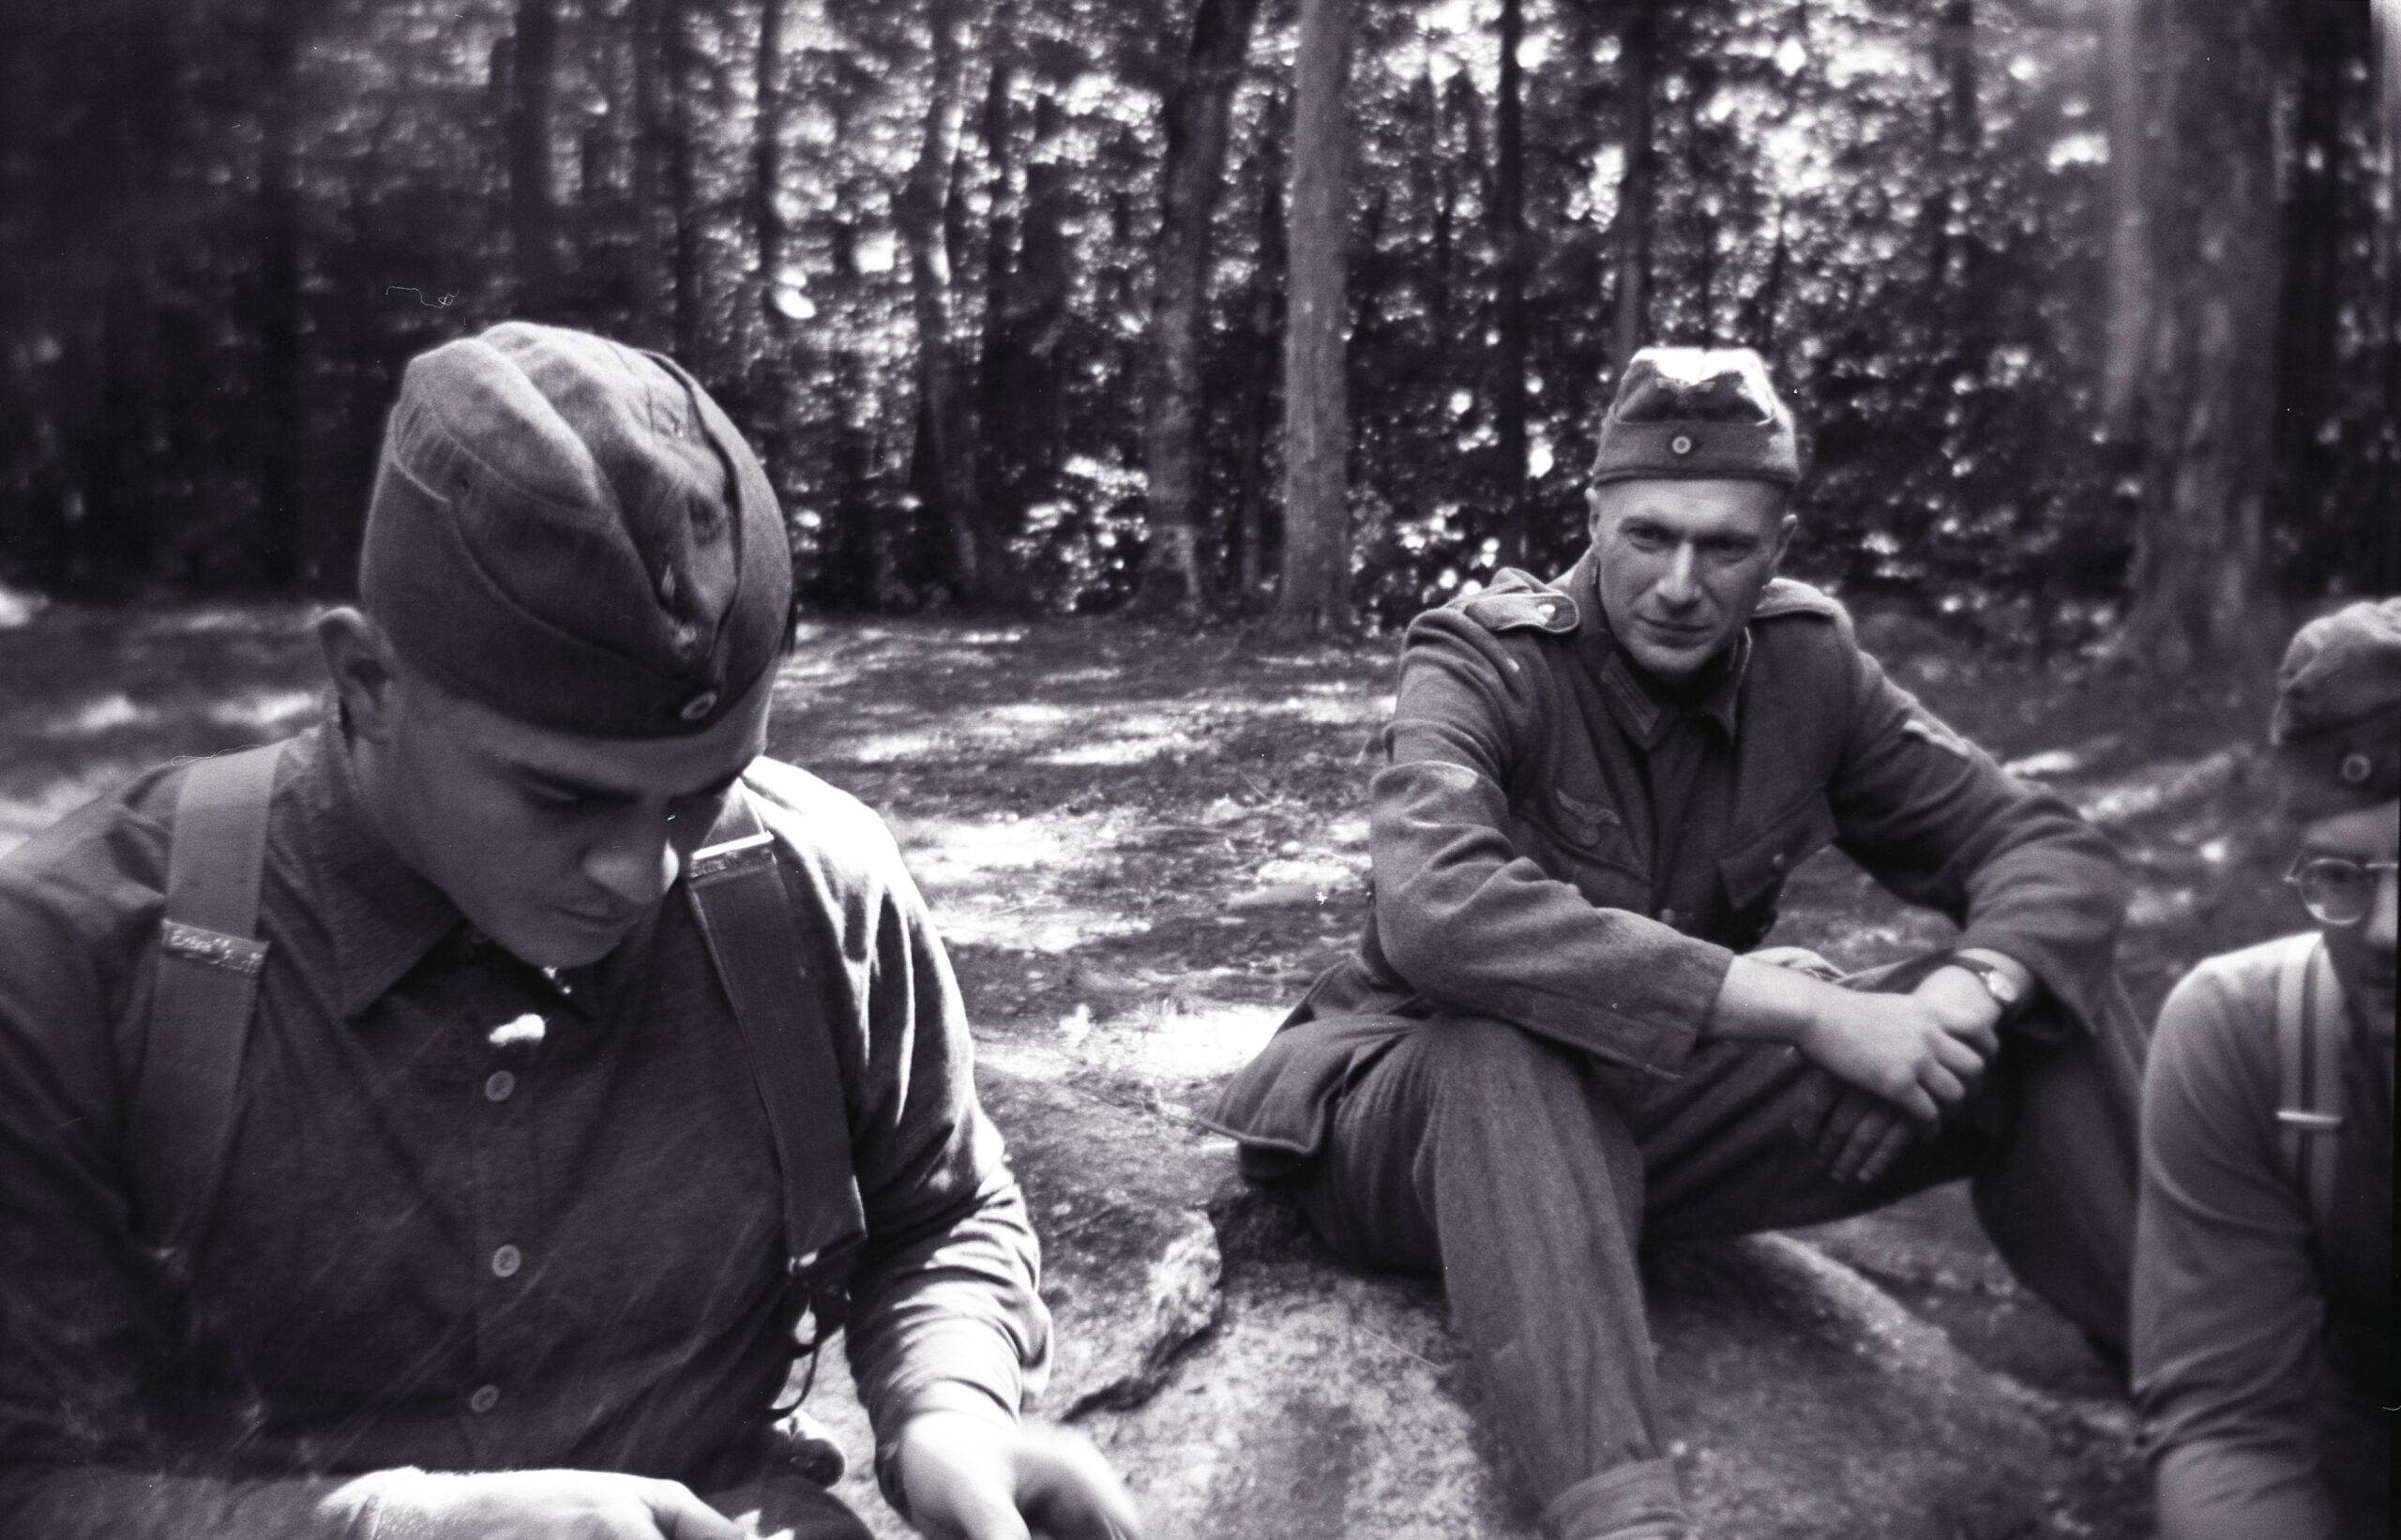
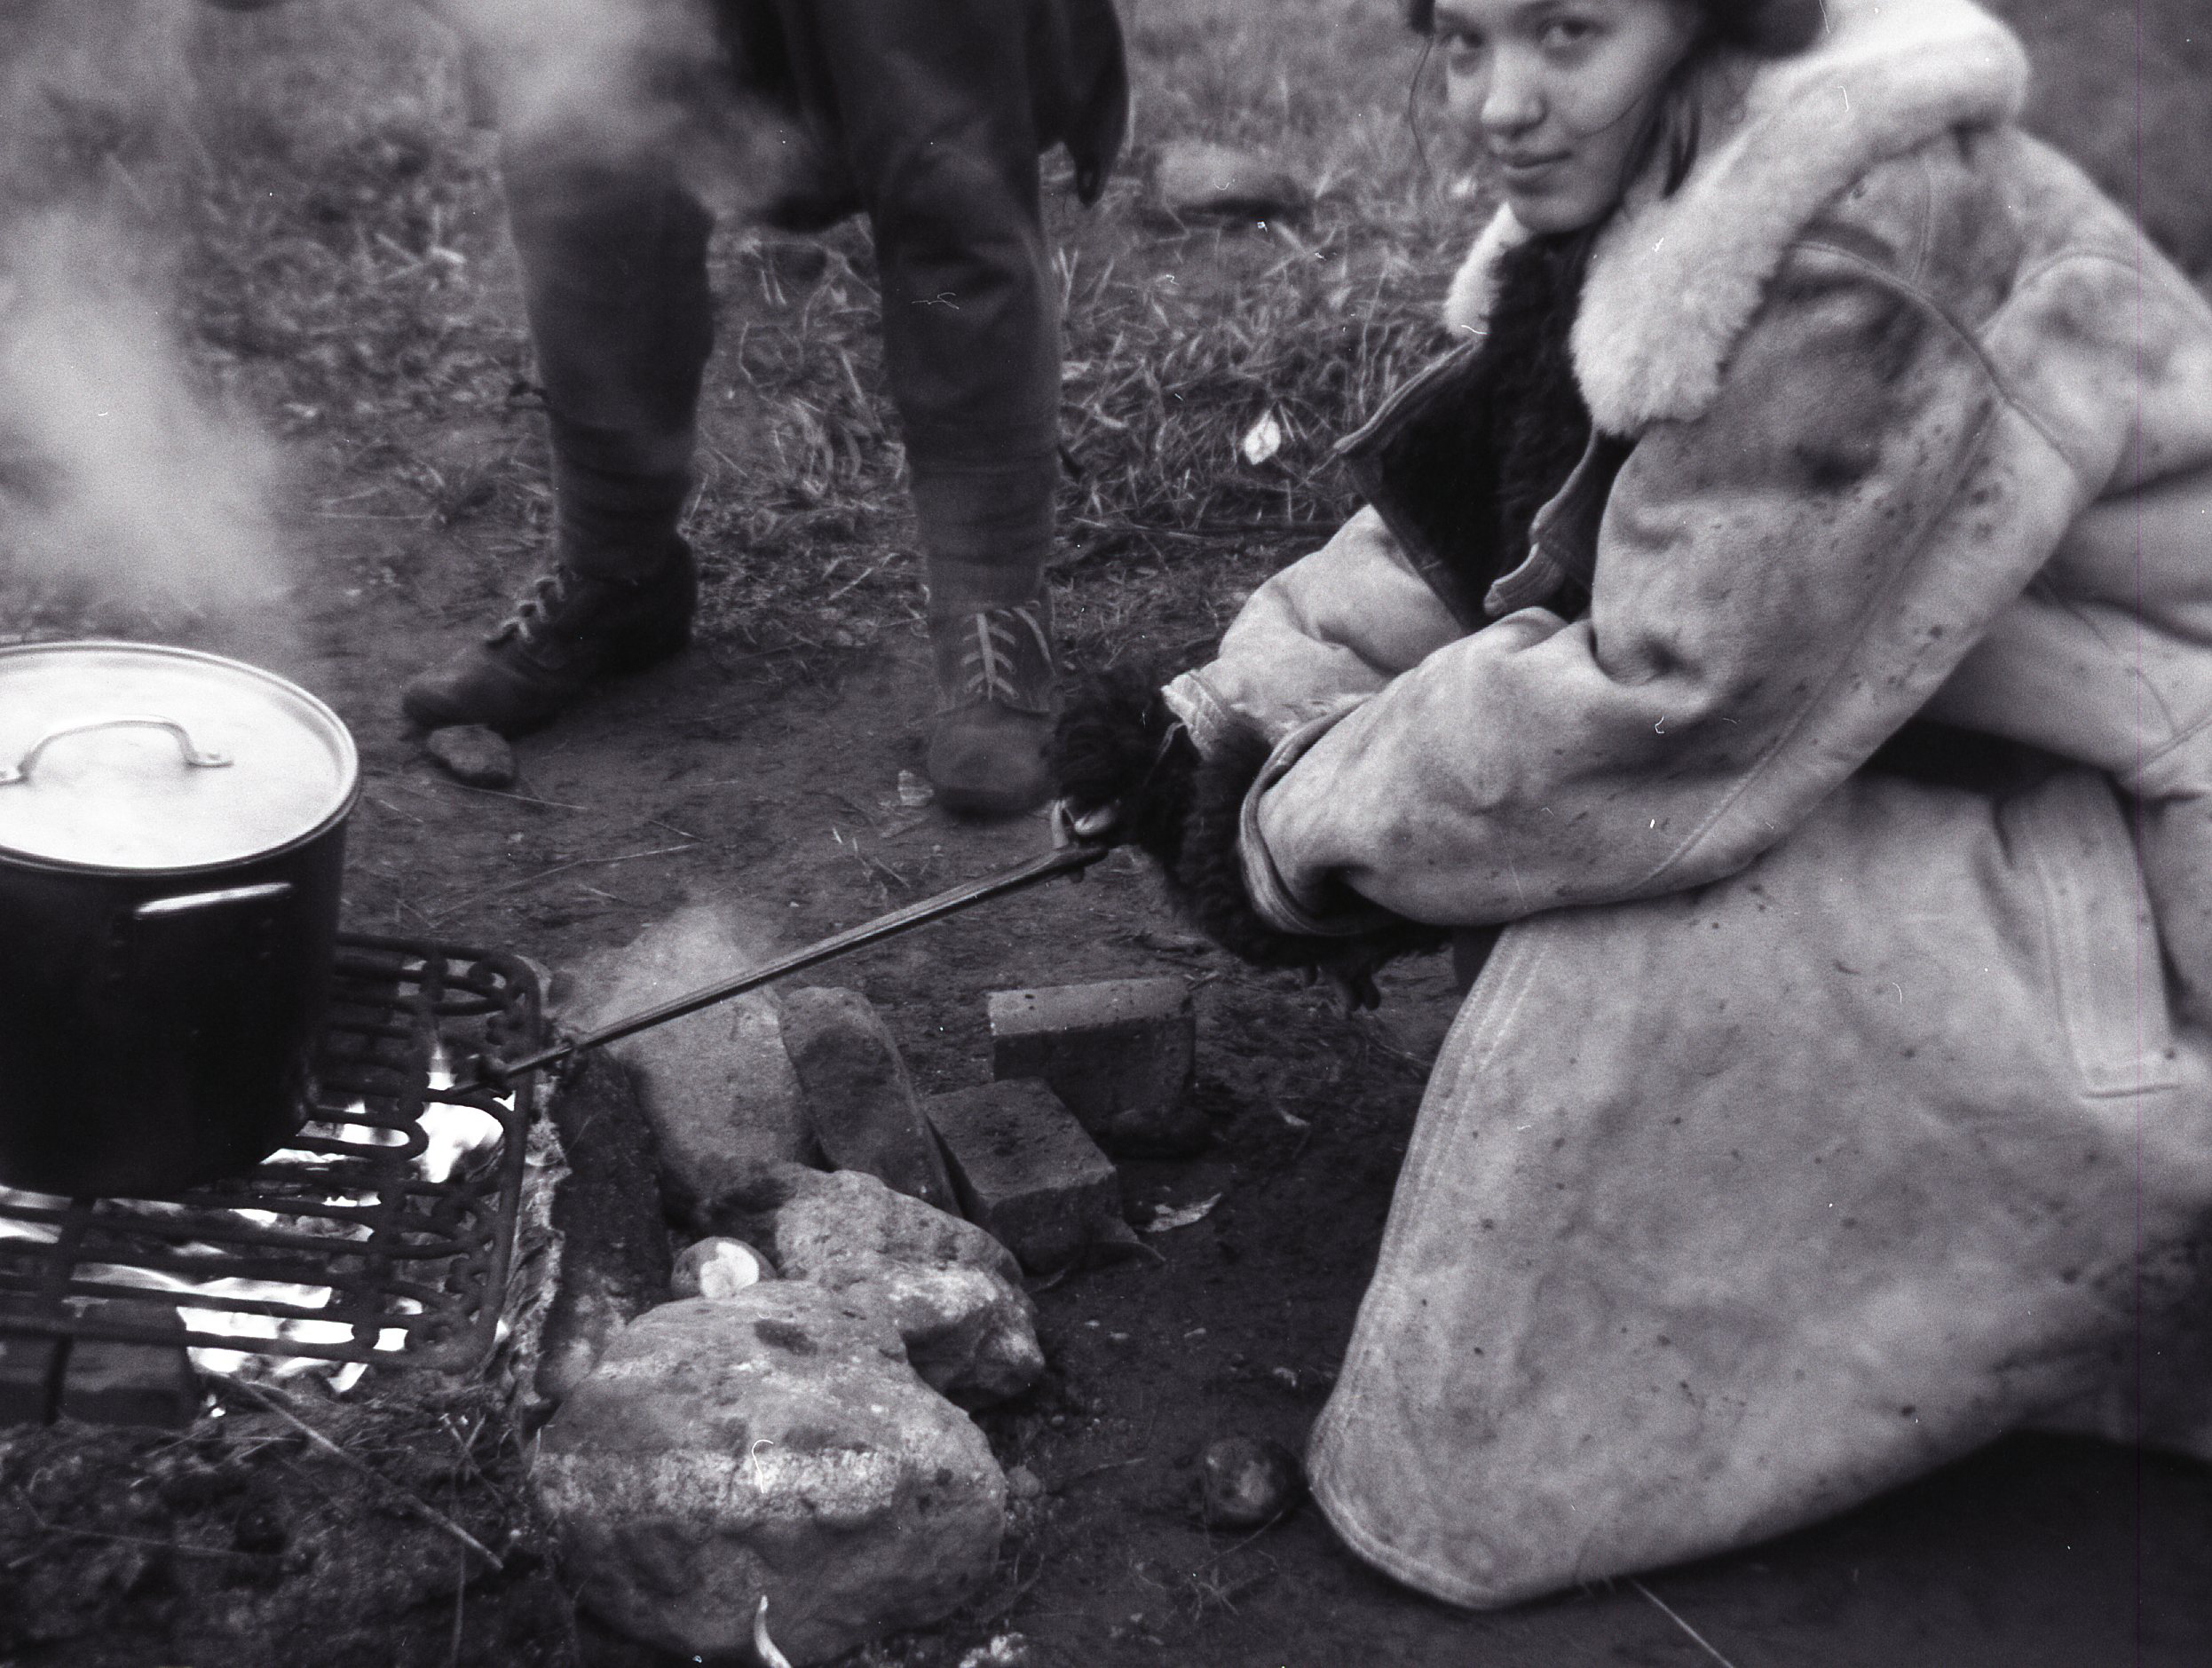
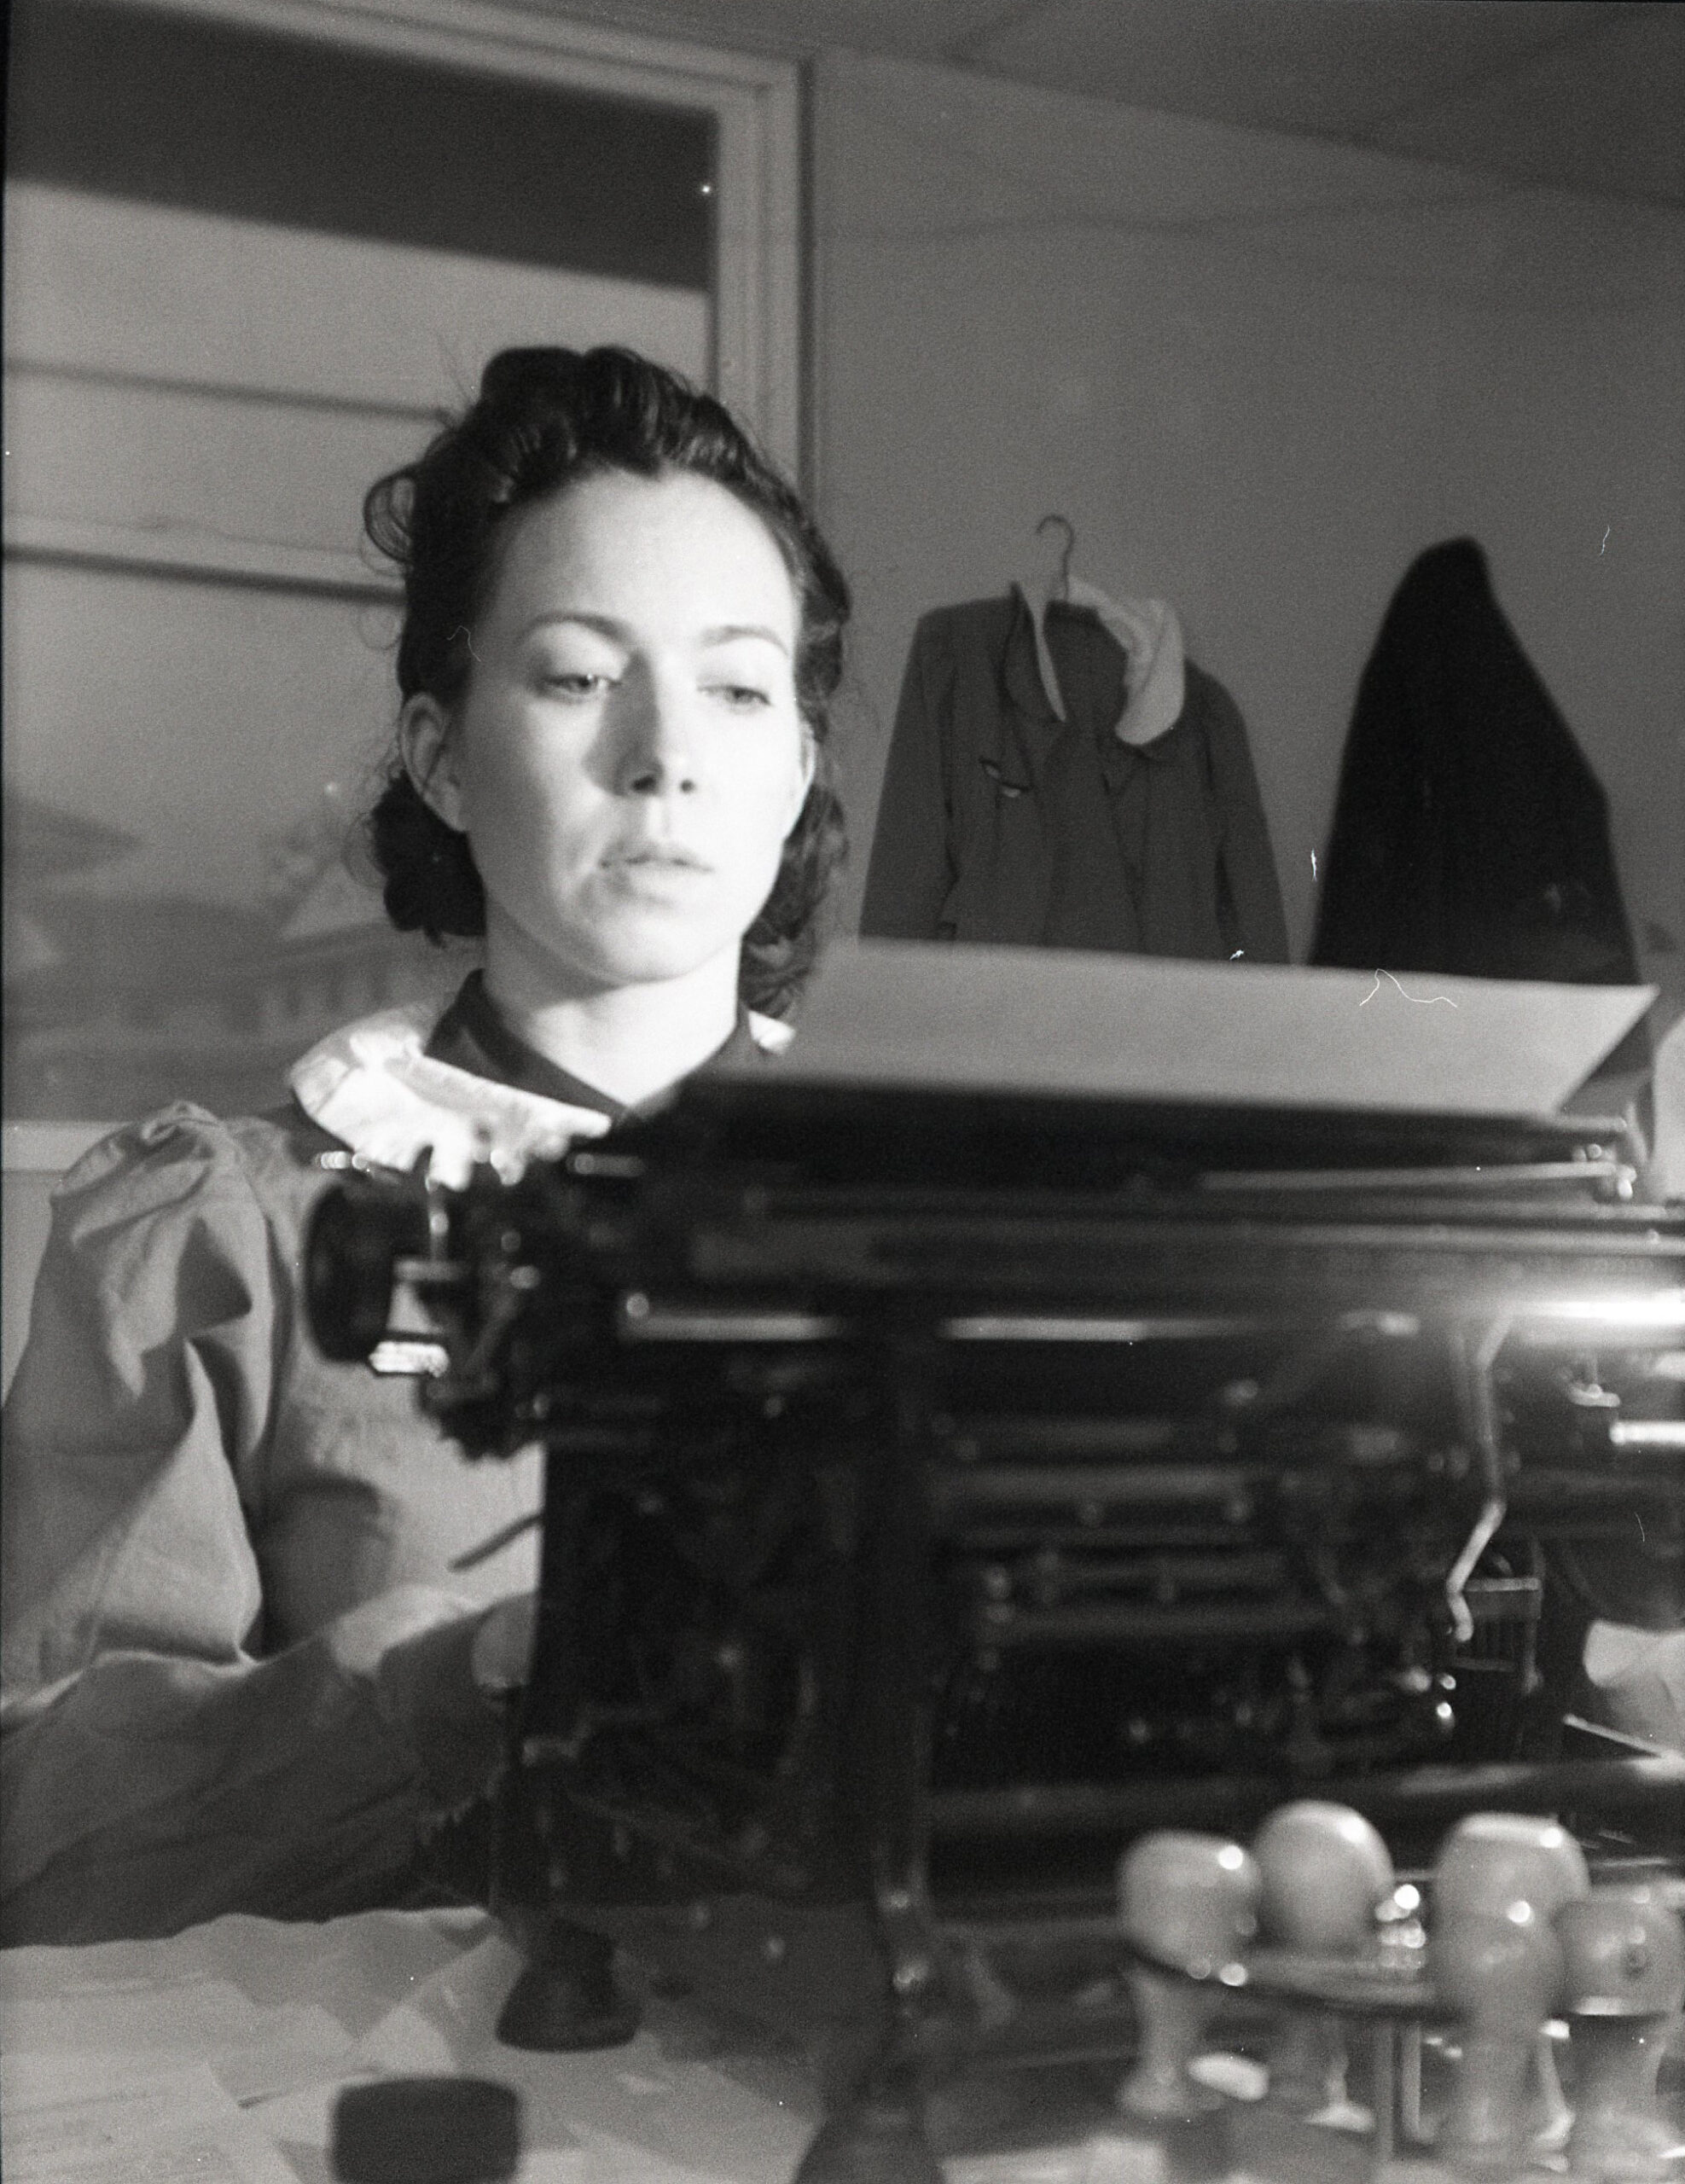
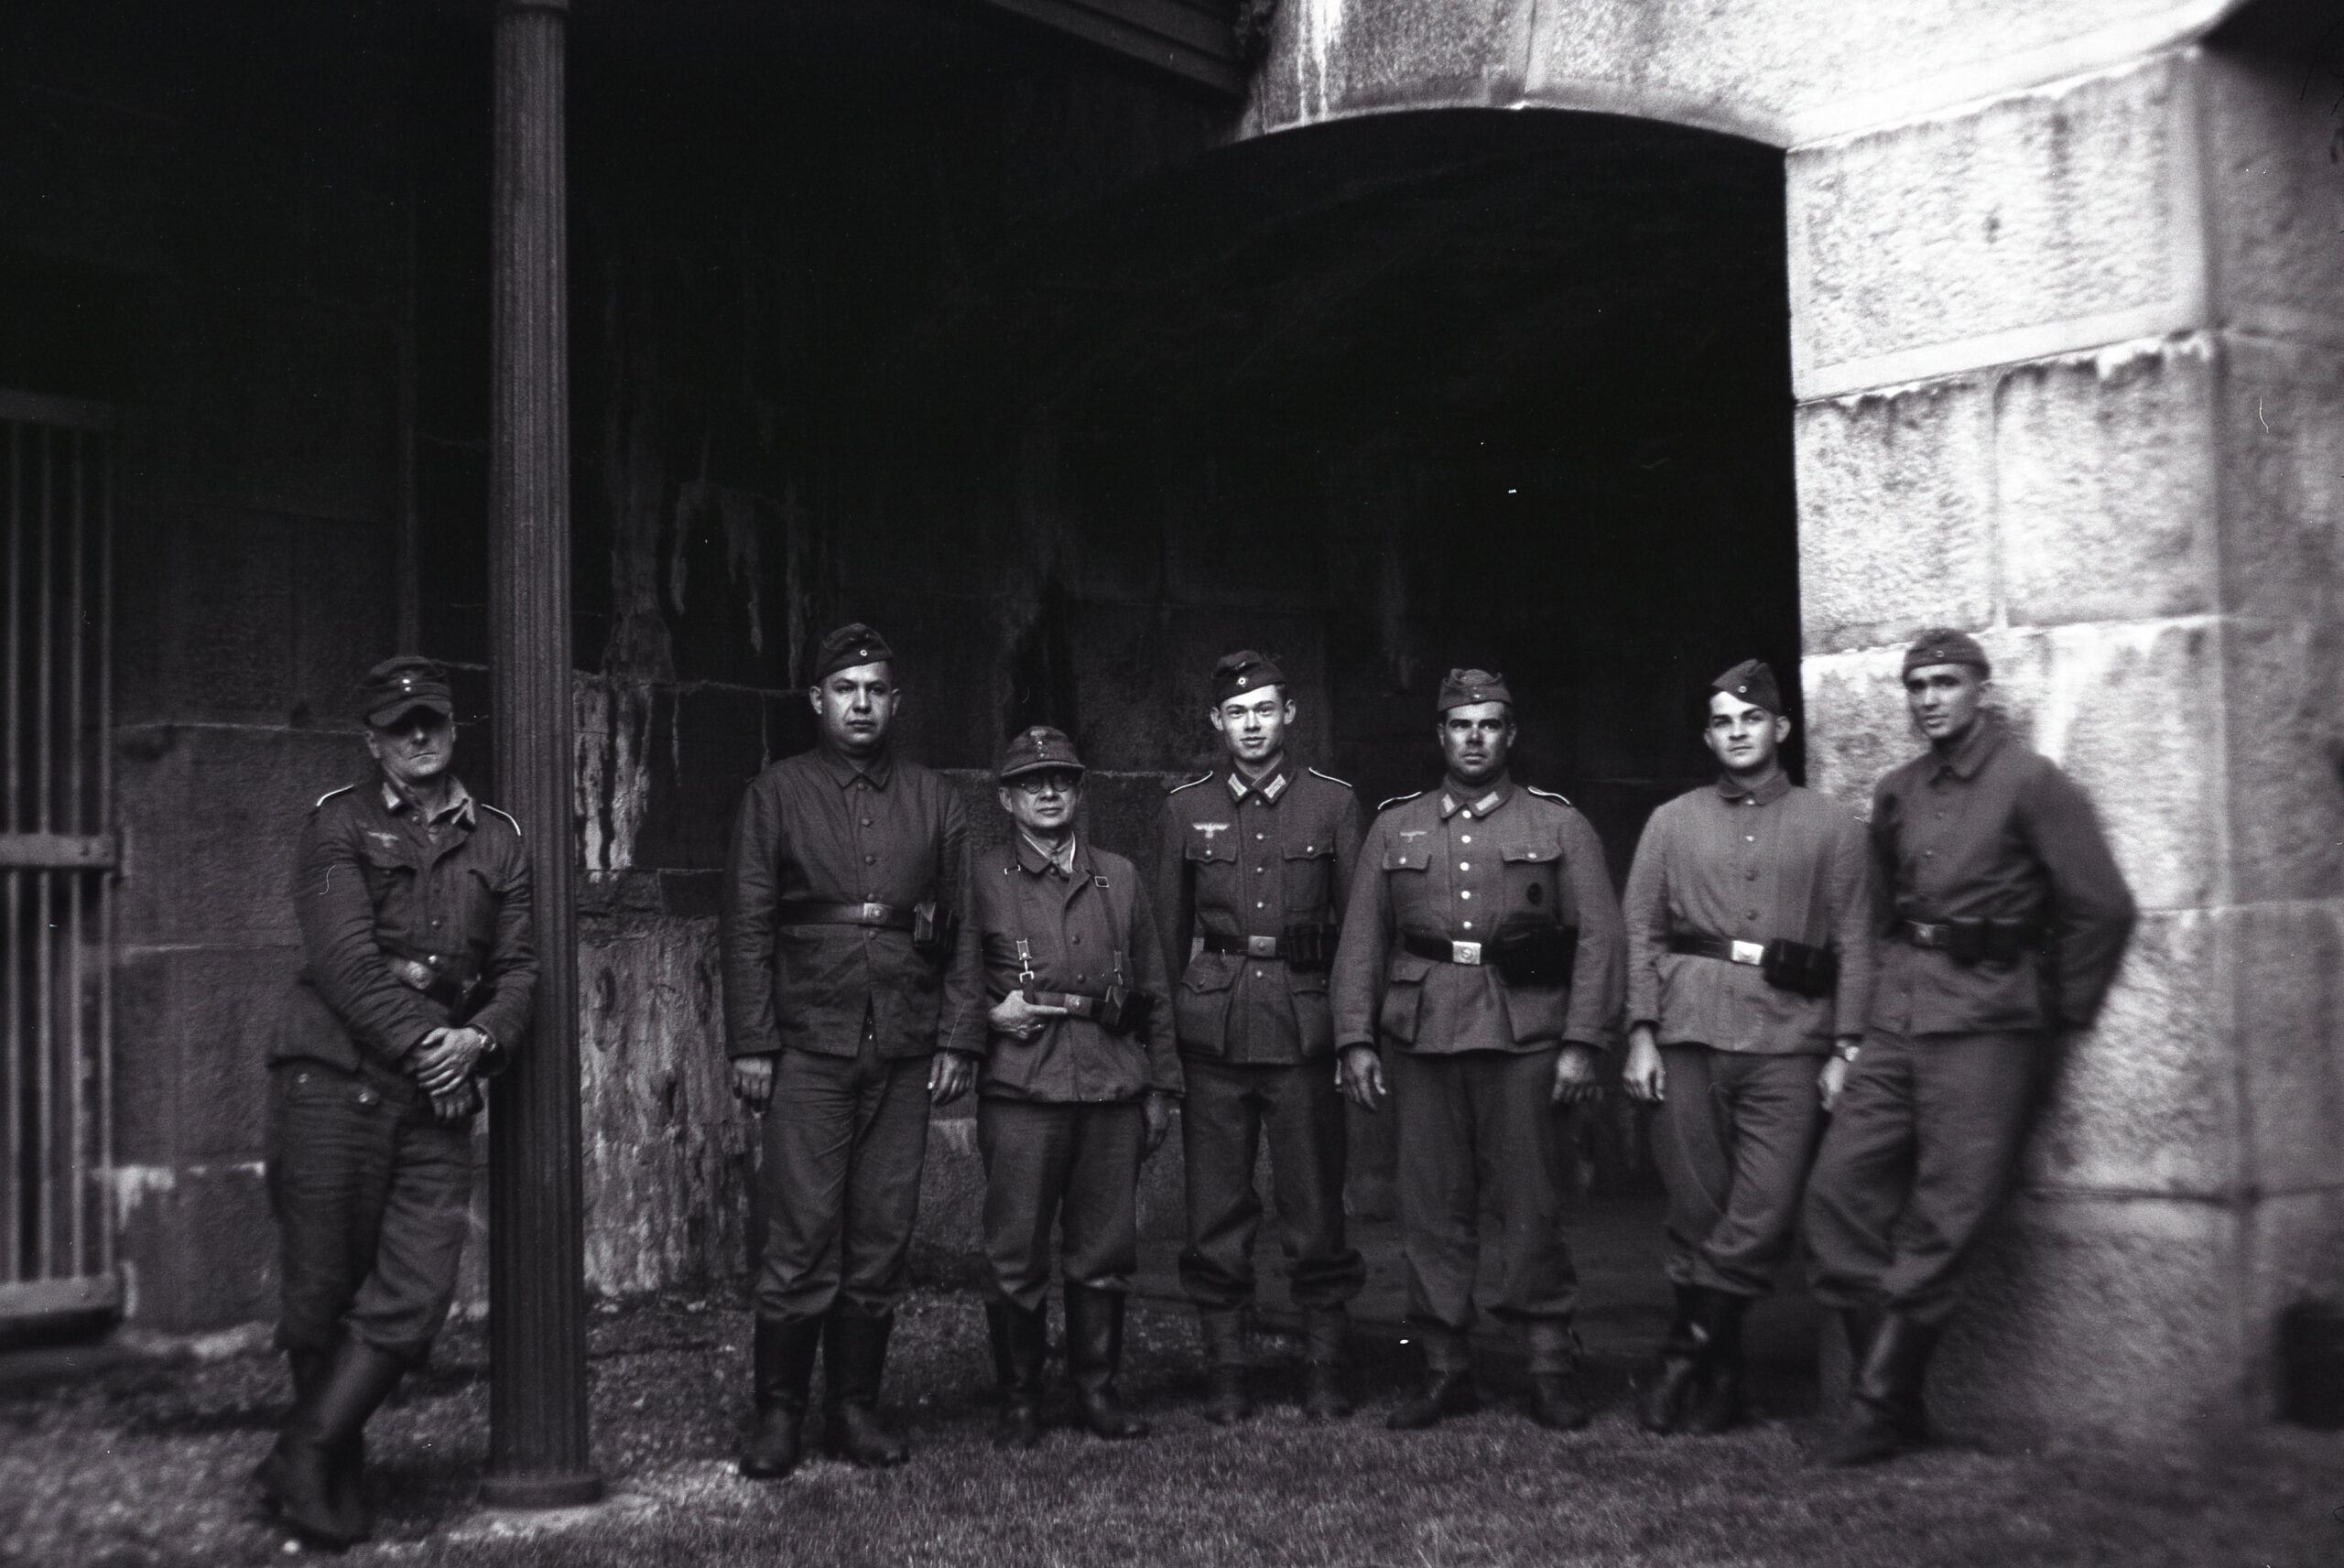
The event was a success. Total participation was 10 people, with 8 portraying German Army soldiers and 2 portraying Soviet partisans. These images from the event were taken with cameras from that era.
The German Army introduced a new model of HBT uniform in 1933. This uniform was called the “Drillichanzug,” literally HBT uniform (“Drillich” is the German word for herringbone twill fabric). It was made of undyed fabric, and was a two-piece uniform, with a simple unlined jacket with 2 lower patch pockets, and straight-legged trousers. In 1940, this uniform was replaced with a green dyed uniform in the same style. In 1942, this uniform was again updated. The two-pocket jacket was replaced with a four-pocket version, made very similar to the wool field blouse, and issued with insignia. The straight-leg pants were replaced with a new pattern that had a fastener at the cuffs. There was also a work uniform, called the Arbeitsanzug, in a different cut, made of blue fabric.
There are many misconceptions about the issue and use of German Army HBT uniforms. These are outside the scope of this article and we will publish something on this uniform, from a historical perspective, at a different time. This article is about reproductions of the first and second pattern (white and green two-pocket) HBT uniforms, from a reenactment perspective.
Original Uniform Color and Material
Looking at original photos showing the first pattern, undyed unifoms, and also at surviving original examples, a huge variety of shades and tones can be seen. It’s likely that some of this is a result of soiling and laundering. It’s possible that when new, the undyed fabric all had an off-white “oatmeal” tone, and that through repeated cleanings, was bleached white, perhaps to then become off-white again, from soiling. This is speculation. The fact is that in reality, these things, were, and are, in a range of shades. This photo of Reichsarbeitsdienst men wearing their version of this uniform in this undyed fabric illustrates this fact.
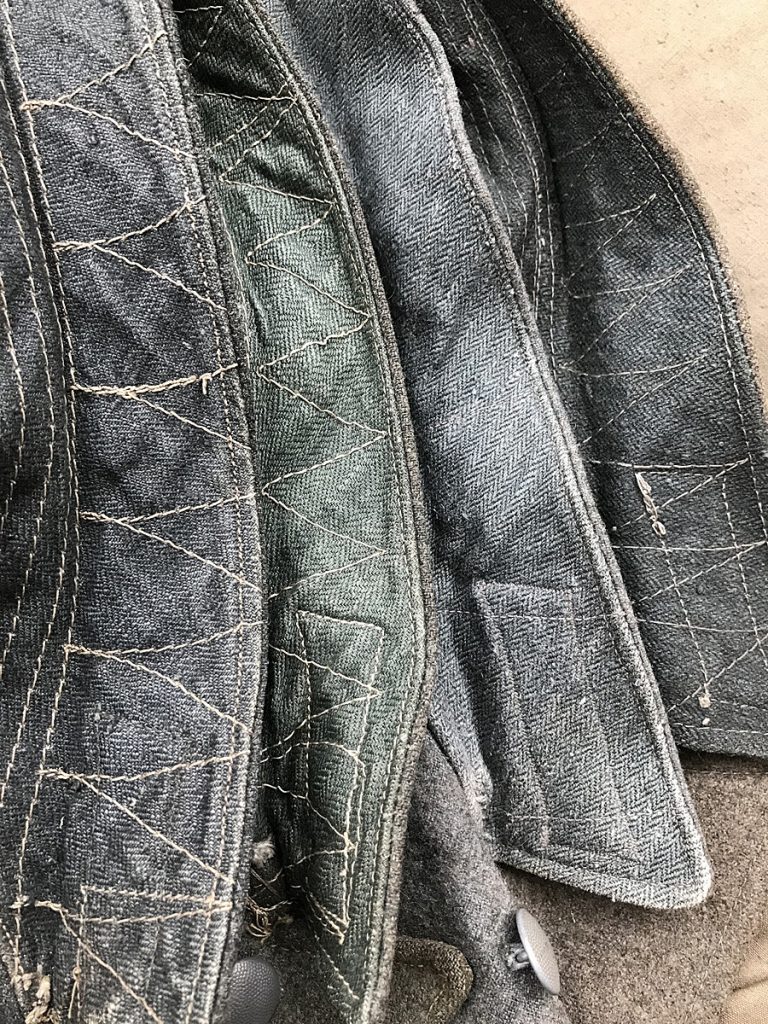
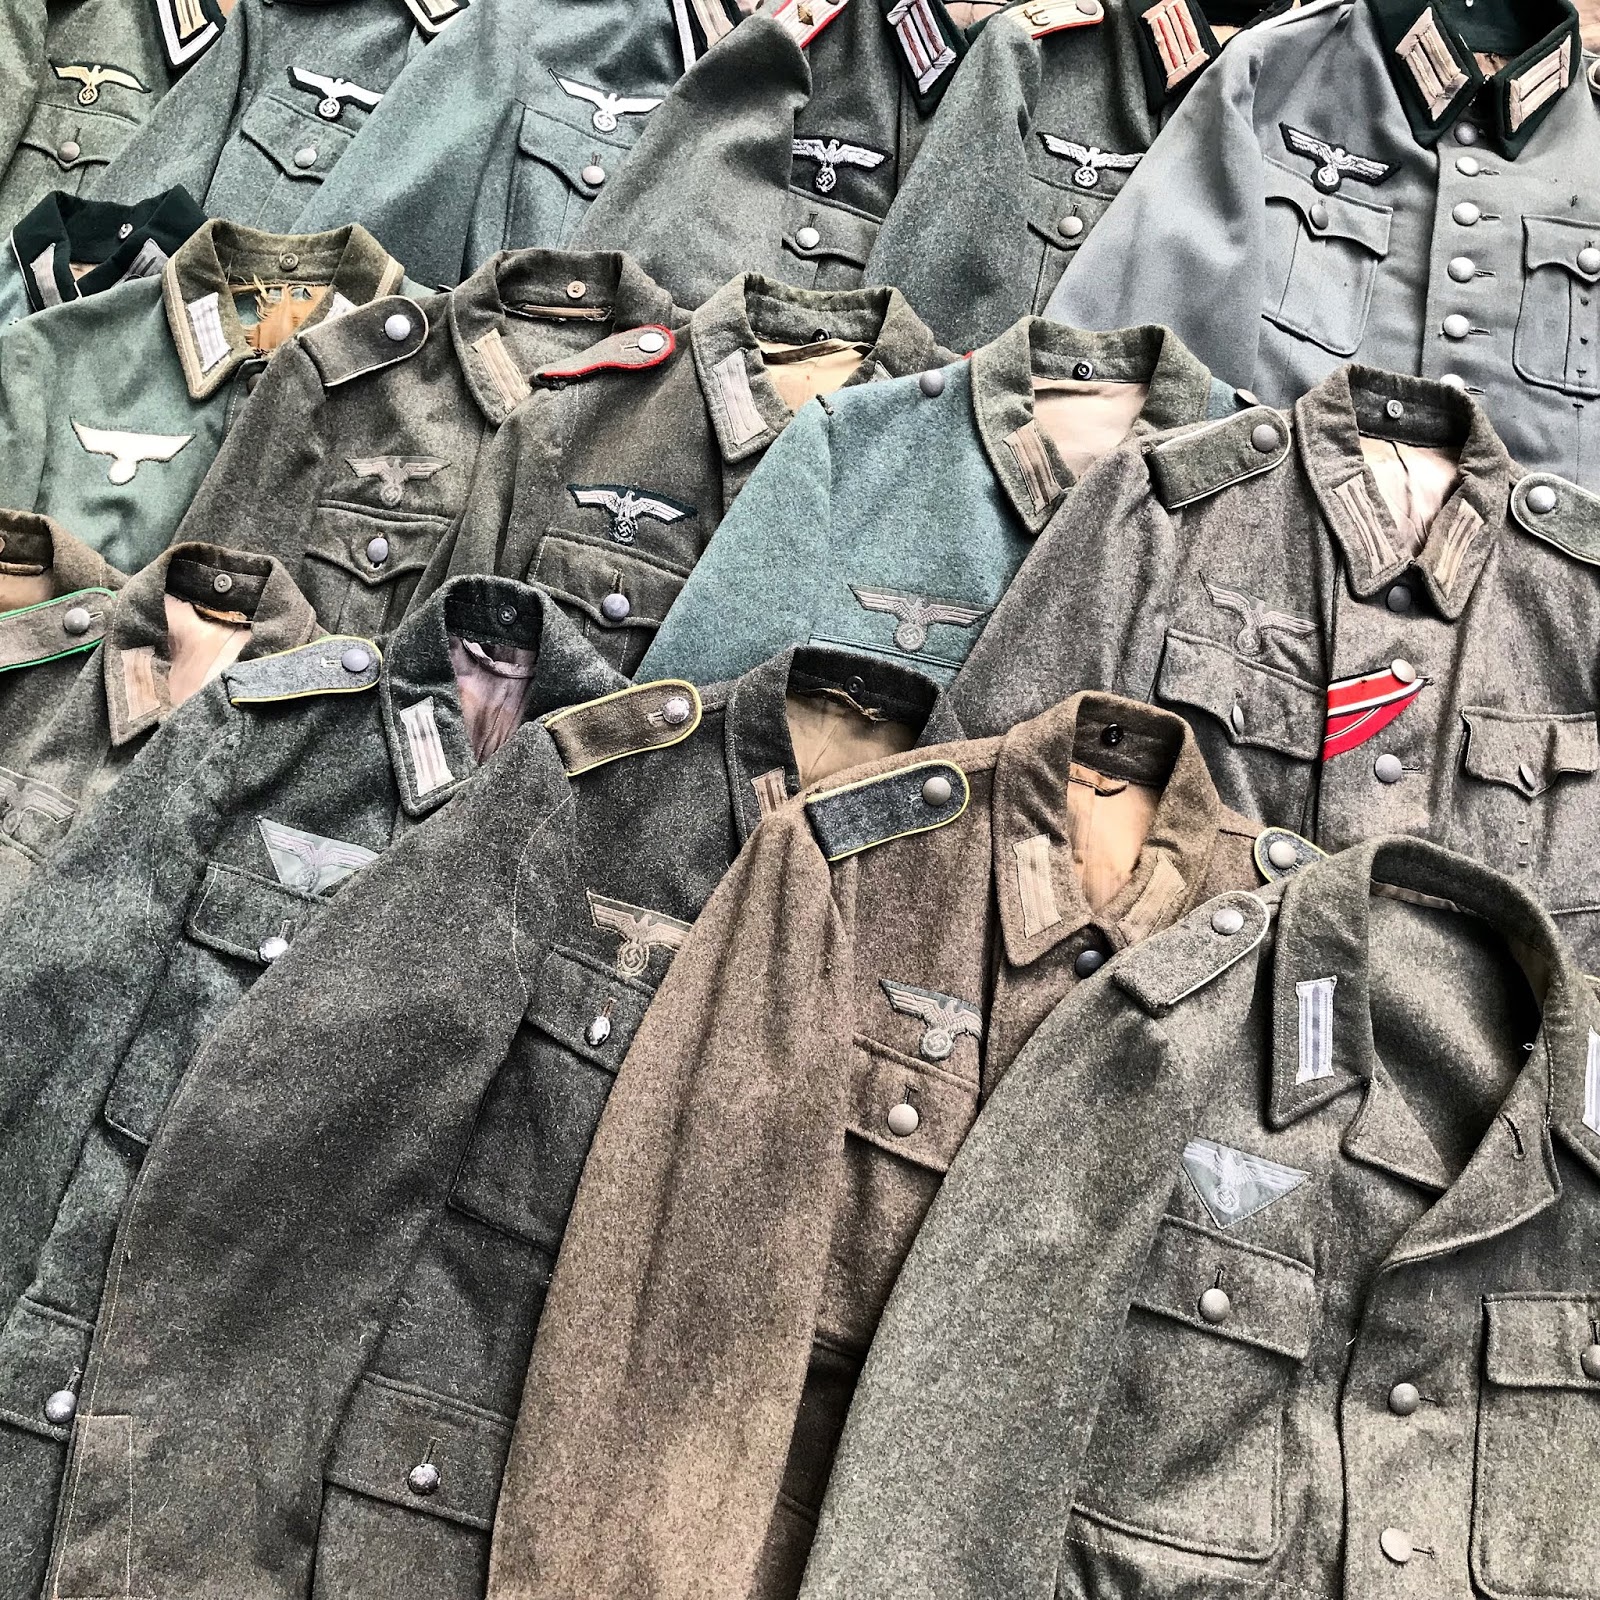
The green HBT material also varied. German fabric manufacturers were not able to standardize color shades for the millions of wartime uniform and equipment items manufactured, it was no different with the HBT. This photo shows original wartime wool uniforms with scraps of the green HBT material used as reinforcement under the collar. This is a protected place, and while some of the visible differences could be due to wear and laundering, I believe most of the evident differences are a product of manufacturer variation. Some is more smooth and fine, some more rough and coarse, the relative size and appearance of the “stripes” woven in the fabric is different from one to the next. As one would expect, there is a wide range of variation in this fabric.
I have no way to determine the fiber composition of original uniforms. Wehrmacht HBT fabric was purportedly made of linen, but I have no wartime or prewar source that states this explicitly. Whether any may have been made from blended fiber, or cotton, I can’t say. Manufacturers of reproductions make various claims about the fiber content of their fabrics but I have no way to verify this. I also have no insight on the extent to which modern Asian linen fiber may vary from wartime or prewar European flax-derived linen, if these are the same or not. I can say that it is possible to find wartime fabric with more or less sheen, or that feels more soft or rough, etc.
Issues with reproductions
Reproductions will always differ from originals in some way. It is the same with these uniforms. Some of these issues are easily remedied and some are not.
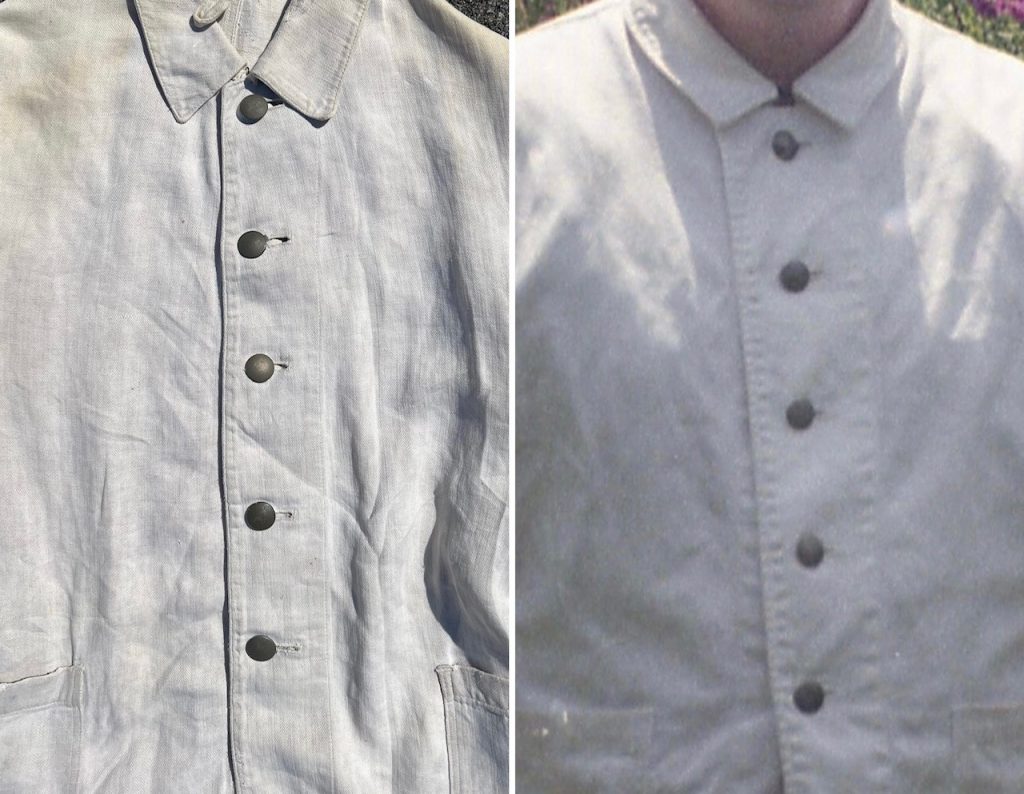
One pattern error that exists with two-pocket HBT jackets from various manufacturers is an issue with the front placket. On originals, the front edge, on the buttonhole side, is cut straight, with the edge parallel to the buttonholes, so that the front edge when worn is straight and in line with the row of buttons. Many reproductions use a placket like that on the wool field blouse, which is slanted, with the edge getting closer to the button row as it moves from the collar to the skirt. This photo illustrates this issue. On the left, an original jacket with straight, vertical placket, and on the right, a reenactor wearing a reproduction jacket, with a slanted, diagonal placket edge. Look how close the edge is to the lowest button and how far it is from the top button; that’s the problem. This can be fixed with a sewing machine by carefully unstitching the edge, folding it to be straight (trimming near the top as needed), ironing or tacking the edge in place and stitching it with a sewing machine.
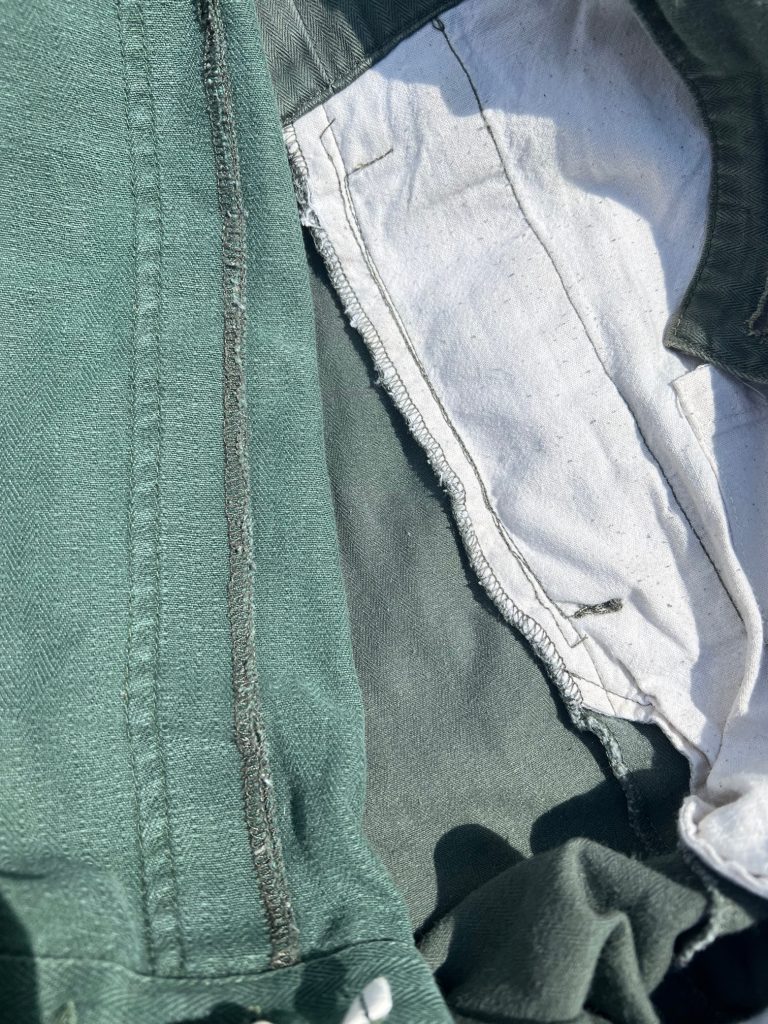
Another common issue with many reproductions is the use of overlock stitching. Overlock stitching existed in WWII and was used by Wehrmacht suppliers mostly on knit items. It is unlikely this stitching was ever used on these HBT uniforms. Most manufacturers of reproductions use this stitching style on parts of the inside of the uniforms. It is not visible on the exterior. This photos shows overlock stitching inside a jacket and a pair of trousers from two different suppliers of reproductions.
For a reason I cannot explain, some makers of reproductions include two internal lower pockets. I have never seen an original two-pocket HBT tunic with internal pockets.
Original uniforms that I have seen, had hooks and eyes at the collars, for fastening the collar, in the style of the wool field blouse. Some makers omit these details.
A perspective on reproduction HBT uniforms
In the reality of the Wehrmacht, the HBT uniform was not a glamorous thing. It was worn for training, for work details, and in the field. Generally speaking, it was not adorned with fancy insignia or awards. A reenactor, who is using this thing in the manner in which it was intended, may not particularly care about small details, that may not be visible when the garment is worn, on a uniform that is likely to become heavily soiled, stained, damaged, repaired, and perhaps, eventually, replaced. Small details may not affect how realistic the uniform feels when it is worn. Other reenactors may hold every item they use, regardless of how it is used, or how soldiers viewed the item, to the highest possible standard, and may seek out custom manufacturers who can manufacture bespoke items in fabrics as close as possible to the original, using exclusively period correct construction techniques. It is my hope that the information offered here may be of use to any reenactor interested in purchasing one of these uniforms, from any supplier and at any price point, regardless of their personal, subjective perspective.
Because these uniforms are perhaps not as evocative of the WWII Wehrmacht soldier as other uniform types in the minds of collectors, and perhaps because of their often simple and plain nature, they are less sought-after by collectors, and therefore less expensive. It is my personal opinion that wearing originals in the way in which they were originally intended, will inevitably cause damage to these collectible historic objects, and that this is at odds with a desire to preserve history. I would only ever wear a reproduction and would only allow reproductions to be used in my reenactment group.
Challenges of evaluating reproductions, and a disclaimer
A challenge of evaluating reproduction items is the fact that suppliers will have items made in different runs and possibly from different manufacturers at different times. These uniforms have been reproduced by various suppliers for perhaps 15 years, maybe more. A uniform purchased from one supplier today may be totally different from one sold by the same vendor a year ago. In fact, depending on the vendor, you may order a uniform in one size, and the same uniform in a different size, and get items made by different manufacturers at different times. The information in this article is the information that I have. It is the information I would give to members of my reenactment group looking to buy one of these, and if possible, I will update it, if things change. It should not be regarded as a final, authoritative word. I have not exhaustively studied every variant of original that might possibly exist.
Comparisons of original fabric with reproduction fabric used for uniforms from various suppliers
This is the part of the article where I will finally discuss who actually makes and sells these uniforms and where one can get them.
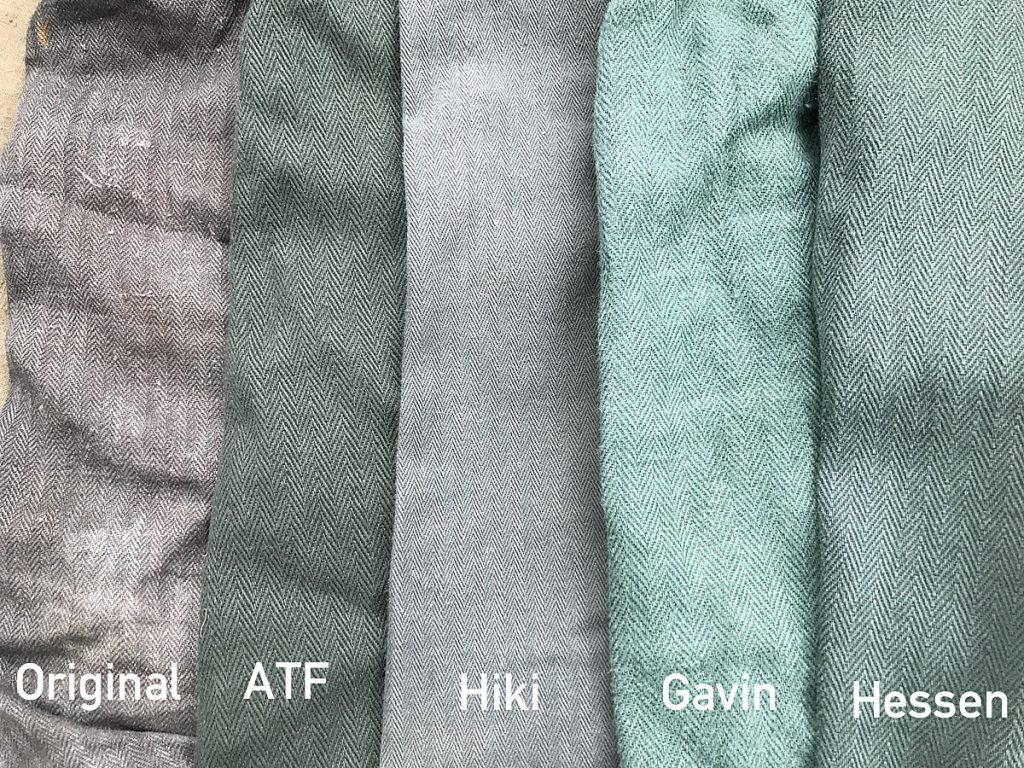
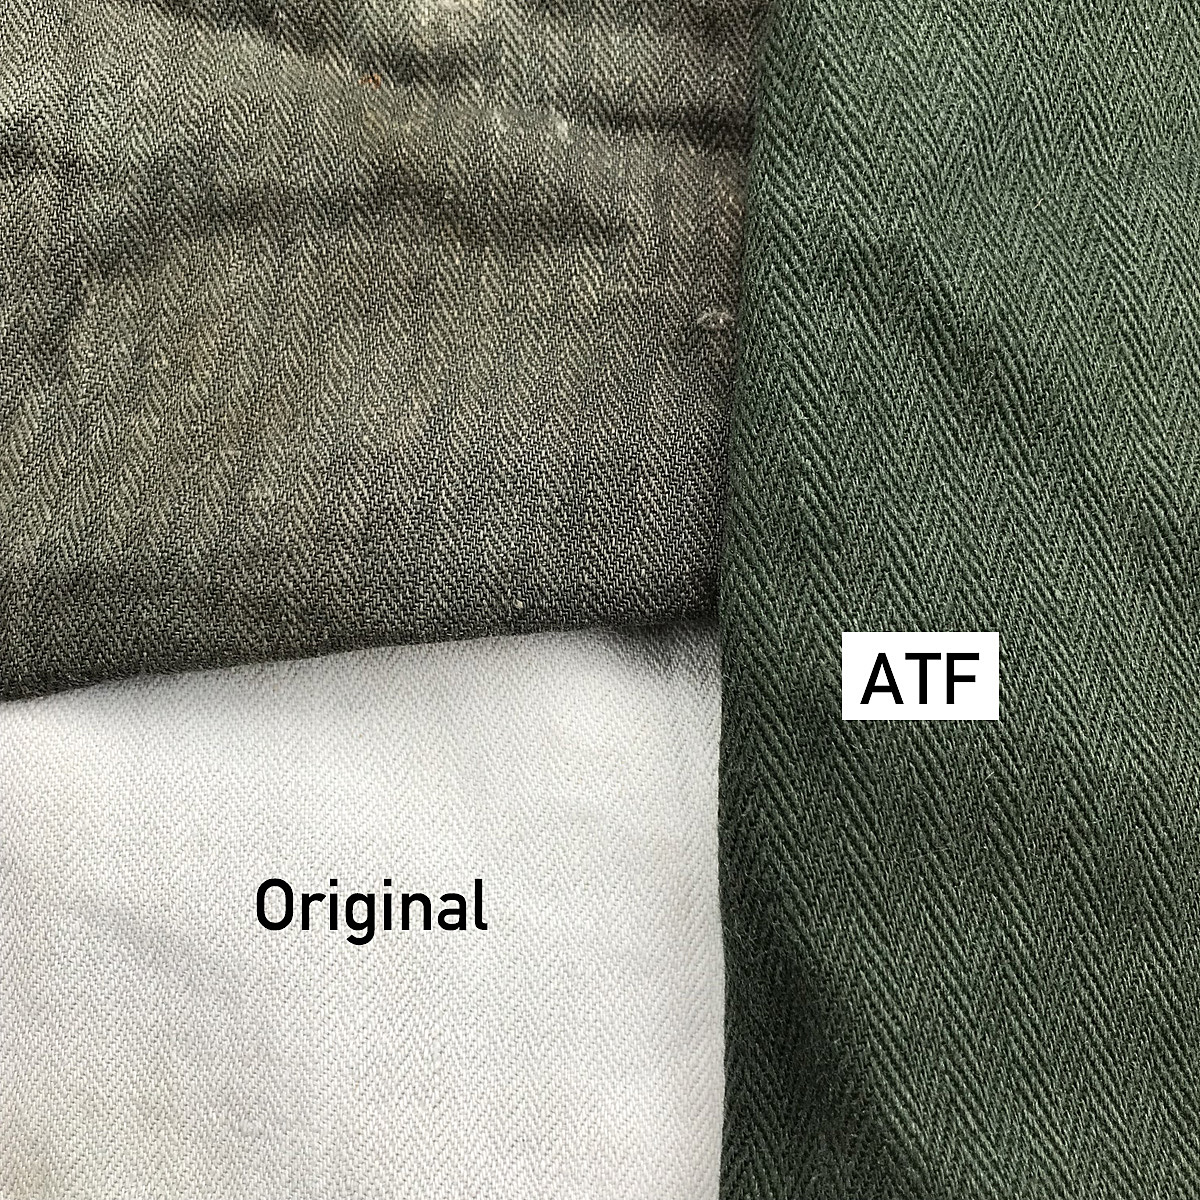
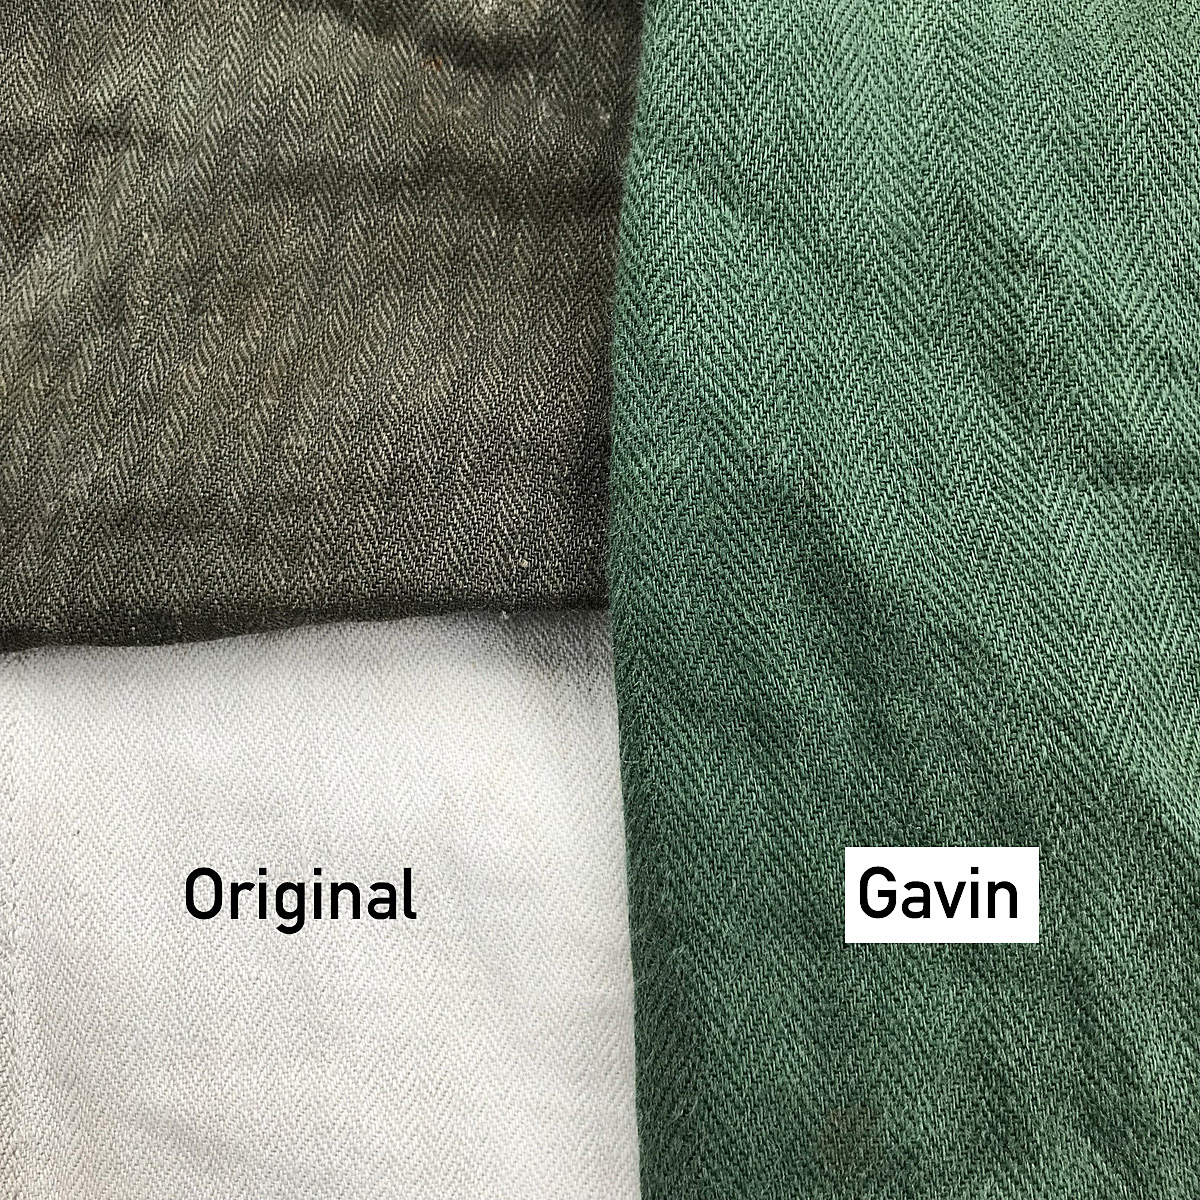
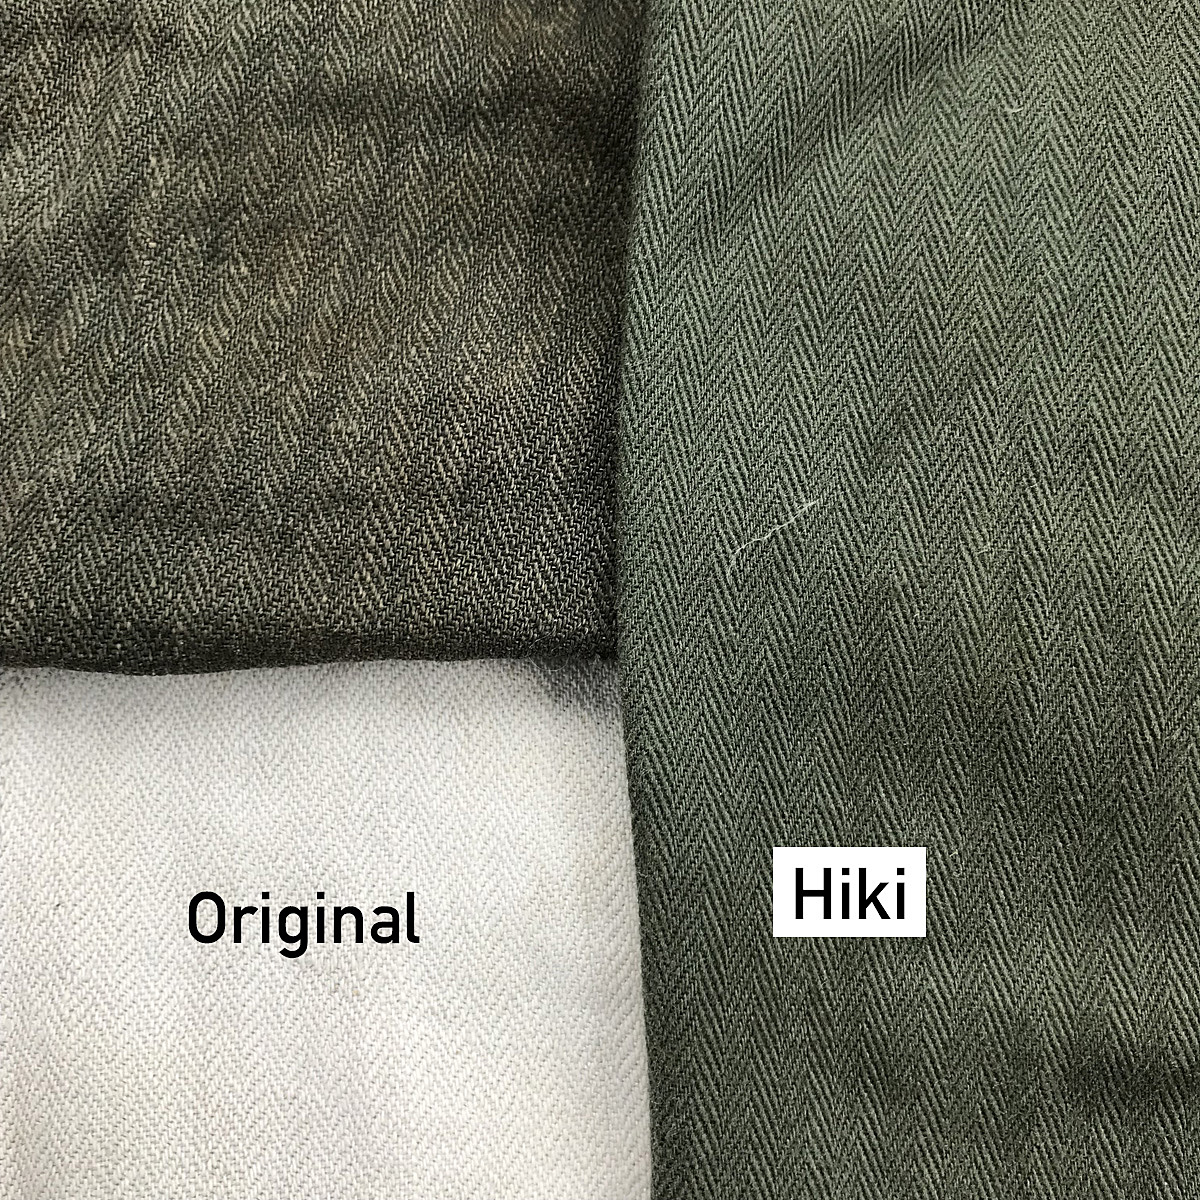
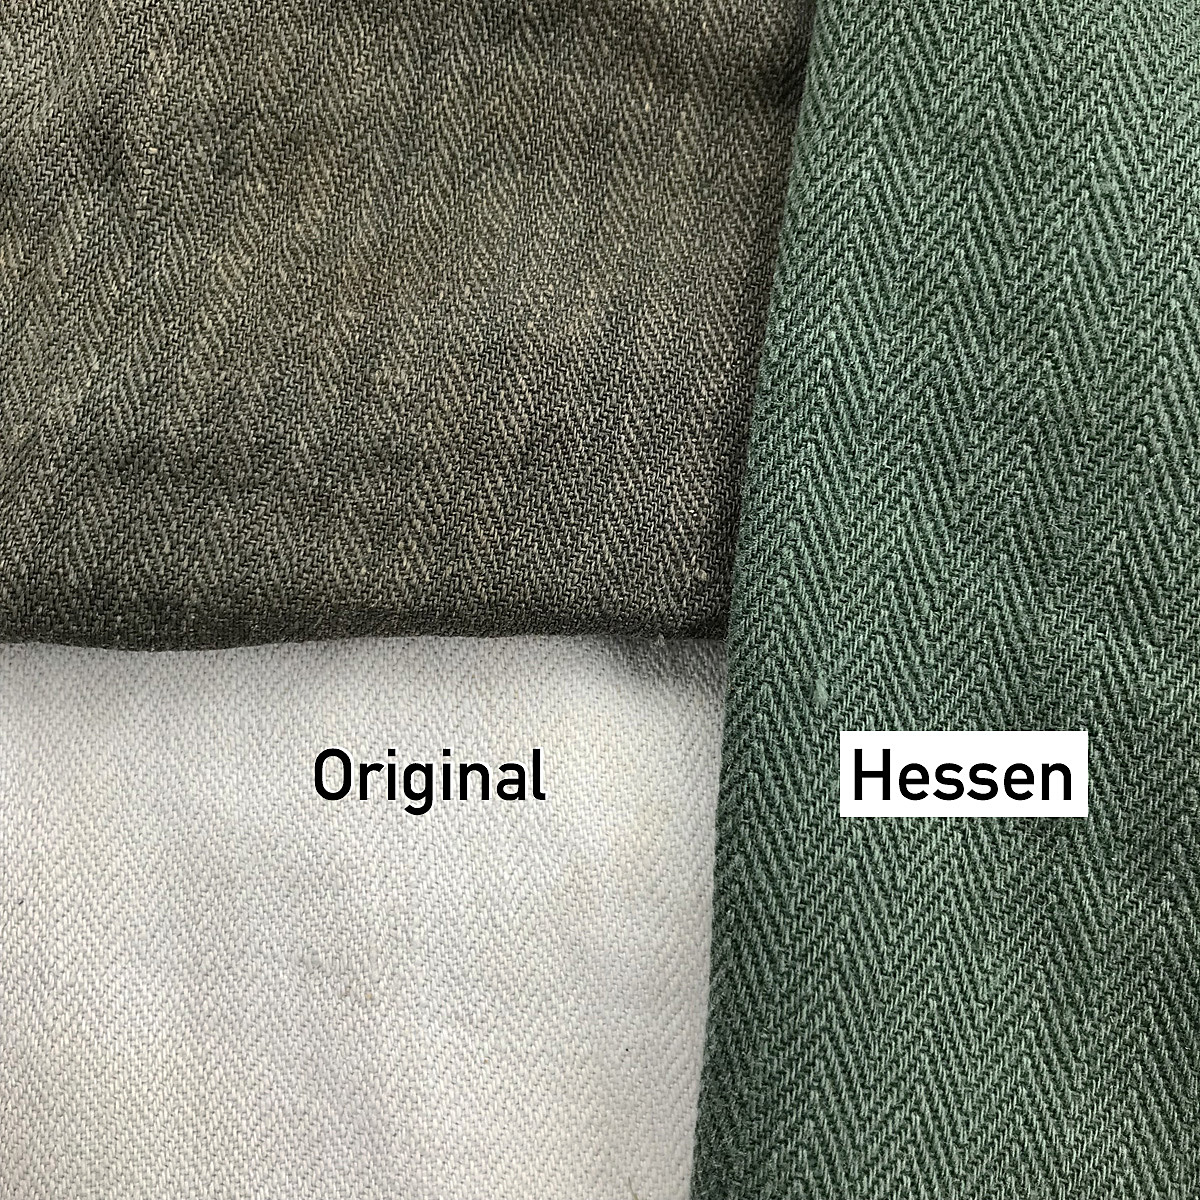
Here are some photos I took in 2019 showing reproduction uniform parts compared to original fabric. The uniforms sold by these vendors in 2019 and before may or may not use the same fabric as uniforms sold by these vendors today. My camera may capture colors differently from how I see them, and colors may look different on different monitors. It’s my opinion that, generally speaking, the available reproduction fabrics, visually, appear to fall within the original range.
All of these images show reproduction fabric compared to two original samples: the uniform fragment shown above, and an original undyed first pattern jacket (click to enlarge).
Where to buy these?
Note: I am not evaluating the buttons as these are easily changed. The pebbled buttons on the original jackets were removable for laundering, affixed with S-rings.
At the Front offer only the green, second pattern tunic. At the time of writing, the size availability is limited. It’s my opinion that these are as good or better as any reproduction of these that has been made. I strongly recommend these to members of my group if they are available in a suitable size. The rear inside seam uses the selvedge edge of the fabric which is correct (most other makers use overlock stitching here). The attention to detail with these is superb.
Hessen Antique stocks both the green and white tunic and trousers. These are quality reproductions, made of a durable, sturdy fabric that wears beautifully over time. The colors of the items are within the original range, the green will fade nicely from sun exposure. The jackets do have the (fixable) placket error, and overlock stitching is used inside. I regard these as very usable if the placket is fixed.
Hiki also sells white and green pants and tops. The green uniforms are in a grayish shade that I do not believe is incorrect. The jackets have the placket issue, and internal pockets. I bought a pair of green pants from them and a small hanging loop that is supposed to be on the inside waist in the rear was sewn to the outside. It was an easy fix. They do have the oveerlock stitching. The white trousers shown on their web site are a fantasy item, a later pattern, not correct.
Gavin sells the white and green tunic and trousers. The second pattern items use a bright green material that does not fade. I do not believe the color is incorrect. The fabric is linen or a blend, with a nice sheen when new. The jacket in the photo on their site has the correct front placket, and no internal pockets. It does have the overlock stitching, as do the trousers. The fabric is fairly thin and, in my opinion and experience, not as durable as that used by ATF, Hessen or Hiki, but it is thicker than that used by Epic.
Epic Militaria sells the first pattern jacket and trousers, mislabeled as a “workers” uniform. This same product was also previously sold by Zib Militaria. The jacket has a correct placket, but is missing the collar hook and eye (easily added). The material is very thin, almost shirt weight, and not likely to stand up to extended, heavy use.
Military Harbor is the newest maker of these, as far as I am aware. The white and green tunic and trousers are offered. A friend bought the white set and raved about the quality of the material, which he regards as fantastic. The jacket uses modern overlock stitching inside, and has internal pockets, as well as provisions for shoulder boards, which should not be there. I have not handled the HBT uniforms from this maker myself.
My personal, subjective buying recommendations
White tunic: if you can fix the placket, or know someone who can, or if you don’t care about this, get it from Hessen. It’s a sturdy fabric, a nice reproduction, cheaper than Military Harbor. Otherwise, if you can’t fix the placket, order from Gavin.
White trousers: Hessen, Gavin or Military Harbor
Green tunic: ATF if possible, otherwise Hessen or Gavin.
Green trousers: Hessen, otherwise Hiki if you want a grayish-green, Gavin for bright green. I haven’t handled the green HBT from Military Harbor.
My reenactment group attended an event in Haydenville, Massachusetts, in October 2021. I took some photos to illustrate some of the items that we brought to the event, to facilitate a weekend of immersive and realistic activities.
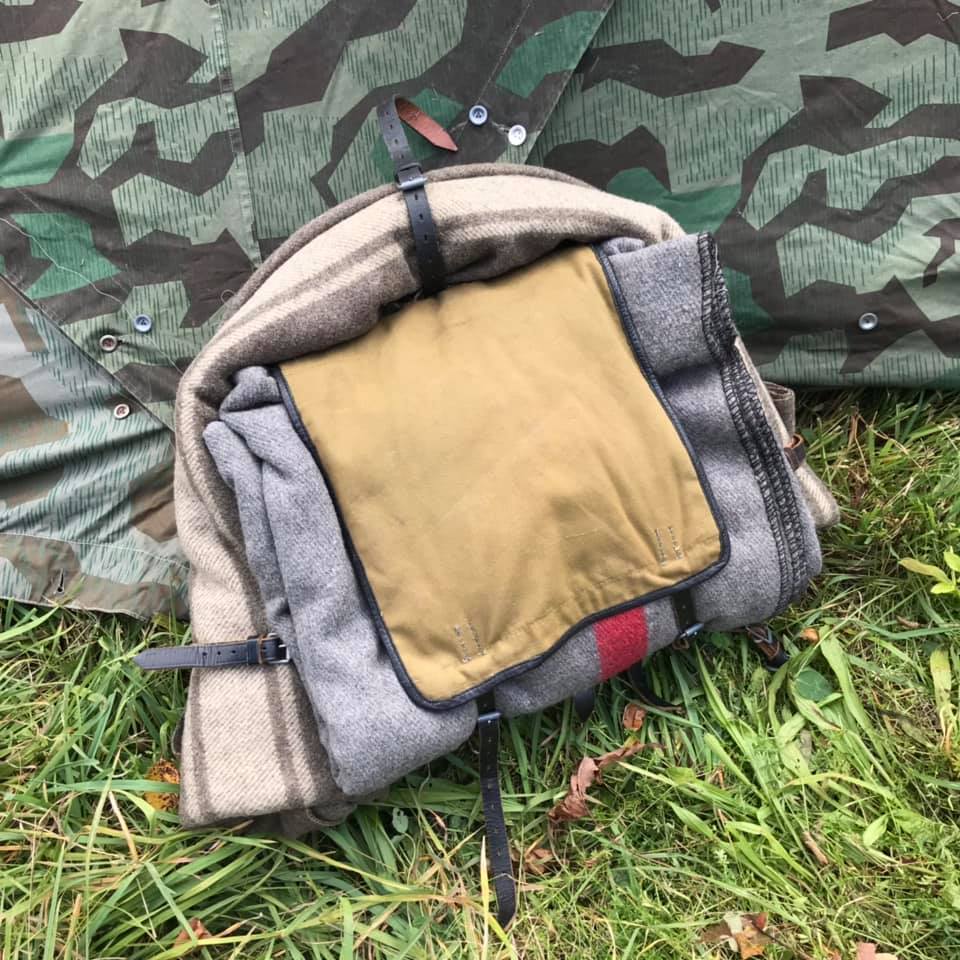
This is my Tornister in the configuration in which I bring it to most events. In the reality of war, in most field situations, the Tornister was kept in the rear with the Kompanie supply train, and was used to contain items that weren’t needed. But there were of course also very many cases where soldiers marched with their packs and had them with them in the field, even in combat settings in some cases. This Tornister is loaded with two blankets- a reproduction of the wartime issue German style, and a surplus WW2 type Italian blanket. There is also, inside, a flashlight, and a Soviet shelter half that I use as a ground sheet (this was an event with an Eastern Front scenario). Inside the pocket under the flap, there is a spare pair of long underwear, a pair of foot wraps and a spare pair of warm knit socks, so important for sleeping in cold temperatures (overnight temperatures at this event were down in the 30s). After arrival at the event, I set up the blankets and ground sheet in our tent where I will sleep, and then use the pack to hold and organize gear that I am not using.
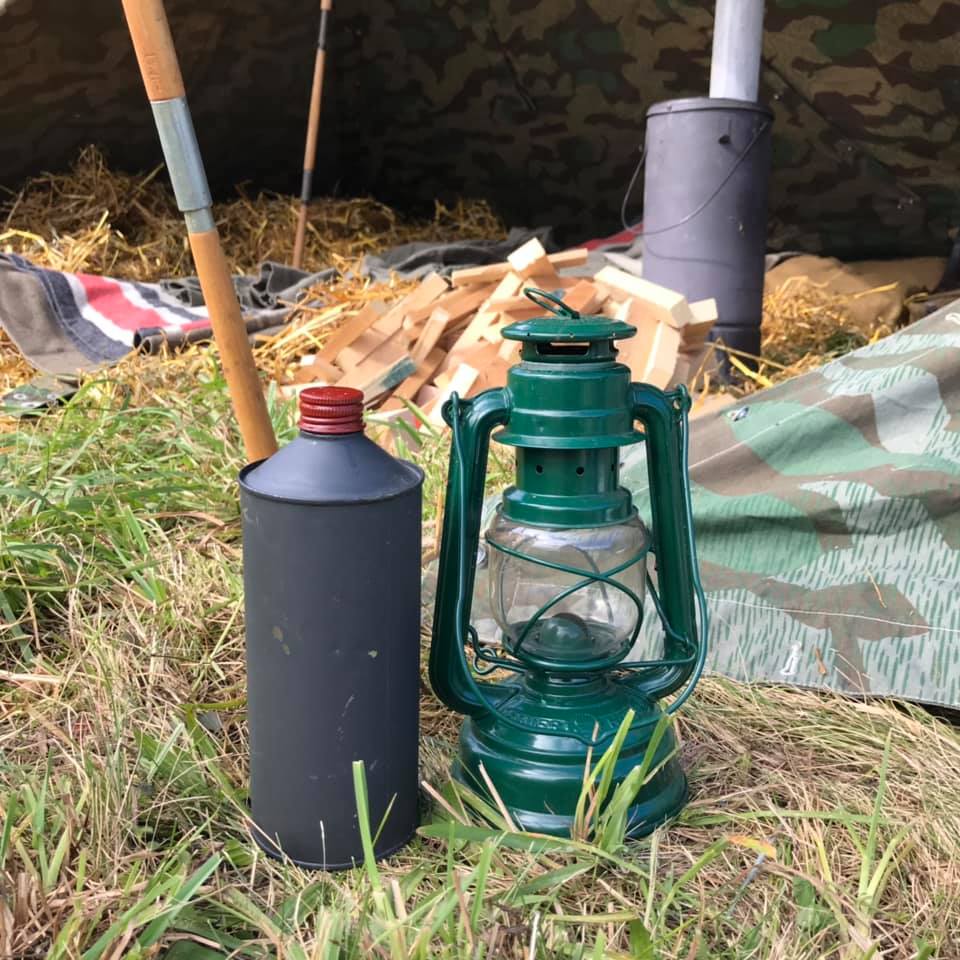
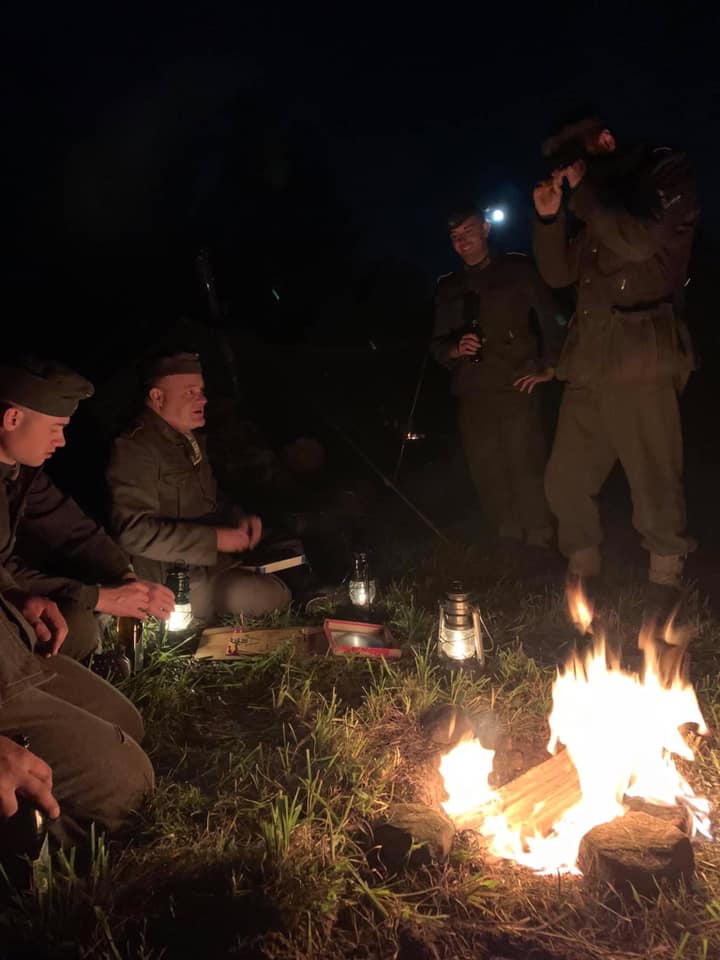
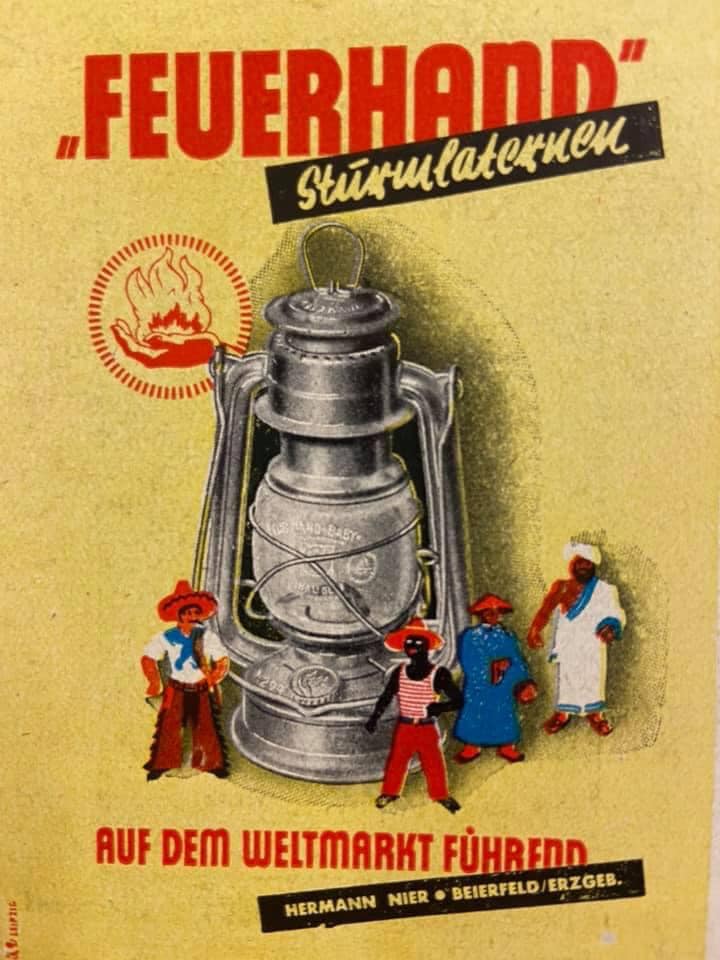
I also brought a lantern and lantern fuel. The lantern is a new made Feuerhand 276. This is a German brand, this model of lantern was introduced in 1934 and the manufacturer did make some lanterns for the Wehrmacht. In the wartime German Army, lanterns like this were not widely used; most issue lanterns were a carbide type rather than these liquid fuel kerosene lanterns. An advantage that these lanterns have today is that the new made ones are widely available and common. I bought this lantern last year, and it was my first; for almost 20 years I re-enacted without one of these, but I can’t imagine going back to not using one. In cold weather, running a lantern like this in a tent all night generates a few degrees of warmth. For gathering firewood at night, for finding one’s way in the dark, these things are ideal and, in my opinion, more practical than period type flashlights. Obviously, a soldier who is marching with only what he can carry is not going to be able to carry a bulky lantern and fuel for it. But in a semi-permanent position, something like this could have been utilized and eventually left behind when it was time to go. I chose this bright green color to be representative of a civilian commercial product rather than a military thing. A collapsed barn is within sight of this camp; the idea that something like this could have been found on a farm is, to me, reasonable. The fuel can is an old brake fluid can that I painted gray with a red cap. This is basically a fantasy thing, but it blends into the background in a camp nicely, and it is certainly a handy thing to have, as we often have more than one lantern going and invariably someone shows up with an empty lantern. Perhaps someday I will buy an actual period kerosene or lamp oil container that I can recreate. In the nighttime photo we are playing the board game “Mensch ärgere Dich nicht” by the light of the moon, a fire, and three lanterns. The advertisement is a wartime era one, showing the same type of lantern I use.
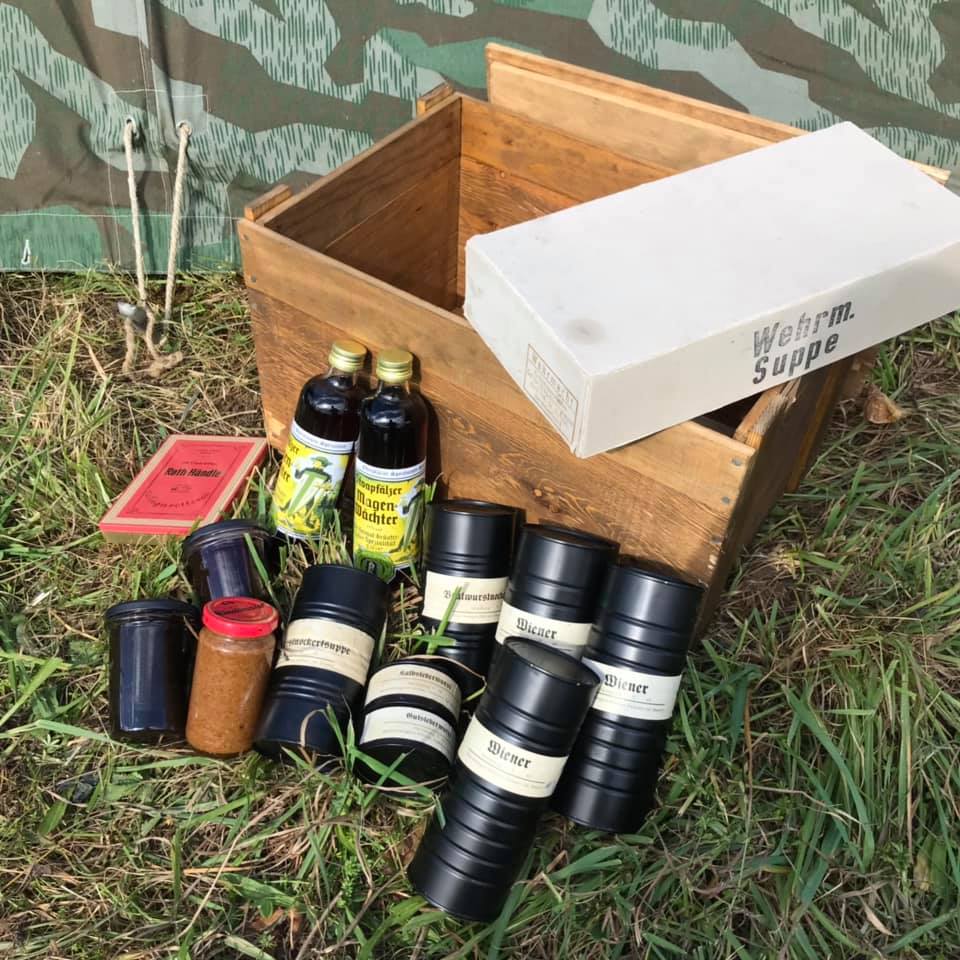
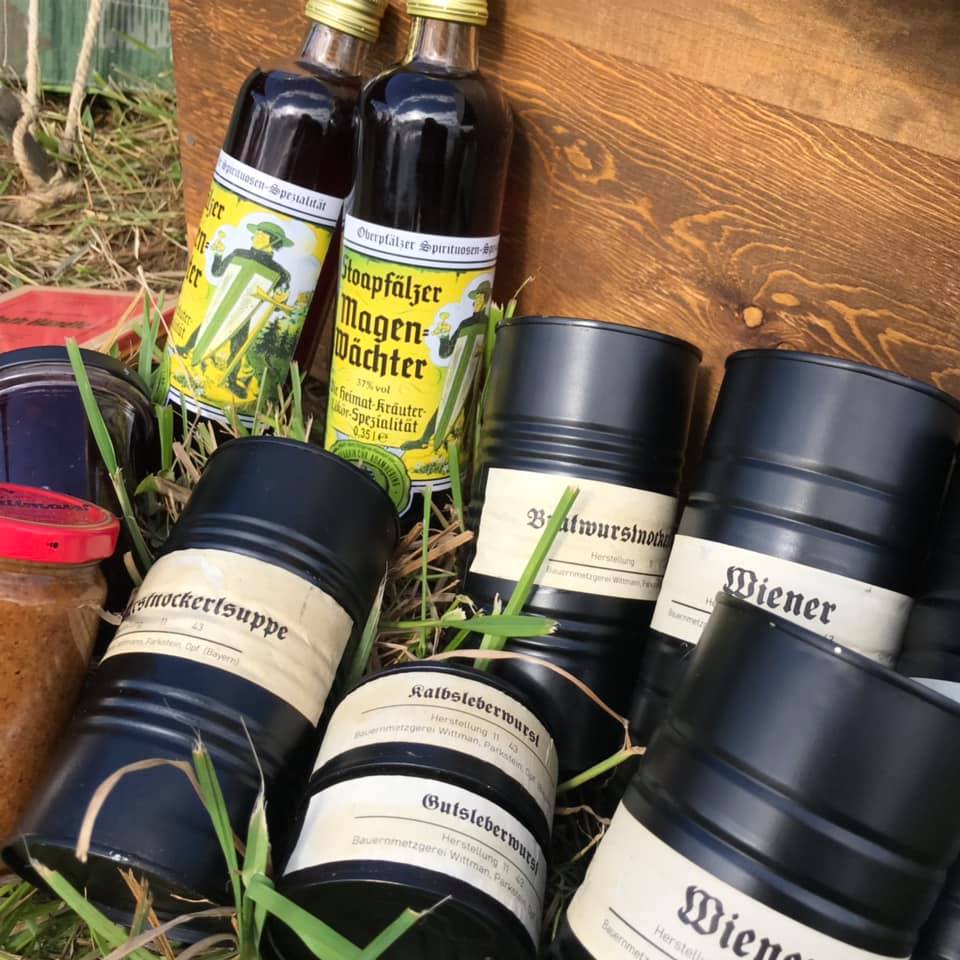
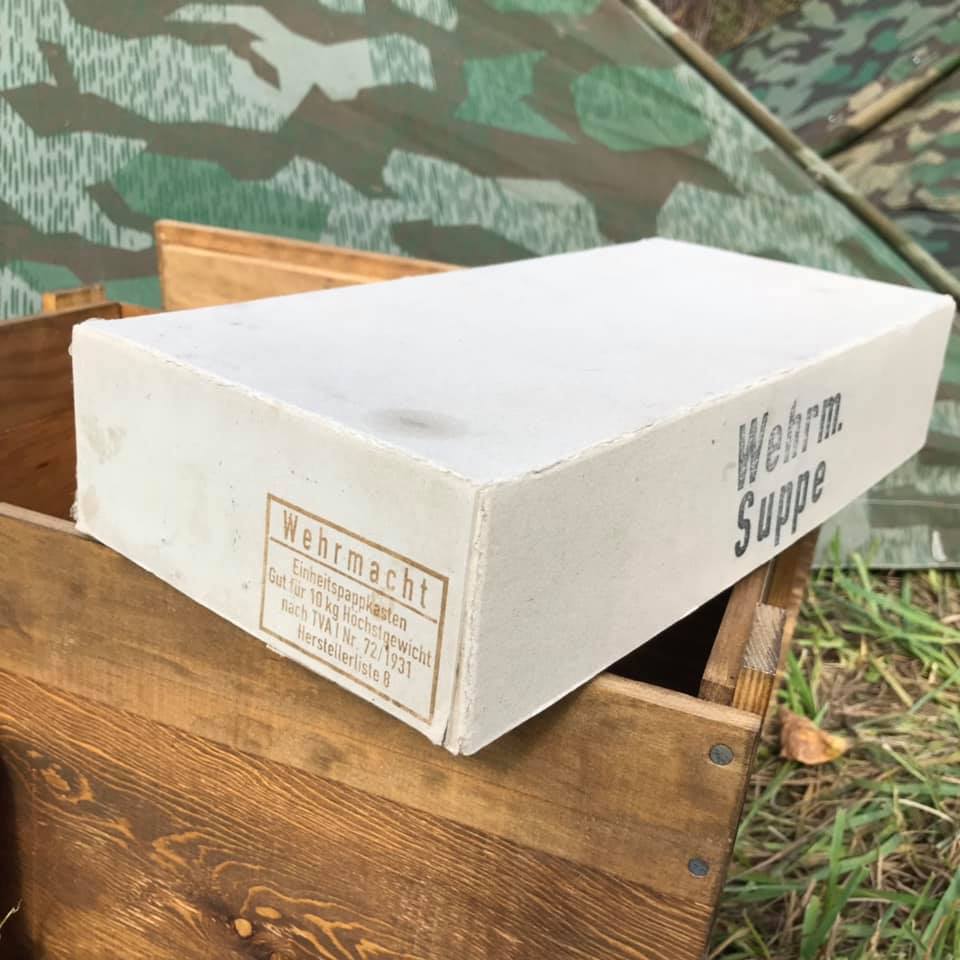
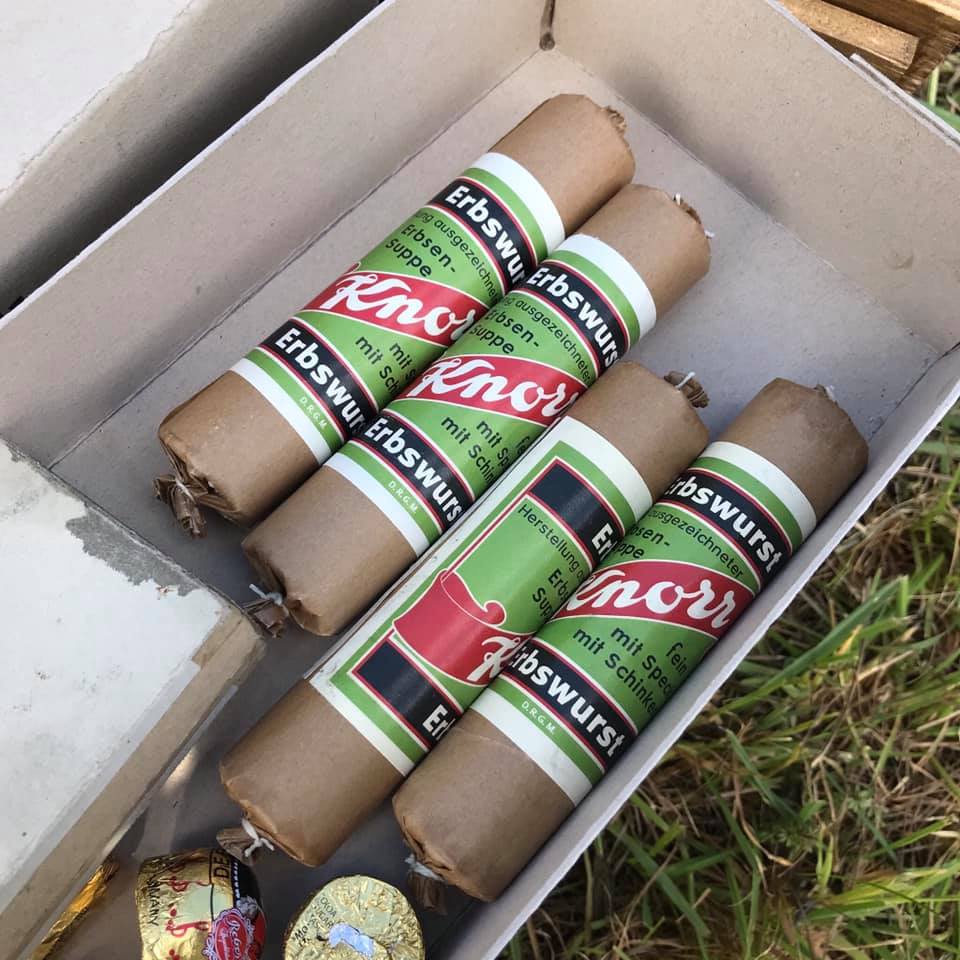
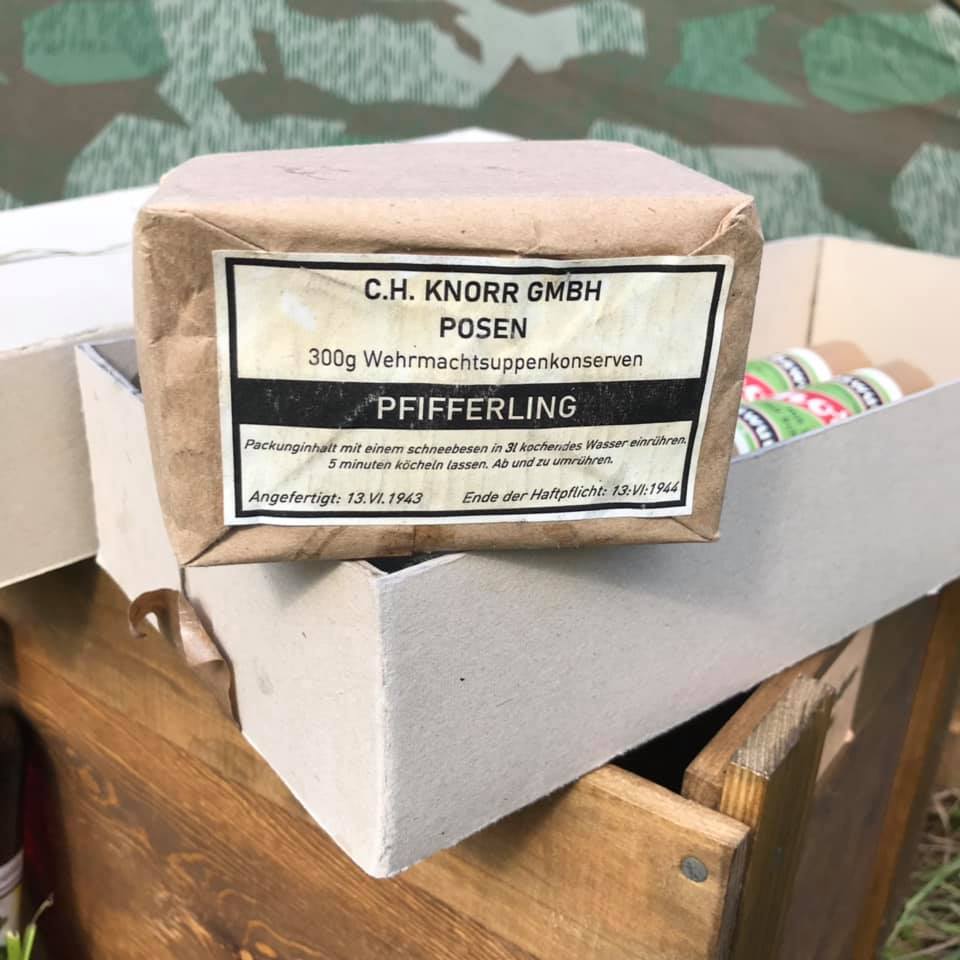
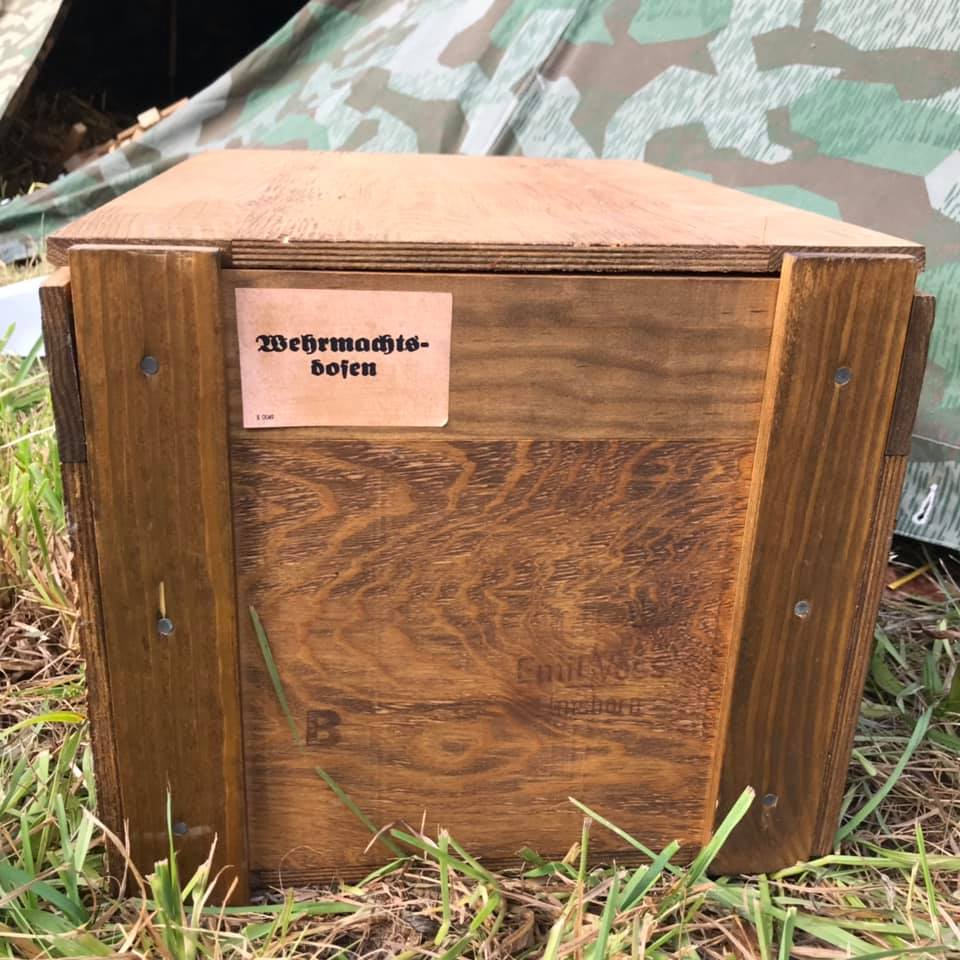
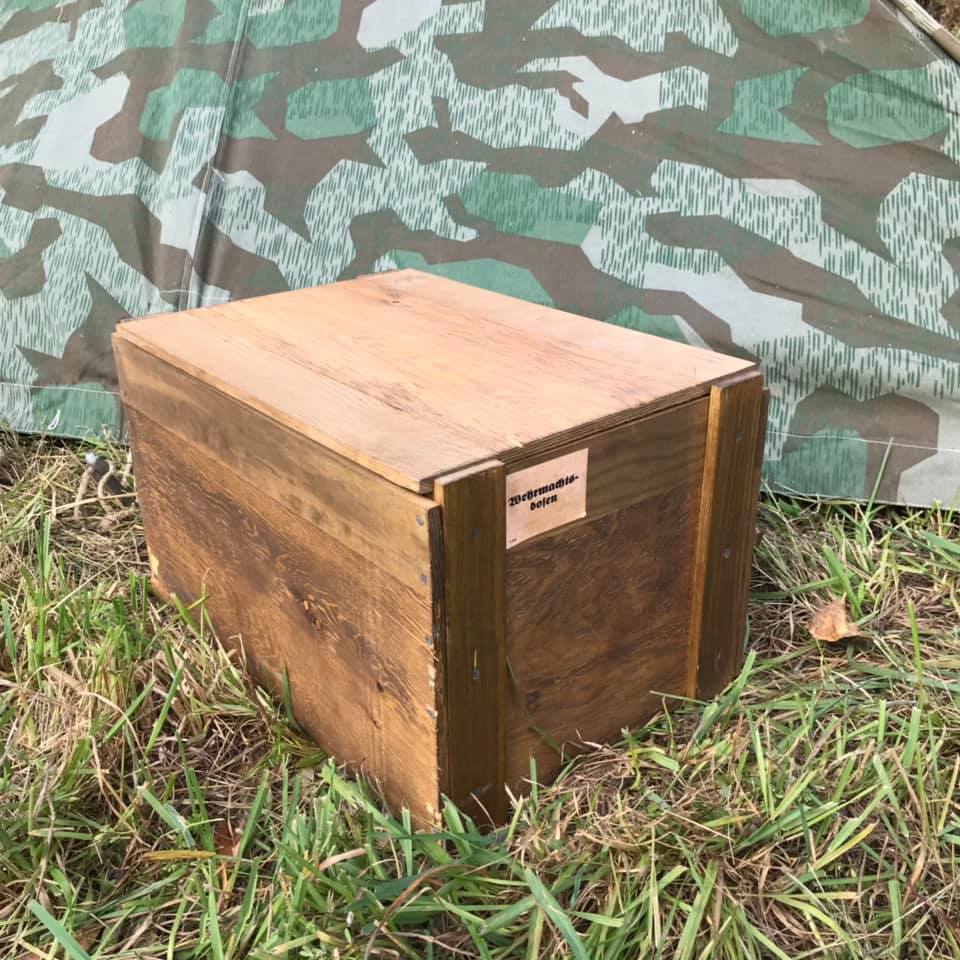
Our unit rations for the event were procured and repackaged by one of our members, Markus Brunner, currently in Germany, and were very generously shipped by him to the US for us to consume at an event. The rations consist of a carefully recreated crate, within which are a mix of reproduced military rations goods and procured/sent from home civil items. These items included canned and dry soup, canned sausages, spreads for bread, as well as liquor, cigarettes and sweets. Normally in our group we prepare meals from fresh bulk foods. This recreation of durable canned and dry rations added a different aspect to our meals, and the attention to detail with regard to the packaging enhanced the realism of the event as well. This supply yielded 2 hearty warm meals for our 8-man team, plus snacks.
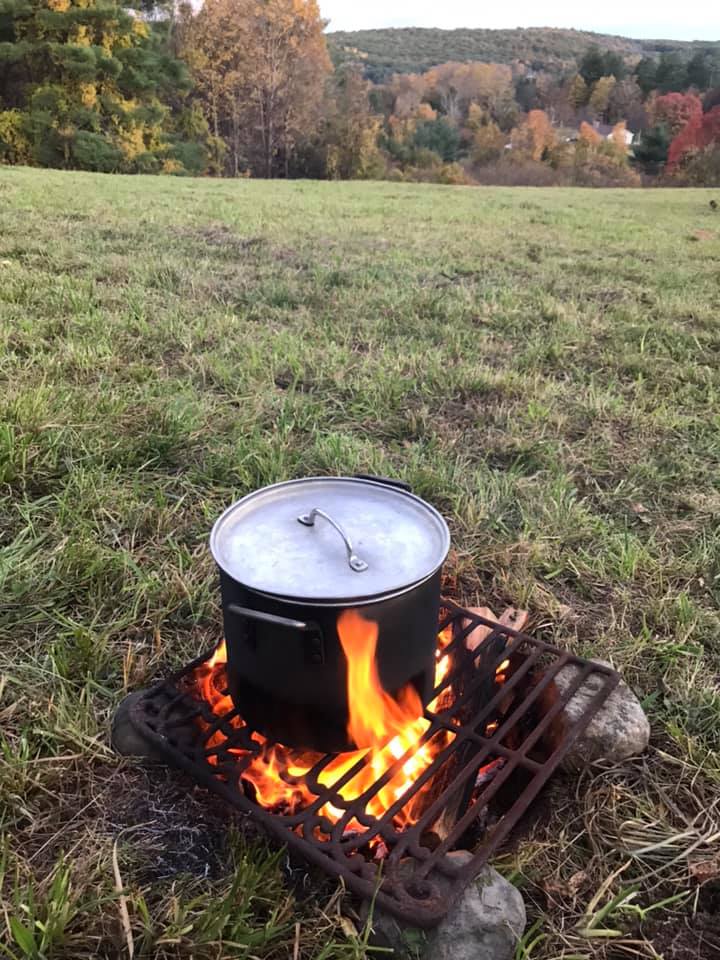
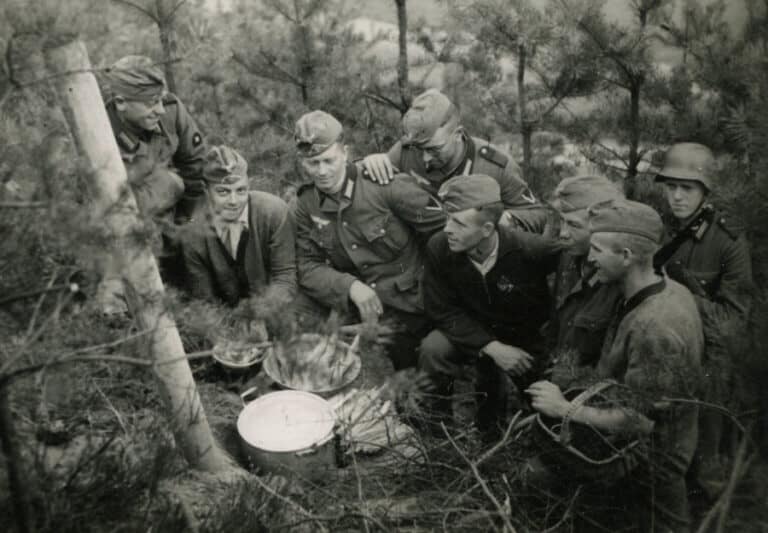
This is what we used to cook the unit meals. The big aluminum pot is a type often seen in wartime photos. The smaller blue pot with loop for hanging is also a common style from that era. Blue is one of the enamel colors that I have been able to document being used in prewar Germany for this kind of cookware. The ladle and knife are old civilian things. The grate is from a 100-year-old wood stove. I don’t bring the grate to most events but for this specific setting, a semi-permanent outpost adjacent to a farm, I regarded it as plausible; ordinarily I cook over rocks, or a hole in the ground, but the grate certainly makes it easier. I’ve included some photos of this stuff in use and also a wartime photo from a Sicherung unit showing a cooking pot that is almost identical to the modern aluminum one we use.
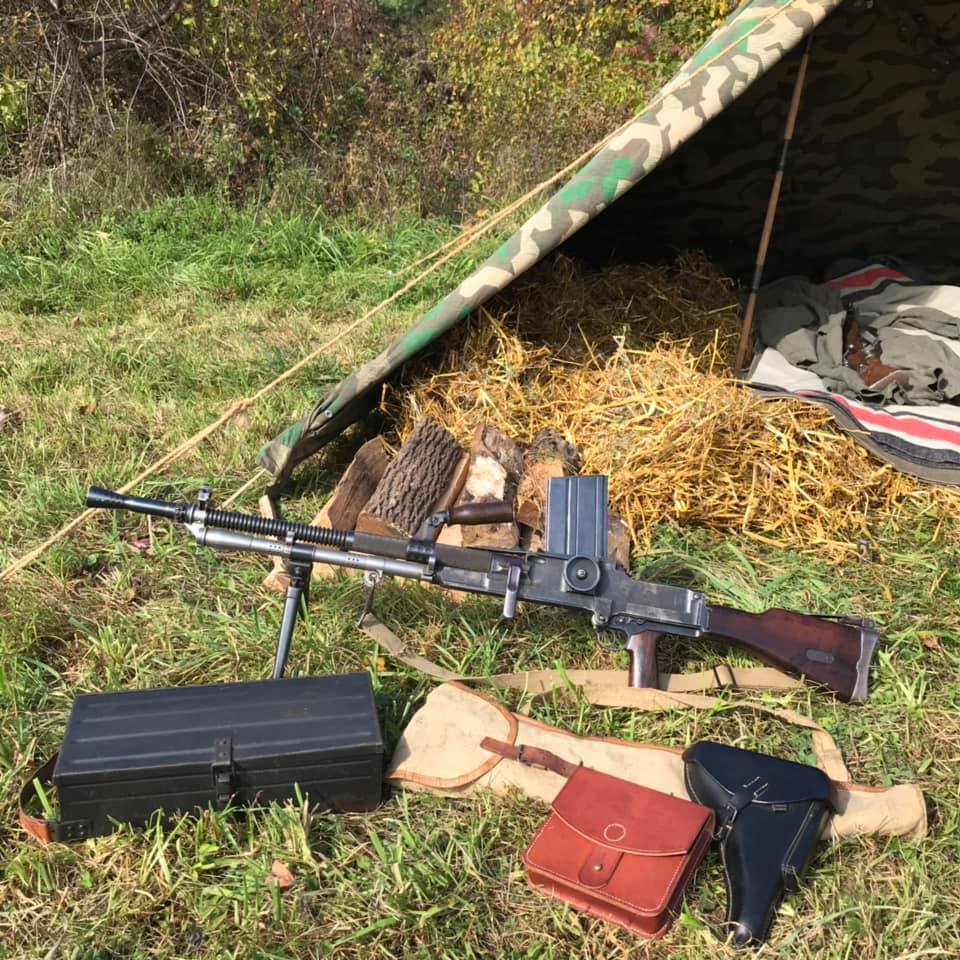
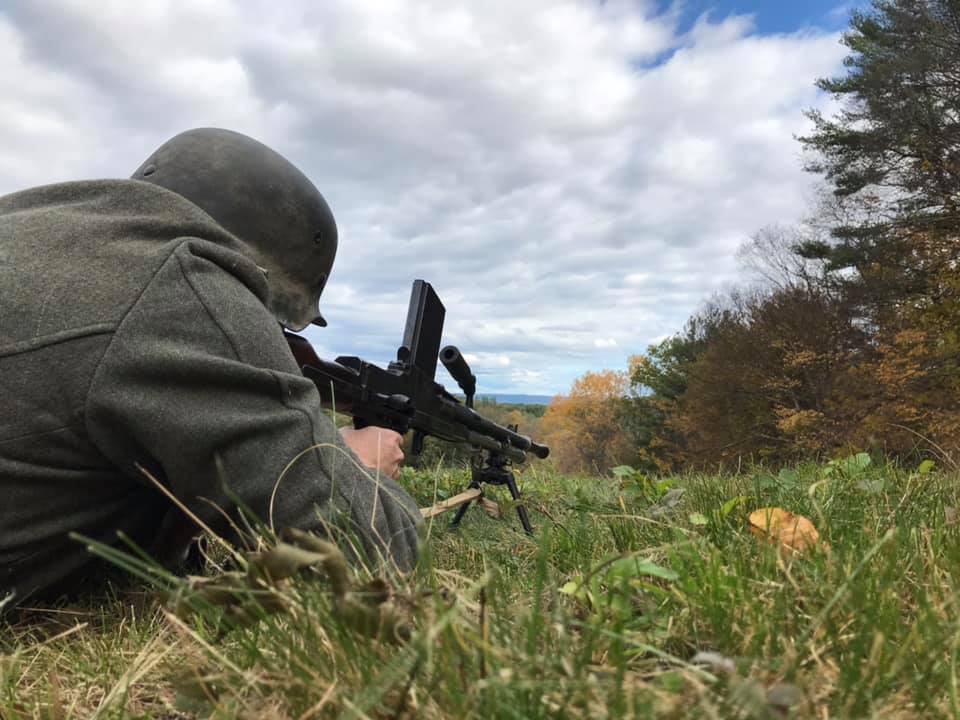
We also brought this ZB30. This is a non-firing dummy gun that we use as a prop for immersive scenarios and also (as in this case) for training. In addition to the dummy gun there are also the necessary accessories for those assigned to be the machine gun team: a pistol, Czech MG tool pouch, spare barrel in barrel bag, and the German made box for ZB magazines. Most of our members arrived at the event on Friday, we were able to use Friday afternoon for training on our tactics.
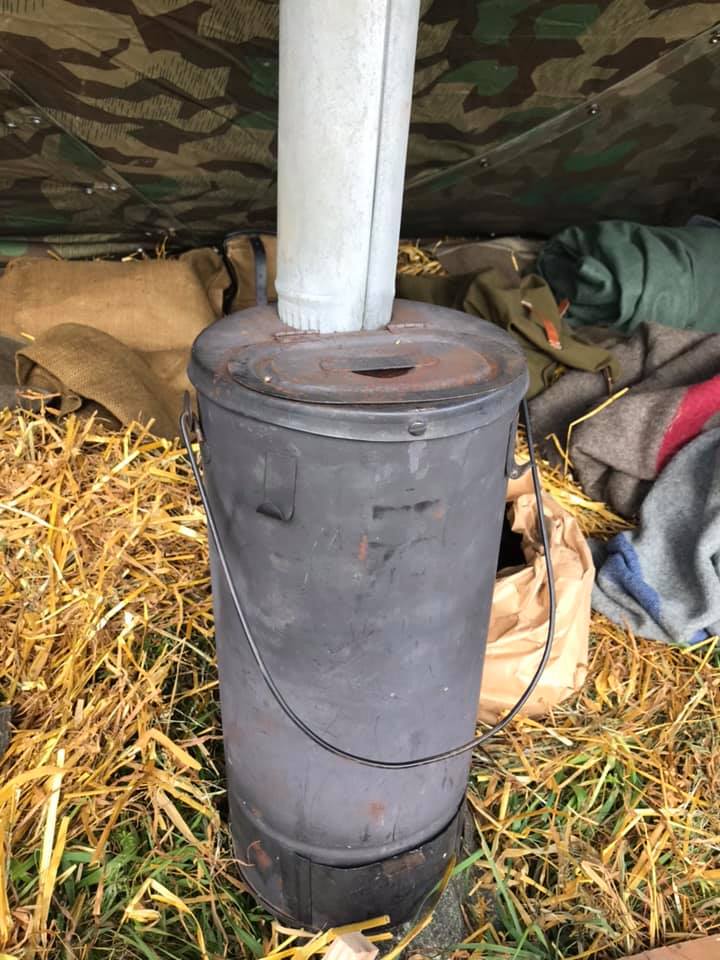
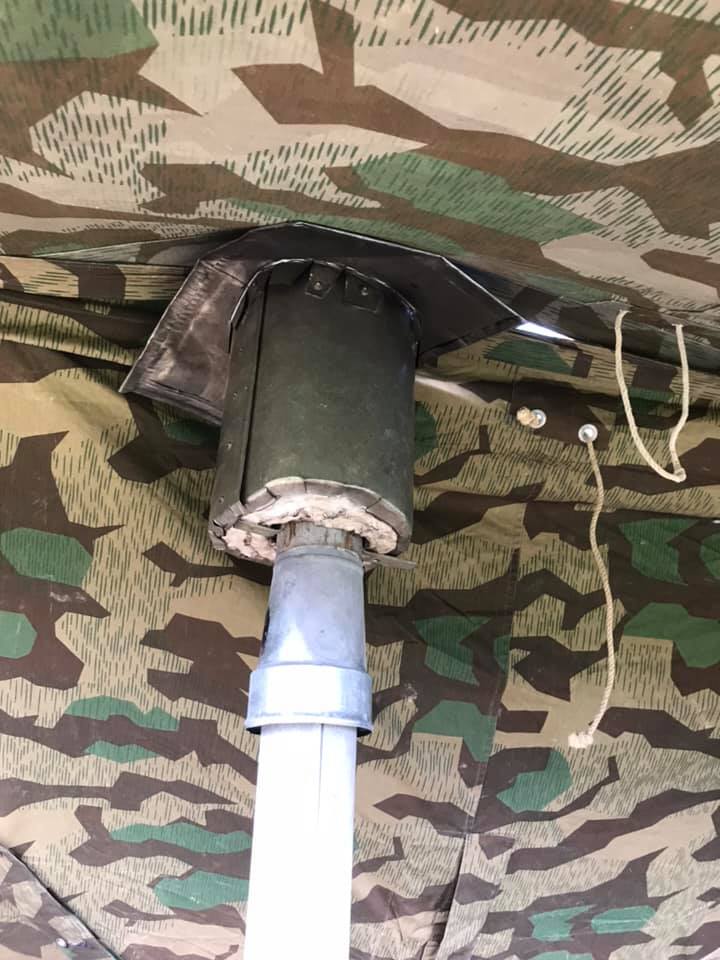
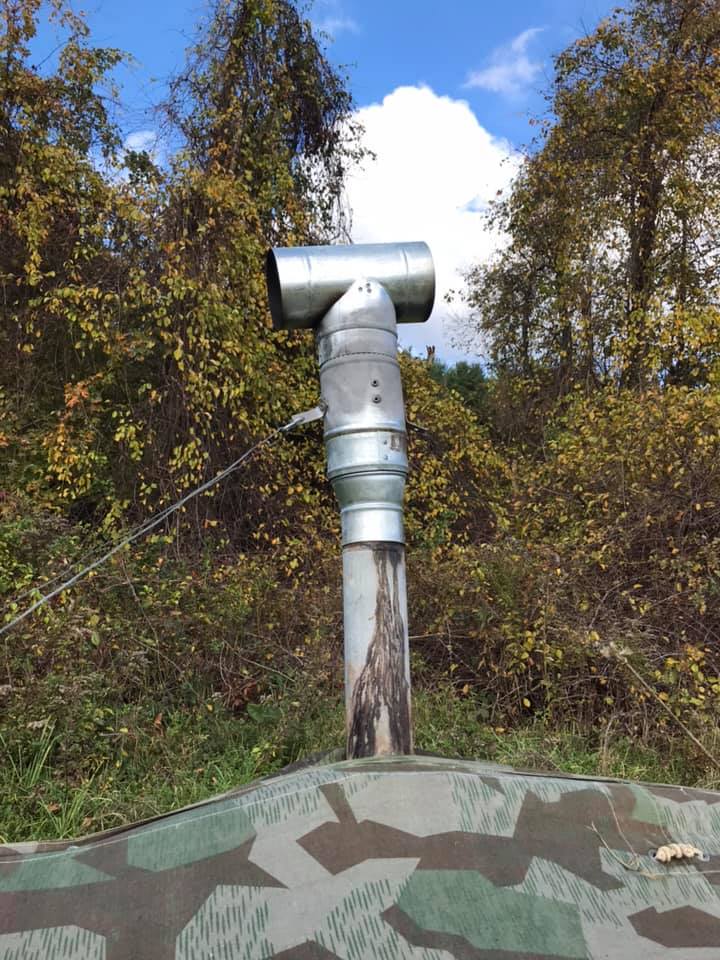
As I mentioned above, temperatures at the reenactment dropped into the low 30s at night. To make sleeping more comfortable, we brought this reproduction field stove. The German manual on winter combat stressed the importance of heated accommodations in cold temperatures, and there are many wartime photos showing various types of stove pipes emerging from tents. This is a sheet metal replica of an issue type stove. We use lump charcoal as fuel, and it throws heat through the night with only minimal need for refueling. There are two key things that reduce the chance of burning down the tent. The first is the insulator and shield where the pipe passes through the opening in the tent. It’s a double wall pipe, with ceramic insulation in the gap, so the metal that touches the tent doesn’t get hot. The other thing is the spark arrestor in the “T” at the top. The smoke exiting the pipe has to flow around a restrictive plate riveted inside this “T.” Sparks hit the plate and fall back into the stove. Saturday night it was nice and cozy in the tent even as a hard frost covered everything outside with a coating of ice.
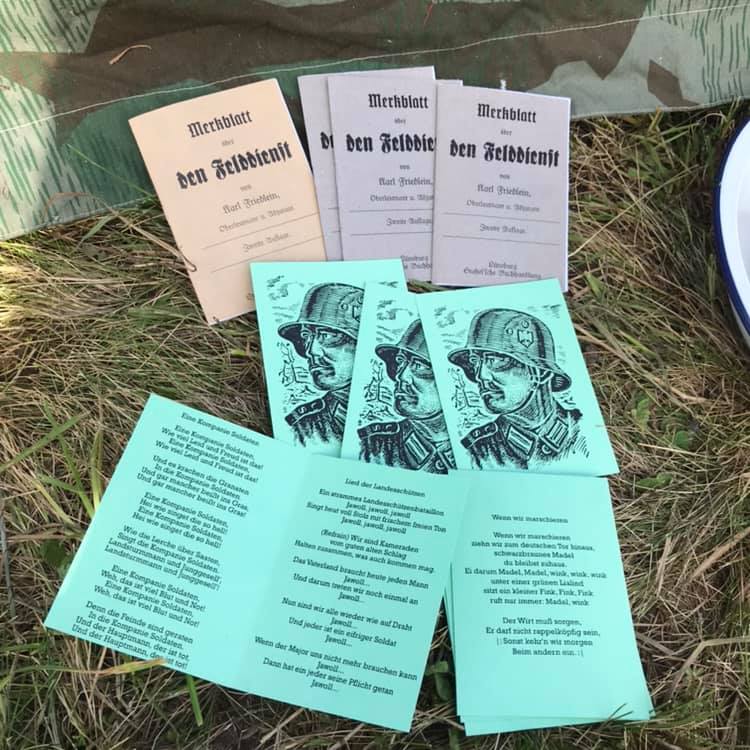
We also brought these printed training aids. The “Merkblatt” is a something that I made up for our group. It is in English inside, and contains the core of our field tactics and doctrine: how to set up a listening/observation post, information on security patrols, hand and flashlight signals, German language commands and terms we use in the field. The flashlight signals are unique to us, something we made up; most of the rest of what is in there is edited translations from Wehrmacht manuals. The folded green card stock item contains the lyrics to three songs we are working on being able to sing: “Lied der Landesschützen,” “Eine Kompanie Soldaten” and “Wenn Wir Marschieren.” The text is simply printed from my computer, in a period type font, but the cover illustration is a hand done block print.
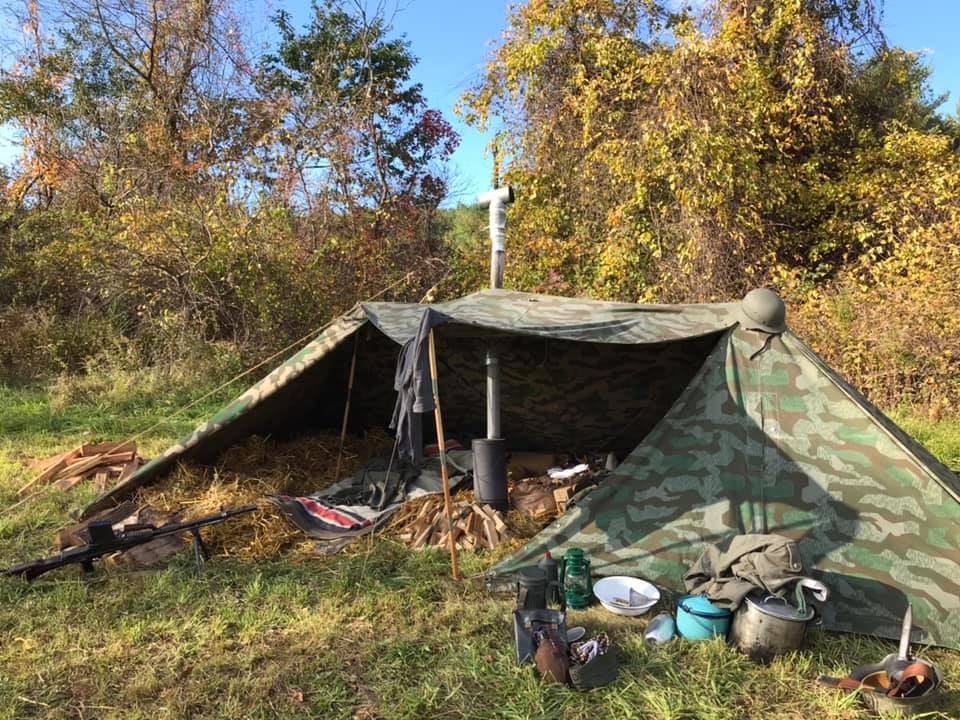
We also brought our tent, of course. This tent is made of eight reproduction Zeltbahn shelter panels. The zelts are made by different manufacturers (different SMW runs, ATF, different Sturm runs, Trident) to replicate the variation found in originals. The tent pegs are either reproductions of the wartime type or near-identical postwar ones. The poles are reproductions or are similar postwar French and Norwegian surplus. At this event we had people showing up at various times from Friday morning to Saturday morning, leaving Saturday night or Sunday. We had 8 members in attendance but only 6 in the tent. In the reality of war, a unit was in transport together, and they could stop and make tents from each man’s personal shelter quarter/poncho (perhaps supplemented with extra shelter quarters if the situation allowed for it, if the goal was to construct semi-permanent lodging). In reenactment, it doesn’t really work that way. Somebody arriving after dark, to an event in progress, is going to want to have a pre-made, dry, sheltered place to stow his blankets and gear, and for sleeping. There are immersion events where when you arrive at the event you are directed to a fighting position and you man it for the duration regardless of weather. But most events are not like that, and even some events that claim to be that aren’t really that. For most events, having a unit tent for lodging is absolutely crucial.
Every reenactment event is different, with countless variables that need to be taken into account when planning. The items shown here, from personal sleeping gear to the unit tent, are largely applicable to most events. From a logistical standpoint, you need something to sleep on, something to sleep in, and something to sleep under; it’s nice to have illumination at night, and meals to eat, when the event is not providing them. Training aids provide opportunity for realistic activity, and prevent people from getting restless and bored. Heated accommodations make a tremendous difference for modern humans who are not acclimated to sleeping outdoors. Being a member of a reenactment group means being part of a team who can share these logistical burdens.
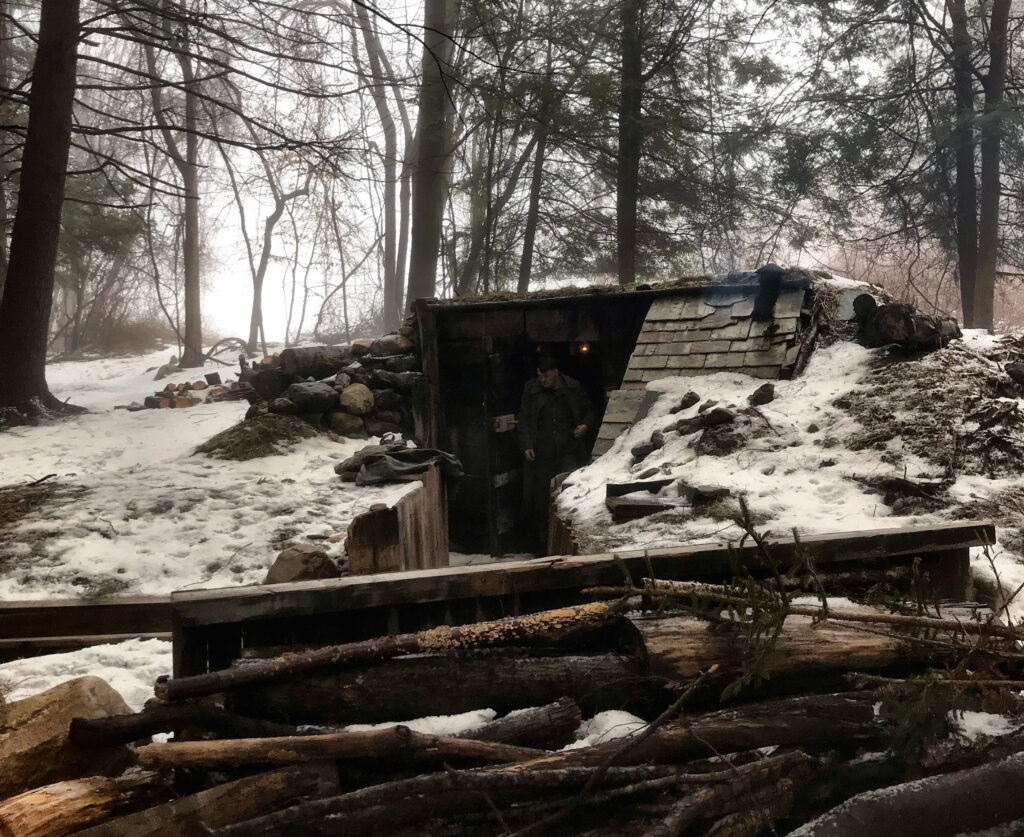
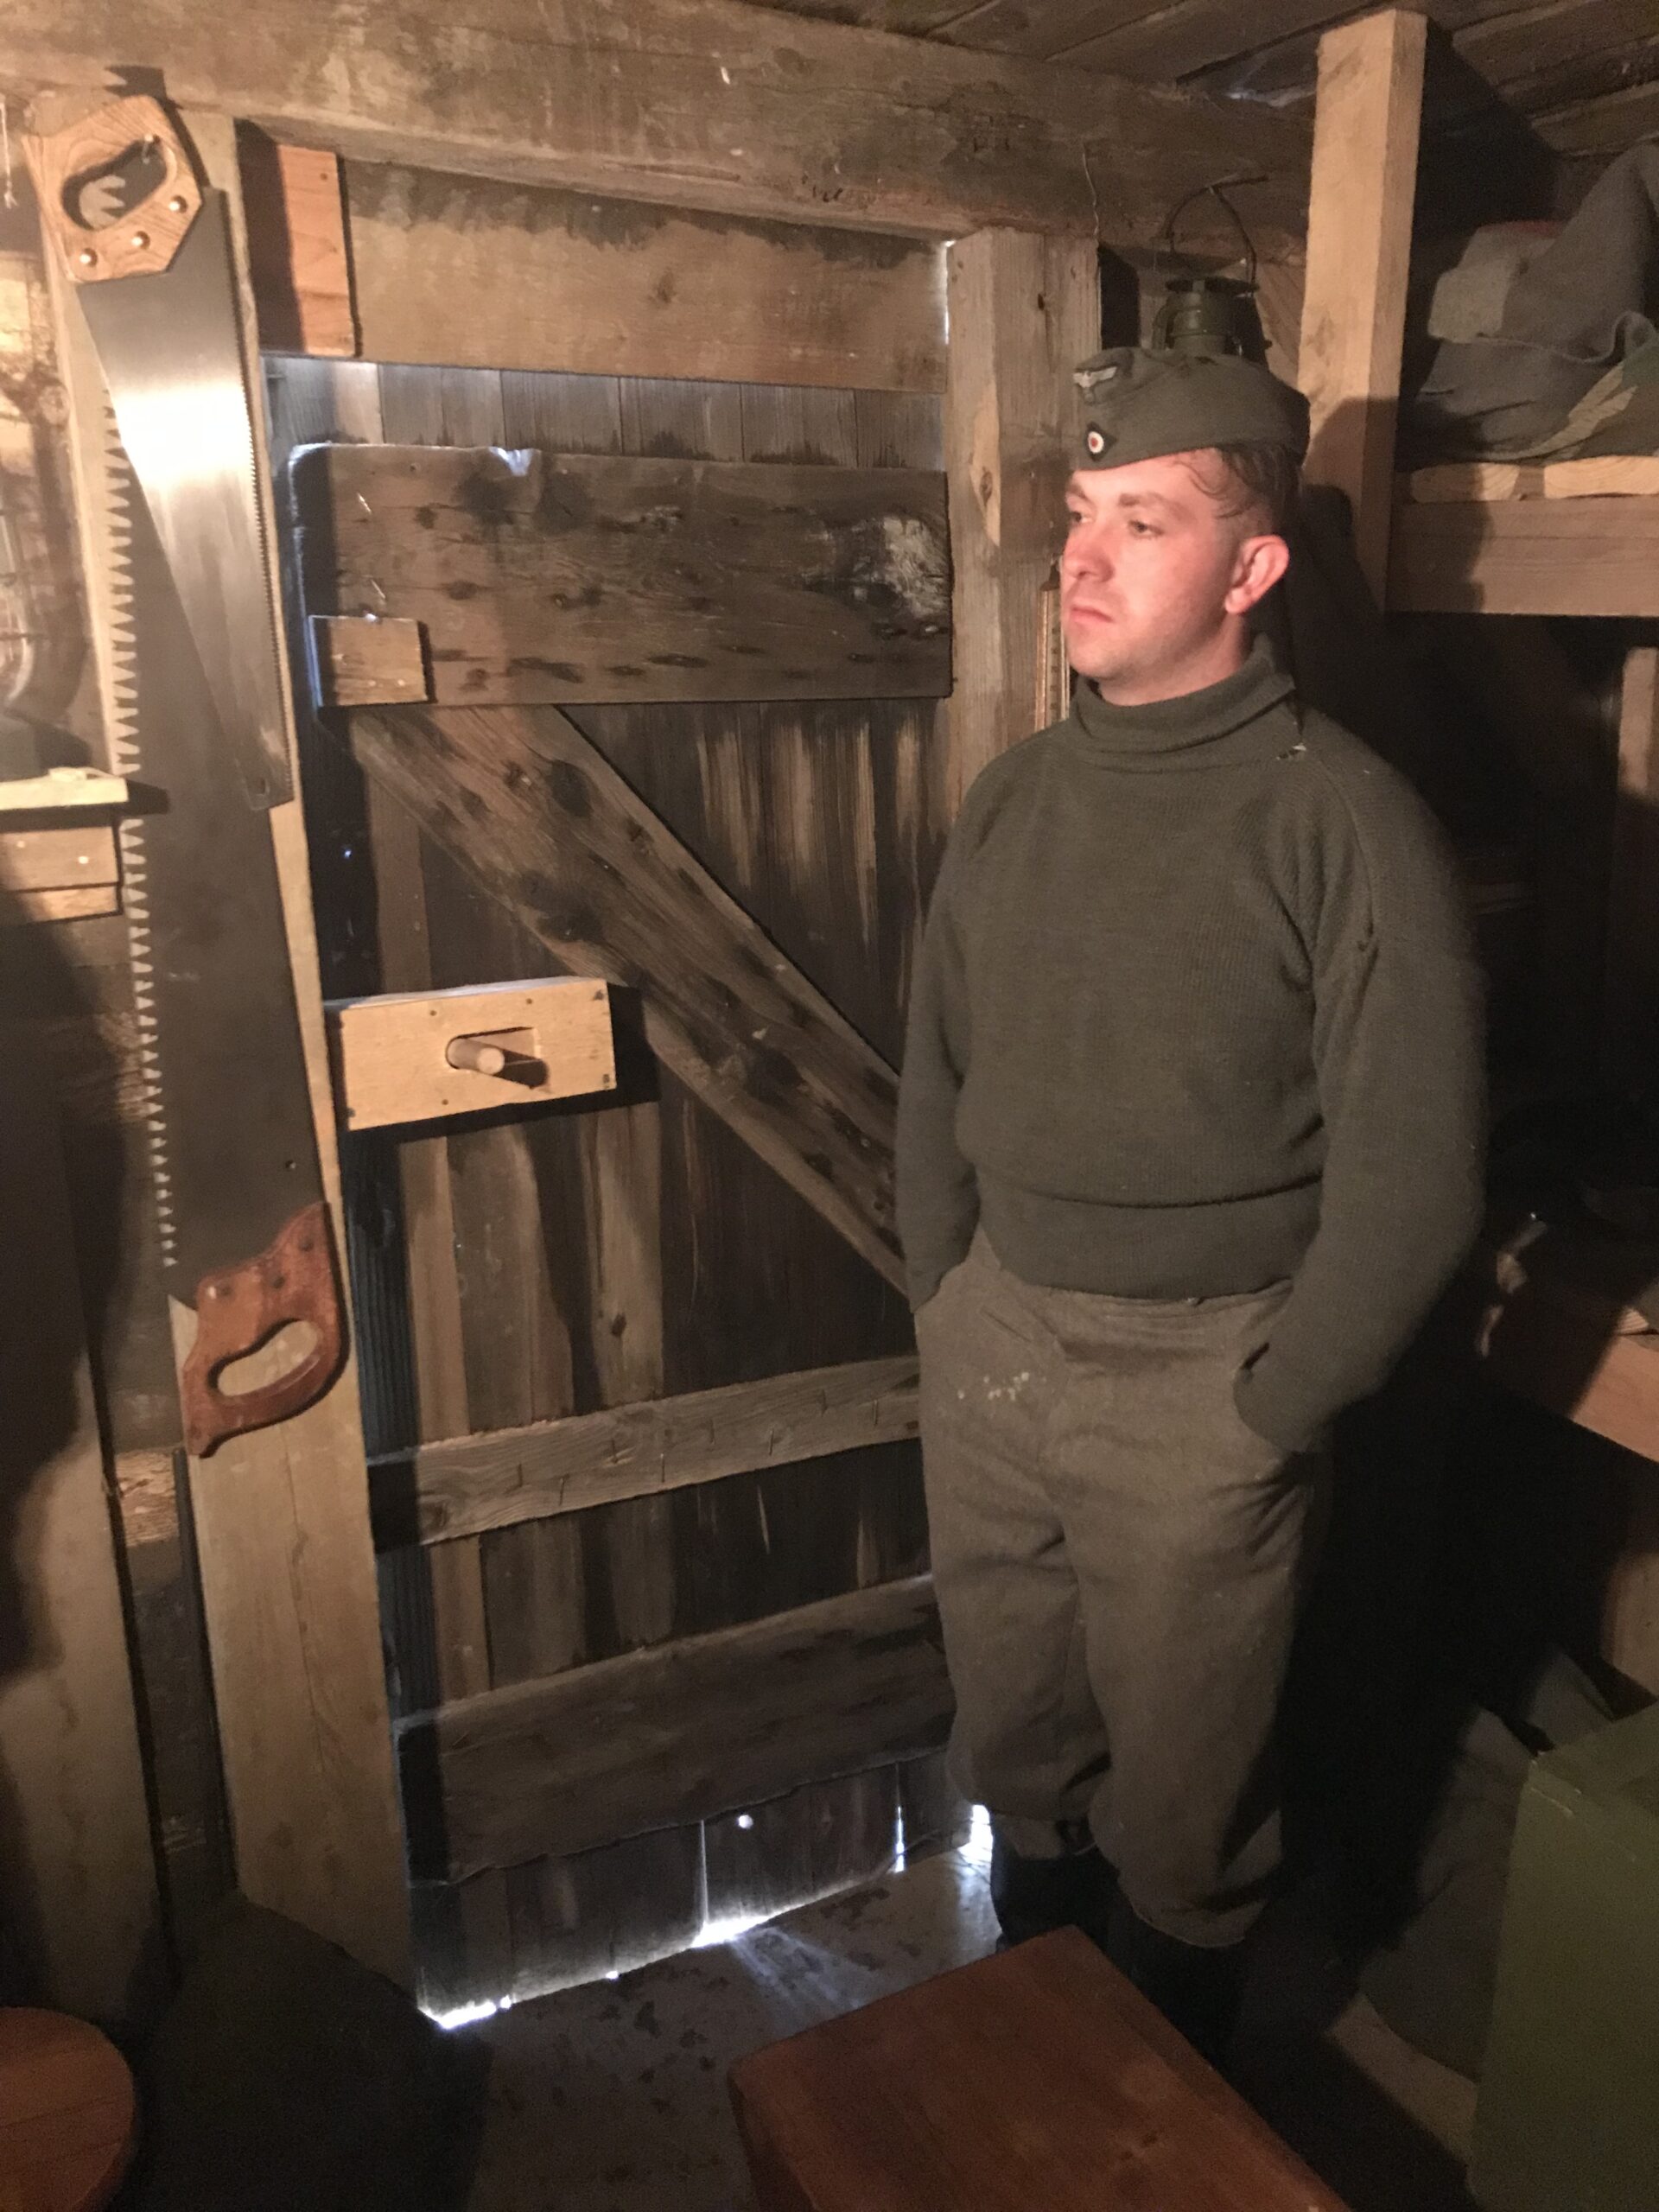
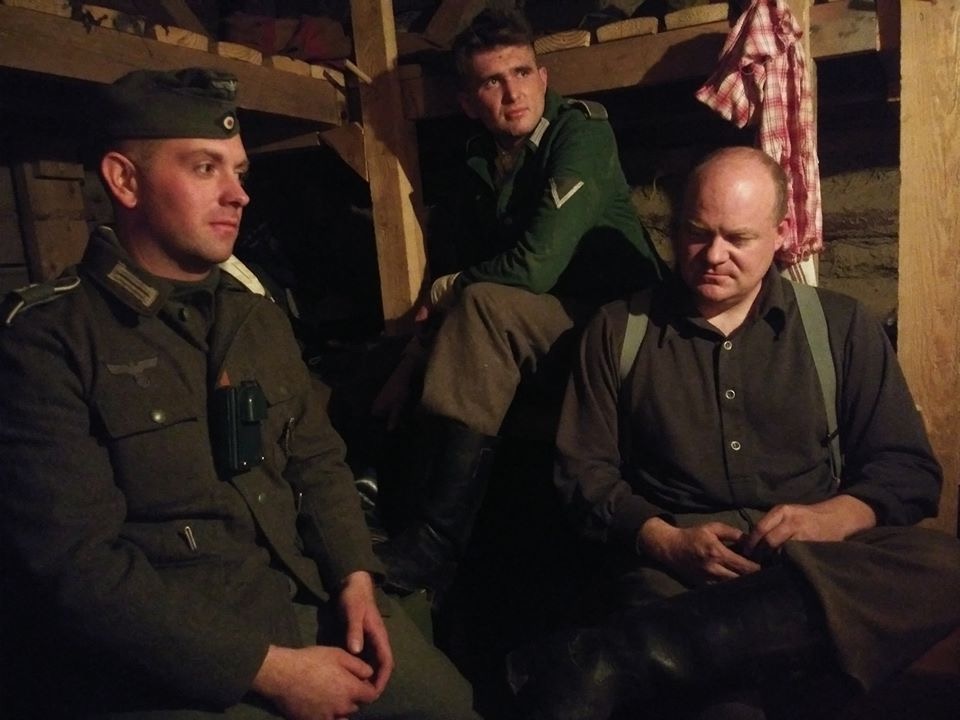
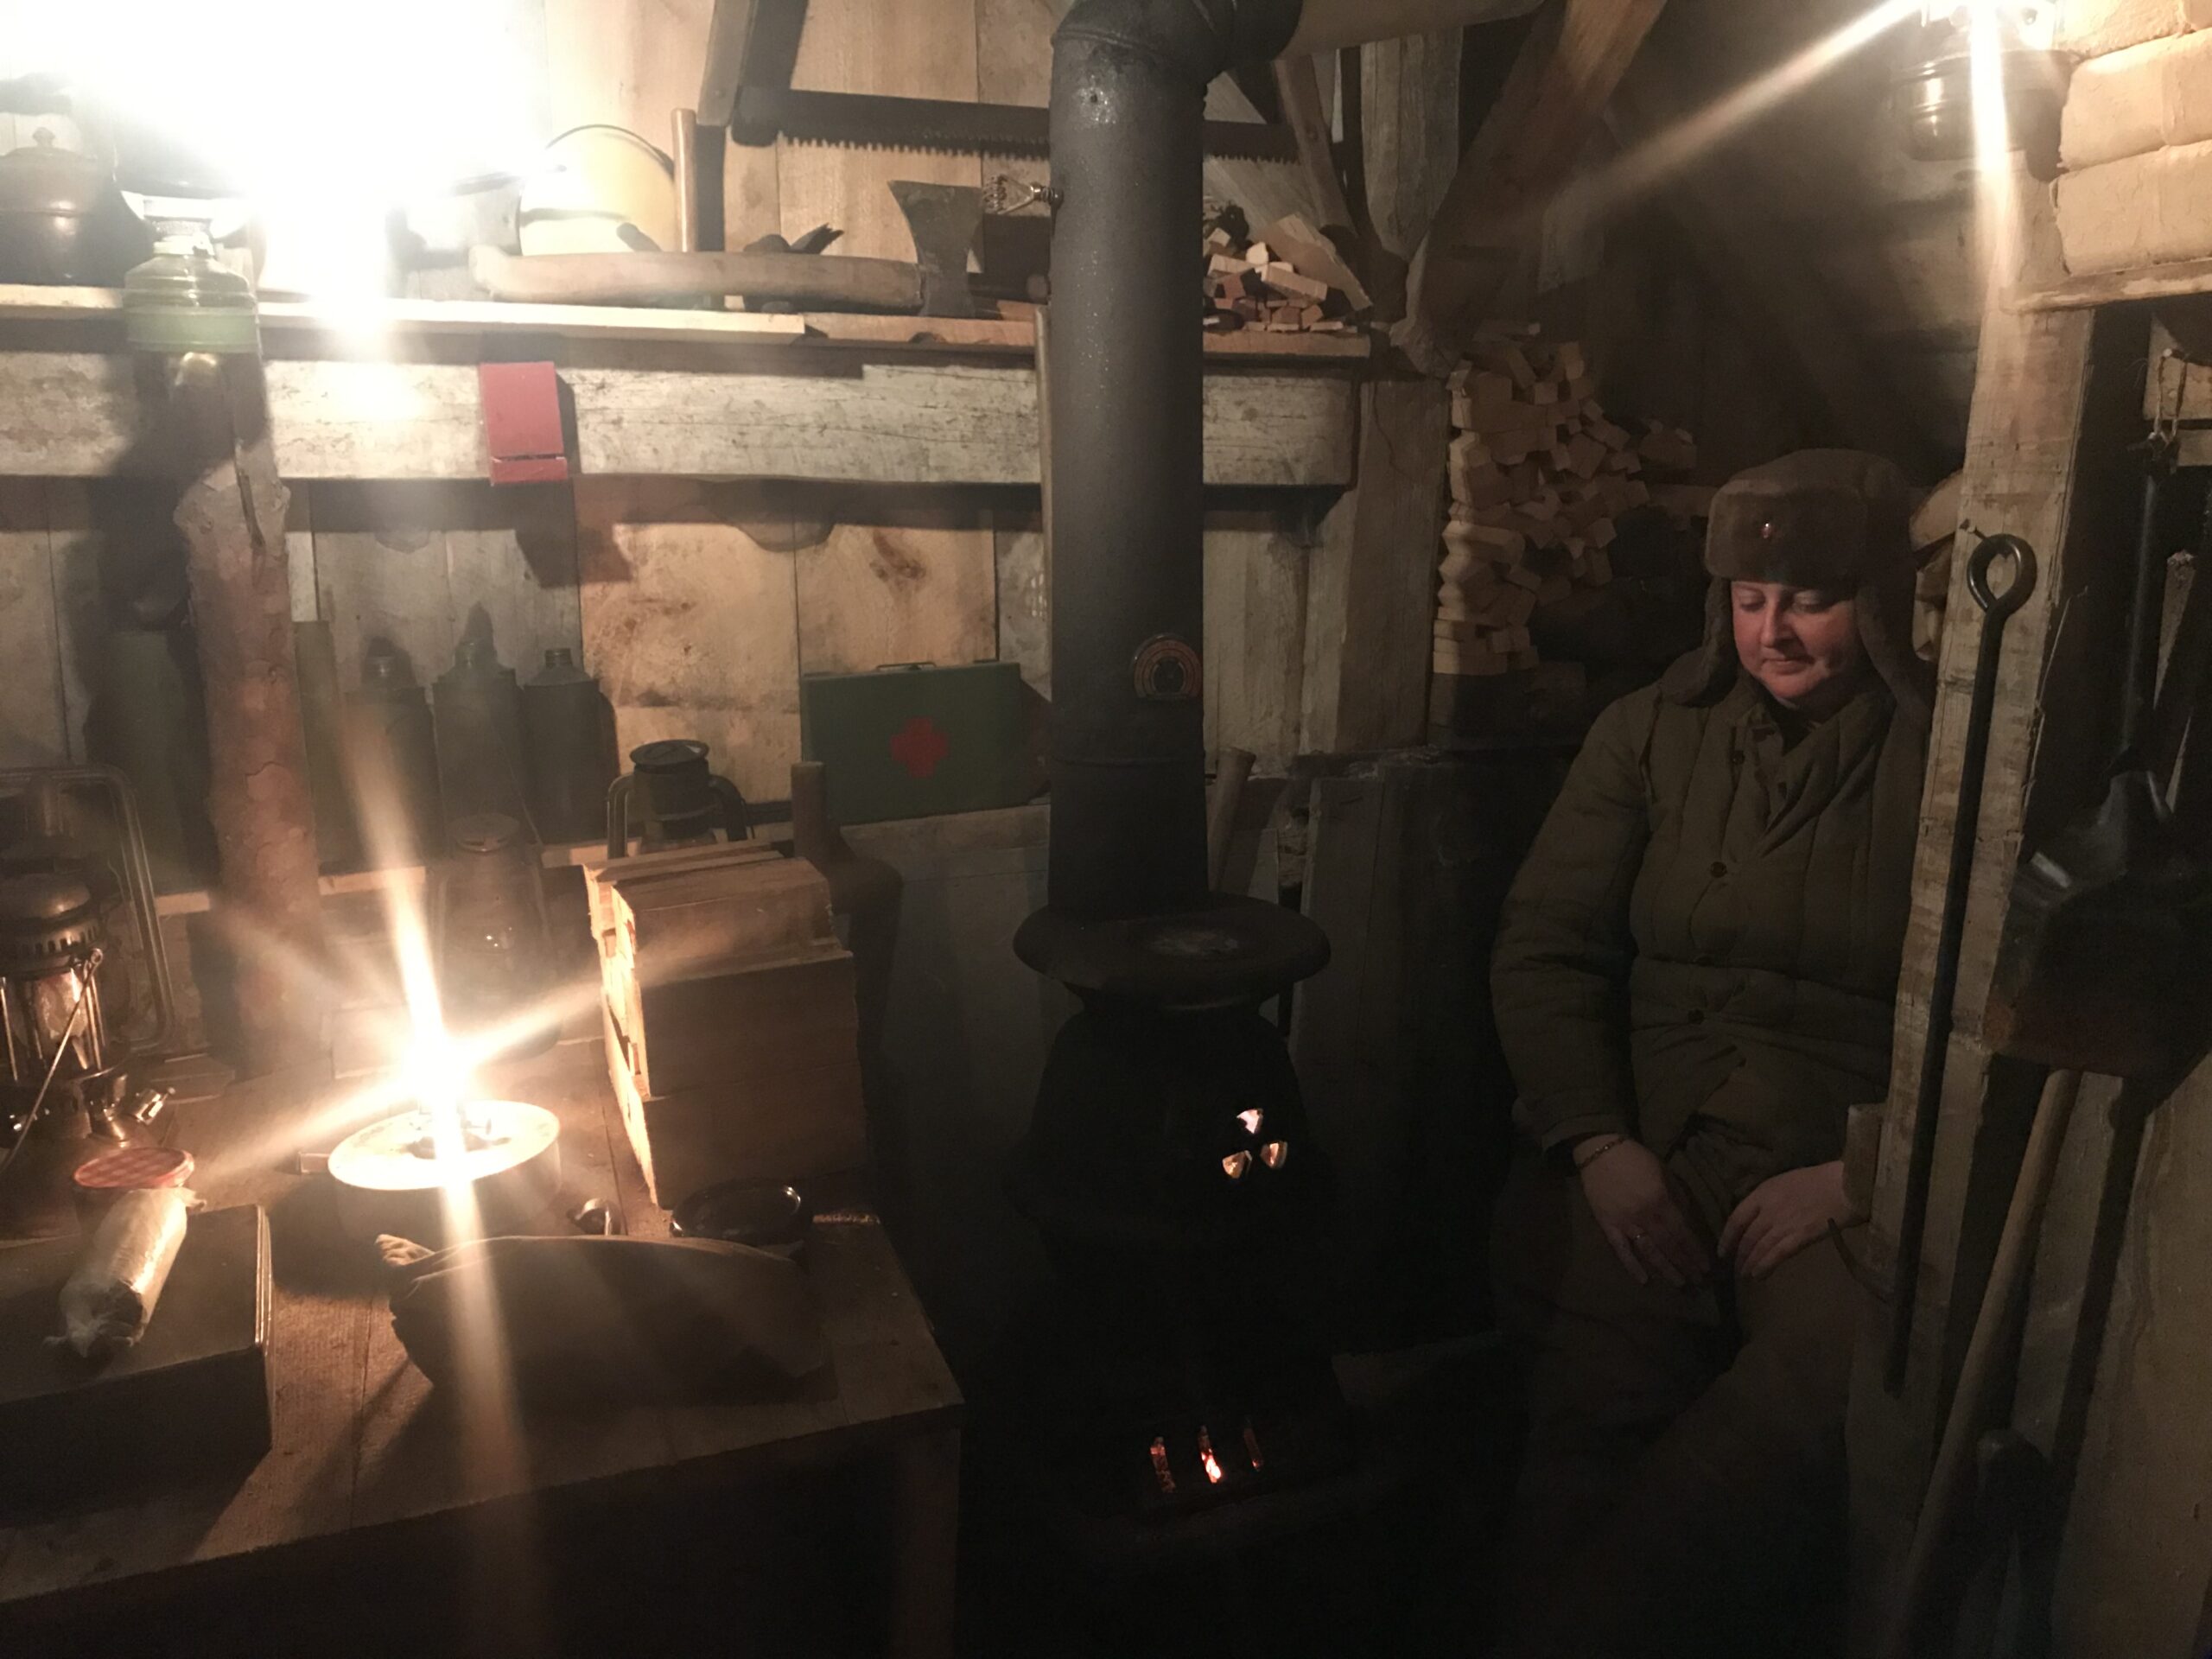
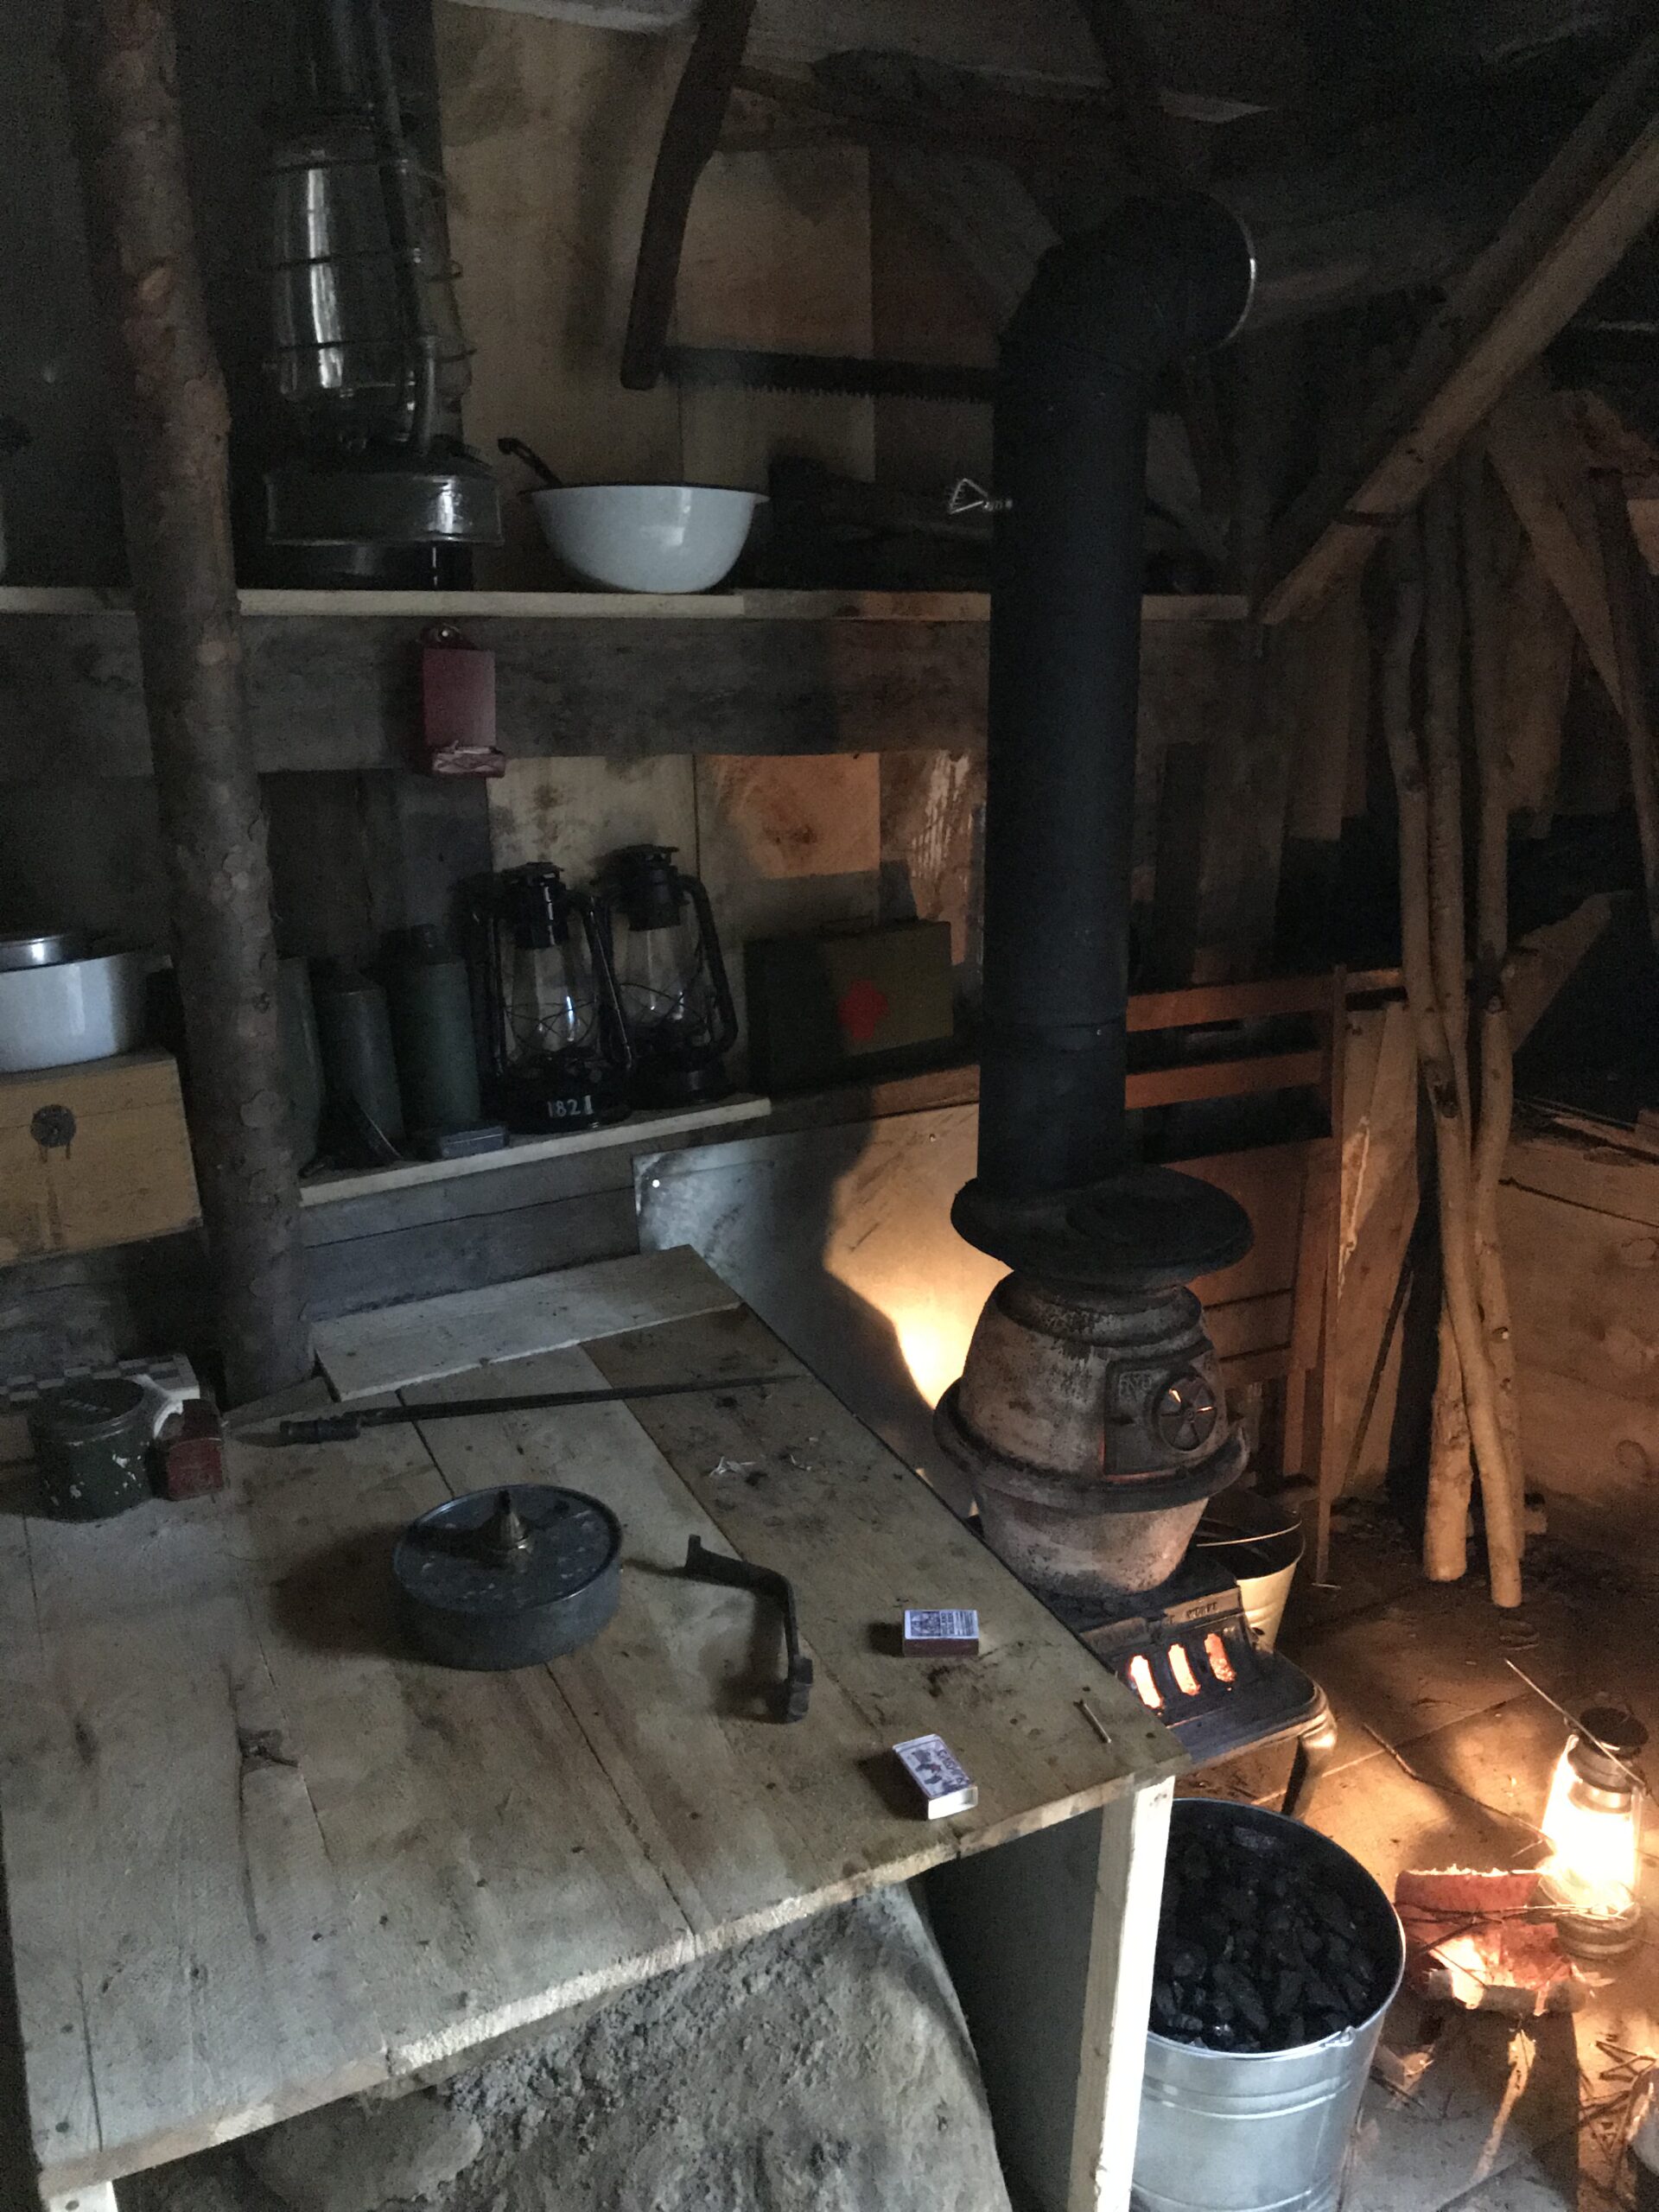
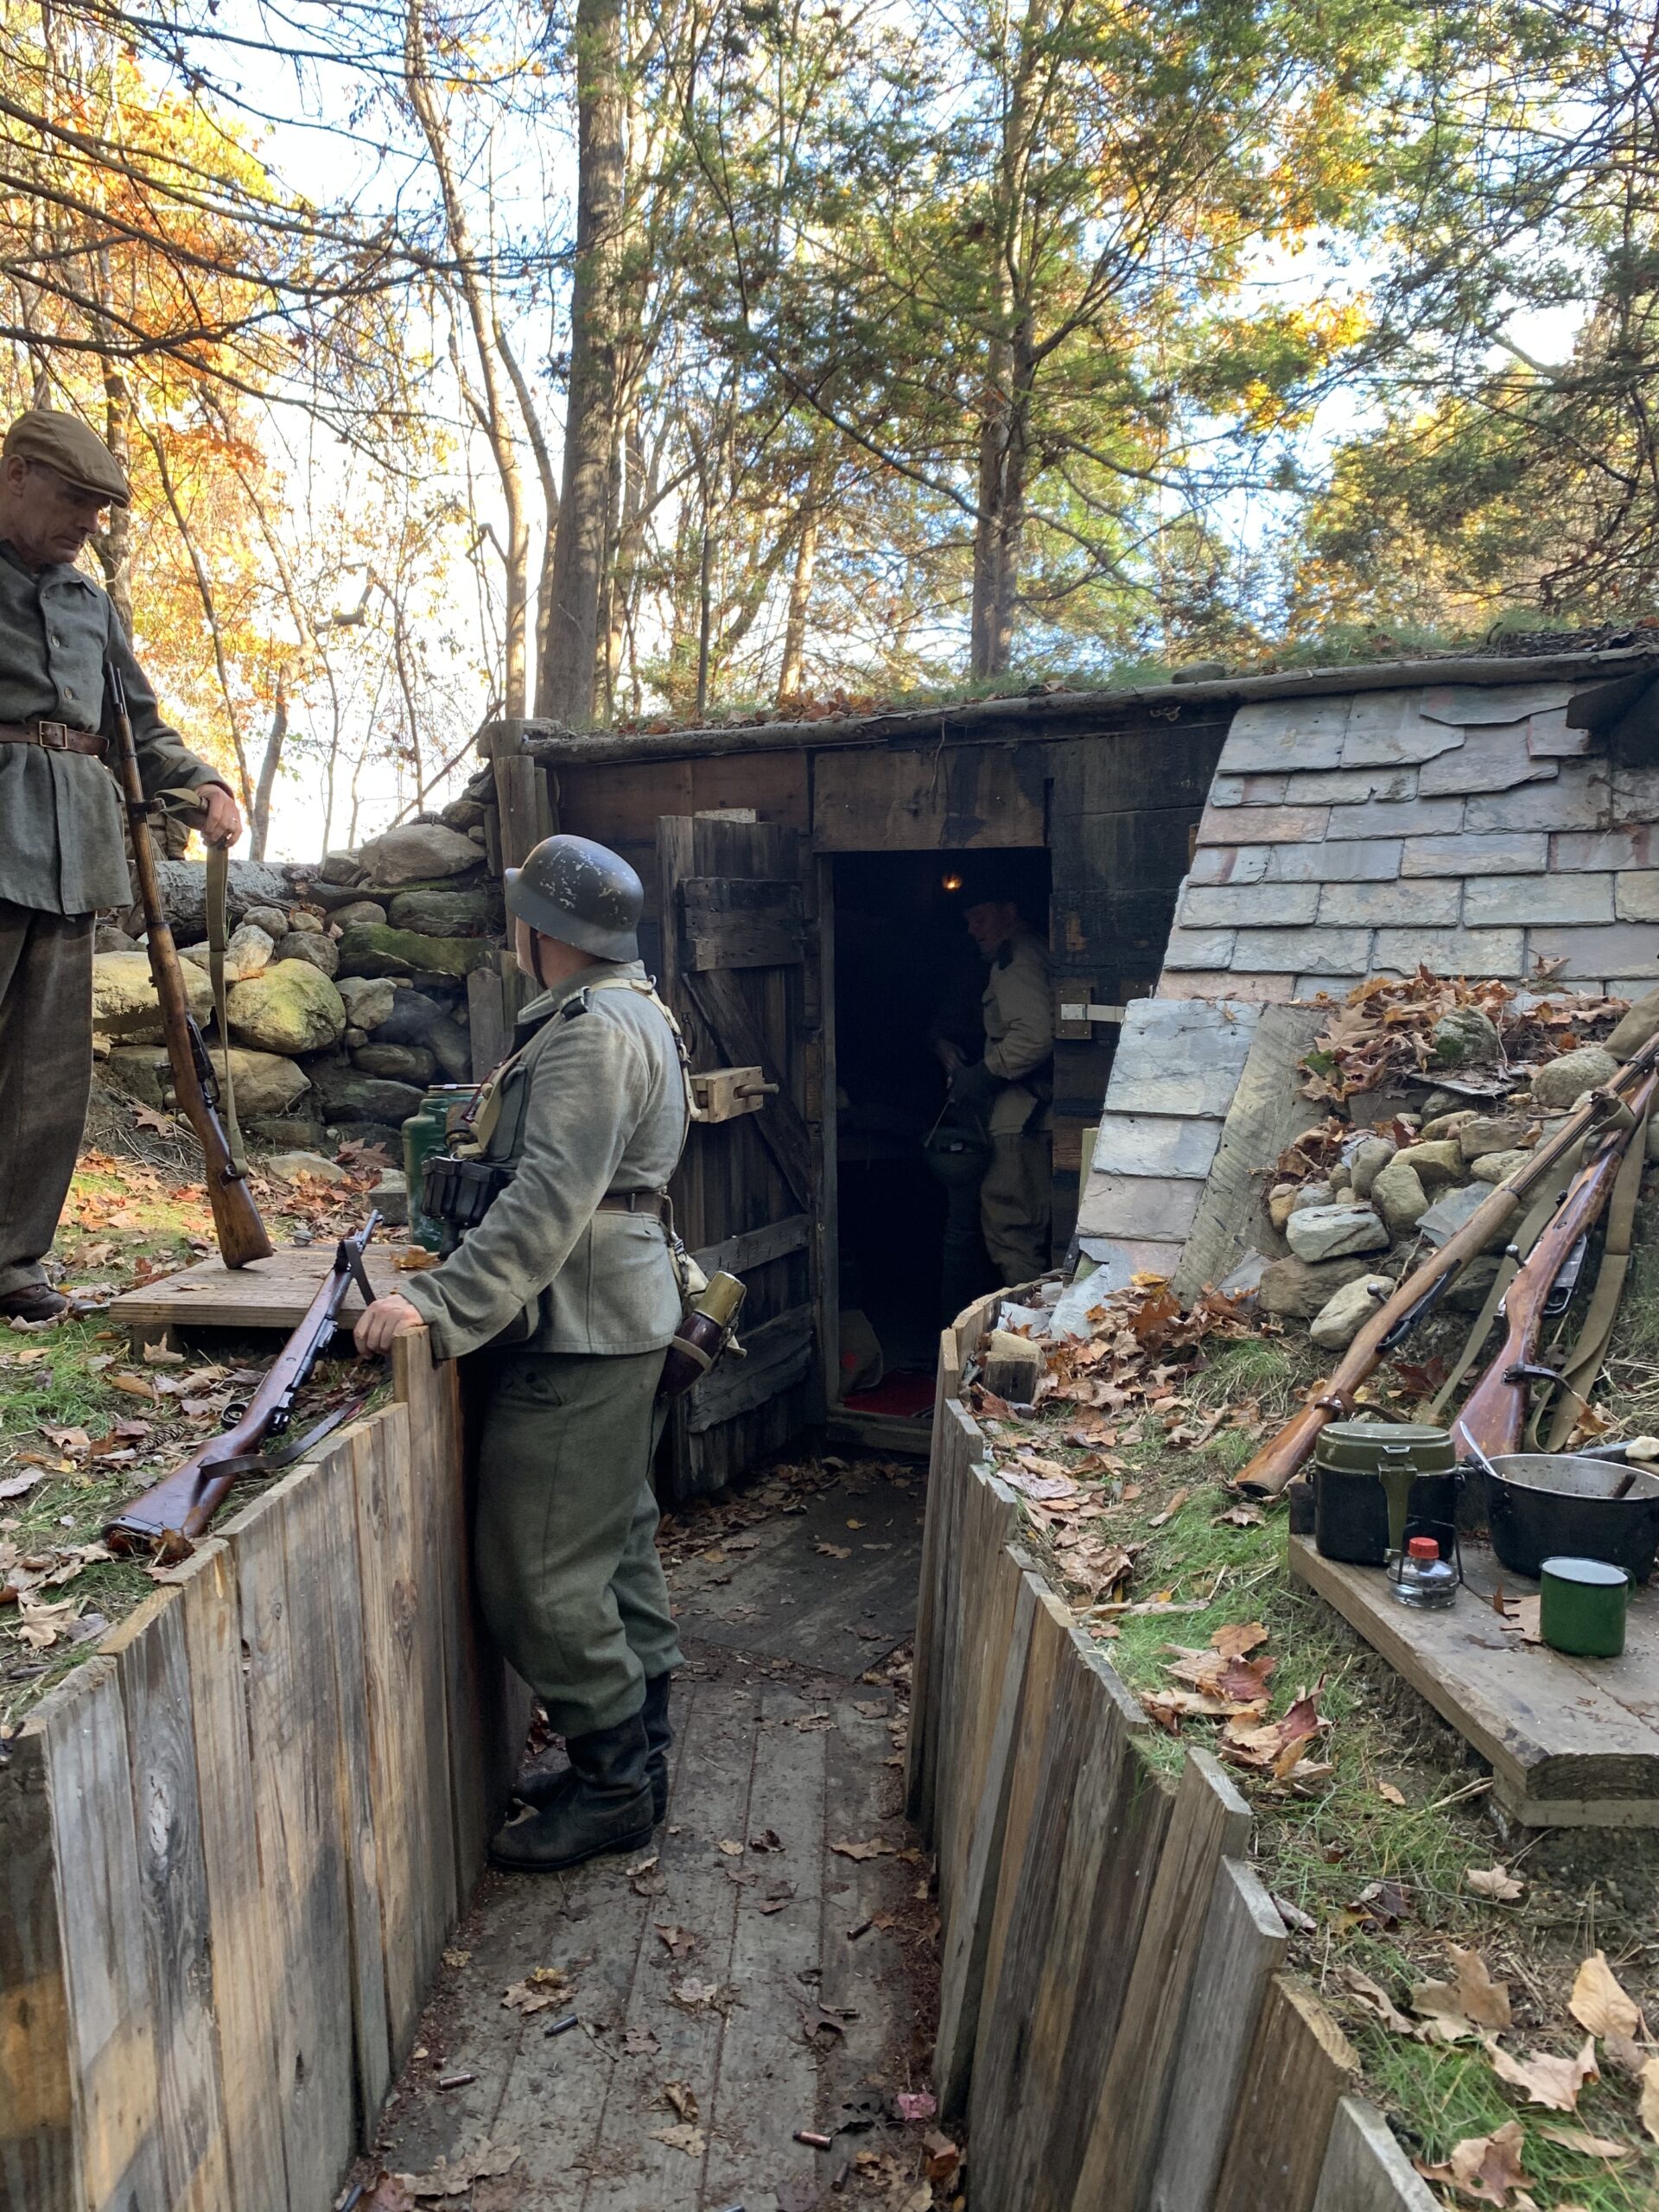
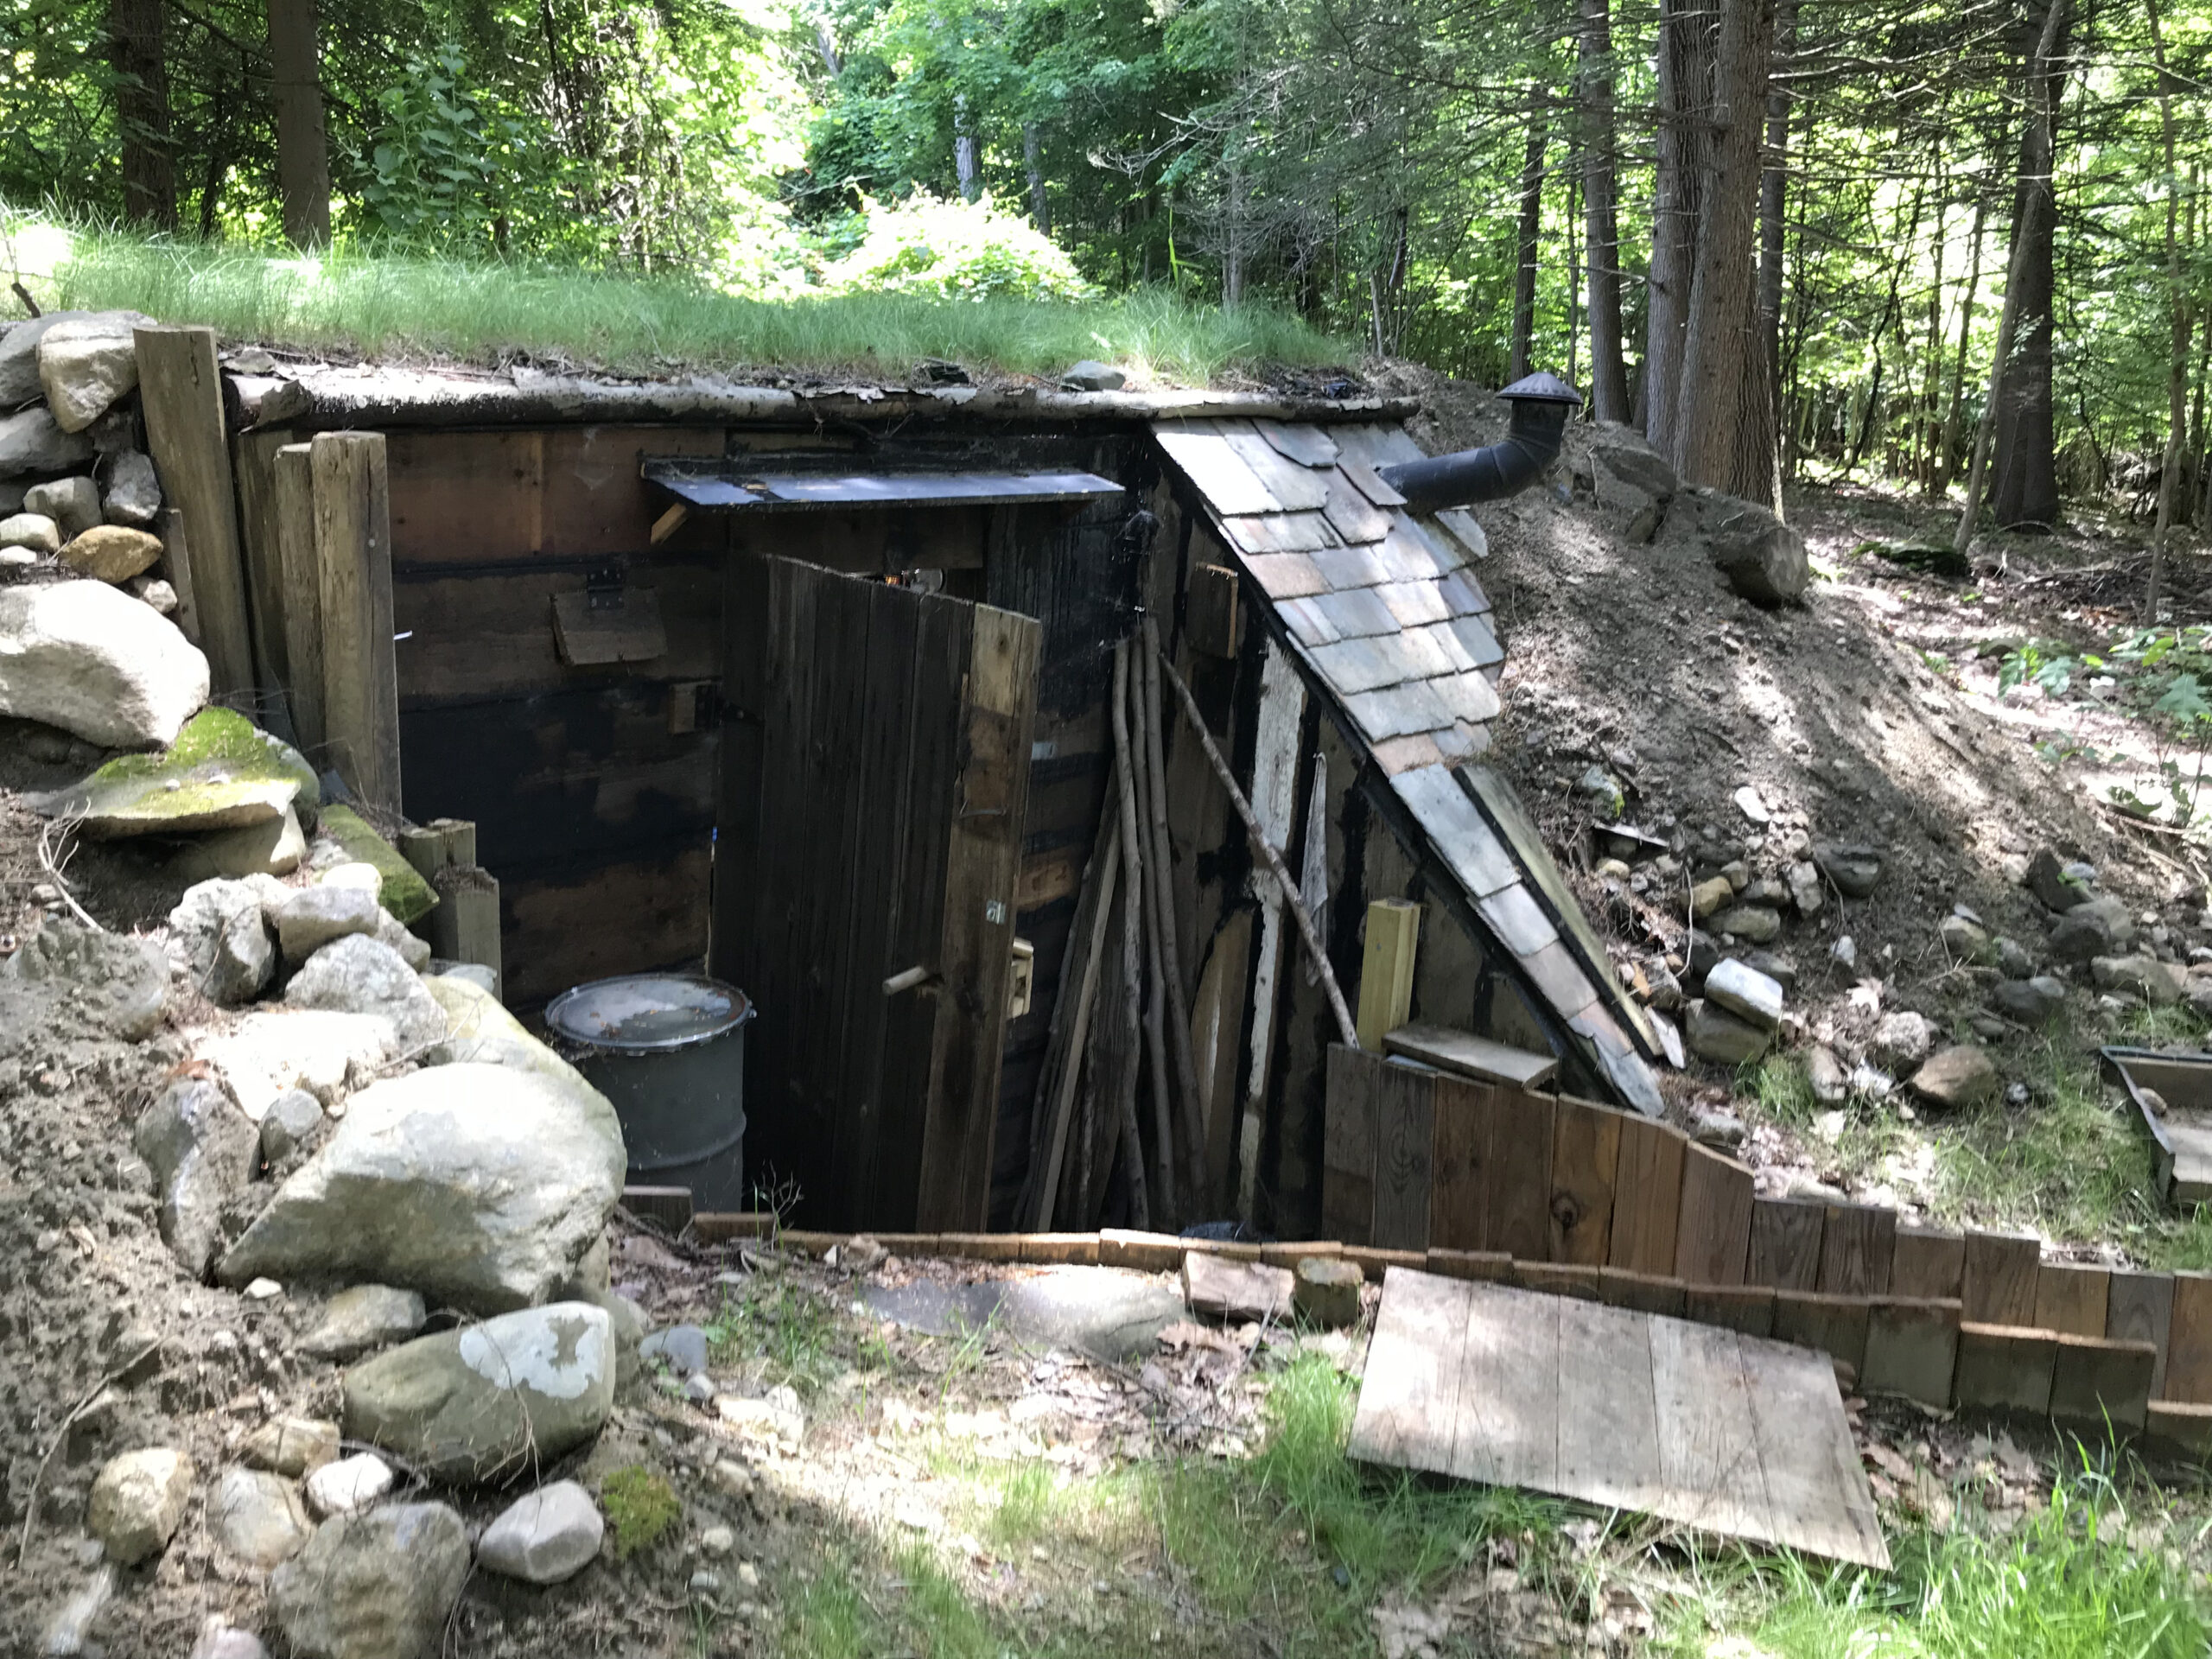
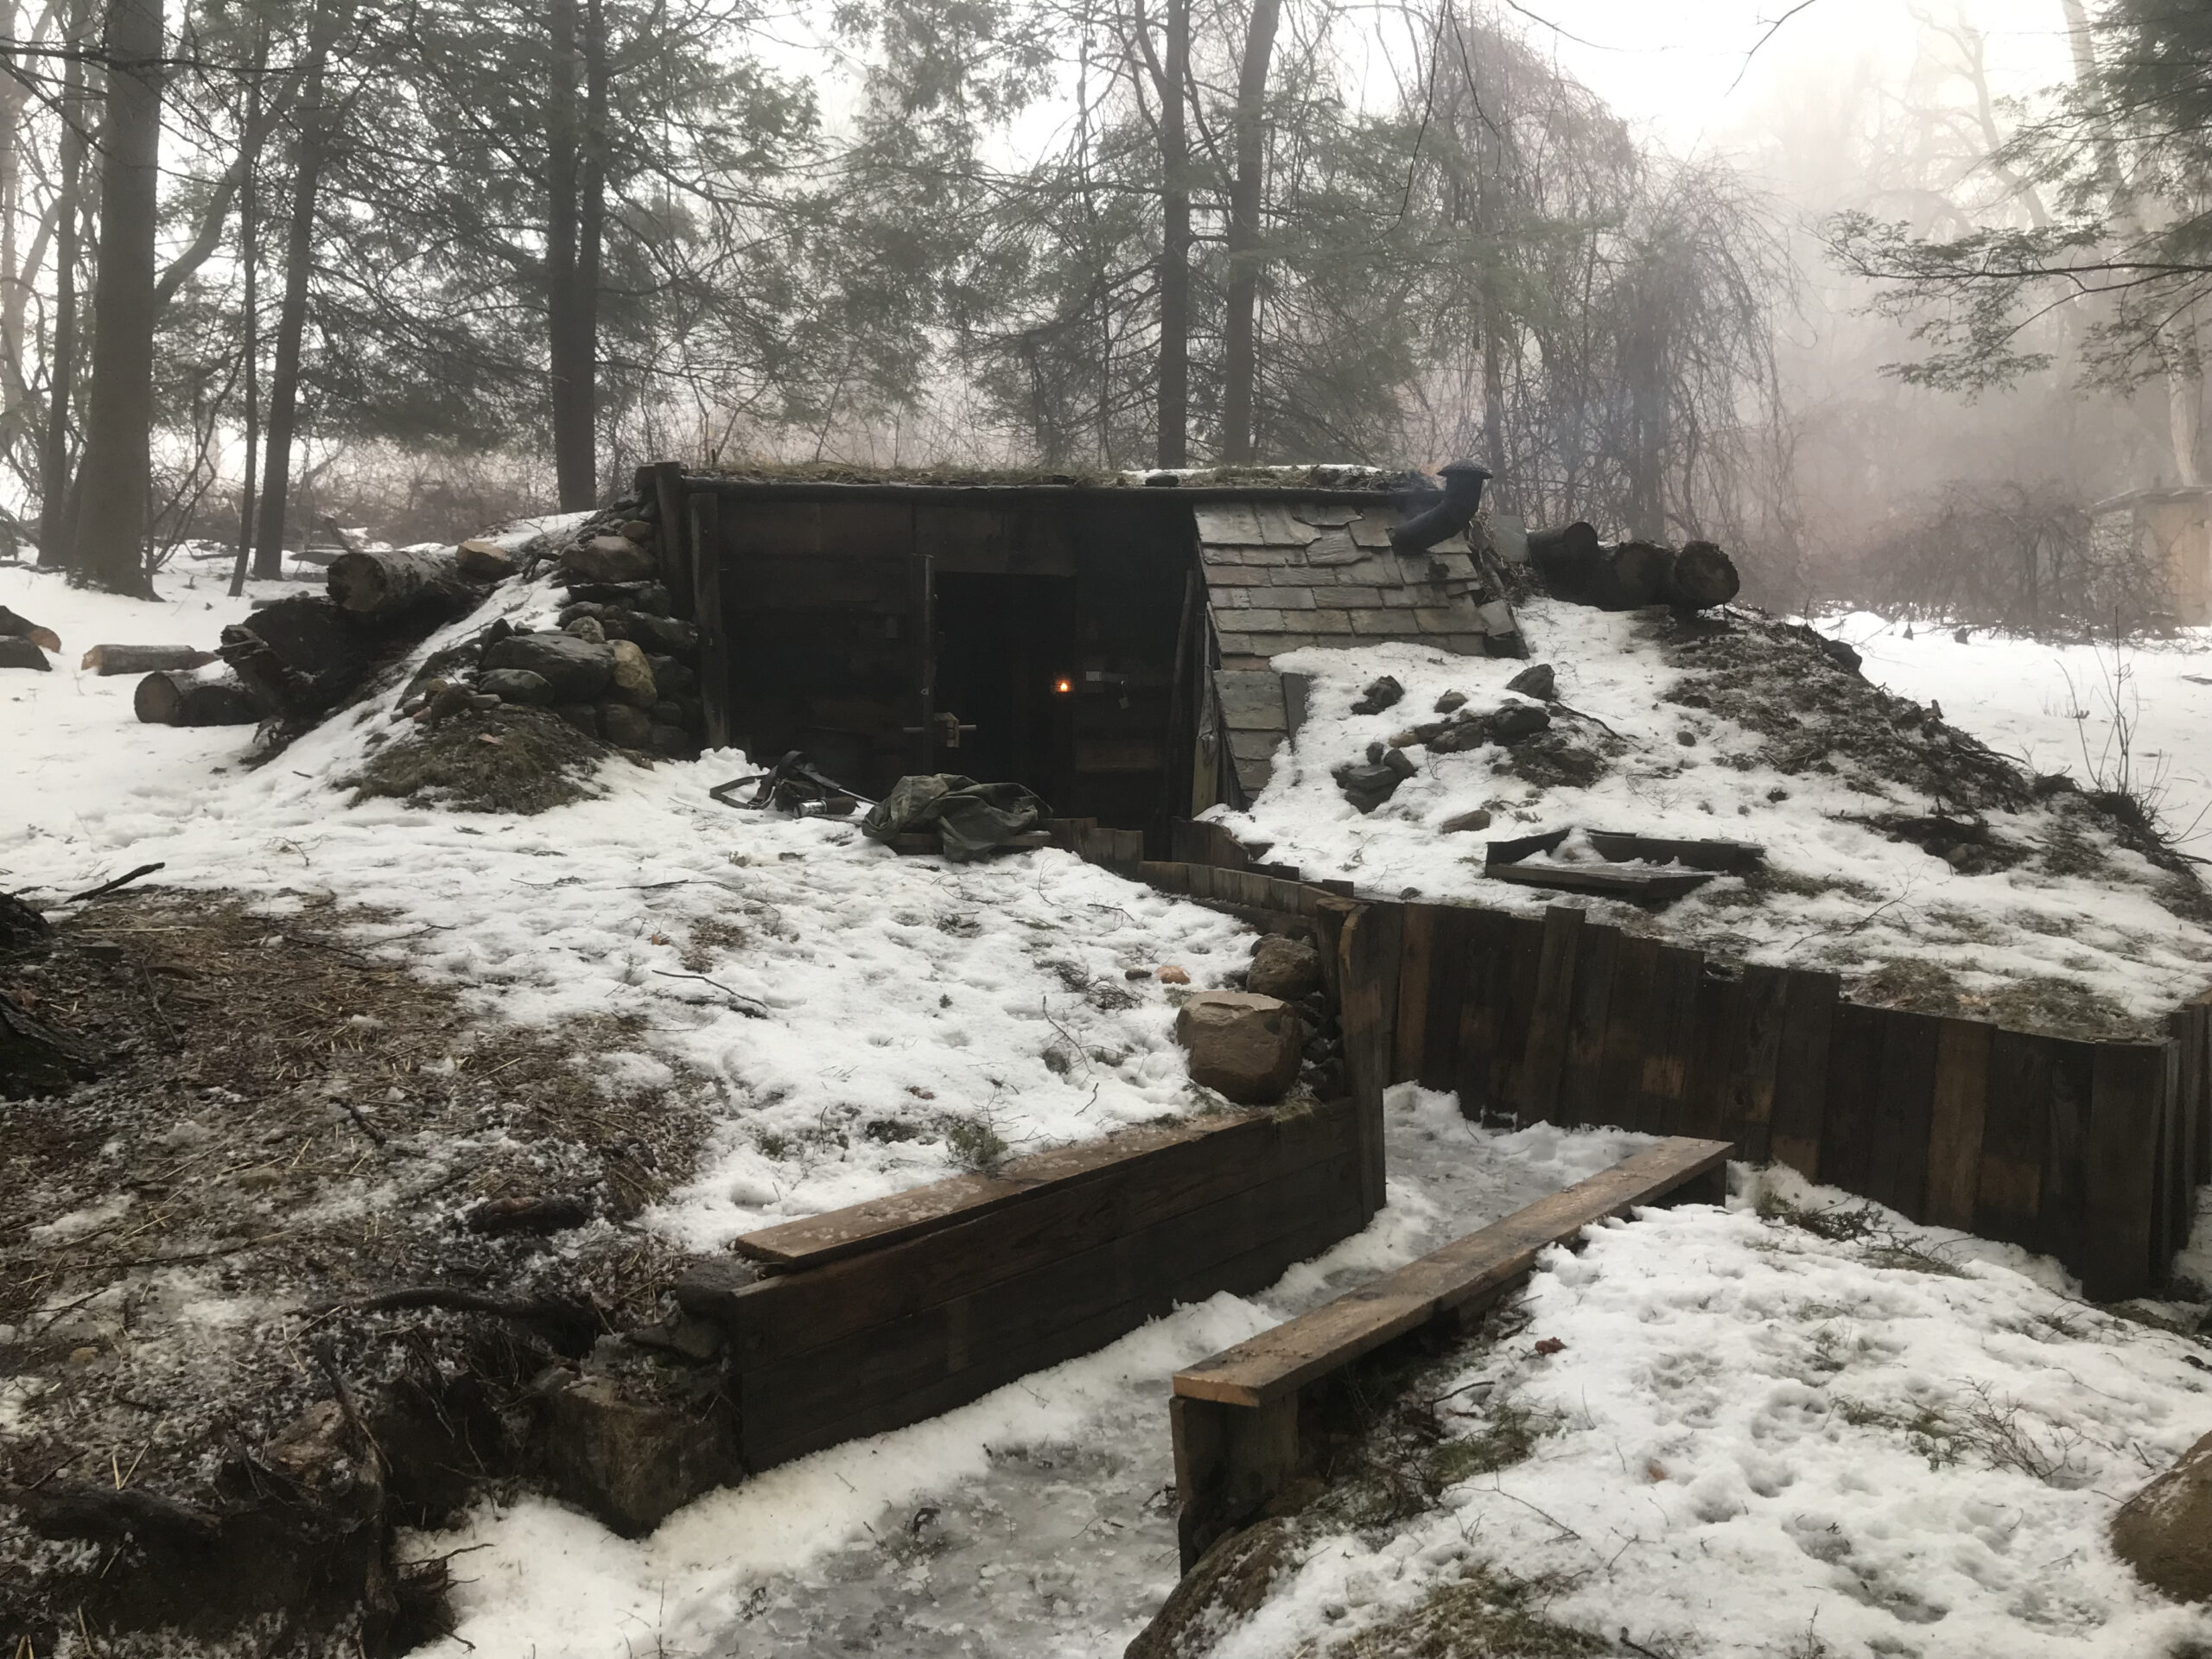
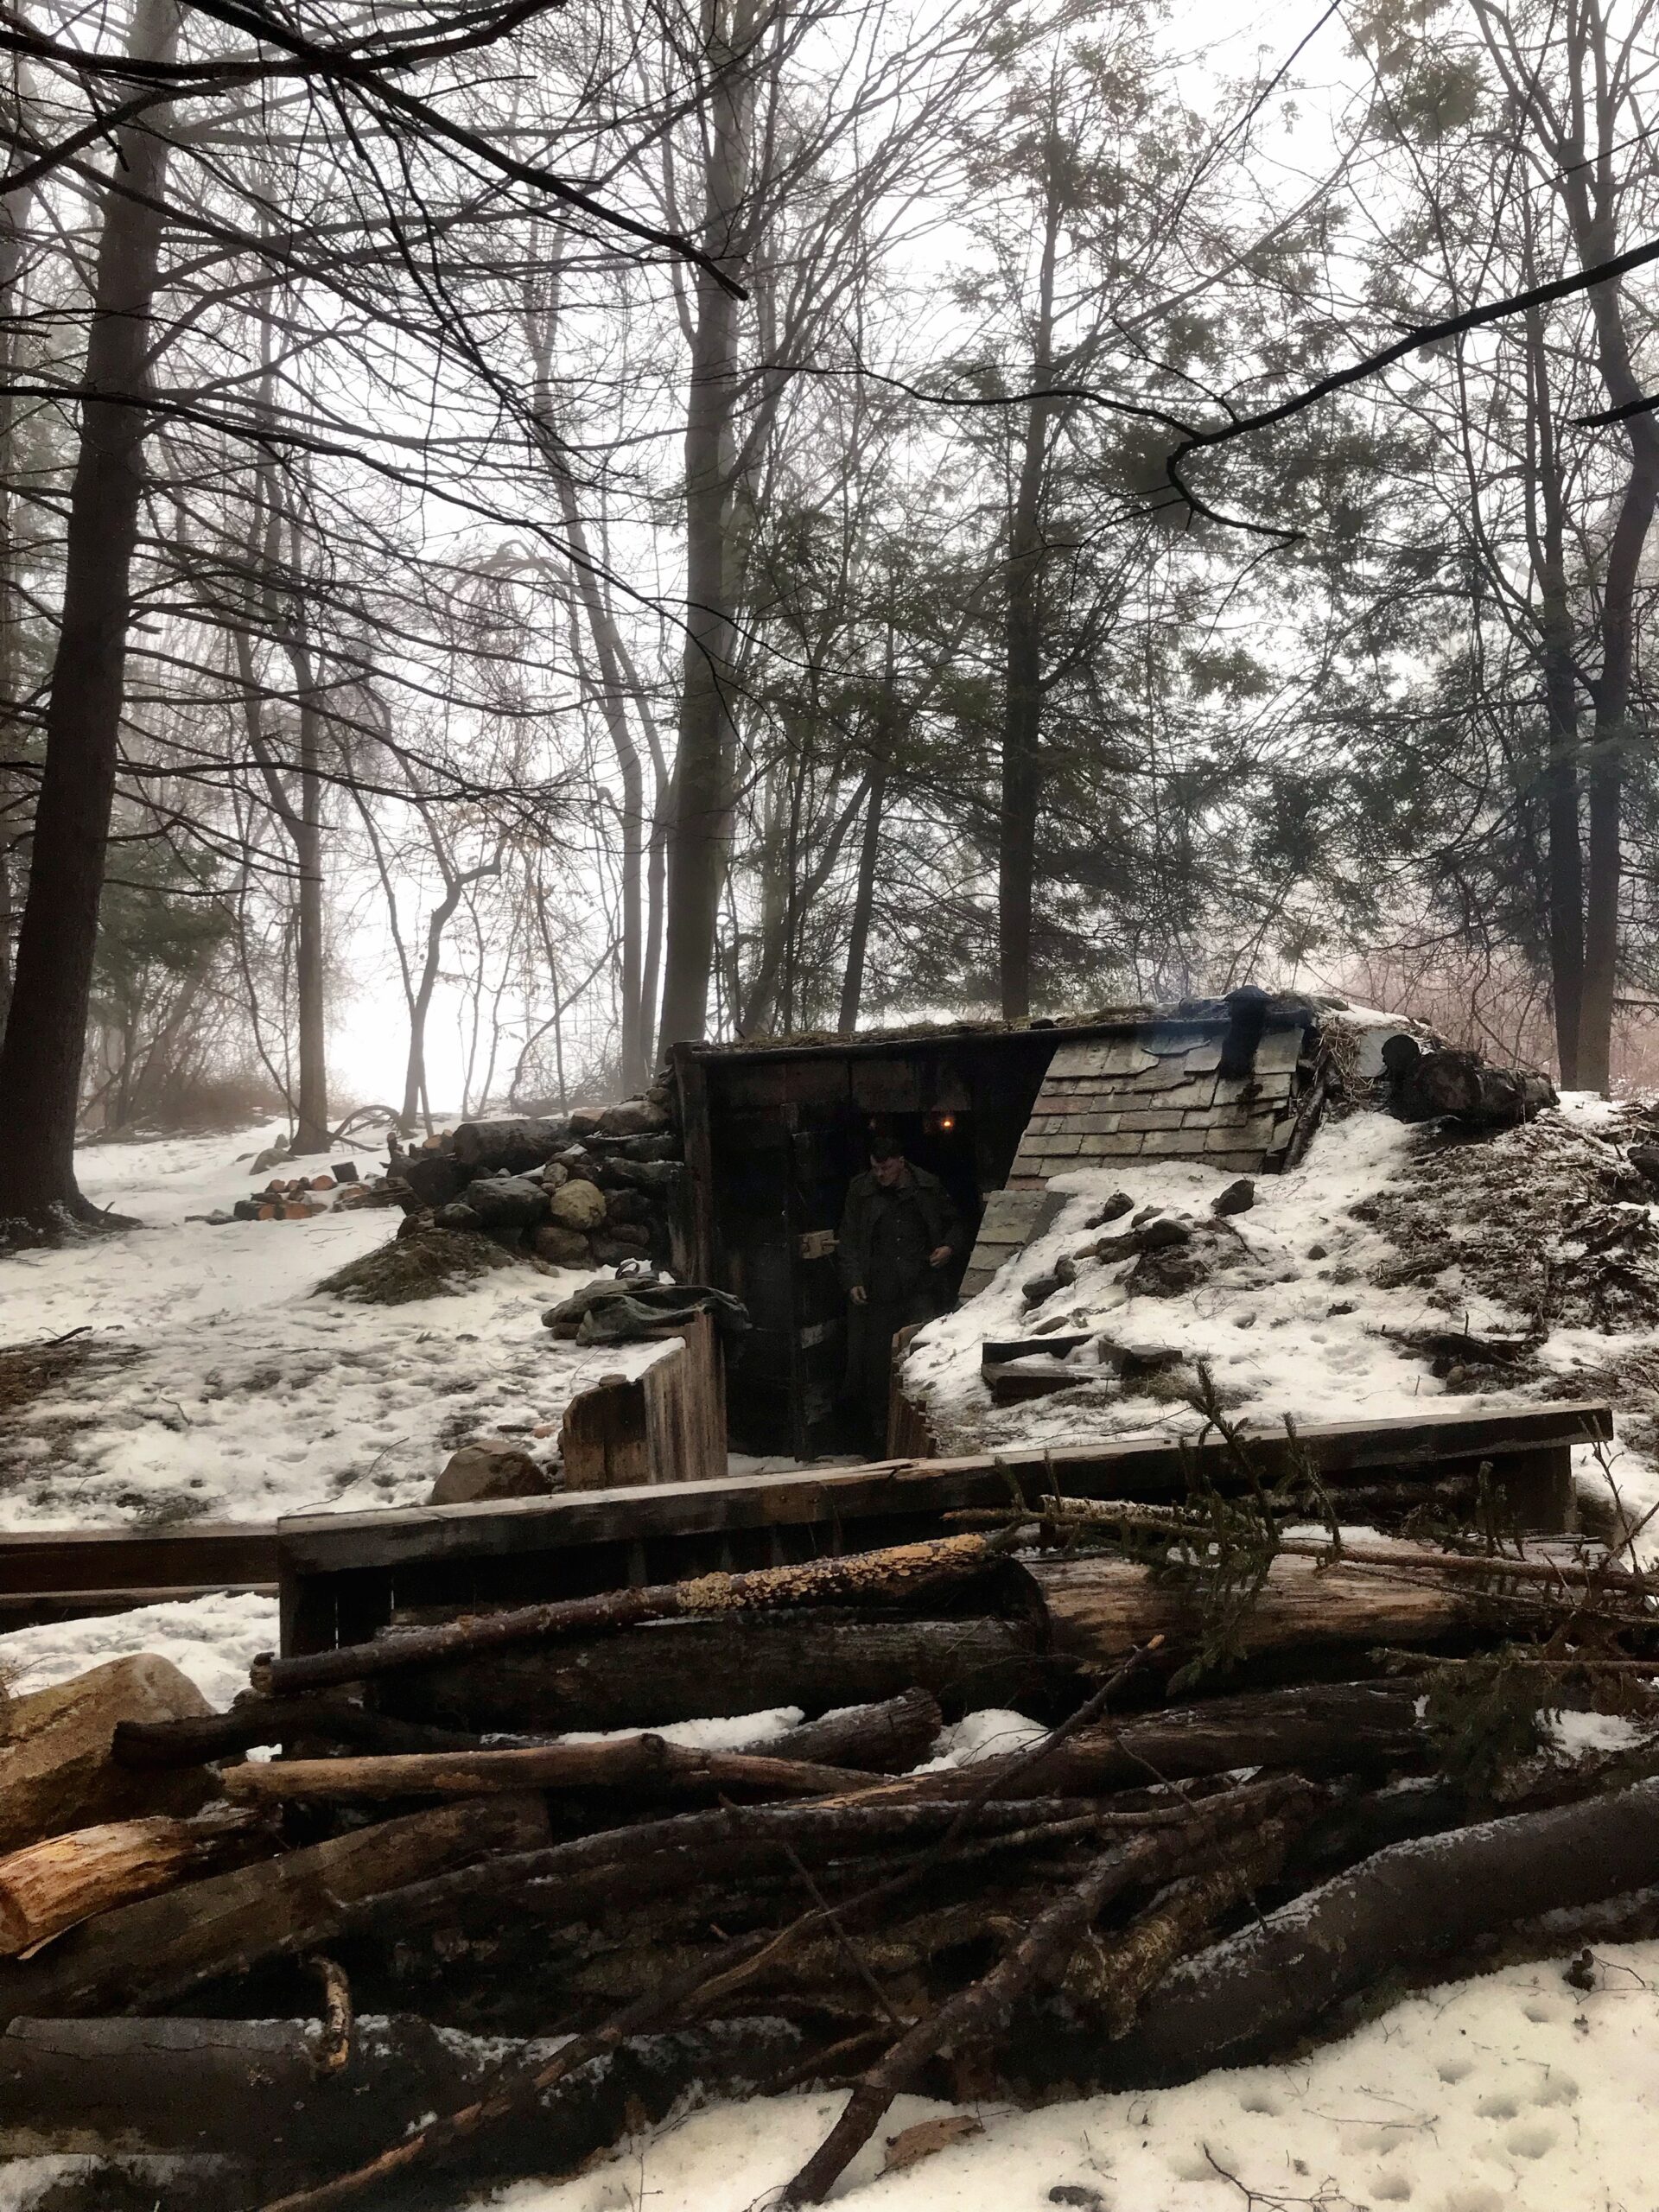
This little structure that we call “Stellung Haselhuhn” was built by the Soviet 26th Rifle Division in cooperation with Sicherungs-Regiment 195 in 2019. It is on private property in western Massachusetts; the involvement of the extremely generous landowner and his family was of course crucial for this project. The design of the structure was chosen by the Soviet group, based on a “Zemlyanka” which was a type of shelter used for centuries by civilians, also built and used in WWII by Soviet soldiers and partisans. Many photos show Wehrmacht soldiers using simple field expedient dugouts like this as well, and wartime German guidelines stressed the importance of dug-in positions as protection from rifle fire and incendiary ammunition. This structure is built into a slope, and although we call it a “bunker,” we use this primarily as a shelter rather than a fighting position. Most of the building materials were salvaged, with some of the beams and the door taken from a ruined barn built around 1915. Some trees at the site were cut to provide logs, and an antique stove provides heat. We did use modern tools to make this; we had limited time and manpower, and we wouldn’t have been able to complete this with hand tools. As of this writing (2021) construction of a second bunker at this site is underway.
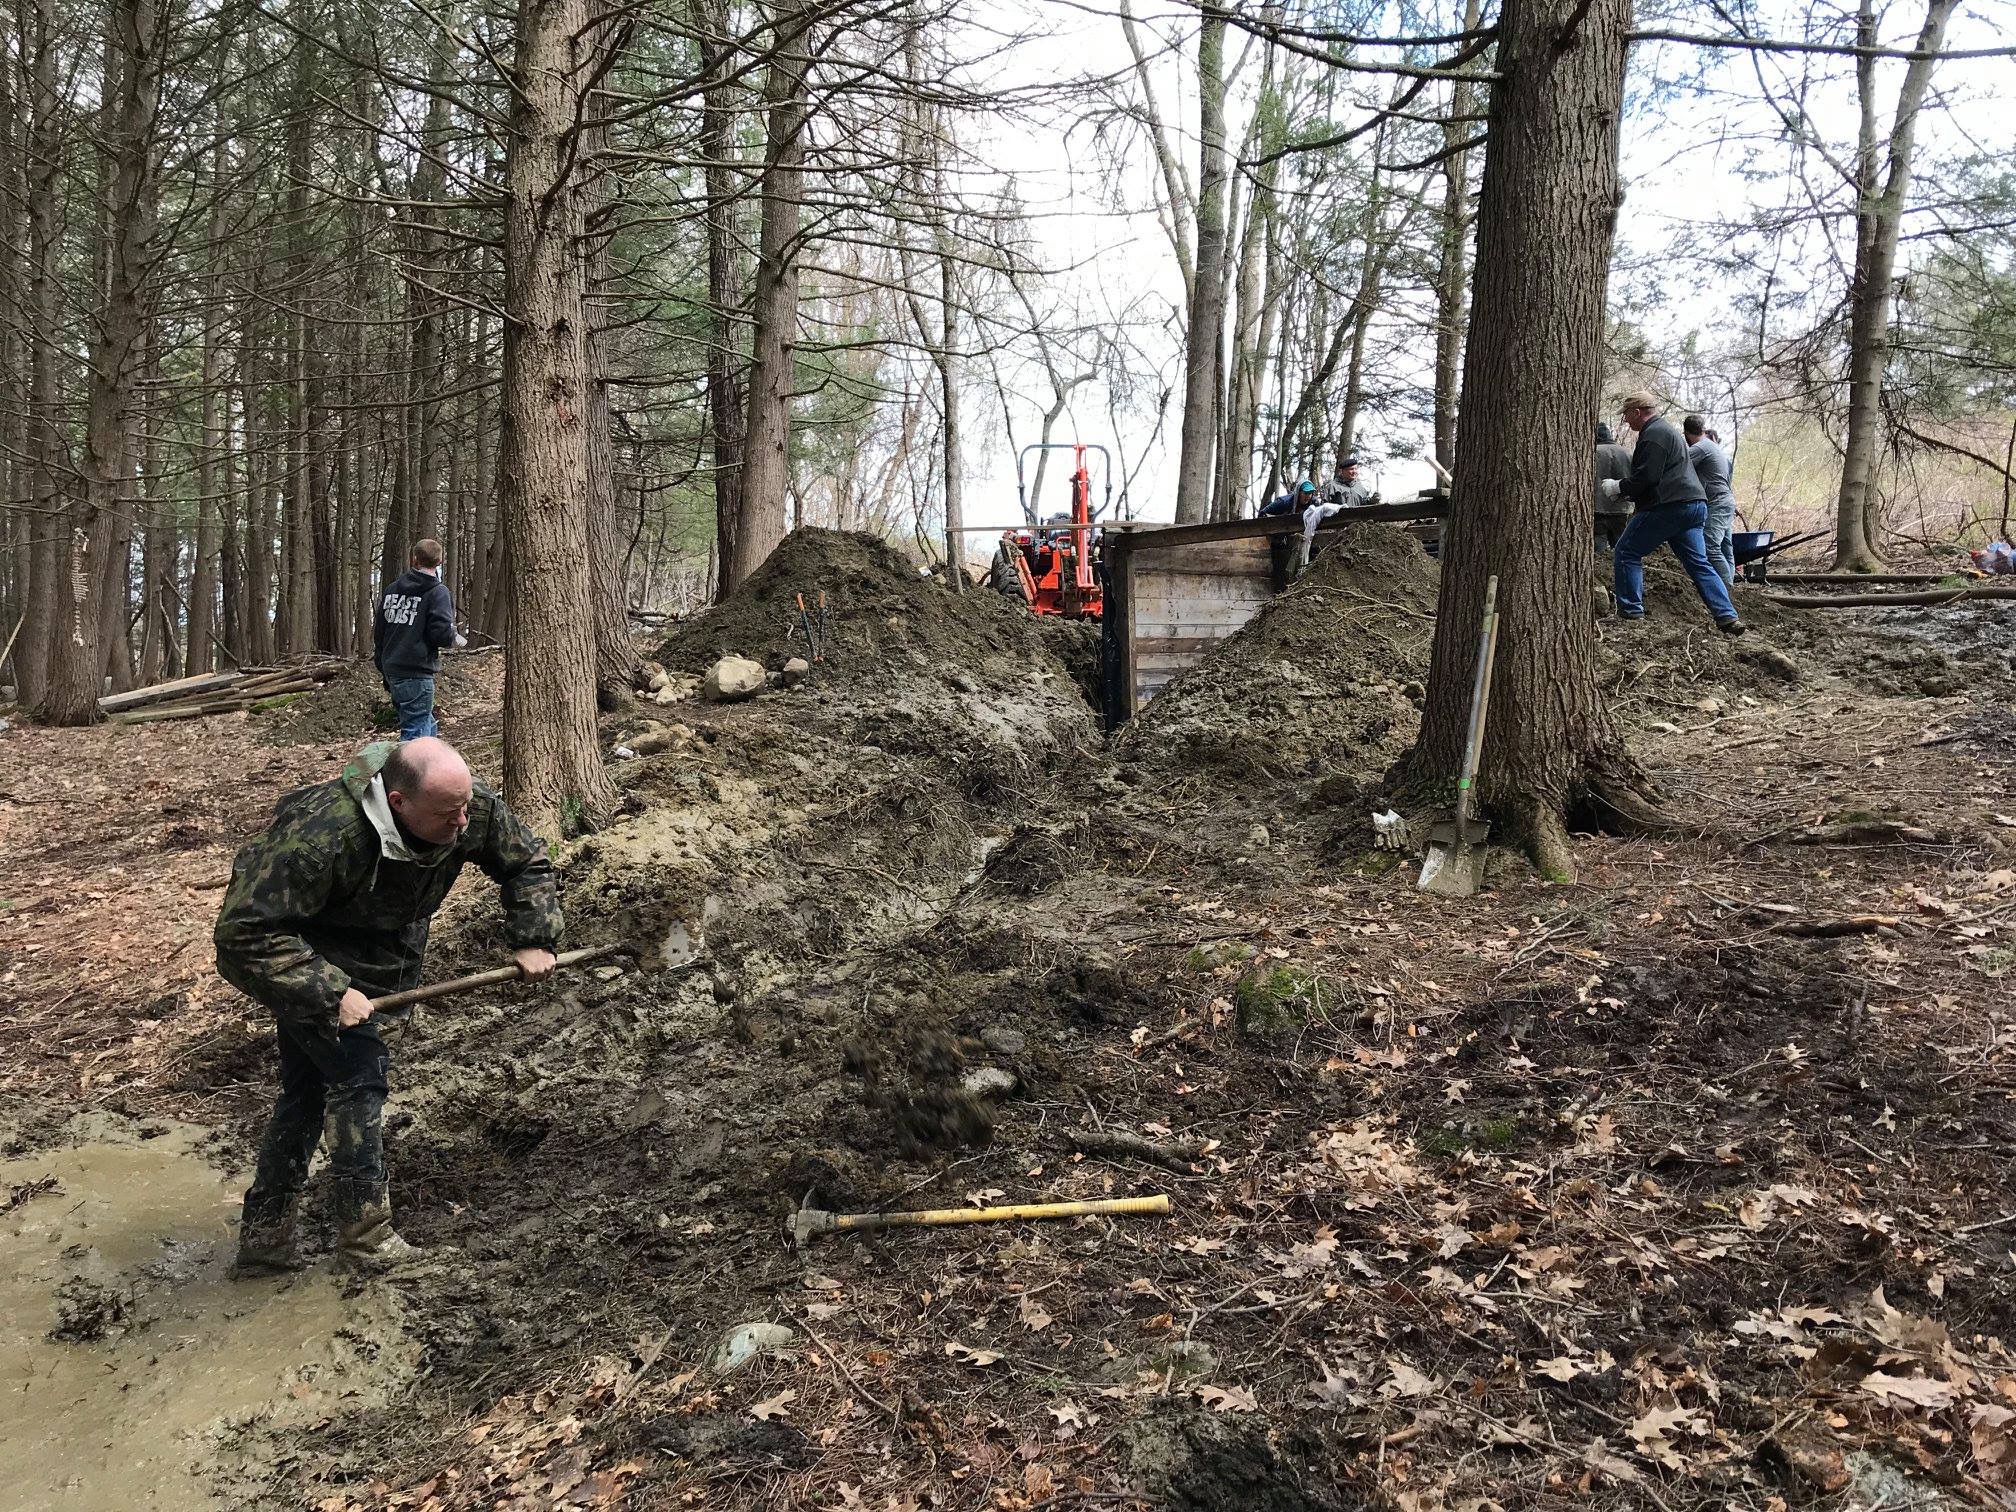
Ground was broken for this project in the spring of 2019. The majority of the work was done by members of the Soviet 26th Rifle Division reenactment group.
When the bunker was first completed, access was via a simple earthen trench.
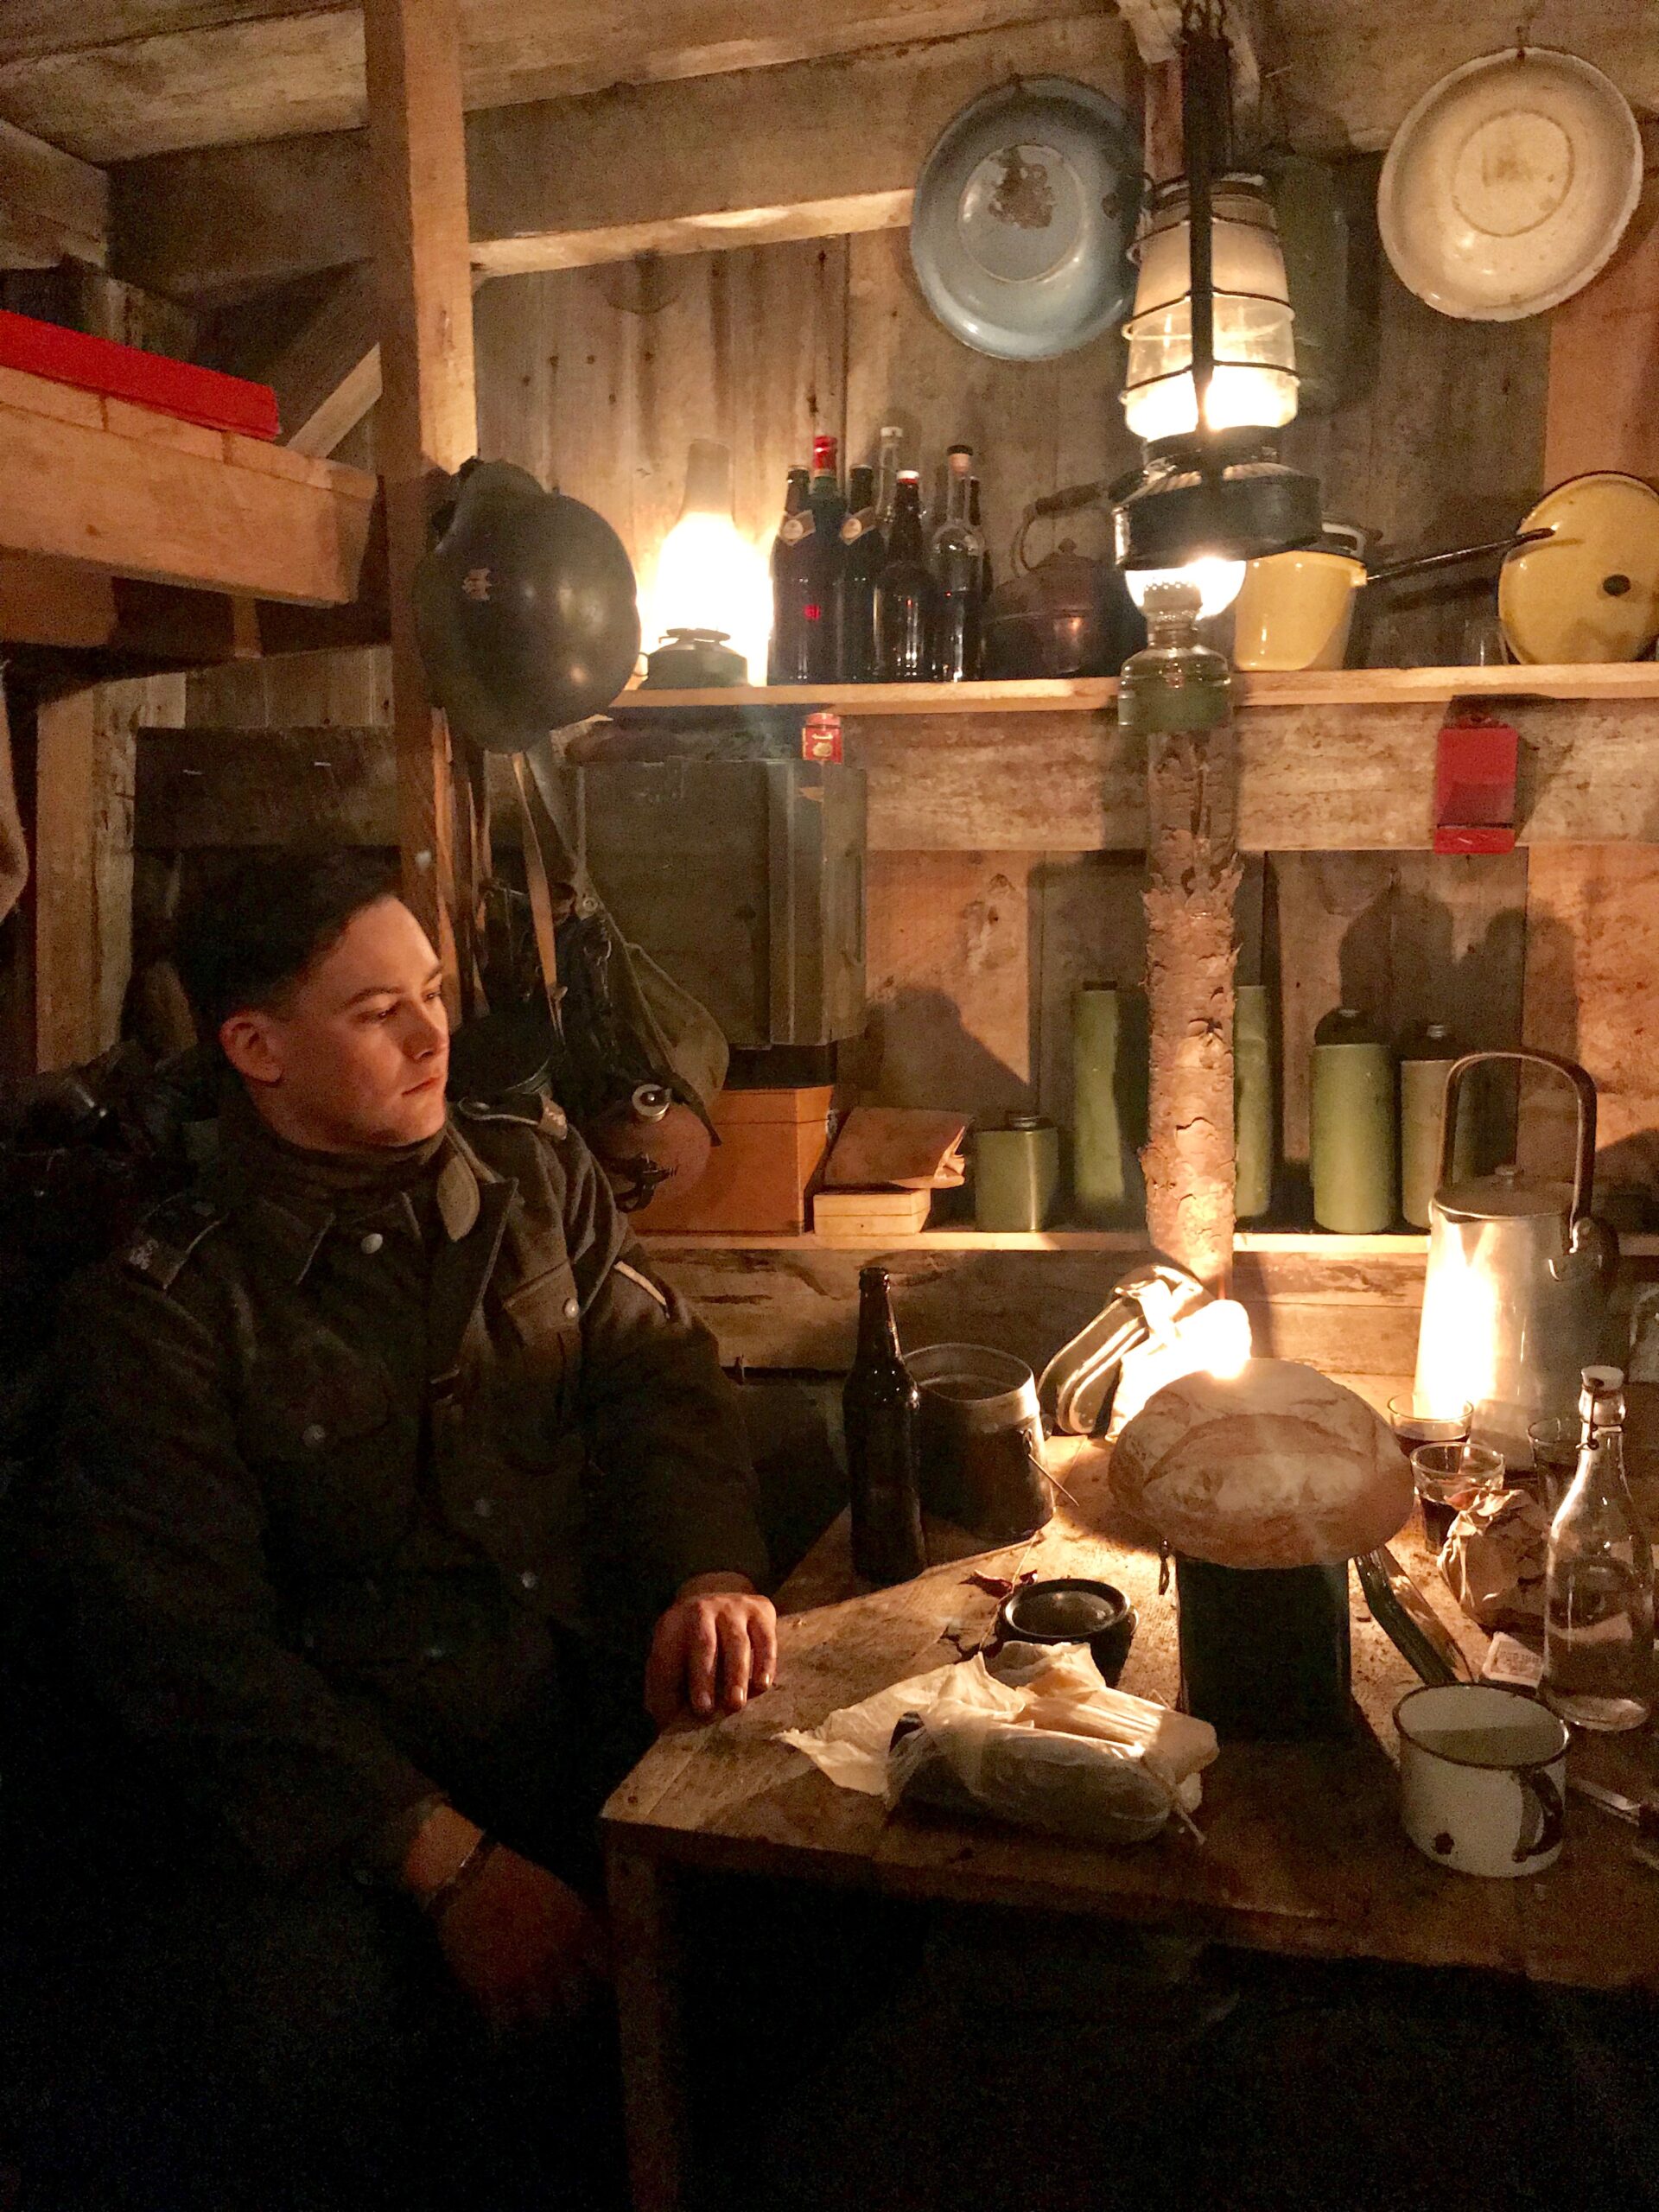
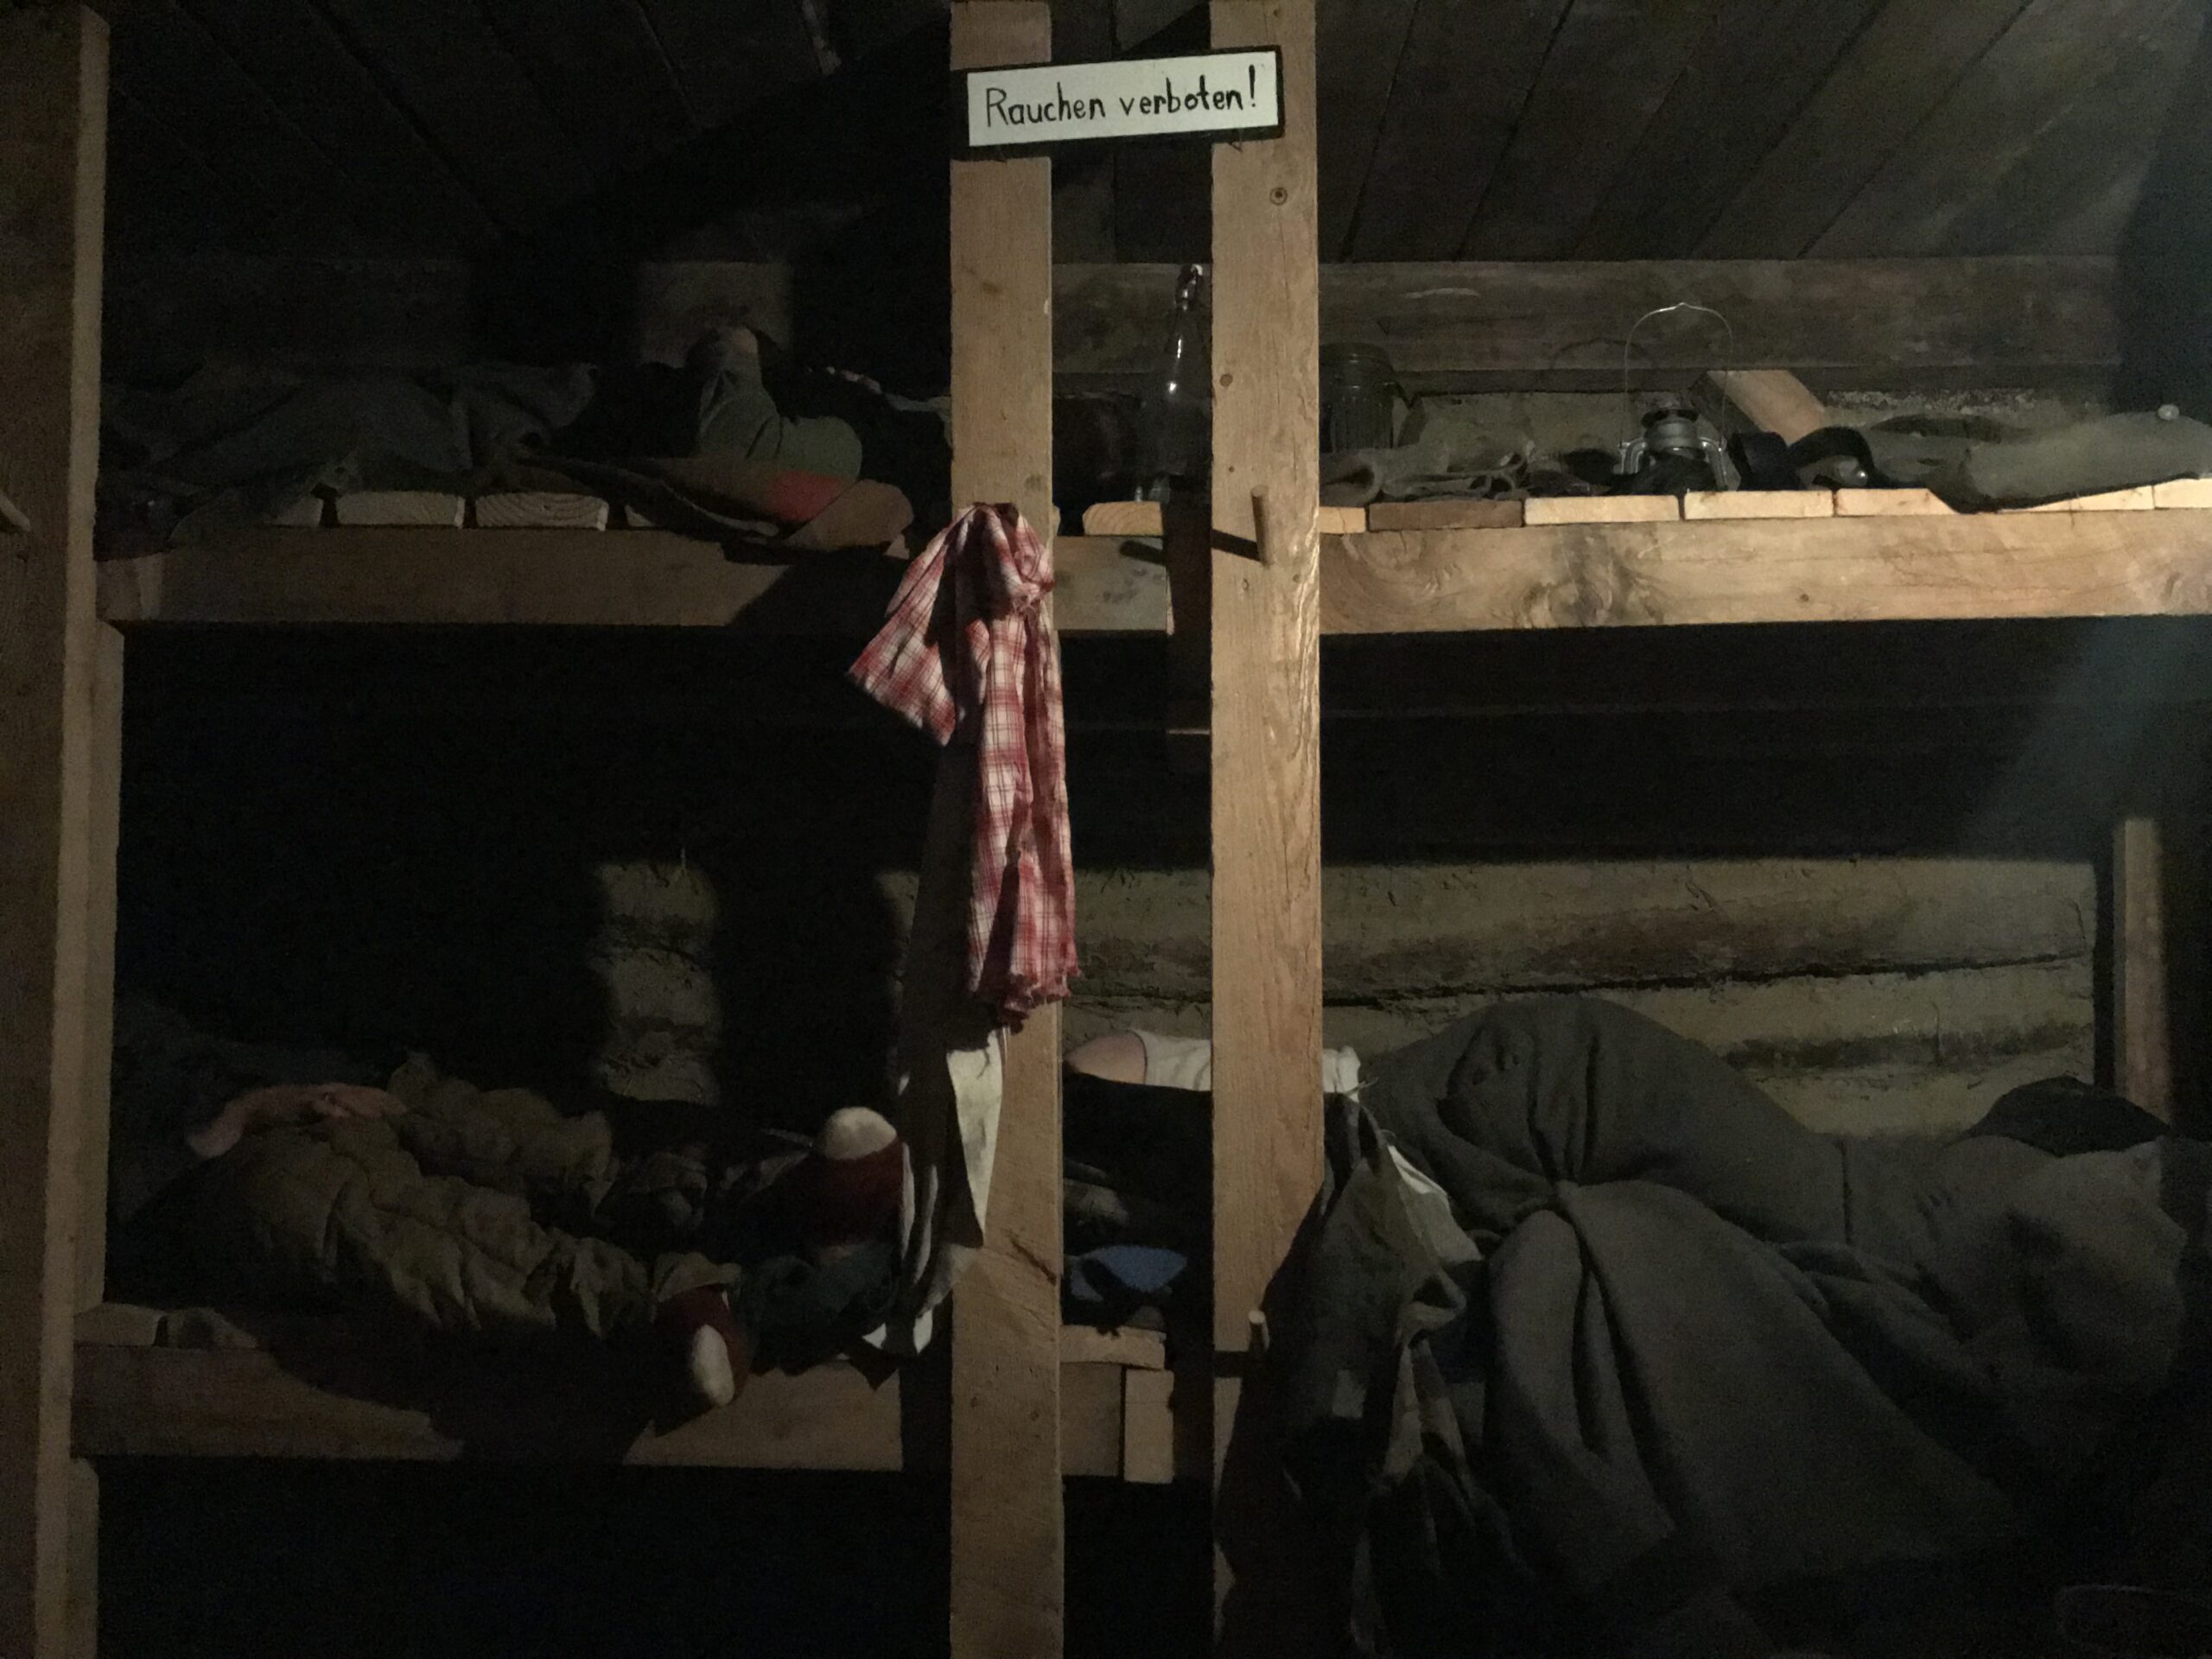
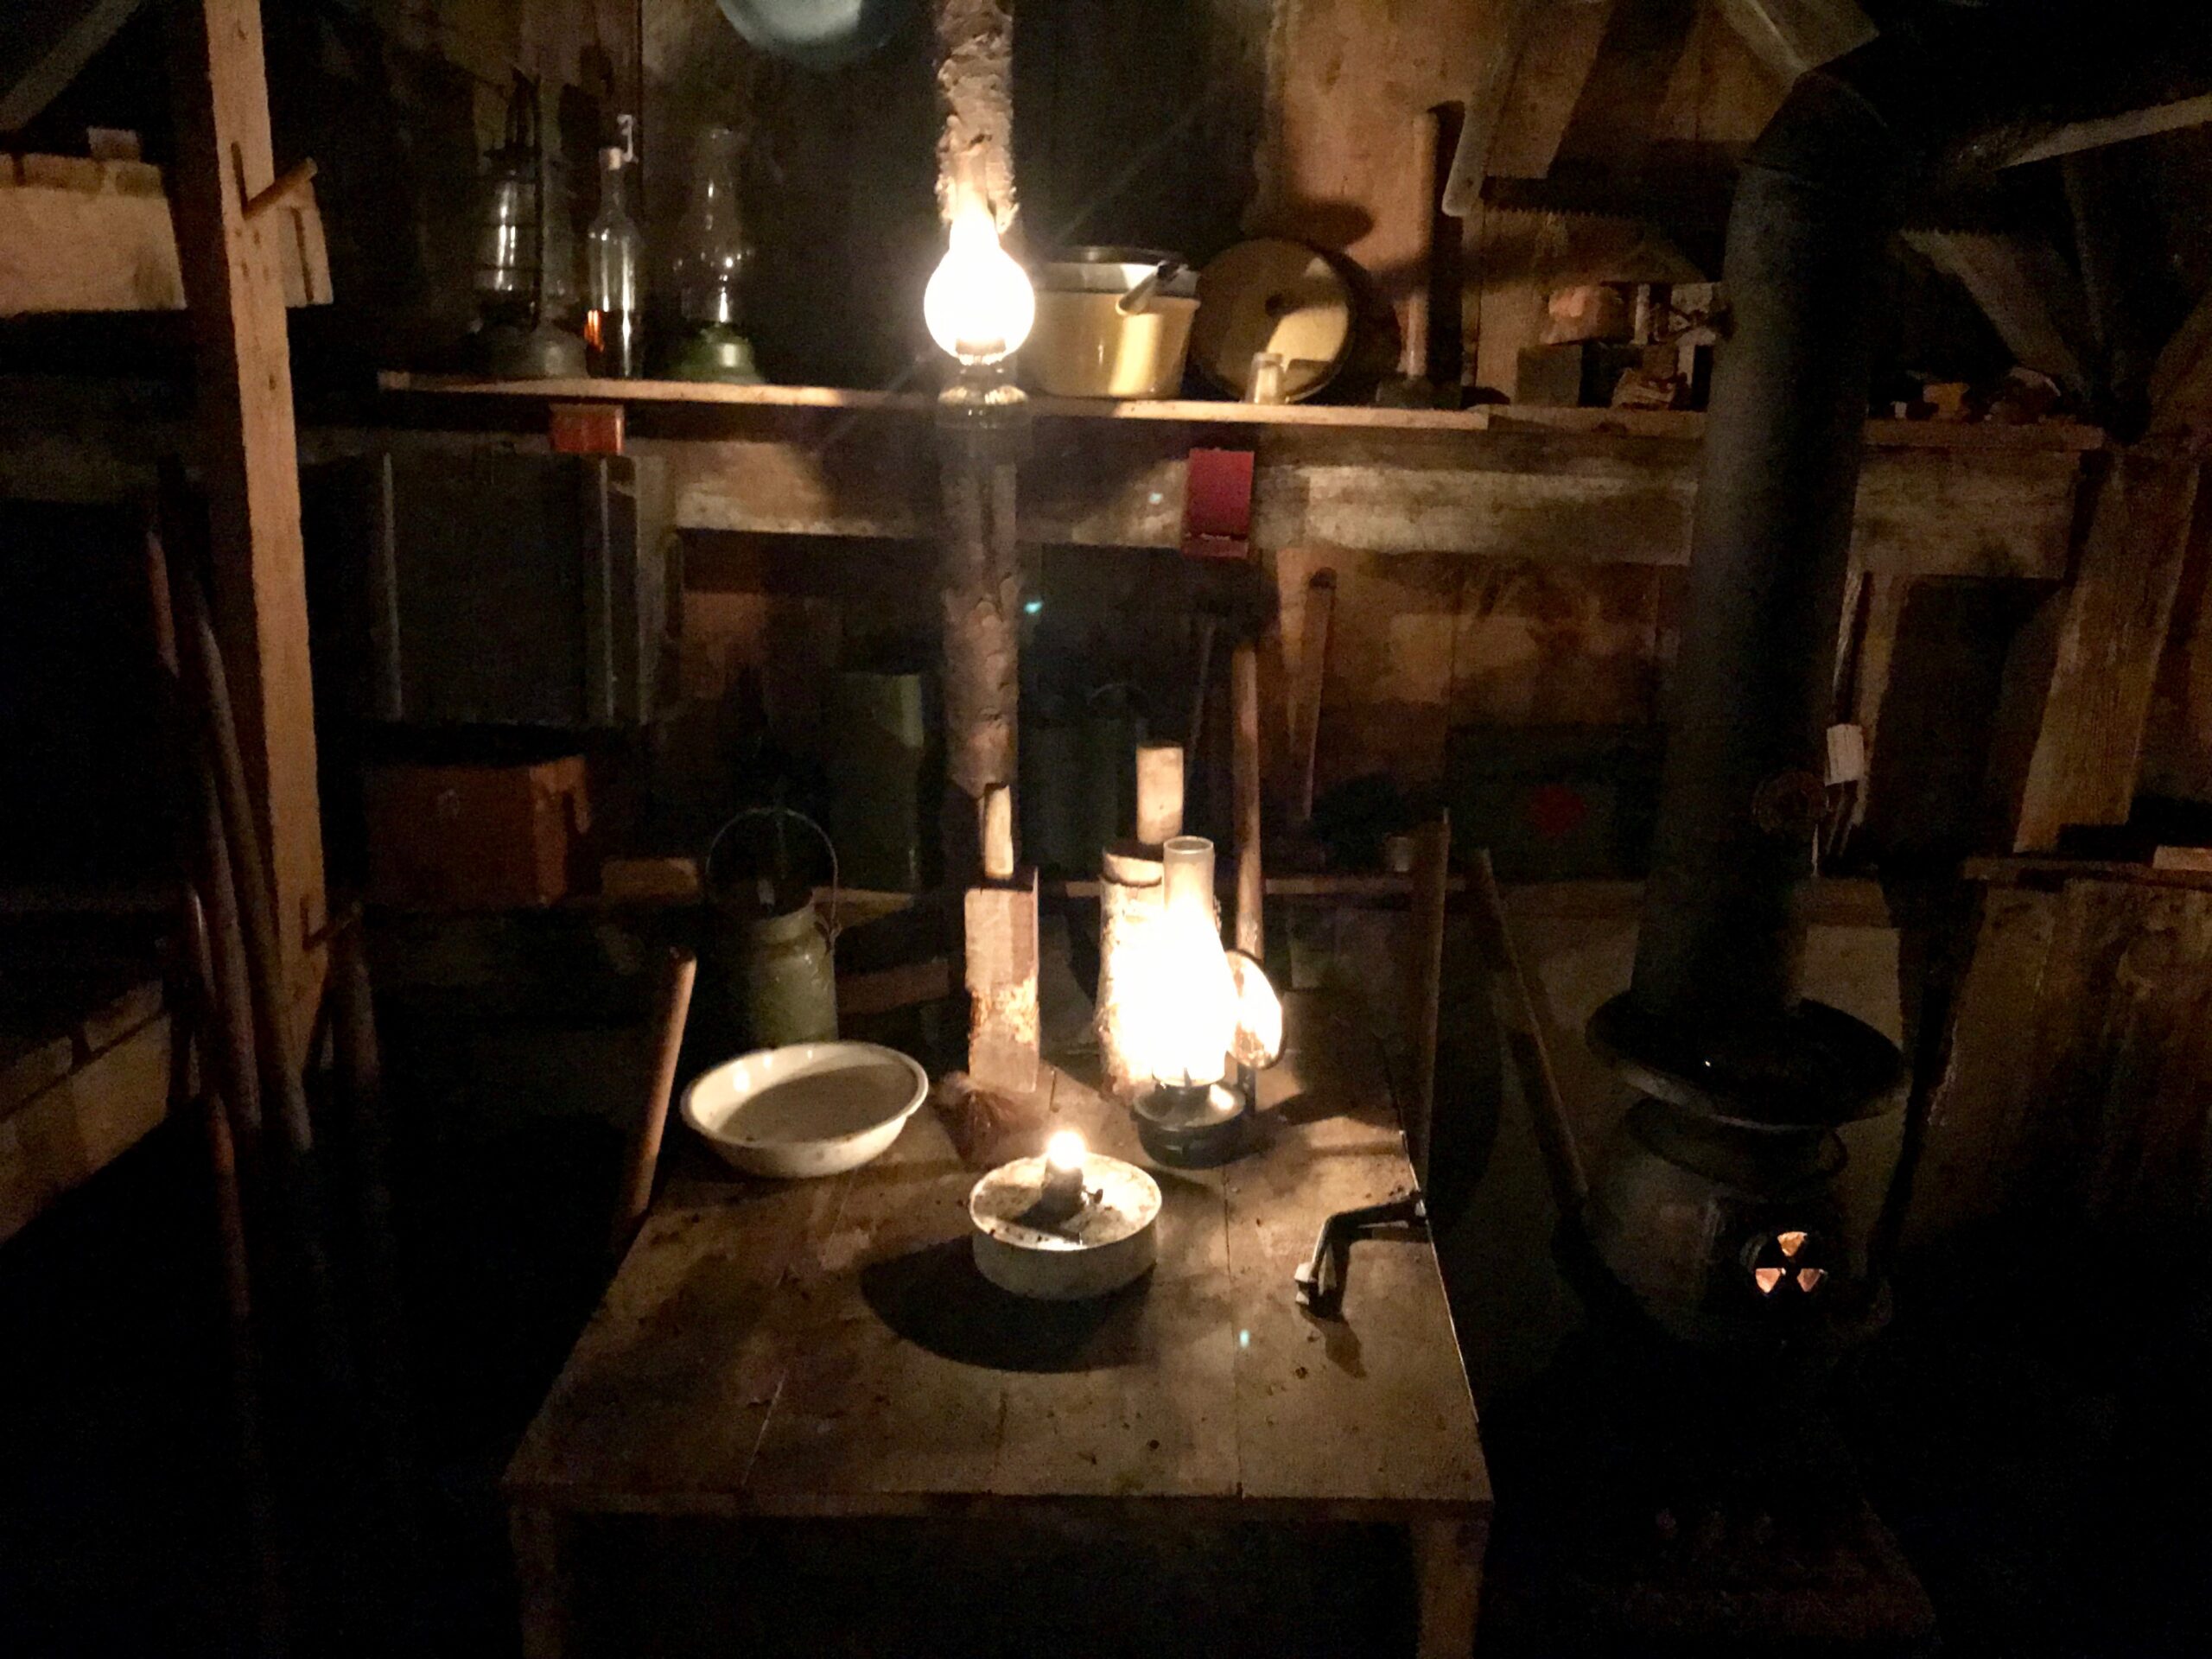
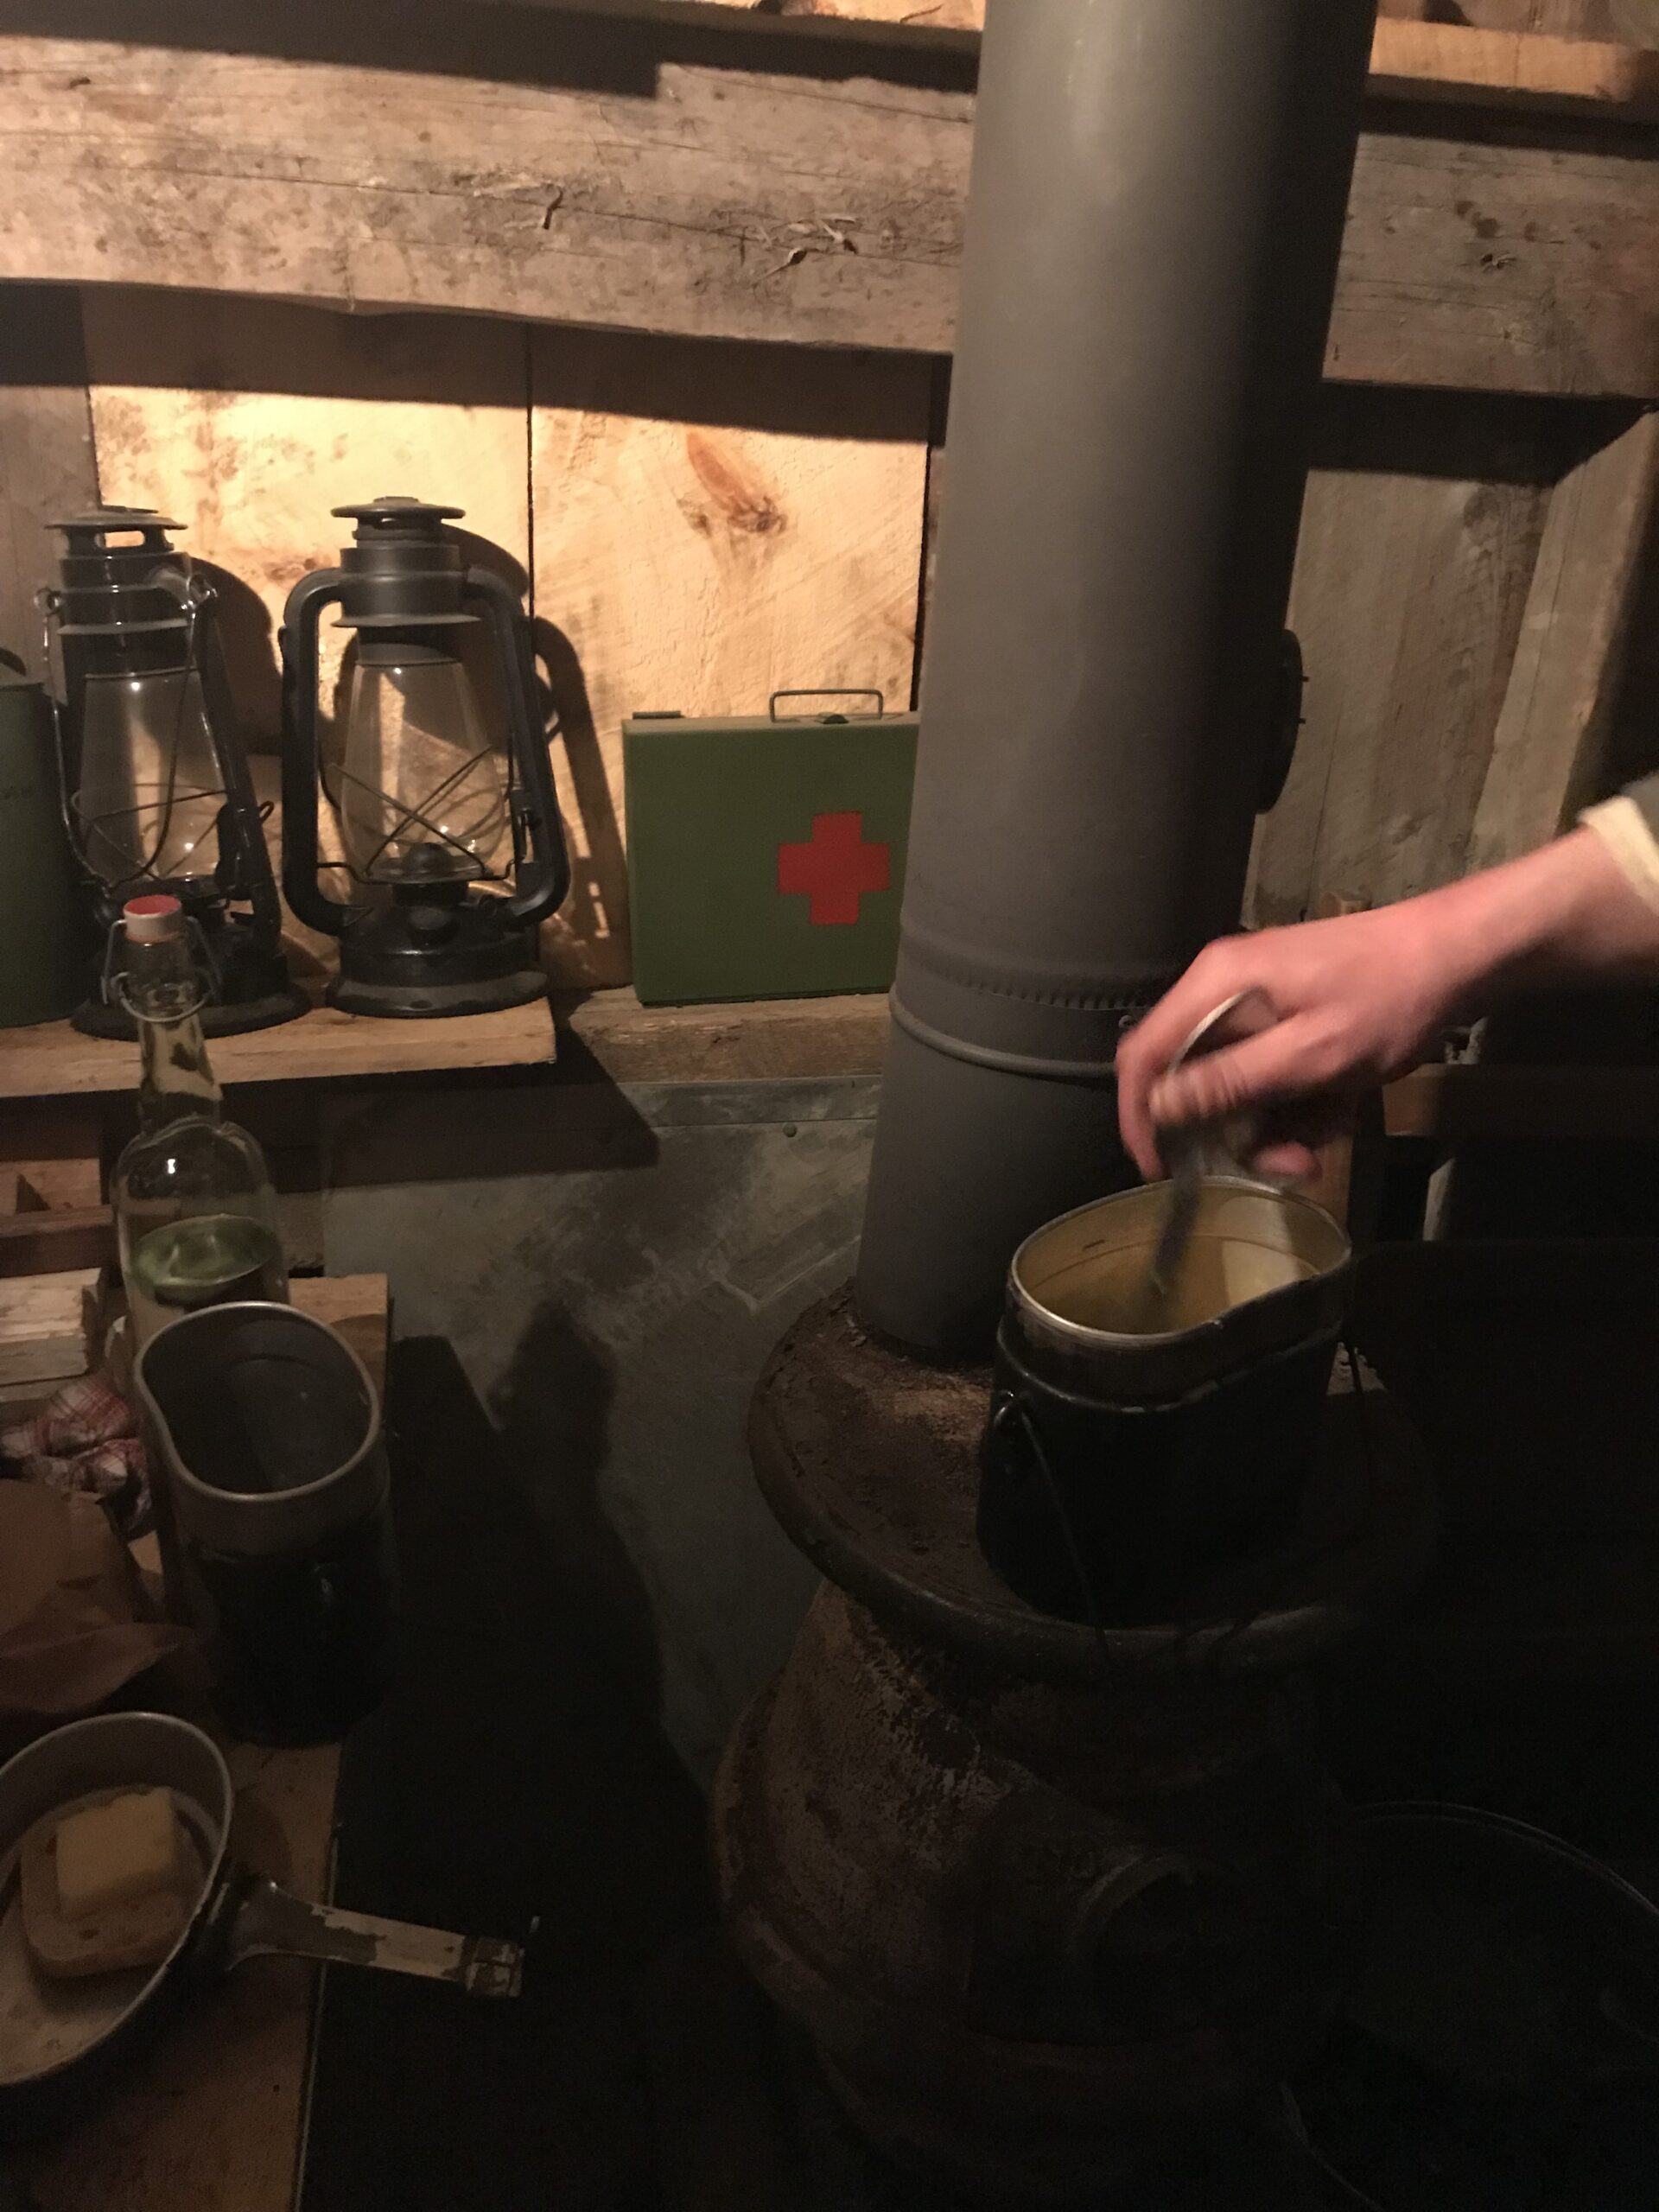
Inside, the bunker features six bunks, a wood stove for heat, and some shelving with a small storage nook for firewood. The bunker is kept stocked with necessary supplies including lamps and lamp fuel for light, cooking equipment and tools.
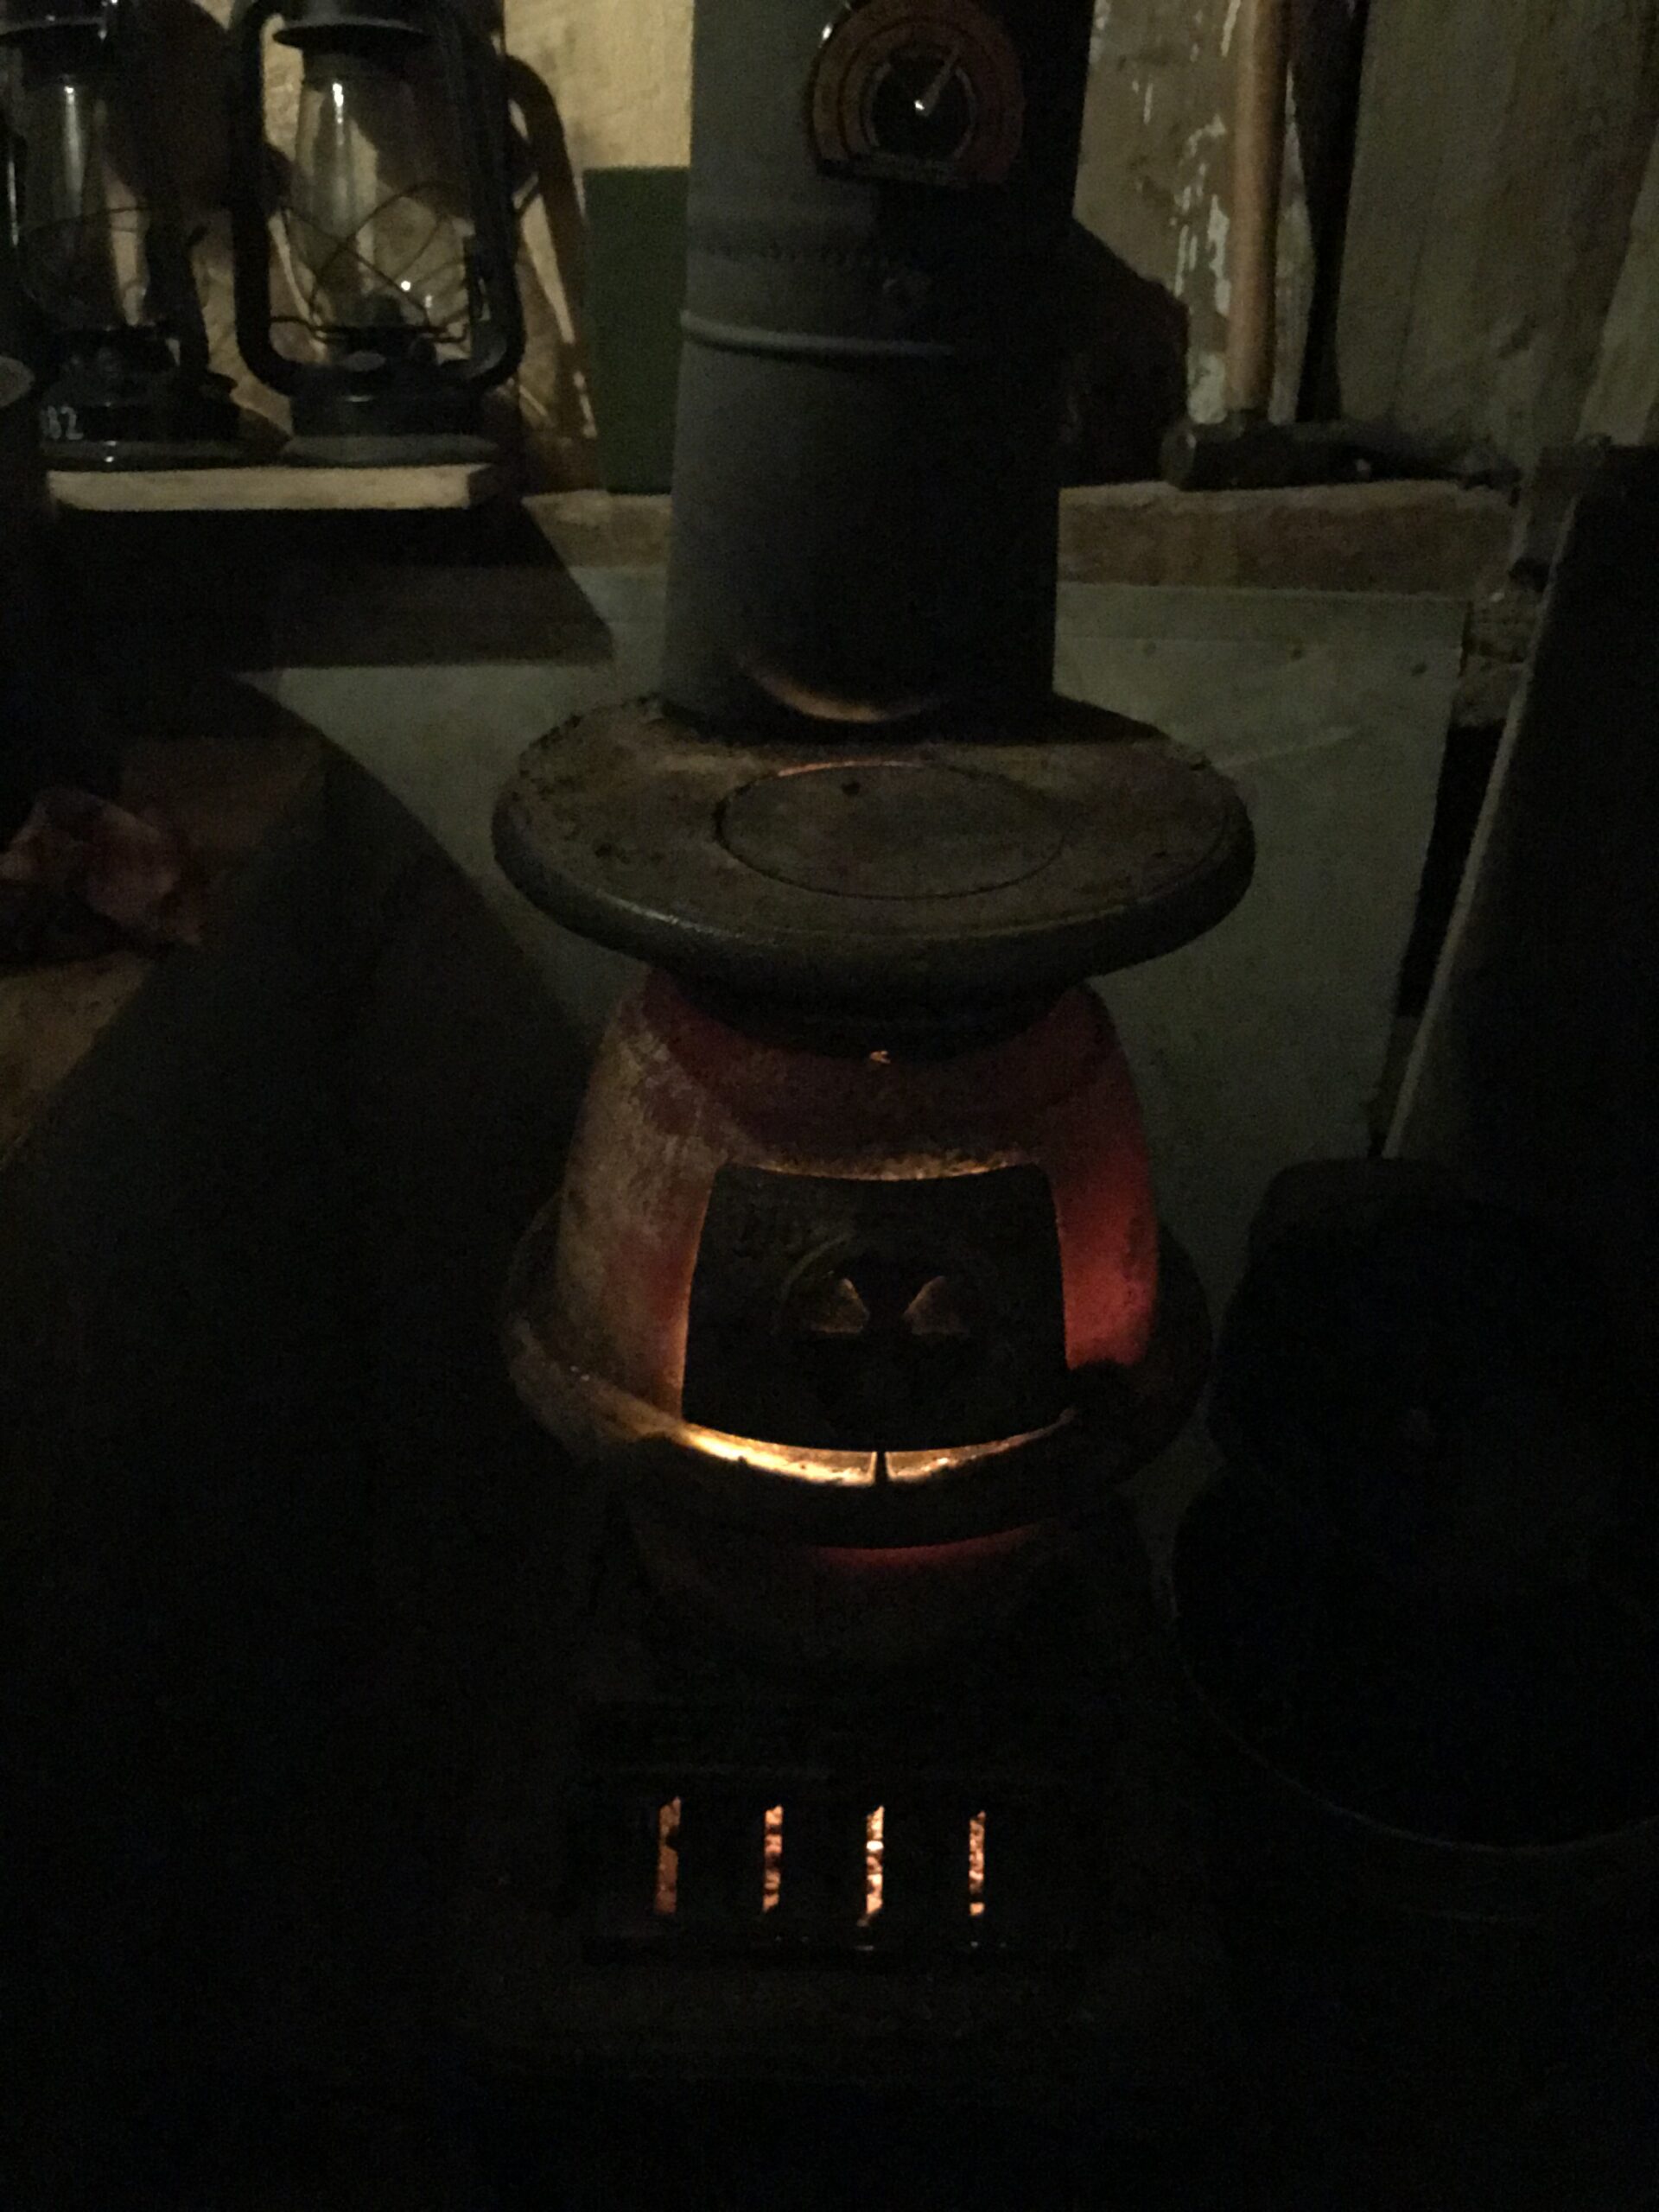
The old wood stove provides heat and can also be used for cooking.
At one winter immersion event, the outside temperature at 4 AM was 13 degrees F (-10 degrees C), the inside temperature was 96 degrees F (35 degrees C)!
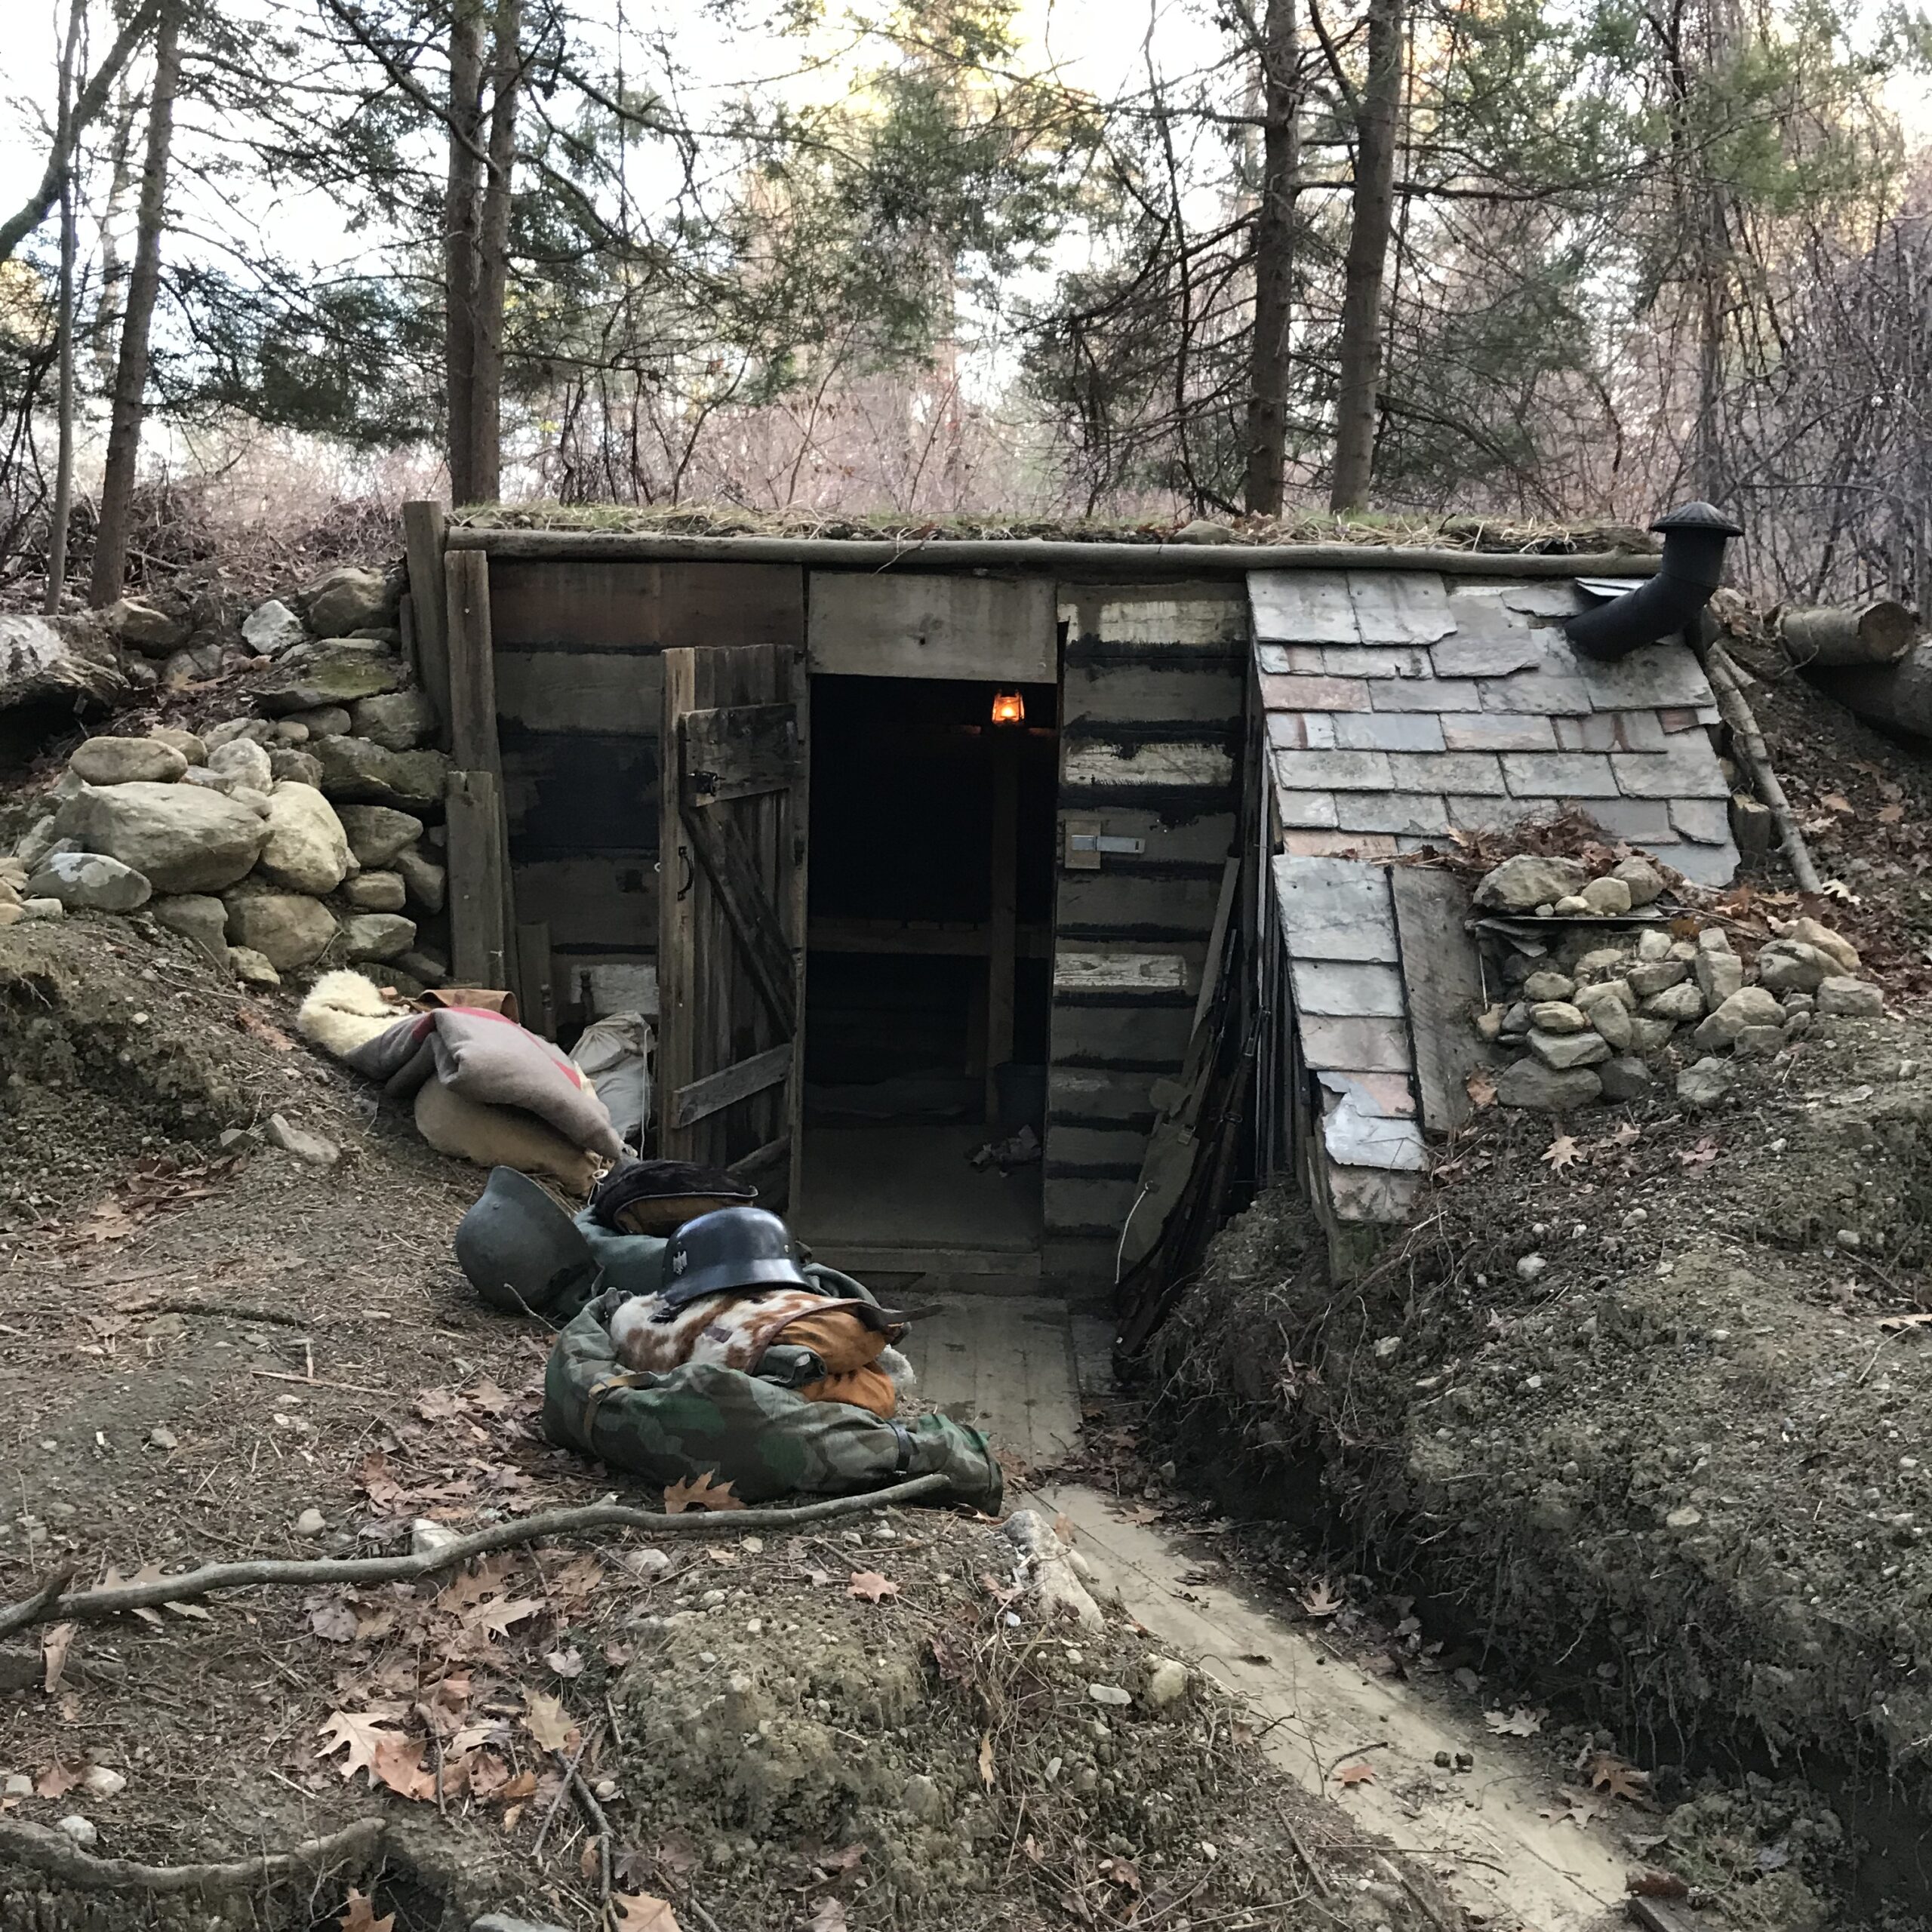
In 2020 the bunker entrance was improved, with wood floor and walls added to the trench.
If you would like to know more about this place or our private reenactment events in Massachusetts, please e-mail us.
What kind of razors were German soldiers issued in WWII? It’s a trick question. Soldiers had to supply their own razors. They could bring them or have them sent from home, or they could buy razors- but the razors made available to them to buy were the same commercial products available to civilians. Many dealers will offer “Wehrmacht issue” razors, this is an inaccurate sales pitch as there simply never was any such thing. Purportedly original razor packaging that says “Wehrmacht Rasierapparat” or “Einheitsrasierapparate für Heereslazarette” is, simply, fake. Shaving soap was issued; razors were not. Soldiers in Germany and in occupied countries, civilians, even concentration camp inmates all used the same razors.
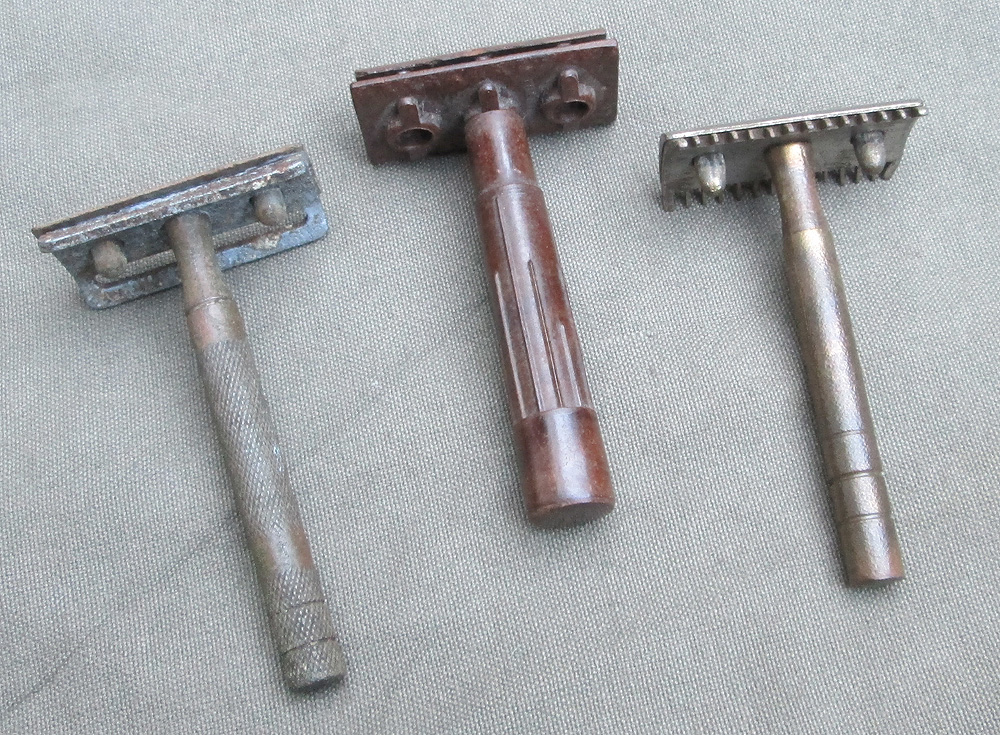
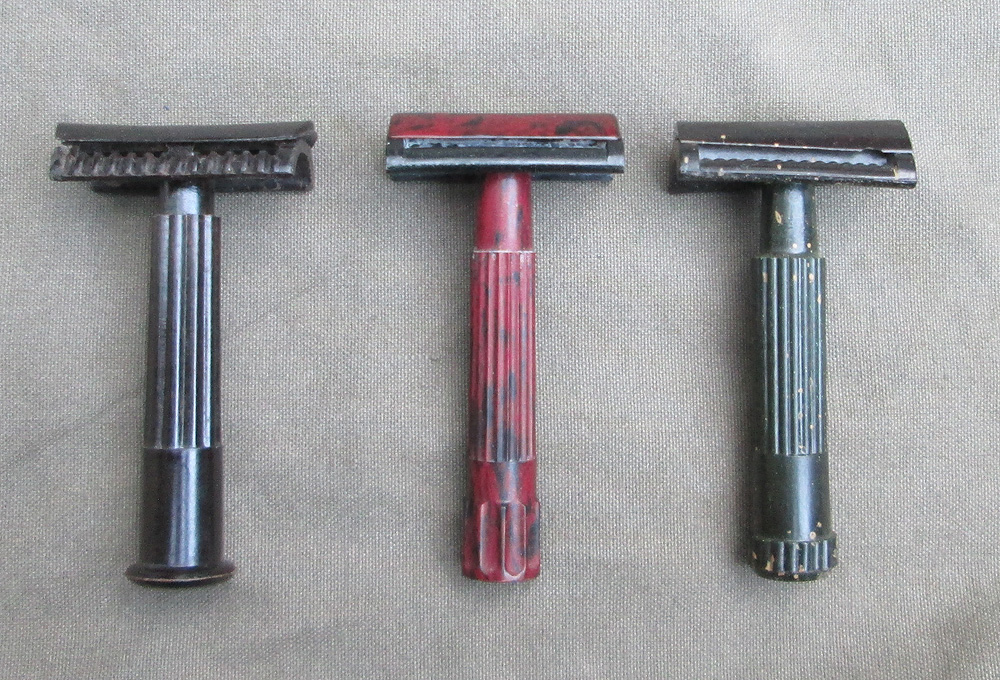
Here are three razors that were actually used by German soldiers during WWII. All three were excavated from remains of former German positions. Two are brass that once had a silver-colored plating, now mostly gone after decades underground. The Bakelite razor is marked “Made in France.” None are marked with a brand name.
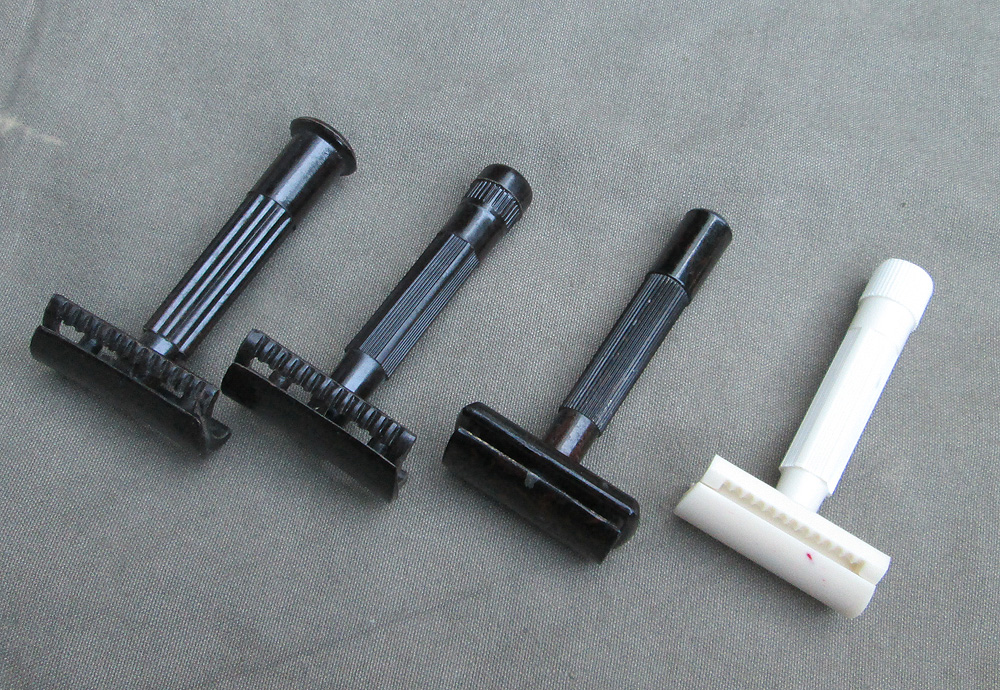
Here are some other period type Bakelite razors. One is also made in France, as was the excavated example; the others are German. None of the German ones are marked.
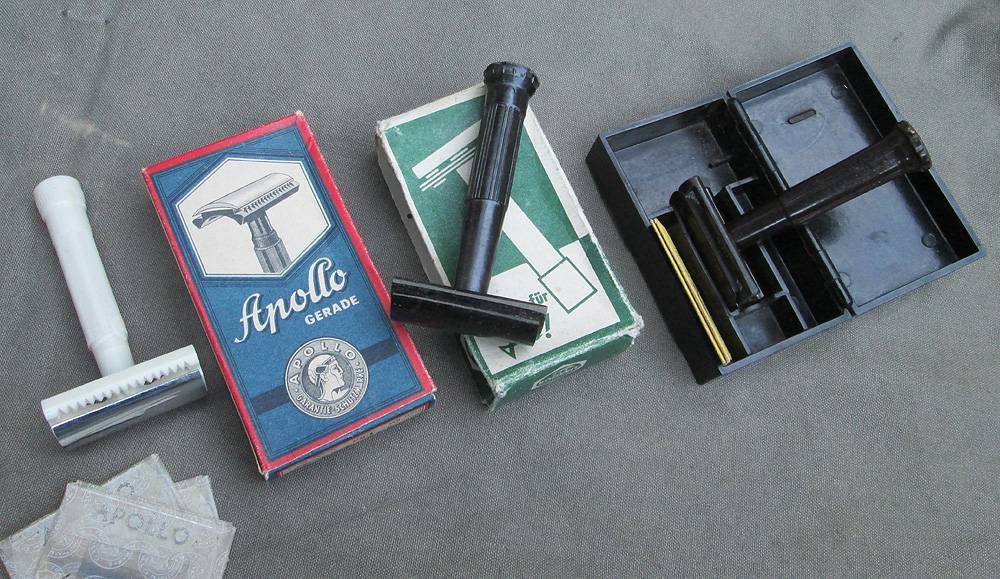
Razors like these were available complete with Bakelite cases, but most were sold in simple cardboard boxes which would presumably be discarded.
The “Apollo” brand razor shown above is still marked with the original price- 1.50 Reichsmarks. That’s about ten US dollars today.
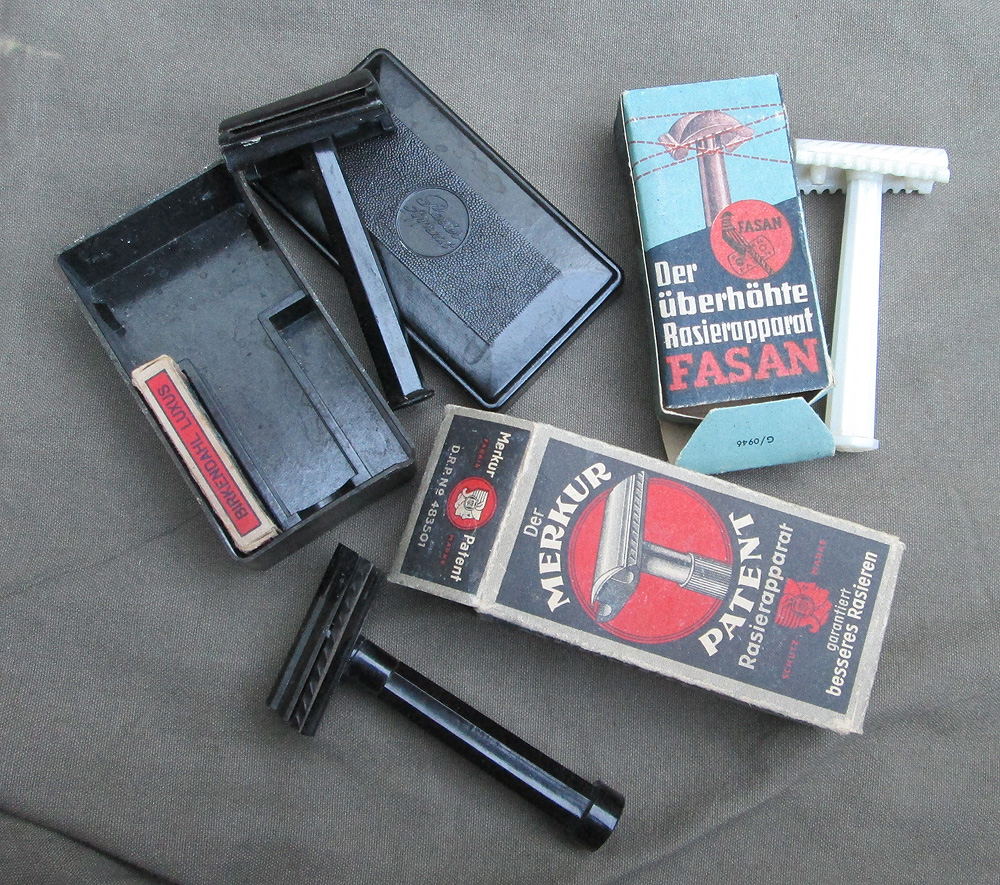
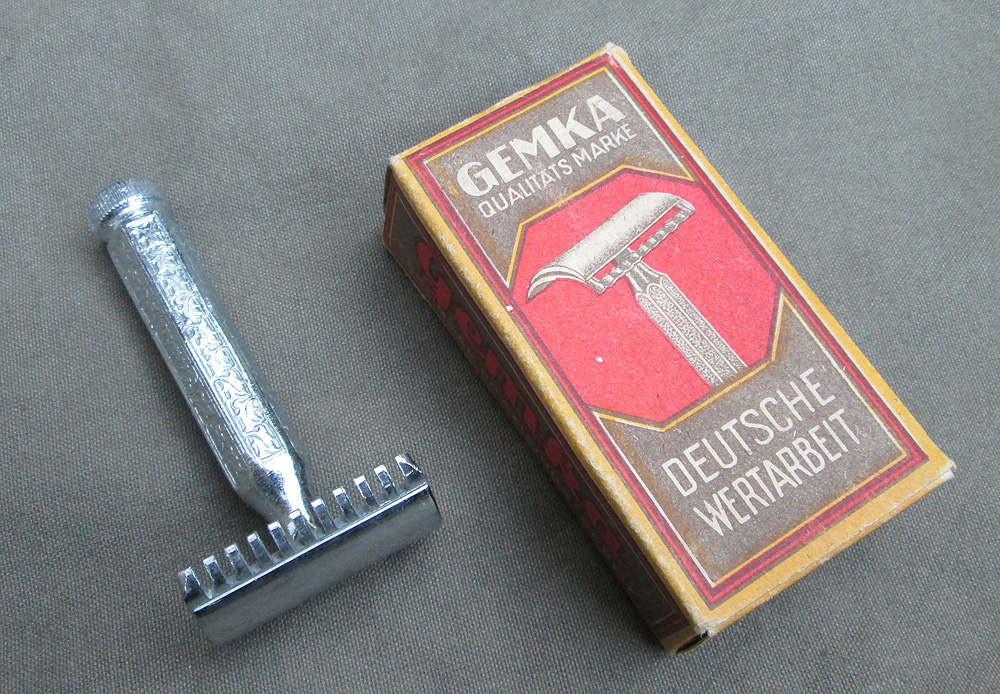
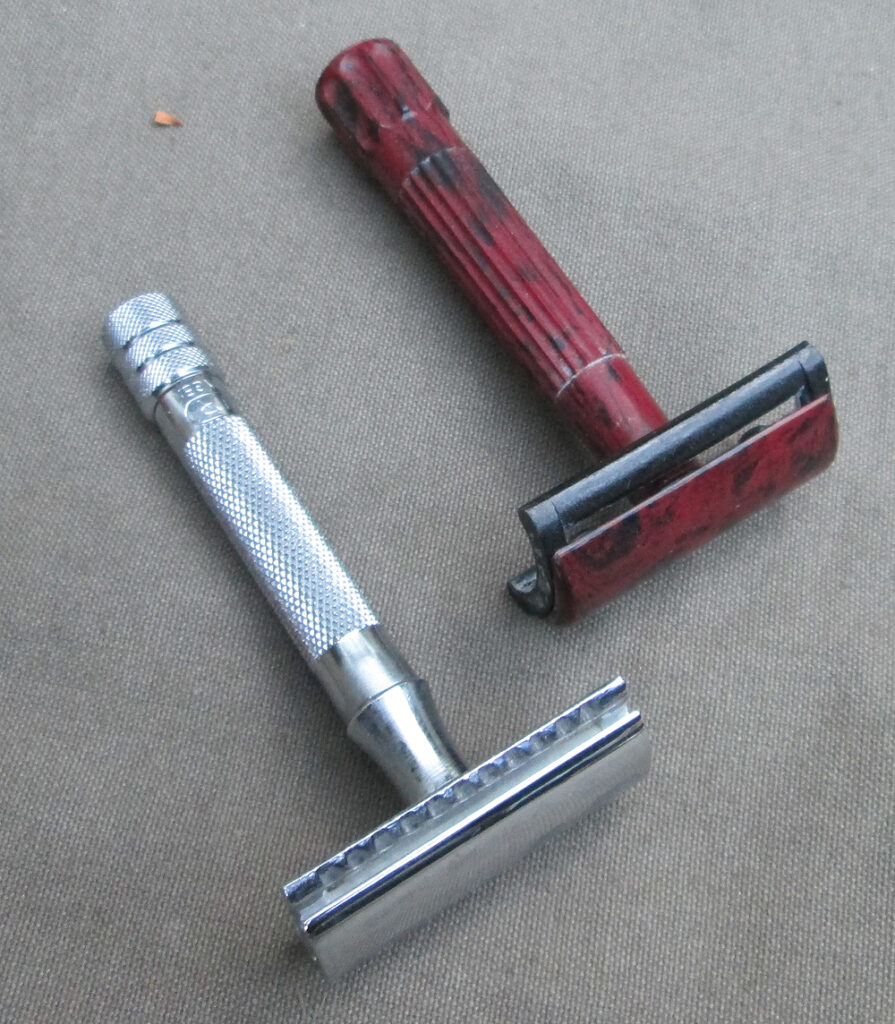
An interesting type of wartime-era German Bakelite razor is the “slant.” The top part of the razor was not exactly perpendicular to the handle, but was set as an angle. This was advertised as a feature that supposedly yielded better results than the usual type. The degree of slant varied, as you can see. The example at left was made by Merkur.
Just as with standard Bakelite razors, these were sold with matching Bakelite cases, or in cardboard boxes.
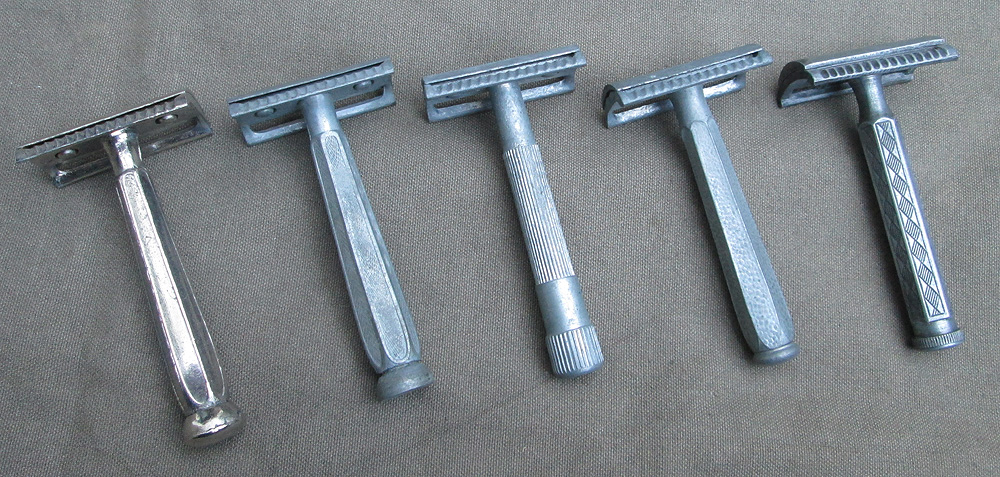
I have seen it stated elsewhere that all WWII German produced razors were Bakelite as metal was reserved exclusively for strategic purposes. That’s not true. Here is a selection of wartime type metal razors. Most are made from a zinc alloy sometimes referred to as “Kriegsmetall”- war metal.
Below: a plated zinc razor in its original box.
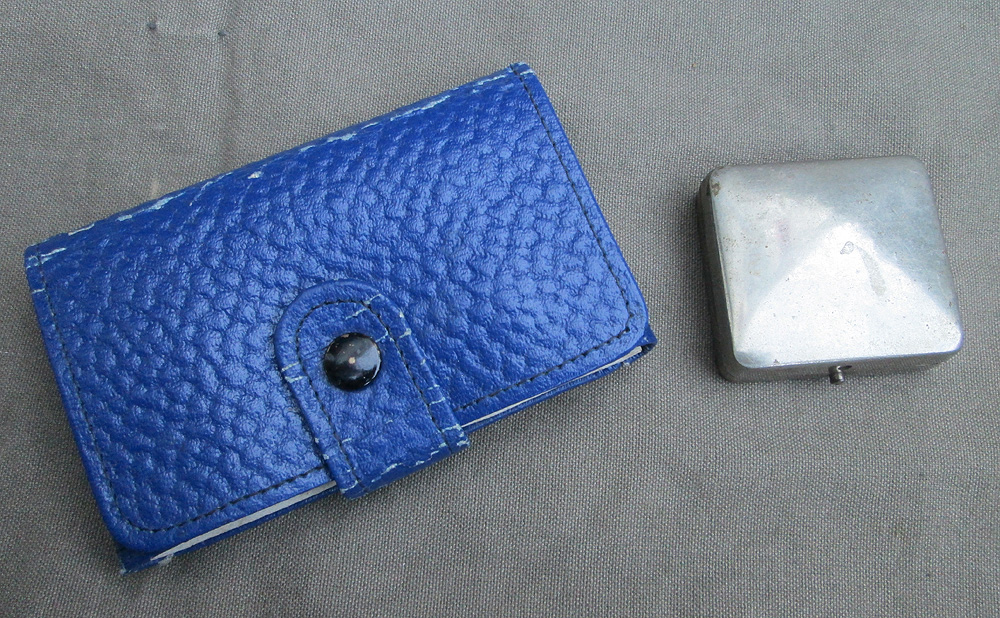
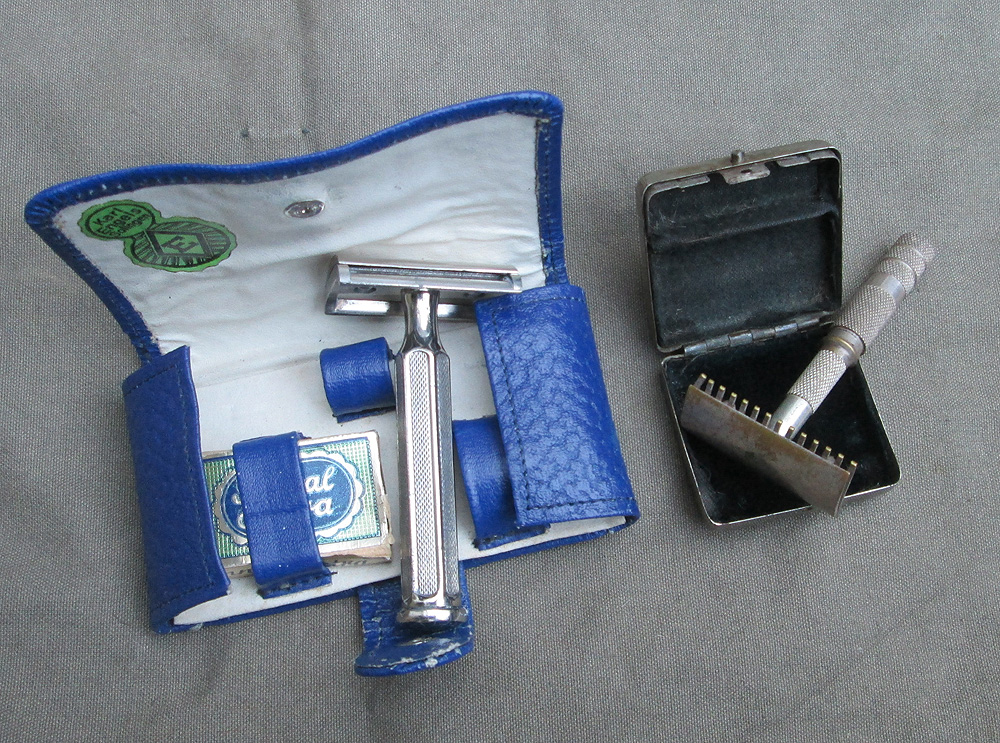
Razors were also available in various types of travel kits. Shown here, a leatherette case, circa 1930s, and a collapsible razor in a tiny metal box, exact vintage unknown.
Inside:
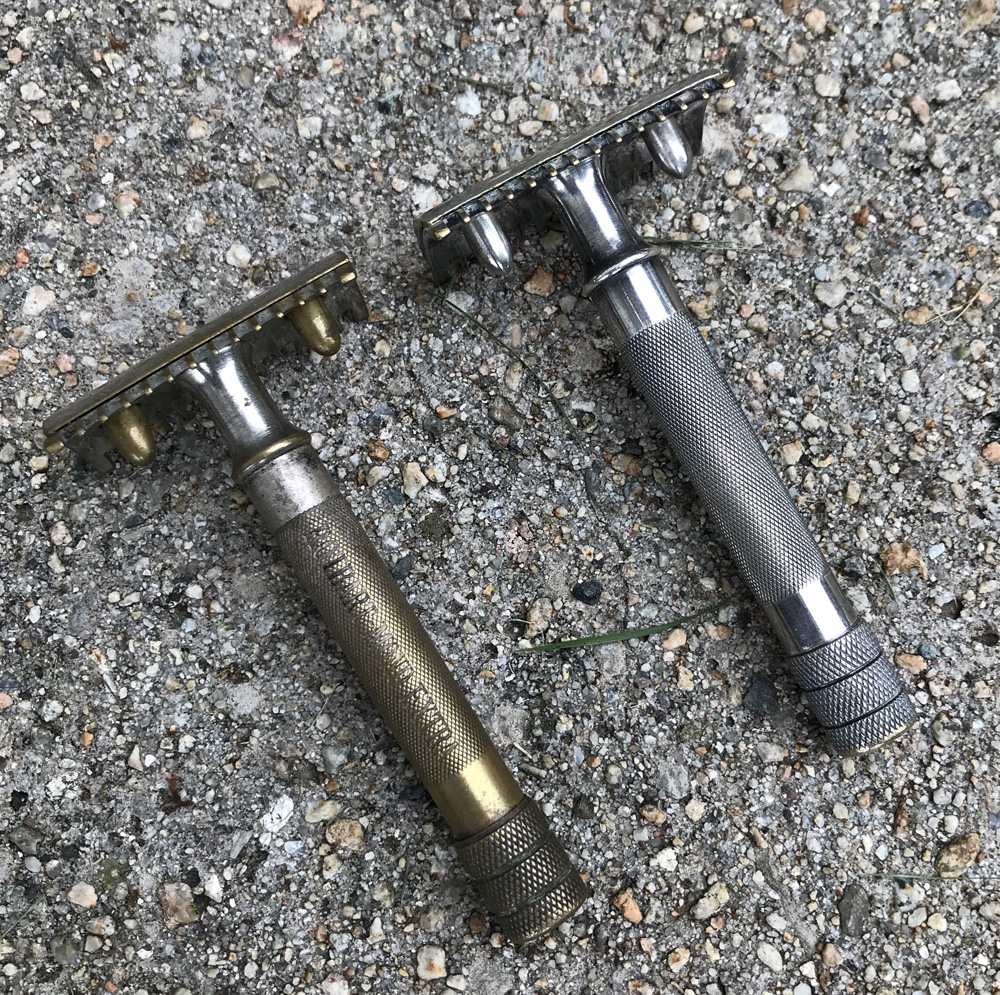
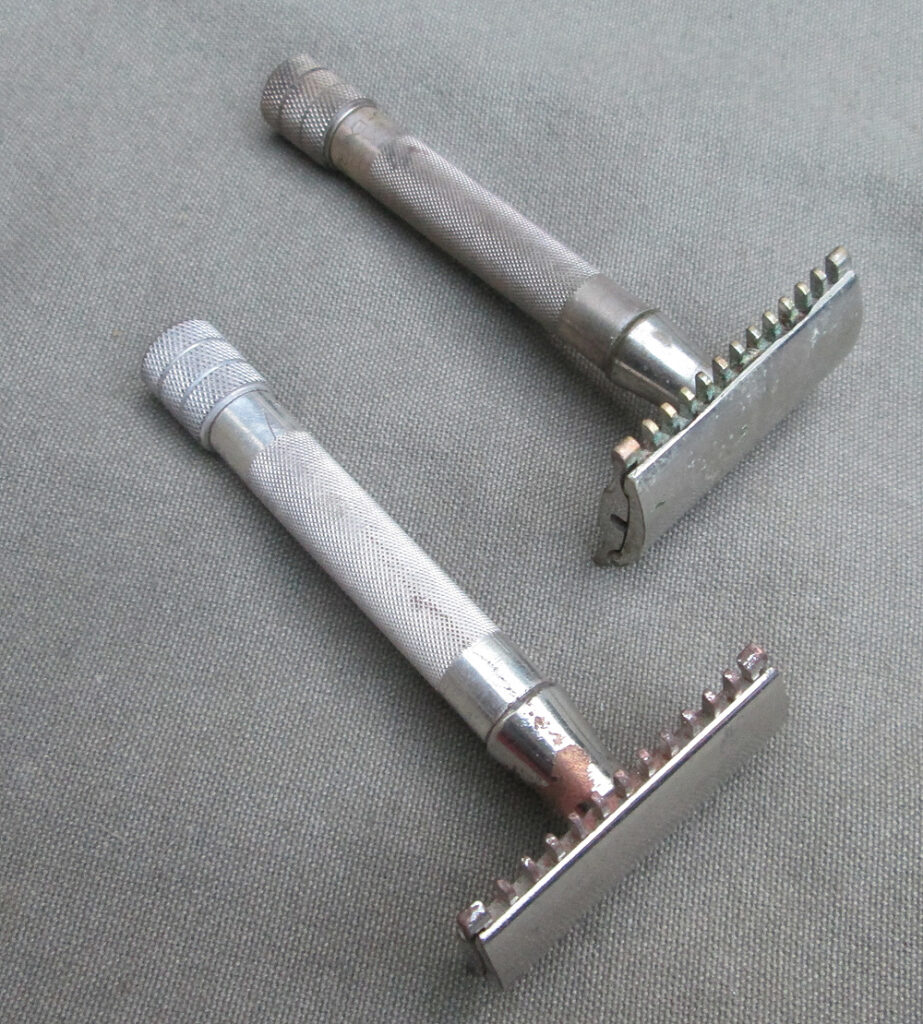
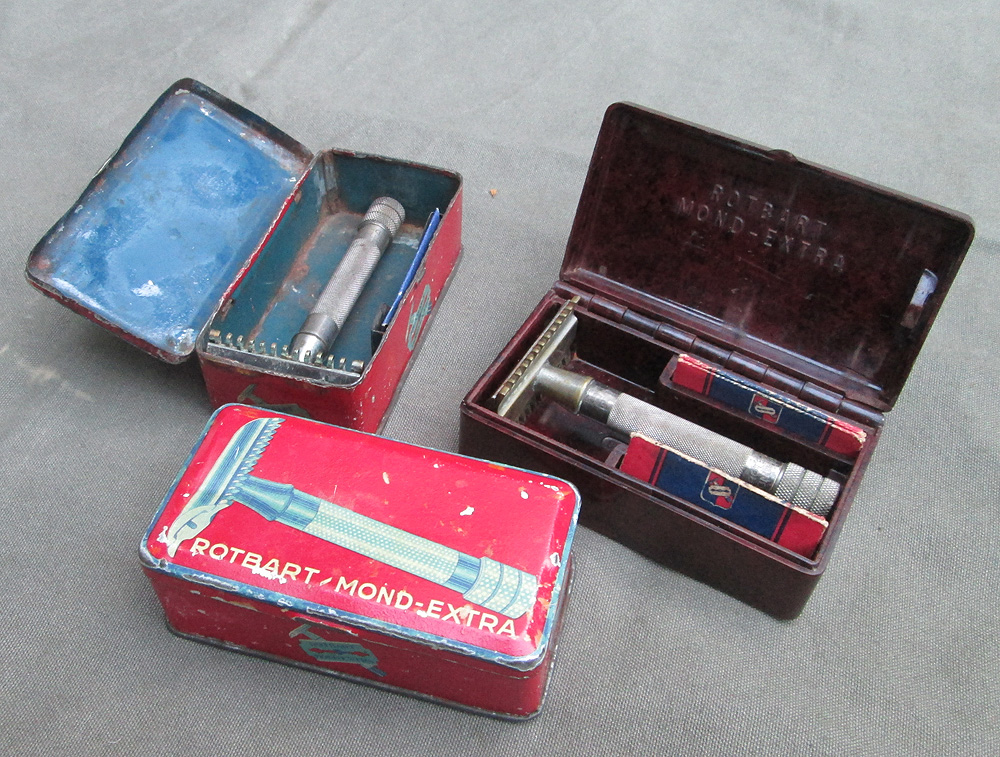
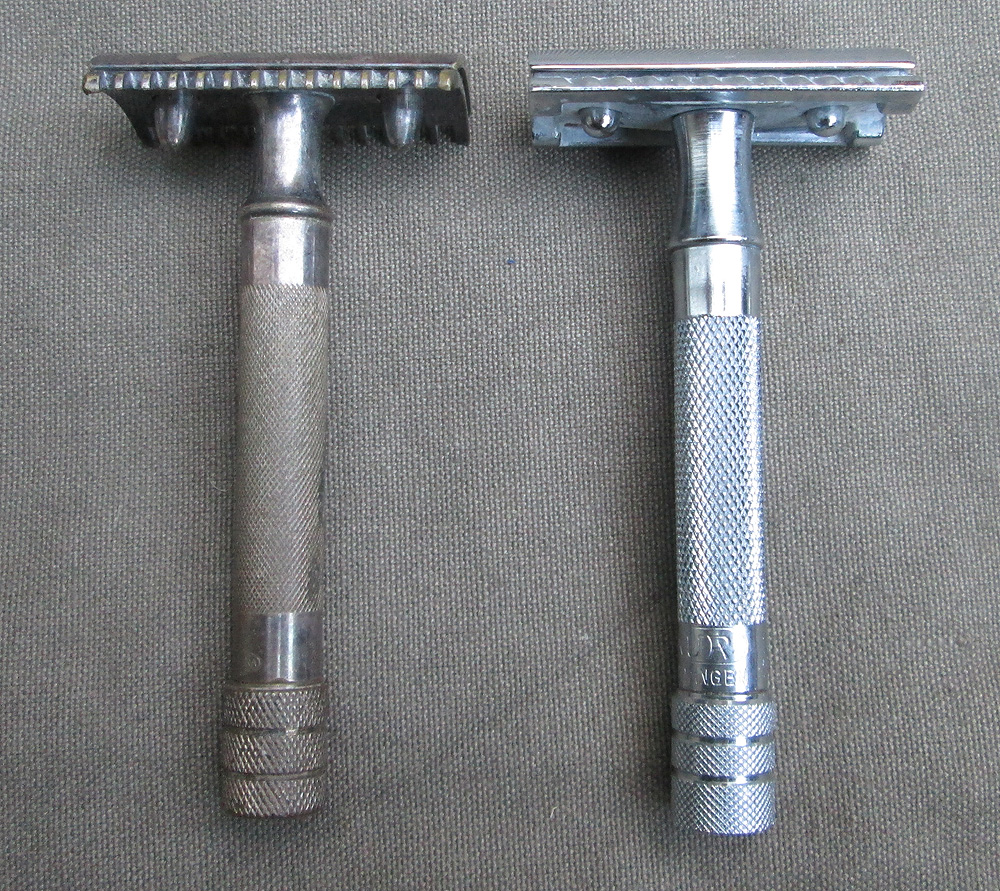
One particular type of razor that seems to have been widely used by soldiers and civilians alike during and before WWII was the Mond-Extra, made by Rotbart. Rotbart was a German company that was bought by Gillette in 1926. Gillette had invented the classic type double-edge safety razor in 1903 and from that time through the 1920s, many were exported to Germany; Wehrmacht soldiers used these Gillette razors, too. After Gillette bought Rotbart, they made the Mond-Extra as a copy of the classic Gillette single-ring safety razor that had been introduced in 1907, with some slight changes over time. Here is an early Mond-Extra on the left, a 1907 USA-made Gillette razor on the right. The Gillette version was made until 1921.
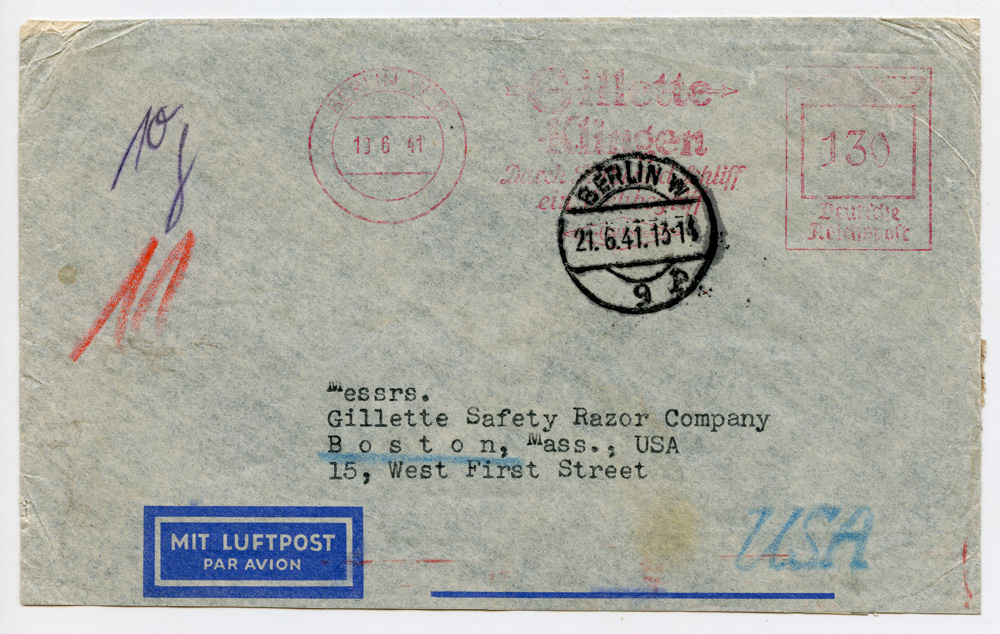
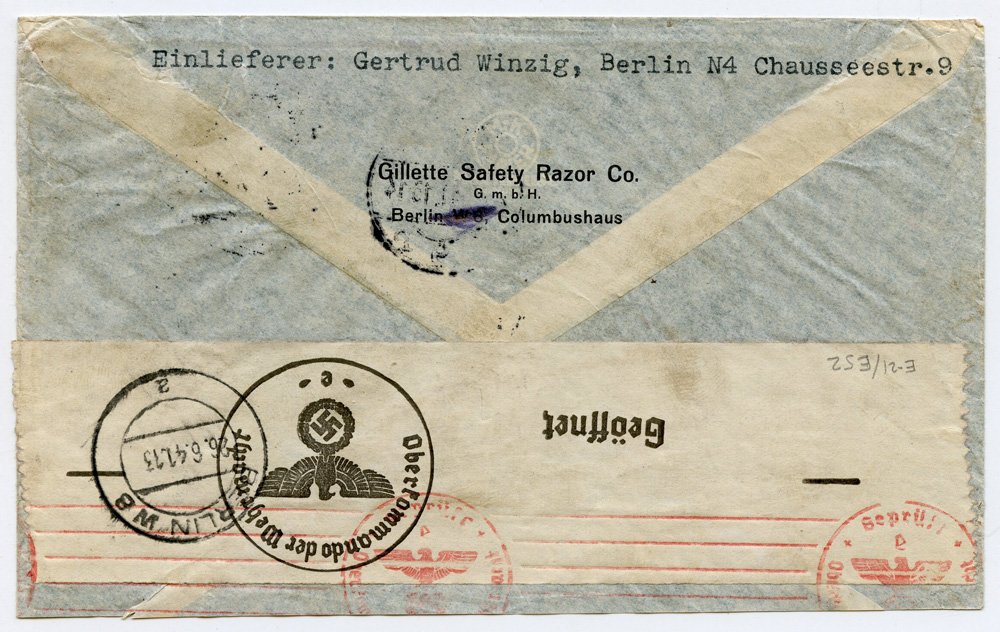
In addition to owning Rotbart, Gillette had its own presence in Third Reich Germany. This envelope was sent from the German Gillette company to Gillette world headquarters in the USA, in 1941. The German postmark advertises Gillette blades; these were no doubt marketed to the German domestic market.
Here are two pre-1945 versions of the Mond-Extra that were made a bit later than the type shown above. They are made of plated brass.
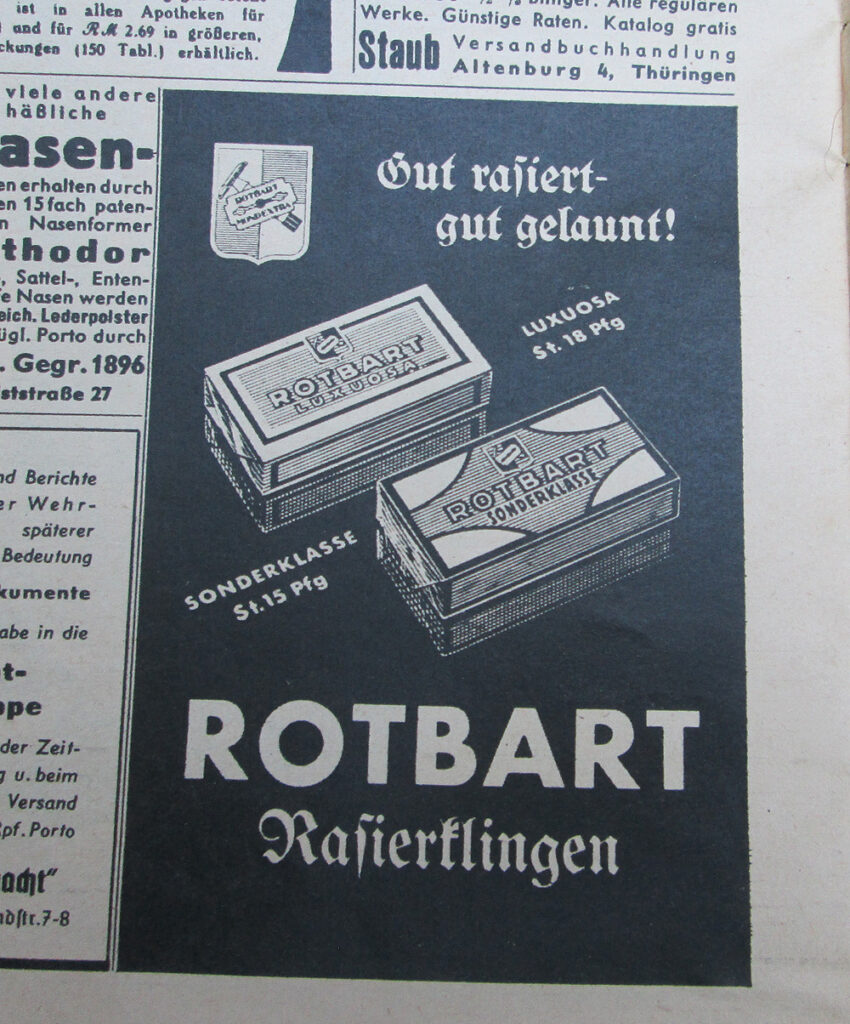
Rotbart advertised heavily in publications intended for soldiers. Here is an ad for razor blades in a 1940 issue of the German armed forces magazine “Die Wehrmacht.”
The Rotbart Mond-Extra razor was available in a cardboard box, an enameled tin box, or a Bakelite case.
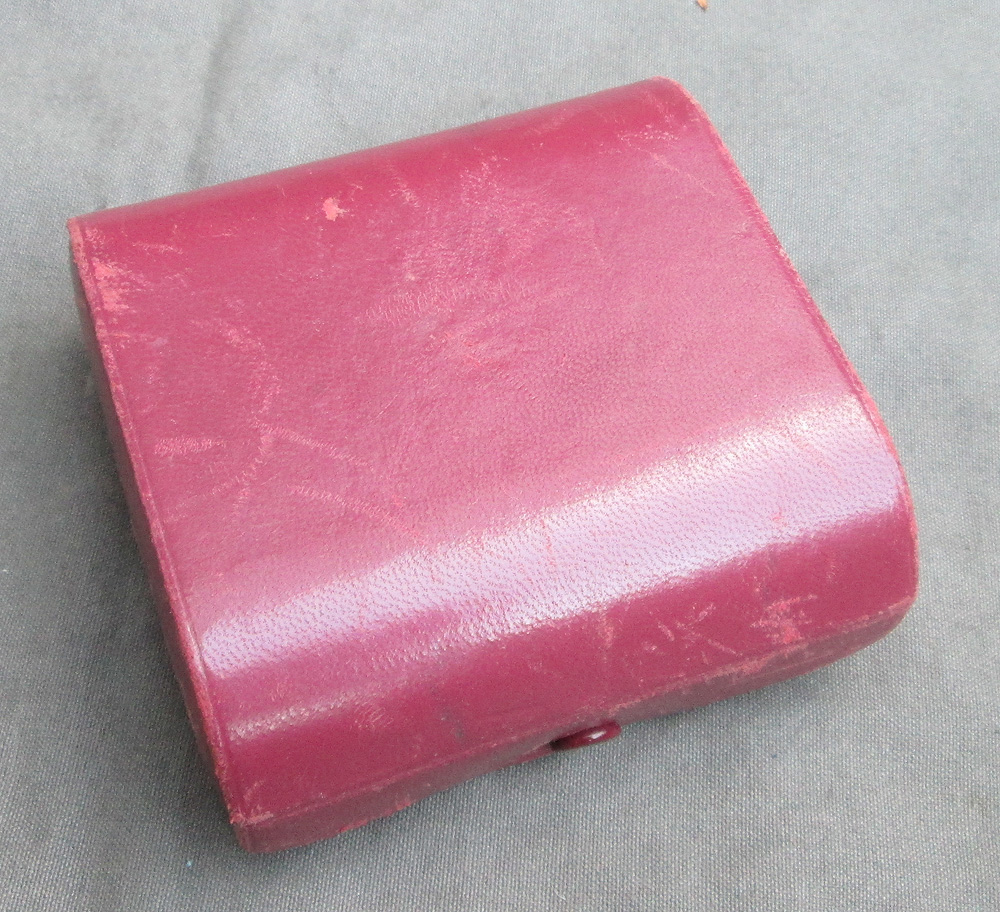
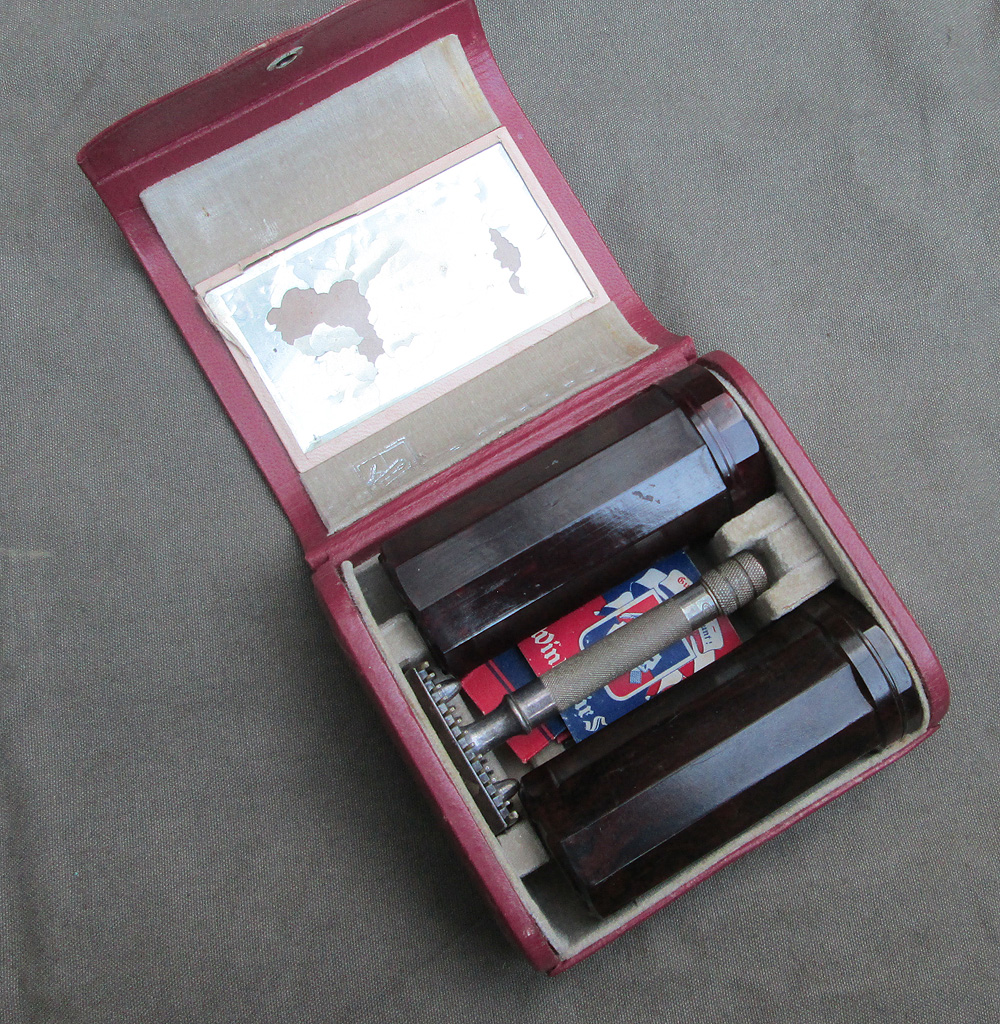
Rotbart also made various types of travel kits for razors including the Mond-Extra.
The leather case opens to reveal a razor, Bakelite tubes for a shaving brush and shaving soap, and a booklet about how to shave. There is even a mirror inside the lid. This kit is vintage 1930s.
A German soldier could have used any of these types of razors depending on personal preference or availability. Double edged safety razors in the same style are still made in Germany today by Merkur, one of the companies that was making razors before and during the war. Here are two modern Merkur products: the Merkur 45, made of Bakelite, and the Merkur 33c, made of plated brass. The Merkur 33c is still available. As of this writing (2021), the Bakelite version seems to have been recently discontinued.
The similarity between the modern Merkur 33c and the Rotbart Mond-Extra (and the 1907 pattern Gillette razor, that it was a copy of) is remarkable and certainly not a coincidence. This is a classic, useful design.
The Merkur 45 Bakelite razor also fits in nicely with its WWII-period counterparts.
The modern Merkur 33c still in production and widely available as of this writing. They retail for around $35 and are great razors for shaving.
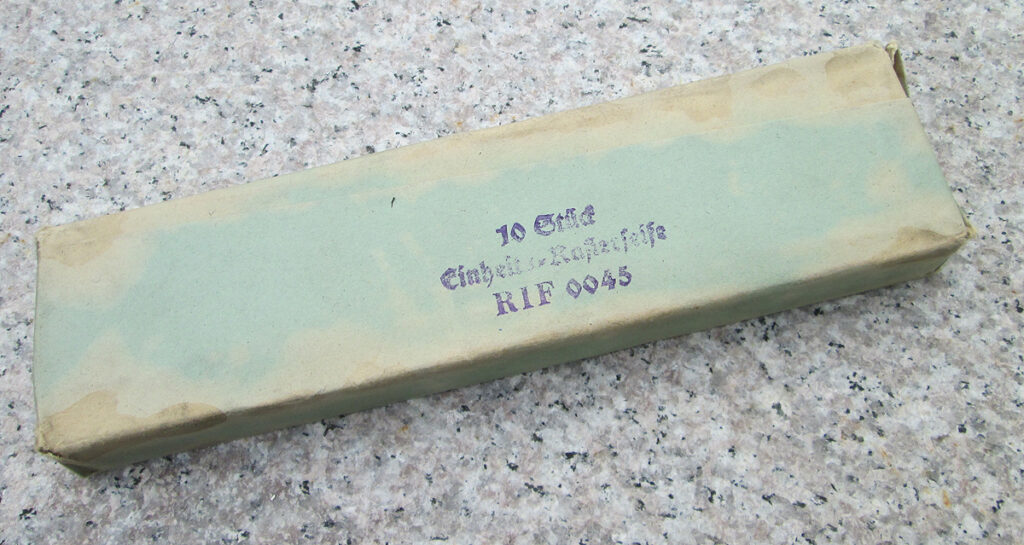
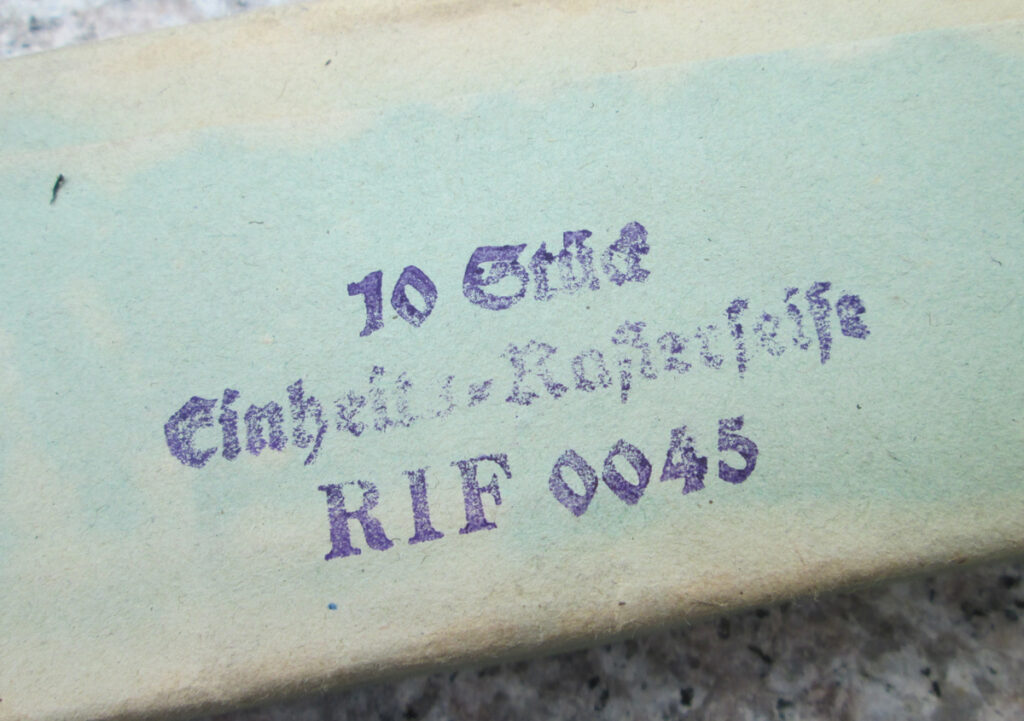
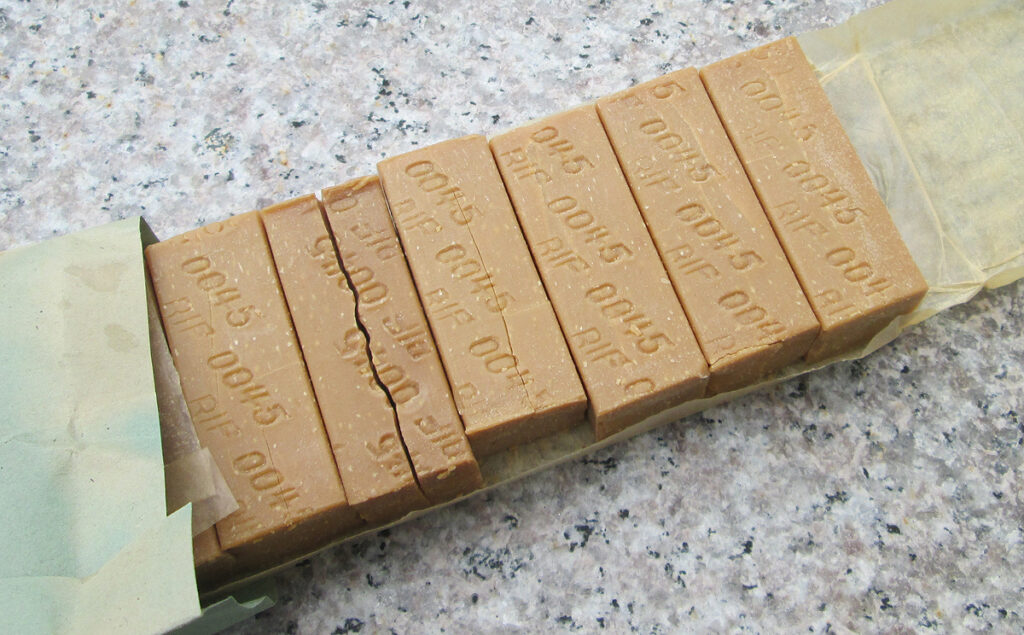
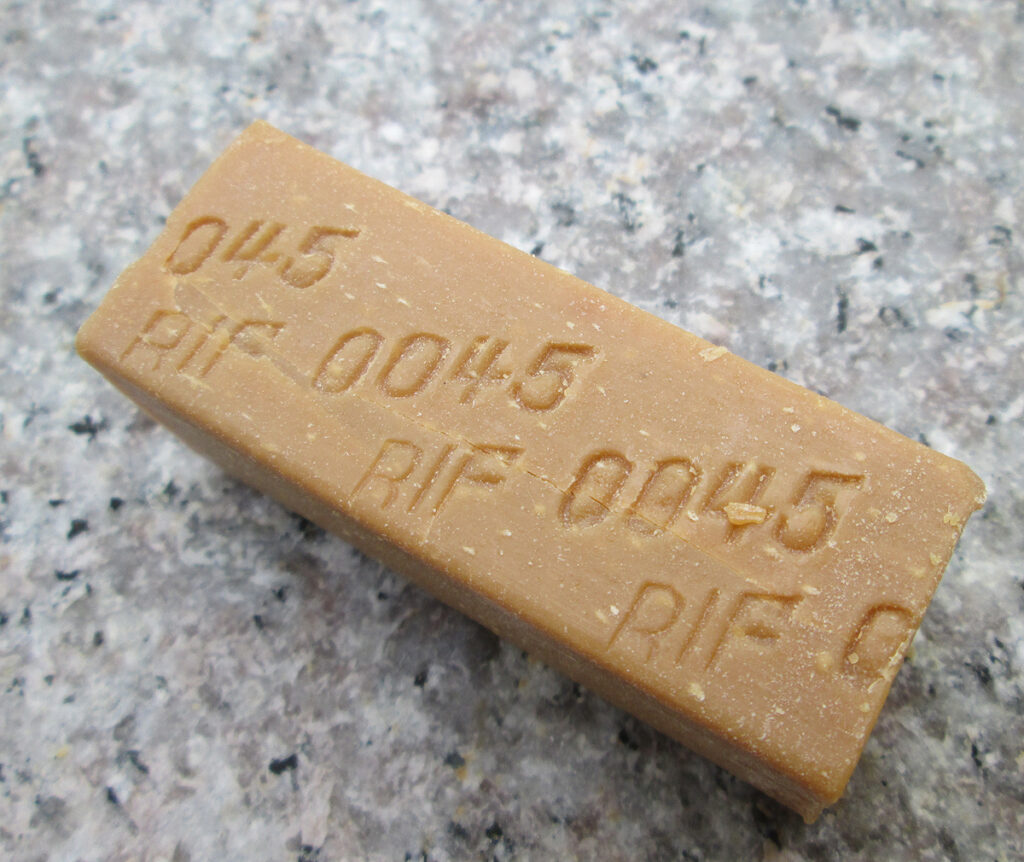
Of course, a decent shave requires more than a razor alone. German soldiers were issued soap to shave with. The shaving soap sticks were rectangular and each bar was stamped with a code assigned by the “Reichsstelle für industrielle Fettversorgung.” Here is an original package of 10 bars of issue type shaving soap.
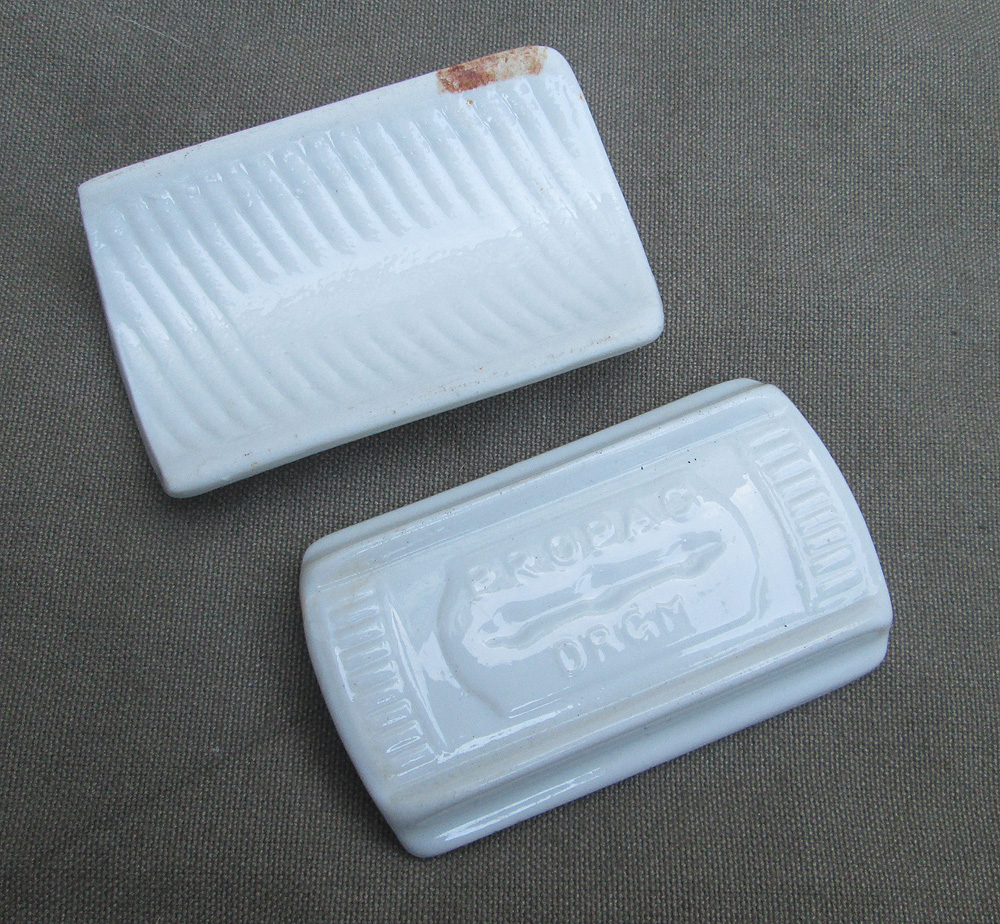
These ceramic hones were used to sharpen razor blades to prolong their life. These were excavated from former German positions on what was once the Eastern Front. These would have been private purchase rather than issue items.
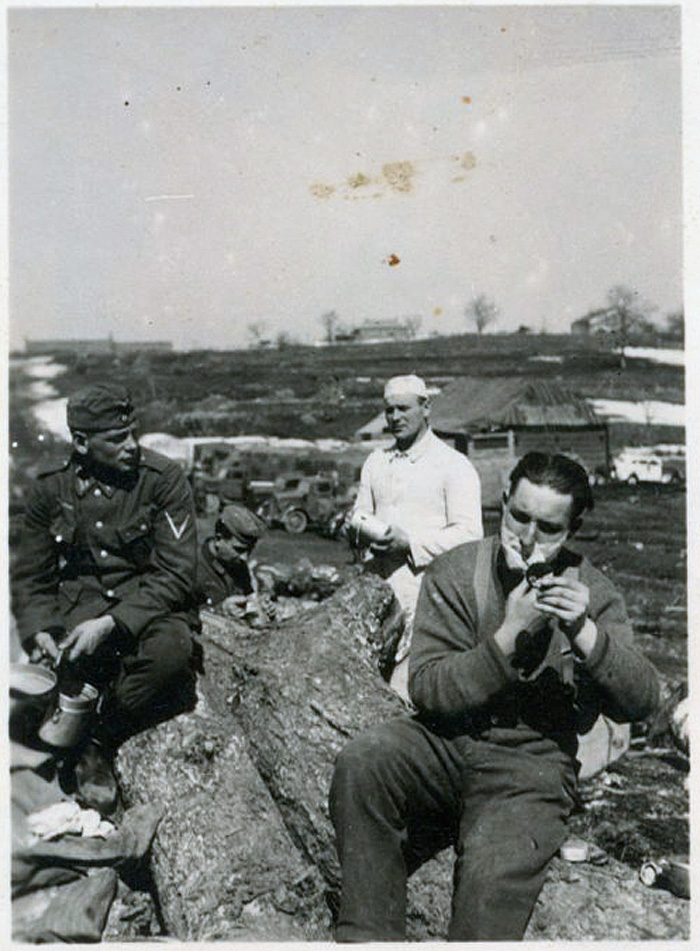
Soldiers in the field also had to fend for themselves when it came to shaving mirrors. Here, a soldier shaves with a small, round pocket mirror.
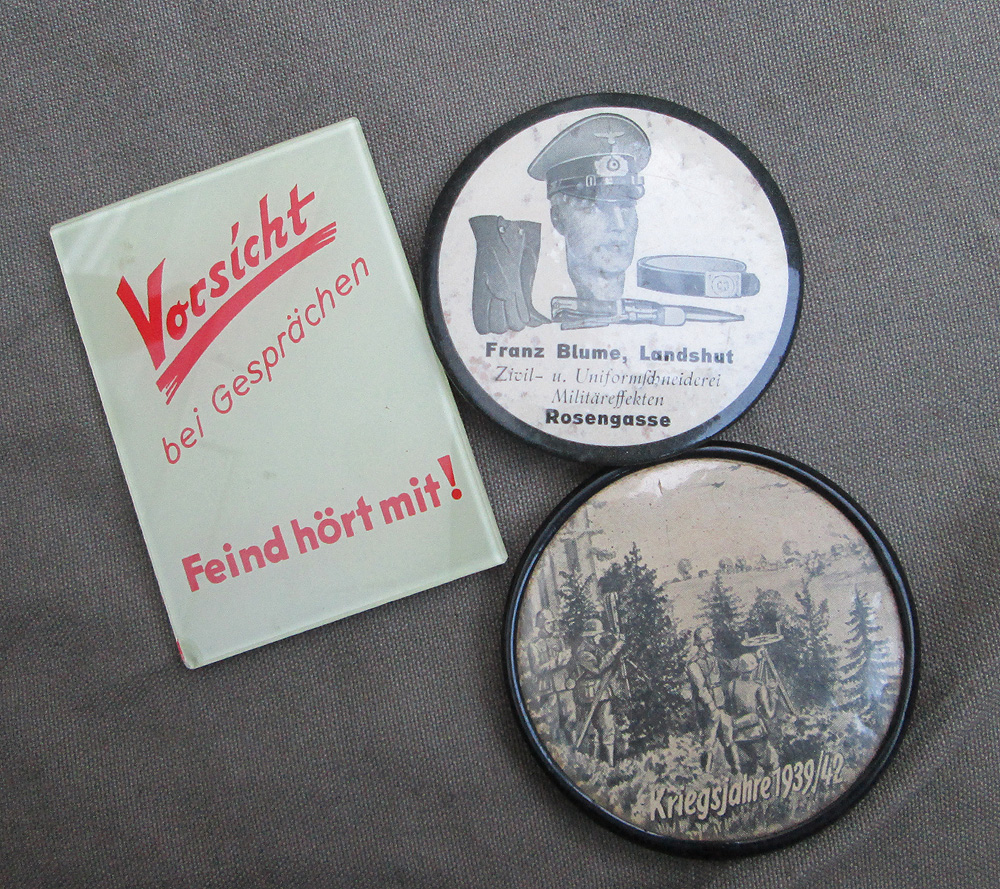
Here is a selection of wartime era pocket mirrors with military themes.
With some creativity, it is not hard to put together a convincing representation of a WWII German soldier’s shaving kit using modern items, that can actually be used today. Shown below is a careful recreation of a kit that could have been used by a soldier in the field. The razor is a modern Merkur 33c, everything else is reproduction- the shaving mirror and leatherette case, the RIF-marked soap bar, the razor blade packaging. All fits inside a wooden box with a reproduction Camembert cheese label.
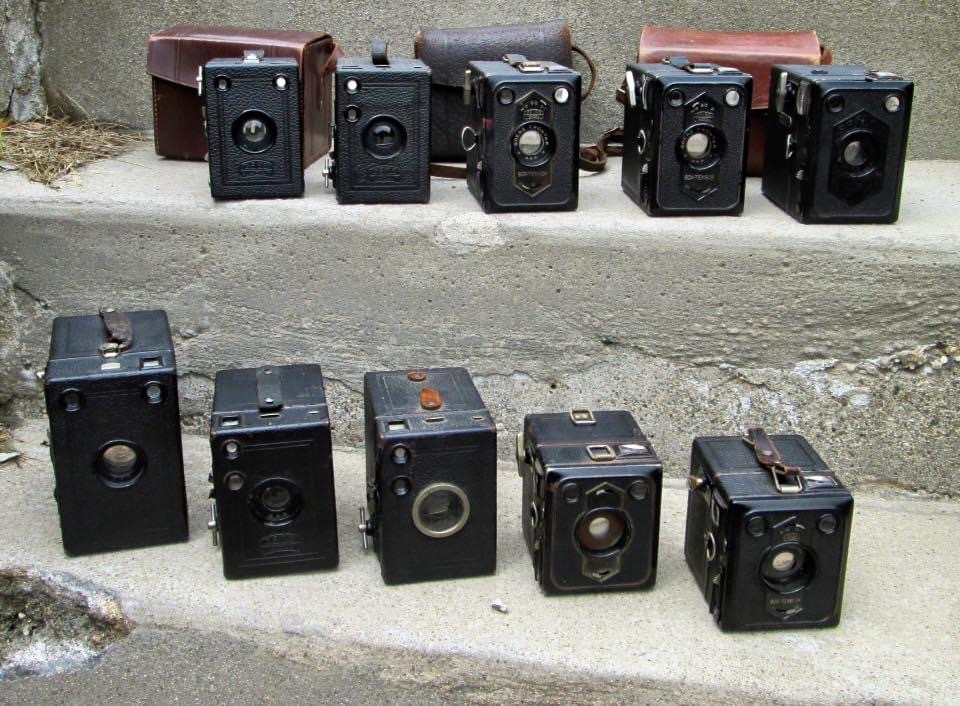
The purpose of this post is to share my process for taking reenactment photos using prewar box cameras and 120 film. It is my opinion that no digital reenactment photo can compare to the realism of a photo taken on film, especially a photo taken with an original camera.
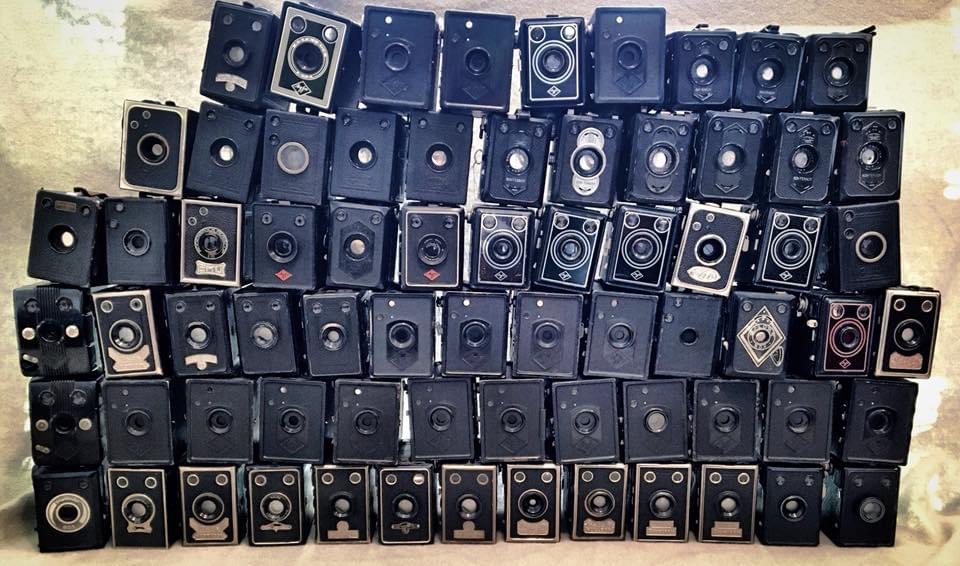
Pre-1945 German box cameras
I choose to use box cameras for a number of reasons. Box cameras were perhaps the most common cameras in prewar Germany, as they were the only cameras that could be had for less than a day’s pay for an average worker. Millions were made. Folding cameras that used 120 film were also common in that era, but these cameras can be more difficult to use today, as they are prone to light leaks in the fragile old bellows, and the lenses can be difficult to access for cleaning. Rangefinder cameras that used 35mm film, such as Leicas, were very expensive and mostly used by professional photographers. The simplicity and ease of use of box cameras is part of their appeal for me. Most box cameras from that era had simple, uncoated meniscus lenses. These simple lenses often resulted in soft focus at the edges of the frame, and this focus vignetting is an instantly recognizable feature of many wartime and prewar private snapshot type photos. Some box cameras did have better lenses and more features, allowing for somewhat more sophisticated photography as well. While better cameras are more appropriate for people portraying military photographers, and may be better at reproducing propaganda type photos, it’s my experience that box cameras cannot be beat when it comes to replicating the look of private snapshots from WWII. All of the reenactment photos used on this page were taken with box cameras.
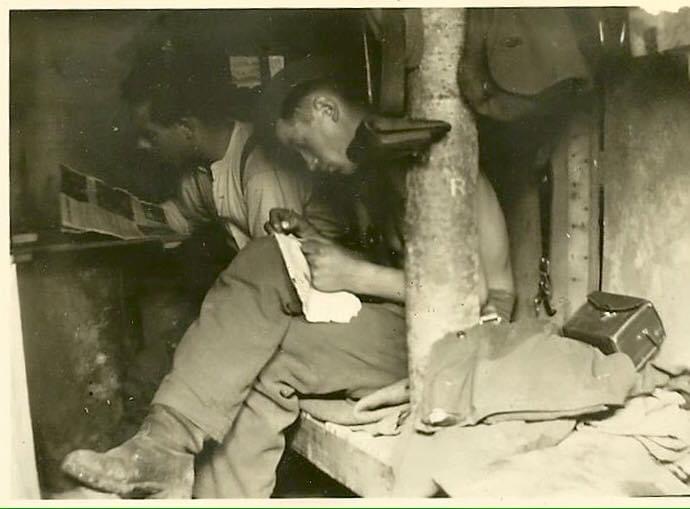
There are drawbacks to using box cameras. They are bulky, too big to carry in a uniform pocket. Soldiers in the field would likely have found it difficult to carry and store box cameras, and use of these cameras in a wartime combat setting can of course be ruled out. Despite this, there is documentation that some Wehrmacht soldiers did carry and use box cameras during the war. In his memoir “Condemned to Live,” Panzer artillery soldier Franz Fritsch recounts using a Kodak box camera to take the wartime snapshots used to illustrate the book. And this wartime bunker photo shows the leather case of a box camera, perhaps the very camera used to take this private snapshot.
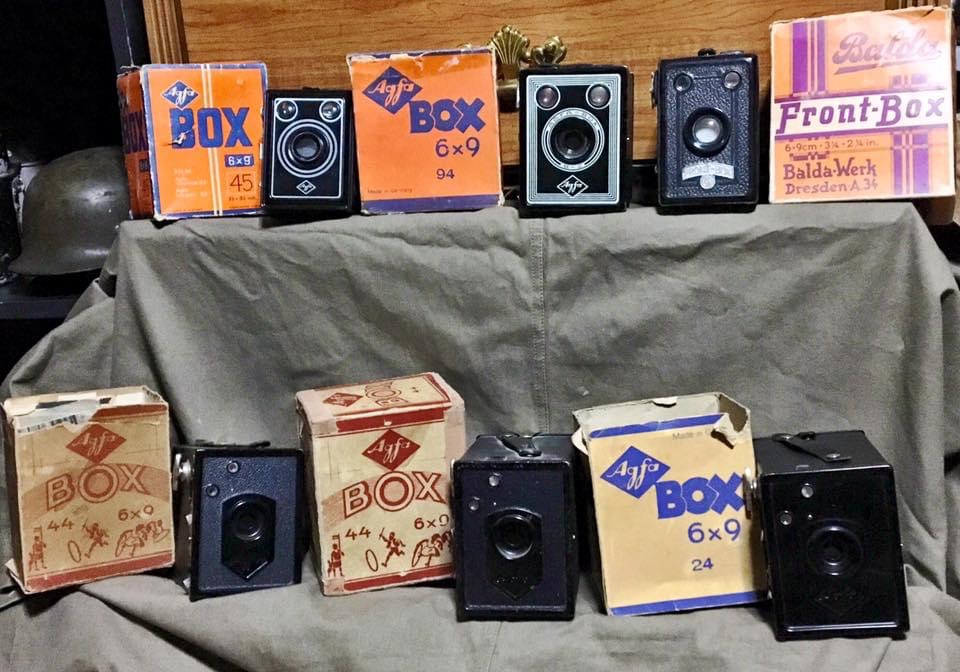
There were many manufacturers of box cameras in prewar Germany. Before WWI, most cameras sold in Germany were Kodak cameras, made in the USA. Kodak had its own dealer network in Germany before 1914. Kodak returned to the German market in 1924, eventually selling cameras including the Brownie No. 2 and Hawk-Eye No. 2 Model C box camera models, but now they were facing competition from some German manufacturers. By 1931, German firms including Agfa, Zeiss-Ikon, Balda, and a number of smaller companies were making cameras (including boxes) for the domestic market. In 1932, Agfa introduced the Box 44, a simple box that sold for the unheard-of low price of 4 Marks (by comparison, the cheapest Kodak box cost 10 Marks in 1926). The Agfa Box 44 was a huge success, that popularized amateur photography in Germany.
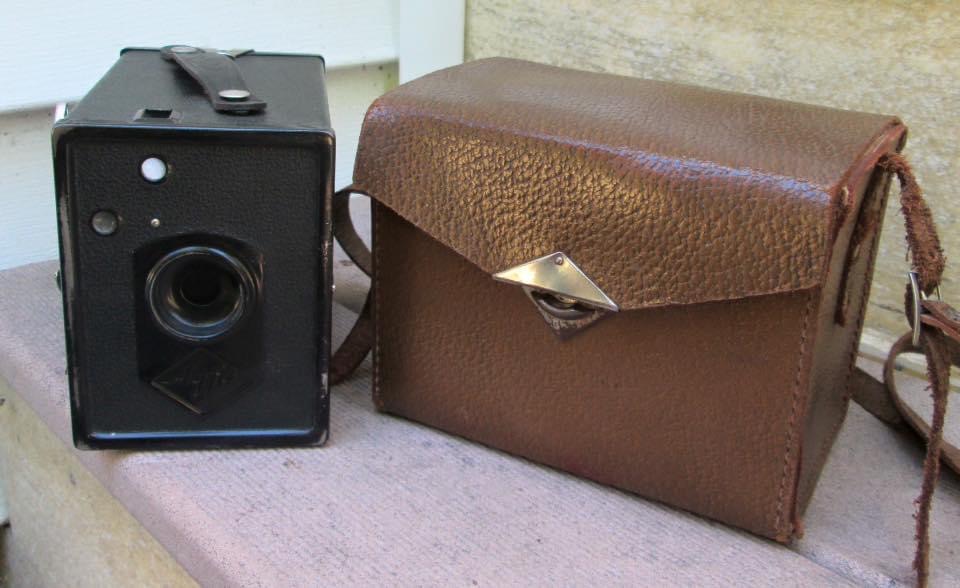
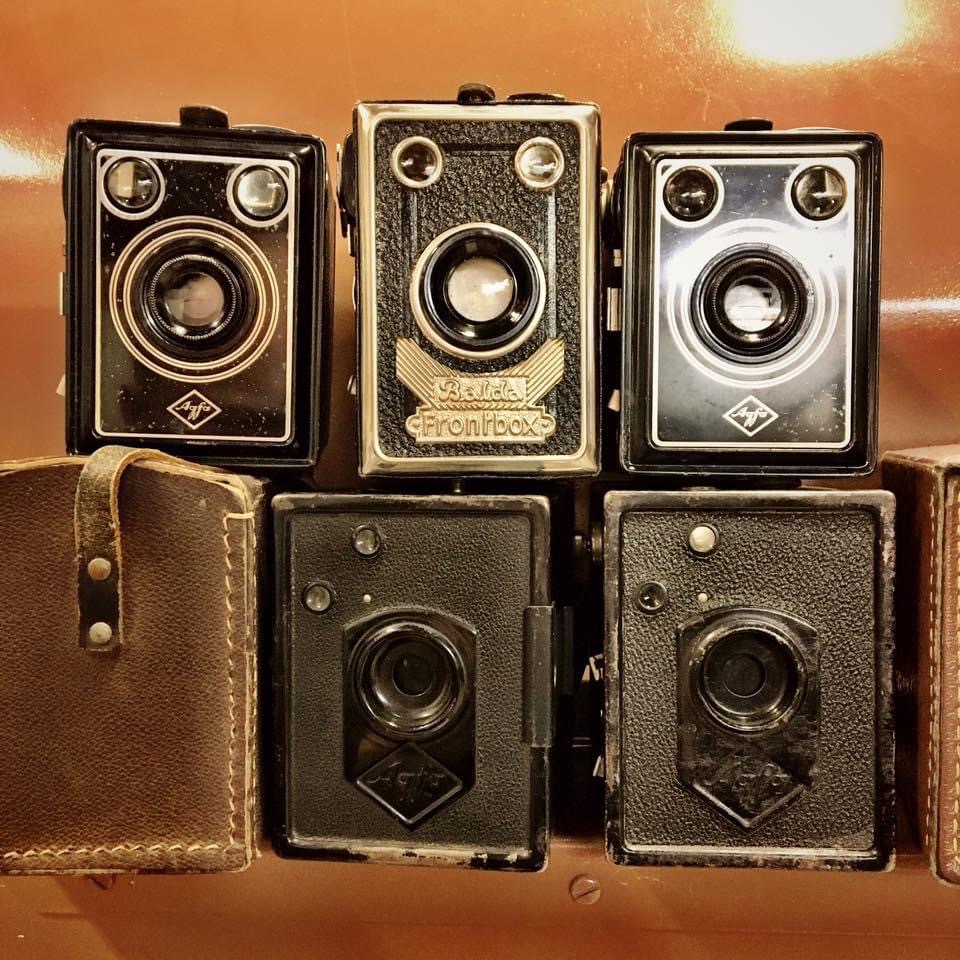
1930s Agfa and Balda cameras
Prewar German and American cameras were made to use a number of roll film formats. Today, all of these formats are obsolete with the exception of 120 film, which was introduced by Kodak for their Brownie No. 2 box camera in 1901. 120 film remains widely available, being made by a number of film manufacturers, and can be found at any real camera store, or online. If you are buying your first box camera, it is easiest if you make sure that the camera you are buying takes 120 film. Some camera models, such as the Agfa Box 44, were only made in the 120 format; if you look up any camera model online, you can probably learn if it was made in just 120 or in other formats also. Kodak cameras are likely to be marked somewhere with “Use 120 film,” while German cameras may be marked with “B2” or “B II,” a German designation for 120. Many Kodak cameras were made to use 620 film, which is the same as 120 but uses a different spool that may not be compatible. If this sounds confusing: just look for a camera that says it takes 120 film, or buy from a seller who knows what film format a camera uses.
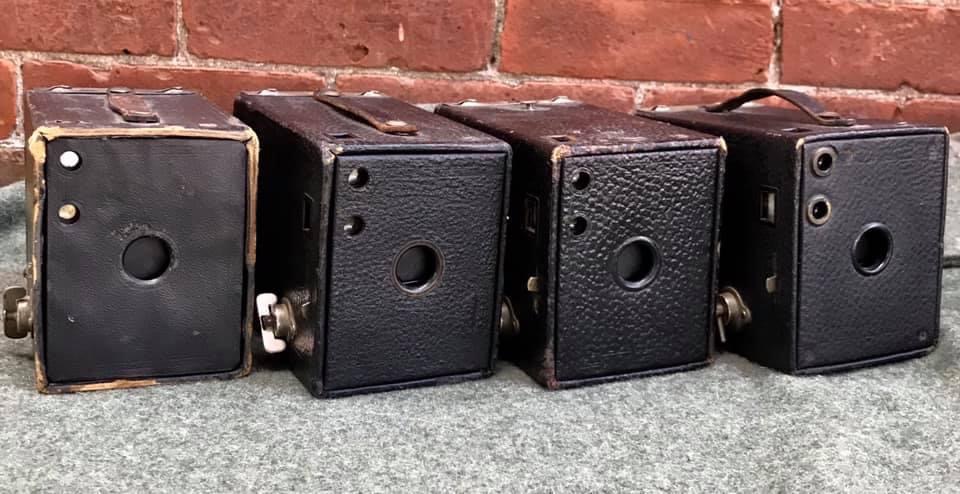
Kodak Brownie No. 2 cameras, made in the USA between 1902 and 1915. Cameras like this were still in use in WWII and beyond, all over the world.
It may be hard to find a box camera that has been cleaned, tested and works. You might have to test and clean the camera yourself. If the shutter fires, it’s likely that the camera can be cleaned up and made to work, but not all sellers will be willing or able to test even that basic function. If you get a camera with a working shutter, the lens will almost always need to be cleaned before the camera will take good photos. Use cotton swabs and glass cleaner to very gently clean the lens. Don’t scrub, wipe carefully. You can use an old T-shirt or a lens wipe at the end to do a final wipe.
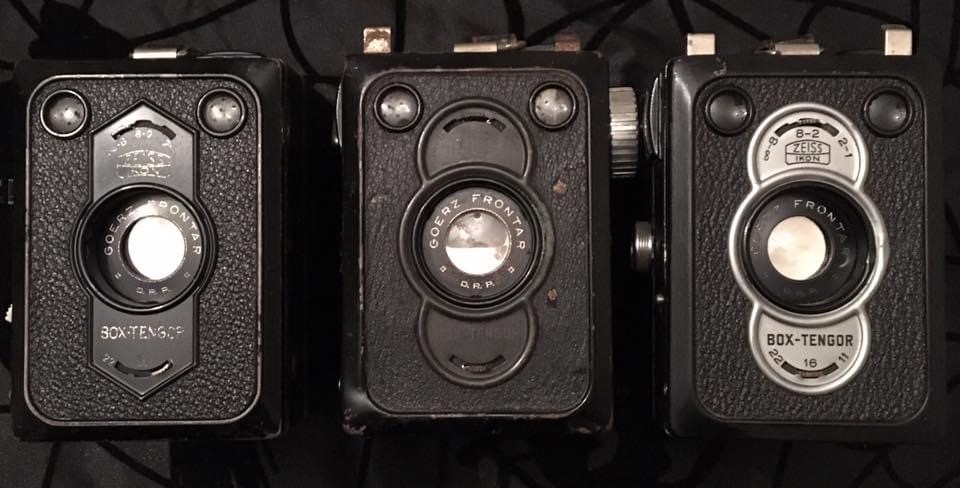
Zeiss-Ikon box cameras, made in Germany
Manuals for many prewar cameras can be found in PDF format online. There are also many YouTube videos showing how to use box cameras, even specific box camera models. For example, here is a video I made showing the Kodak Hawkeye No. 2 Model C. Most box cameras function similarly to this.
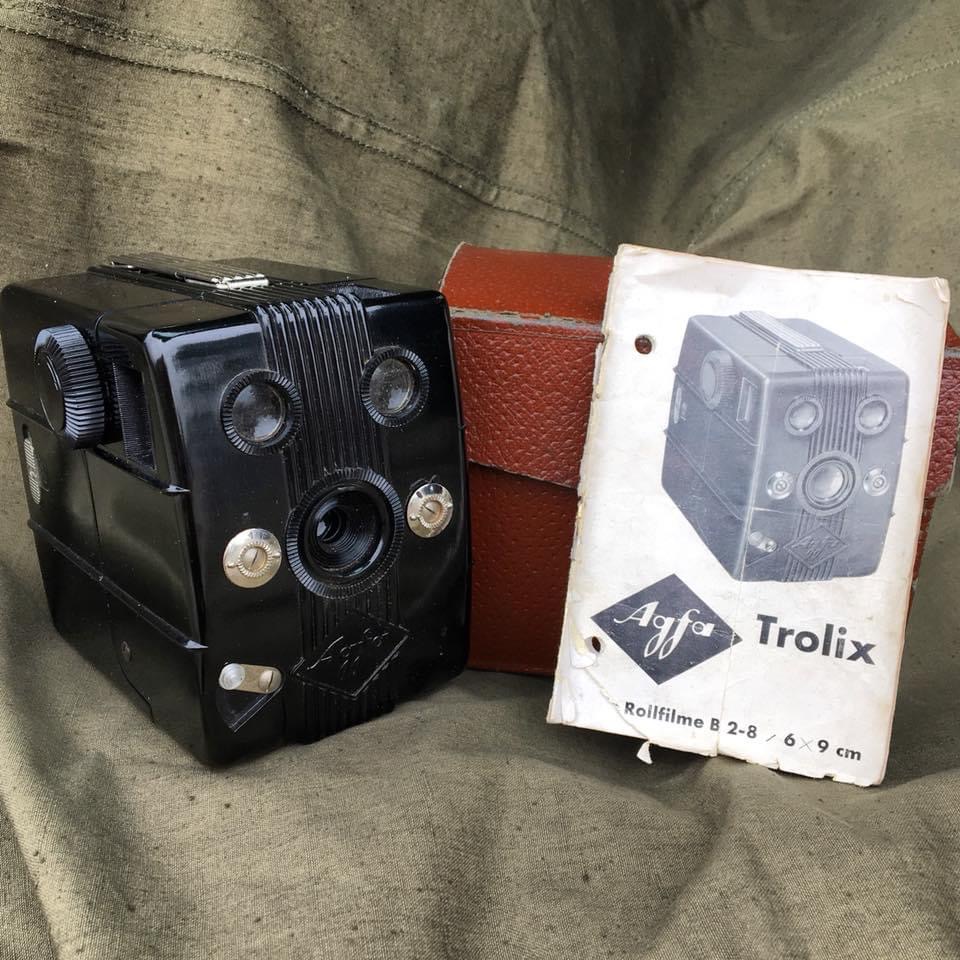
Agfa Trolix, made of an early plastic material, 1936
Here are the most important things to keep in mind when shooting with box cameras. The shutters are slow by modern standards, so if you are not holding the camera still, the images will come out blurry. Press the camera against your body to steady it, breathe out, hold your breath, and smoothly fire the shutter. You also need to make sure you are a proper distance from your subject. While some box cameras offer different focus zones, most box cameras are fixed focus. With a Box 44, everything six feet and further from the camera will be in focus. Kodak manuals indicated that subjects eight feet and further away would be sharp, while objects as close as six feet, while not as sharp, would be sharp enough for practical purposes. You may need to experiment a bit to get a sense for how close, is too close, with your camera.
Prewar German box cameras with original packaging
With most box cameras, you will get 8 exposures per roll of 120 film. It’s my experience that the brand or even the speed of the film won’t make a big difference in most situations. My favorite all-purpose film for box cameras is Ilford FP4 Plus, which at the time of writing (2021) can be found for $6-$7 roll. I have also used cheaper film, with very good results. Ilford FP4 Plus is ISO 125 (125 speed). The higher the speed number, the faster the film is exposed when light hits it. As I mentioned above, box cameras have shutters that are slow by modern standards. You will want a film with a fairly low speed, so that the photos are not overexposed. In bright sun, I will use 100 speed film. In lower light (a cloudy day) I will use 400 speed film; I haven’t used anything faster than that. If you are going to take photos indoors, or in low light conditions, you need to take a time exposure, if that is a setting your camera has. Film has a lot more latitude and flexibility with exposures, than you might think.
The Zeiss-Ikon Box Tengor was a fairly sophisticated model. These have three focus zones and three aperture settings.
Once you have taken your photos, the next step is developing your film. There are many labs all over the world that still develop film, and you may be able to find a place local to you. Most places that develop film will develop 120 film, and they may be able to make prints or scans for you, depending on how you want to view and share your photos. If you can’t find a local place, you can send the film out to a place that will develop, print or scan for you. I used to send my film to The Darkroom in San Clemente, CA. They would develop my film, scan my negatives, and upload them to the Internet so I could download and share them. But I was taking a lot of film photos, and at $12/roll, it got kind of expensive. I found that I could save a lot of money over time by developing and scanning my black and white film myself.
Sending my film out for development and scanning cost me more than $2 per photo I took. The same photo now costs me less than $1. I had to spend a bit of money up front, but have since enjoyed cheap photos for a long time. Developing black and white film yourself at home is super easy. You need the following supplies to develop your own film: -Developing tank and reel for 120 film -Chemicals. You need developer and fixer. I used Kodak powdered chemicals because they are inexpensive and they always work for me. The developer I use is Kodak Professional D76 Developer and the fixer is Kodak Professional Fixer. You also need a bucket to mix the chemicals. -A measuring cup (ideally with gradations in milliliters) and thermometer -Containers for chemicals. I bought cheap gallon water jugs at the grocery store, dumped the water out, and I use those bottles for my developer and fixer. You can use any kind of bottle. -Something to weigh the bottom of the film roll when hanging to dry. I use clips for documents. This is EVERYTHING I use to develop film. I go in a darkened room and sit under 2 or 3 wool blankets and a Zeltbahn shelter quarter, and tuck the blankets around me so no light can get in, and I load the film into the tank. I measure the developer, make sure the temperature is in the 68-75 degree F range, and pour the developer in the tank. I use a stopwatch to time the developing, agitating the tank every minute until the developing is done. Then I dump the developer, put water in the tank and dump it out twice, then I pour in the fixer, timing it and agitating just as I did with the developer. When the time is up, the fixer goes back into the bottle, I rinse the film and hang it to dry. The total time is about 20 minutes and it is so easy. I found lots of great YouTube tutorials on every aspect of the process, from mixing the powdered chemicals, to loading the tank and developing the film. The cost for all the supplies needed to develop film is less than $100, an amount you might spend having someone else develop your pictures from 5-6 reenactment events. Doing the developing yourself cuts the cost of developing to less than $1 per roll.
I share my reenactment photos online. To do this, you need to scan your negatives; this requires a scanner that can handle film. The film has to be backlit to get a good scan. A document scanner uses reflected light, and won’t give good results. Some people use a light table and a DSLR digital camera on a stand to photograph the negatives, then rework the photos to create the images; I have never attempted this. I find it easy to use a film scanner and I am very happy with the results I get. At this time, I think the best scanner for this purpose is the Epson V600. The list price for this scanner is $230, and you can get it on Amazon with free shipping. You can likely find a refurbished one from a reliable seller for under $170. The scanner that I use is an Epson V550, which was cheaper than the V600 but is now discontinued. You may be able to get a good deal on a used V550 or V600.
After scanning my negatives, I will crop them and add contrast or otherwise edit the lighting to make the images look their best. A photo print may have more contrast than a scan from a negative, and lab techs have always been able to crop negatives and adjust lighting when making prints. I feel the digital edits I make are analogous to these analog processes. The scanner makes its own adjustments before I even see the scan; I don’t see any reason to be a “straight from the scanner” purist when I am making digital images from negatives, to share online. I mostly use Photoshop Elements for this. Sometimes I will e-mail the photos to myself, download the photos to my phone, and then use the basic photo editing tools or a photo editing app, before sharing them from my phone to a social media platform.
Once you have bought the developing supplies and the scanner, you are all set to develop your own black and white film. The total start-up cost is around $300-$350. As a reenactor, you might pay this much for a helmet or some other uniform or gear item. Processing your own film, you will spend $5-$7 per roll, plus less than $1 in chemicals to develop, every time.
This post is meant to illustrate some things that I believe were common, that are functional, attainable, and scalable.
Below I have included some pictures of a reenactment display I put together, with some items I have collected for this purpose. The scenario being recreated here, is that of the Verpflegungstroß of an Infanterie-Kompanie establishing an Ausgabestelle for the platoons to rotate through before heading out to their forward positions.
This Ausgabestelle (issue point) remains established behind the lines, as a point of centralized issue for food, ammunition, lubricants, and water. It is common that reenactors will use their cars as a “supply point” to obtain more water or other needed supplies. This is a representation of what that imaginary supply point might have looked like, in reality.
In my opinion the soldier can not soldier without things to soldier with.
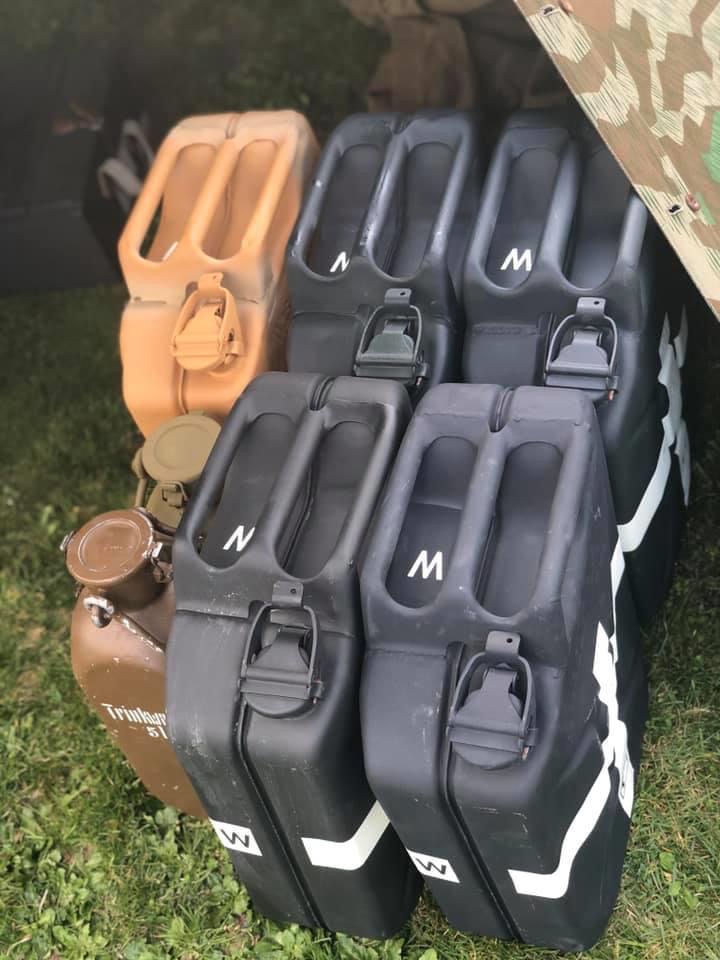
Step one: Water, Water is very obviously a critical supply that a unit or human being can not live without. Here at this “station” the soldiers can centralize their canteens and refill. Pictured are some common means of carrying water, the 20 liter Einheitskanister, and the 5 liter aluminum drinking water container. The exact purpose of the 5 liter aluminum container is unknown, but they show up in photographs every now and again. A typical enameled funnel of the time helps to avoid spilling such a precious commodity.
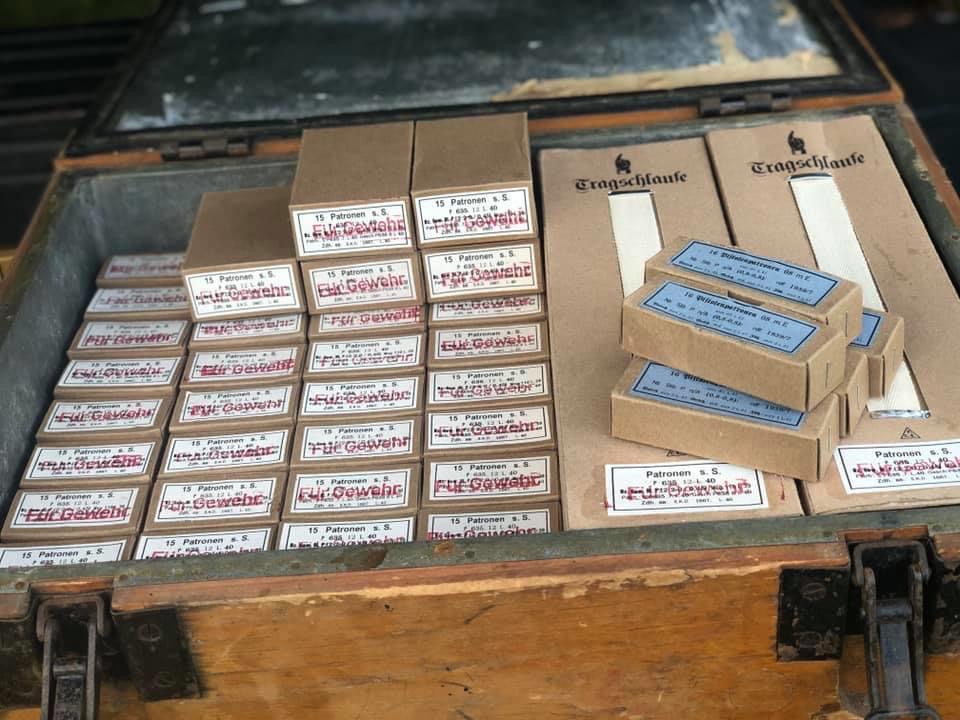
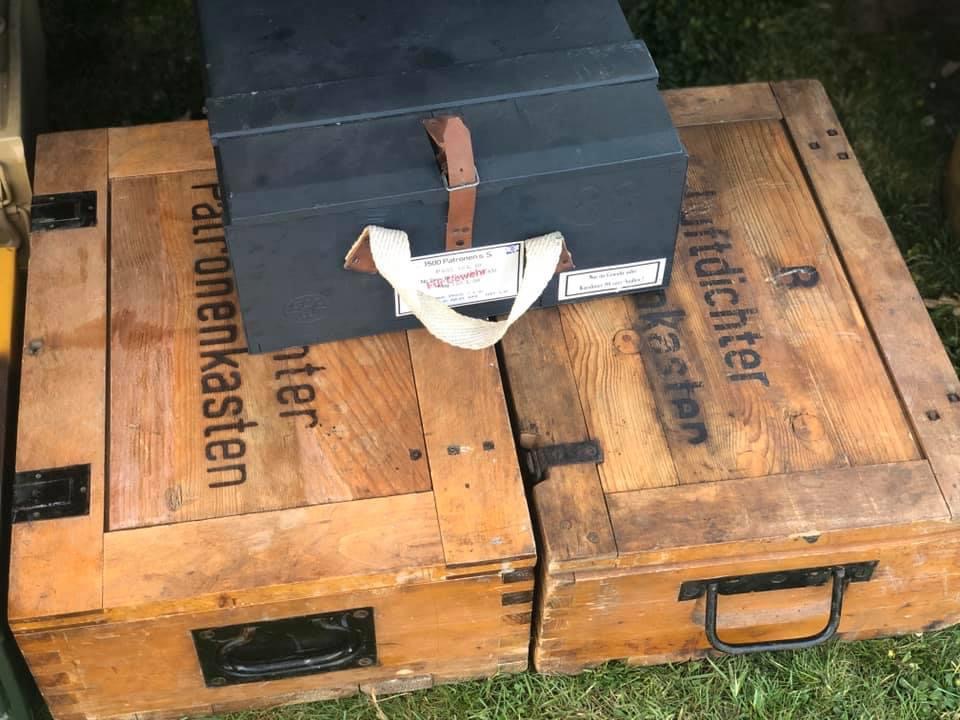
Step two: Ammunition. Wehrmacht rifle ammunition was issued in cardboard boxes, unlike most allied forces who issued it in cans. These cardboard boxes were packed into cardboard sleeves of 300 rounds each, and then into a variety of different wooden boxes that changed throughout the war. The most common variations of those are listed below.
Patronenkasten 88
Patronenkasten 88B
Luftdichter Patronenkasten
Luftdichter Patronenkasten B
Patronenkasten 900
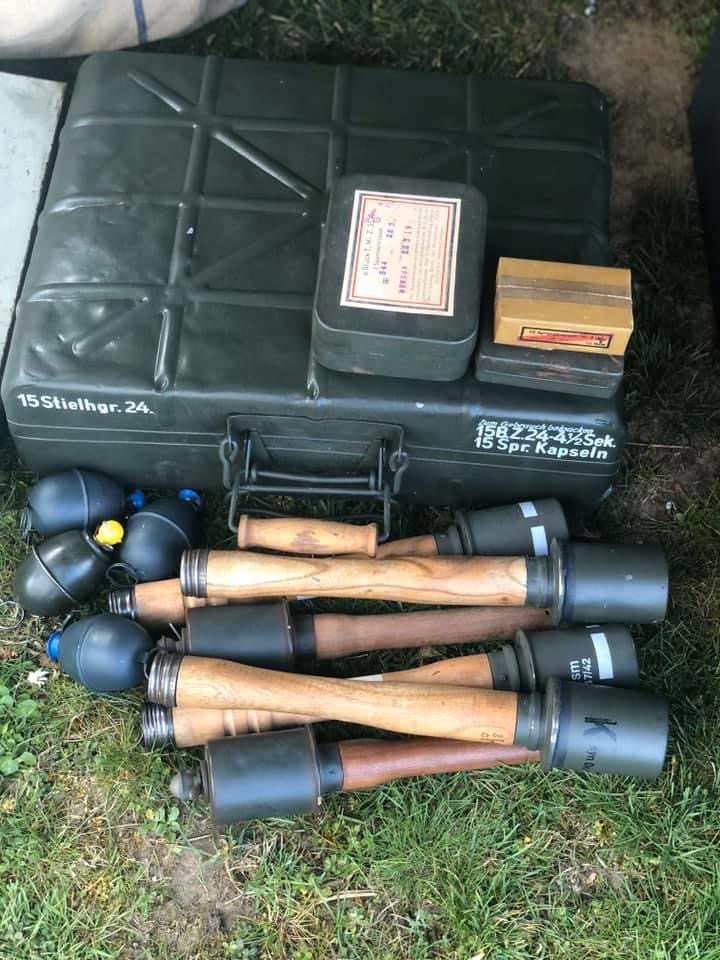
Also pictured are some common types of grenades with the associated detonators, fuses, and metal carrying case.
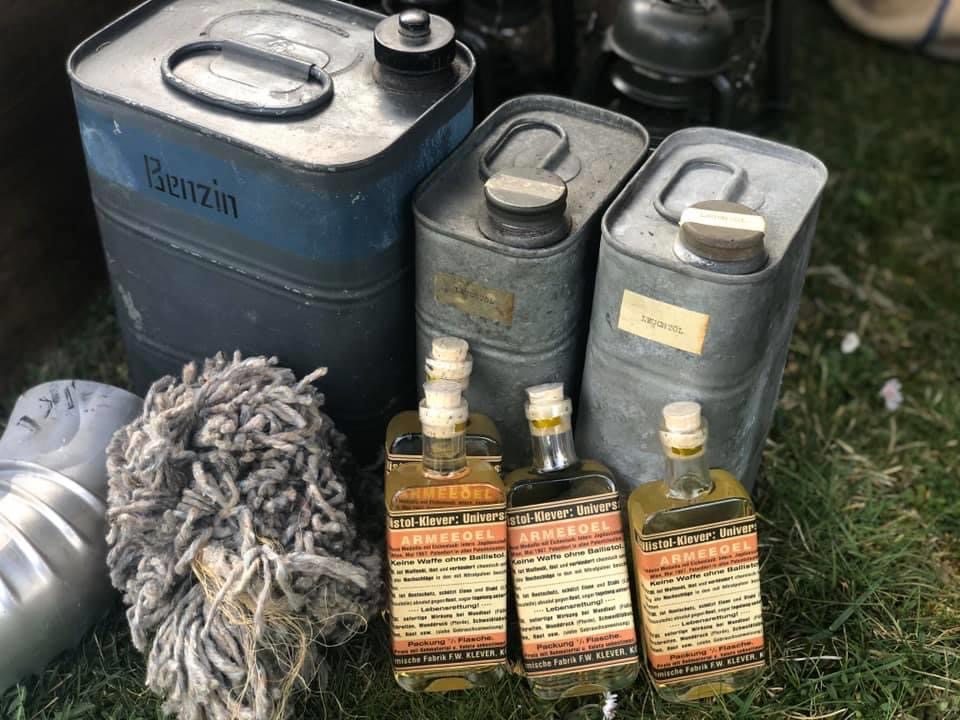
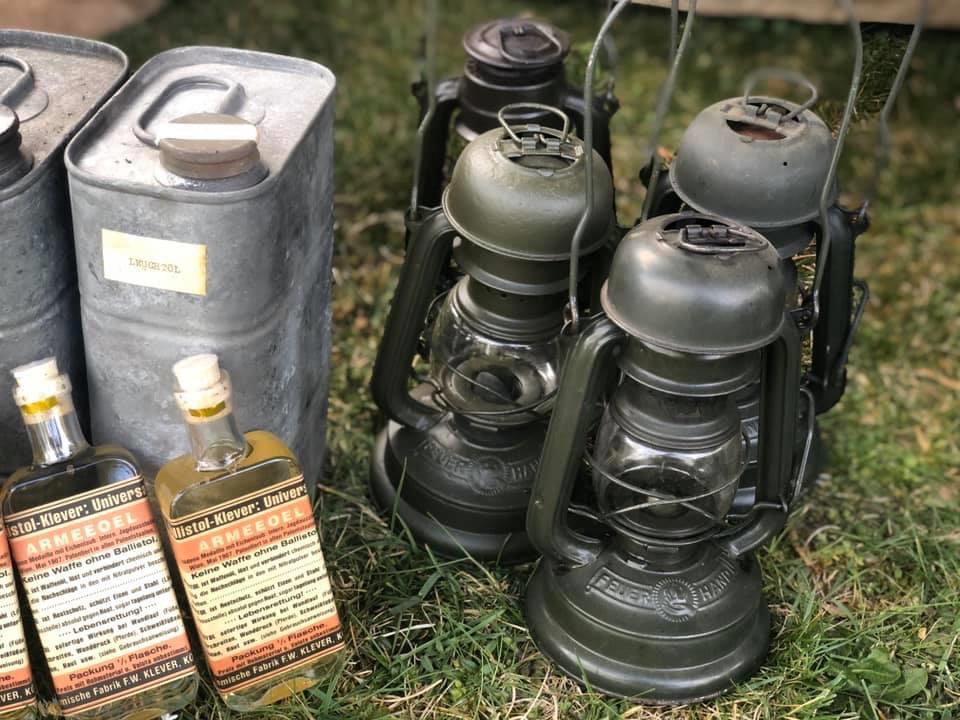
Step 3: Lubricants and fuels. Pictured here are some fairly common cans meant to store oil, or fuels. The commercial product Ballistol for protecting leather and cleaning weapons, some replacement cleaning wicks and some common replacement parts. Also pictured are some examples of German lanterns of the time period.
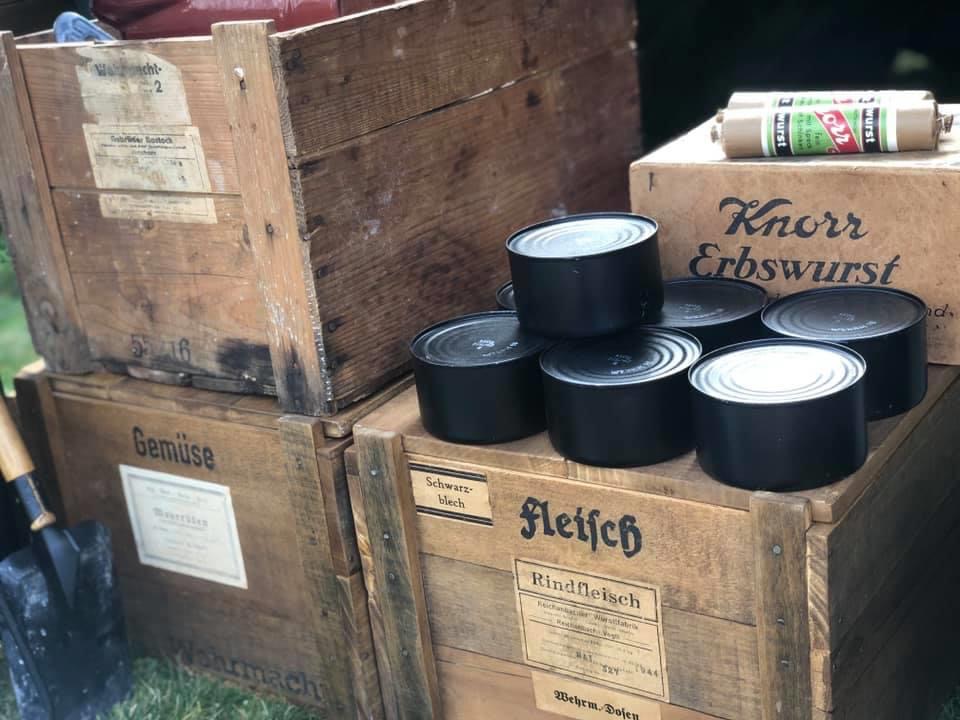
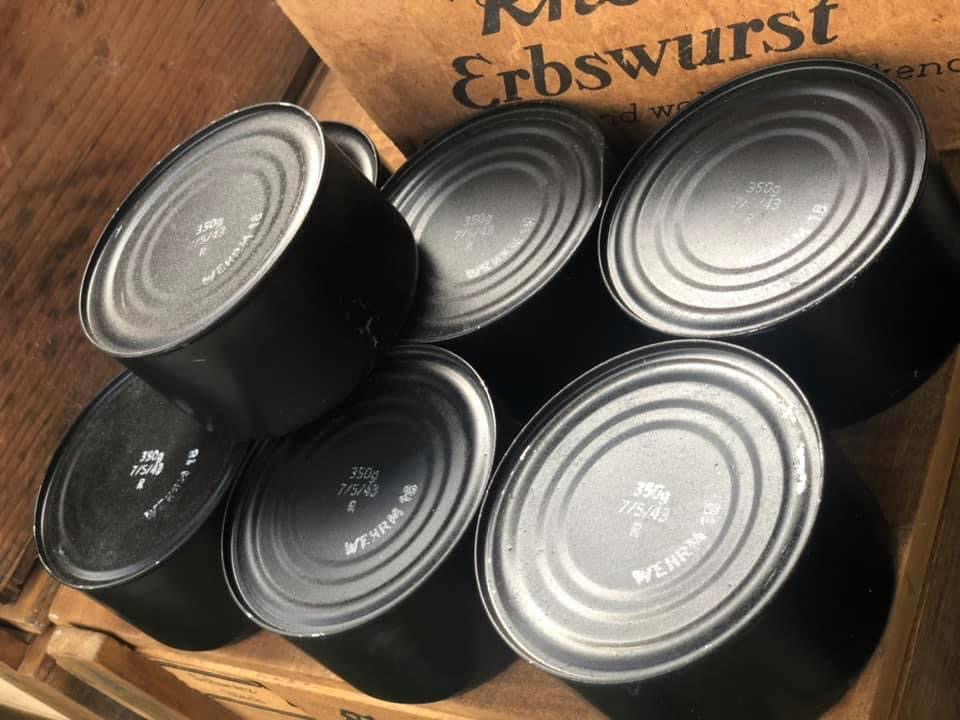
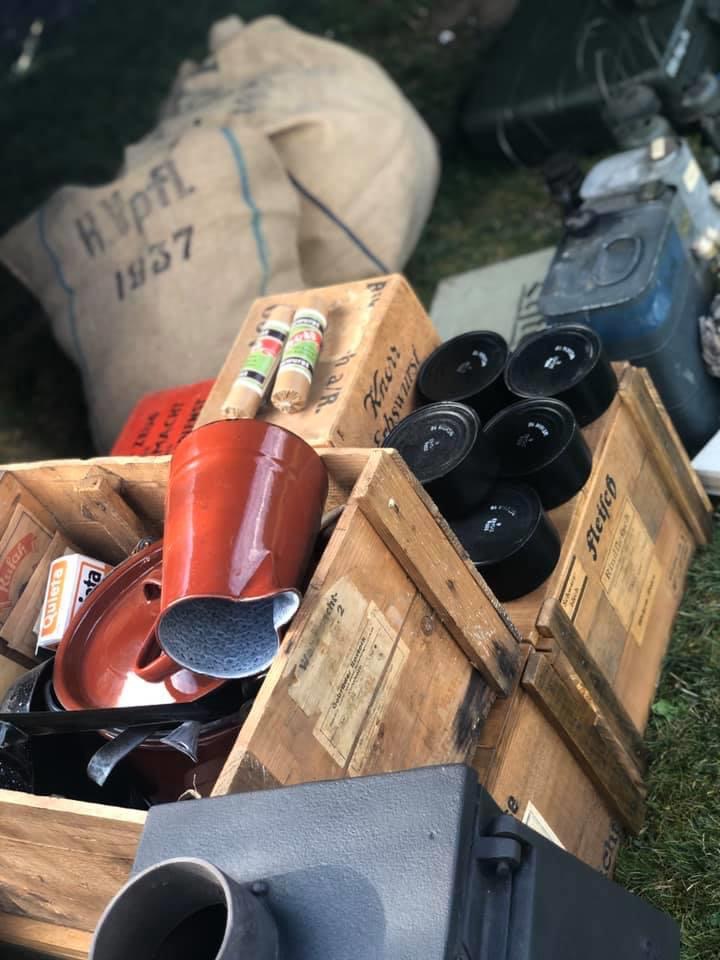
Step 4: Food. Here are some examples of some crates of food made to Wehrmacht specification. Inside of these boxes are “Schwarzblech” (black tin) cans of meat. On top of this is a common food product “Erbswurst” or pea sausage. This popular food staple was a series of pressed tablets of pea soup that could be prepared into a hearty ham and pea soup, in a mess kit with a cup of water and only a few minutes. Behind the crates you can see larger bags used for larger bulk items such as loaves of bread or vegetables.
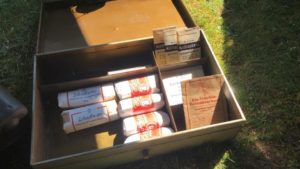
Step 5: First aid: Here is a civilian first aid kid which is filled with modern relabeled first aid items to handle basic trauma or boo-boos.
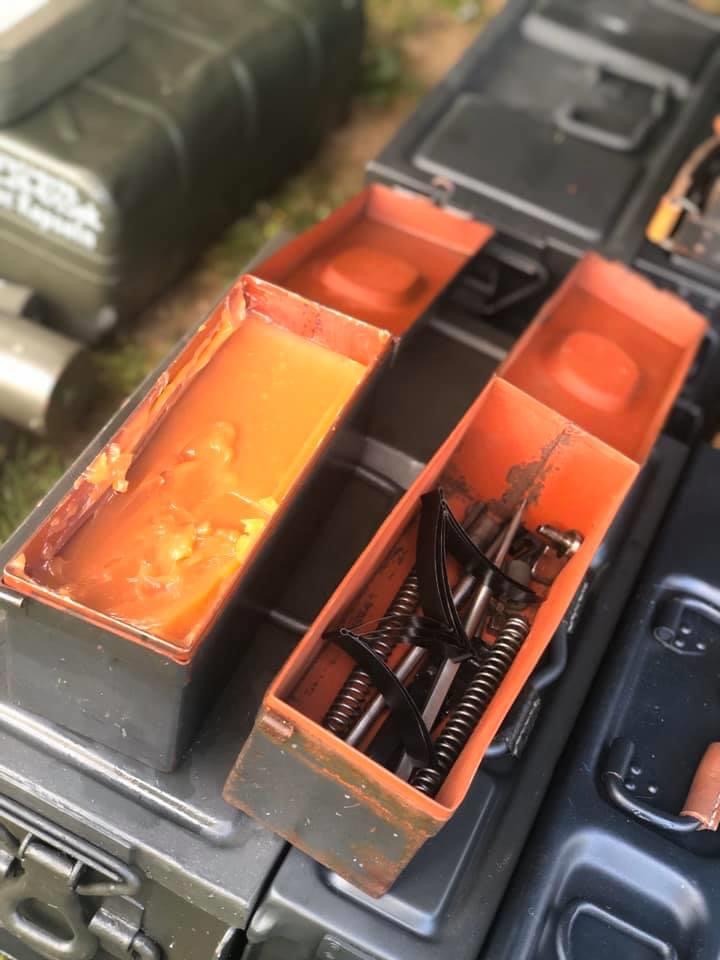
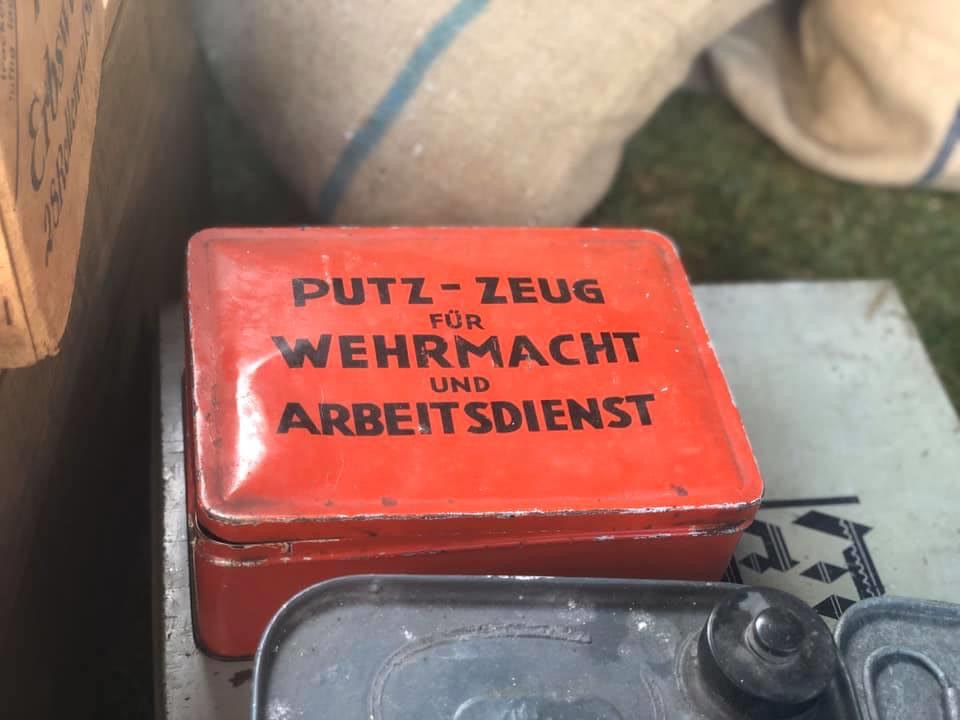
Step 6: Lastly, morale/comfort items. Pictured here is the Feldofen 42 field oven, made by Quint in Trier, with its associated coal shovel, and hooked poker. There are also a few enamelware pots and pans, and a few cooking knives, all of which were common styles in use at that time. A metal box of maintenance supplies for uniforms and equipment, and some other period type German tools and rope round out the display.
“Esbit” is a type of hexamine-based solid fuel invented in Germany in 1936. The name is an acronym for the initials of the inventor, Erich Schumm, and “Brenstoff in Tablettform” (Fuel in Tablet Form). The Erich Schumm company (later the Esbit company) also made small, portable stoves for use with this fuel. They were advertised as a way to warm food and beverages for sport and hiking, for travel, and for workers to use on their breaks. Prior to 1945 there were a few different types of these stoves offered, of which the most commonly encountered today is the Model 9. Esbit stoves were issued to German soldiers in WWII and were also available for soldiers to buy. They are mentioned in memoirs written by Wehrmacht soldiers and also in memoirs of American troops who served in Europe and use these as captured items. It’s reasonable to conclude that they must have been fairly common among Wehrmacht troops, and they are very handy and practical items to use for living history.
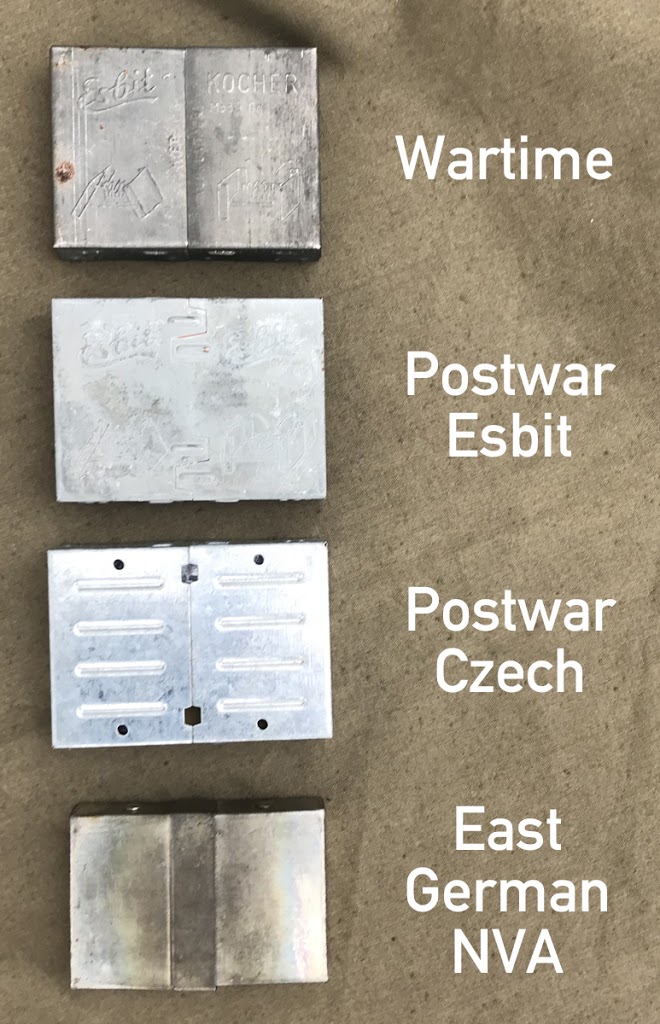
The wartime Model 9 Esbit stove is made of zinc-coated steel. With use, the zinc coating is worn away or possibly burned off by the heat of the burning fuel. The bare steel is extremely susceptible to rust, and black residue from the burned fuel will build up on the inside of the stove. These are not things that were intended to be used forever, they were cheap and have a limited lifespan with extensive use. The original wartime Model 9 is now collectible and not extremely common. From a living history perspective, I think it is better to preserve the originals than to consume them and further reduce the finite number of surviving original examples. Production of the Model 9 continued after the war, with some design updates. Other nations and armies also made different types of similar stoves for their own troops, after the war. Here is a comparison showing the wartime Model 9 Esbit, and various postwar types that can be found today.
The postwar Esbit stove shown, is very similar to the wartime one. The biggest difference on the top of the folded stove, is that the wartime one has straight edges on the central closure, while the postwar one has “teeth.”
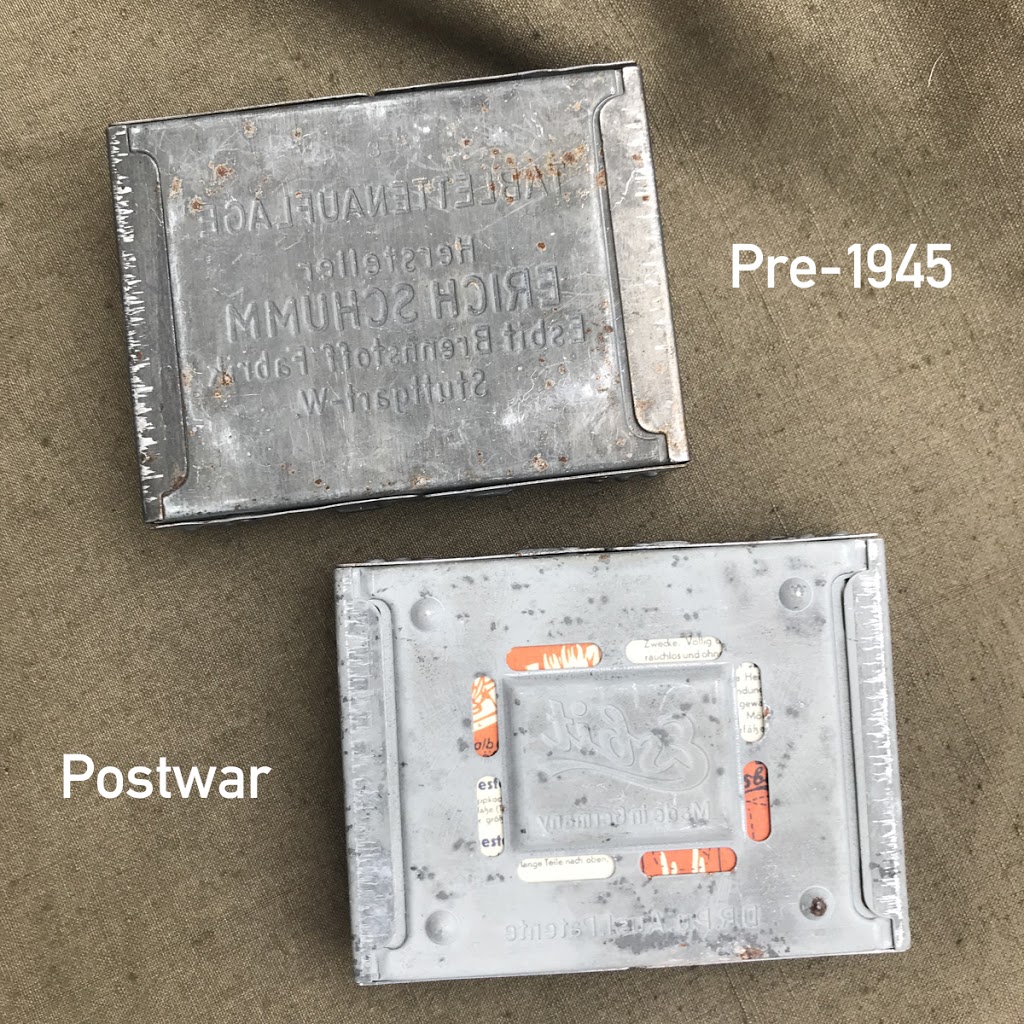
The bottom of the pre-1945 Model 9 is solid, and the postwar one has vents.
For reenactment, I personally have always carried this postwar Model 9 version, as I use my Esbit a lot and do not want to destroy collectible originals. You will notice that the “Esbit” script logo on both is identical. In the 1980s the company switched to a different logo.
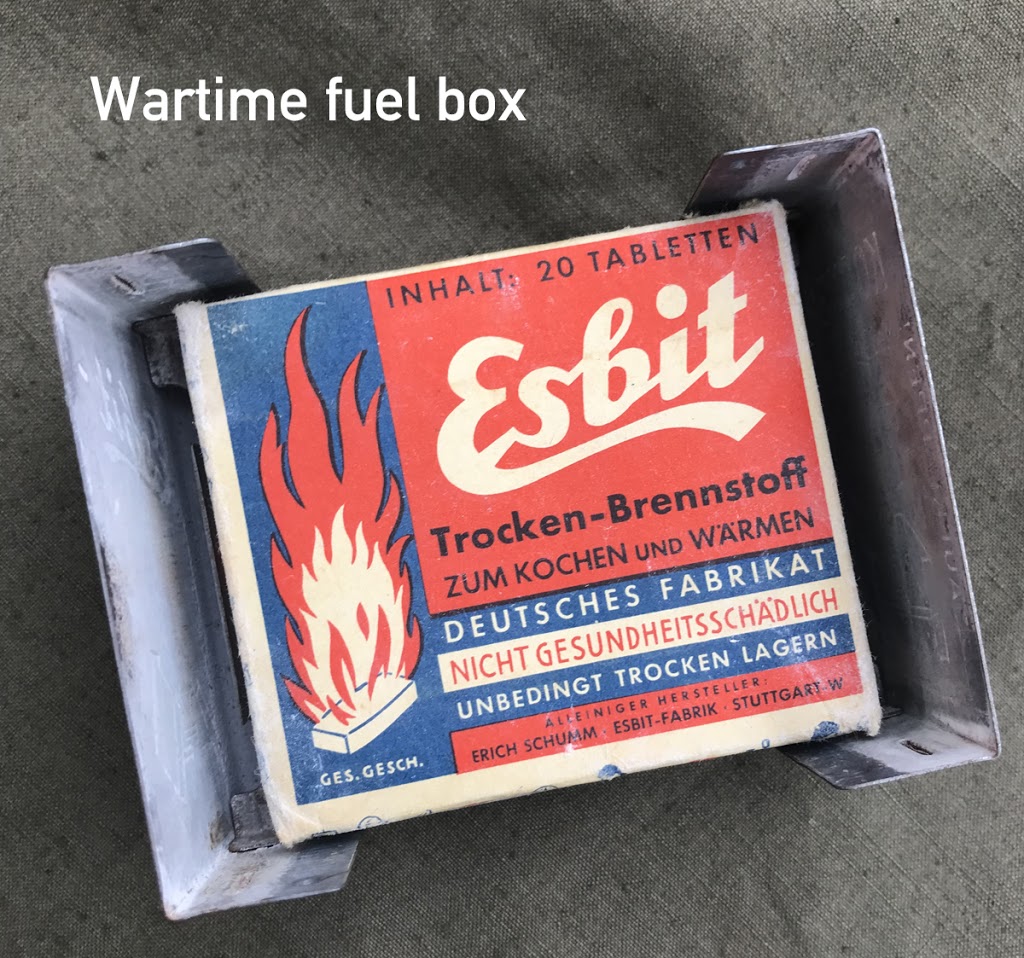
The Esbit fuel was packaged in a cardboard box that fit inside the stove. Reproductions of this box are available from some reenactment vendors.
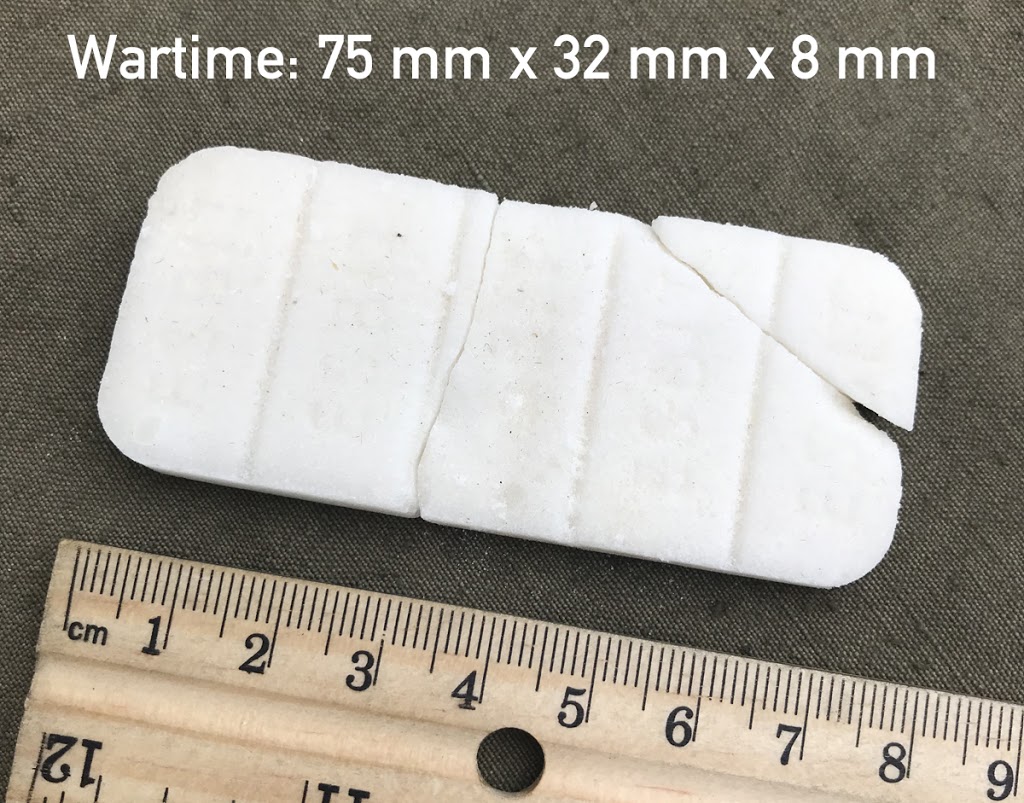
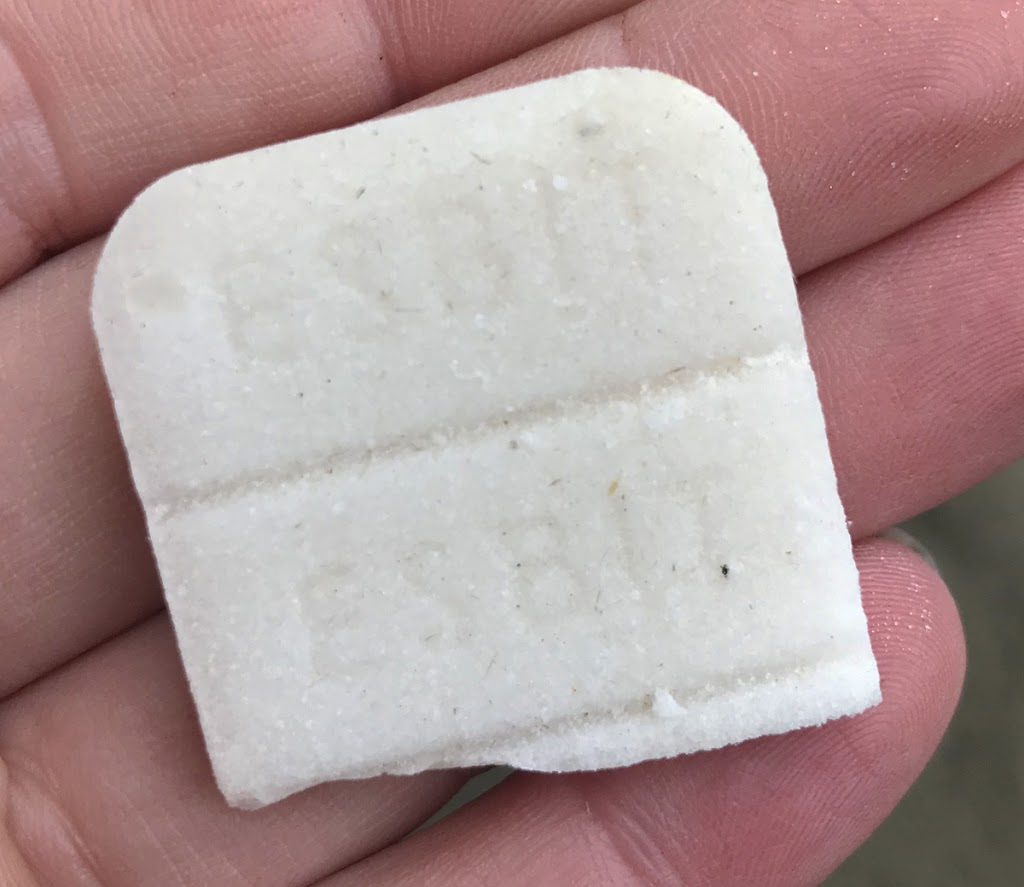
The box claims to contain 20 fuel tablets, but that isn’t really true. It contains 4 large tablets, that are scored so that you could break each tablet into 5 parts. I opened this wartime box, which probably had never been open. The tablets in the box are broken, perhaps due to inherent instability of the fuel tablets over time.
Each of the 5 sections of the original tabs is marked “ESBIT.”
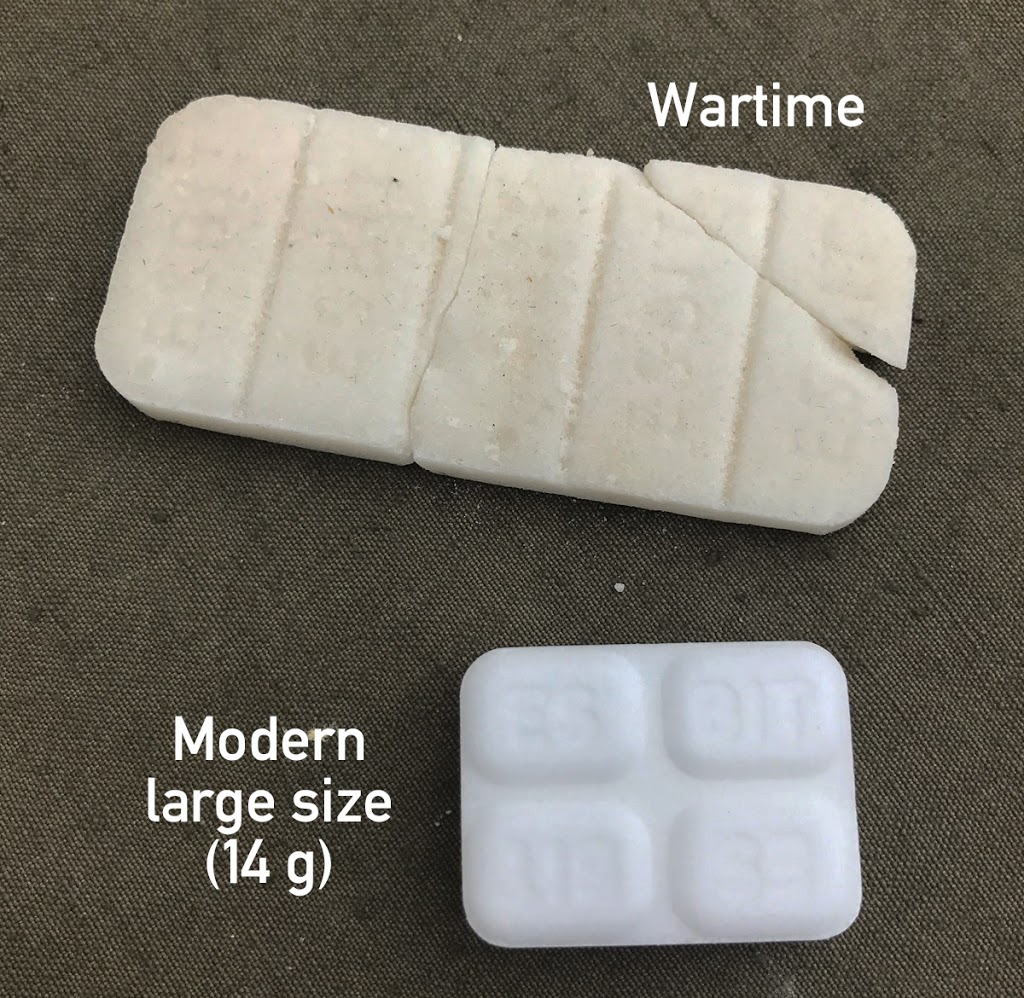
Esbit currently offers fuel in two sizes, neither of which are the same as the 75 mm x 32 mm x 8 mm wartime slabs. They make a small 4 gram size, and a larger 14 gram cube. The smaller, 4 gram tablets are similar to the sections of the original tablet, and 20 will fit in the wartime box. 6 of the larger tablets fit perfectly in the wartime box. Other types of hexamine fuel are available today and may function more or less the same as the Esbit product. I once ordered “Esbit” fuel from a seller on Amazon but got a generic, made in China product that did not function as well, in my opinion. Generally, I prefer to purchase Esbit fuel at a local shop where I can see exactly what I am buying. The modern Esbit fuel cubes come individually blister packed and when you open them, there is a smell that is quite strong. I unpack the cubes and load them into a reproduction box, the smell vanishes after a day or so.
In my opinion, the Esbit is best at heating prepared food, rather than actually cooking. Esbit stoves and fuel are great at warming soup or other canned foods. For reenactment, if you plan to eat out of cans, you can consult this list of Wehrmacht steel ration can contents for some meal ideas.
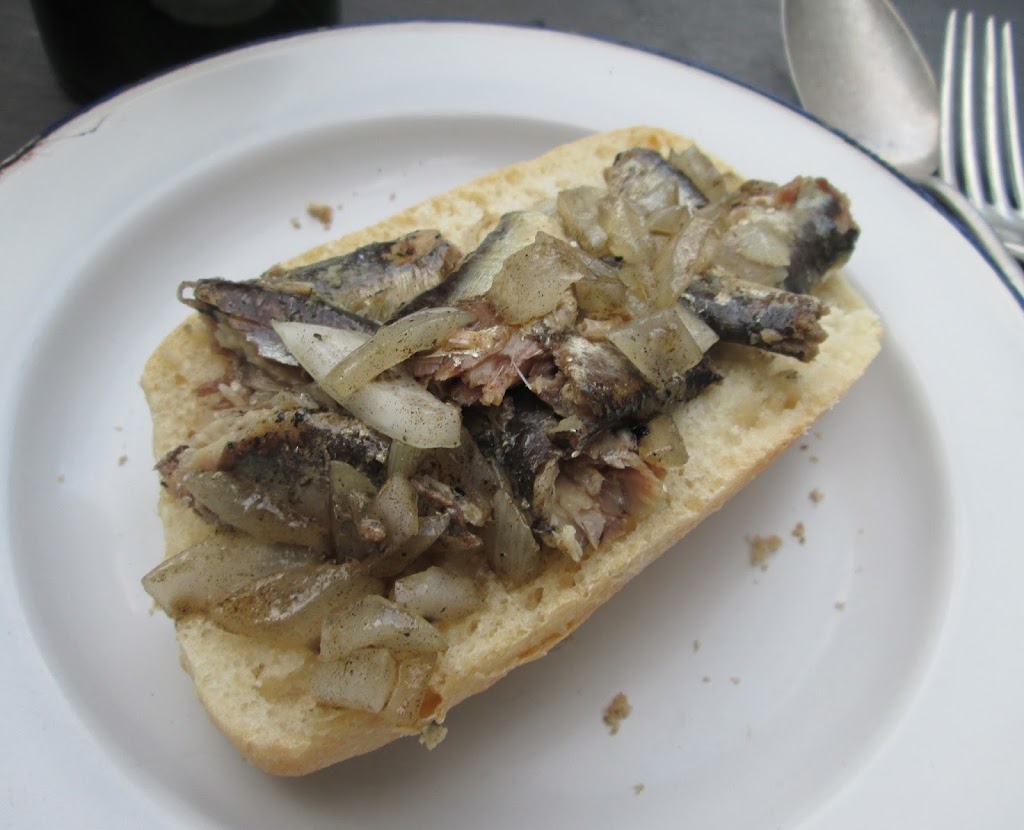
It is also possible to actually cook meals with the Esbit as well. With enough fuel and time, you can boil water and keep it boiling. One recipe I like to prepare with my Esbit stove is “Ölsoldaten” (Oil Soldiers), from the wartime Wehrmacht cookbook “Östliche Speisen nach deutscher Art.” The recipe in the book: “Fry sardines in their own oil while adding finely chopped onions. Drizzle with lemon juice as a dressing.” It is further noted that “Tuna fish in oil can be prepared just as the canned sardines.” I find the tuna version of this to be delicious.
Not every reproduction field blouse has correct size markings- many are unmarked. I make size stamps for my uniforms because I think it is a detail that adds realism. To find out how the actual measurements of a garment corresponded with the stamped sizes, I measured 5 different unaltered original Heer enlisted issue wool field blouses. I then took this small sample and looked at the numbers. There was no exact ratio that always held true. This may be because the garments were worn and may have stretched or shrunk with use or over time. Or, it could be a result of manufacture variation. Based on this quick survey, I came to make size stamps for my uniforms based on the following formula. Note that all sizes are in centimeters.
-Back length: Measure from the base of the collar straight down the back to the level of the bottom of the bottom belt hook hole, and add 1 to this measurement. -Collar size: Measure the inside of the collar from the hook to the eyelet, and use this exact number. -Chest size: Button the field blouse, measure from armpit to armpit across the front, double this number, then subtract 8. -Overall length: Measure from the base of the collar to the bottom edge of the skirt in the back, and add 3. -Sleeve: Measure from the seam at the top of the soldier straight down to the bottom sleeve edge, and add 1.
There exists a chart that purports to show the original range of sizes for each measurement based on chest size. For making the stamps on my own uniforms I have not referred to this chart, preferring to stamp these according to the sizes that they actually are.
For reference, here are the measured and stamped sizes for each of the 5 tunics.