These lists are from the war diary of the 285. Sicherungs-Division.
The first list is all of the unusable clothing and equipment that was cleaned/repaired by the workshops of the Divisional supply depot and reissued to the troops in the one year period between October 1, 1942 and September 30, 1943.
887 field caps 2010 field blouses 635 wool trousers 268 breeches 1299 greatcoats 1854 HBT jackets 1470 HBT trousers 101 work jackets 4970 shirts 3533 underpants 141 helmets 615 belts 514 belt buckles 195 bayonet frogs 757 ammo pouches 906 canteens 1419 mess kits 139 rucksacks 620 Tornister 165 A-frames 132 Y-straps 1180 hand towels 463 handkerchiefs 160 sweaters 634 various armbands 381 collar binds 135 belt loops 1225 equipment straps 210 rain capes 4297 mosquito nets 760 pair jackboots 1315 pair low boots 376 pair Gamaschen 4613 pair wool socks 1395 pair foot wraps 638 Zeltbahnen 505 bread bag straps 159 sport trousers 180 sport shirts 260 night shirts
The second list is winter gear issued for the winter of 1942/43 that was collected, repaired, cleaned, washed, deloused and made ready for reissue.
2146 fur caps 19160 toques 5208 hoods for the padded winter set 4980 wool scarves 6199 ear protectors 4632 surcoats 1651 fur coats 1758 fur jackets 3813 jackets for the padded winter set 4677 trousers for the padded winter set 4107 sweaters 4016 fur vests 1483 motorcyclists pullovers 5386 chest and back warmers 2161 lung protectors 3076 wrist warmers 11469 belly bands 461 muffs of all kinds 1600 trouser liners 394 foot sacks 670 snow shirts 1302 snow overcoats 830 snow trousers 950 snow jackets 4423 shirts 4758 underpants 12934 wool blankets 100 fur chest protectors 26 fur pants 135 camo cover for Tornister 190 camo cover for helmets 8500 pair gloves 4850 pair mittens 6271 pair wool mittens 735 motorcyclists gauntlets 2471 oversocks 7754 knee warmers 3362 knit leg warmers 6500 felt boots 919 sentry boots 7417 wool socks 470 overgloves for the padded winter set
My reenactment group attended an event in Haydenville, Massachusetts, in October 2021. I took some photos to illustrate some of the items that we brought to the event, to facilitate a weekend of immersive and realistic activities.
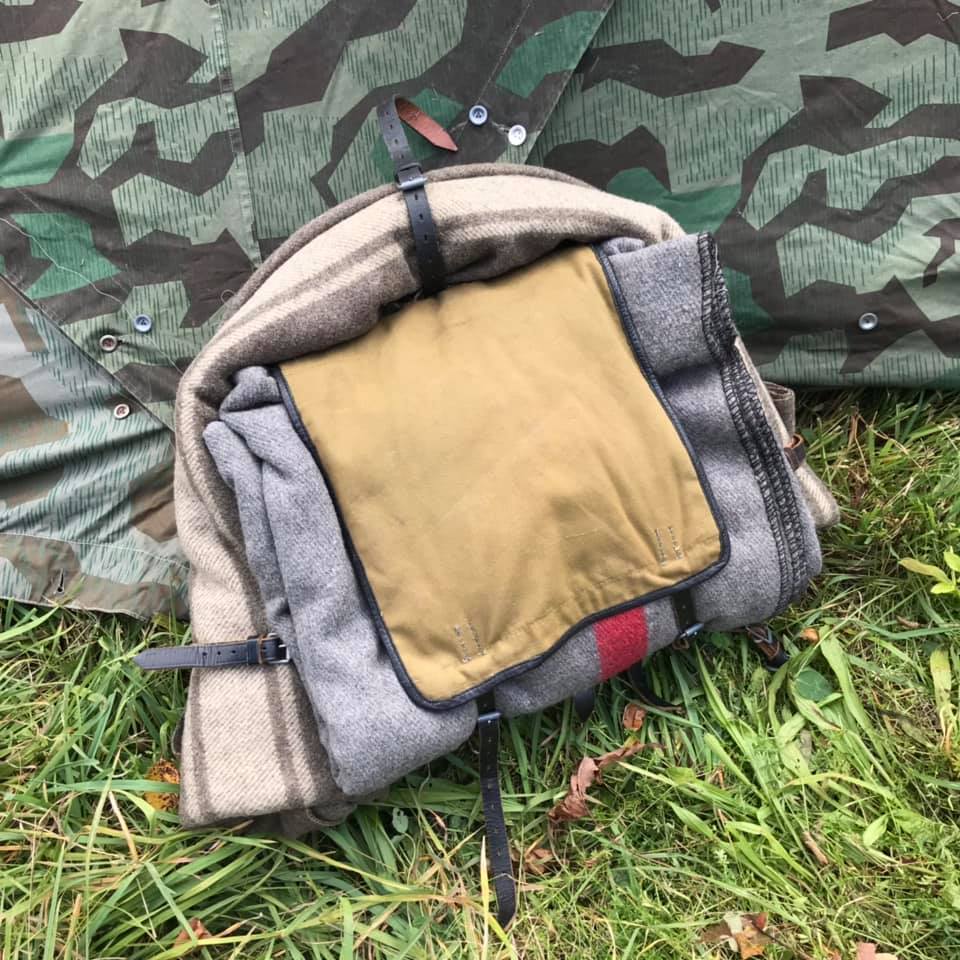
This is my Tornister in the configuration in which I bring it to most events. In the reality of war, in most field situations, the Tornister was kept in the rear with the Kompanie supply train, and was used to contain items that weren’t needed. But there were of course also very many cases where soldiers marched with their packs and had them with them in the field, even in combat settings in some cases. This Tornister is loaded with two blankets- a reproduction of the wartime issue German style, and a surplus WW2 type Italian blanket. There is also, inside, a flashlight, and a Soviet shelter half that I use as a ground sheet (this was an event with an Eastern Front scenario). Inside the pocket under the flap, there is a spare pair of long underwear, a pair of foot wraps and a spare pair of warm knit socks, so important for sleeping in cold temperatures (overnight temperatures at this event were down in the 30s). After arrival at the event, I set up the blankets and ground sheet in our tent where I will sleep, and then use the pack to hold and organize gear that I am not using.
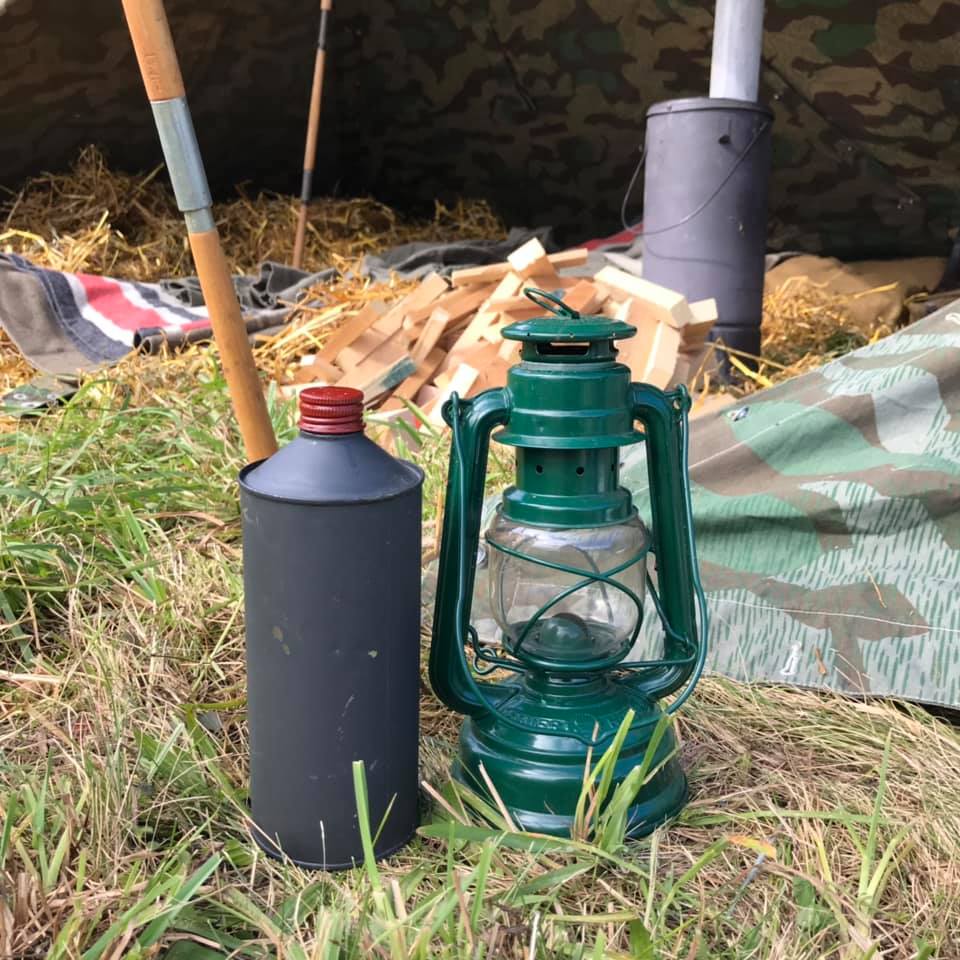
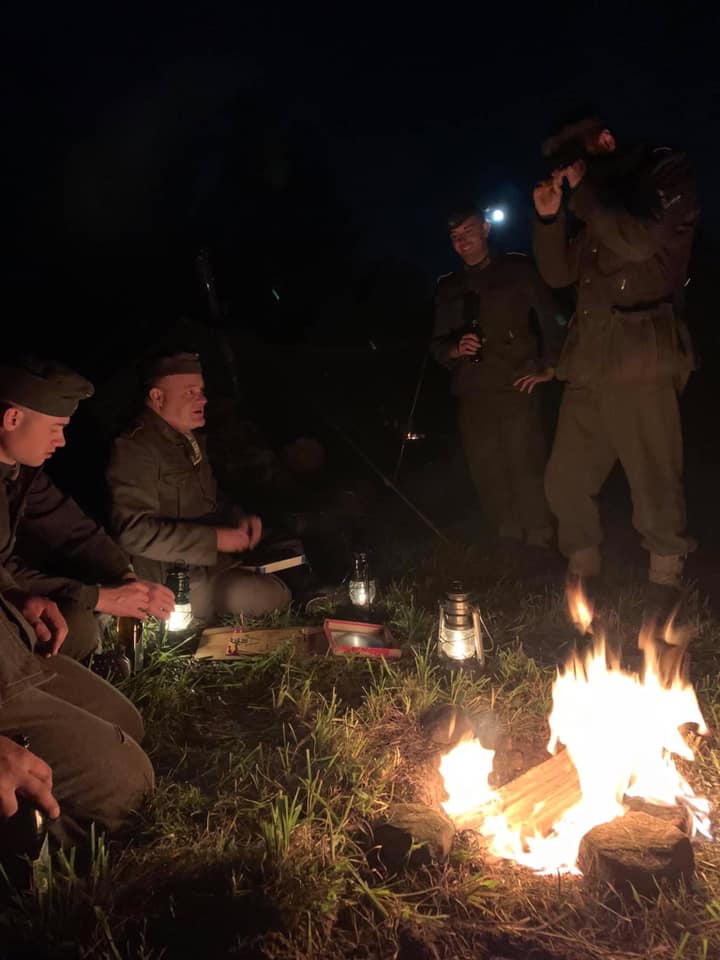
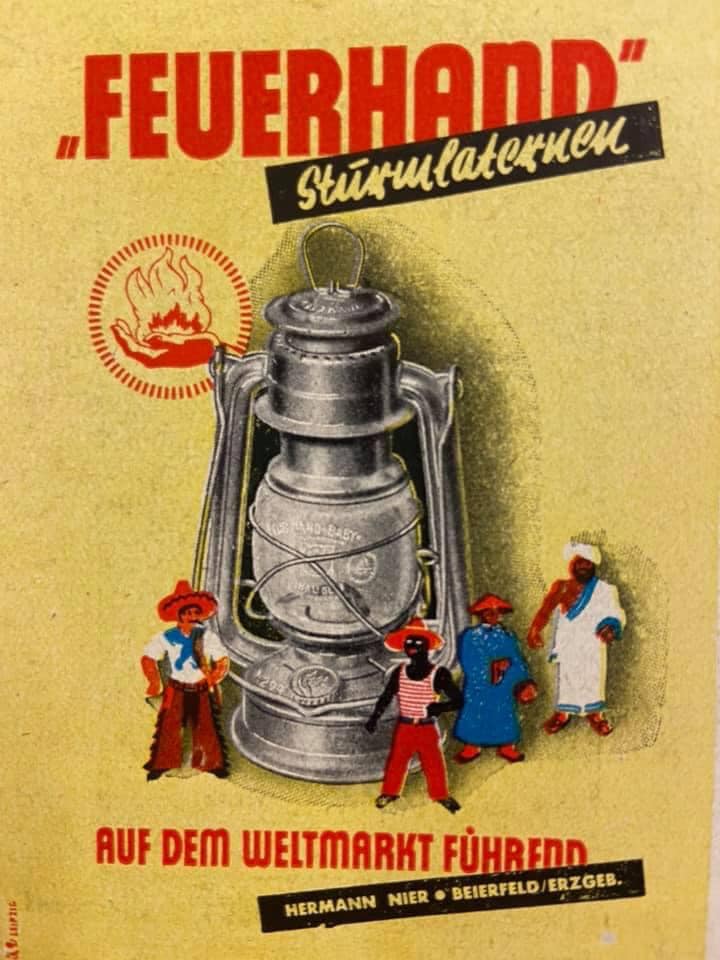
I also brought a lantern and lantern fuel. The lantern is a new made Feuerhand 276. This is a German brand, this model of lantern was introduced in 1934 and the manufacturer did make some lanterns for the Wehrmacht. In the wartime German Army, lanterns like this were not widely used; most issue lanterns were a carbide type rather than these liquid fuel kerosene lanterns. An advantage that these lanterns have today is that the new made ones are widely available and common. I bought this lantern last year, and it was my first; for almost 20 years I re-enacted without one of these, but I can’t imagine going back to not using one. In cold weather, running a lantern like this in a tent all night generates a few degrees of warmth. For gathering firewood at night, for finding one’s way in the dark, these things are ideal and, in my opinion, more practical than period type flashlights. Obviously, a soldier who is marching with only what he can carry is not going to be able to carry a bulky lantern and fuel for it. But in a semi-permanent position, something like this could have been utilized and eventually left behind when it was time to go. I chose this bright green color to be representative of a civilian commercial product rather than a military thing. A collapsed barn is within sight of this camp; the idea that something like this could have been found on a farm is, to me, reasonable. The fuel can is an old brake fluid can that I painted gray with a red cap. This is basically a fantasy thing, but it blends into the background in a camp nicely, and it is certainly a handy thing to have, as we often have more than one lantern going and invariably someone shows up with an empty lantern. Perhaps someday I will buy an actual period kerosene or lamp oil container that I can recreate. In the nighttime photo we are playing the board game “Mensch ärgere Dich nicht” by the light of the moon, a fire, and three lanterns. The advertisement is a wartime era one, showing the same type of lantern I use.
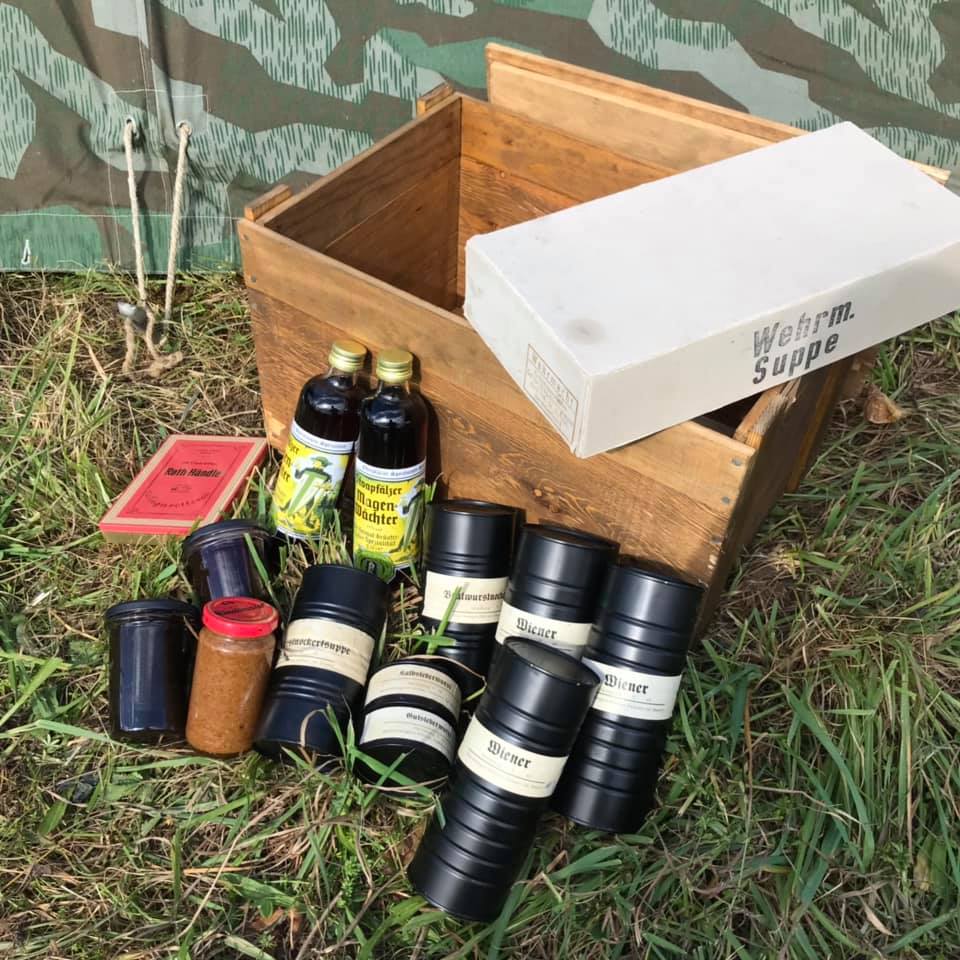
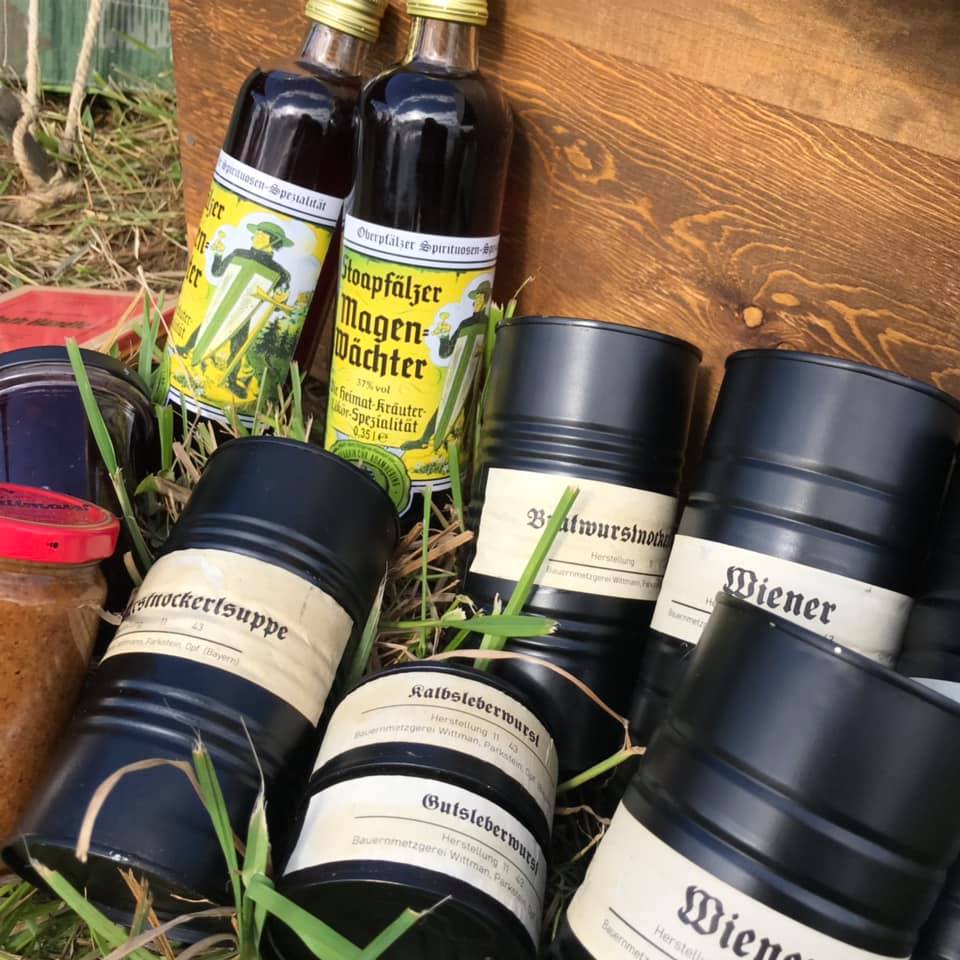
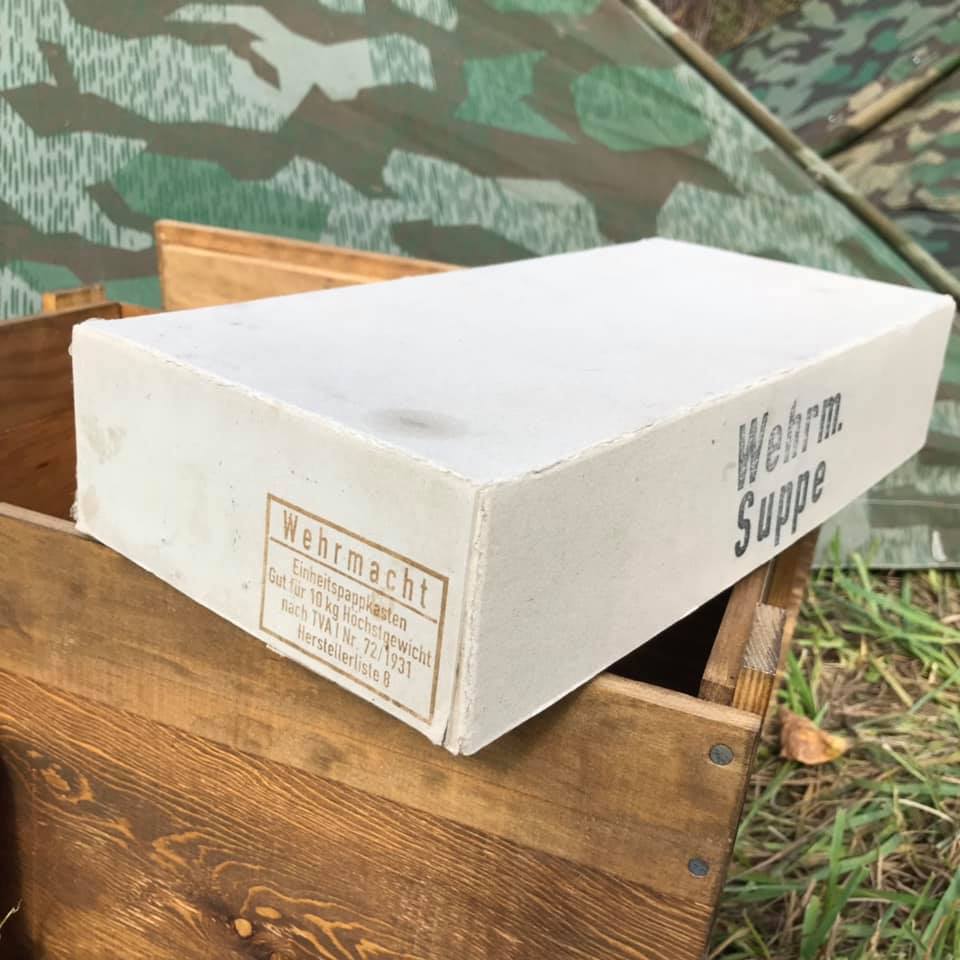
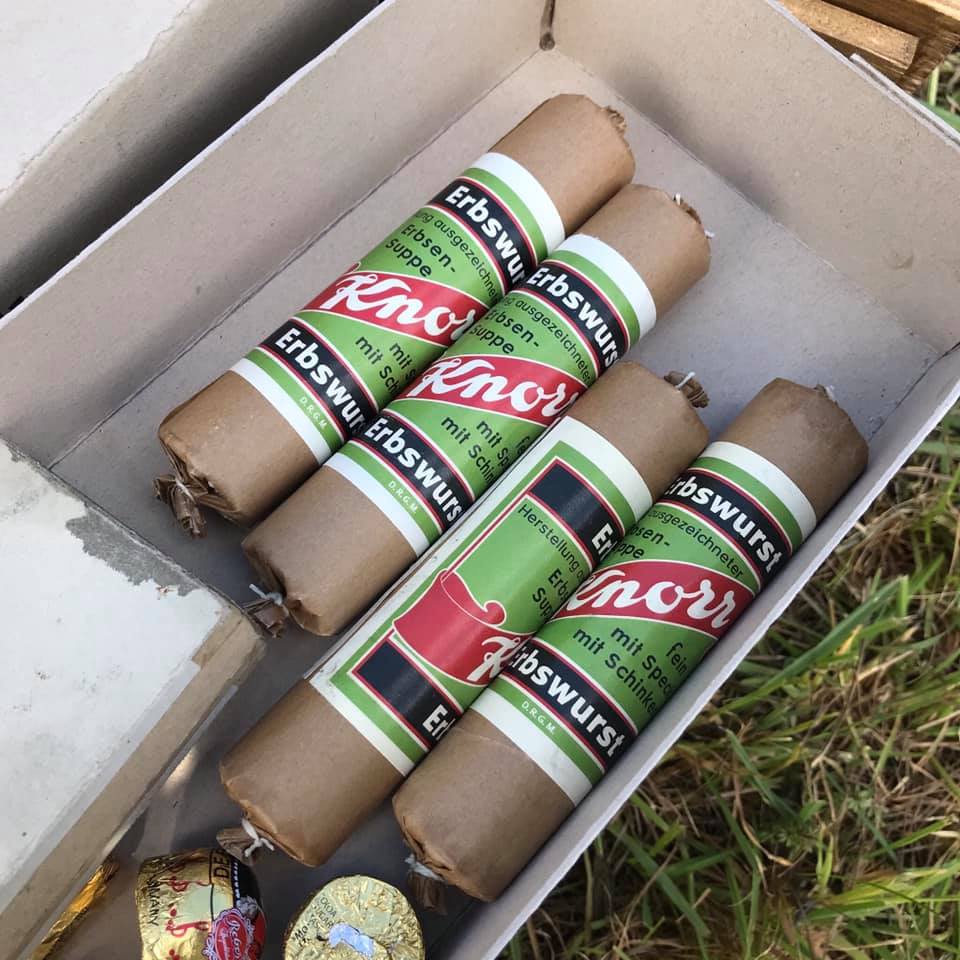
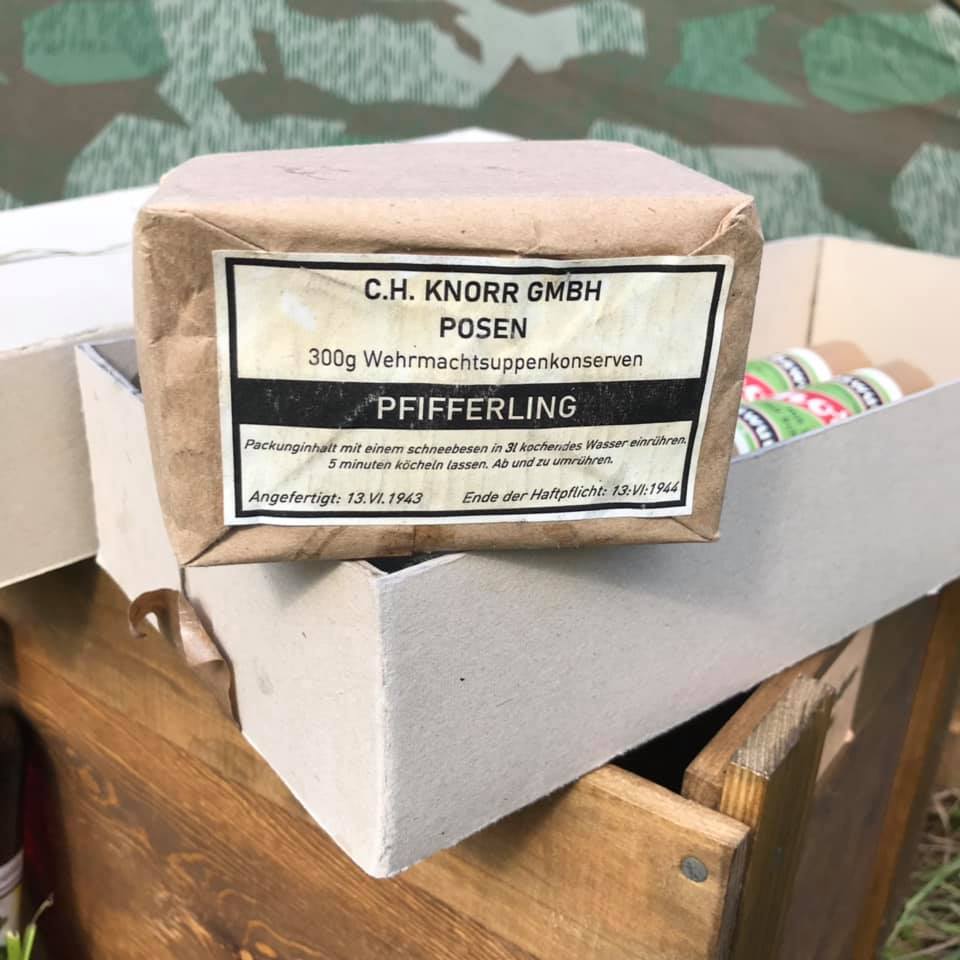
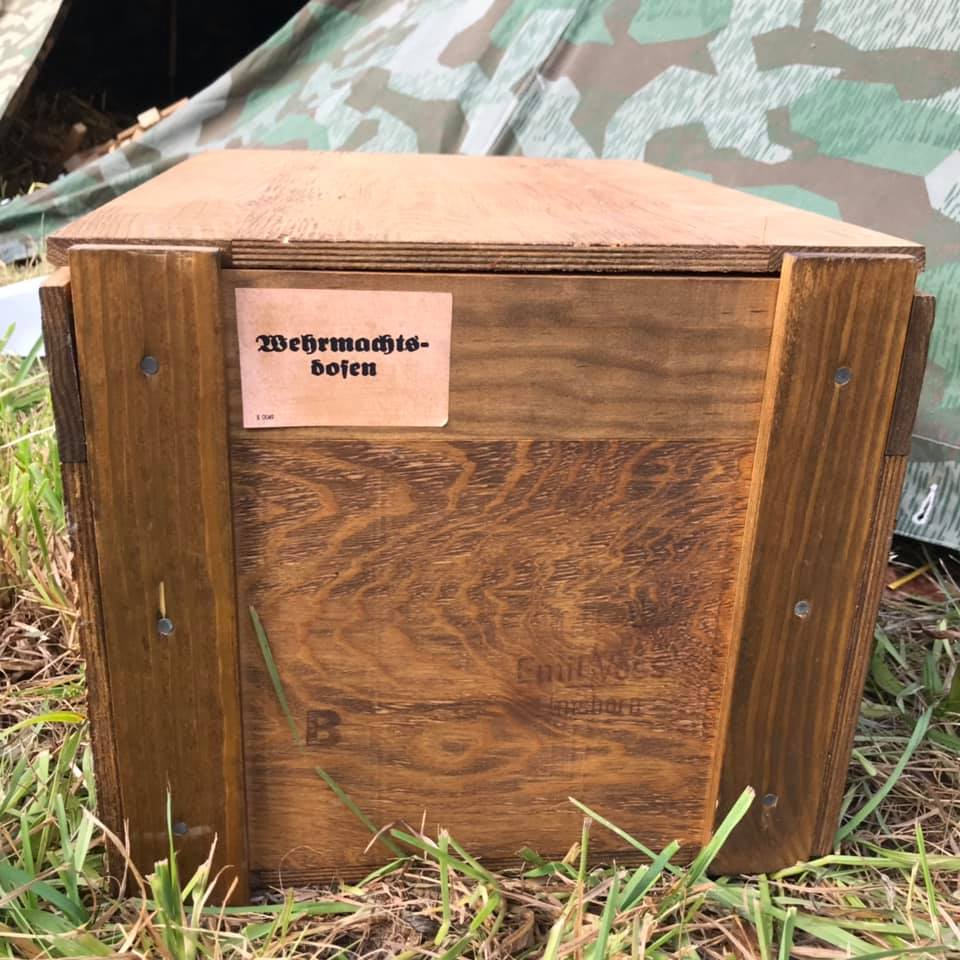
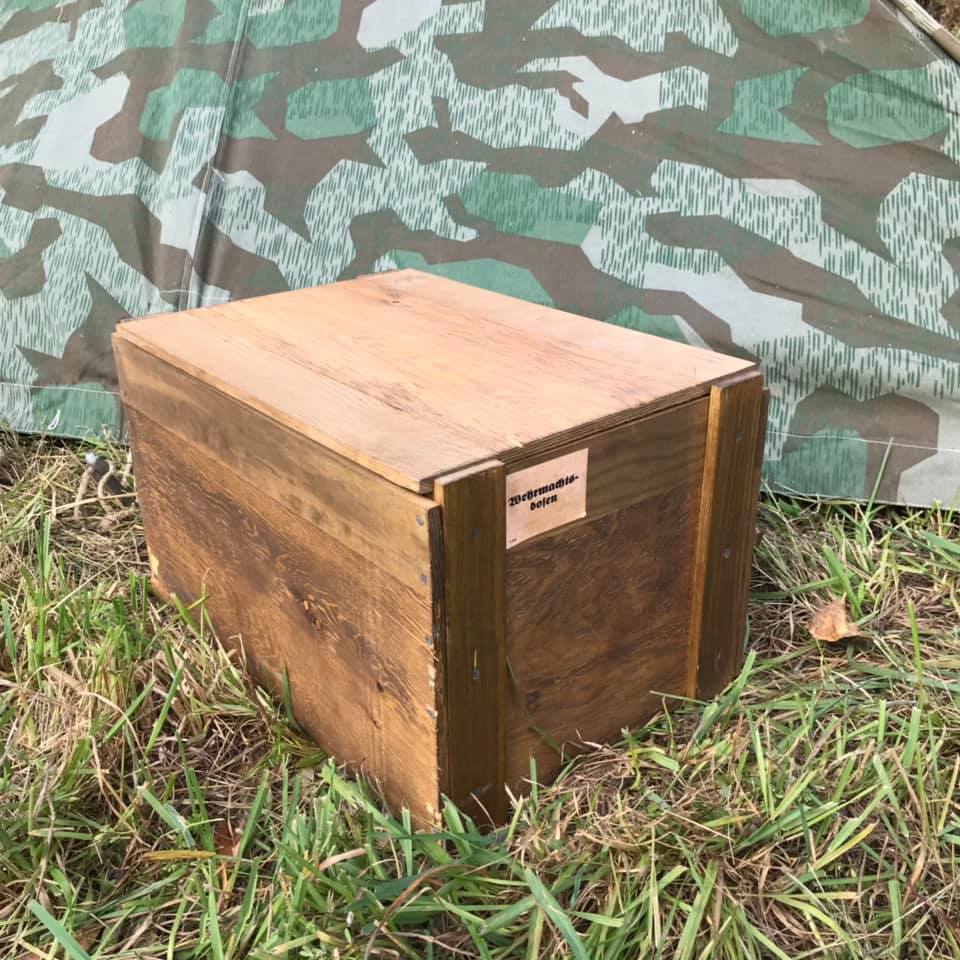
Our unit rations for the event were procured and repackaged by one of our members, Markus Brunner, currently in Germany, and were very generously shipped by him to the US for us to consume at an event. The rations consist of a carefully recreated crate, within which are a mix of reproduced military rations goods and procured/sent from home civil items. These items included canned and dry soup, canned sausages, spreads for bread, as well as liquor, cigarettes and sweets. Normally in our group we prepare meals from fresh bulk foods. This recreation of durable canned and dry rations added a different aspect to our meals, and the attention to detail with regard to the packaging enhanced the realism of the event as well. This supply yielded 2 hearty warm meals for our 8-man team, plus snacks.
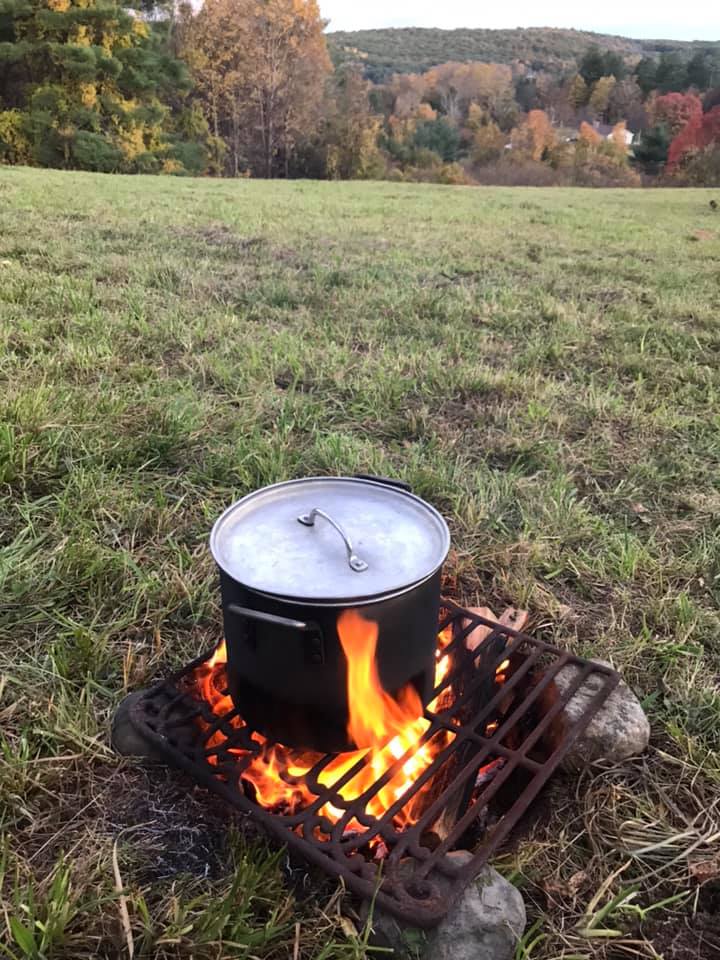
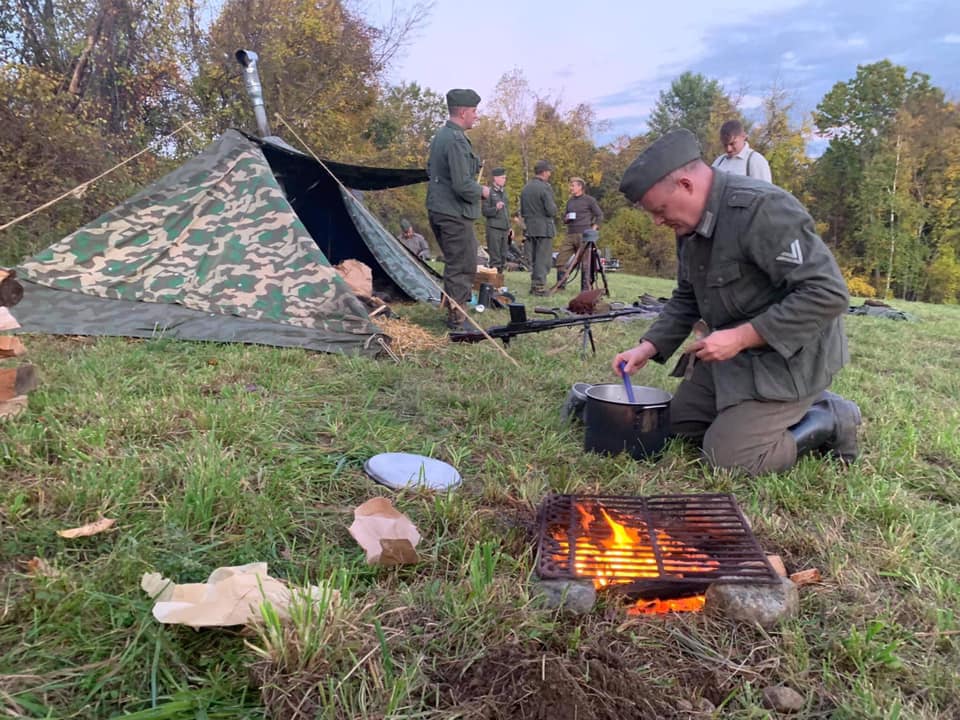
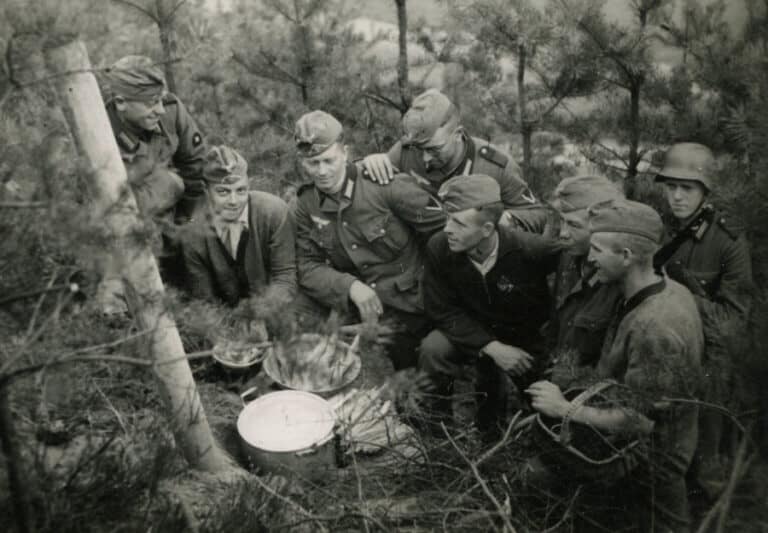
This is what we used to cook the unit meals. The big aluminum pot is a type often seen in wartime photos. The smaller blue pot with loop for hanging is also a common style from that era. Blue is one of the enamel colors that I have been able to document being used in prewar Germany for this kind of cookware. The ladle and knife are old civilian things. The grate is from a 100-year-old wood stove. I don’t bring the grate to most events but for this specific setting, a semi-permanent outpost adjacent to a farm, I regarded it as plausible; ordinarily I cook over rocks, or a hole in the ground, but the grate certainly makes it easier. I’ve included some photos of this stuff in use and also a wartime photo from a Sicherung unit showing a cooking pot that is almost identical to the modern aluminum one we use.
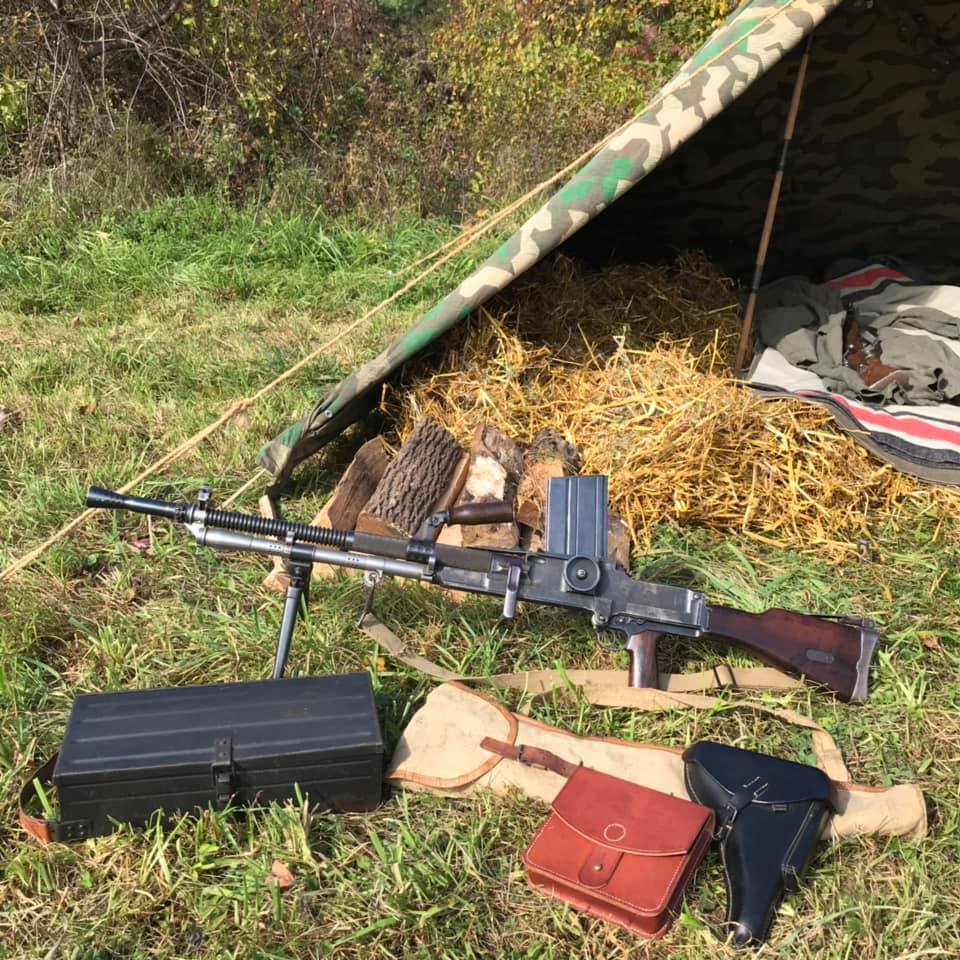
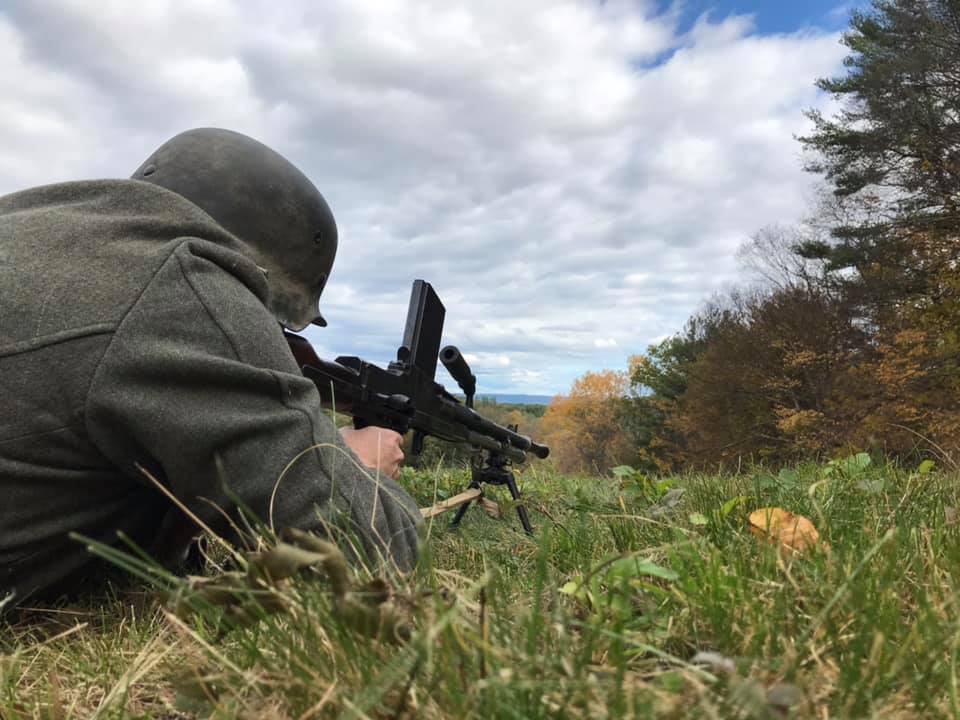
We also brought this ZB30. This is a non-firing dummy gun that we use as a prop for immersive scenarios and also (as in this case) for training. In addition to the dummy gun there are also the necessary accessories for those assigned to be the machine gun team: a pistol, Czech MG tool pouch, spare barrel in barrel bag, and the German made box for ZB magazines. Most of our members arrived at the event on Friday, we were able to use Friday afternoon for training on our tactics.
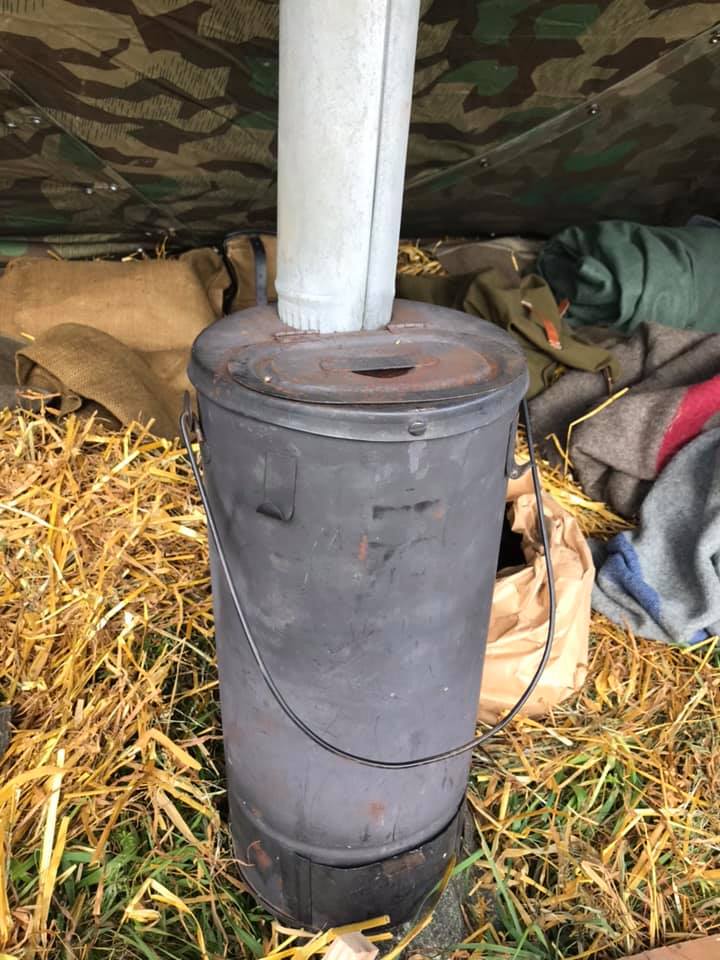
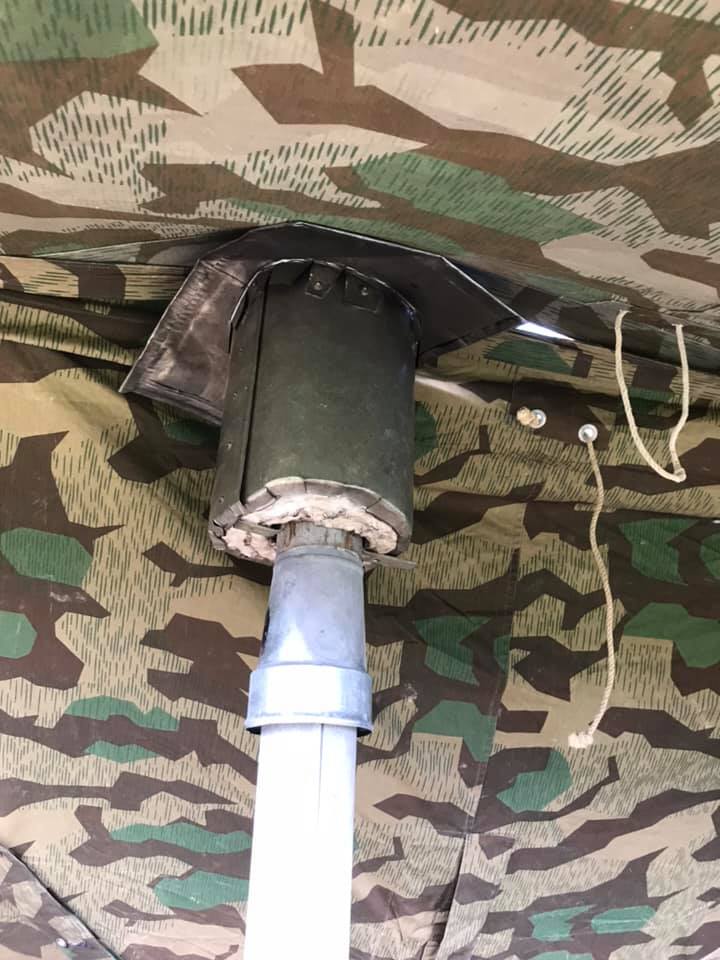
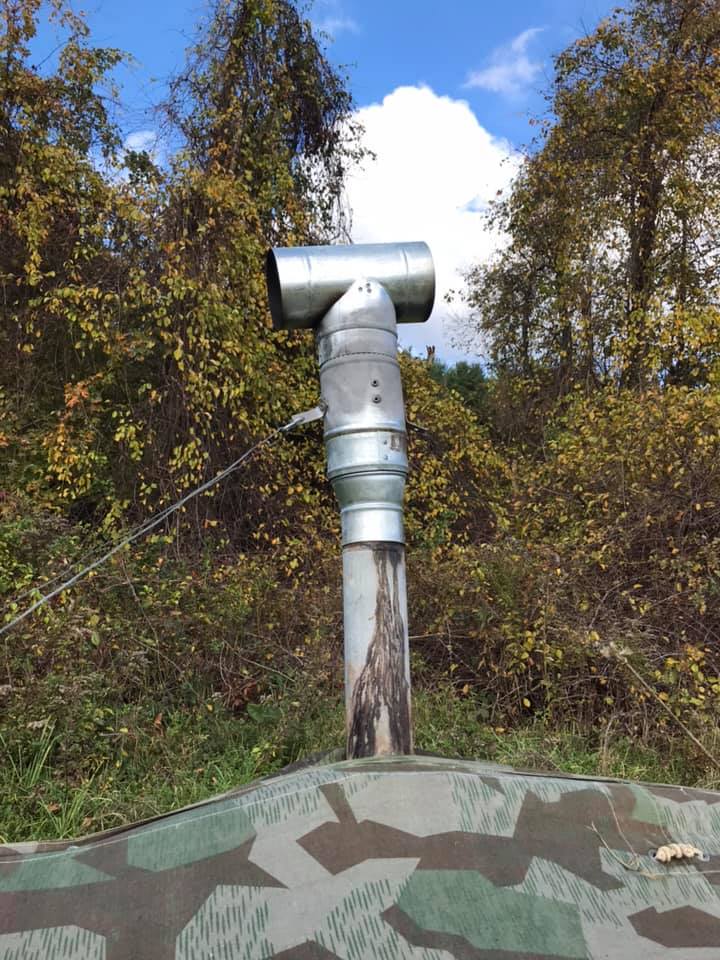
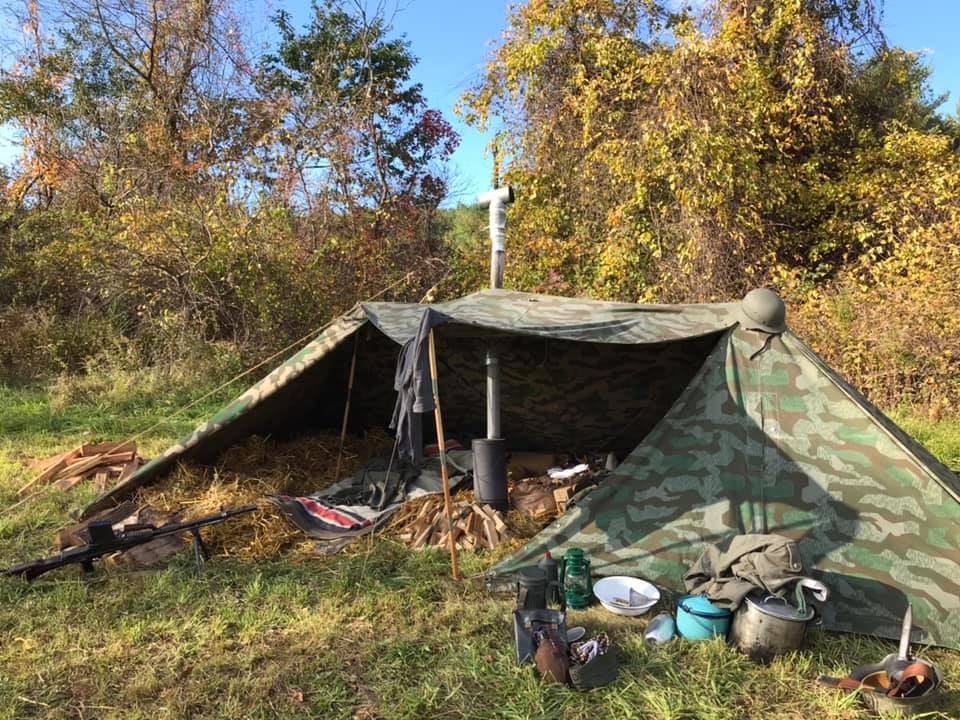
As I mentioned above, temperatures at the reenactment dropped into the low 30s at night. To make sleeping more comfortable, we brought this reproduction field stove. The German manual on winter combat stressed the importance of heated accommodations in cold temperatures, and there are many wartime photos showing various types of stove pipes emerging from tents. This is a sheet metal replica of an issue type stove. We use lump charcoal as fuel, and it throws heat through the night with only minimal need for refueling. There are two key things that reduce the chance of burning down the tent. The first is the insulator and shield where the pipe passes through the opening in the tent. It’s a double wall pipe, with ceramic insulation in the gap, so the metal that touches the tent doesn’t get hot. The other thing is the spark arrestor in the “T” at the top. The smoke exiting the pipe has to flow around a restrictive plate riveted inside this “T.” Sparks hit the plate and fall back into the stove. Saturday night it was nice and cozy in the tent even as a hard frost covered everything outside with a coating of ice.
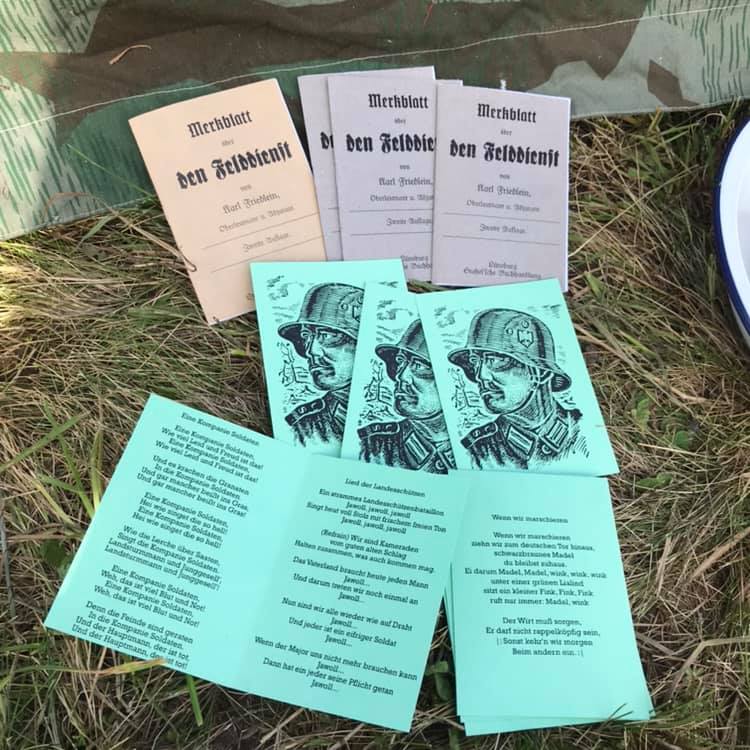
We also brought these printed training aids. The “Merkblatt” is a something that I made up for our group. It is in English inside, and contains the core of our field tactics and doctrine: how to set up a listening/observation post, information on security patrols, hand and flashlight signals, German language commands and terms we use in the field. The flashlight signals are unique to us, something we made up; most of the rest of what is in there is edited translations from Wehrmacht manuals. The folded green card stock item contains the lyrics to three songs we are working on being able to sing: “Lied der Landesschützen,” “Eine Kompanie Soldaten” and “Wenn Wir Marschieren.” The text is simply printed from my computer, in a period type font, but the cover illustration is a hand done block print.
We also brought our tent, of course. This tent is made of eight reproduction Zeltbahn shelter panels. The zelts are made by different manufacturers (different SMW runs, ATF, different Sturm runs, Trident) to replicate the variation found in originals. The tent pegs are either reproductions of the wartime type or near-identical postwar ones. The poles are reproductions or are similar postwar French and Norwegian surplus. At this event we had people showing up at various times from Friday morning to Saturday morning, leaving Saturday night or Sunday. We had 8 members in attendance but only 6 in the tent. In the reality of war, a unit was in transport together, and they could stop and make tents from each man’s personal shelter quarter/poncho (perhaps supplemented with extra shelter quarters if the situation allowed for it, if the goal was to construct semi-permanent lodging). In reenactment, it doesn’t really work that way. Somebody arriving after dark, to an event in progress, is going to want to have a pre-made, dry, sheltered place to stow his blankets and gear, and for sleeping. There are immersion events where when you arrive at the event you are directed to a fighting position and you man it for the duration regardless of weather. But most events are not like that, and even some events that claim to be that aren’t really that. For most events, having a unit tent for lodging is absolutely crucial.
Every reenactment event is different, with countless variables that need to be taken into account when planning. The items shown here, from personal sleeping gear to the unit tent, are largely applicable to most events. From a logistical standpoint, you need something to sleep on, something to sleep in, and something to sleep under; it’s nice to have illumination at night, and meals to eat, when the event is not providing them. Training aids provide opportunity for realistic activity, and prevent people from getting restless and bored. Heated accommodations make a tremendous difference for modern humans who are not acclimated to sleeping outdoors. Being a member of a reenactment group means being part of a team who can share these logistical burdens.
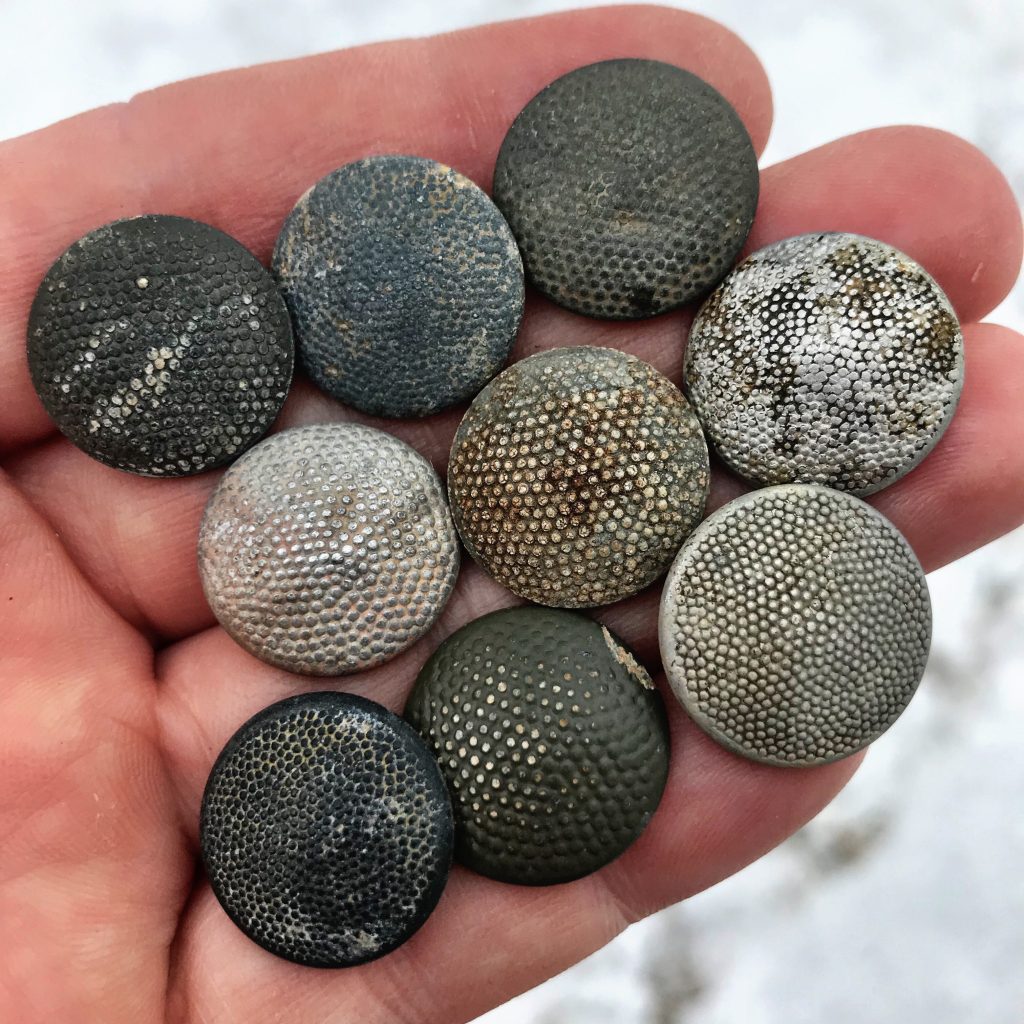
Our previous post on Wehrmacht pebbled field blouse buttons included a photo of the backs of some pre-war and early war pebbled buttons, recovered from the Stalingrad battlefield. Here is a photo of the fronts of some of these buttons. This pattern of button was standard on Wehrmacht tunics and overcoats, and was used on some other uniform items as well.
These buttons show varying degrees of wear, and also spent many years on or under the ground. The mostly bare metal surfaces reveal details of the pebbled texture- large or small, more or less “pebbles,” arranged in an orderly or chaotic pattern, with more or less defined pebbling.
These are all pre-war or early war buttons, made of zinc or aluminum. They are from a tiny sample of original buttons and do not reflect the full range of pebbling patterns used by all of the manufacturers that made Wehrmacht tunic buttons out of various materials from 1935 to 1945.
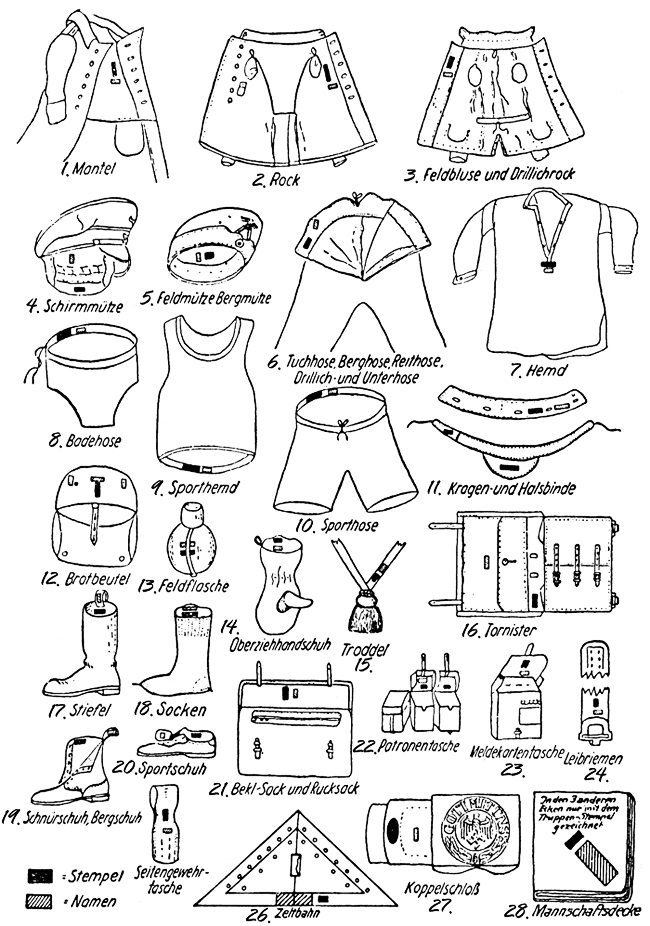
Before the outbreak of WWII, Wehrmacht regulations stipulated that each soldier’s uniform and equipment items were to be marked with a tag with his name, and a stamp for his unit. Here is a scan from a Wehrmacht manual that showed where these stamps and labels were to be placed in the various items a soldier was issued.
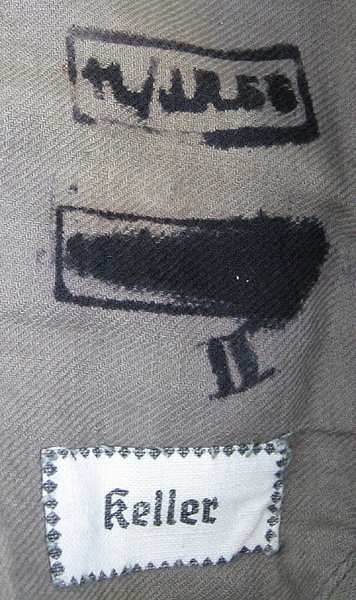
Here is the interior of an early M34 field cap:
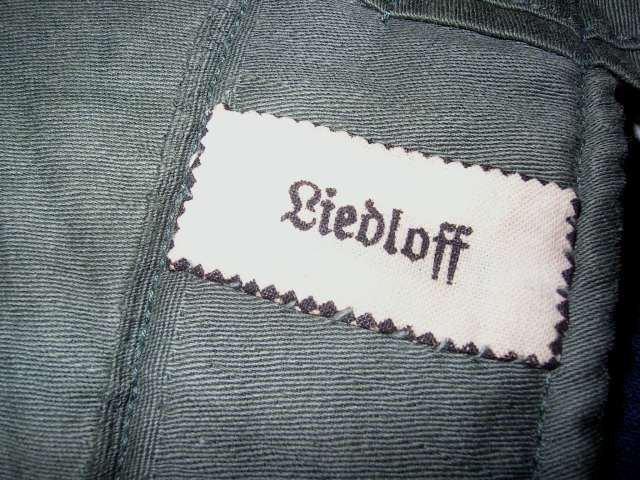
This cap follows the regulations exactly. Note that at some point the soldier was transferred and the unit stamp inked out with a new unit stamped in. There is no unit designation on the name tag, this would have been redundant as that information was on the ink stamp. Here is another original pre-war name tag of the same type.
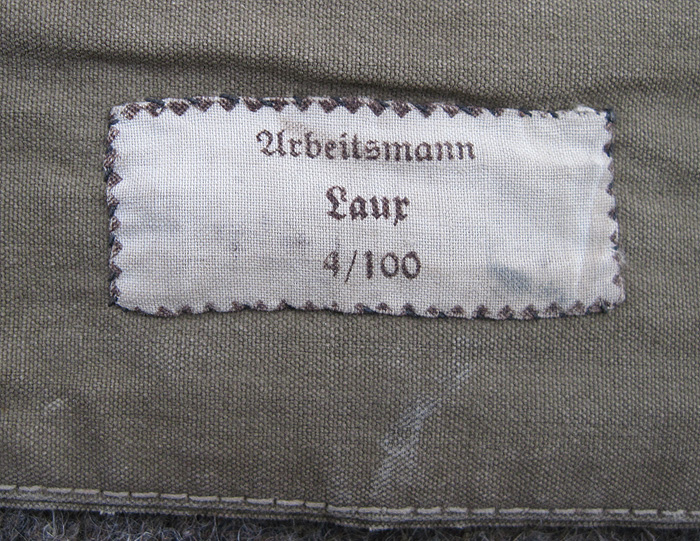
Some of the name tags used before the war also did have ranks and unit designations. Here is one on a Reichsarbeitsdienst Zeltbahn. Various typefaces were used on these tags.
The use of the name tags and stamps was not the easiest or simplest way to mark gear, it was also not the most permanent way as the tags could be removed/replaced, but it was the prewar German regulation way. Wehrmacht units were in charge of stamping the gear with the unit designation and we can assume that the tags were supplied by the units to the soldiers, or at least the tags were made easily available for them to buy. All this changed in 1940 with the following regulation:
“Allegemeine Heeresmitteilungen, Marz 1940
Namenszettel Waehrend des Krieges kommt das anbringen von Namenszettel as Stoff bzw Papier in die Bekleidungs und Ausrusestungsstuecke des Mannes (H. Dv. 121 Nr. 142) in Fortfall. Vorhandene sowie bereits bestellte Namenszettel koennen aufgebraucht werden.”
Translation: During the war the use of name tags made of cloth or paper in clothing and equipment of the men (as stated in previous regulation) is discontinued. Existing tags and those already ordered can be used.
Use of clothing labels was not a totally private and optional endeavor before the war, it was by regulation. When a new regulation stated that these tags were to be discontinued, it seems reasonable to assume that they were no longer supplied to soldiers by their units. This is presumably why the majority of surviving wartime issue uniform and equipment items do not have these name labels. Most surviving labels of this style are on pre-war items, though even some late war items can be seen with these; I regard it as probable that the tags were still made available for soldiers (or anyone else) to purchase. Despite the official discontinuation of these name tags, many soldiers did still feel a need to identify personal property and kit items. Here are original wartime field gear items that are marked in various ways. Many wartime items remained in use after May 1945, in POW camps and later, in civilian use, in some cases for decades; there is no doubt that some original Wehrmacht field gear items are out there in use to this day. It may be impossible to look at a wartime object and know when exactly a personal marking was applied, and it can be hard to find wartime photos showing a level of detail that would show if equipment items had small personal markings. For this article, I have chosen what I regard as typical examples that I regard as plausible for having been wartime done.
-Stitching name or initials into fabric, as seen on this gas mask strap:
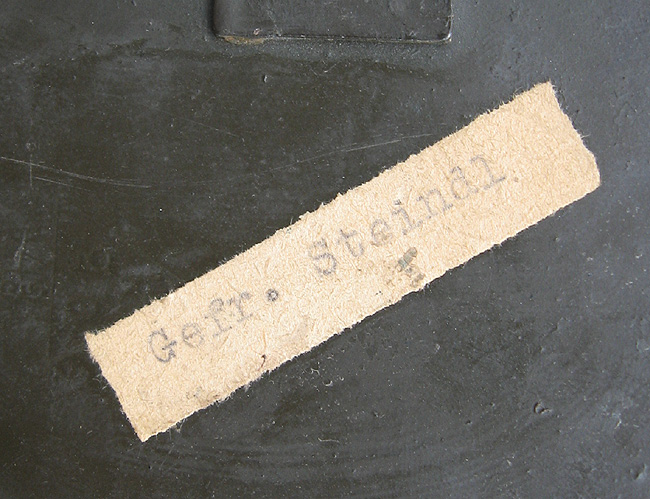
-Use of simple typed glued-on name labels in place of printed tags, here on a gas mask canister:
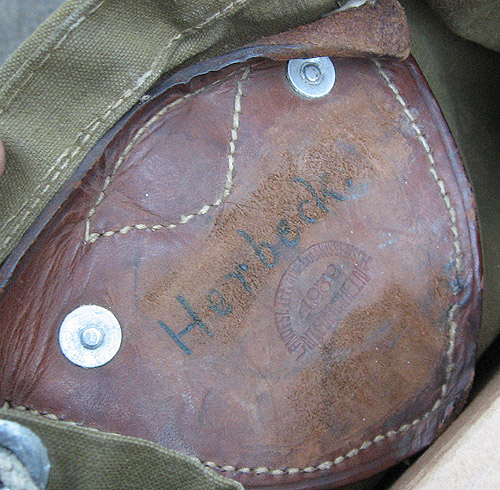
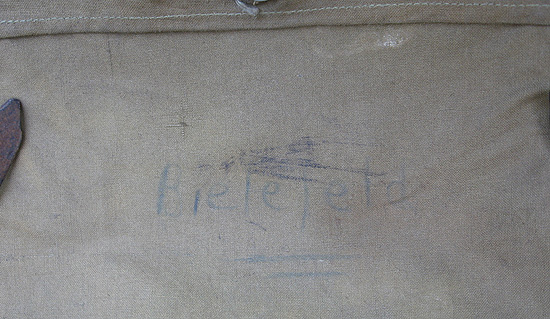
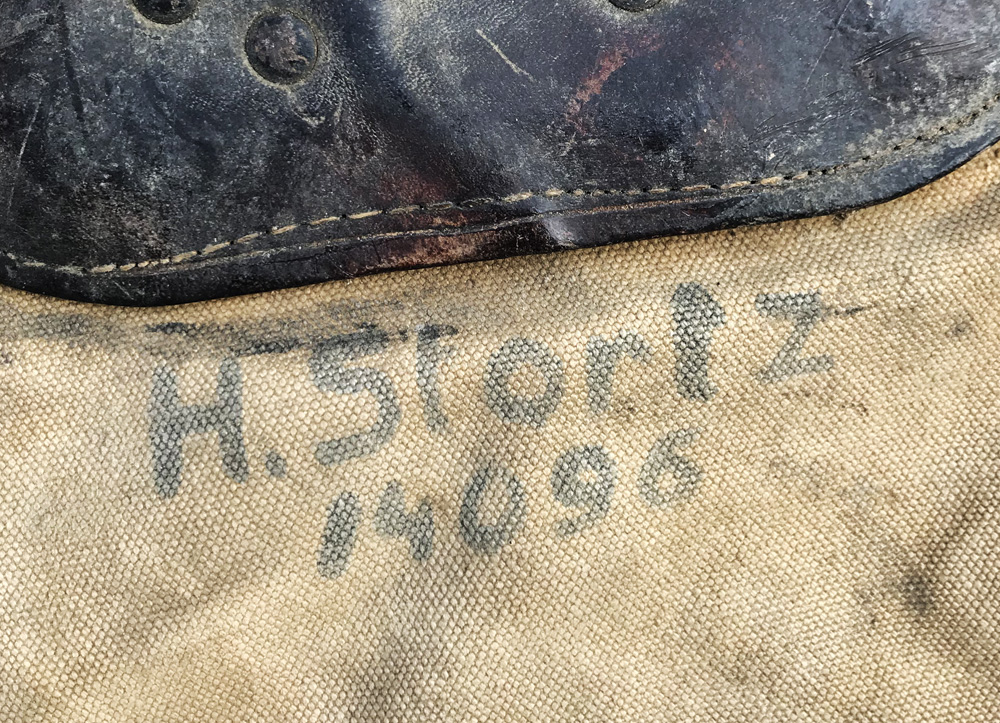
-Writing a name on the item in ink, probably most common way for cloth items; here on a Rucksack, a Tornister, and a canteen cover:
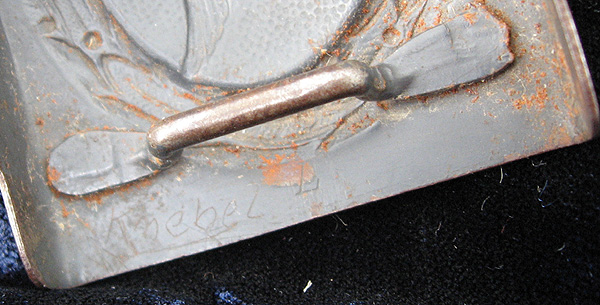
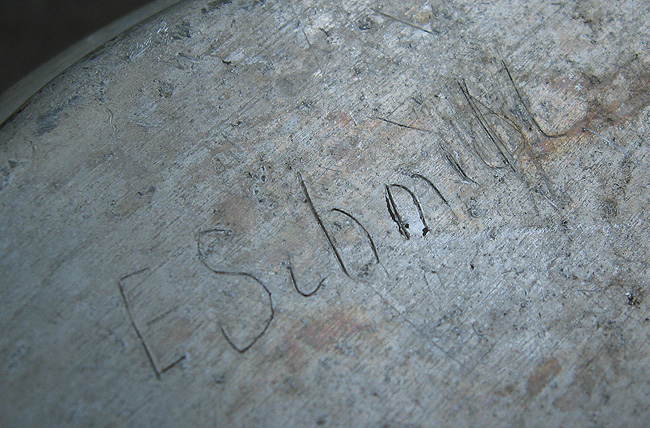
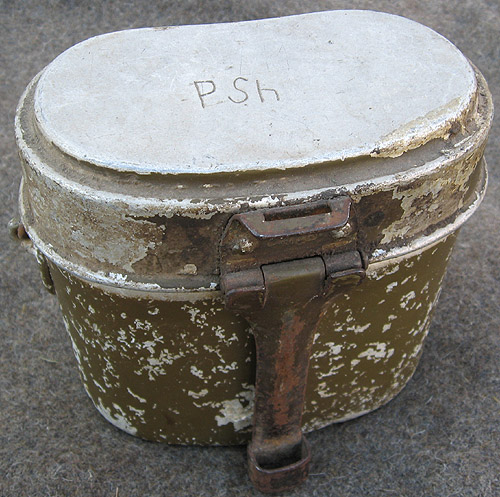
-Scratching a name into a metal item, shown here on a belt buckle and a mess tin:
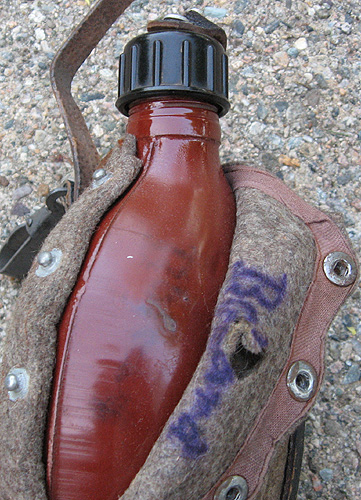
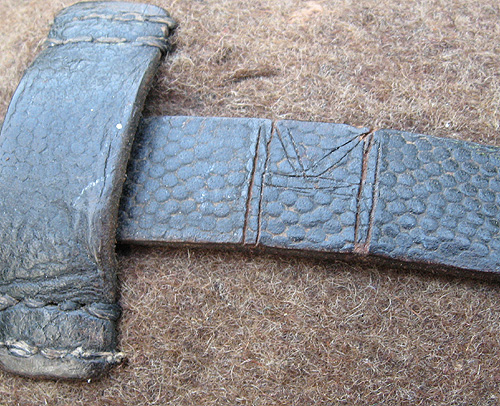
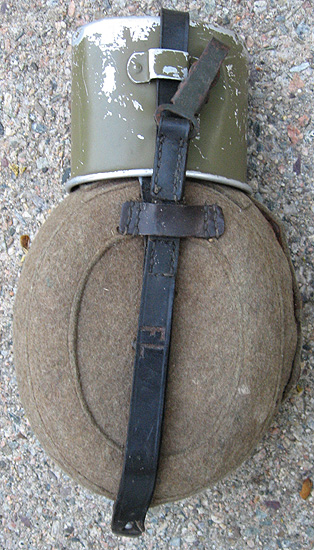
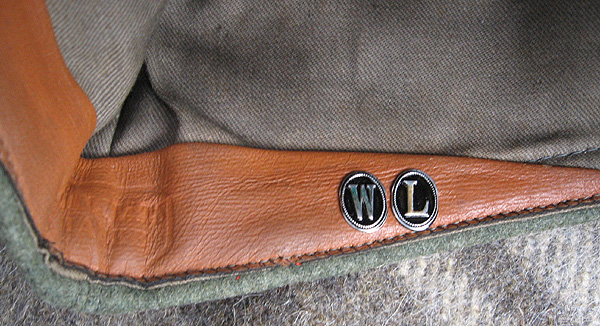
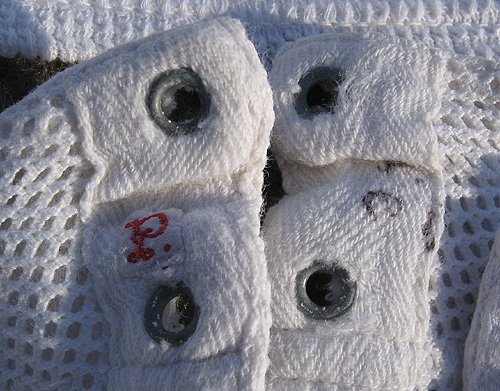
-Scratching or writing initials, a monogram, or identifying symbol of some kind. Here are a couple of canteens with marks on the leather straps, a Zeltbahn with an ink marking, and a mess kit:
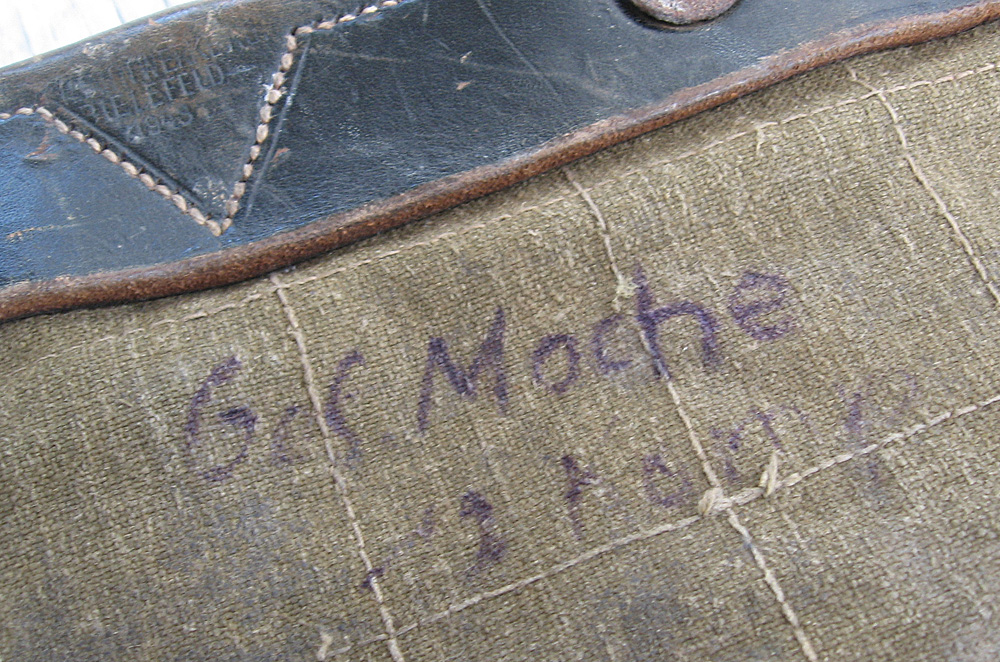
Note that none of these examples have any kind of unit designation, divisional symbol or other identifier. Only rarely would a soldier have also added his unit. In such cases the Kompanie was specified, not the Division. A typical way would be the soldier’s name and the number of the Kompanie, as on this 1943 Tornister:
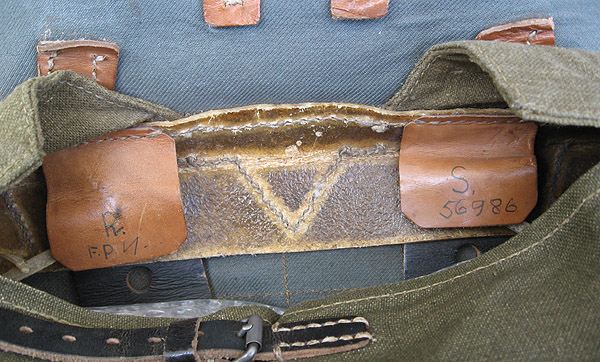
In some cases the Feldpost number of the soldier’s unit might be used, as on this late-war Tornister:
This large Rucksack and captured Soviet map case were also marked with names and Feldpost numbers:
There were also private purchase civilian type identifying items that soldiers could have bought and used as well to mark kit. Here are metal initials on a tailor made officer’s M38 cap, and a woven initial sewn on issue underclothing.
It should also be pointed out that many or most wartime Wehrmacht equipment items were not named at all. Issue items were Reich property, not owned by the soldier; he was responsible for them, but to a soldier, one canteen or mess kit might have been indistinguishable from another.
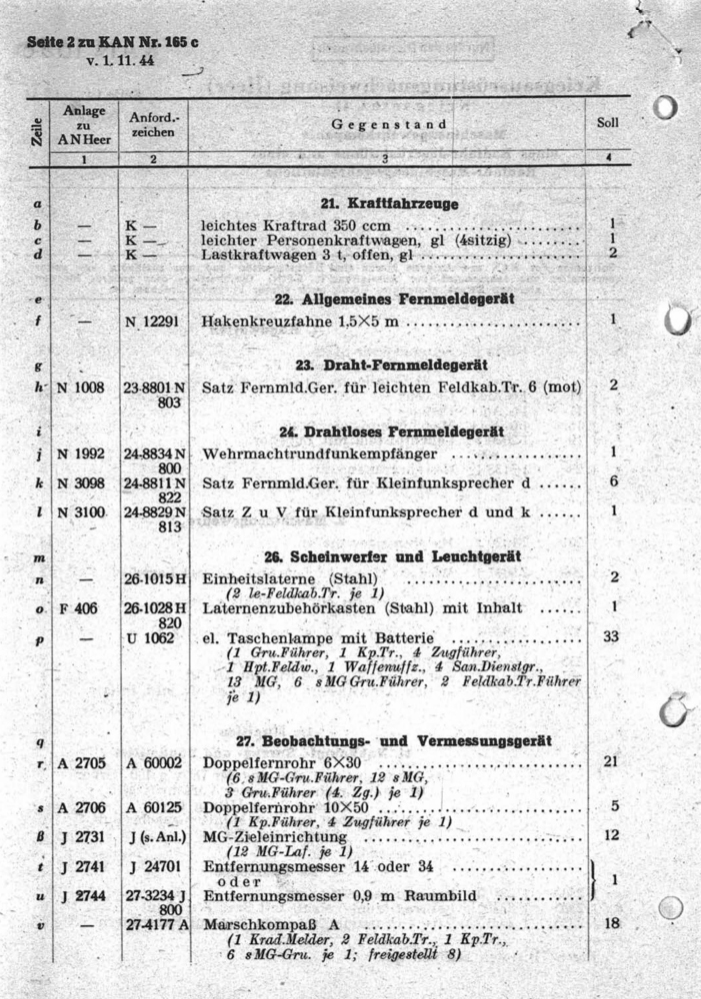
The Kriegsausrüstungsnachweisung (KAN) was a detailed list prepared by the Wehrmacht command for every type of unit, showing the gear with which that unit was to be equipped. The KAN did not list items like mess kits and canteens, that were issued to soldiers, but rather unit-level assets like weapons and vehicles. Here are two pages from two different wartime KAN documents. The typewritten one is from a leichte Panzer-Aufklärungskompanie (gepanzert), and the printed one is from a Maschinengewehrkompanie eines Jägerbataillons und eines Radfahr-Maschinengewehrbataillons. Both of these documents list in the “General long-distance signalling equipment” section, a “Swastika flag 1.5 x 5 meters” (Hakenkreuzfahne 1.5 x 5 m).
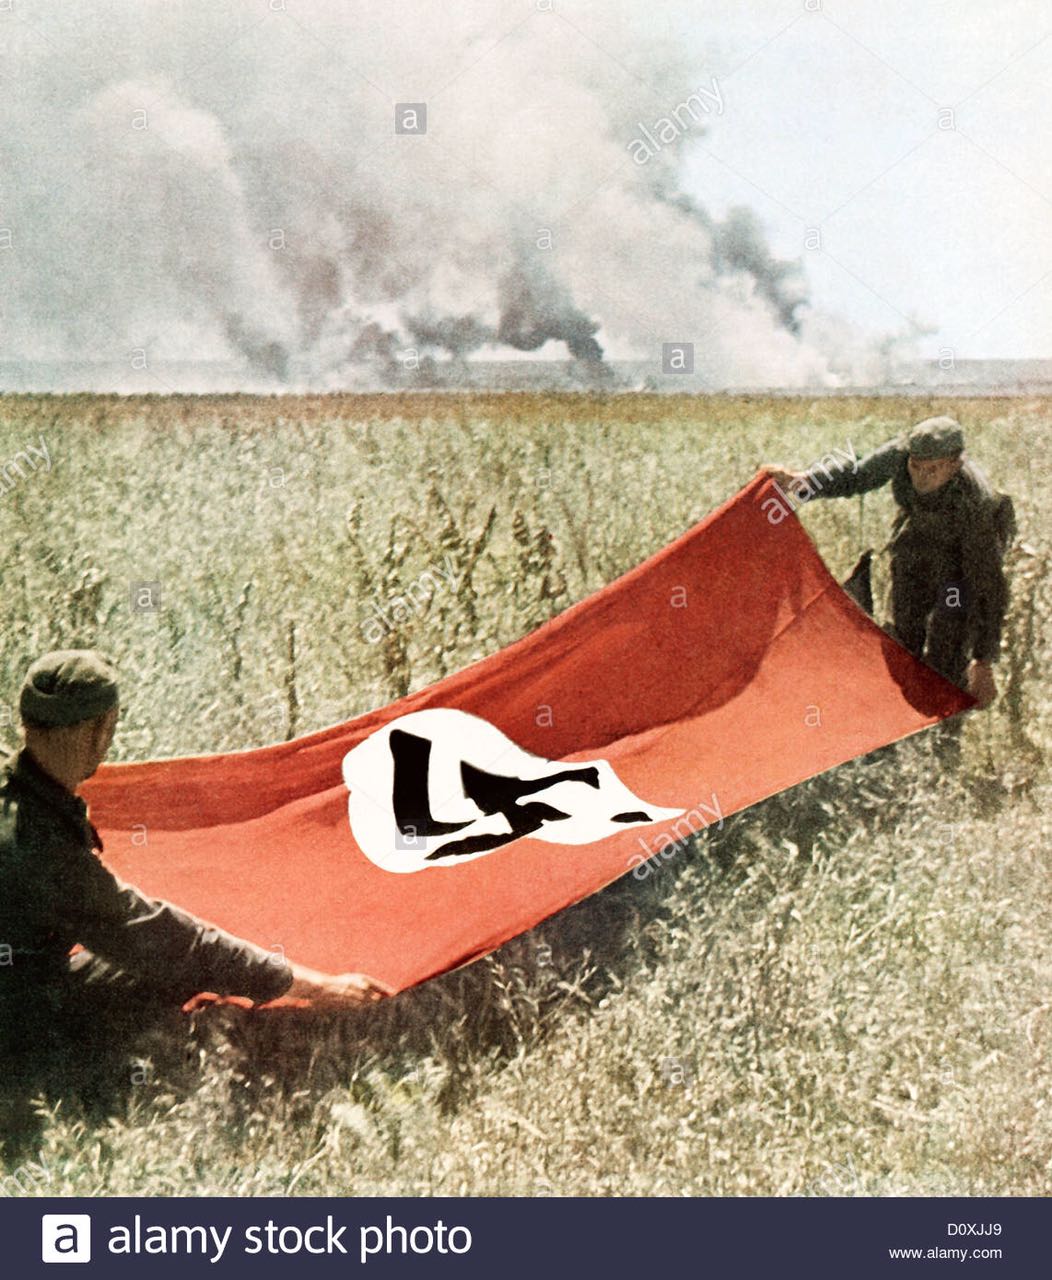
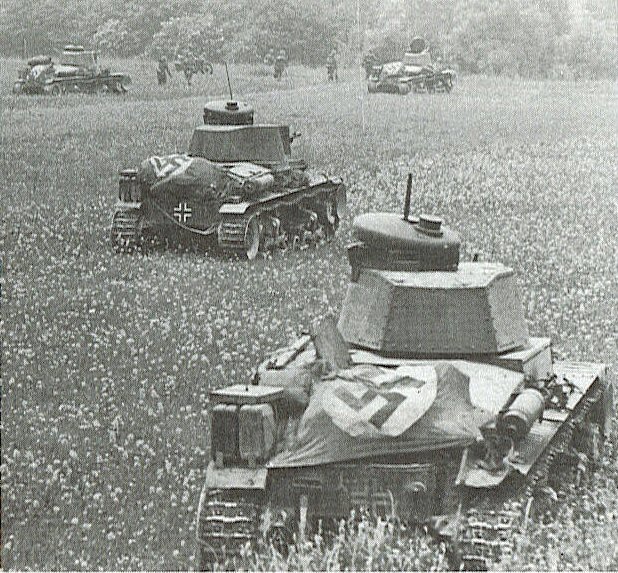
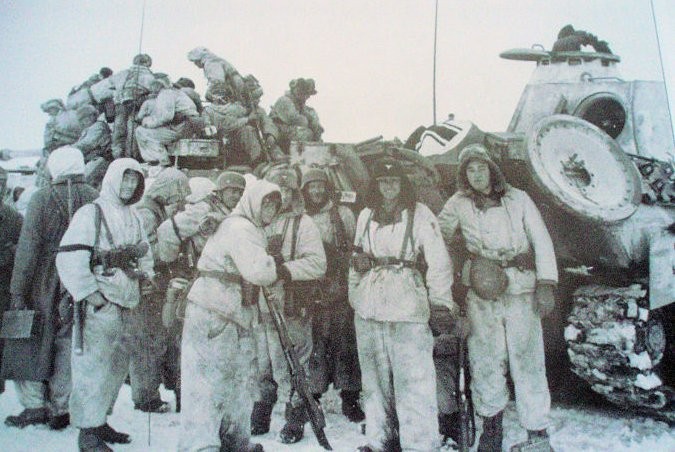
Here are a couple of photos that appear to show this type of large recognition banner in use. The propaganda film “Sprung in den Feind” also shows one of these at the 21:41 minute mark.
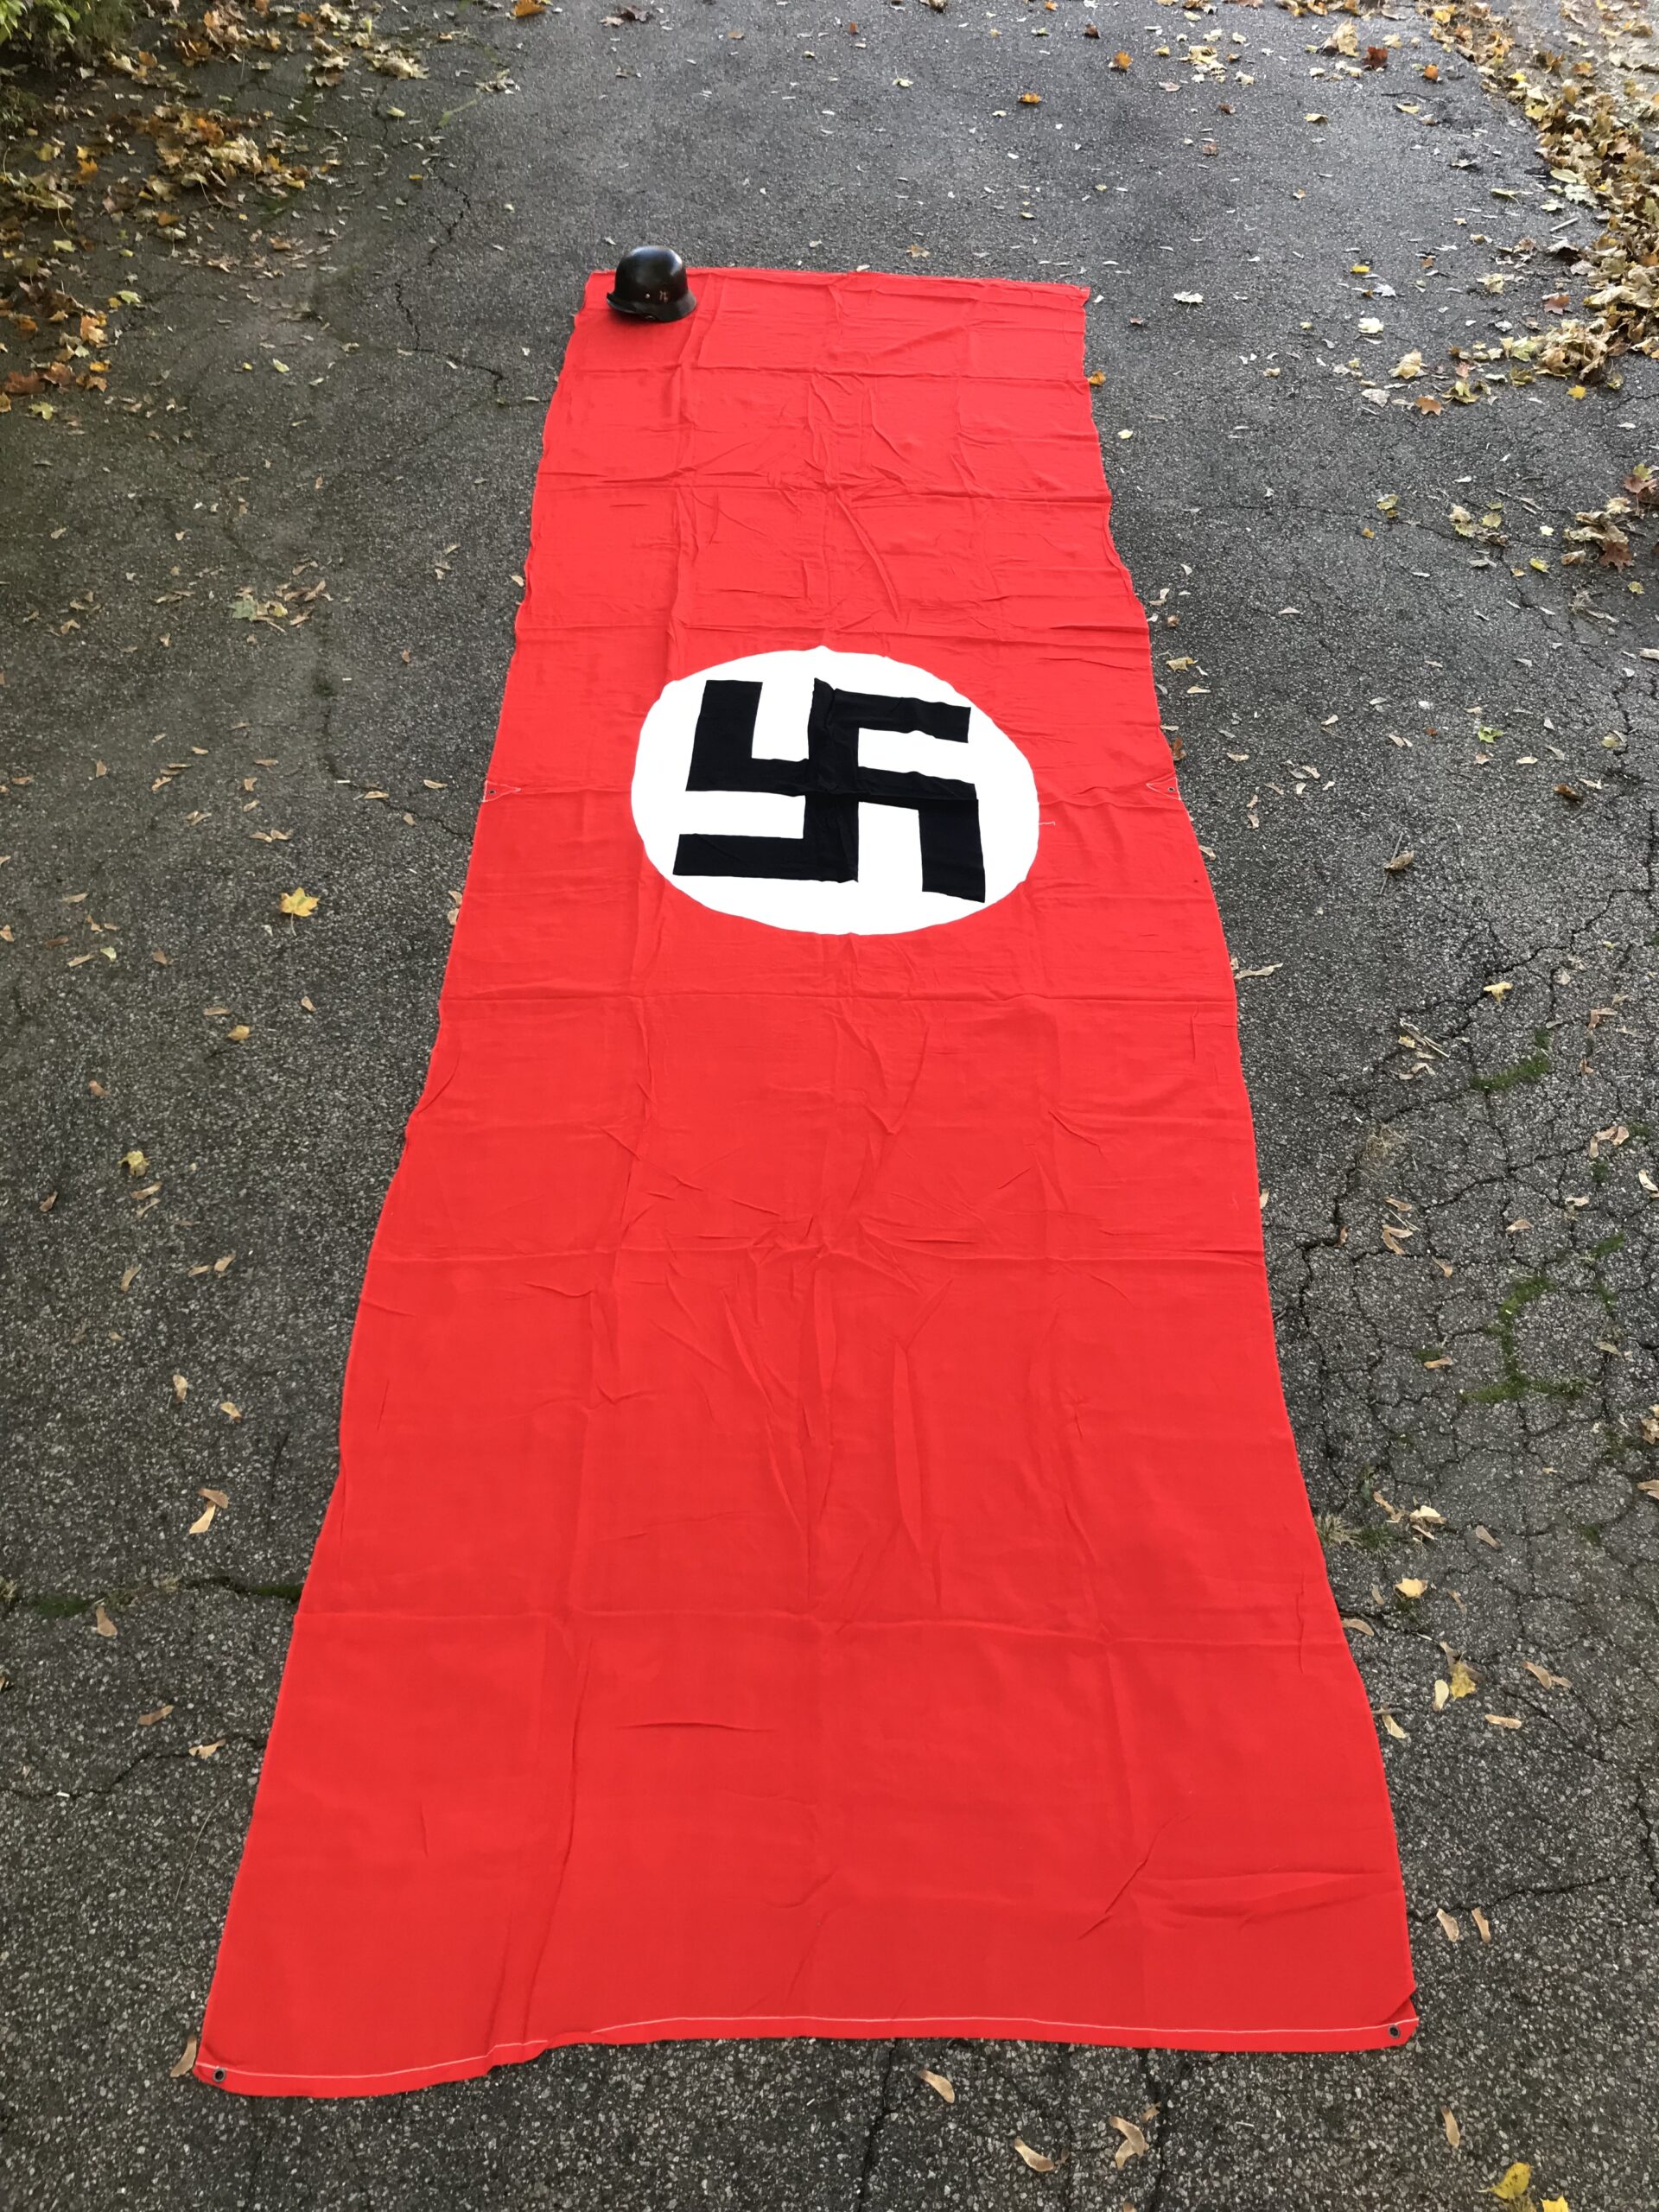
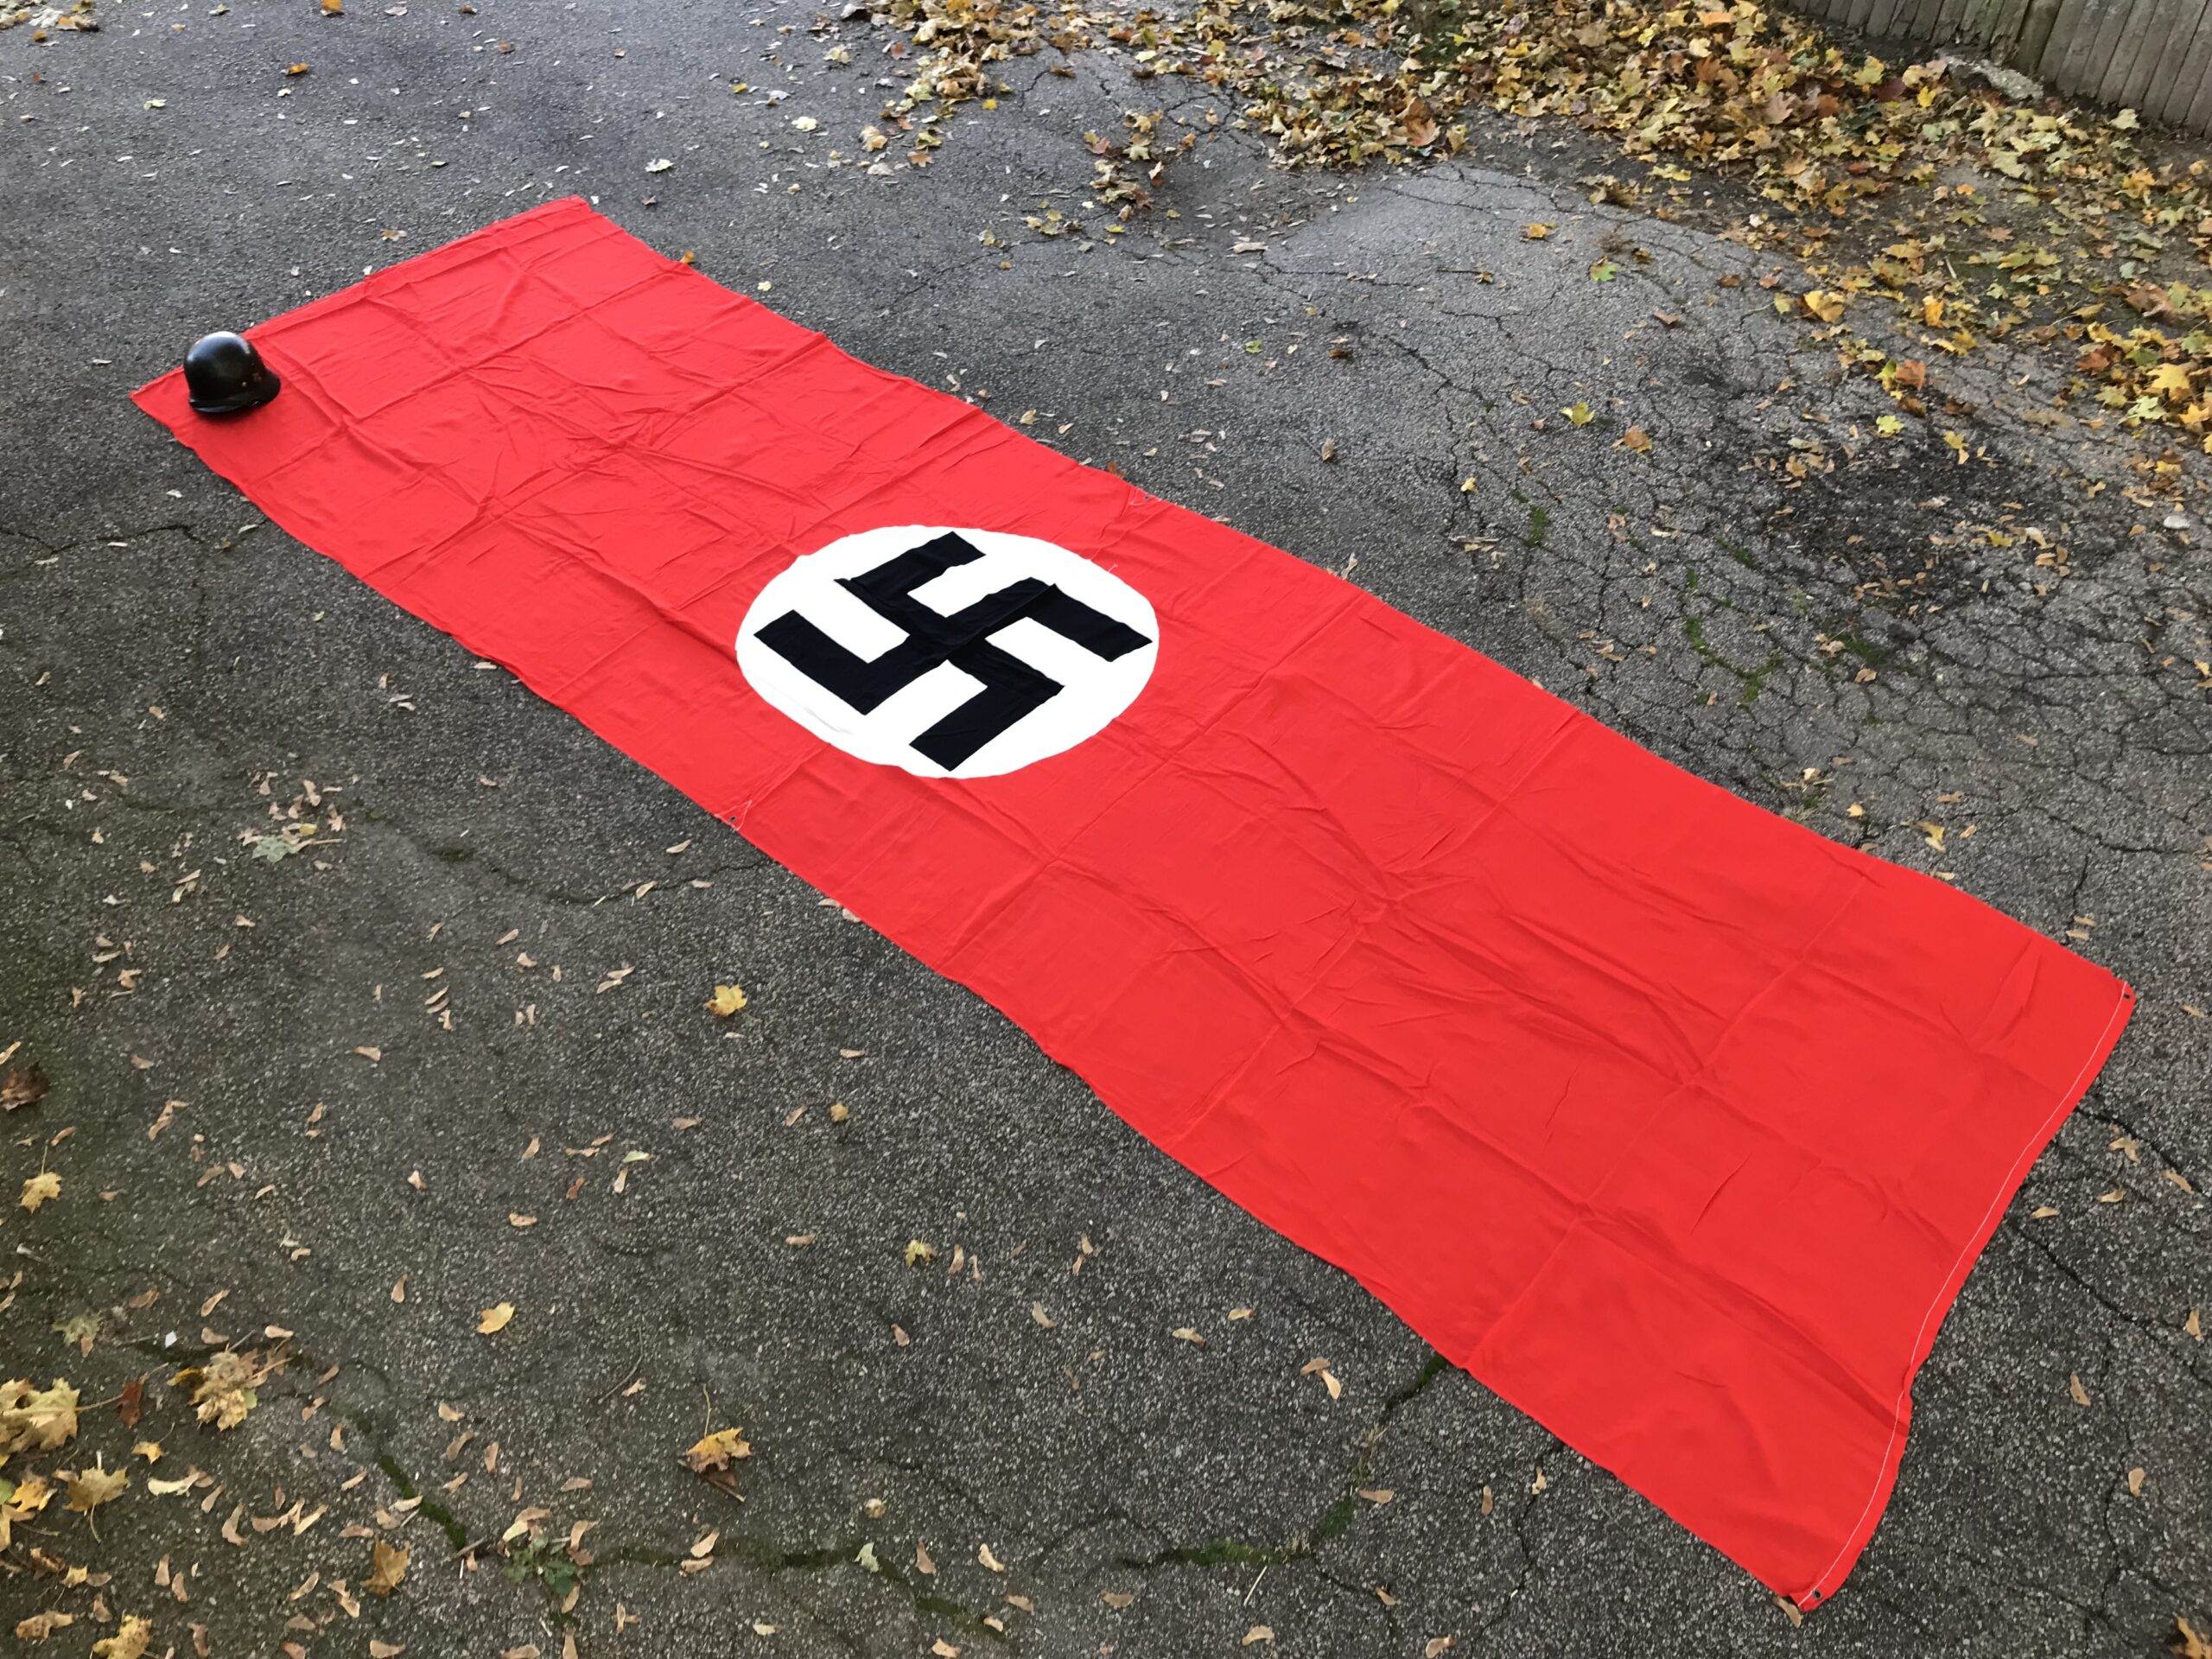
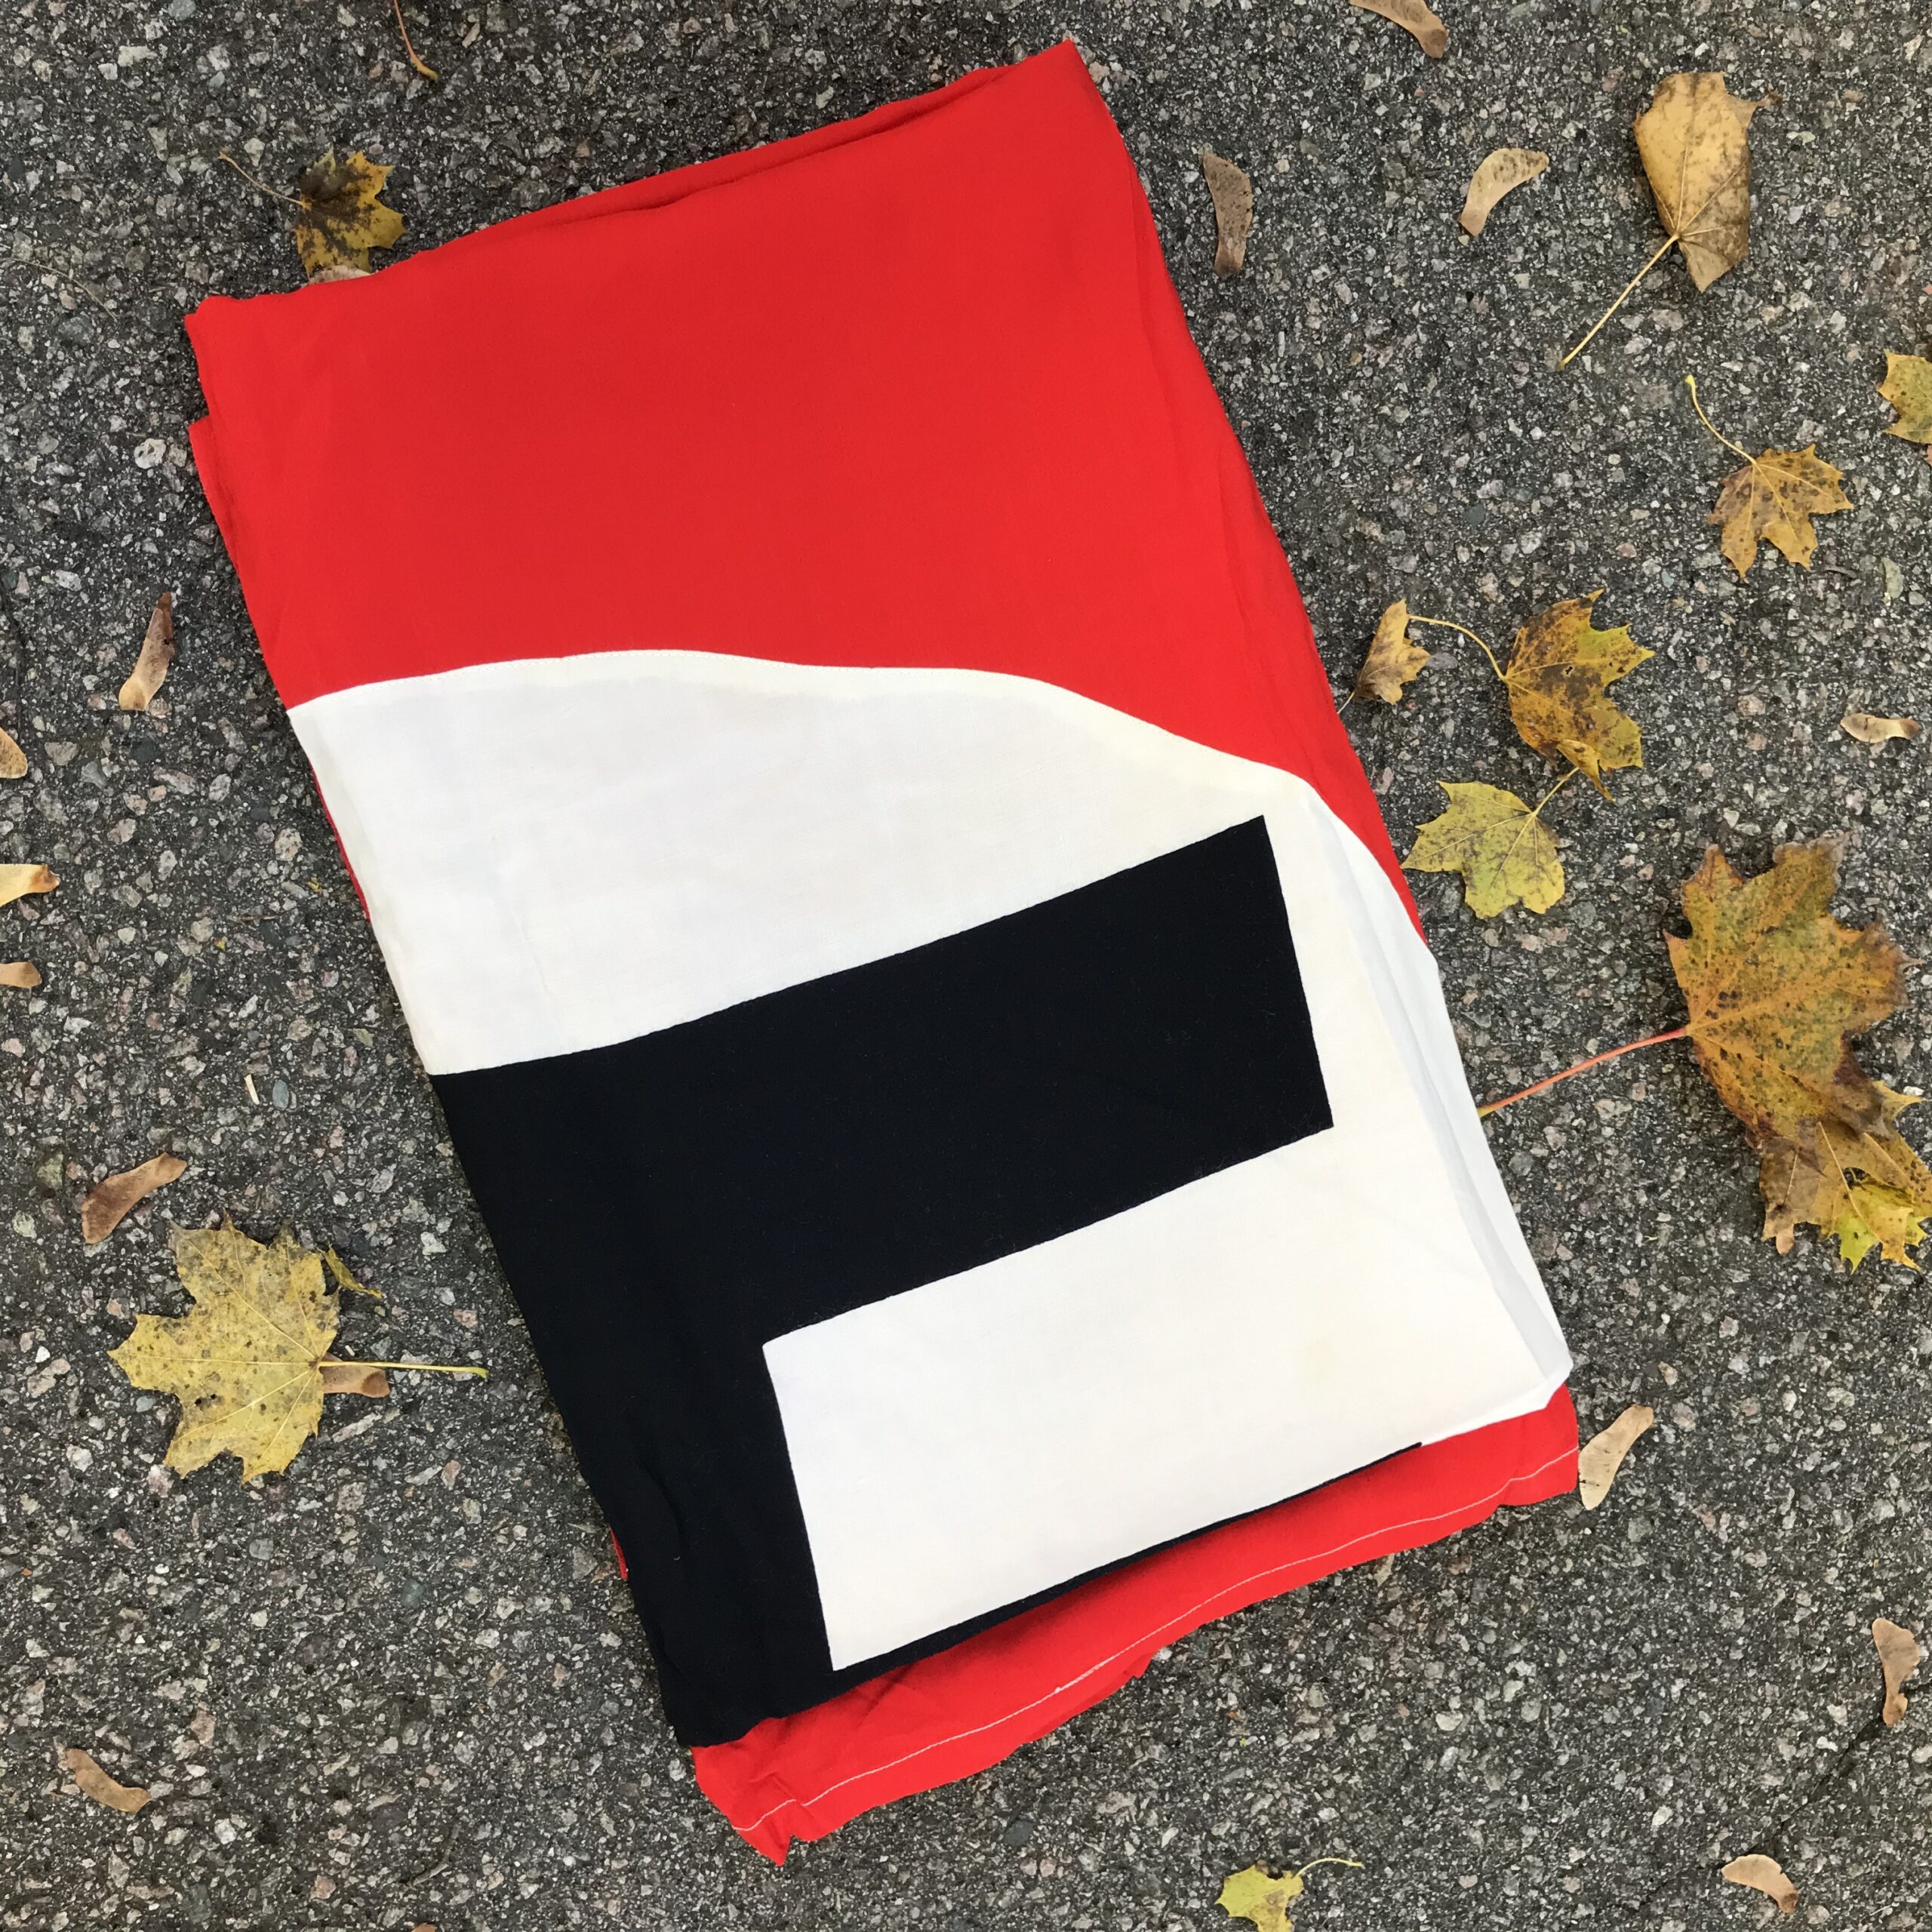
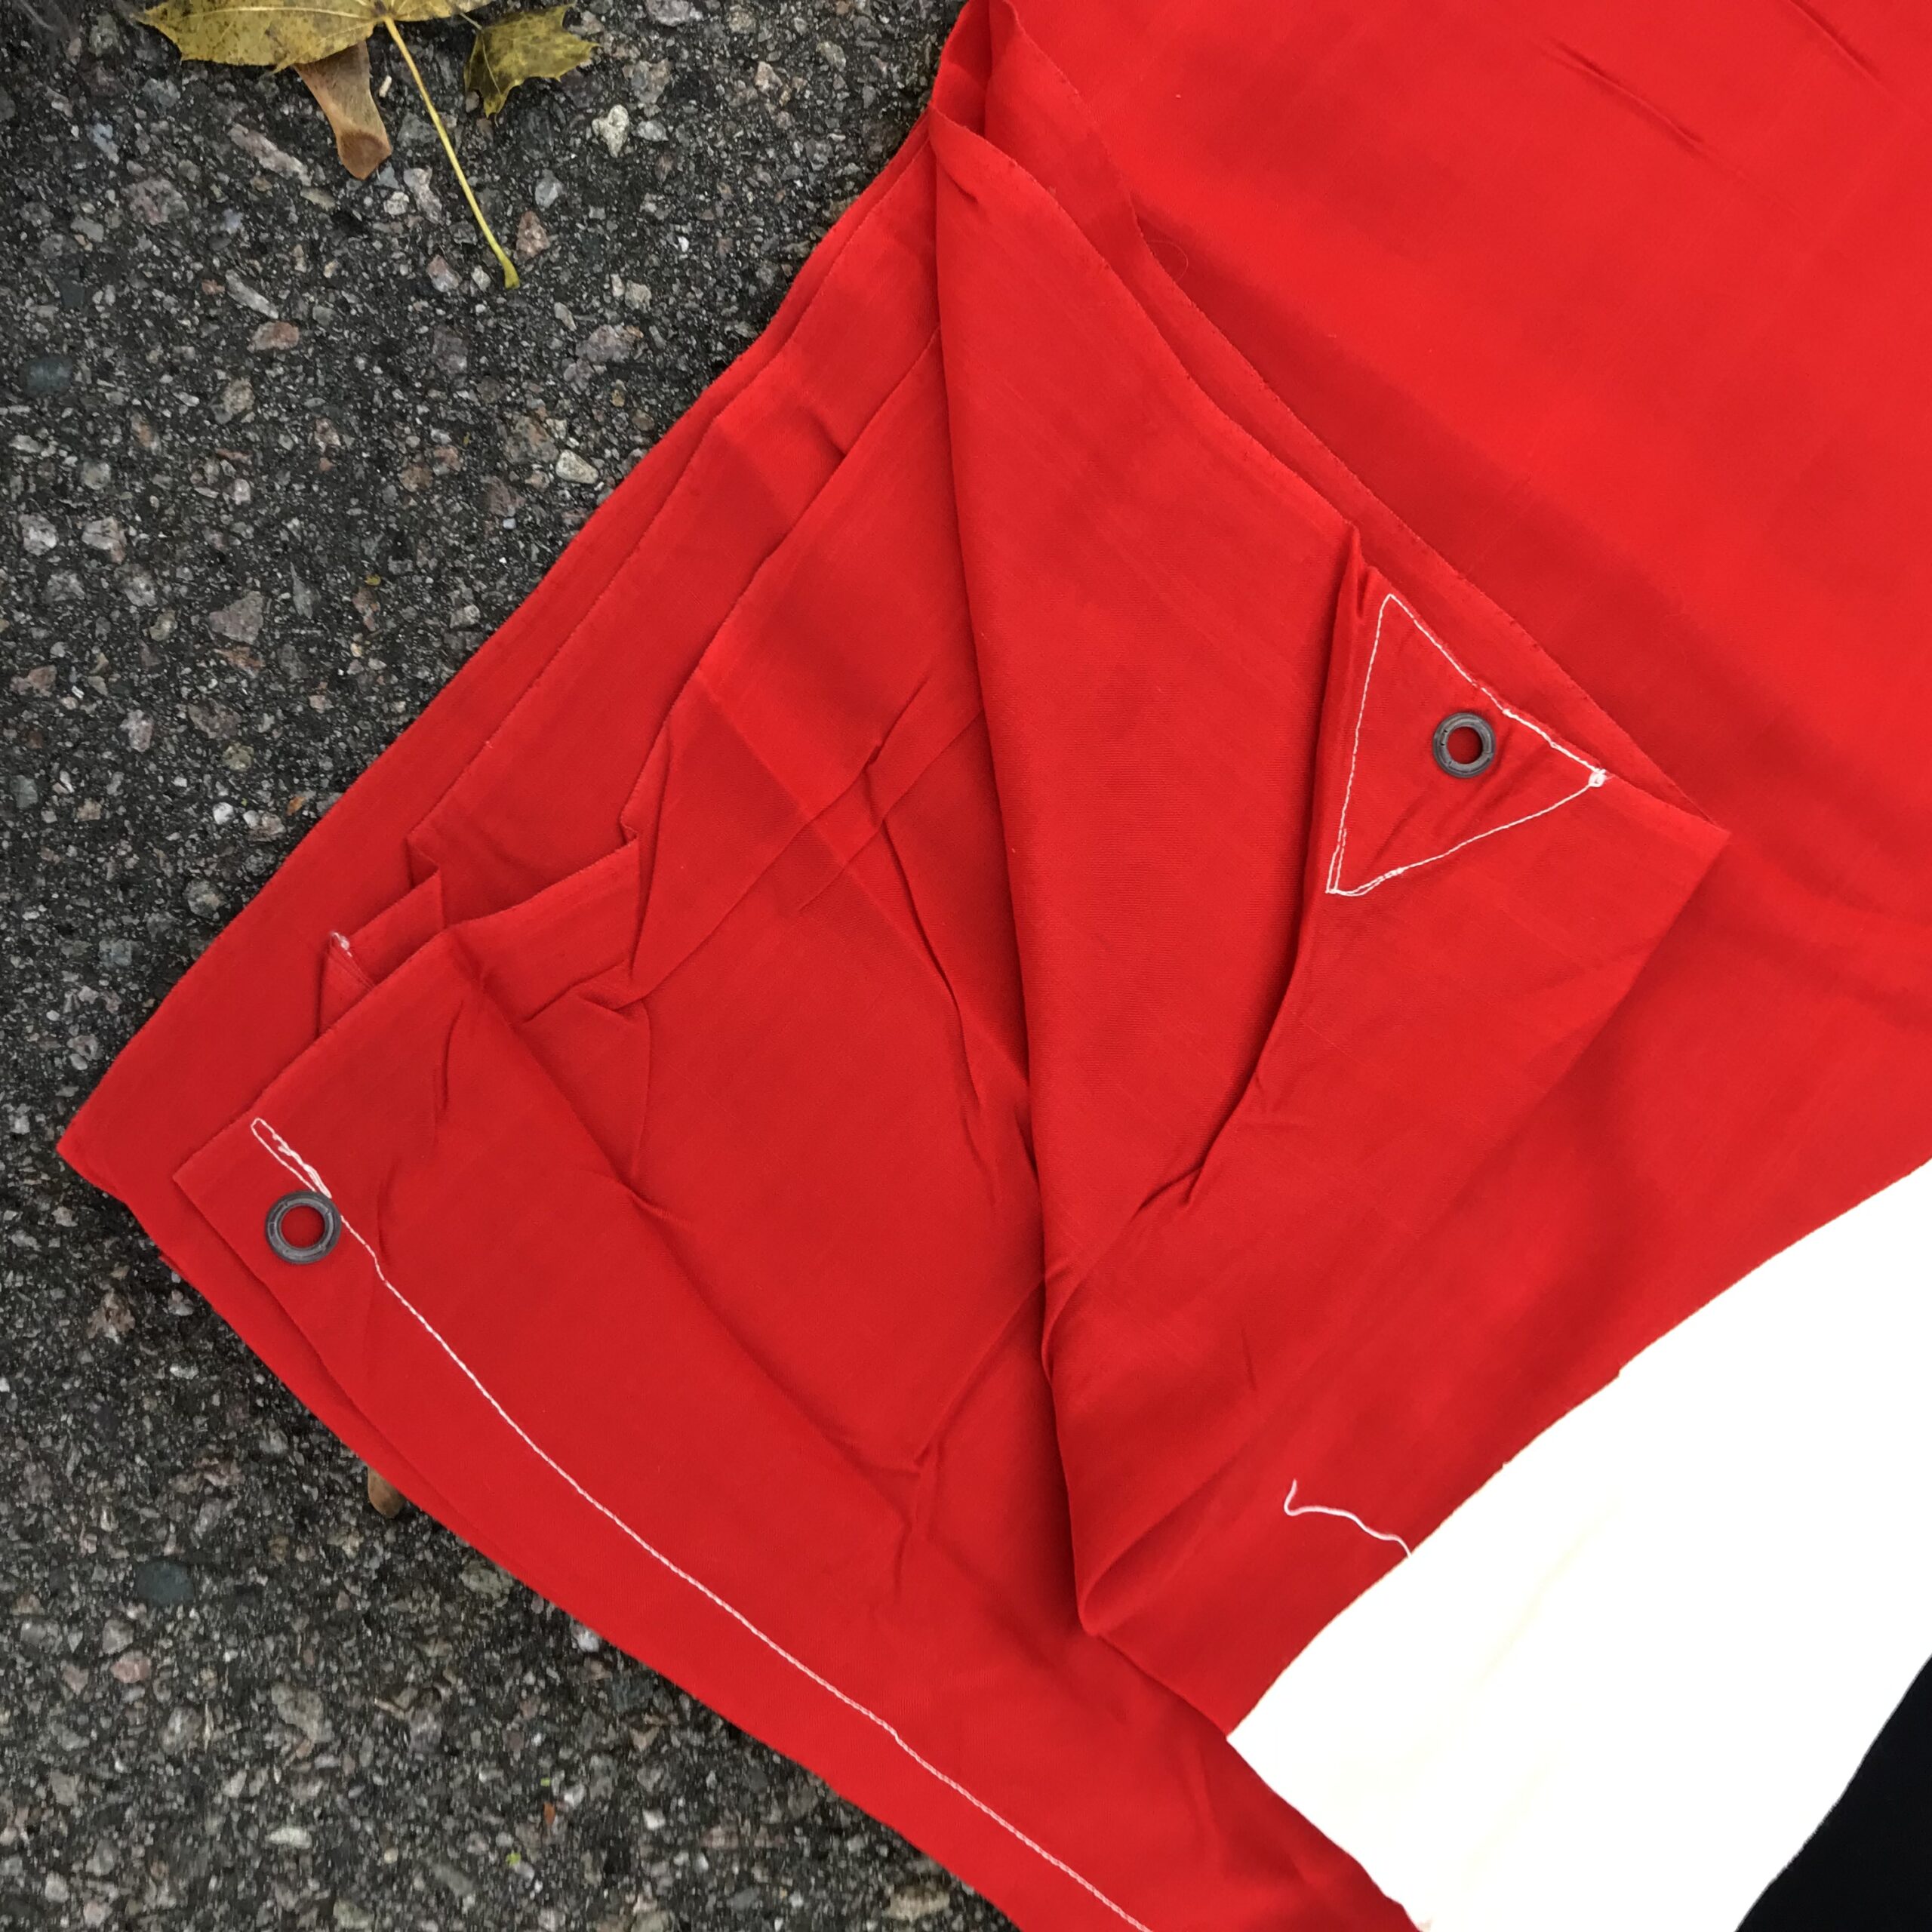
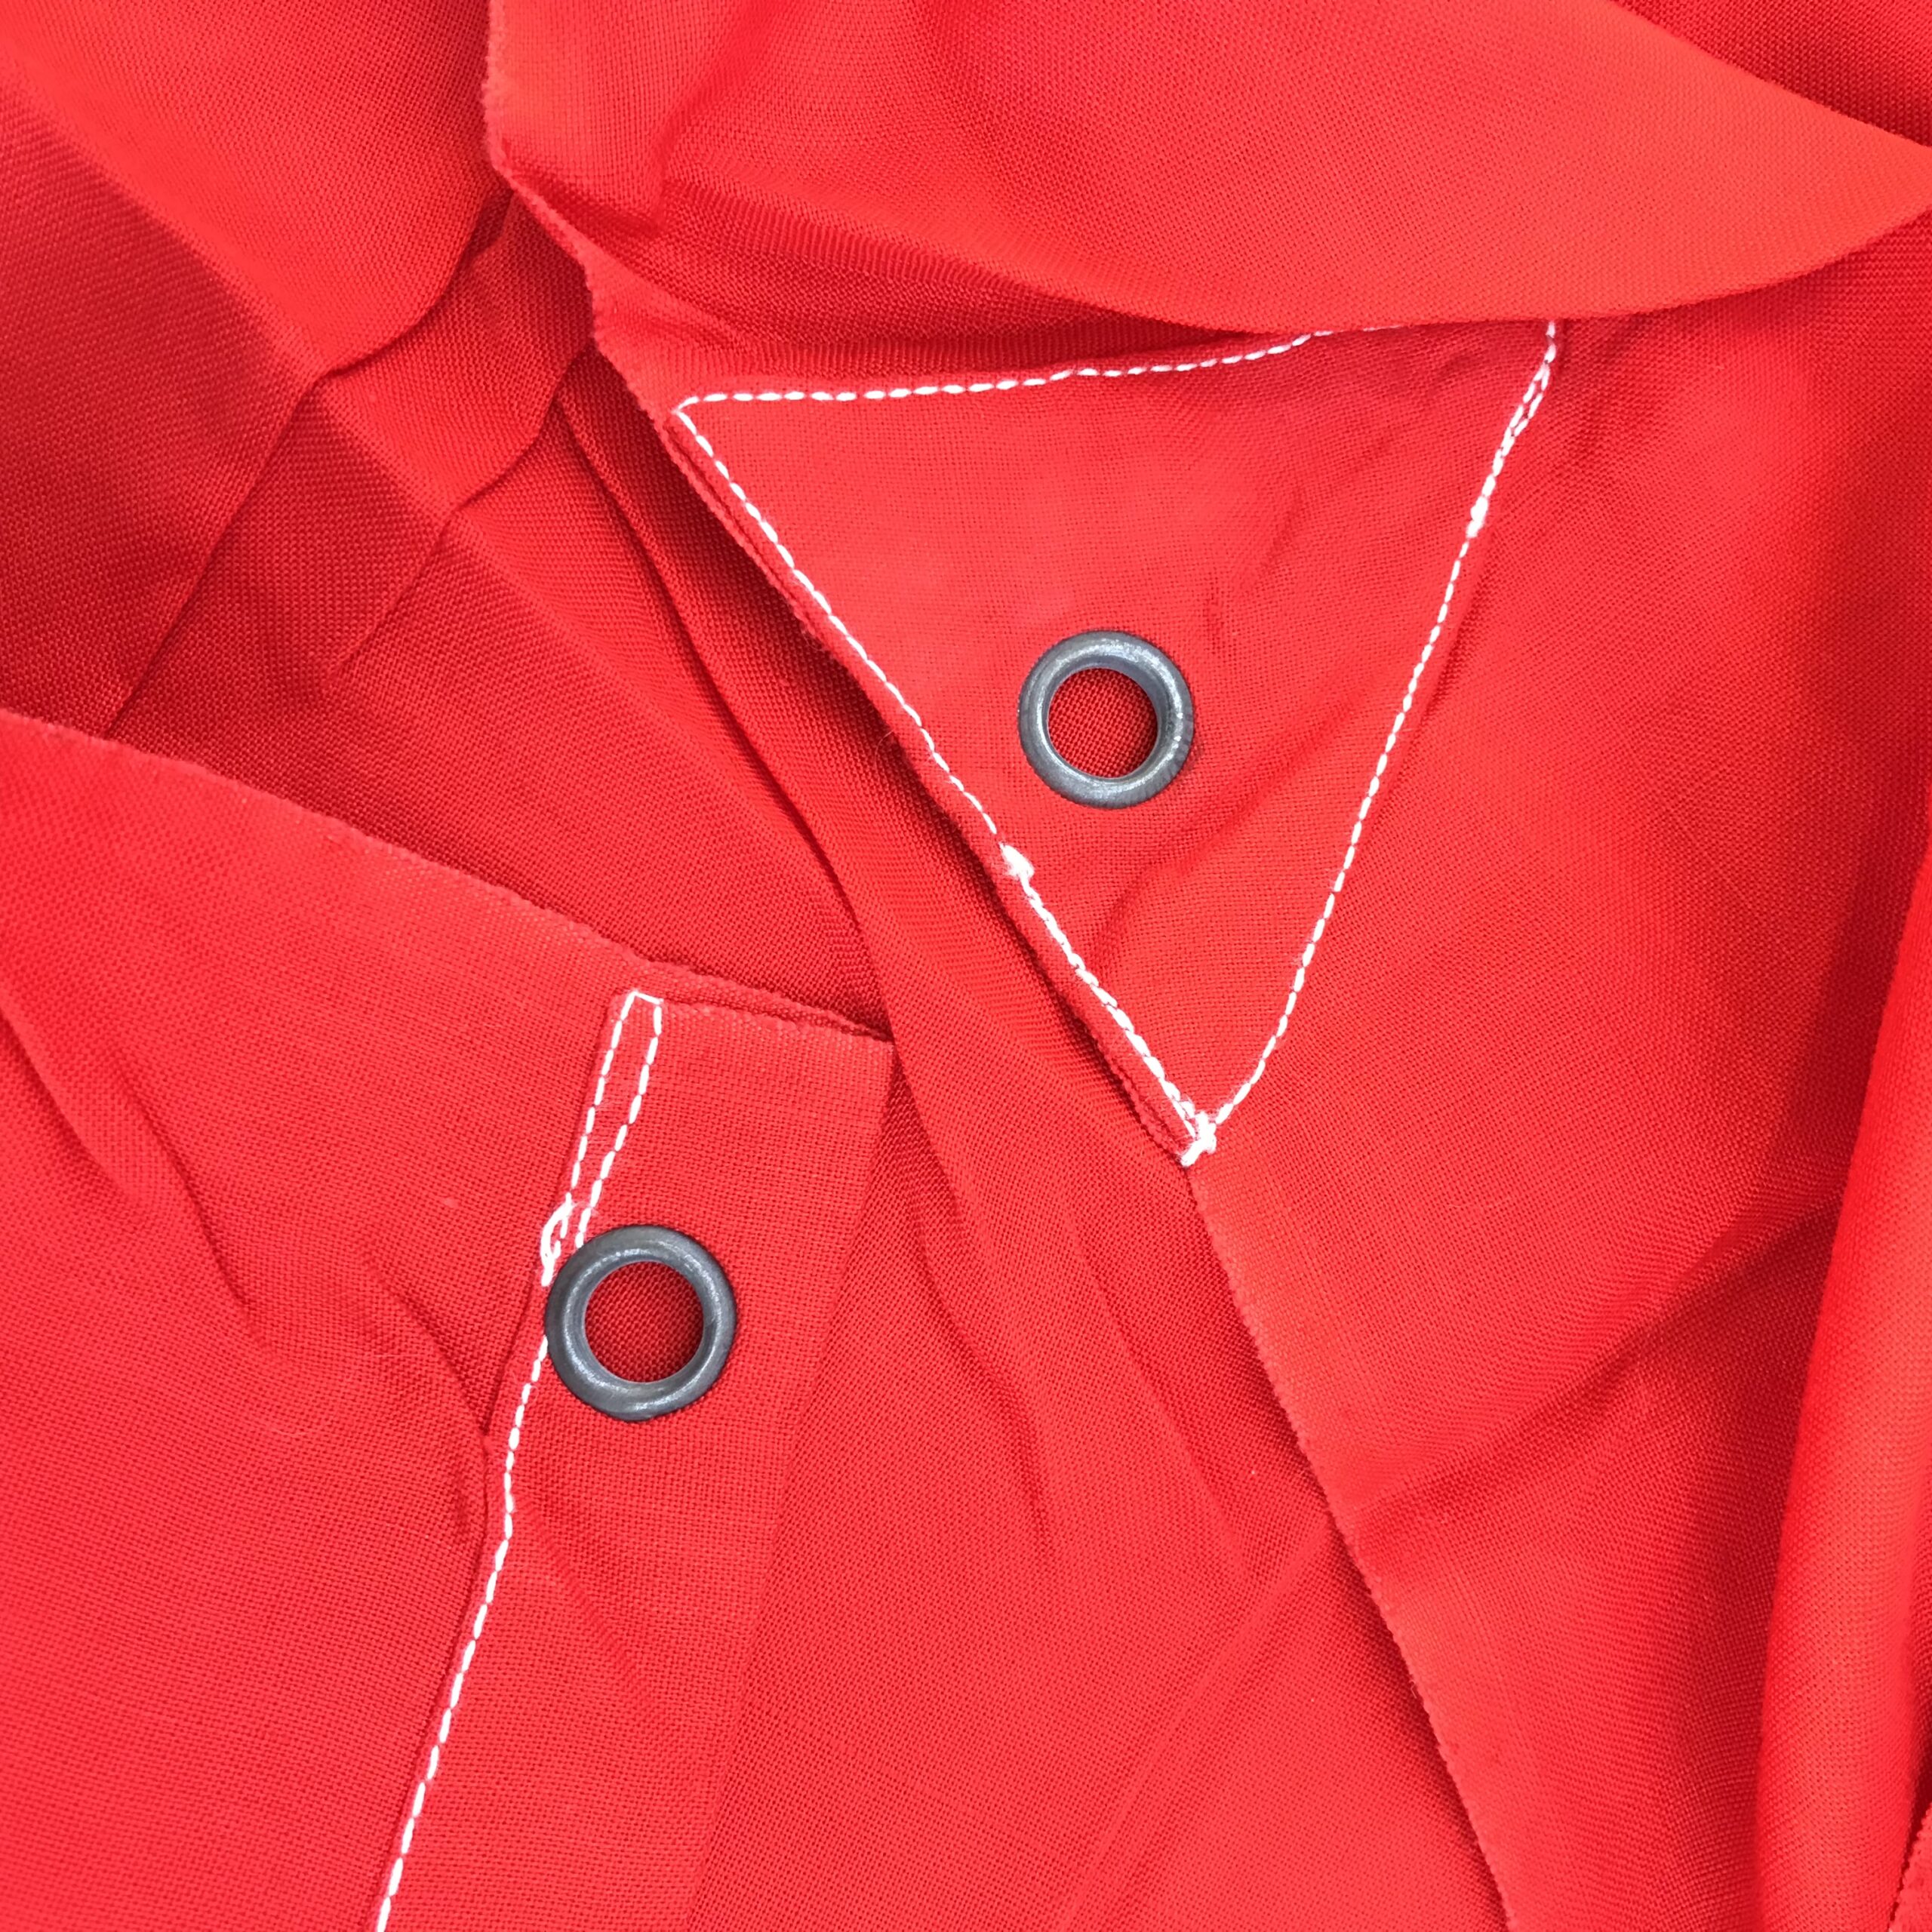
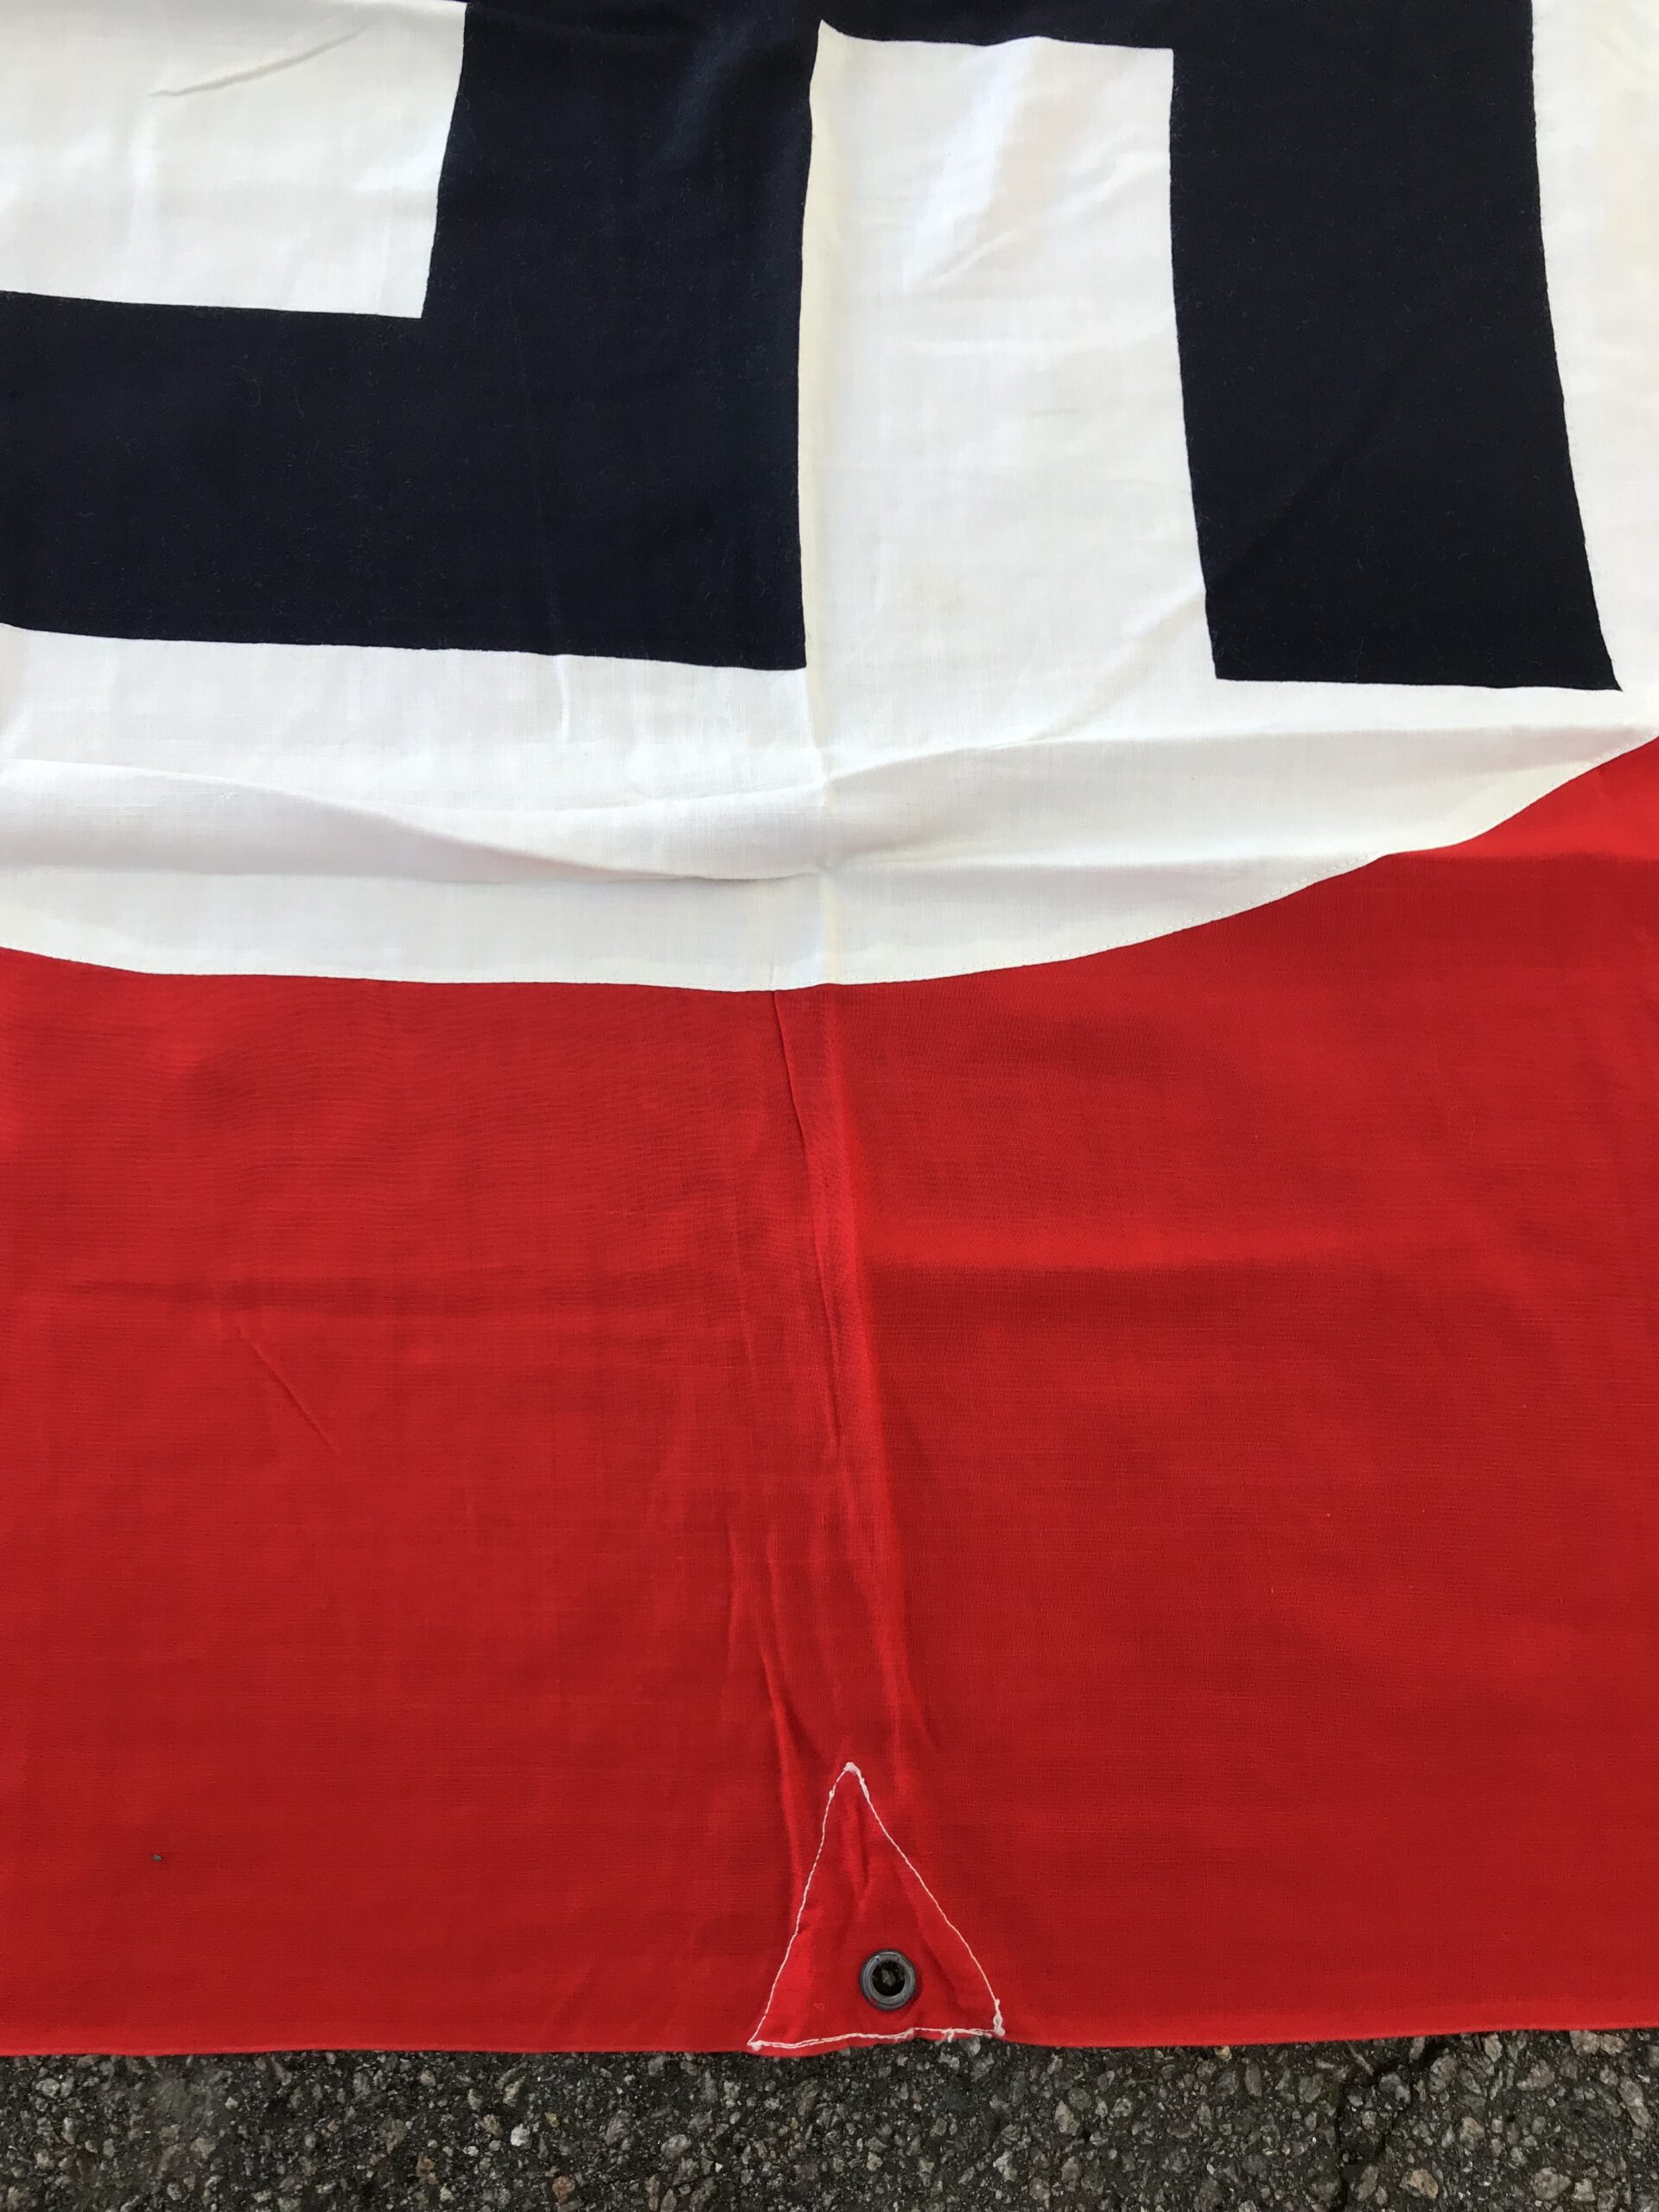
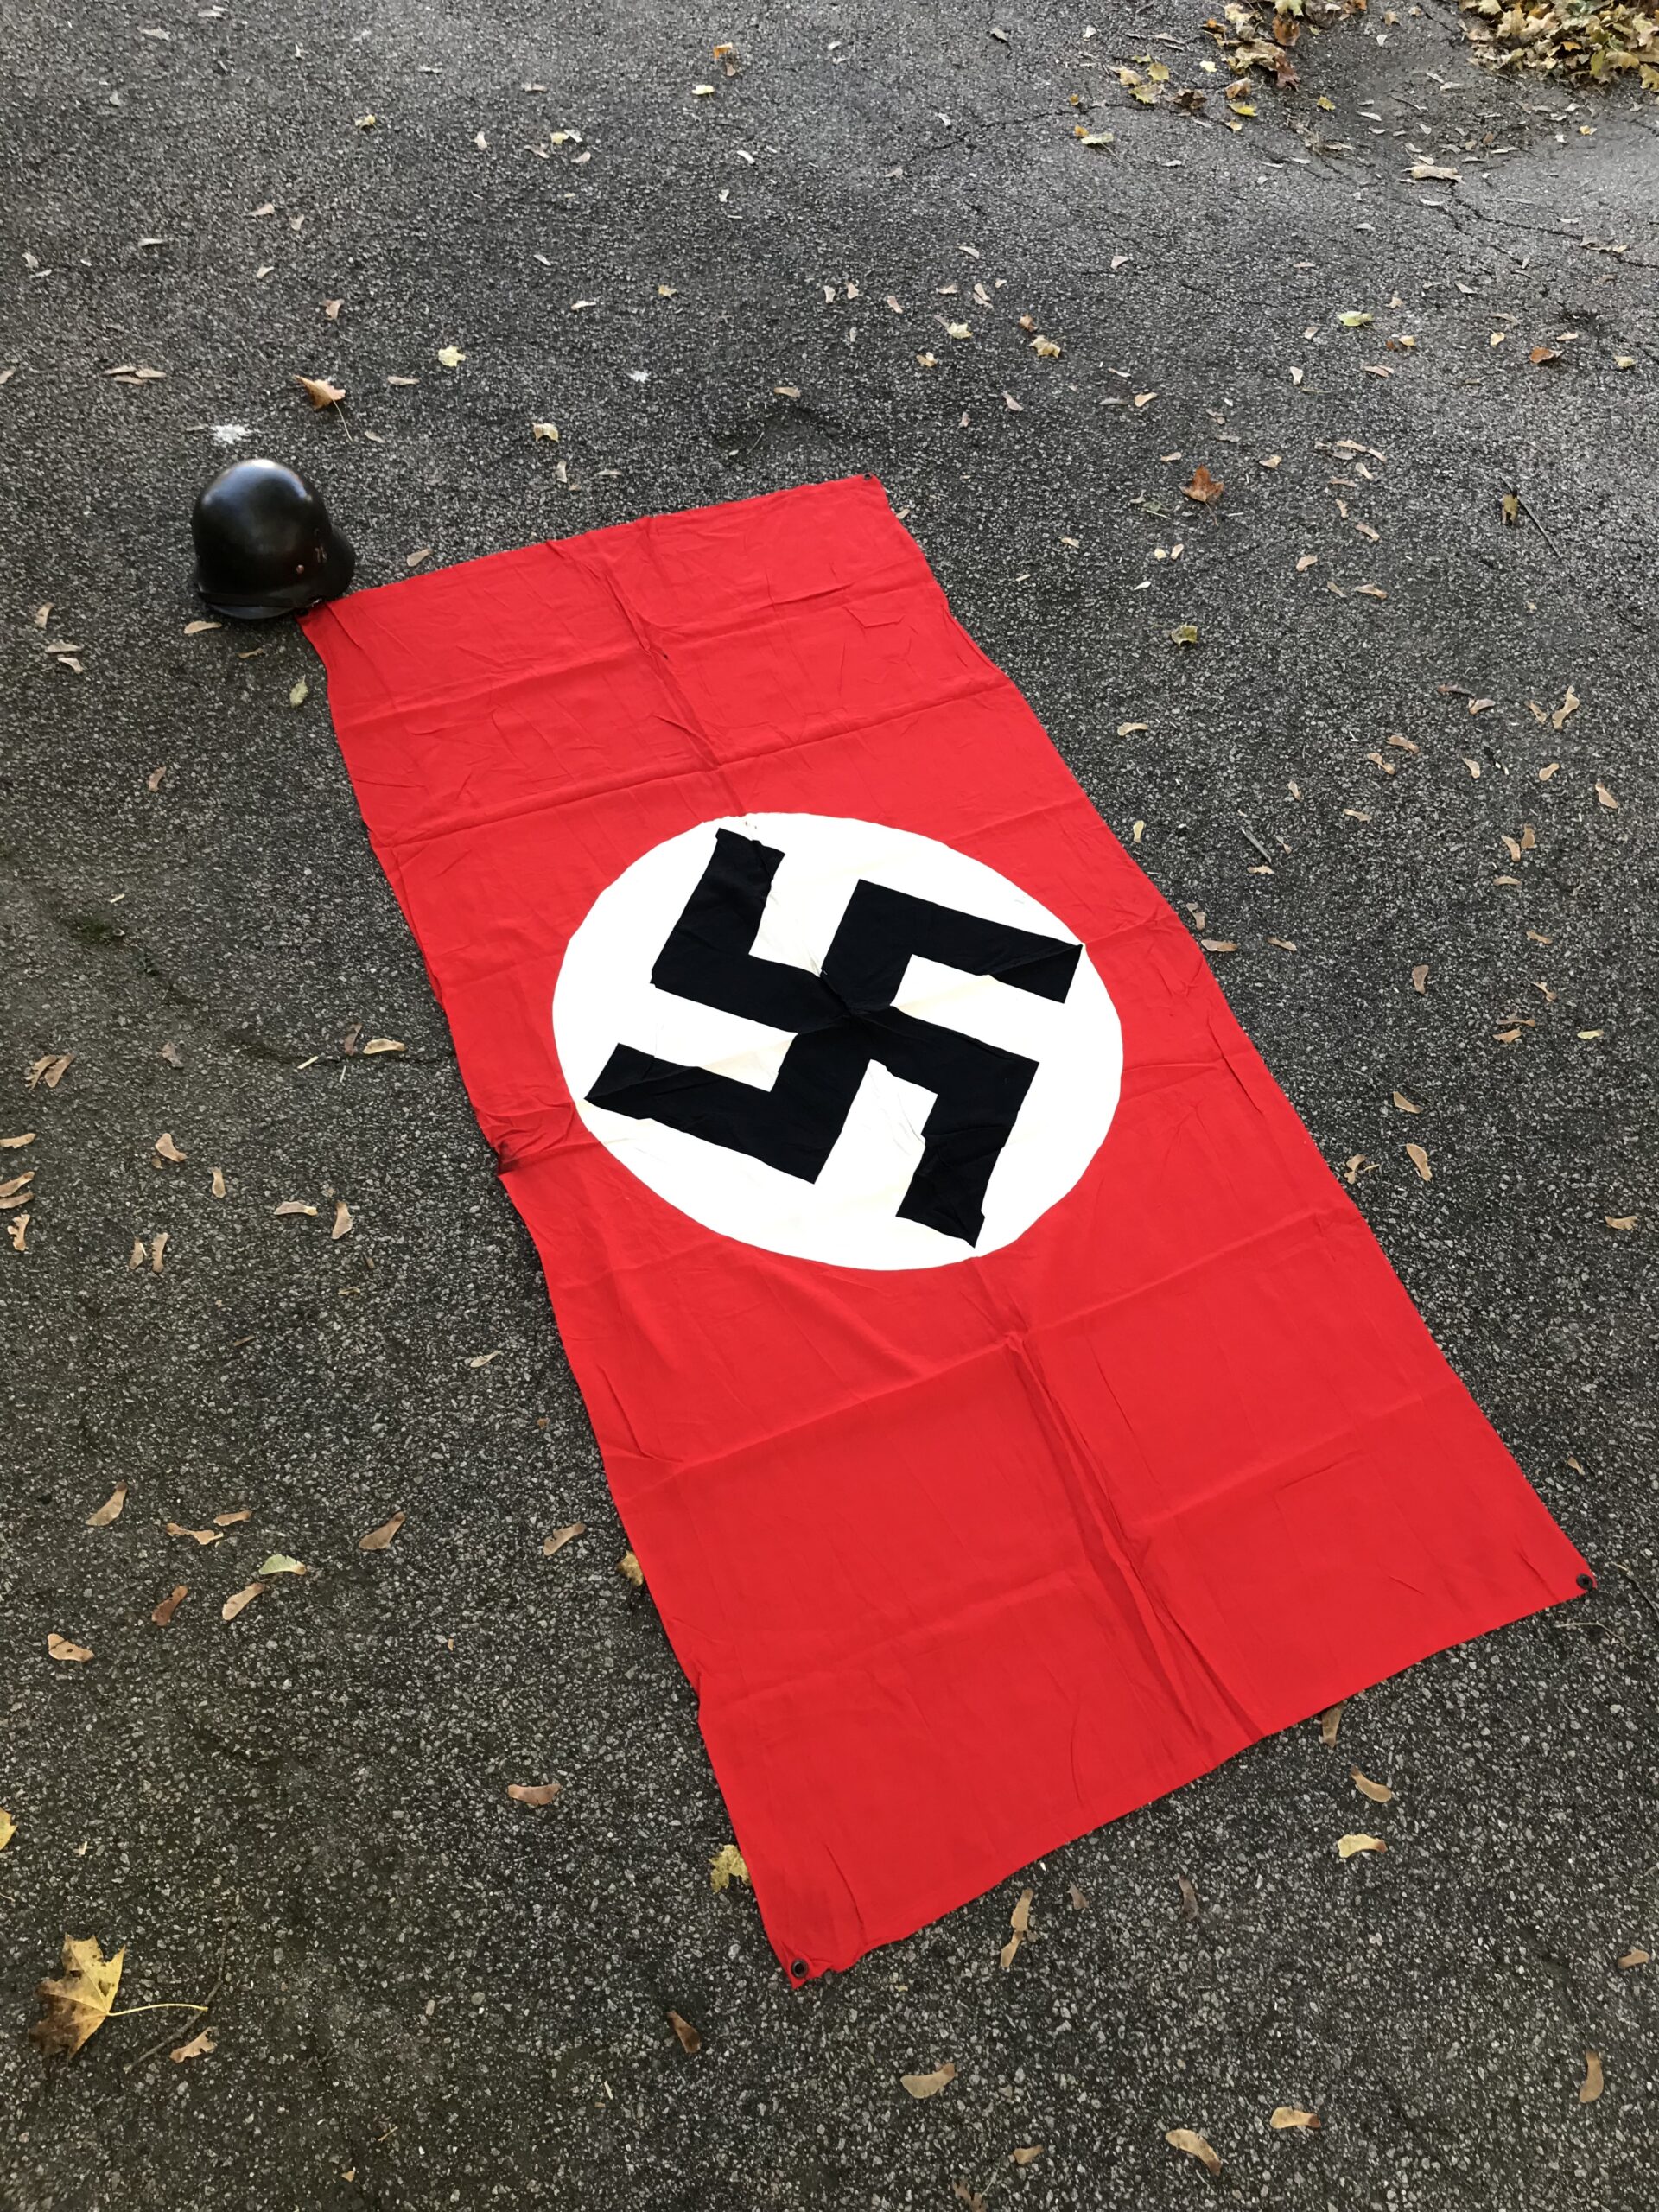
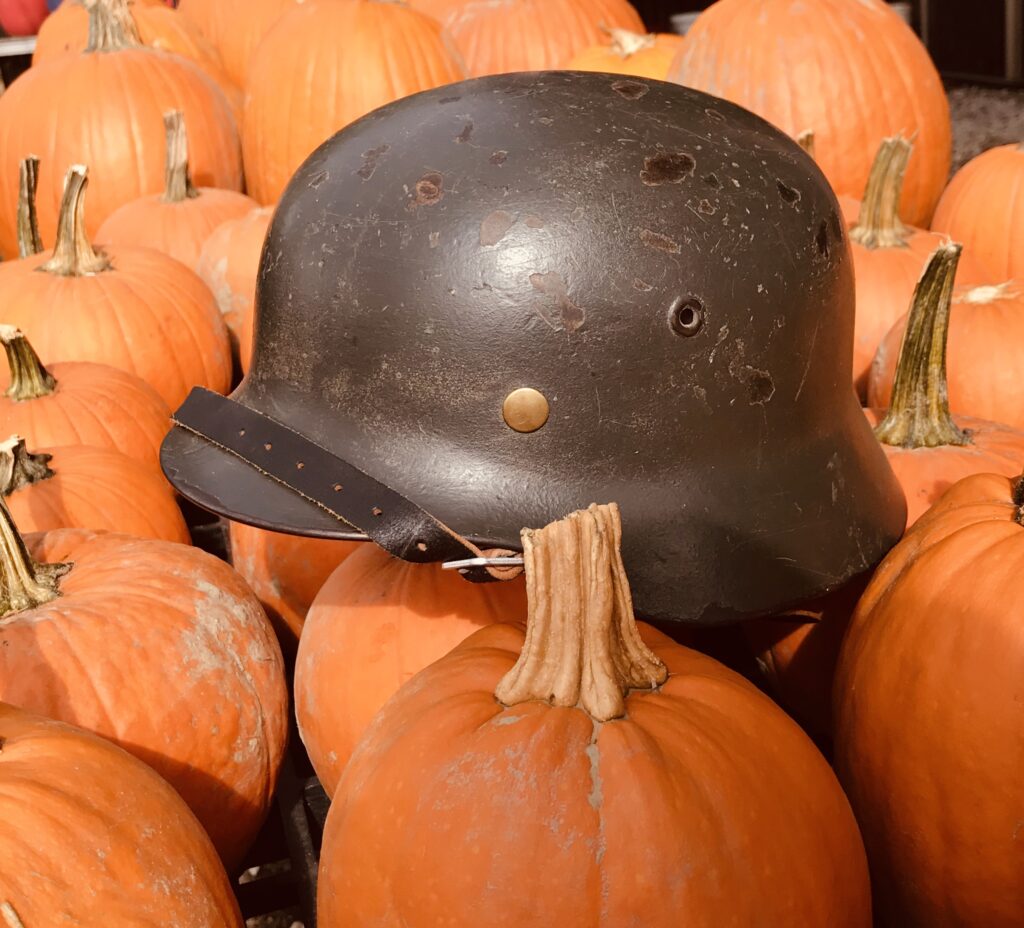
Here is a surviving original aerial recognition flag in this regulation 1.5 x 5 m size. Aerial recognition flags were single-sided, and had grommets for lashing them to objects on the ground. This banner has grommets at the corners and also at the center of each long side. Some of the photos include a German helmet, for scale.
Wehrmacht aerial recognition flags were also produced in smaller sizes.
Here are two originals. The larger measures 1 x 2 m. This is a common size of original aerial recognition flag to find today. The smaller one measures about 80 x 90 cm. Note that on the small flag, both the red field and the white roundel have seams, showing they were made of separate pieces of fabric that were pieced together. This was necessary due to the shortage of raw material for war production.
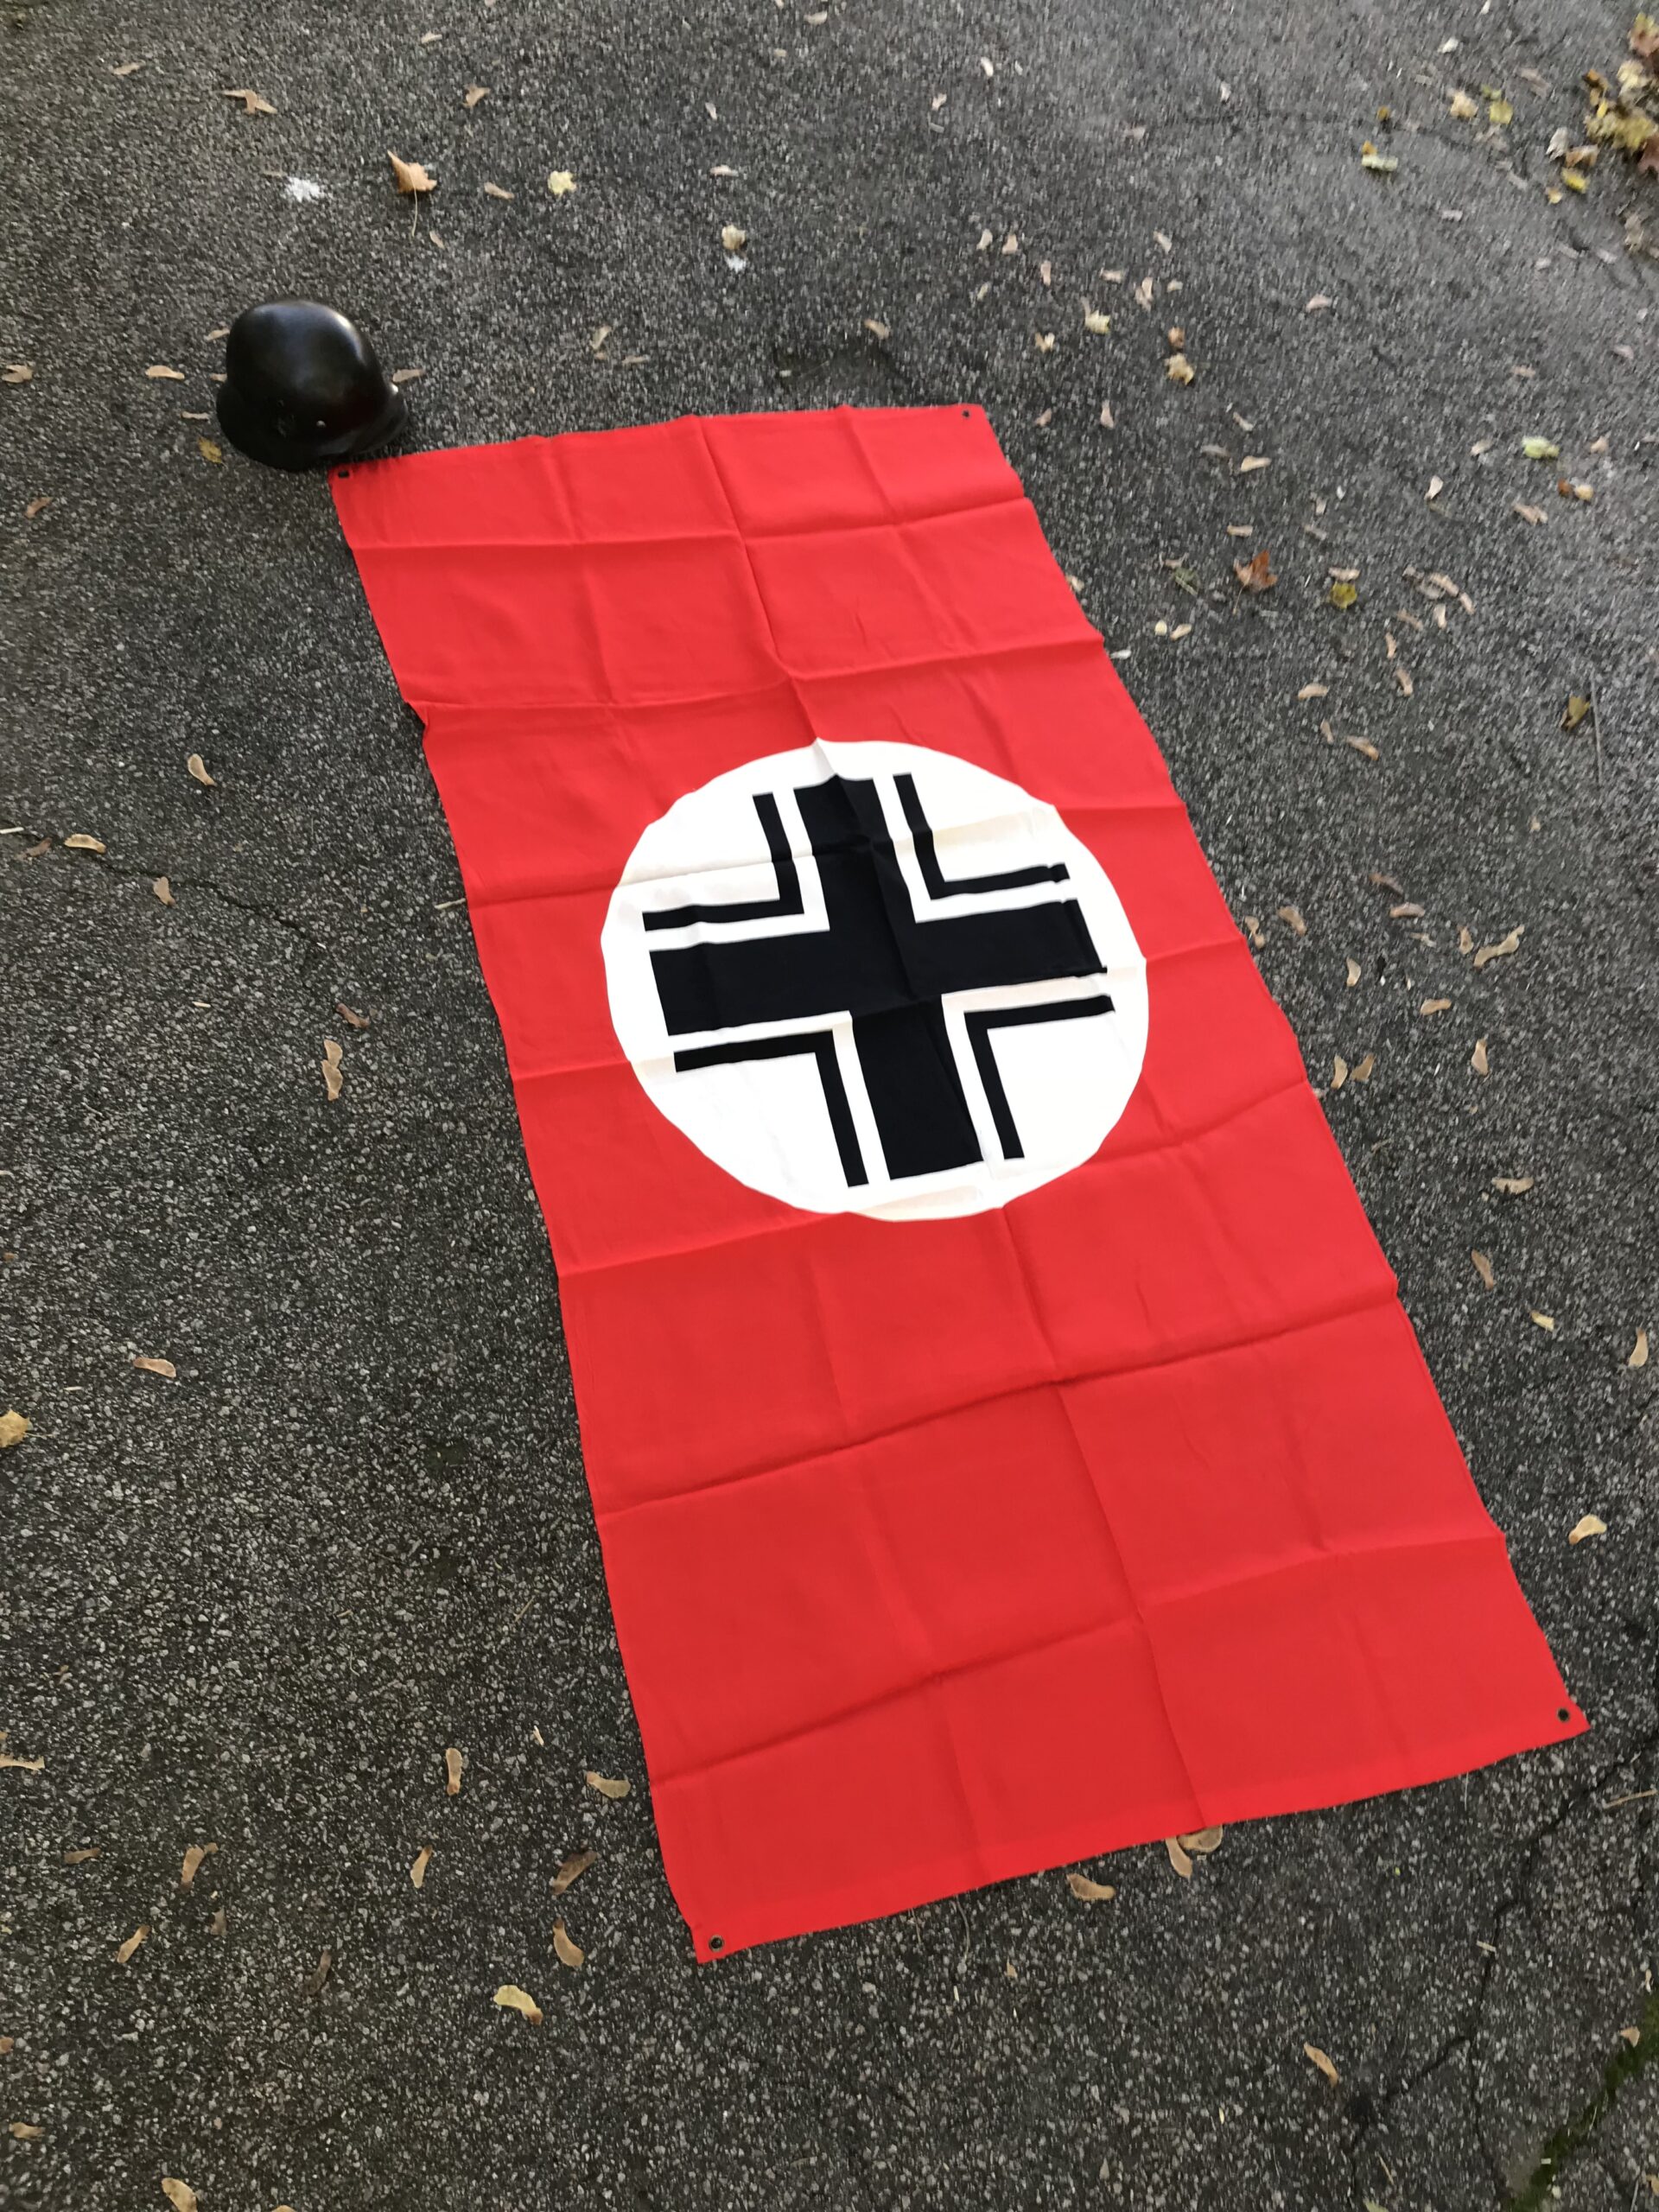
Some wartime aerial recognition banners used the “Balkenkreuz” military emblem rather than the Nazi swastika. The wartime photo shown here is the only one known to this writer, depicting this flag in wartime German use. The original shown here measures 1 x 2 m.
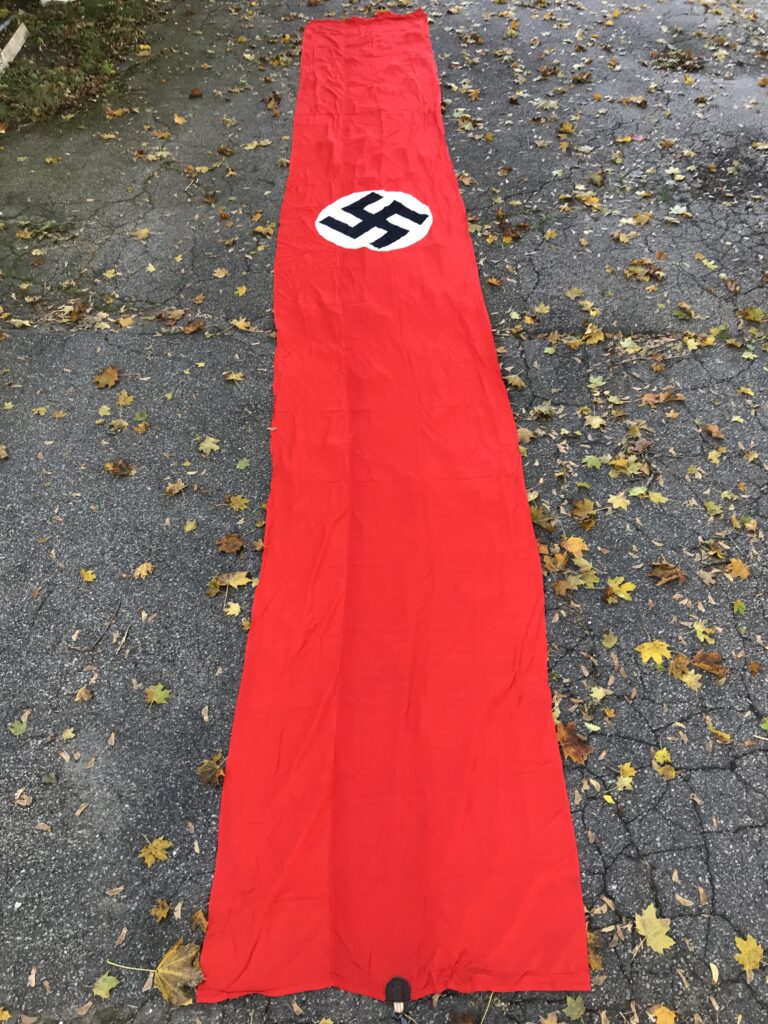
Aerial recognition drapes can be distinguished from other German 1935-45 national flags by the presence of the grommets and the single-sided construction. For comparison purposes, here is a very long national banner that would have hung from a pole or building. It’s double sided. The bottom end has a small, leather reinforced, web strap with snap hook for anchoring it, while the top end is sleeved for a pole. The pole sleeve on this one was torn by the American soldier who ripped this from its mounting when he took it as a souvenir.
The Division has held the following instructional courses on the handling of weapons since January 1942:
Russian hand grenade model 1933,
Russian light machine gun “Degtyaryov,”
Russian heavy machine gun 39/41,
Russian heavy machine gun “Maxim,”
Russian mortar (Manuals were translated into German by the Division),
Mine detection and clearing courses.
In addition, instructional courses for vehicle drivers and signals units were held.
Starting on July 27, 3 additional courses for training on mortars are scheduled.
[Translator note: besides the Maxim machine gun, the other weapons are more commonly known in English by their Soviet designations of the RGD-33 hand grenade, DP-29 machine gun and, I believe, the DS-39 machine gun. This Division, the 281. Sicherungs-Division, was at this time in the northern sector of the Eastern Front, in the occupied USSR.]
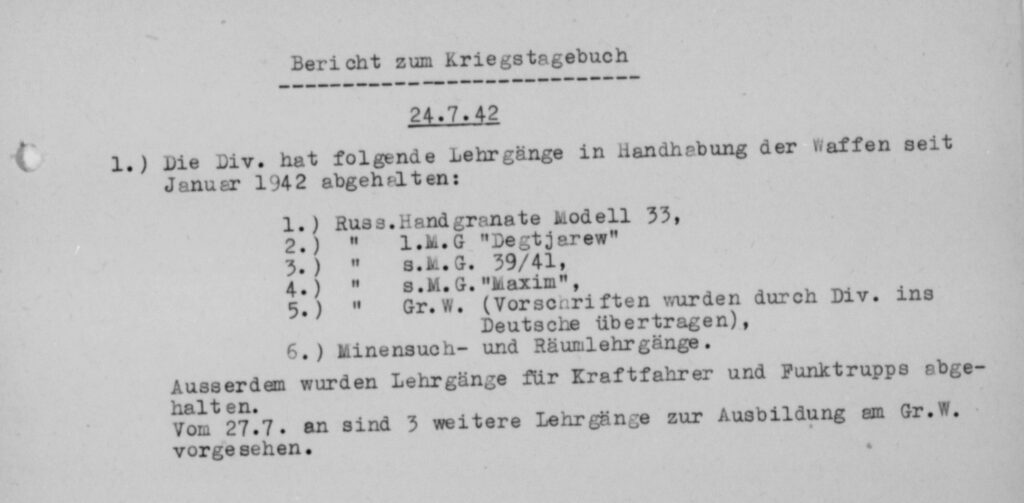
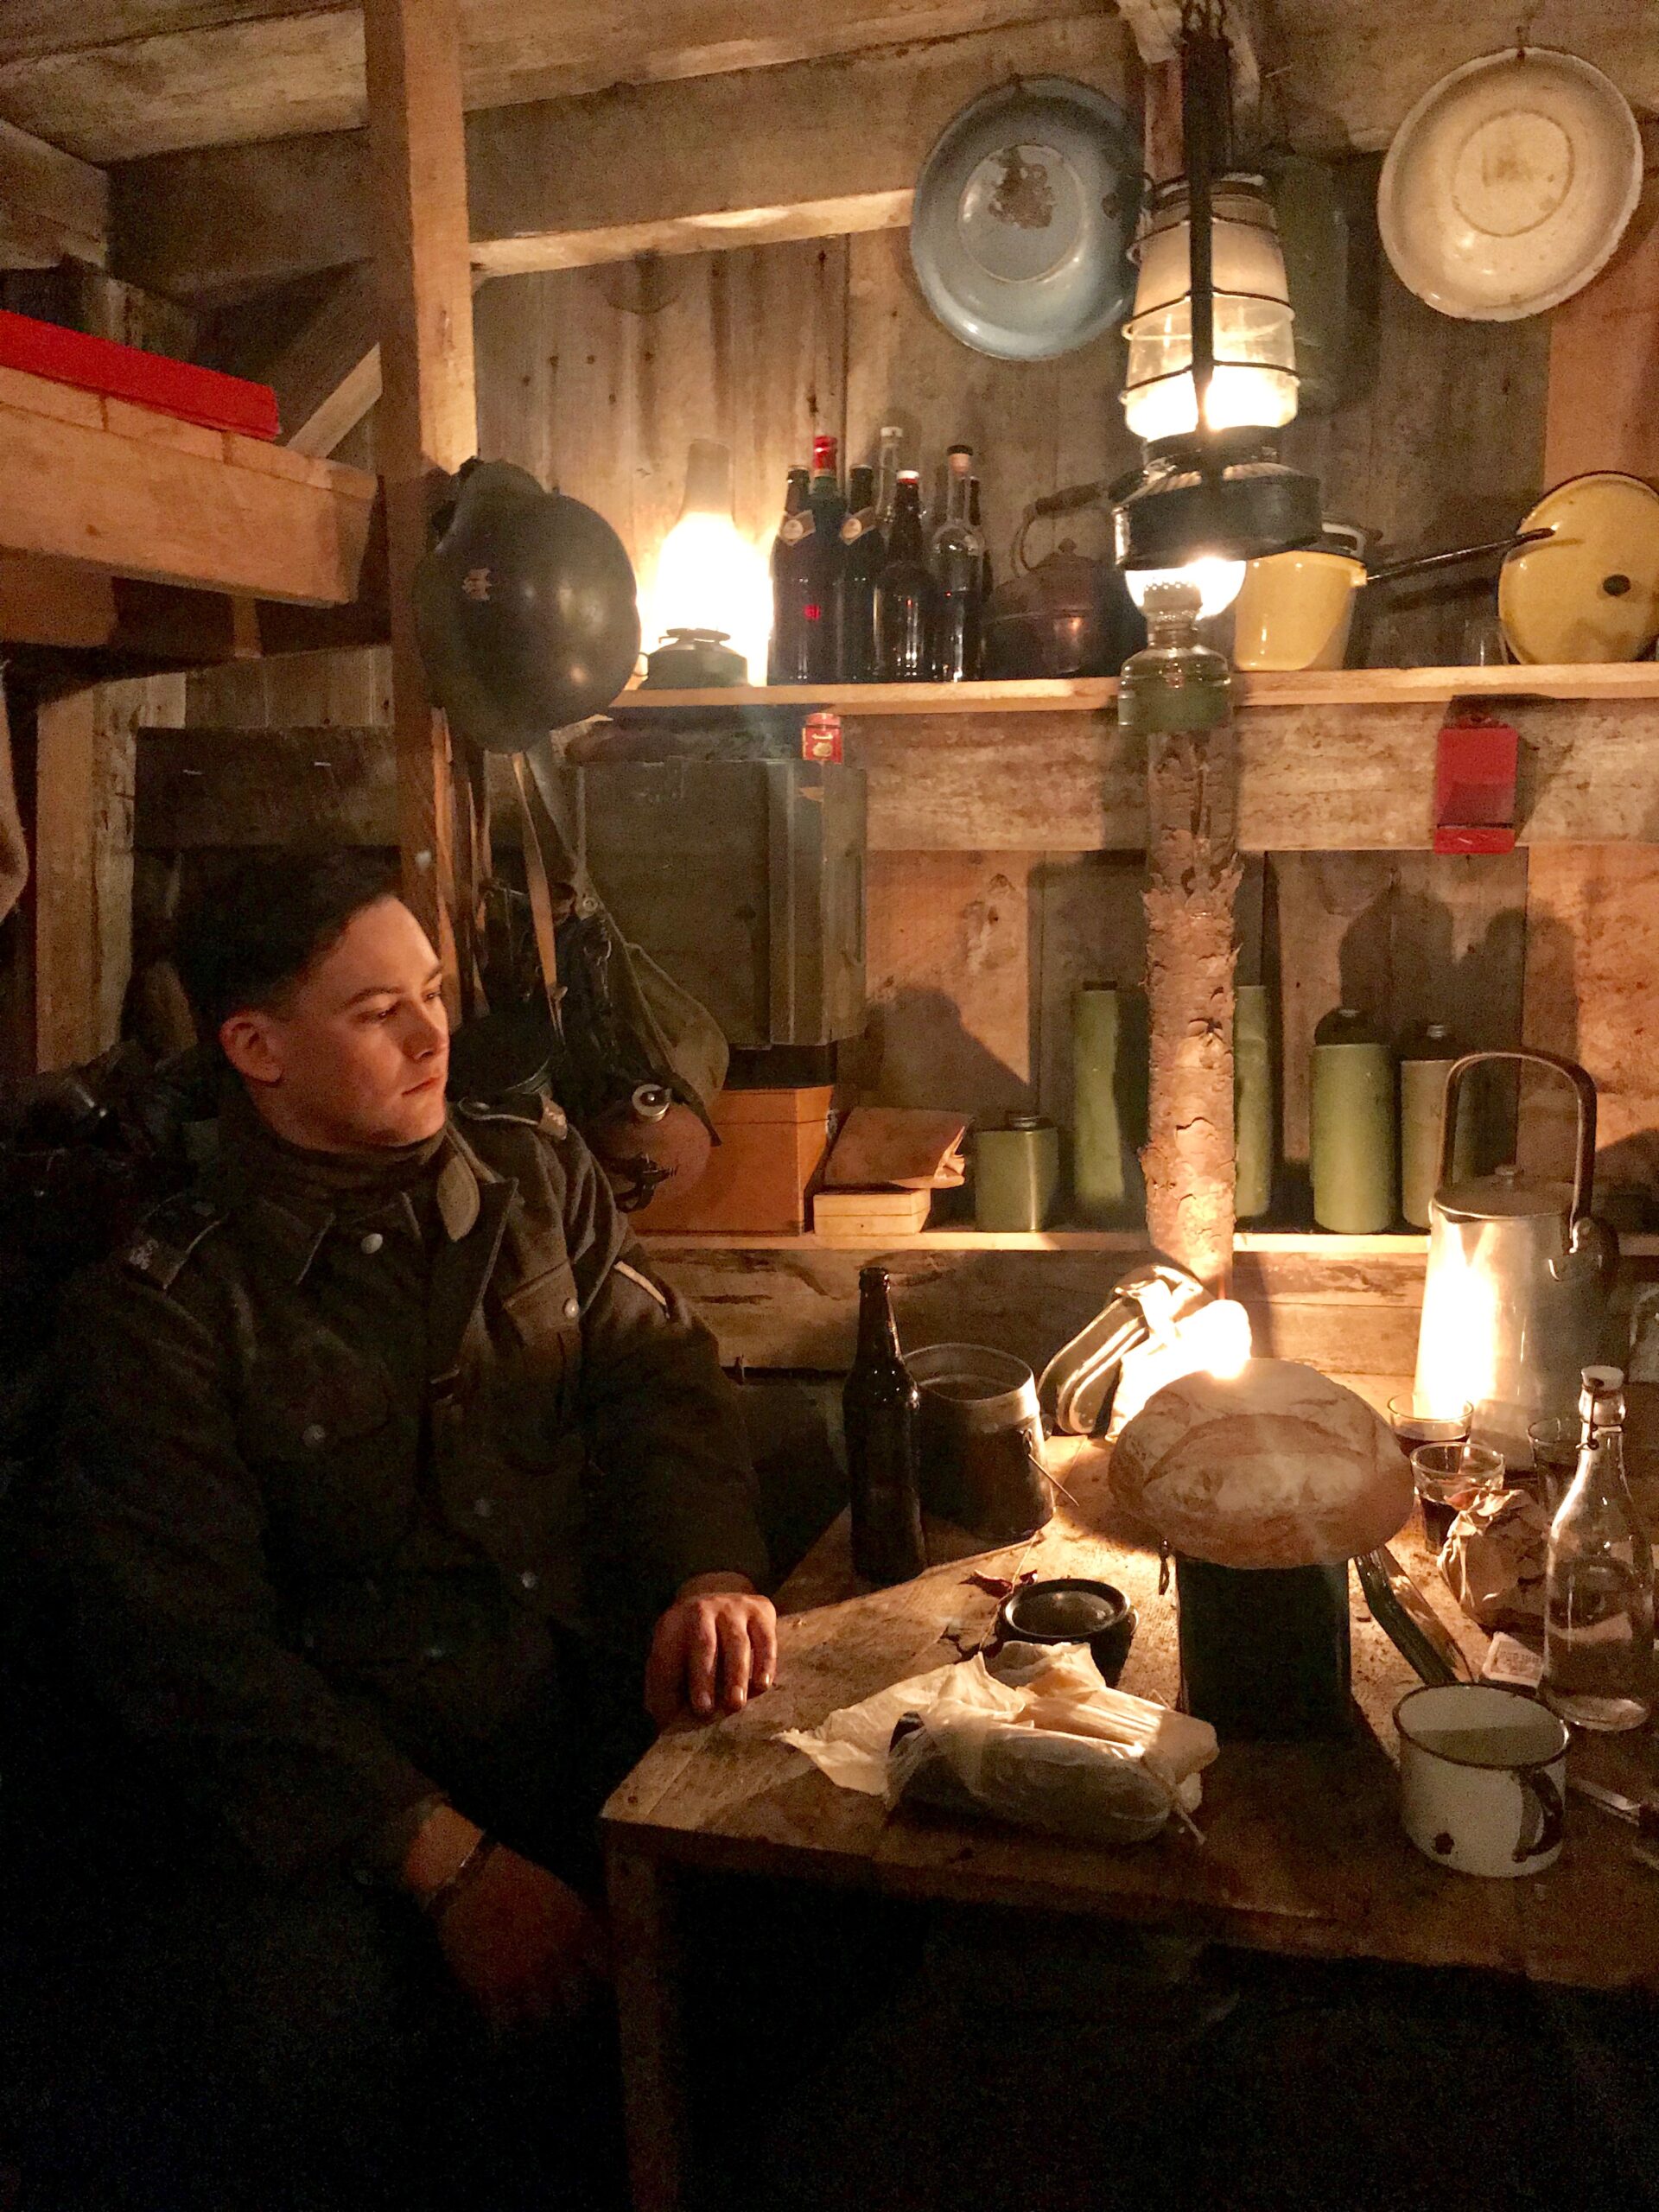
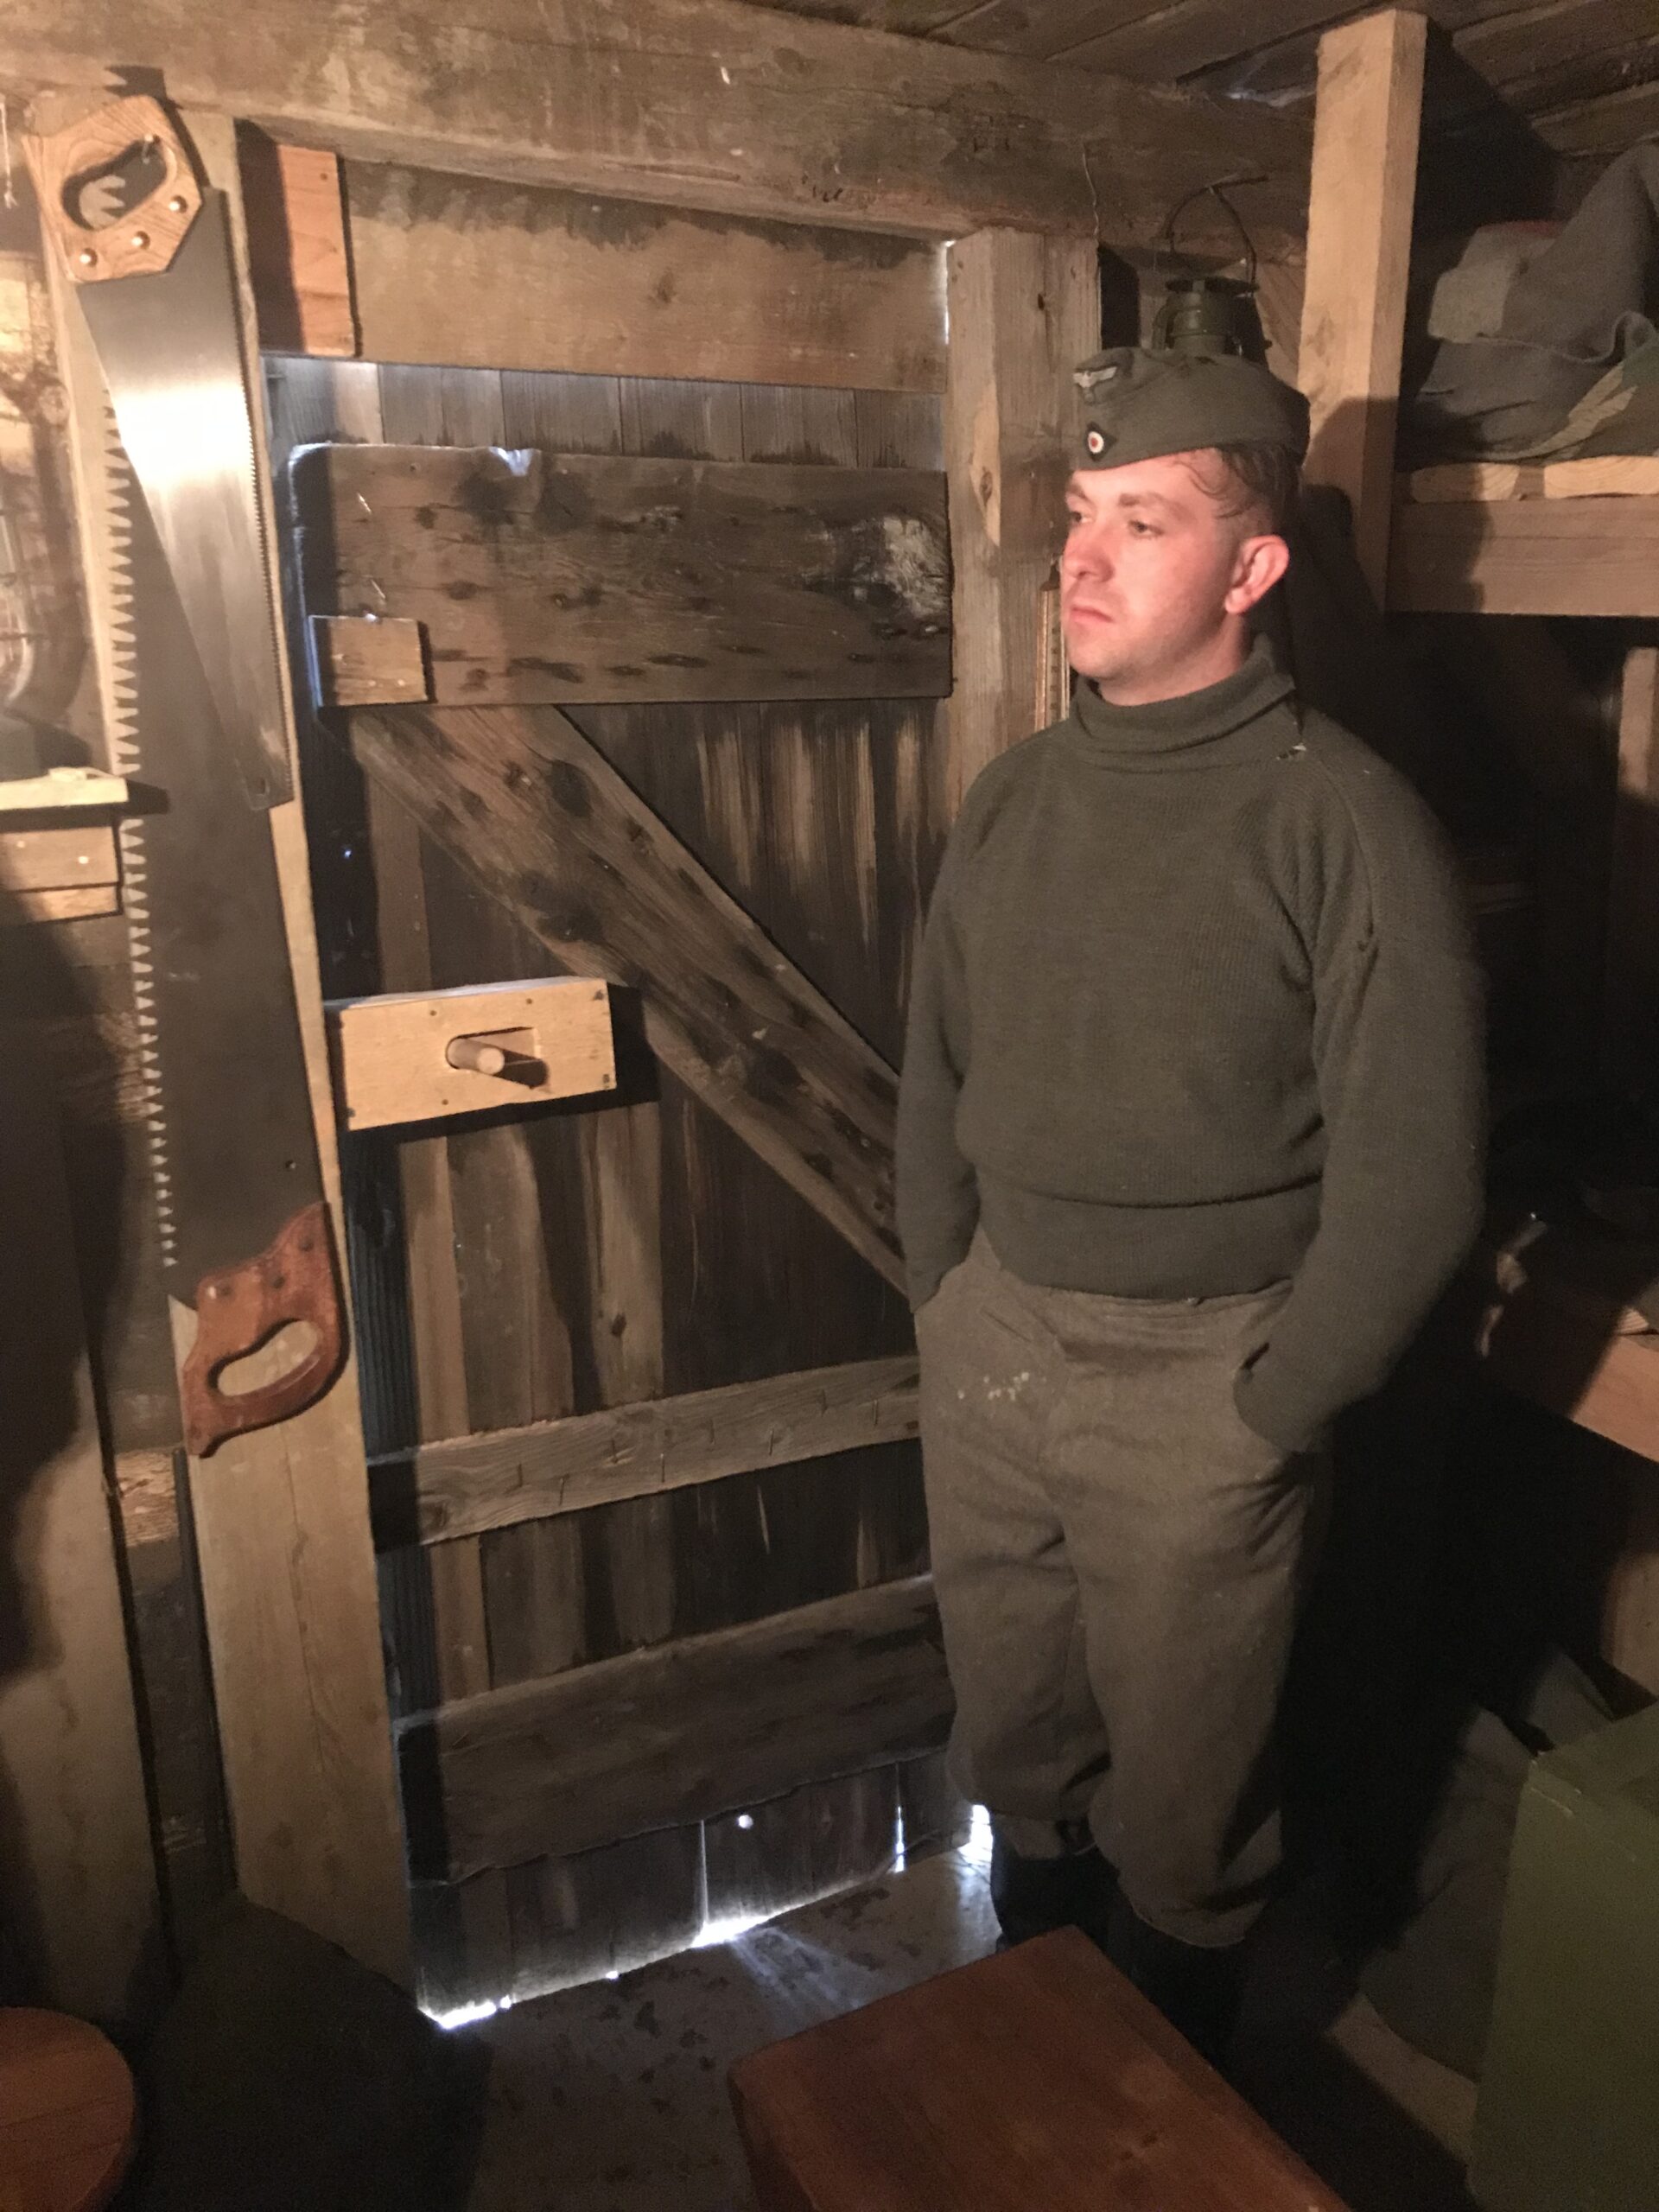
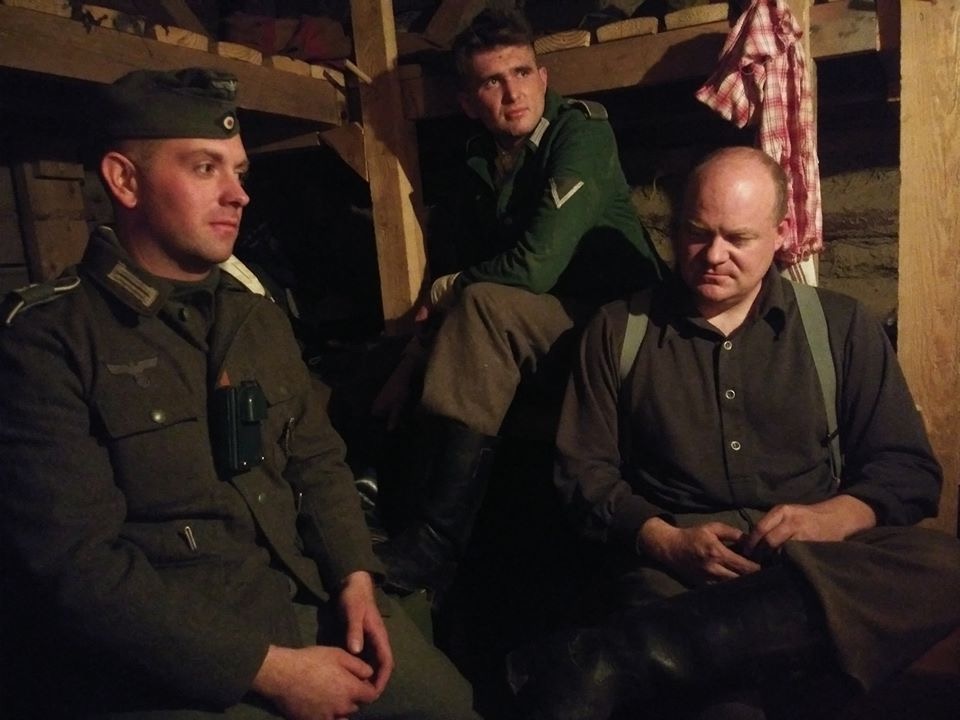
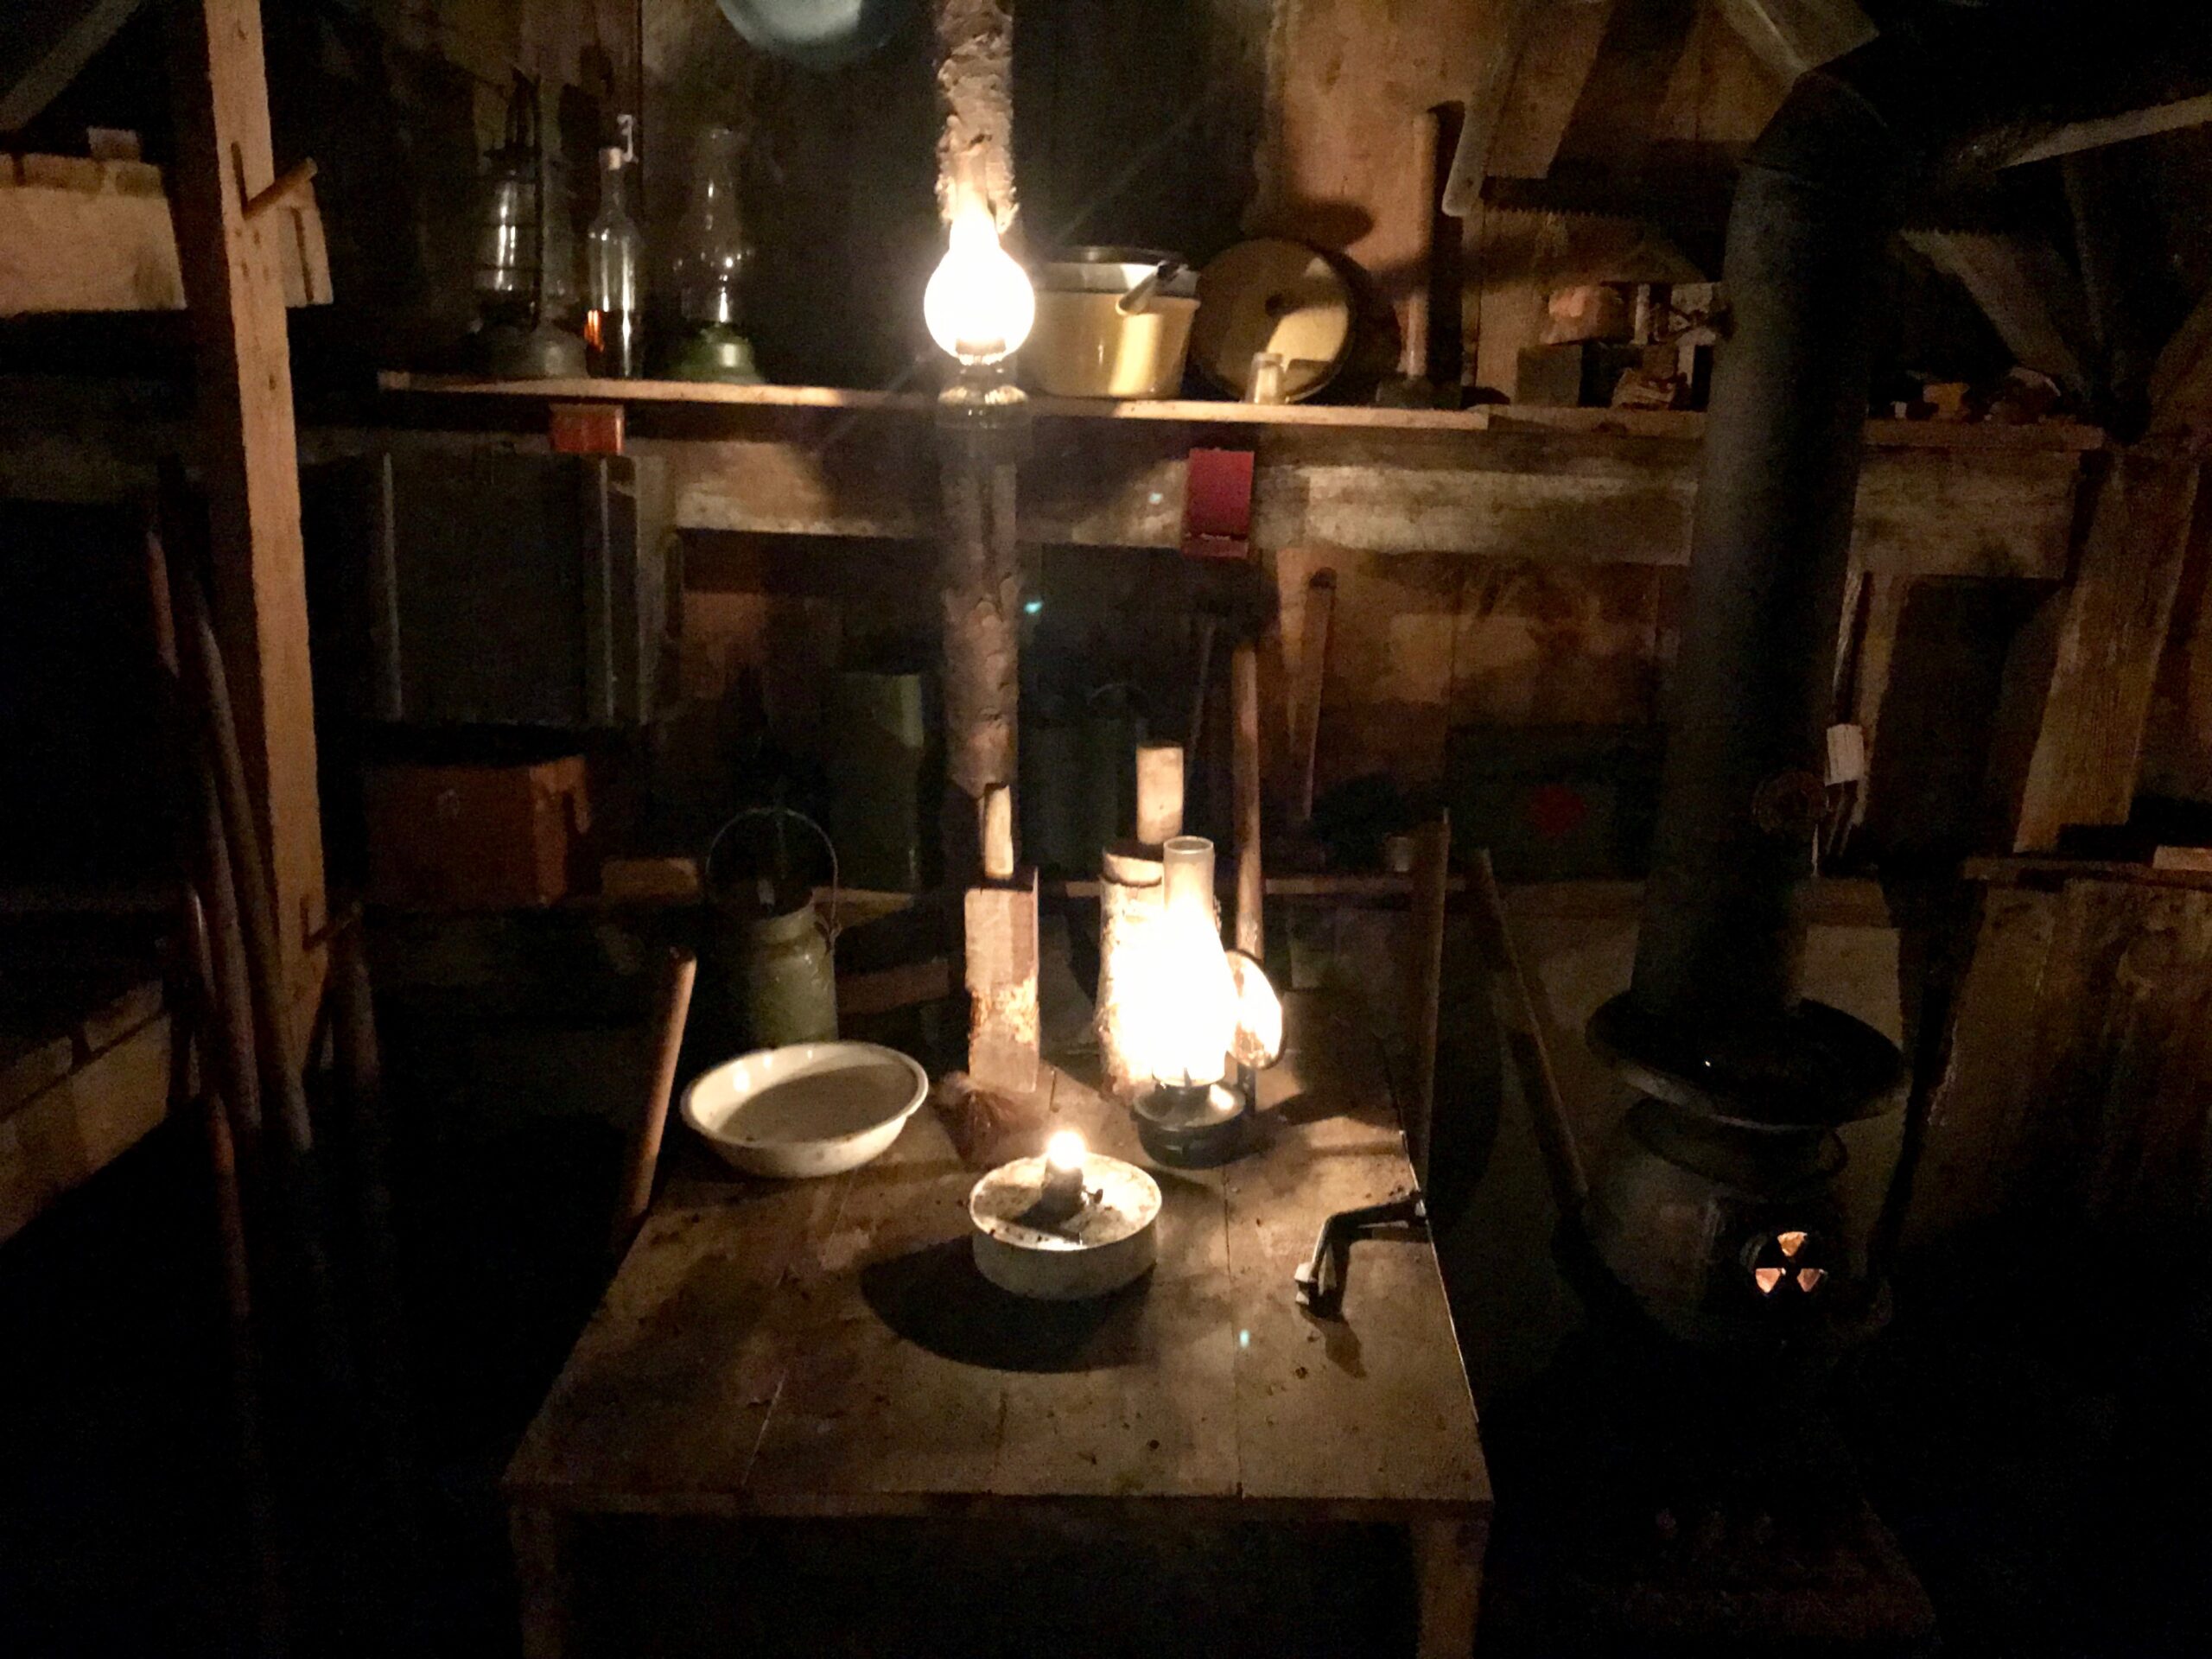
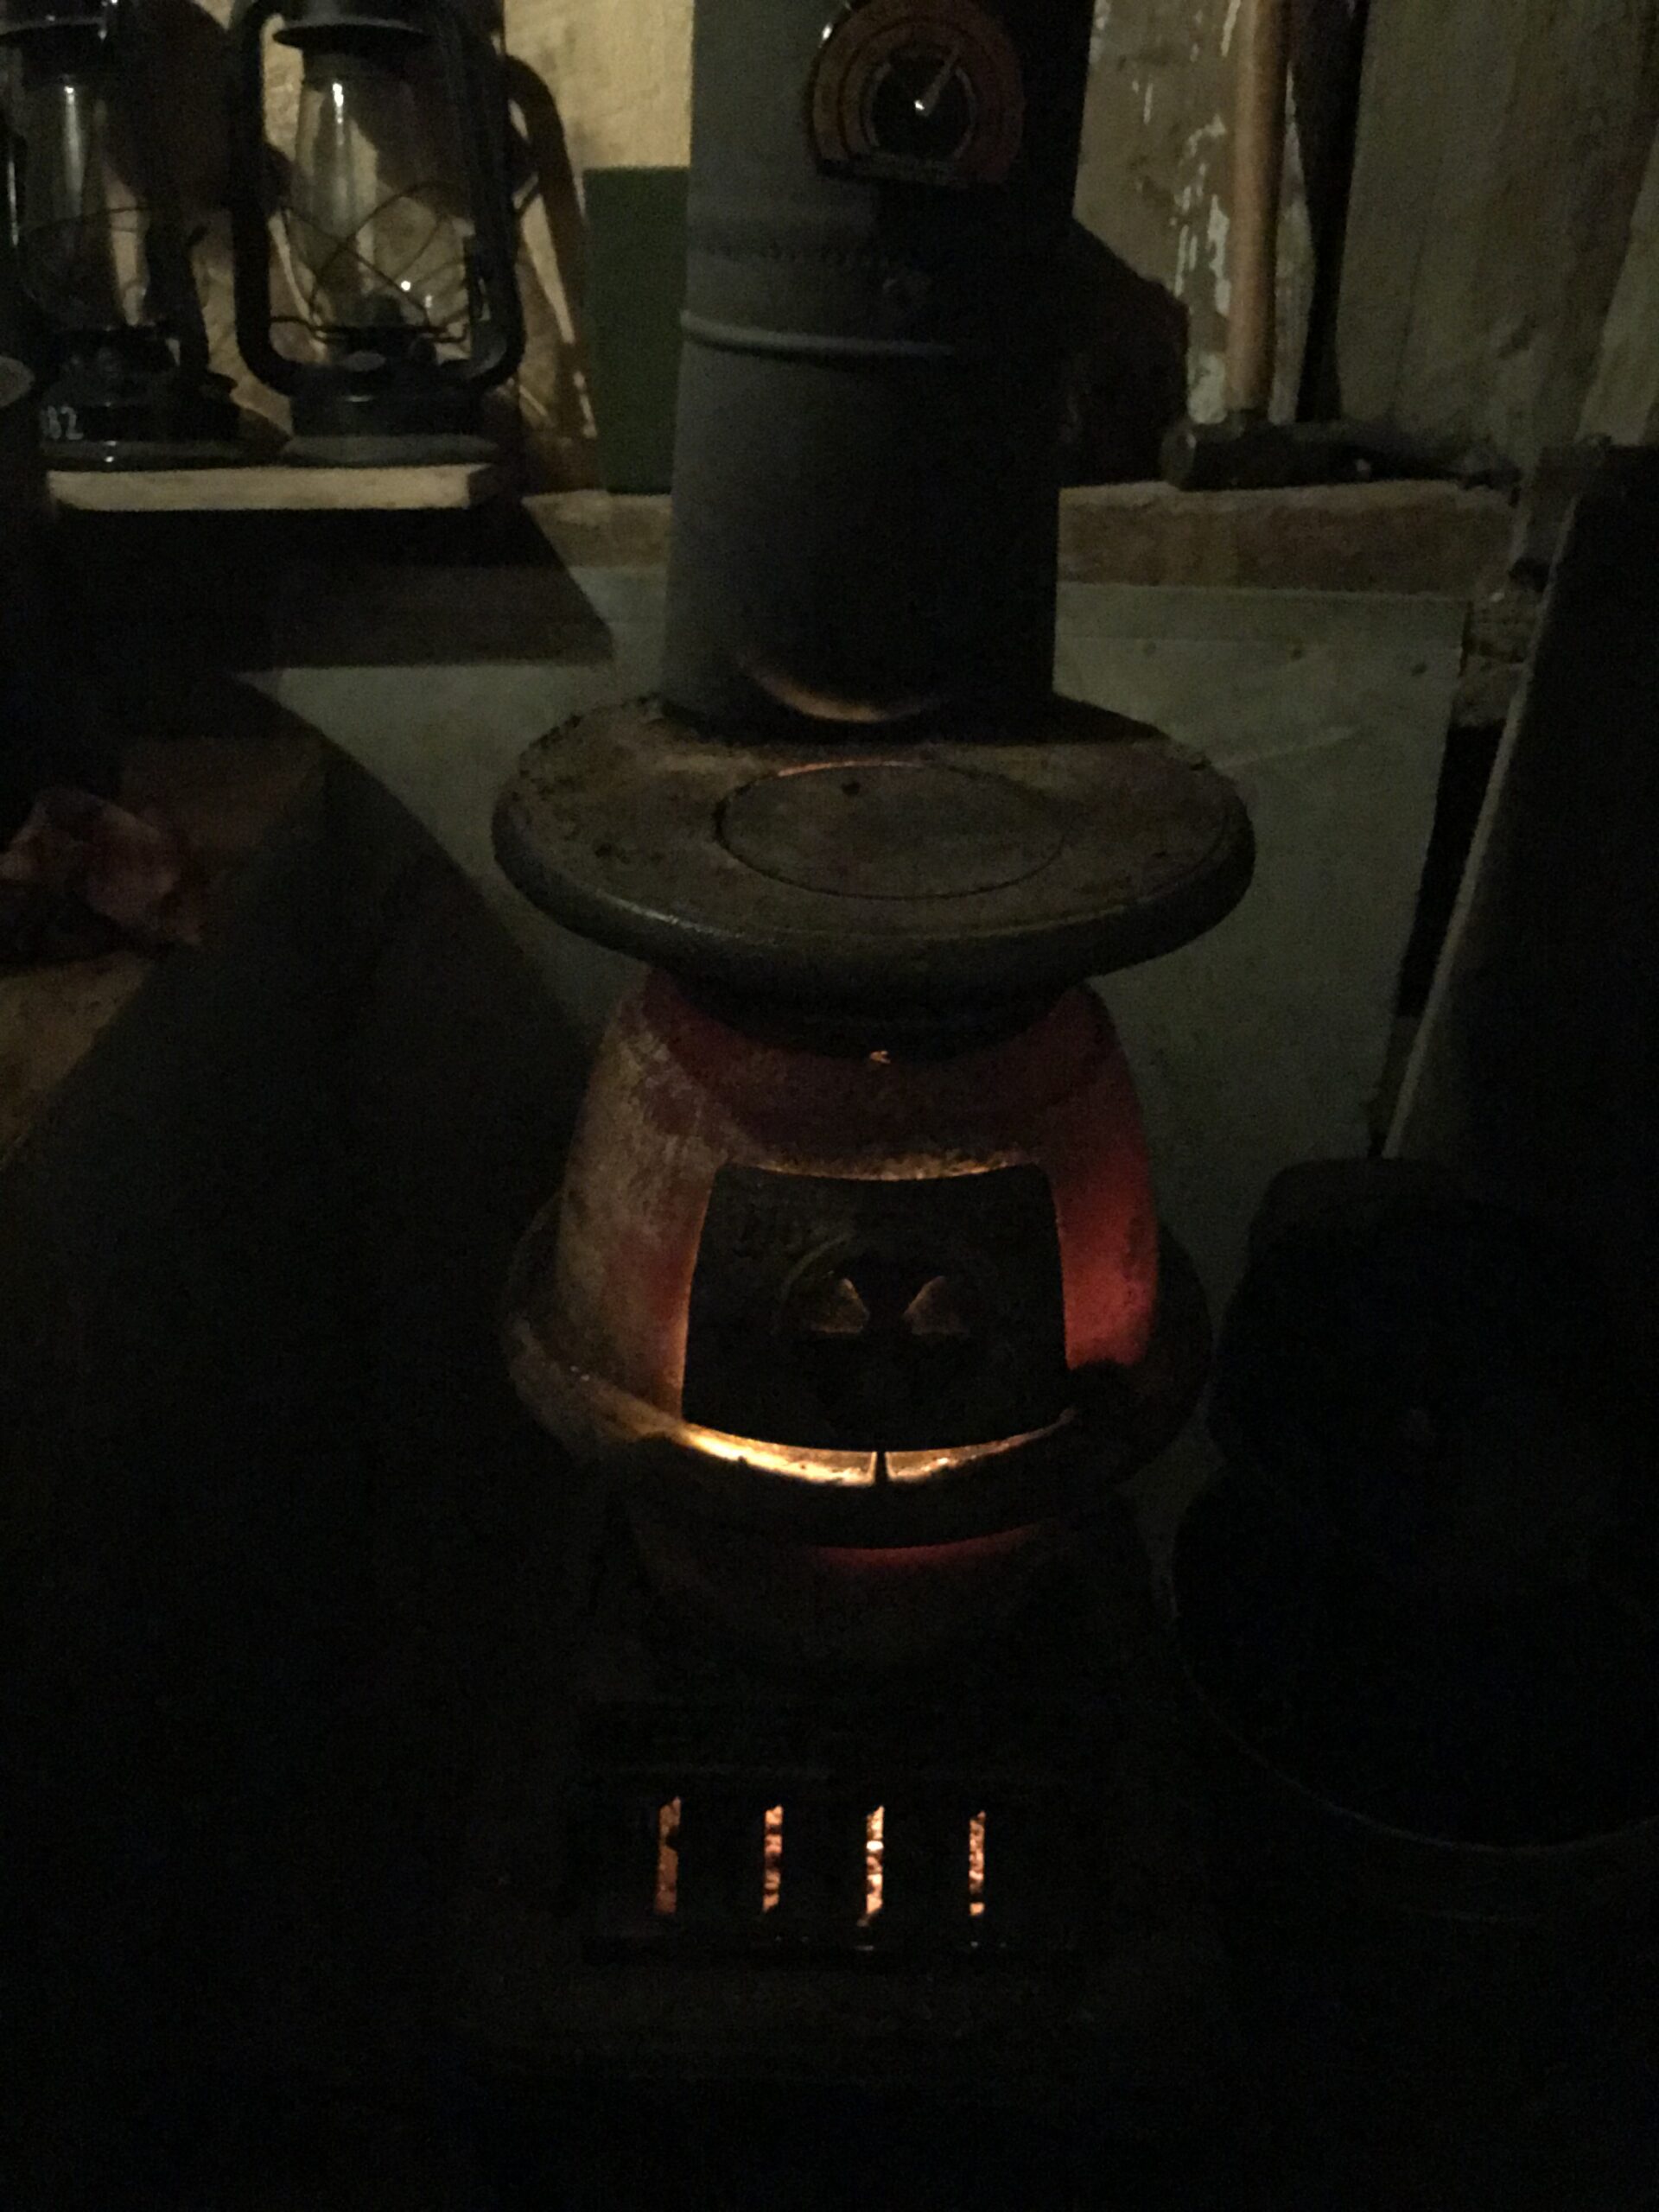
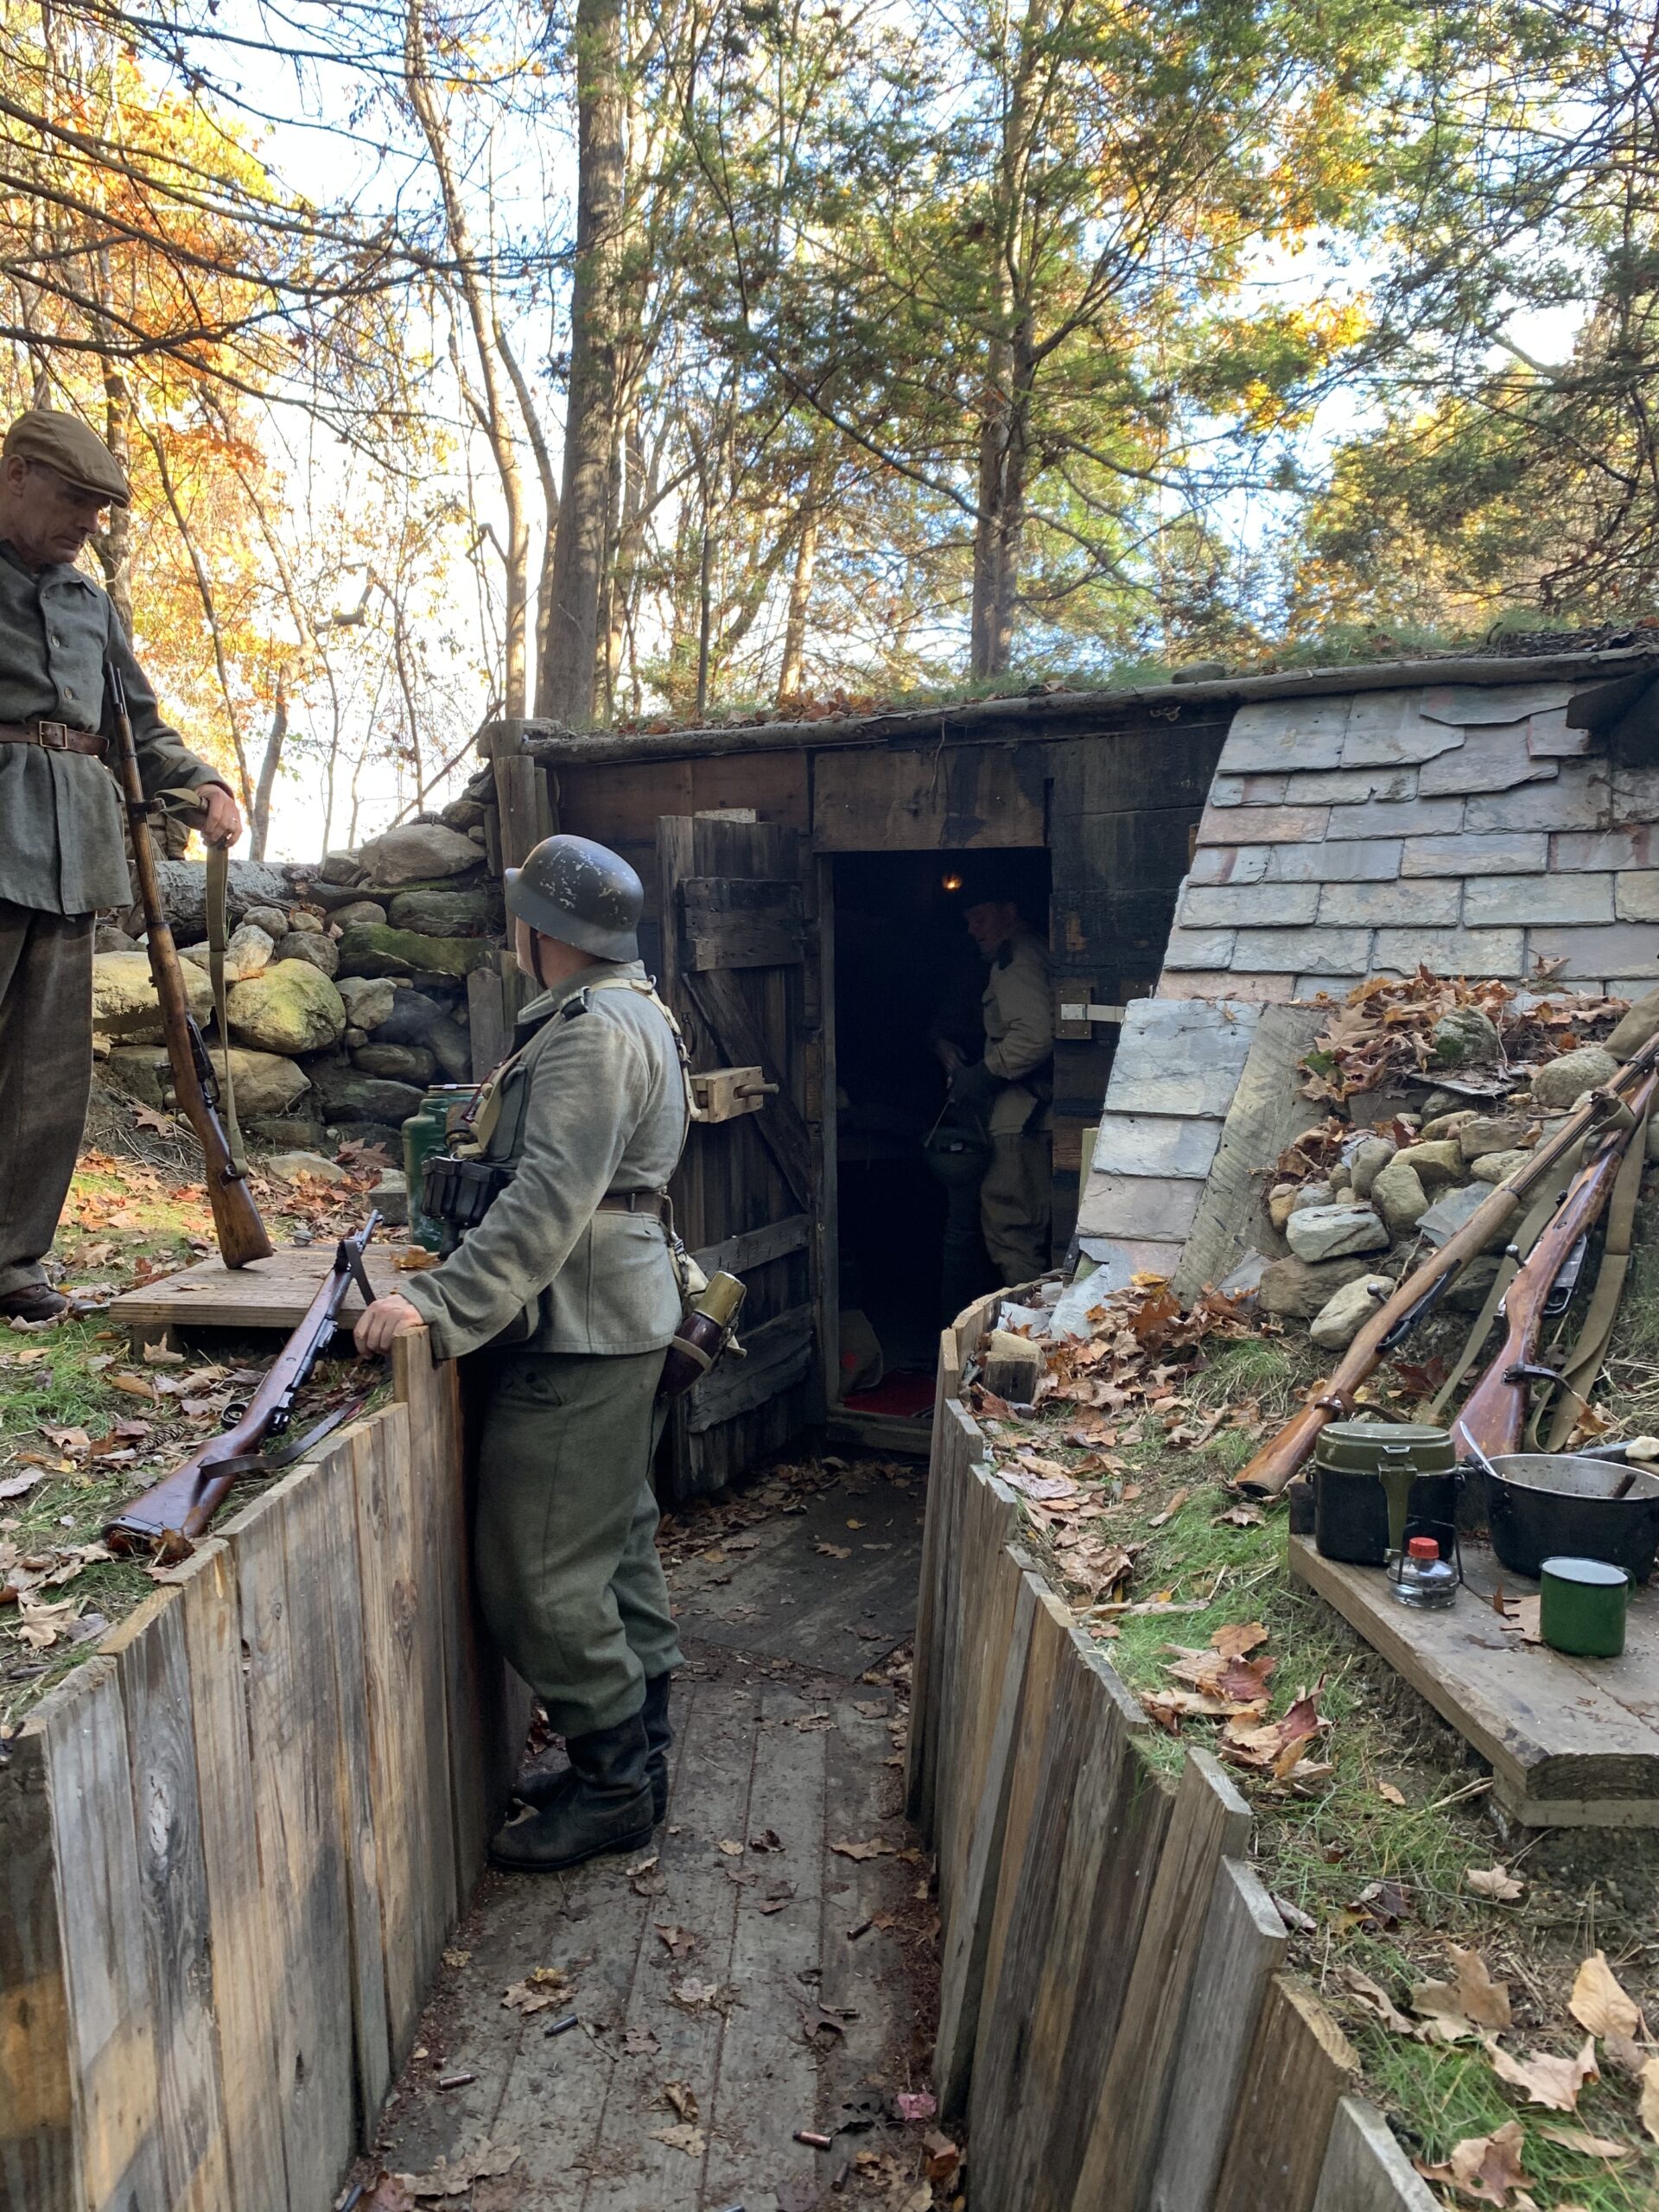
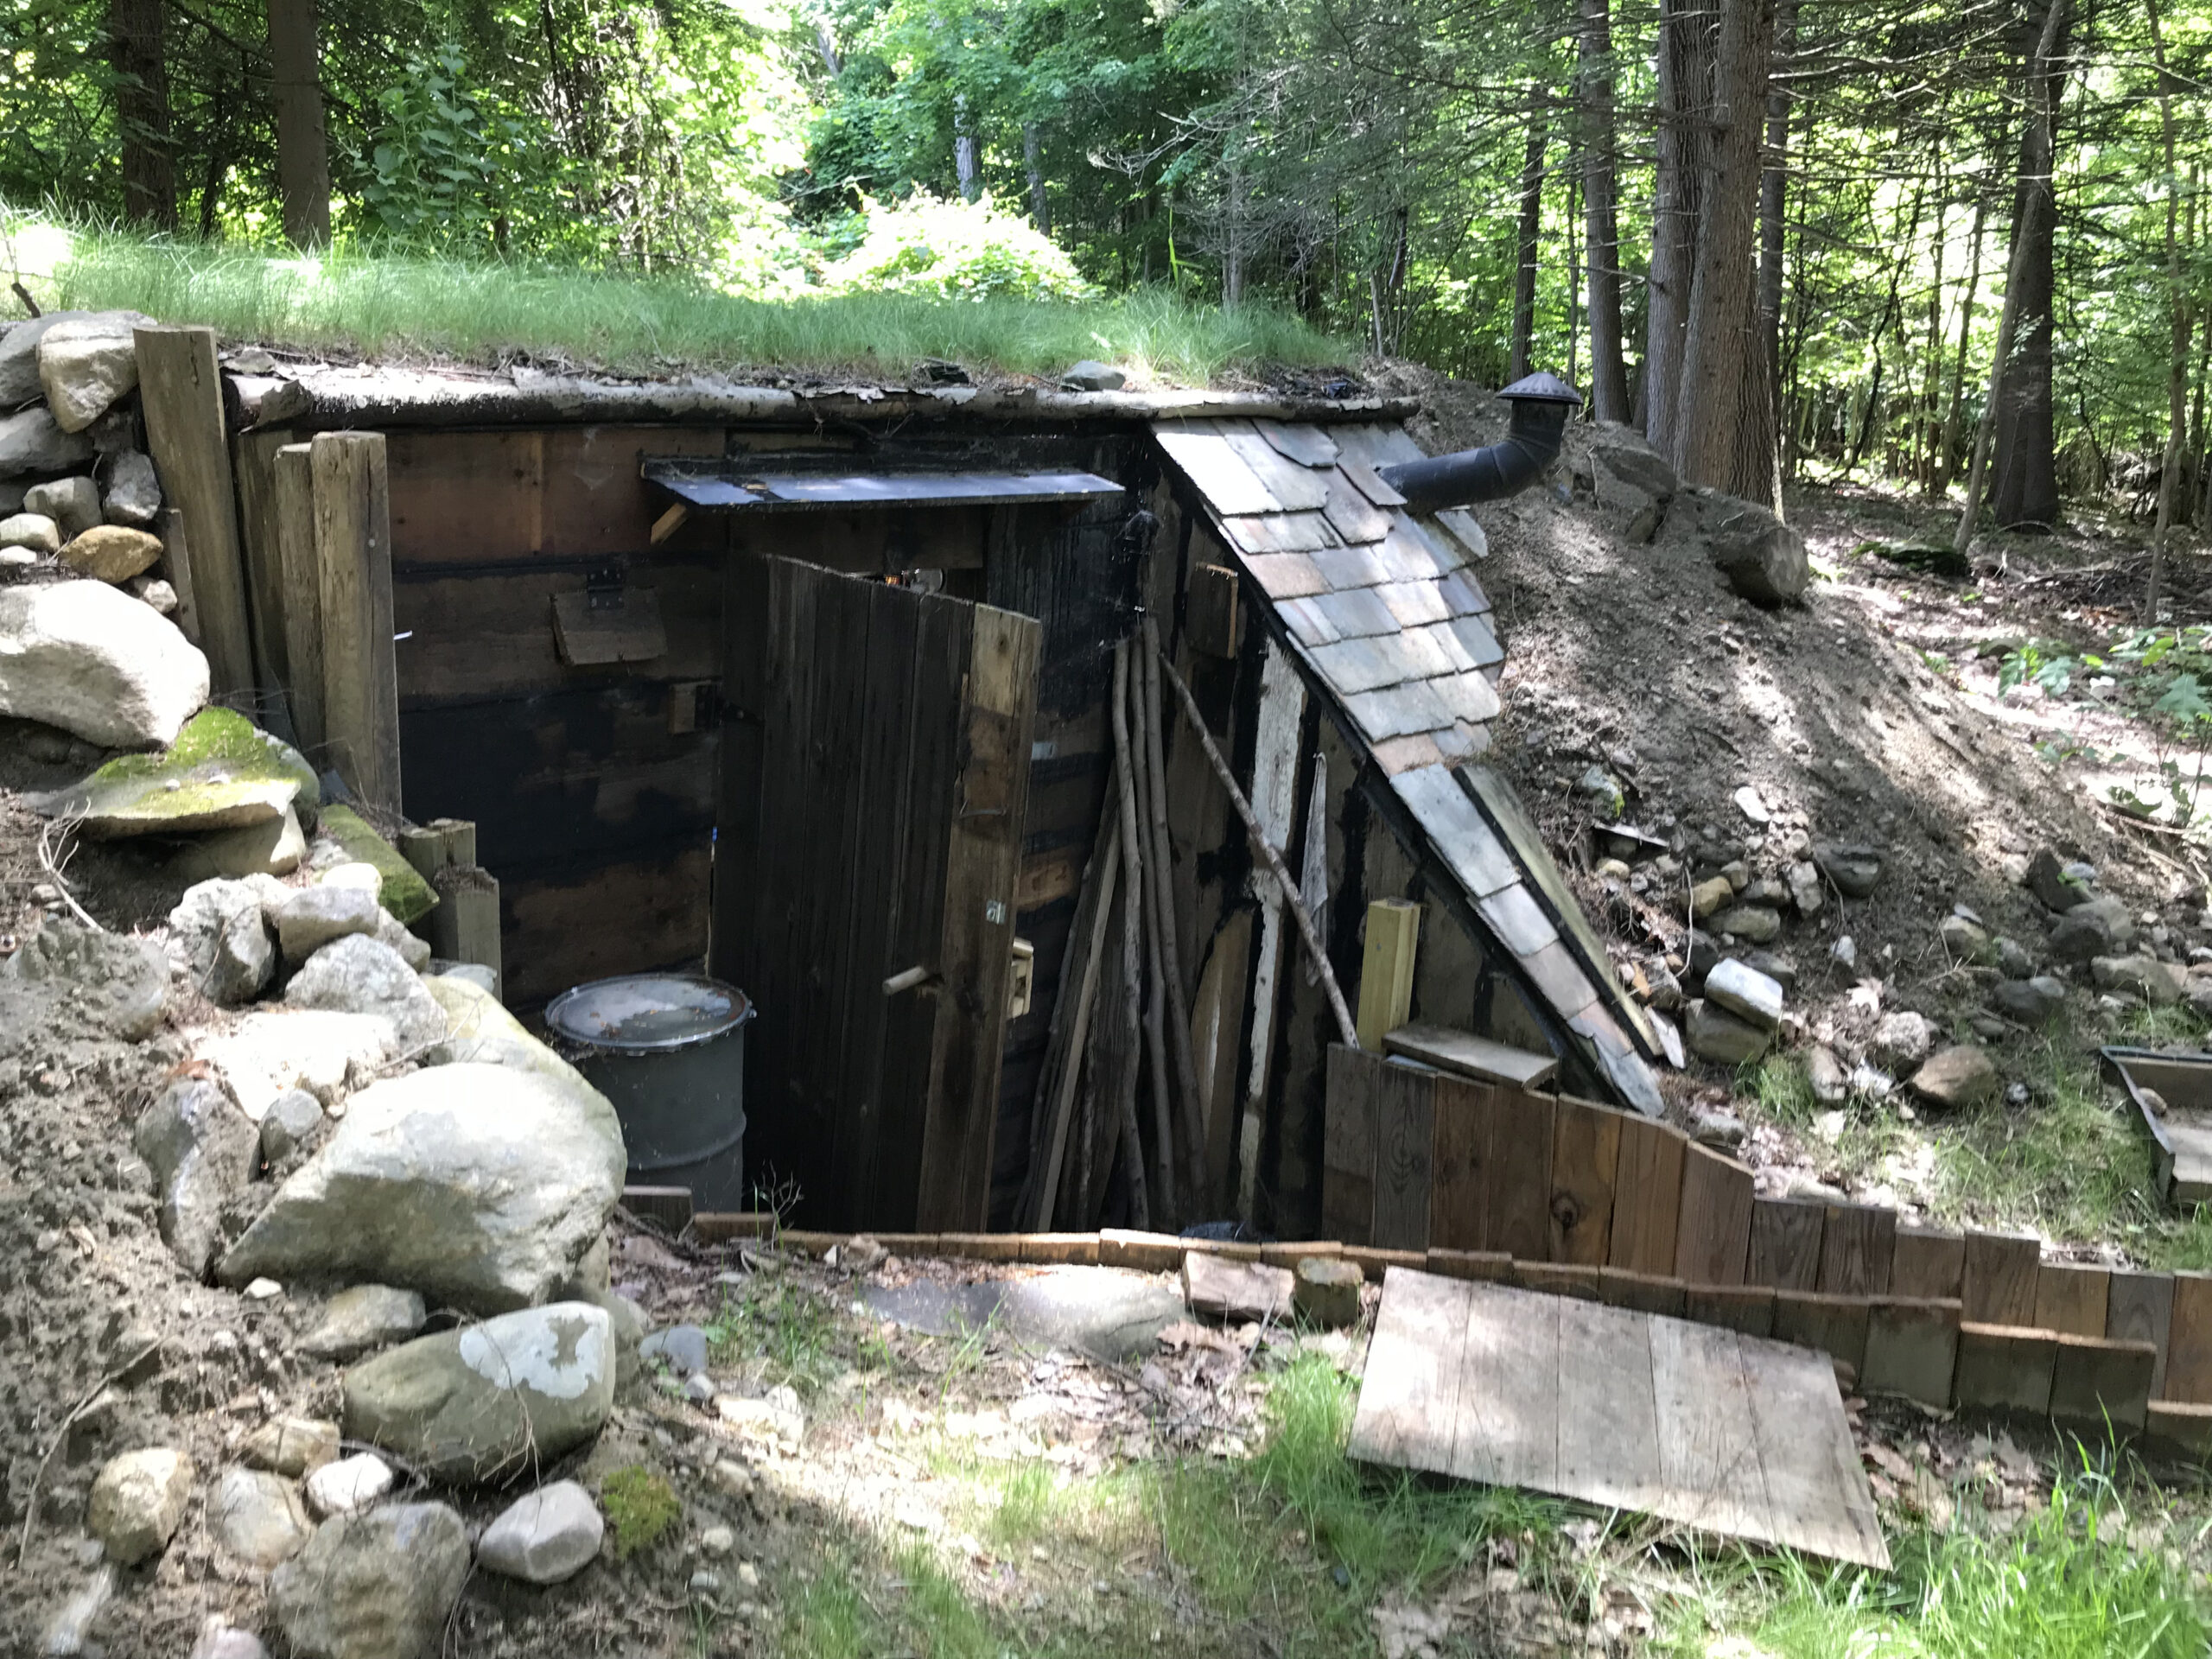
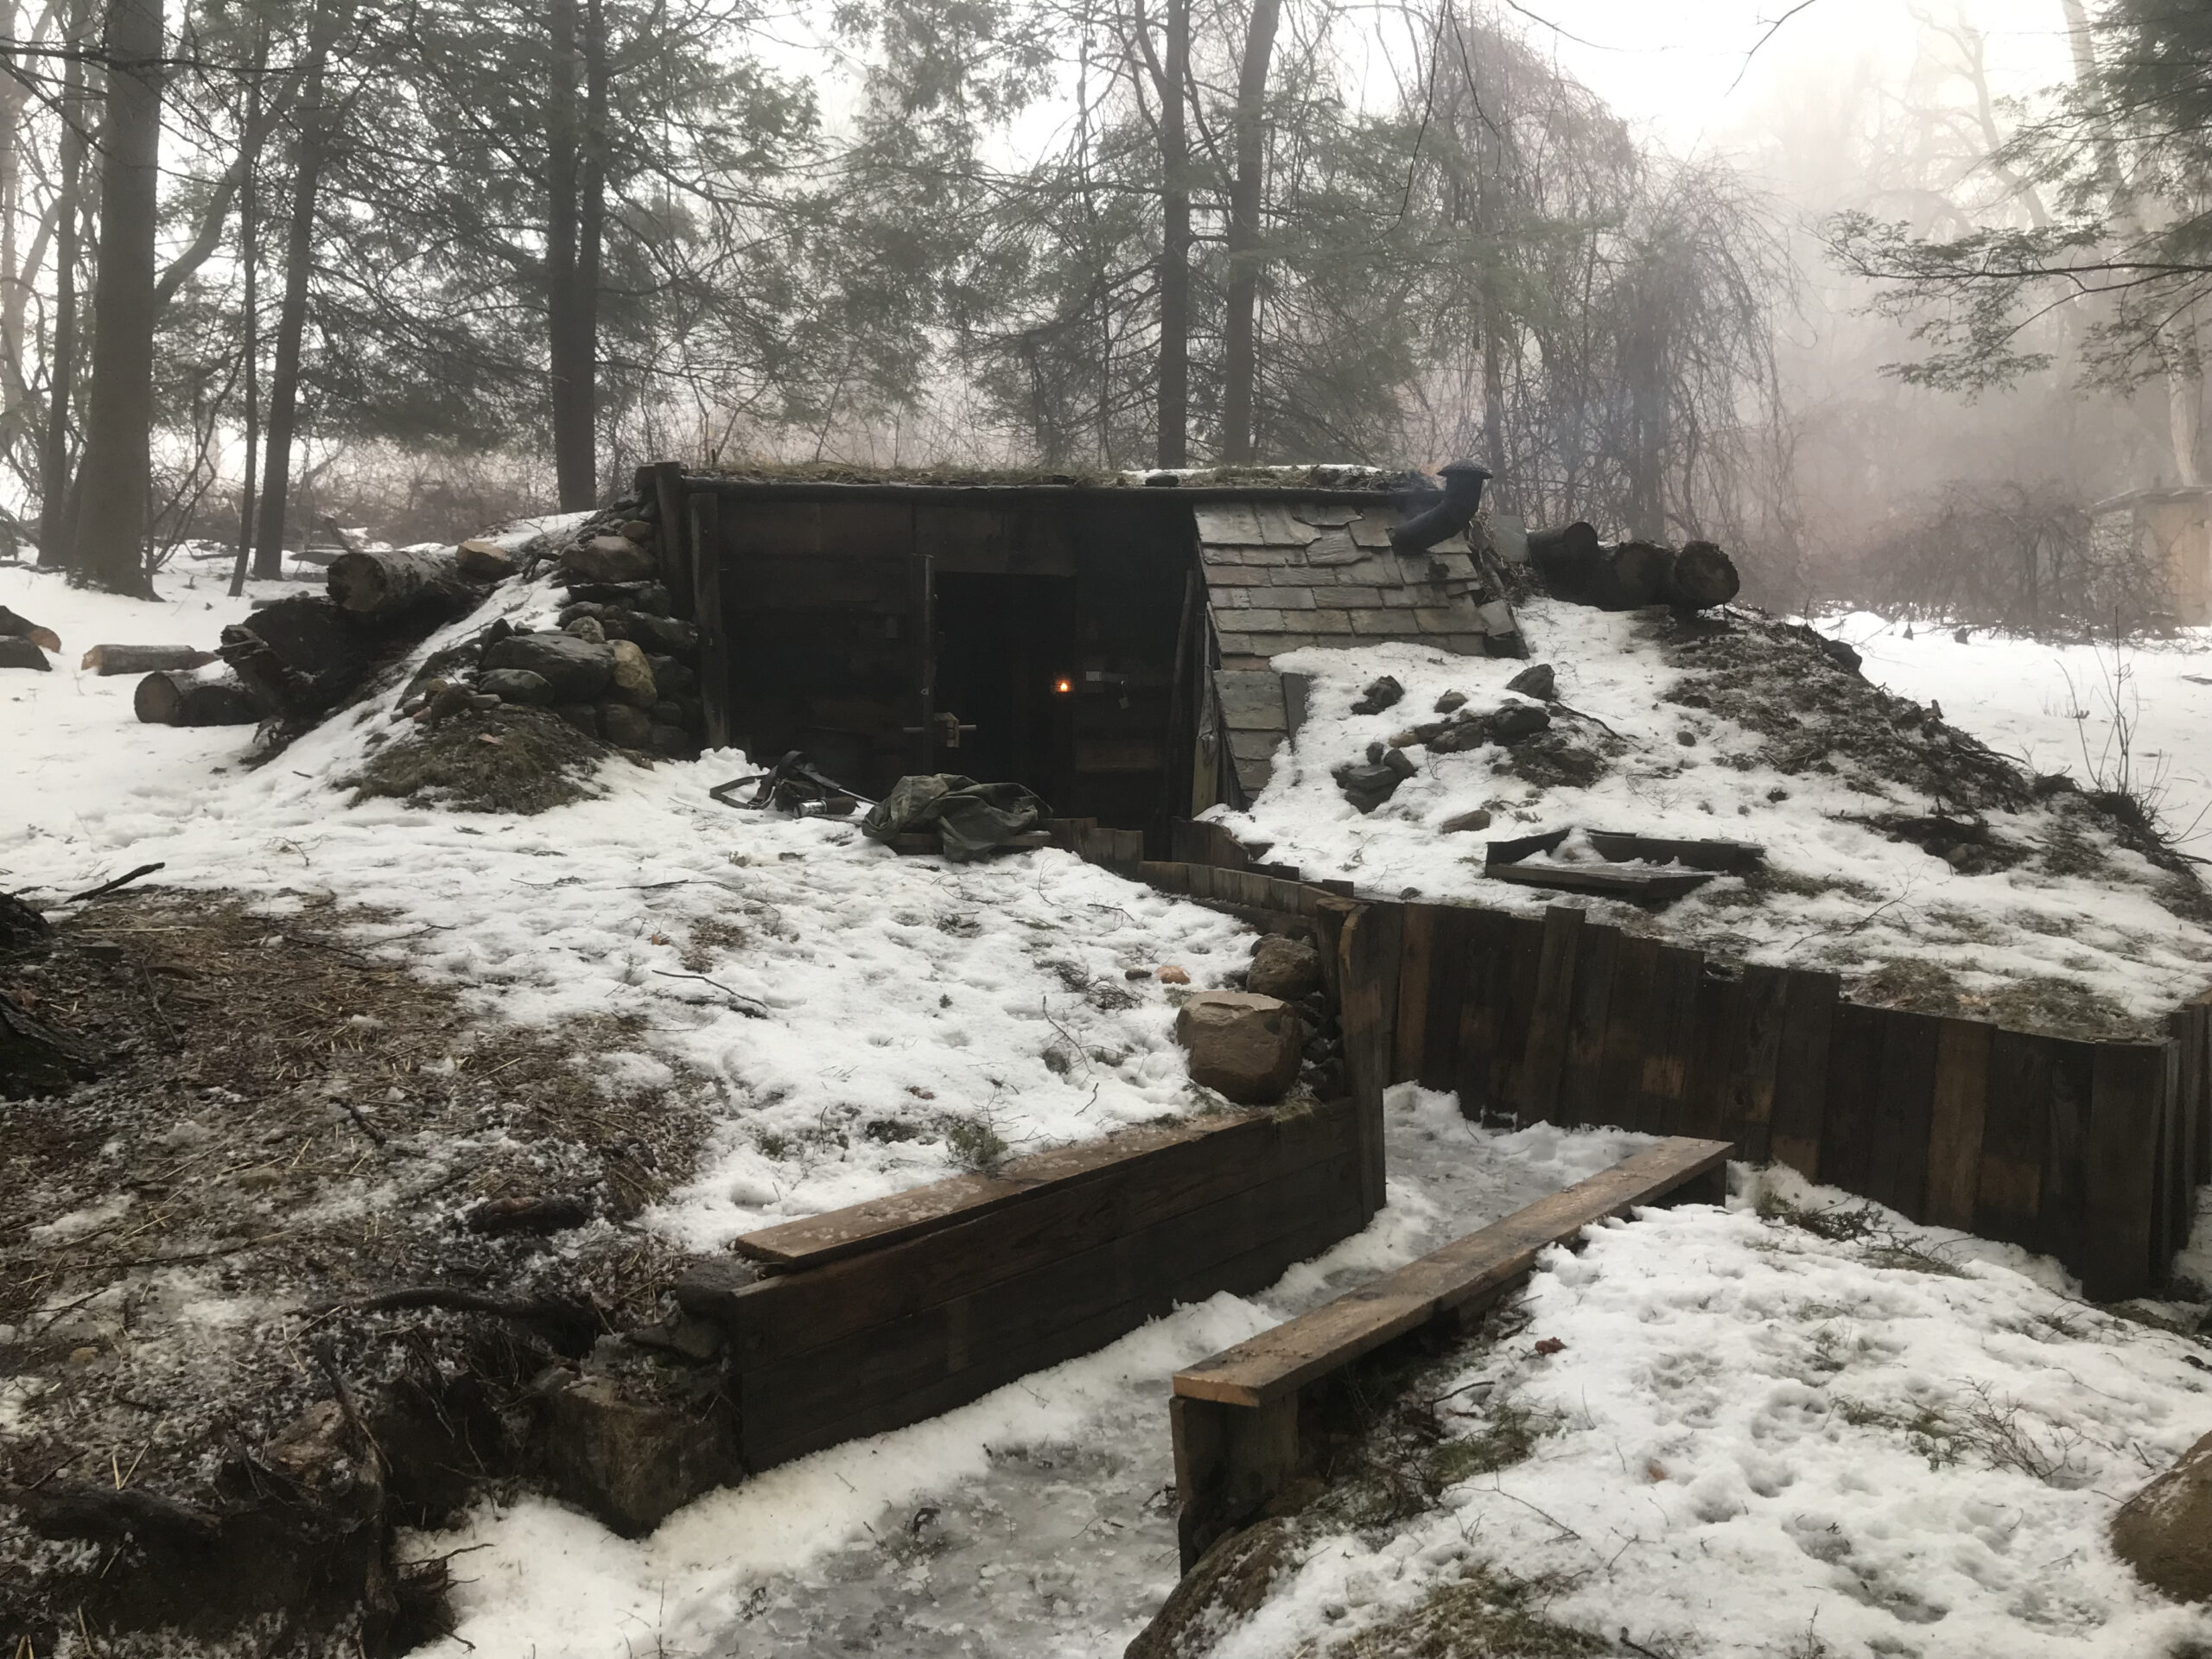
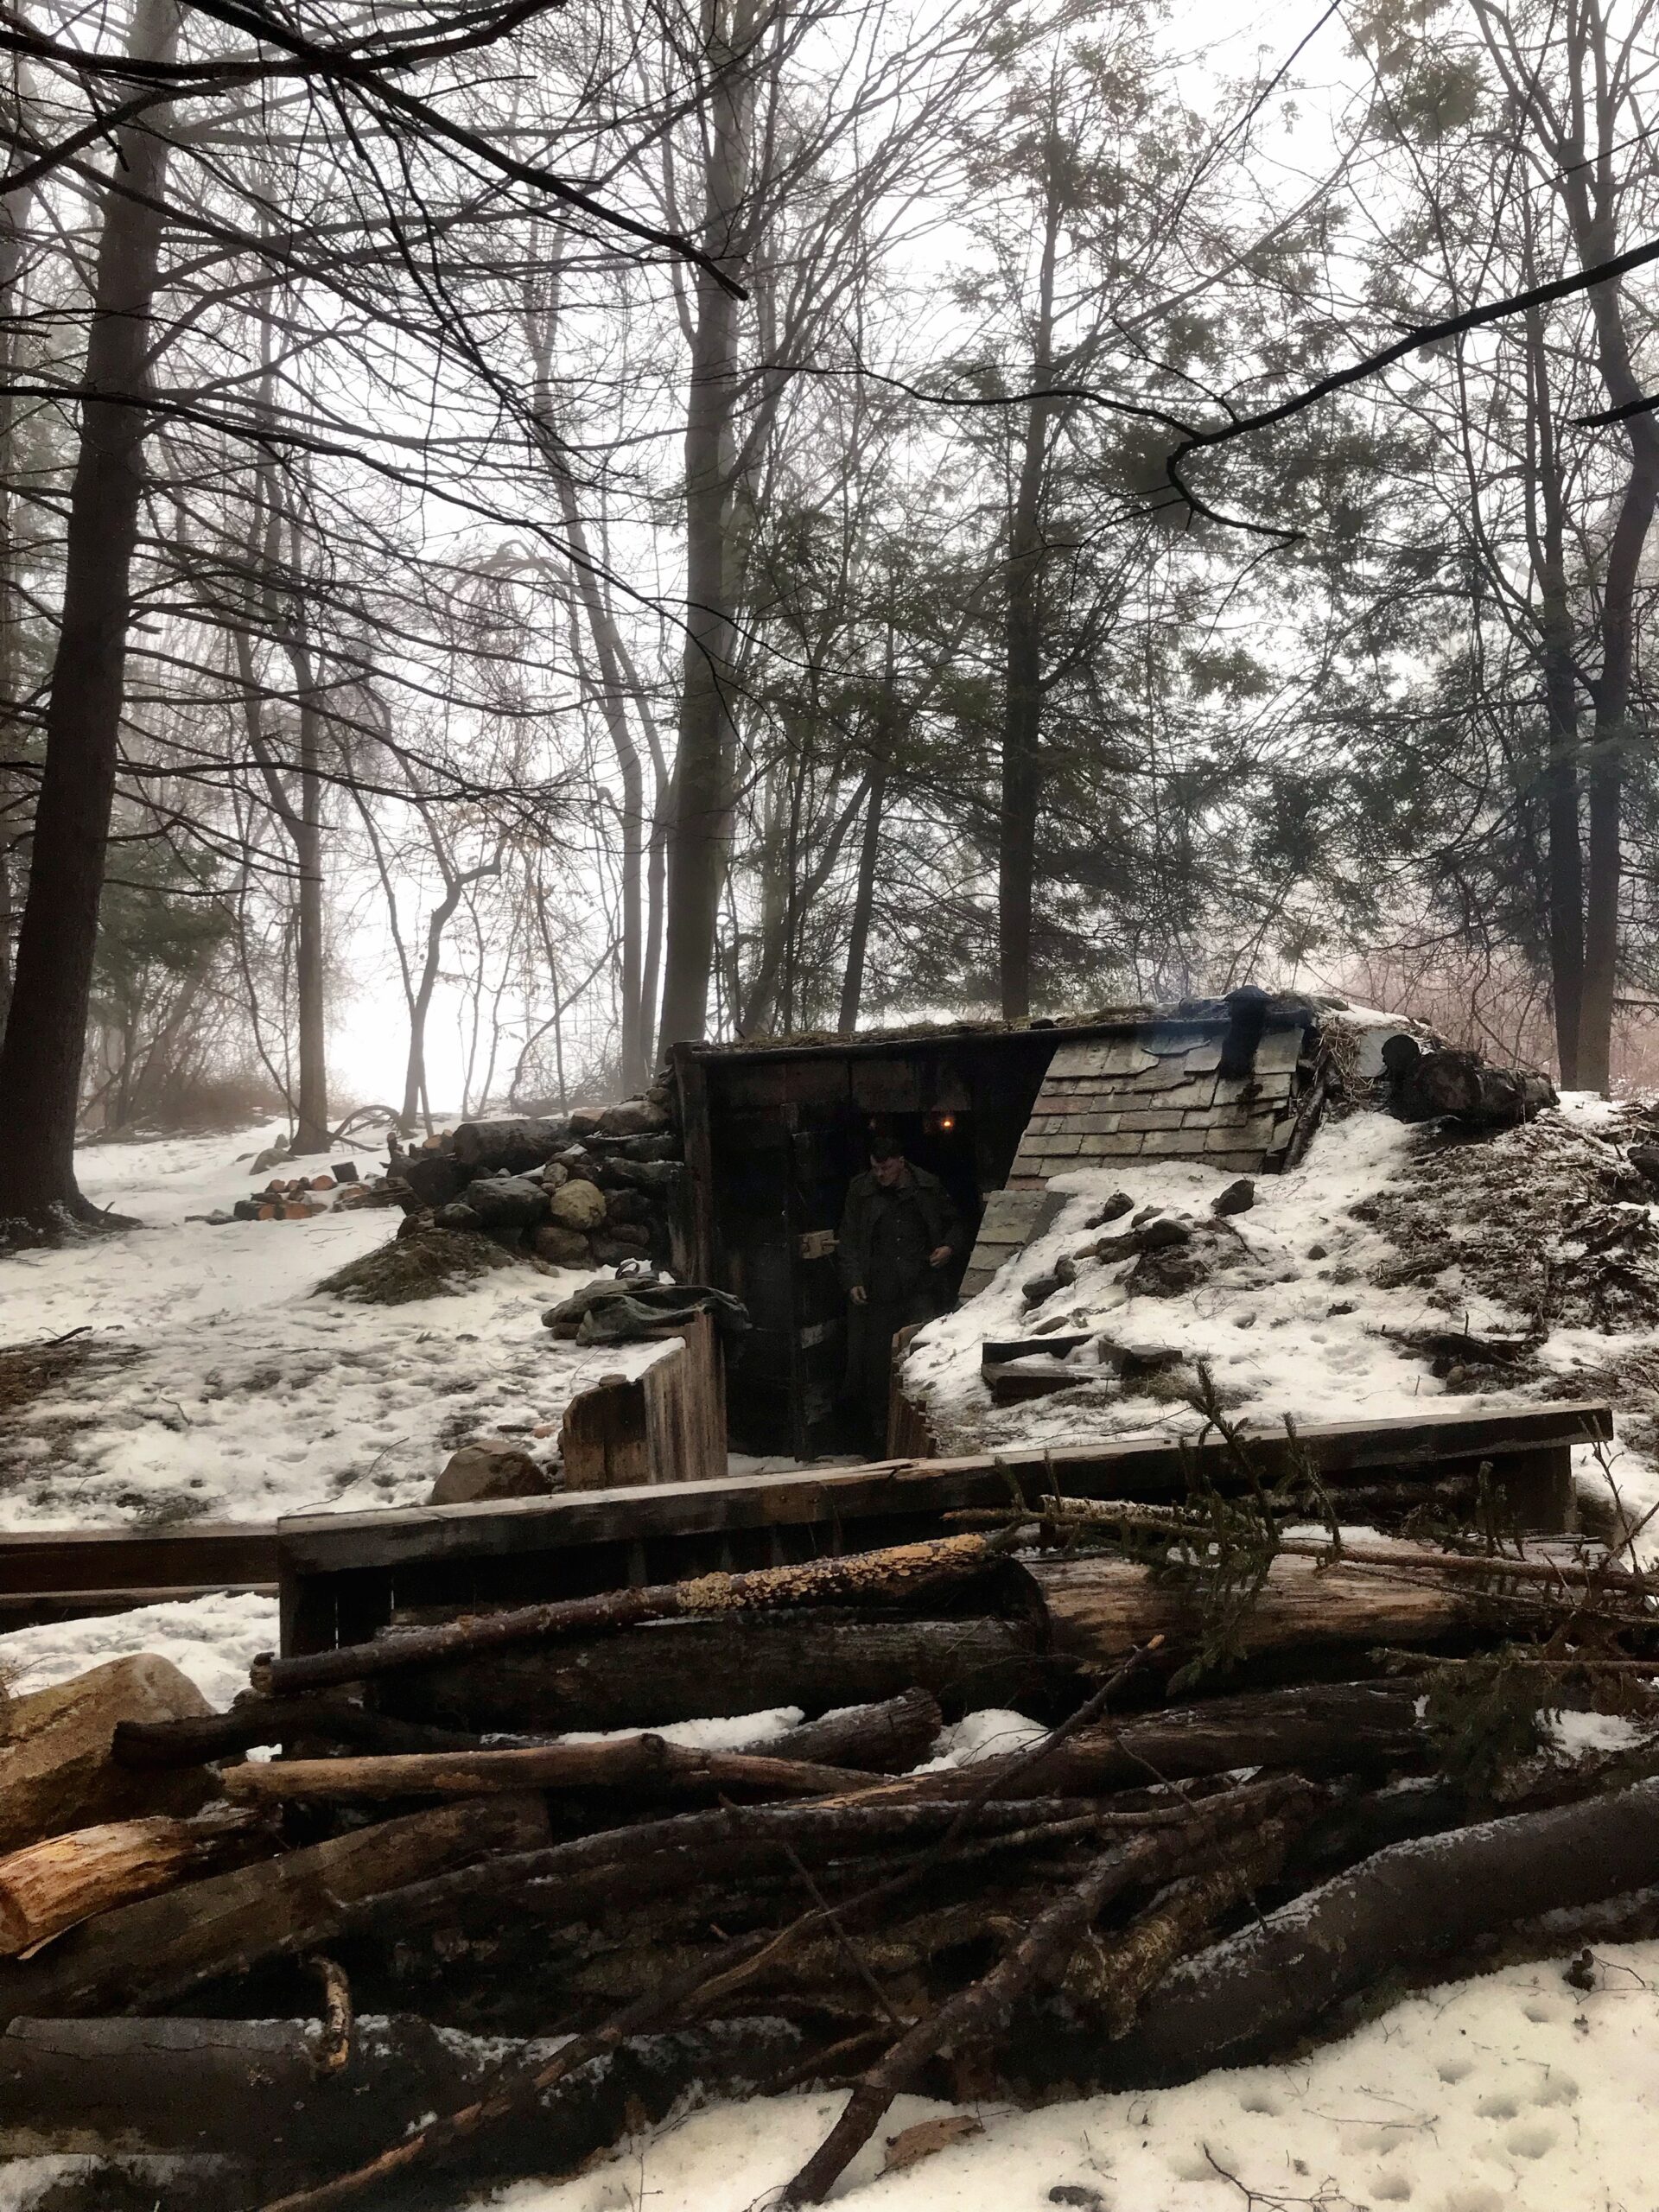
This little structure that we call “Stellung Haselhuhn” was built by the Soviet 26th Rifle Division in cooperation with Sicherungs-Regiment 195 in 2019. It is on private property in western Massachusetts; the involvement of the extremely generous landowner and his family was of course crucial for this project. The design of the structure was chosen by the Soviet group, based on a “Zemlyanka” which was a type of shelter used for centuries by civilians, also built and used in WWII by Soviet soldiers and partisans. Many photos show Wehrmacht soldiers using simple field expedient dugouts like this as well, and wartime German guidelines stressed the importance of dug-in positions as protection from rifle fire and incendiary ammunition. This structure is built into a slope, and although we call it a “bunker,” we use this primarily as a shelter rather than a fighting position. Most of the building materials were salvaged, with some of the beams and the door taken from a ruined barn built around 1915. Some trees at the site were cut to provide logs, and an antique stove provides heat. We did use modern tools to make this; we had limited time and manpower, and we wouldn’t have been able to complete this with hand tools. As of this writing (2021) construction of a second bunker at this site is underway.
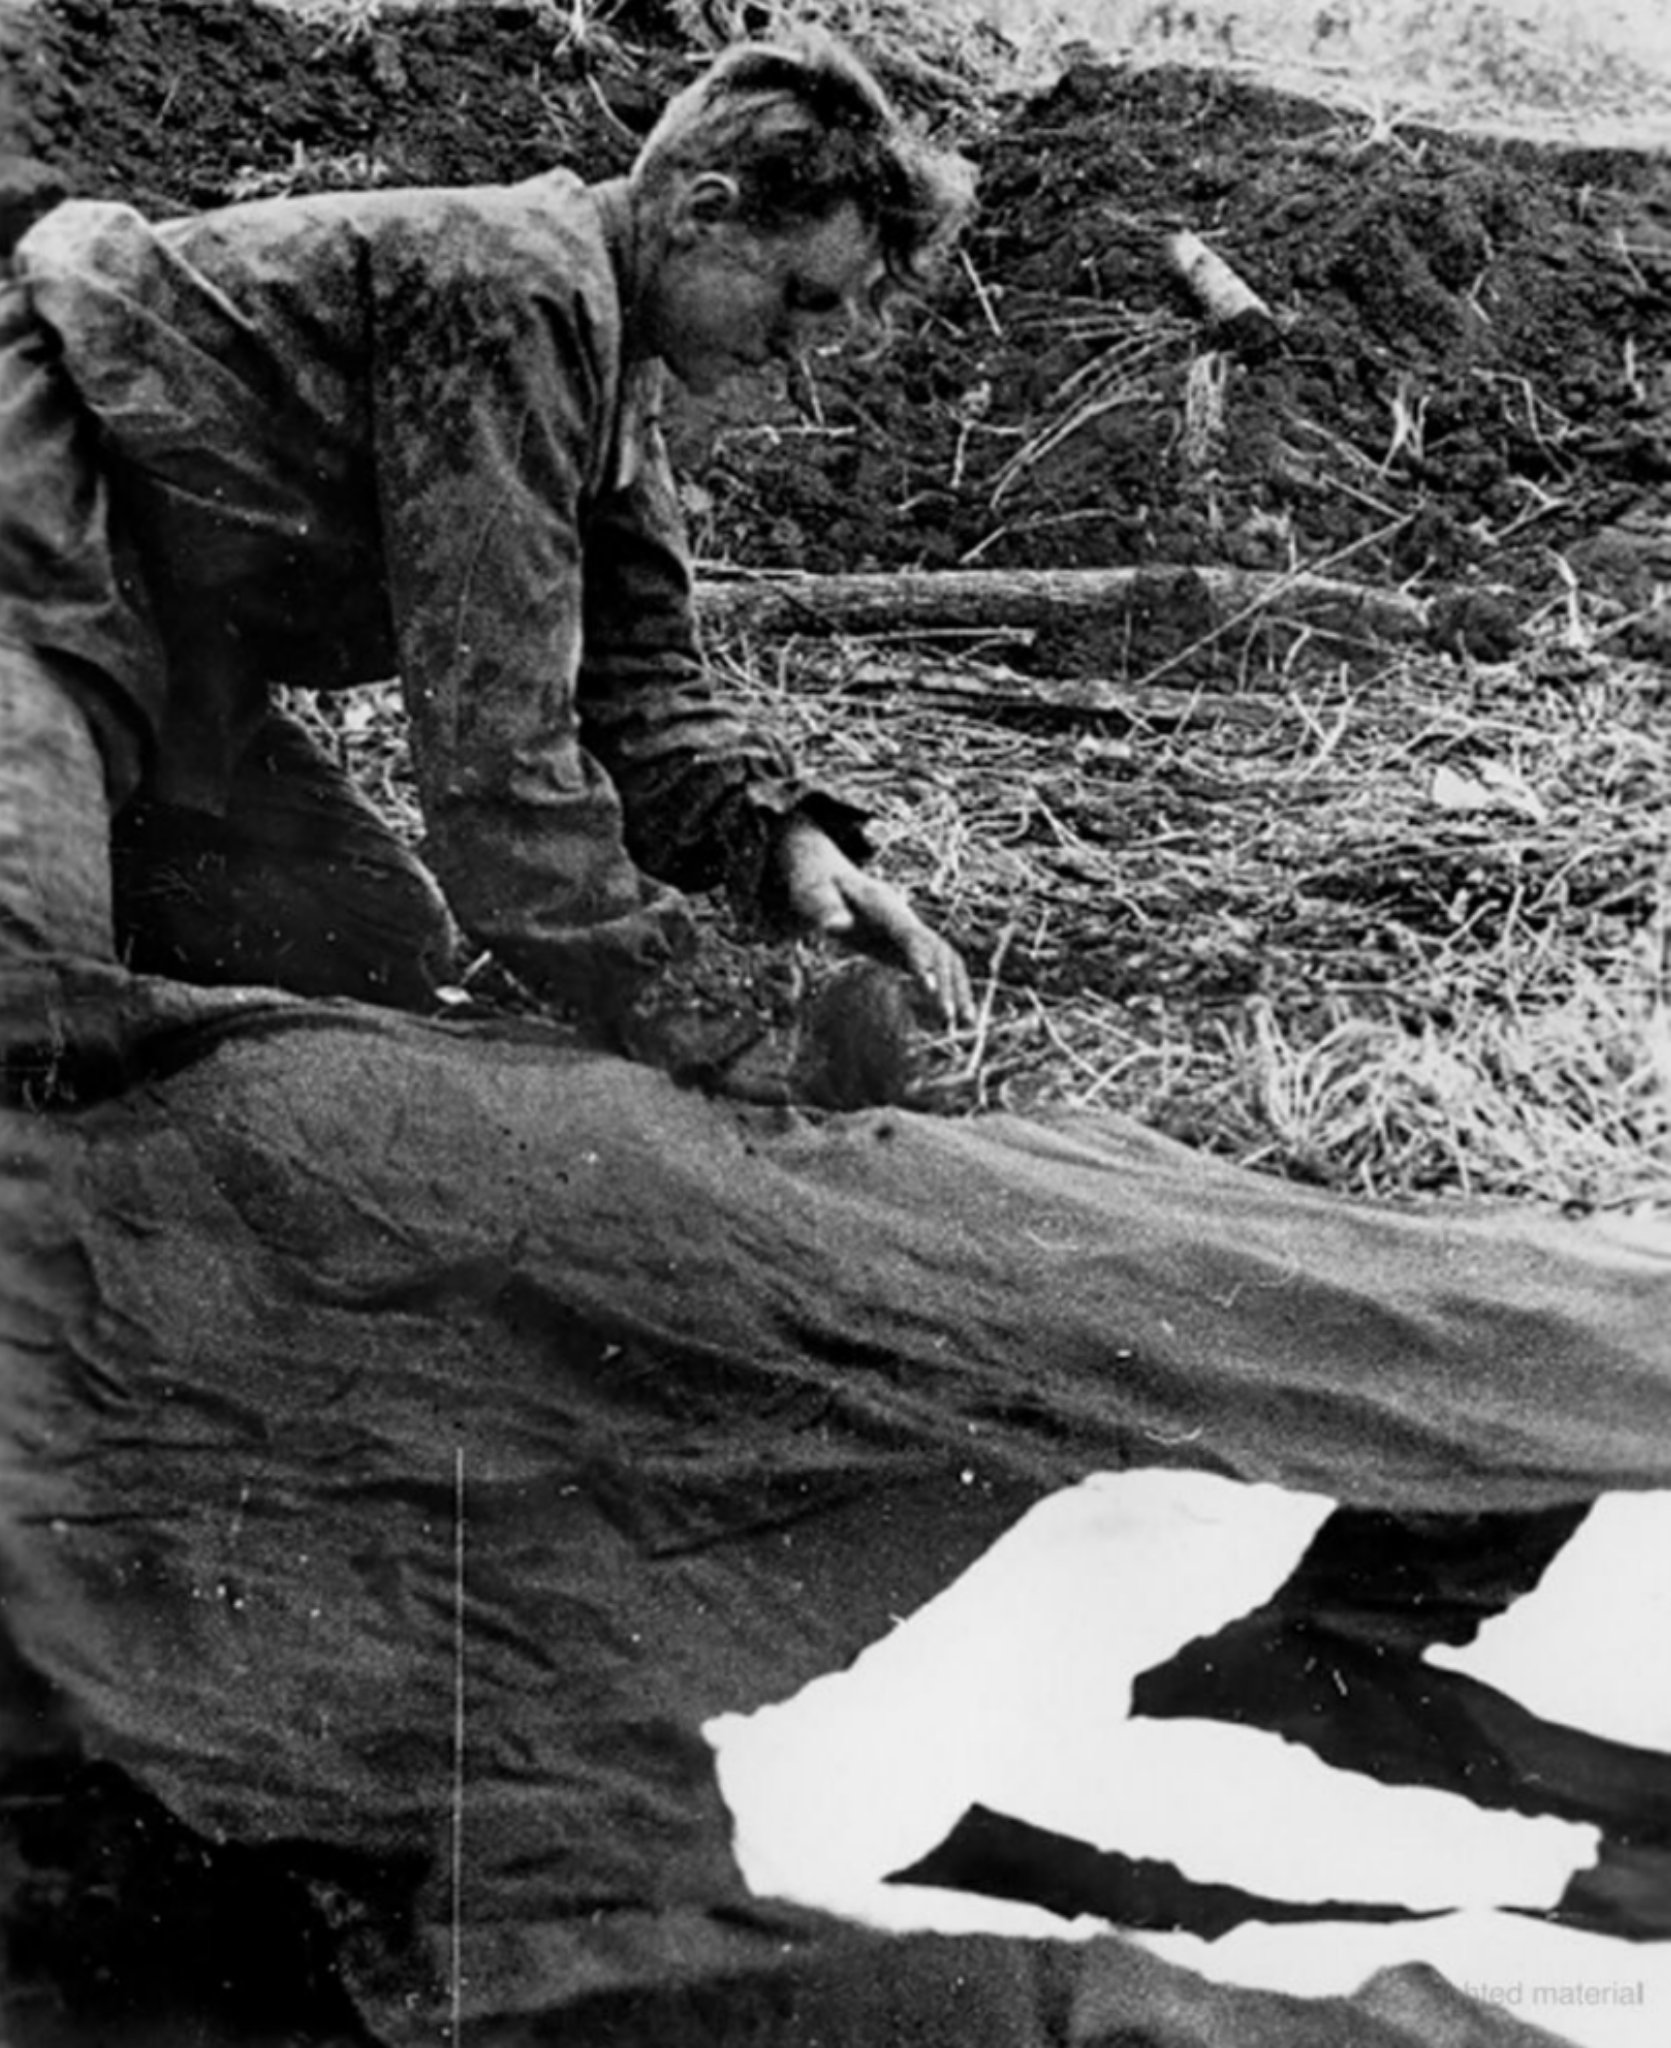
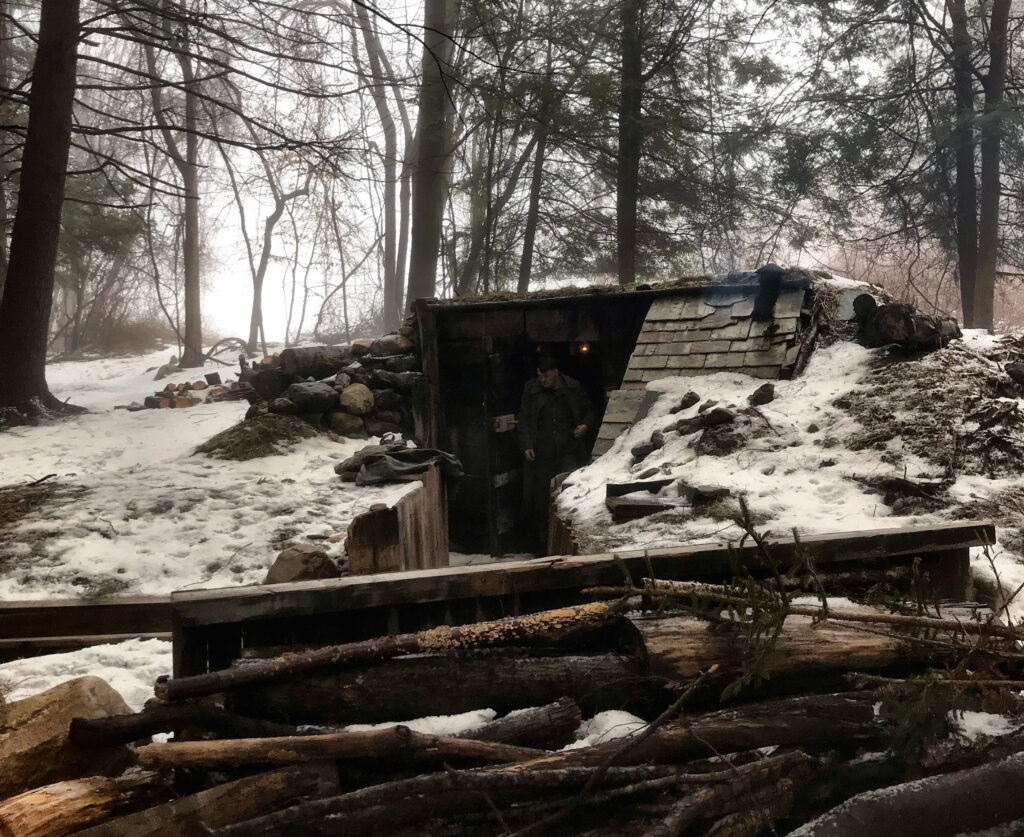
Ground was broken for this project in the spring of 2019. The majority of the work was done by members of the Soviet 26th Rifle Division reenactment group.
When the bunker was first completed, access was via a simple earthen trench.
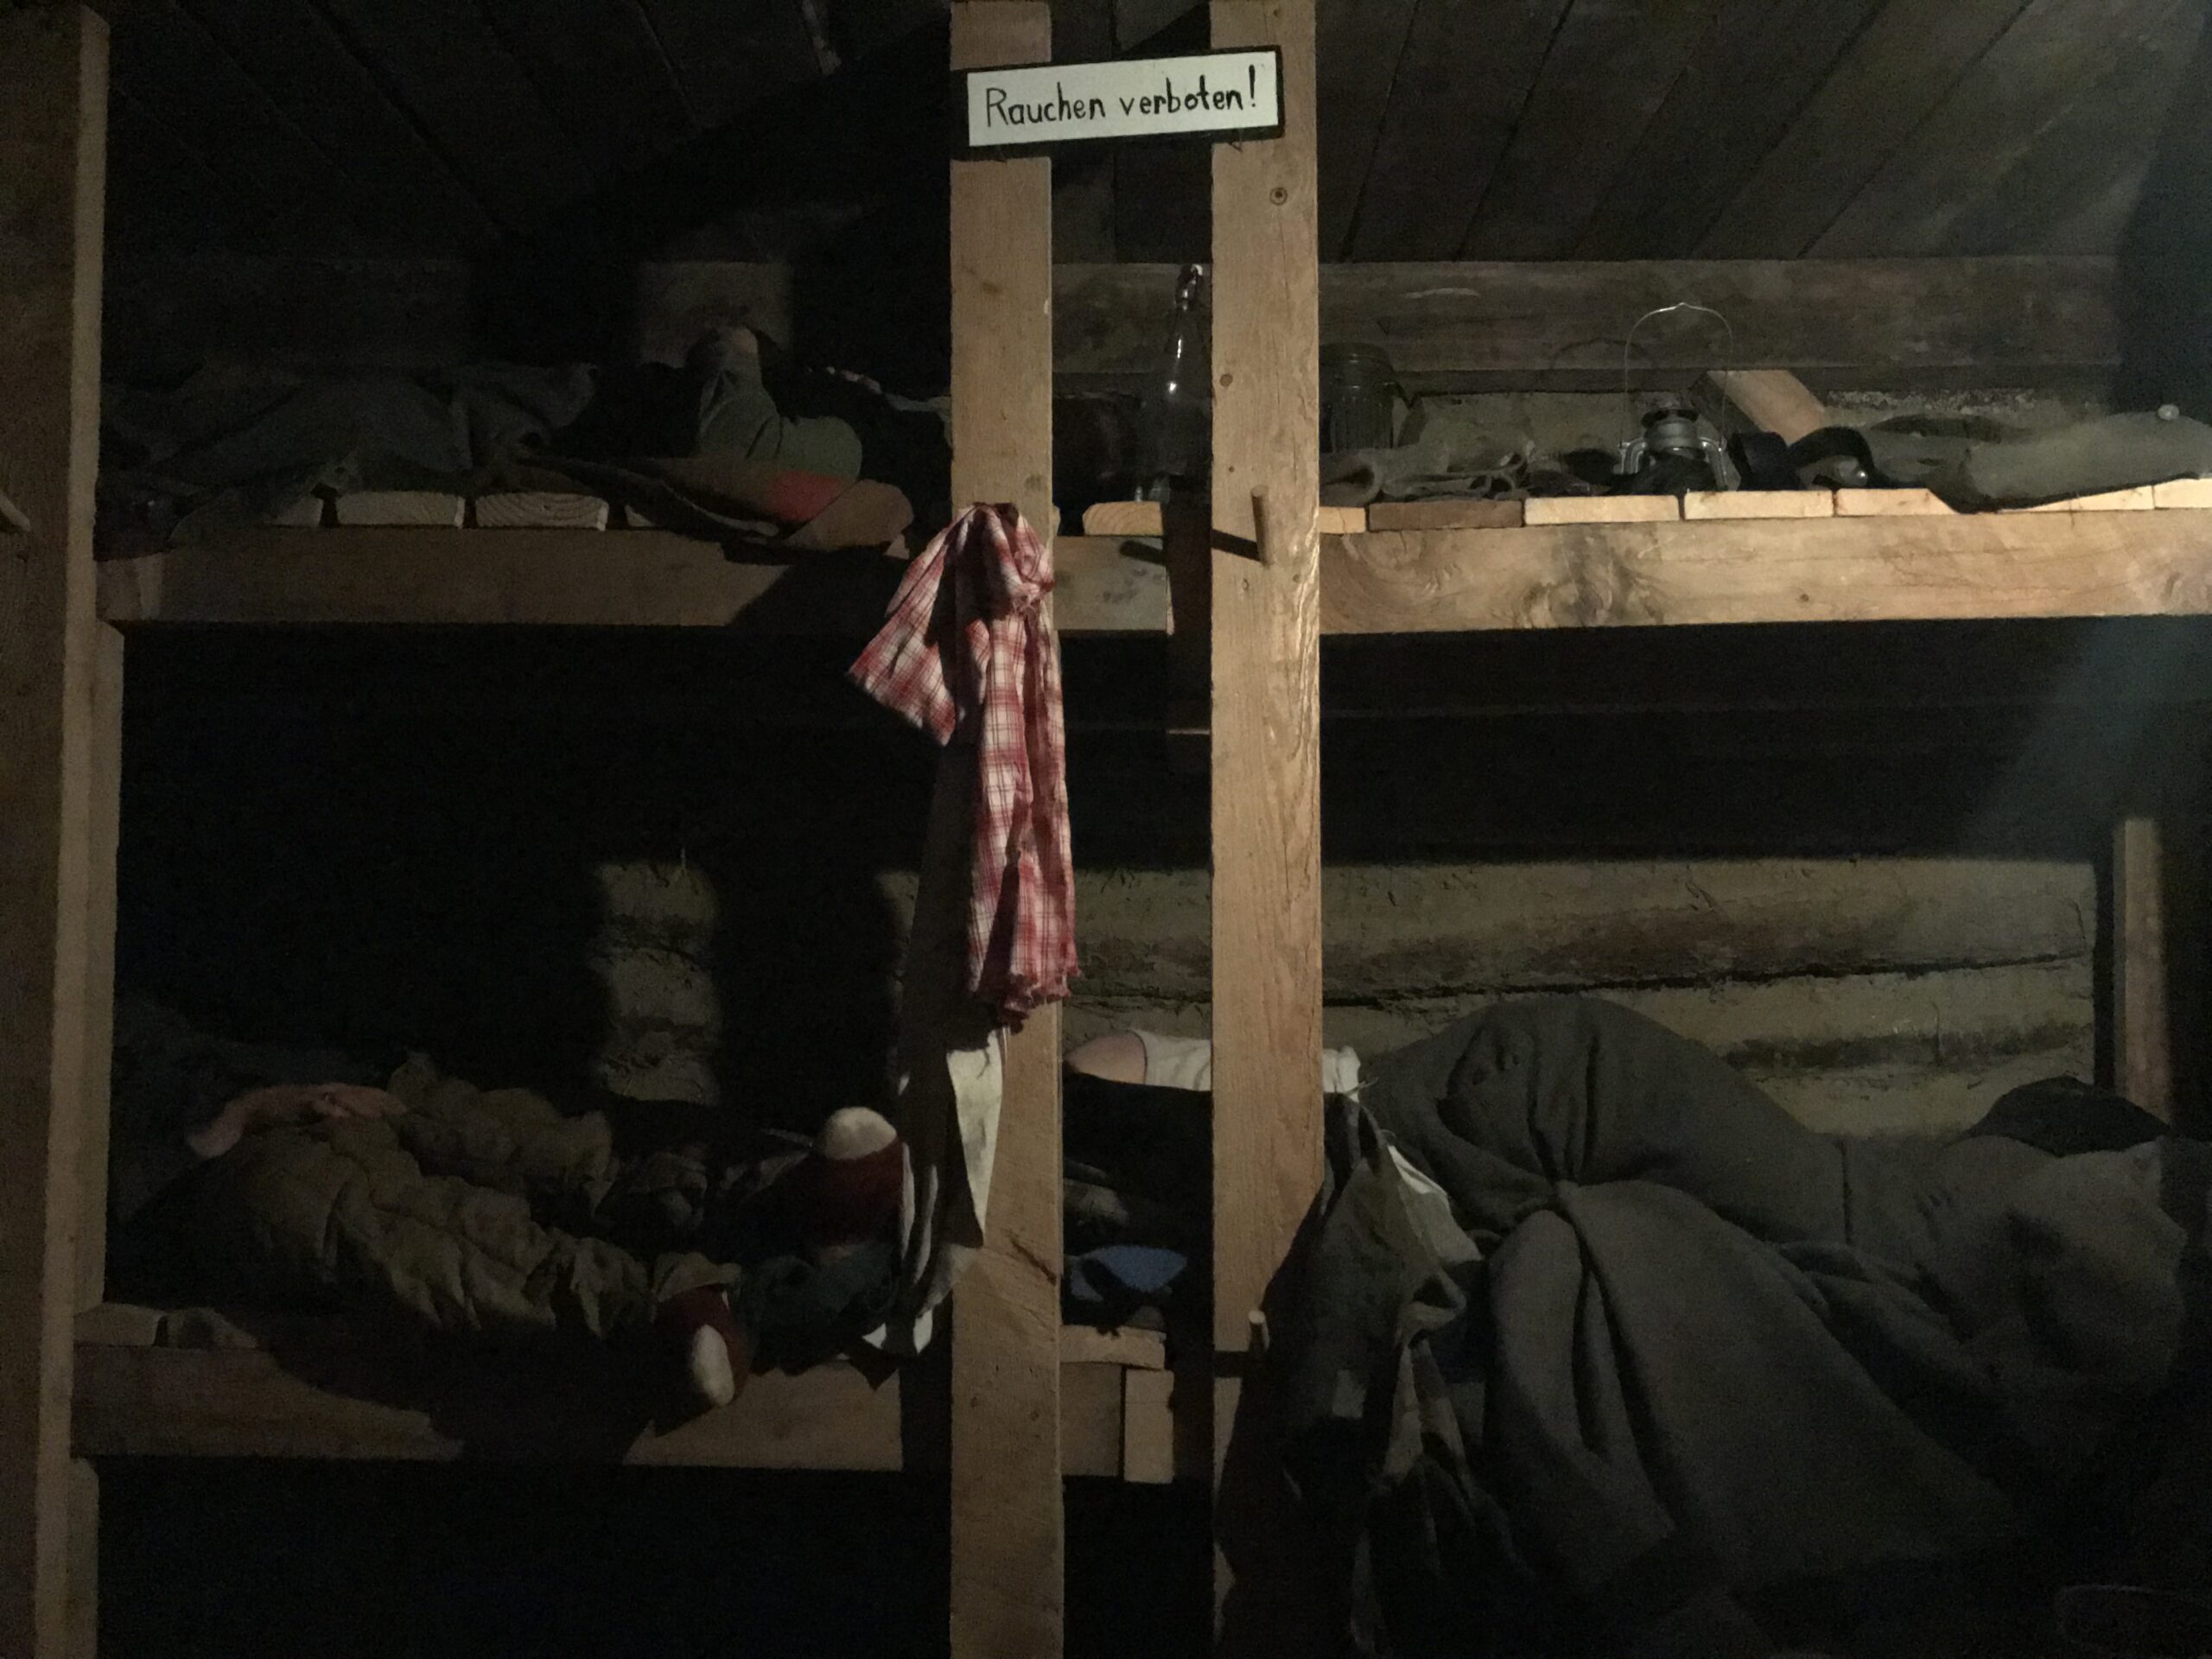
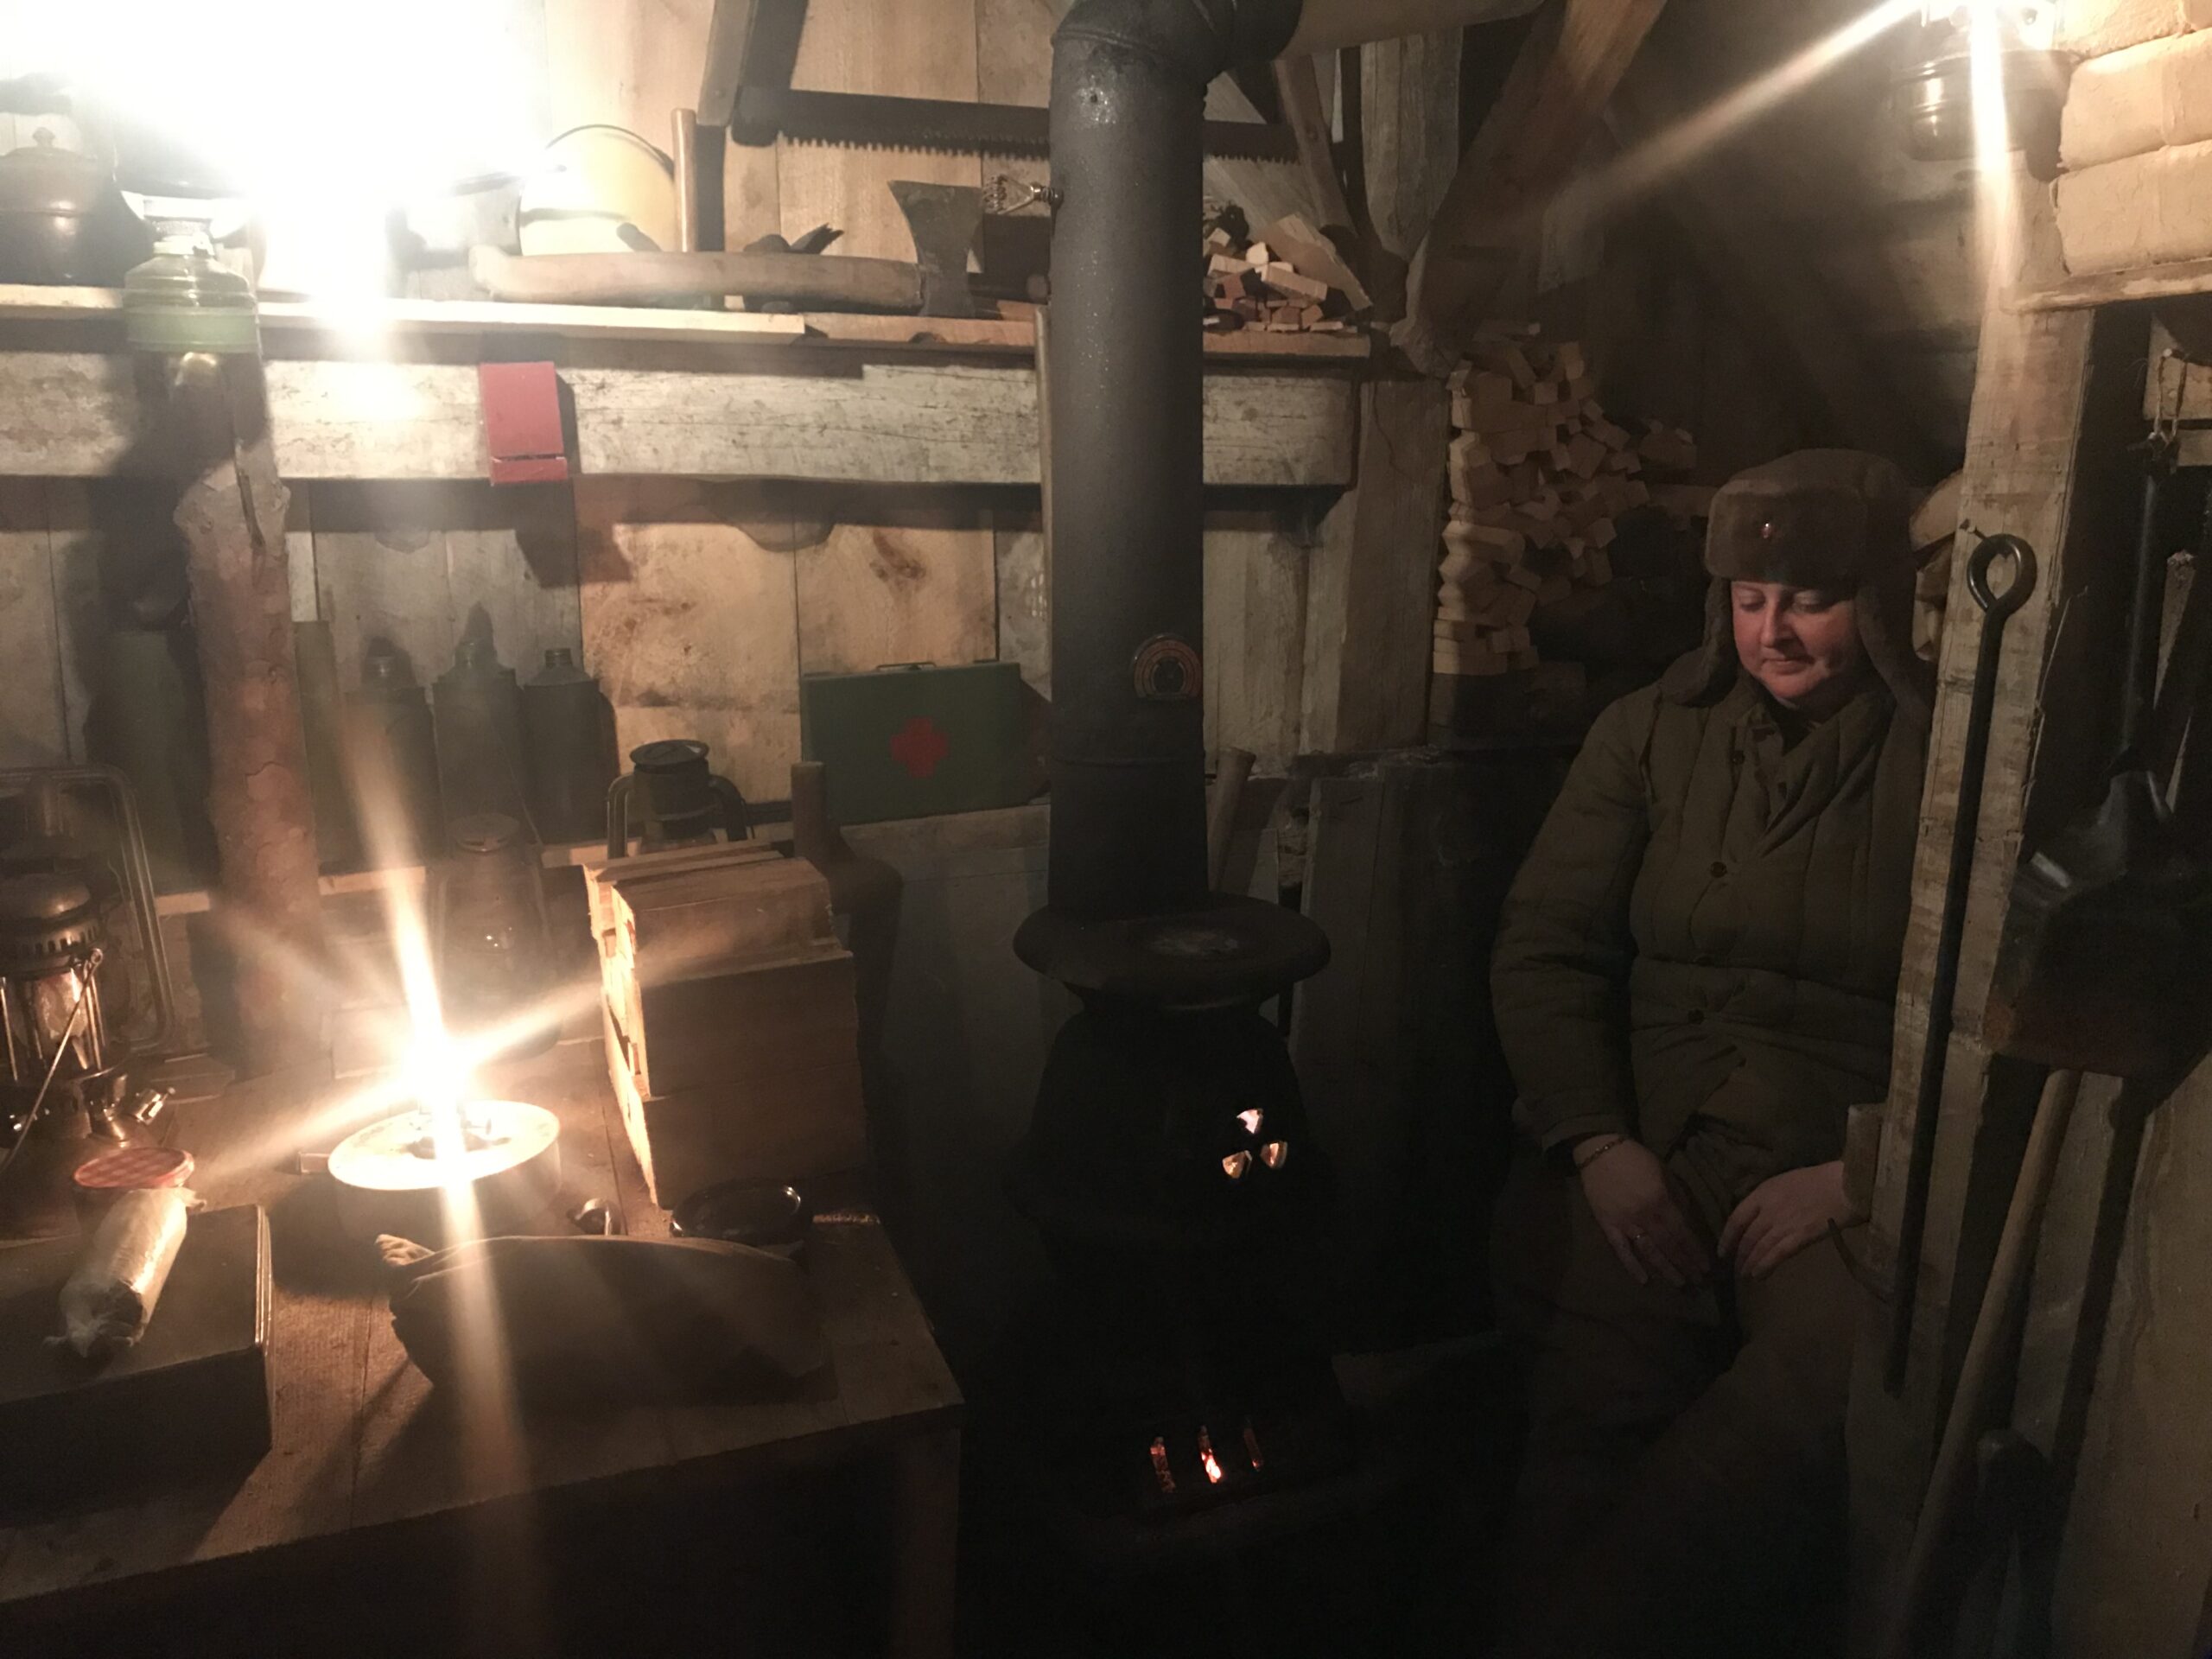
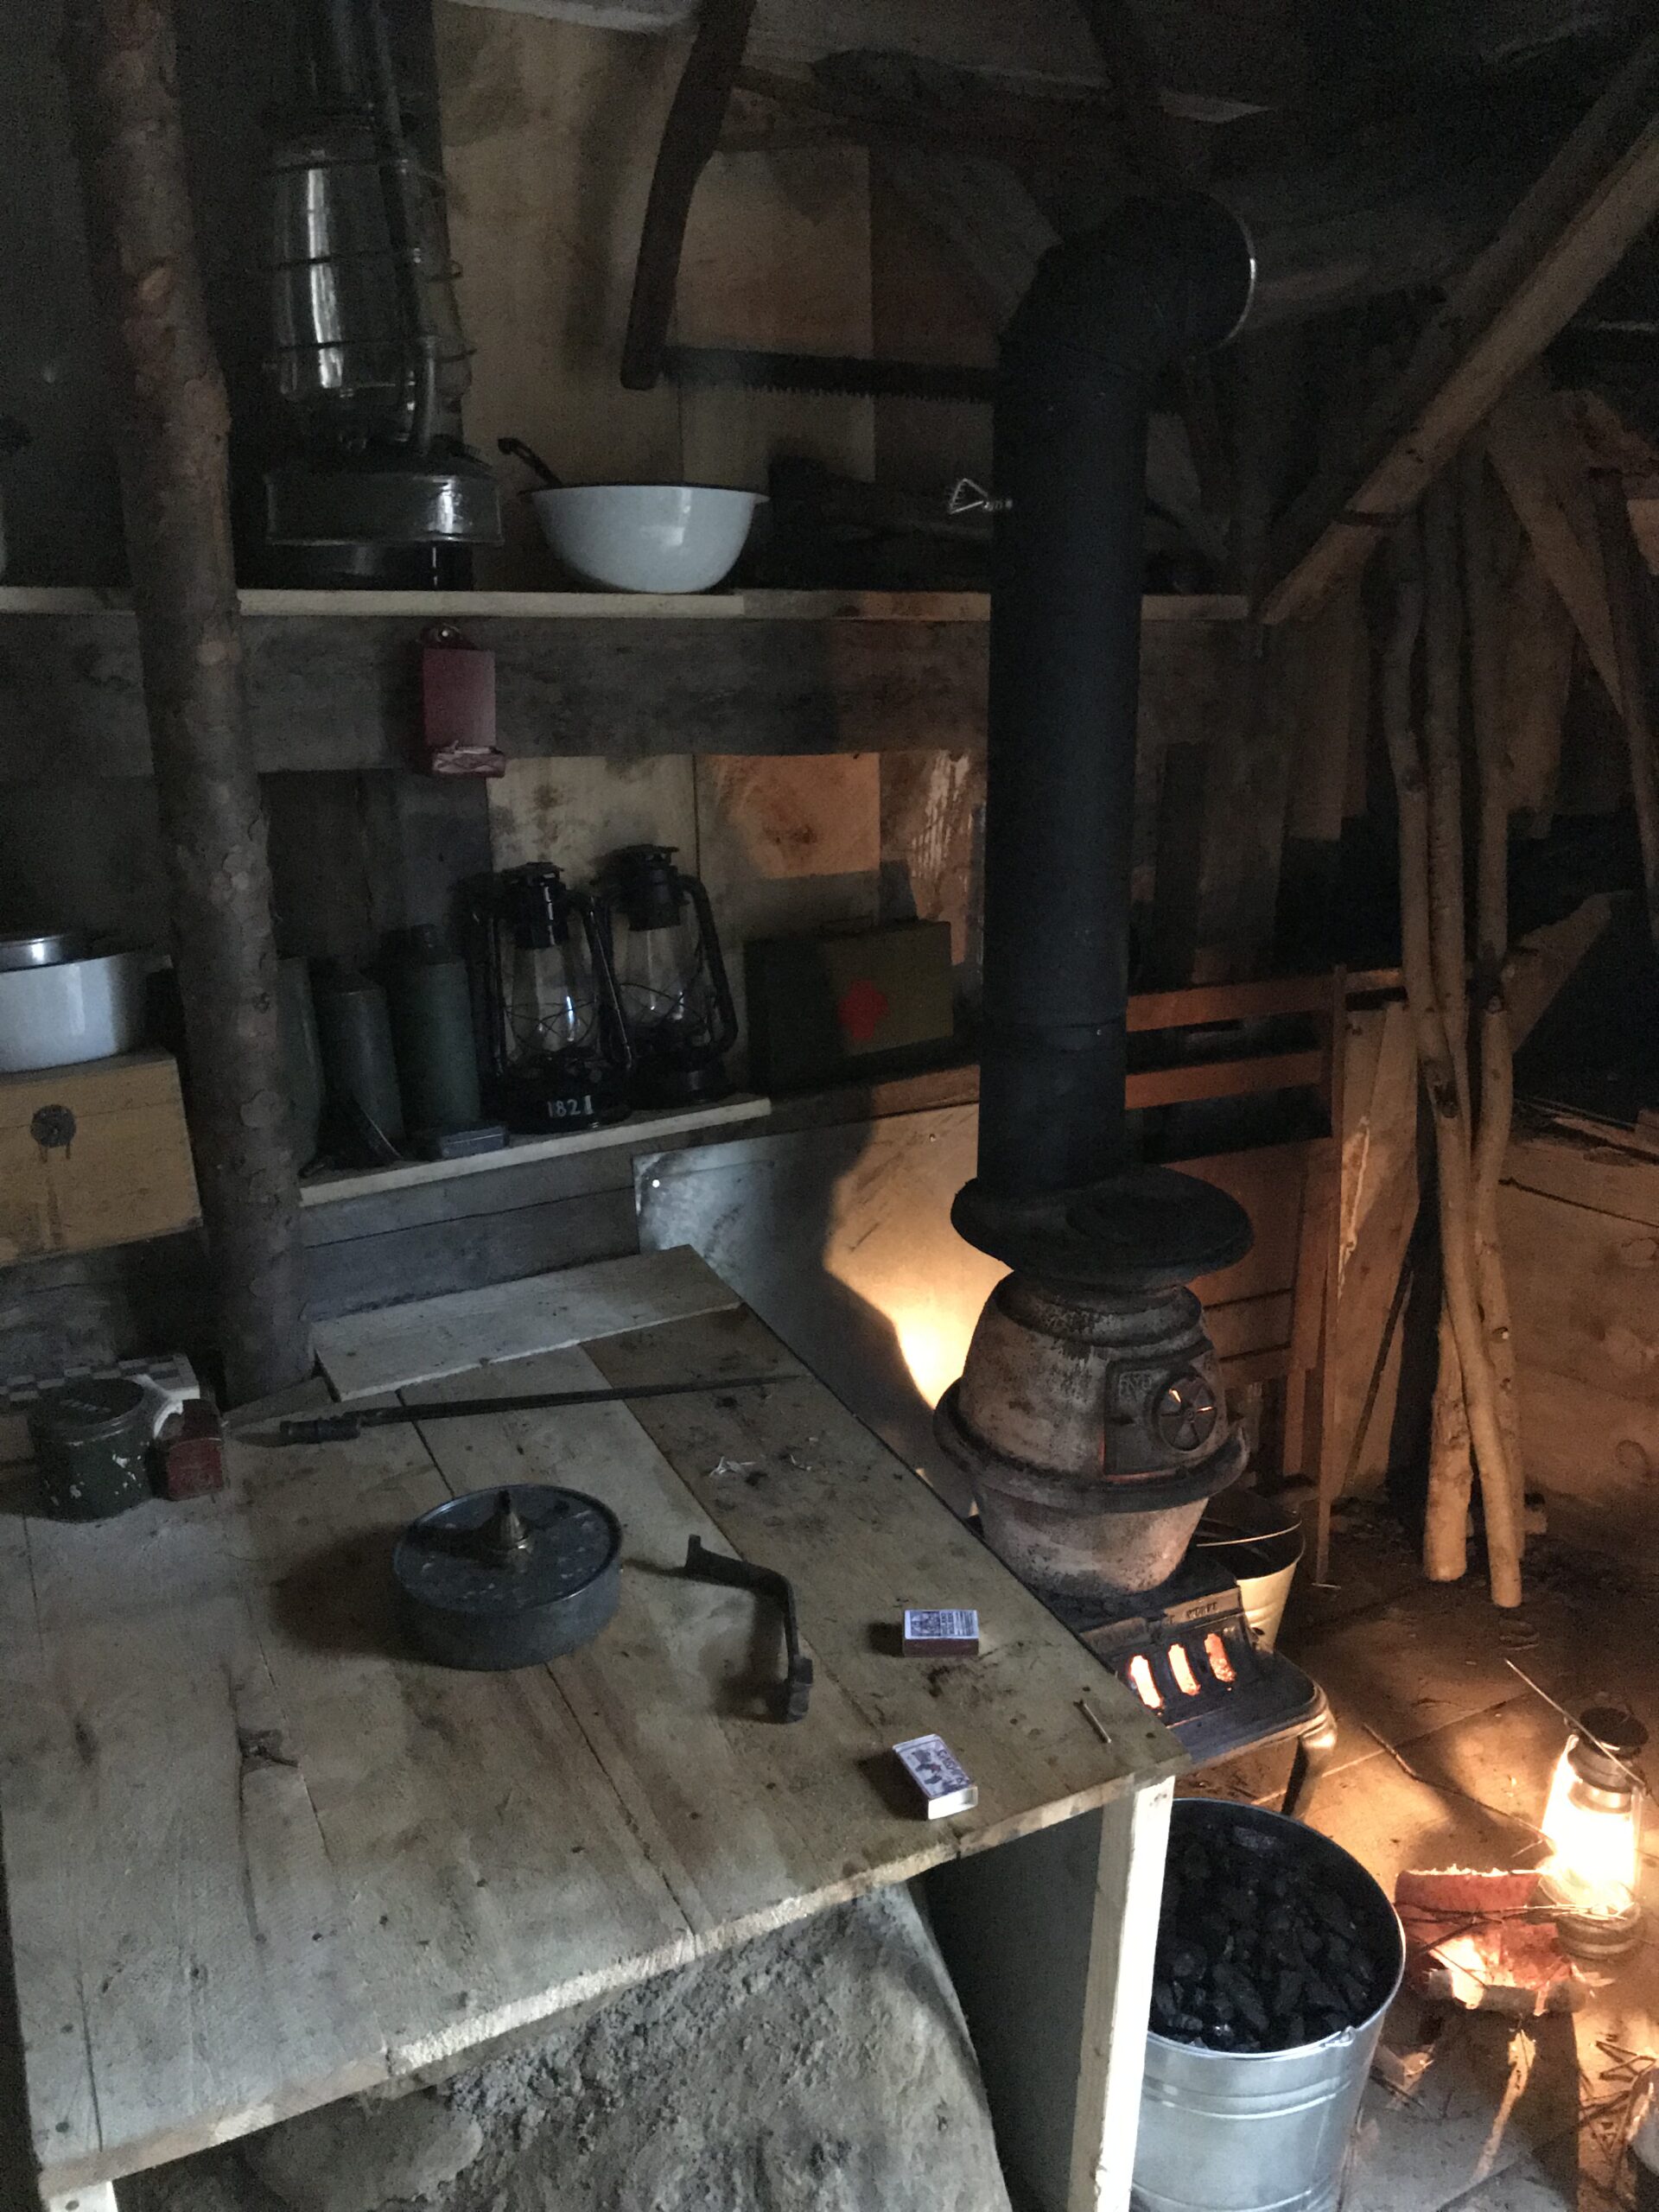
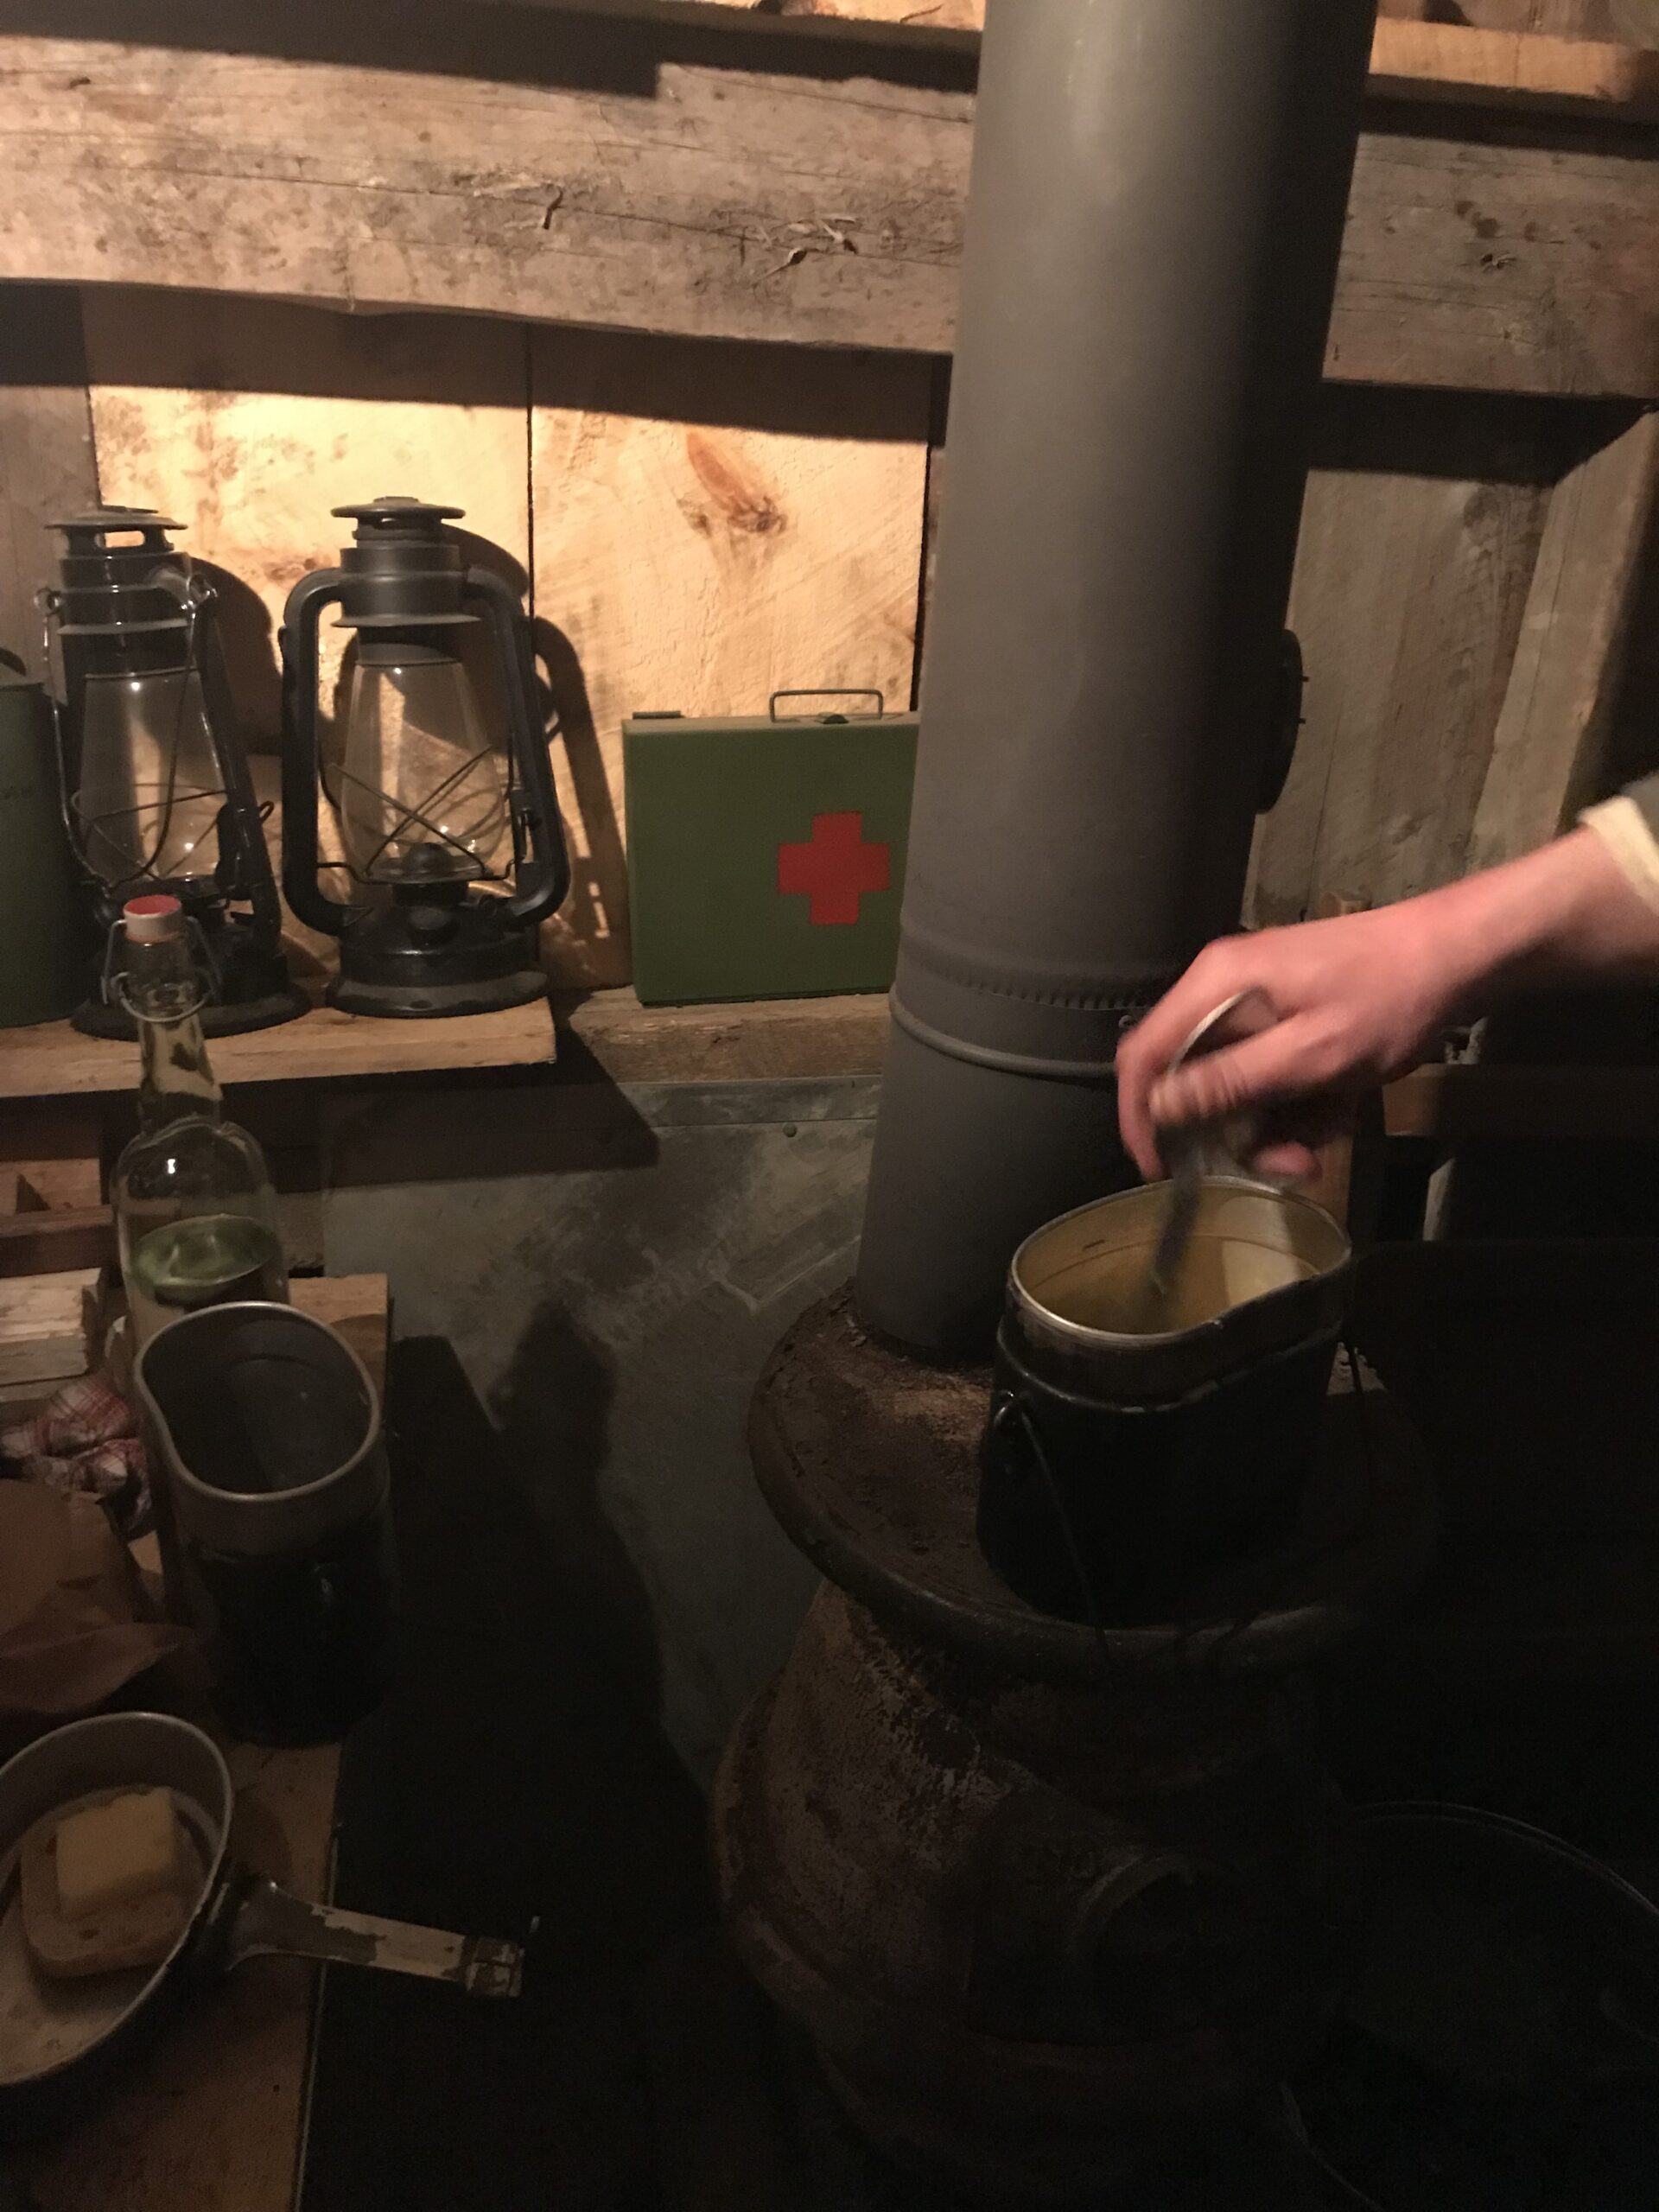
Inside, the bunker features six bunks, a wood stove for heat, and some shelving with a small storage nook for firewood. The bunker is kept stocked with necessary supplies including lamps and lamp fuel for light, cooking equipment and tools.
The old wood stove provides heat and can also be used for cooking.
At one winter immersion event, the outside temperature at 4 AM was 13 degrees F (-10 degrees C), the inside temperature was 96 degrees F (35 degrees C)!
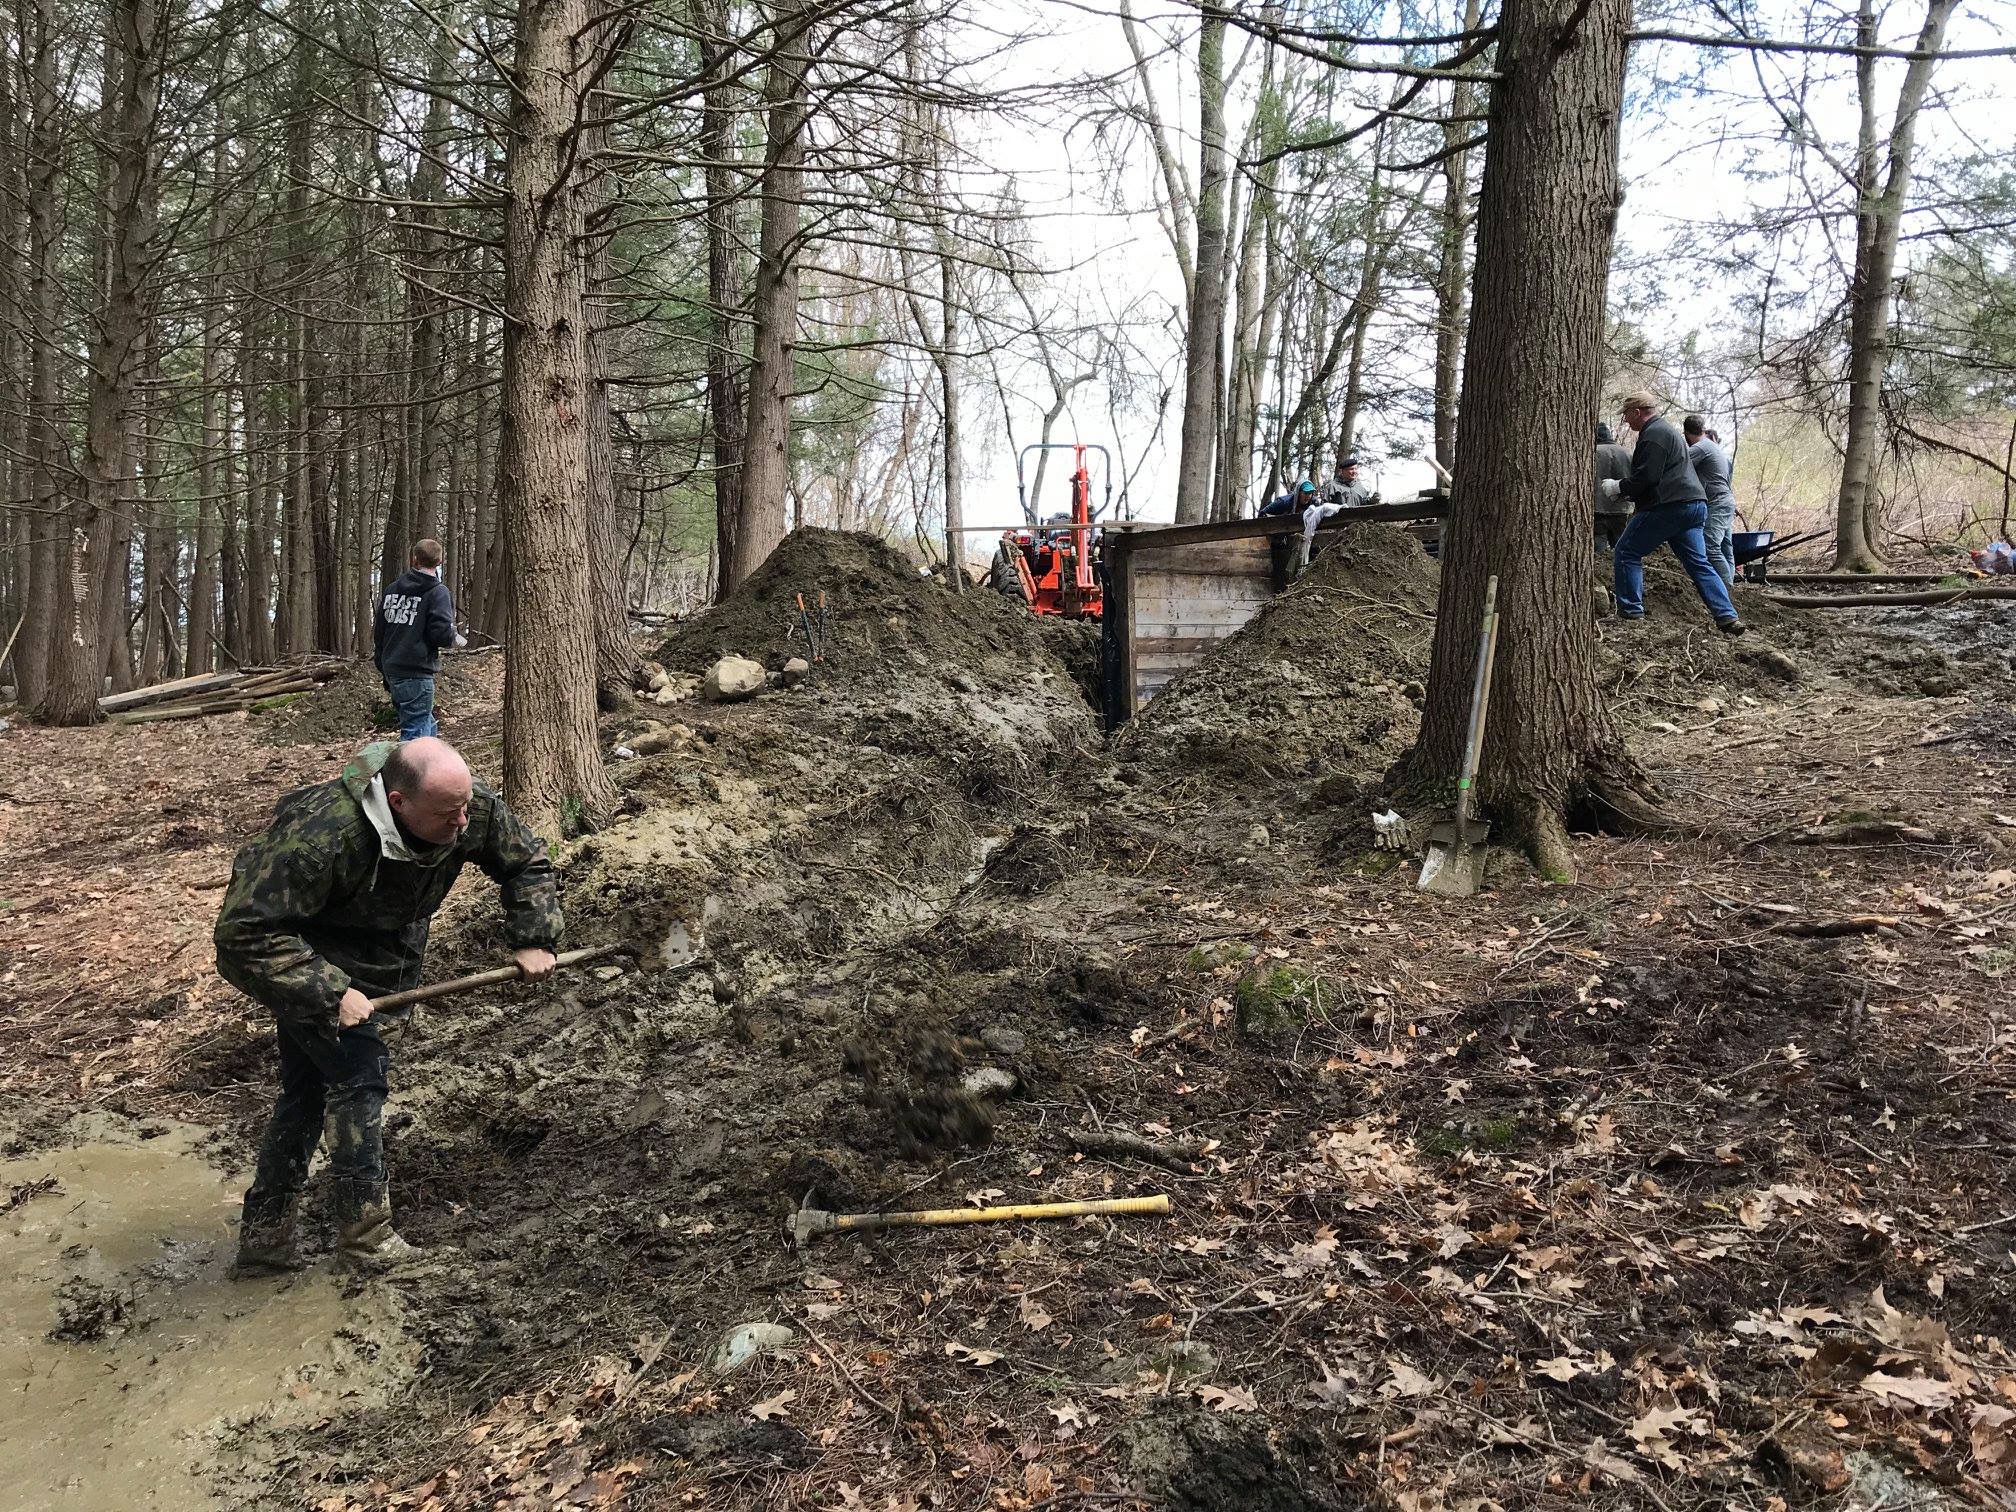
In 2020 the bunker entrance was improved, with wood floor and walls added to the trench.
If you would like to know more about this place or our private reenactment events in Massachusetts, please e-mail us.
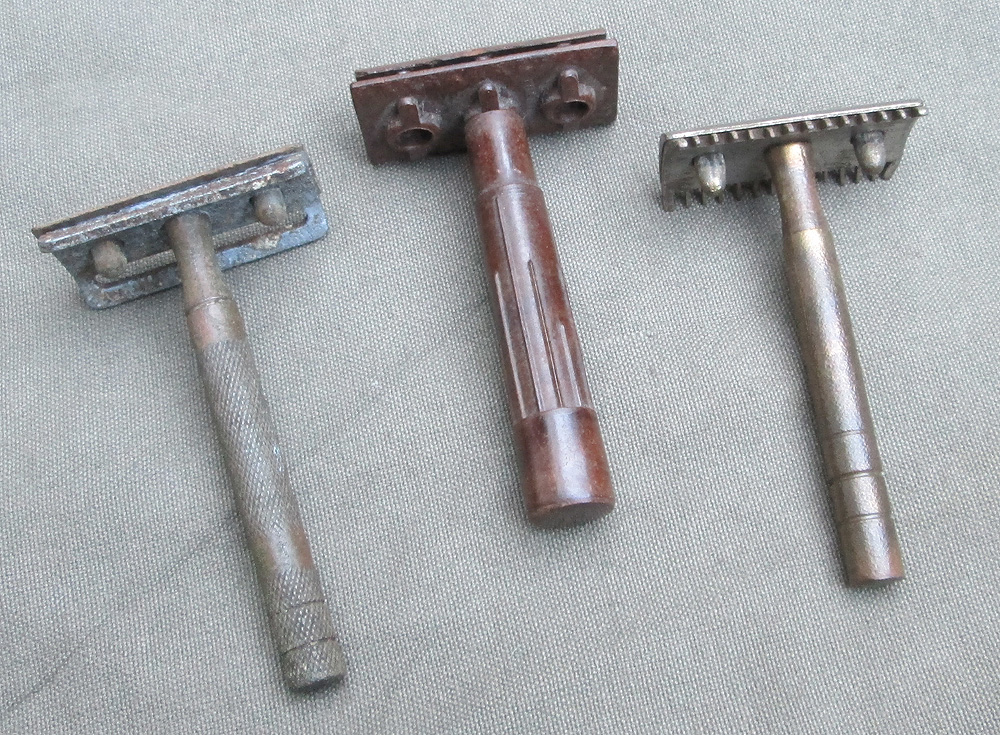
What kind of razors were German soldiers issued in WWII? It’s a trick question. Soldiers had to supply their own razors. They could bring them or have them sent from home, or they could buy razors- but the razors made available to them to buy were the same commercial products available to civilians. Many dealers will offer “Wehrmacht issue” razors, this is an inaccurate sales pitch as there simply never was any such thing. Purportedly original razor packaging that says “Wehrmacht Rasierapparat” or “Einheitsrasierapparate für Heereslazarette” is, simply, fake. Shaving soap was issued; razors were not. Soldiers in Germany and in occupied countries, civilians, even concentration camp inmates all used the same razors.
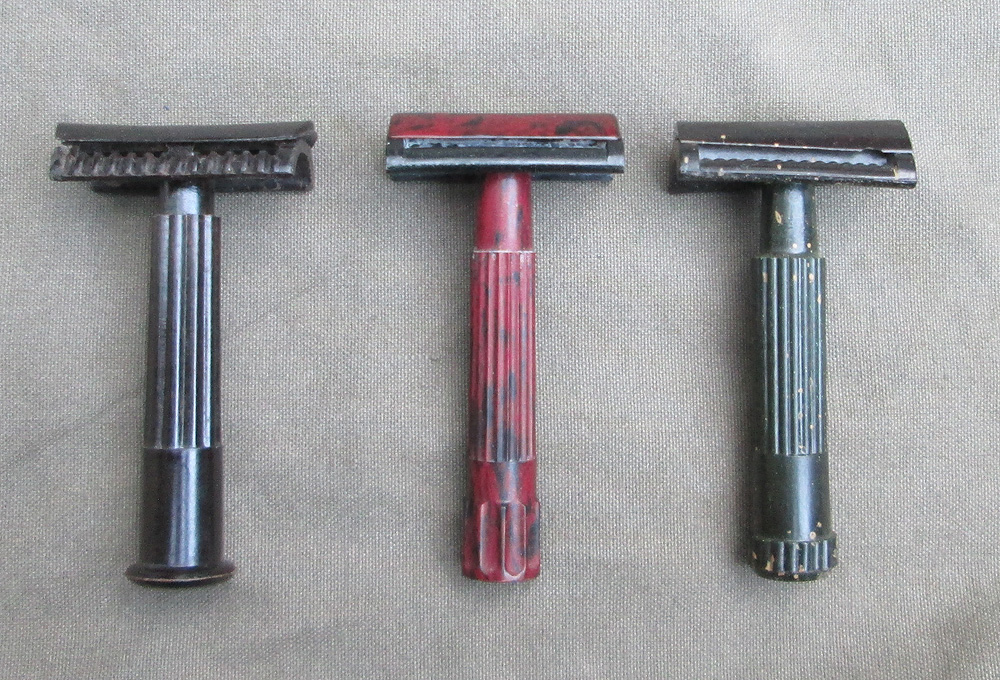
Here are three razors that were actually used by German soldiers during WWII. All three were excavated from remains of former German positions. Two are brass that once had a silver-colored plating, now mostly gone after decades underground. The Bakelite razor is marked “Made in France.” None are marked with a brand name.
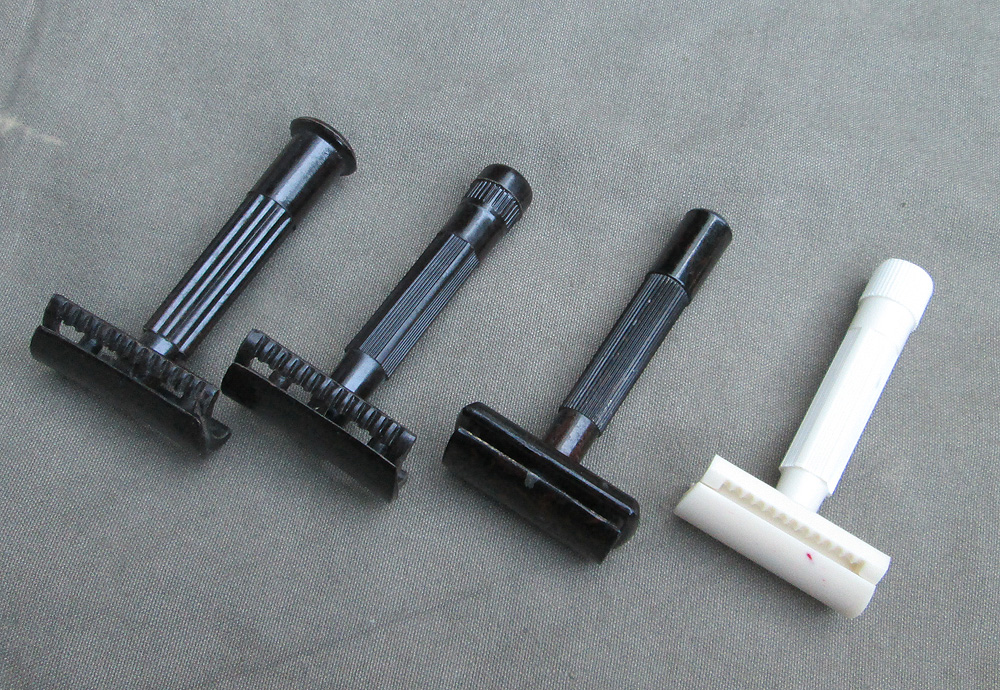
Here are some other period type Bakelite razors. One is also made in France, as was the excavated example; the others are German. None of the German ones are marked.
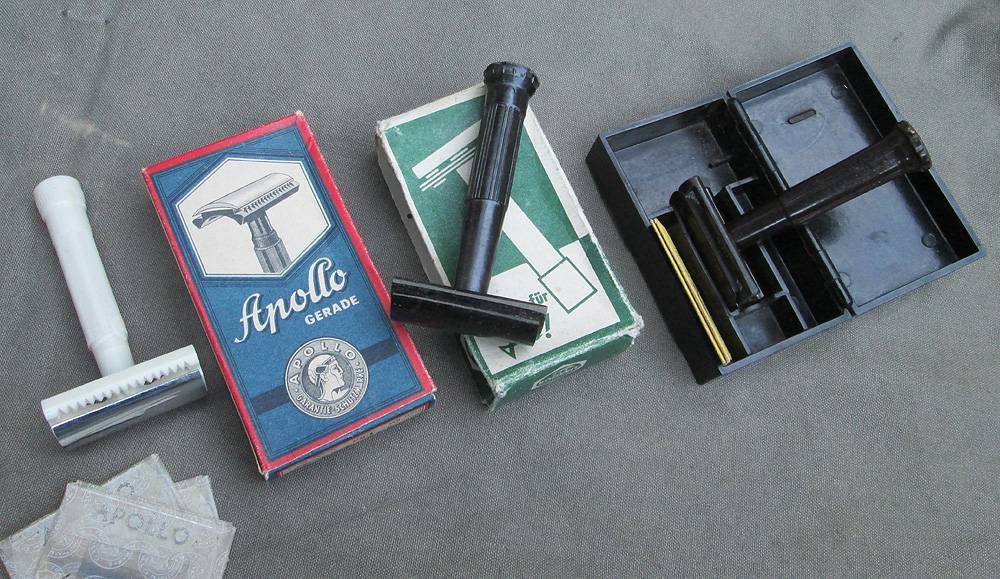
Razors like these were available complete with Bakelite cases, but most were sold in simple cardboard boxes which would presumably be discarded.
The “Apollo” brand razor shown above is still marked with the original price- 1.50 Reichsmarks. That’s about ten US dollars today.
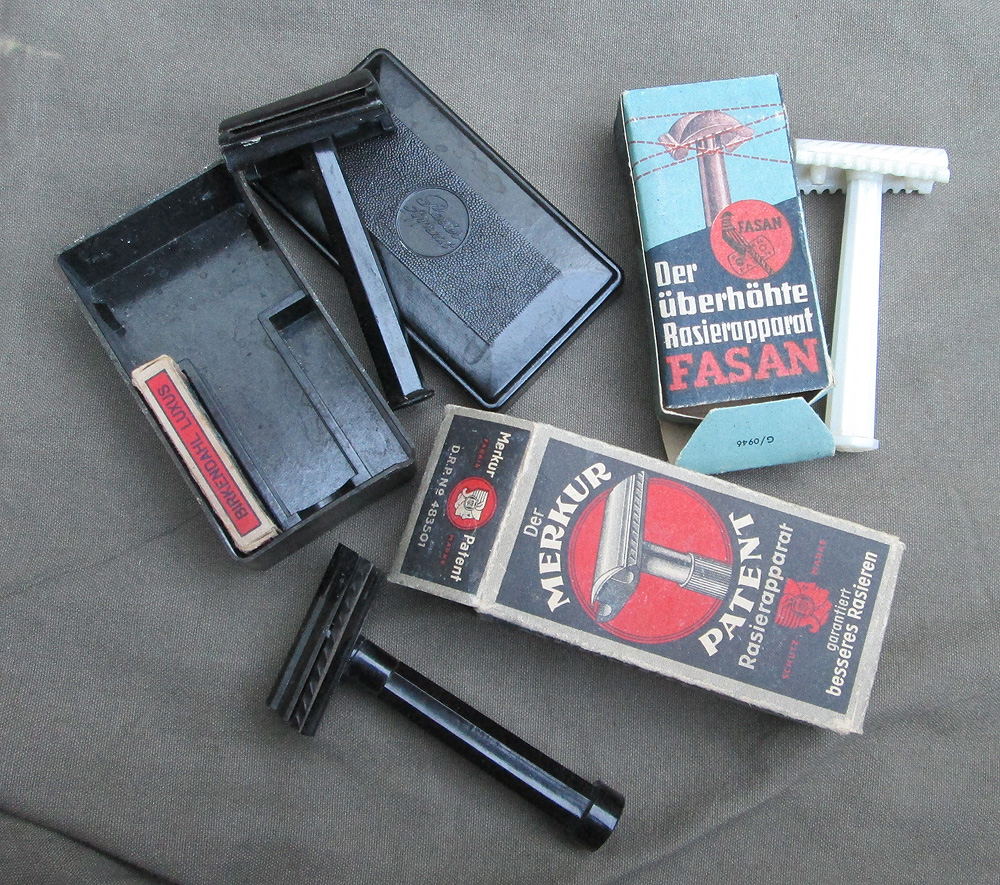
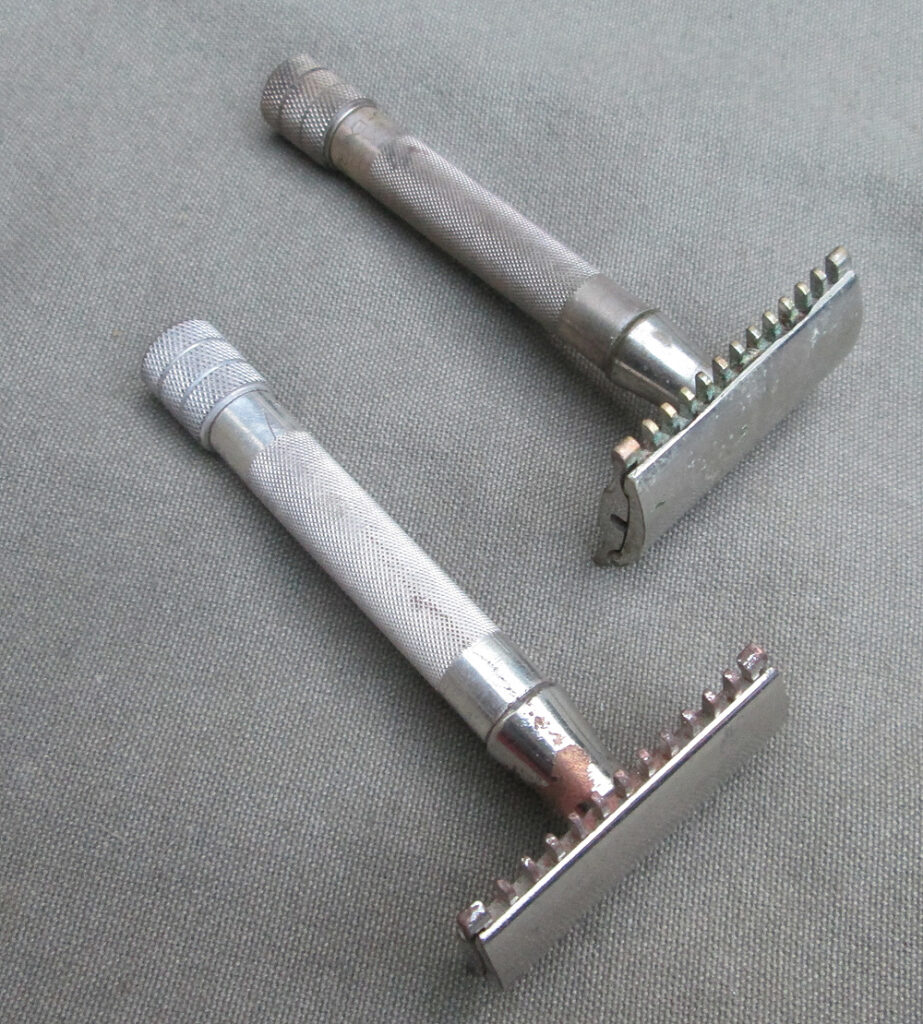
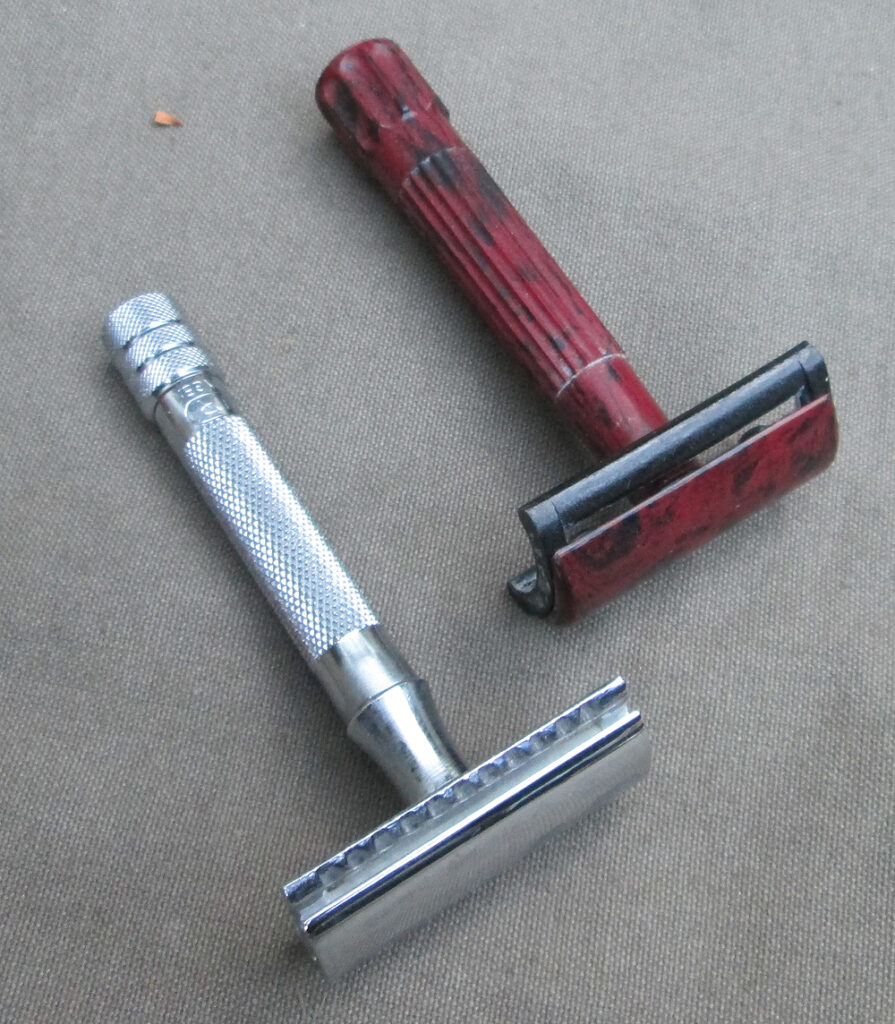
An interesting type of wartime-era German Bakelite razor is the “slant.” The top part of the razor was not exactly perpendicular to the handle, but was set as an angle. This was advertised as a feature that supposedly yielded better results than the usual type. The degree of slant varied, as you can see. The example at left was made by Merkur.
Just as with standard Bakelite razors, these were sold with matching Bakelite cases, or in cardboard boxes.
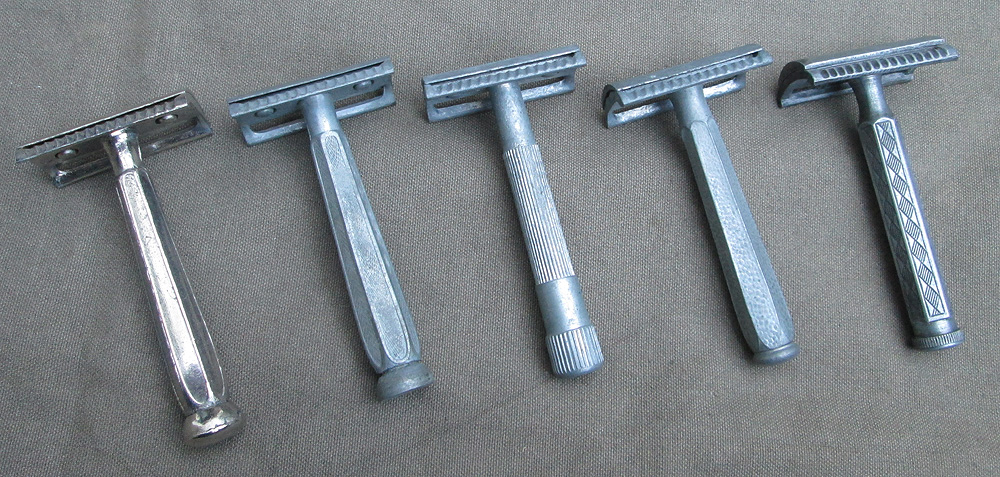
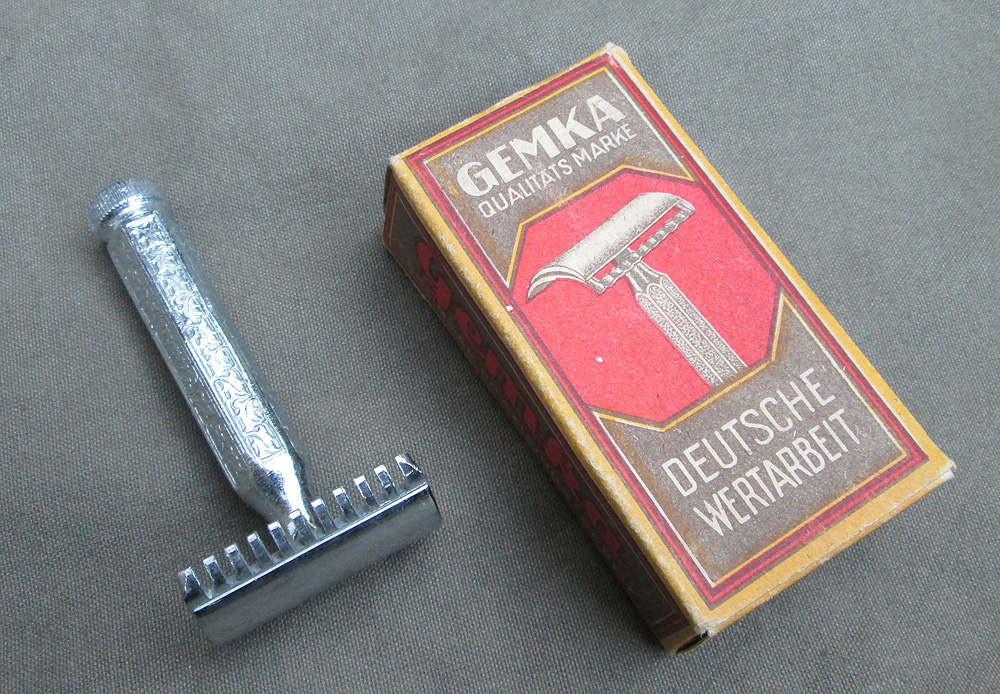
I have seen it stated elsewhere that all WWII German produced razors were Bakelite as metal was reserved exclusively for strategic purposes. That’s not true. Here is a selection of wartime type metal razors. Most are made from a zinc alloy sometimes referred to as “Kriegsmetall”- war metal.
Below: a plated zinc razor in its original box.
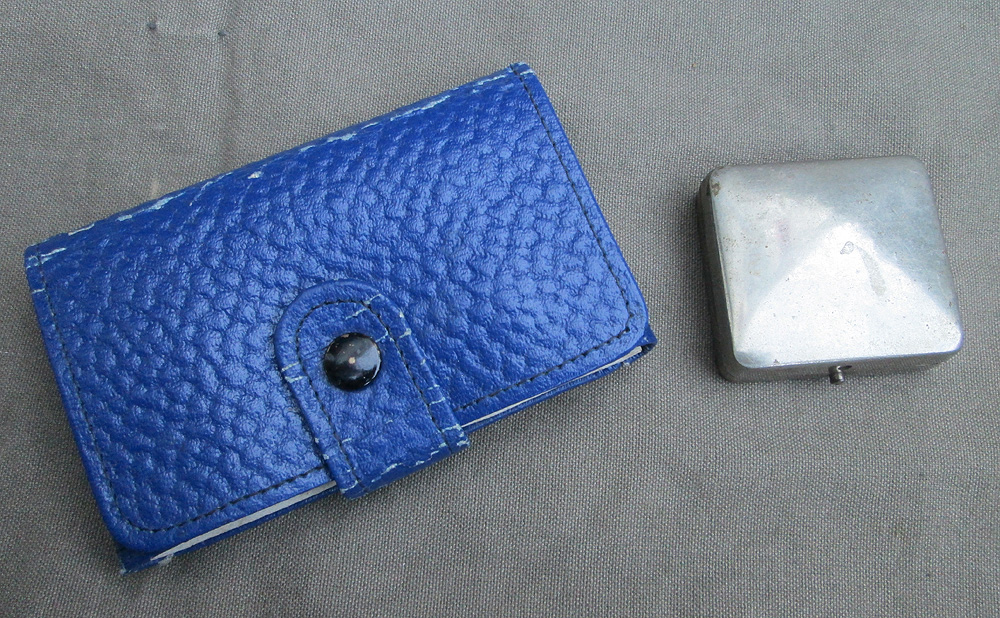
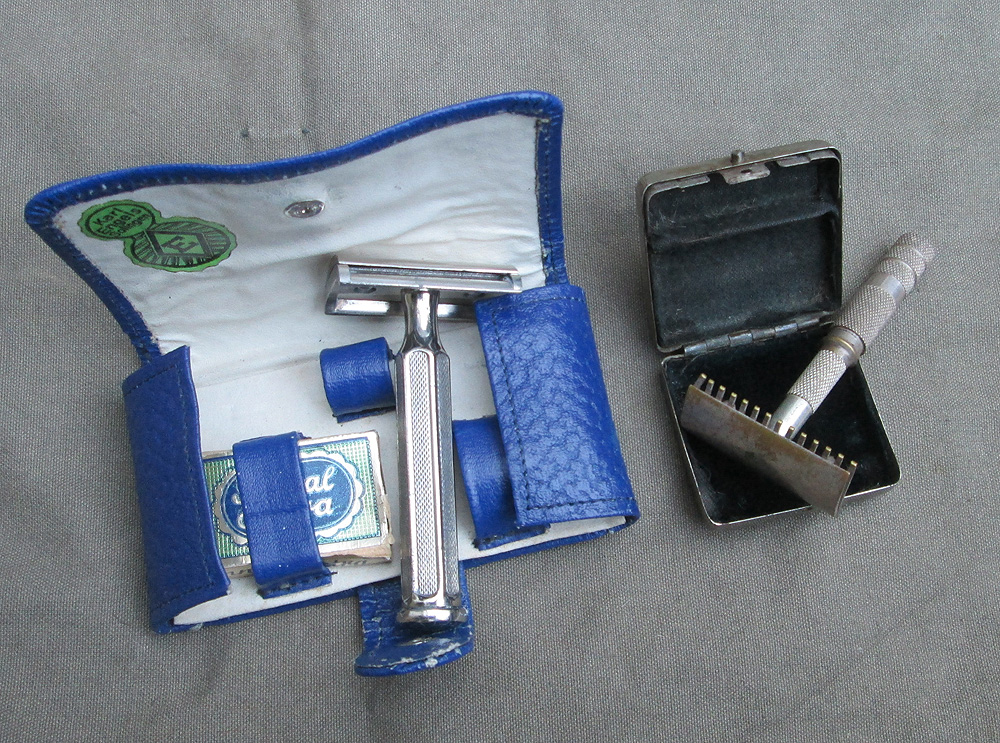
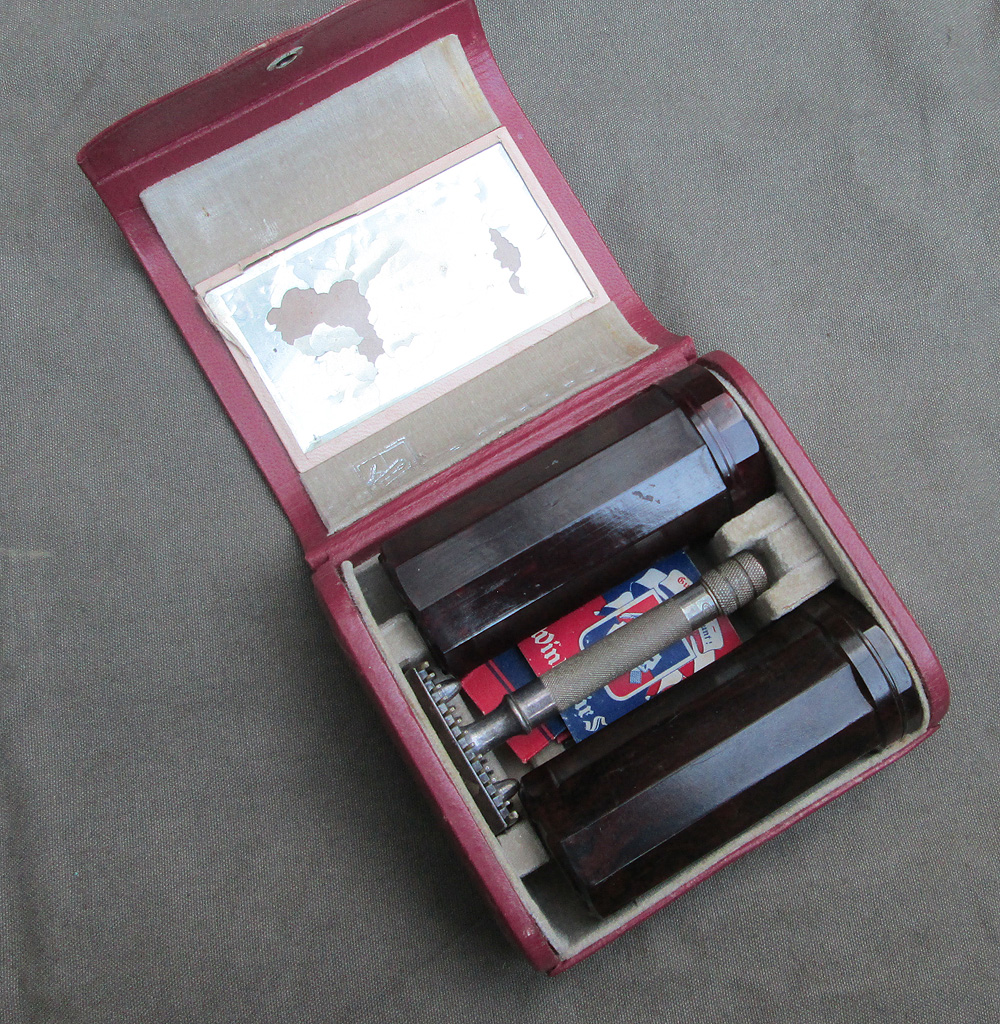
Razors were also available in various types of travel kits. Shown here, a leatherette case, circa 1930s, and a collapsible razor in a tiny metal box, exact vintage unknown.
Inside:
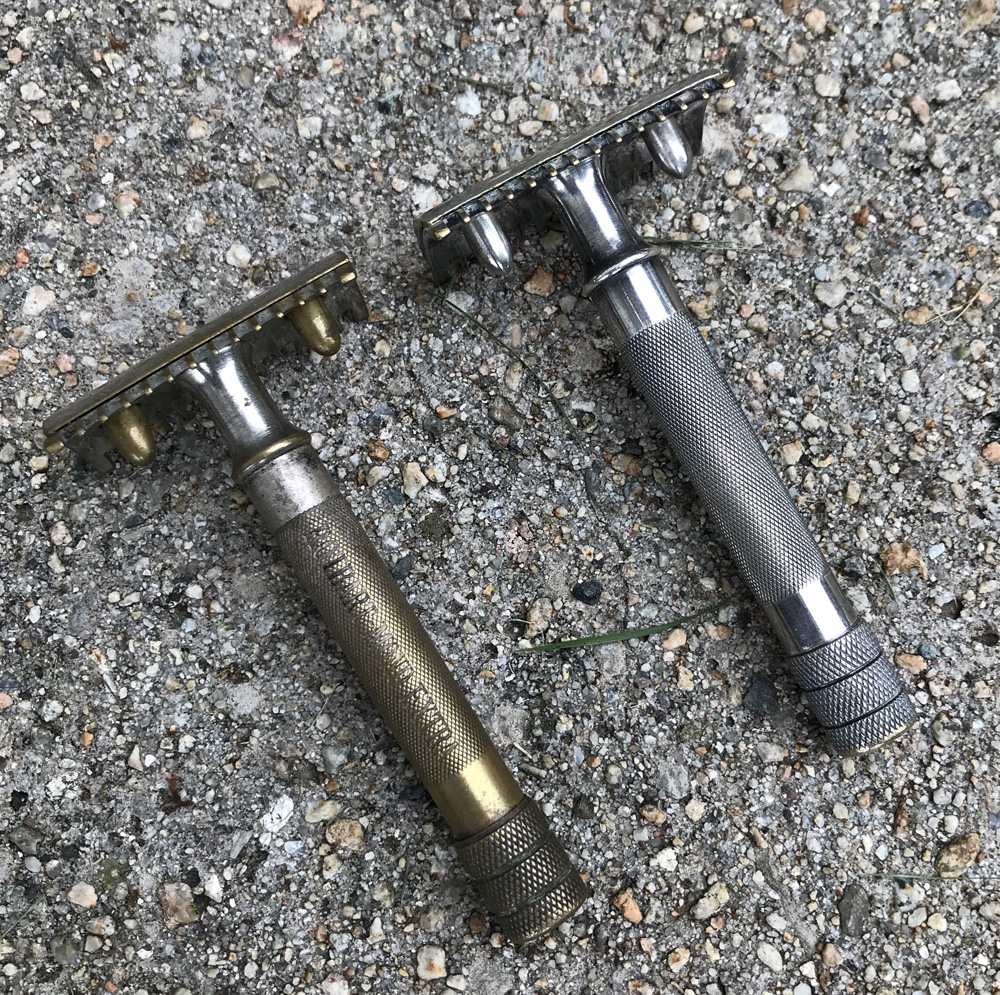
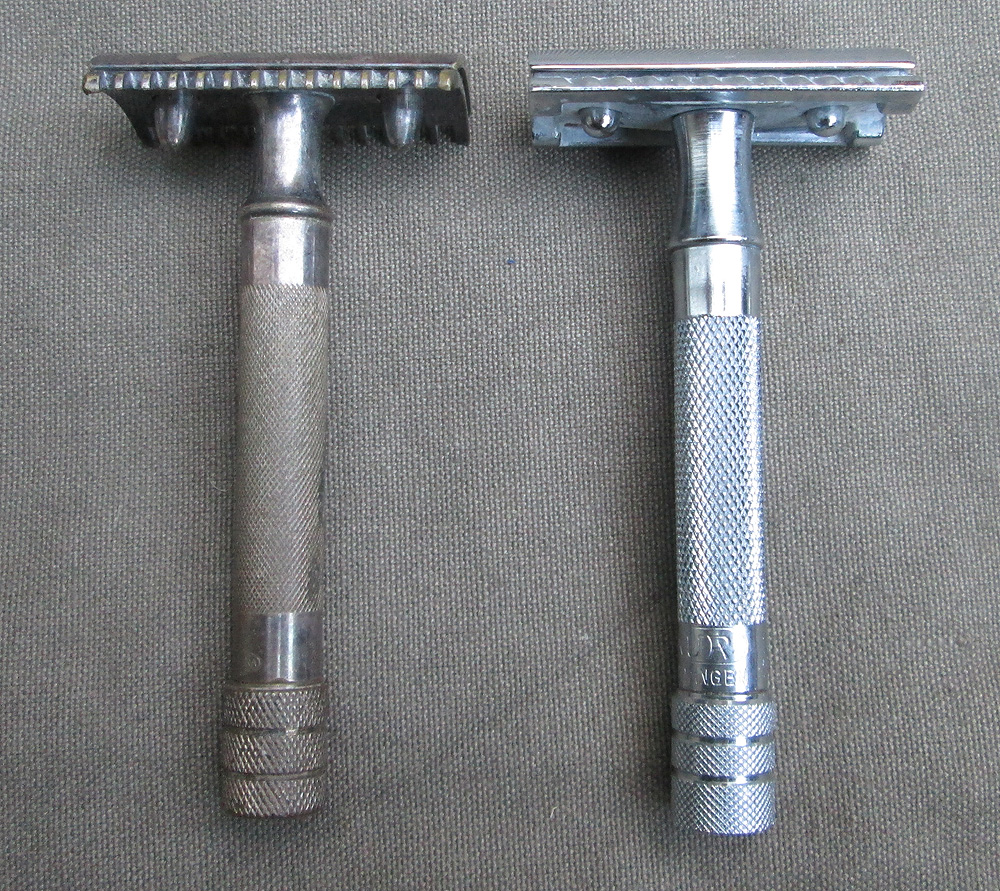
One particular type of razor that seems to have been widely used by soldiers and civilians alike during and before WWII was the Mond-Extra, made by Rotbart. Rotbart was a German company that was bought by Gillette in 1926. Gillette had invented the classic type double-edge safety razor in 1903 and from that time through the 1920s, many were exported to Germany; Wehrmacht soldiers used these Gillette razors, too. After Gillette bought Rotbart, they made the Mond-Extra as a copy of the classic Gillette single-ring safety razor that had been introduced in 1907, with some slight changes over time. Here is an early Mond-Extra on the left, a 1907 USA-made Gillette razor on the right. The Gillette version was made until 1921.
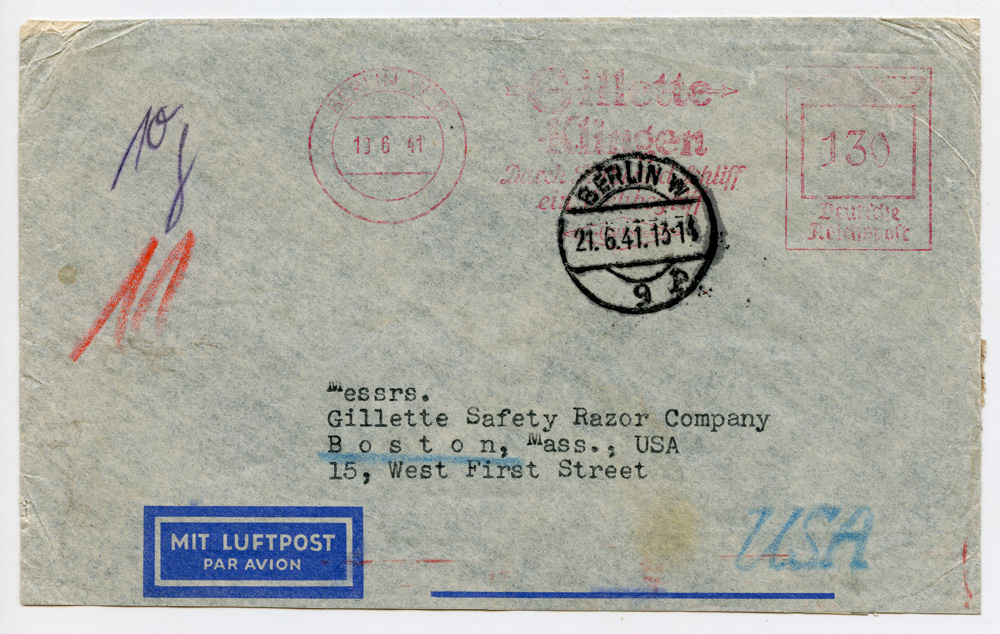
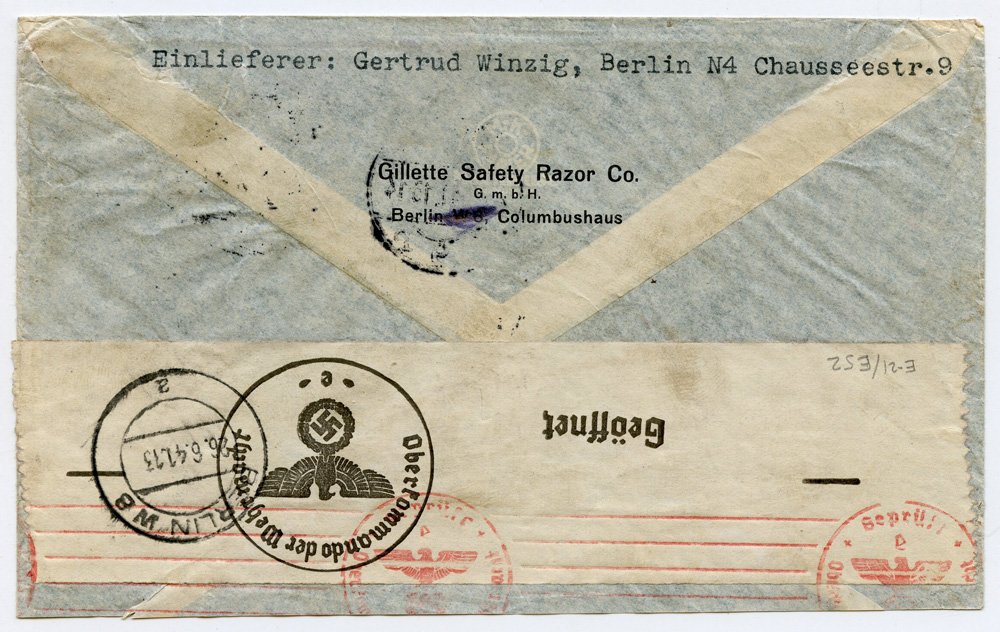
In addition to owning Rotbart, Gillette had its own presence in Third Reich Germany. This envelope was sent from the German Gillette company to Gillette world headquarters in the USA, in 1941. The German postmark advertises Gillette blades; these were no doubt marketed to the German domestic market.
Here are two pre-1945 versions of the Mond-Extra that were made a bit later than the type shown above. They are made of plated brass.
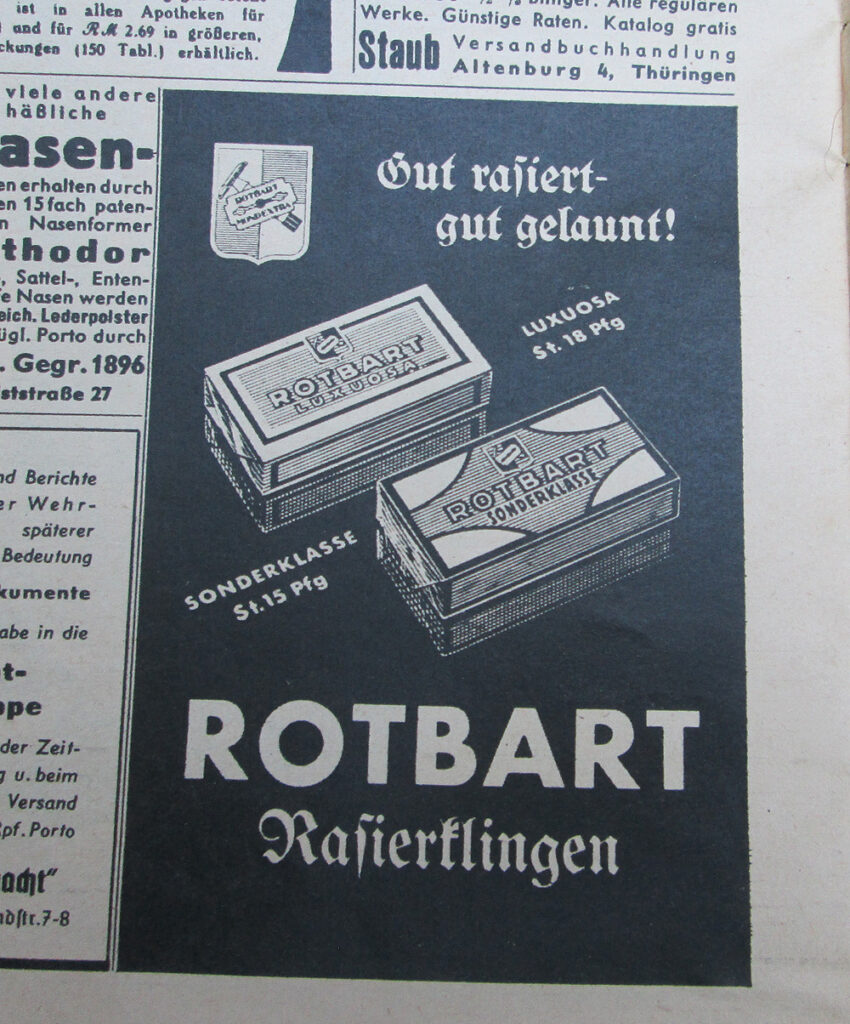
Rotbart advertised heavily in publications intended for soldiers. Here is an ad for razor blades in a 1940 issue of the German armed forces magazine “Die Wehrmacht.”
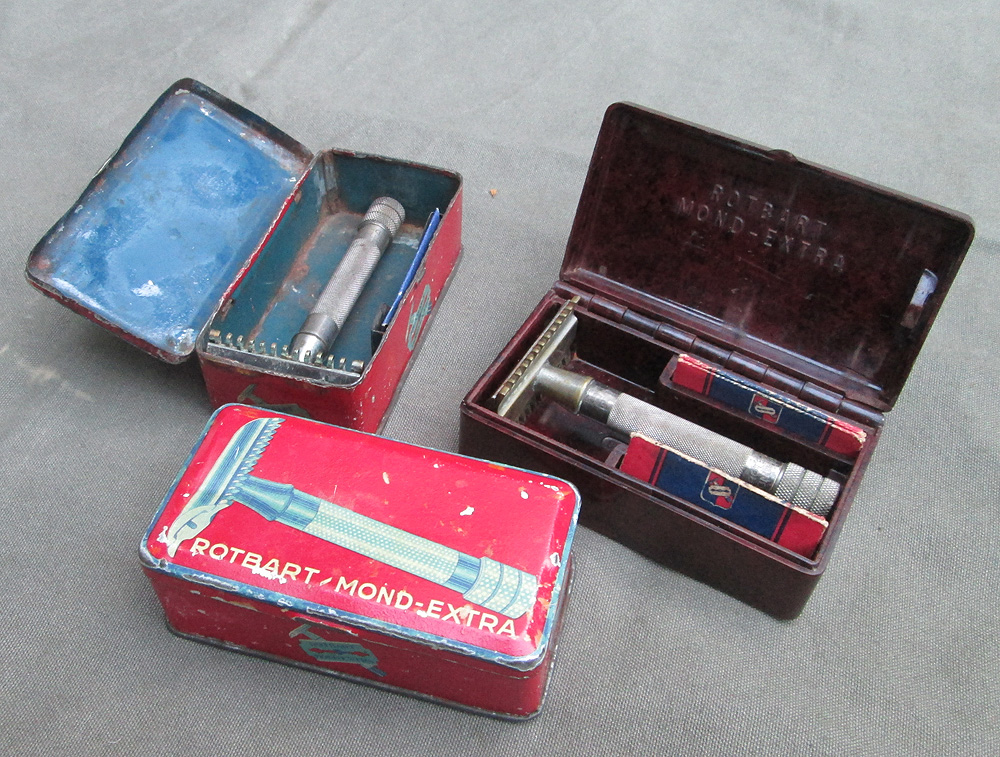
The Rotbart Mond-Extra razor was available in a cardboard box, an enameled tin box, or a Bakelite case.
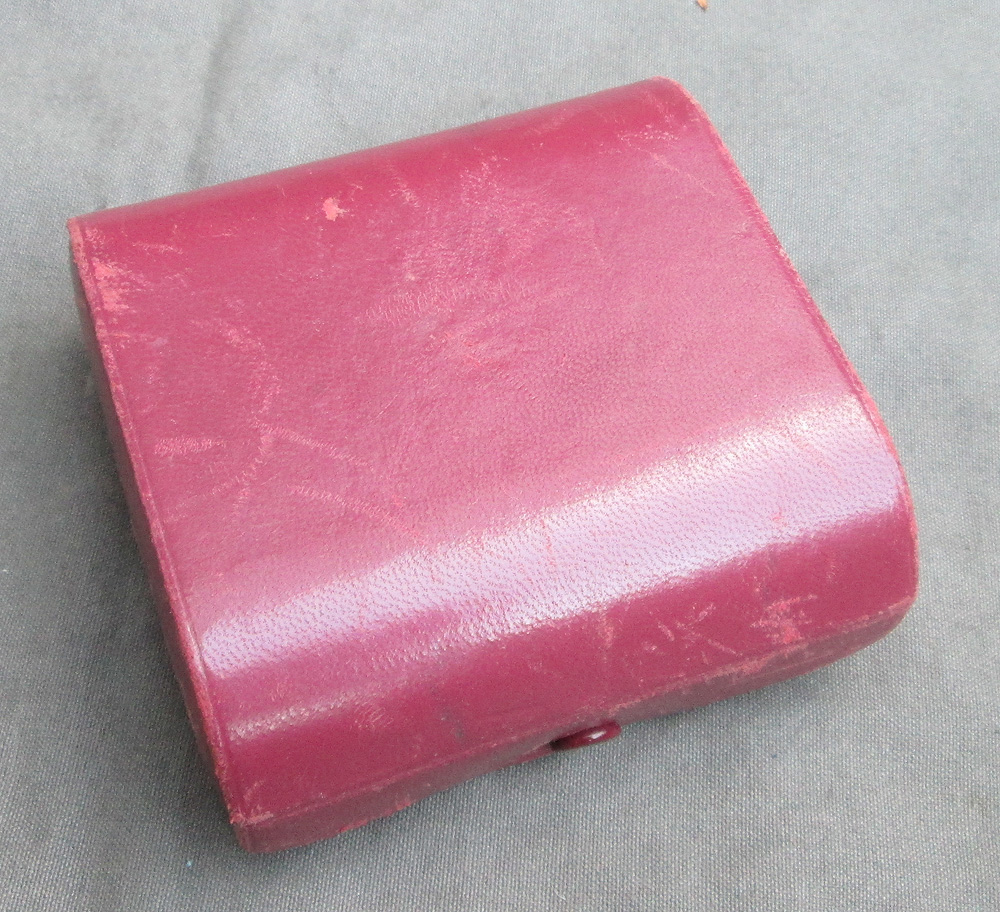
Rotbart also made various types of travel kits for razors including the Mond-Extra.
The leather case opens to reveal a razor, Bakelite tubes for a shaving brush and shaving soap, and a booklet about how to shave. There is even a mirror inside the lid. This kit is vintage 1930s.
A German soldier could have used any of these types of razors depending on personal preference or availability. Double edged safety razors in the same style are still made in Germany today by Merkur, one of the companies that was making razors before and during the war. Here are two modern Merkur products: the Merkur 45, made of Bakelite, and the Merkur 33c, made of plated brass. The Merkur 33c is still available. As of this writing (2021), the Bakelite version seems to have been recently discontinued.
The similarity between the modern Merkur 33c and the Rotbart Mond-Extra (and the 1907 pattern Gillette razor, that it was a copy of) is remarkable and certainly not a coincidence. This is a classic, useful design.
The Merkur 45 Bakelite razor also fits in nicely with its WWII-period counterparts.
The modern Merkur 33c still in production and widely available as of this writing. They retail for around $35 and are great razors for shaving.
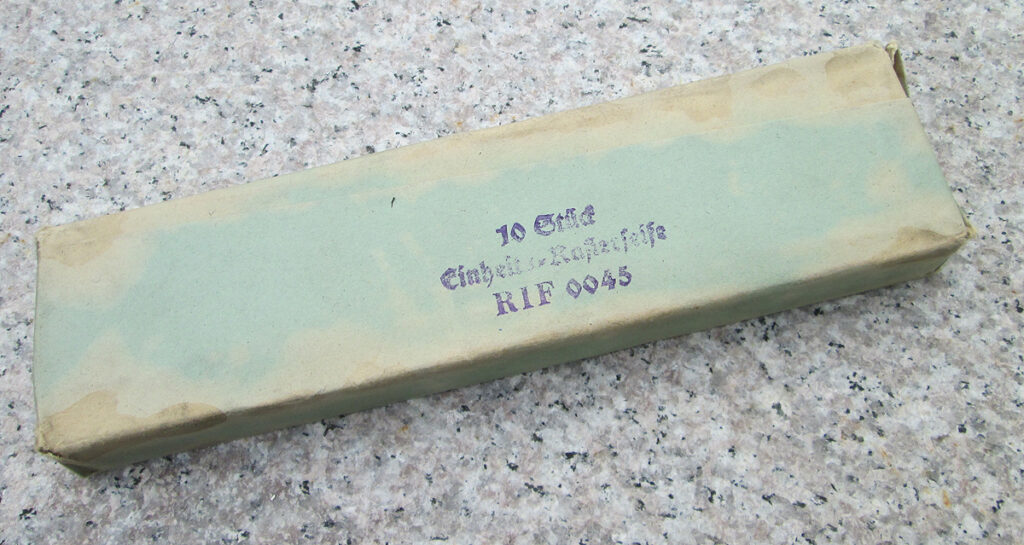
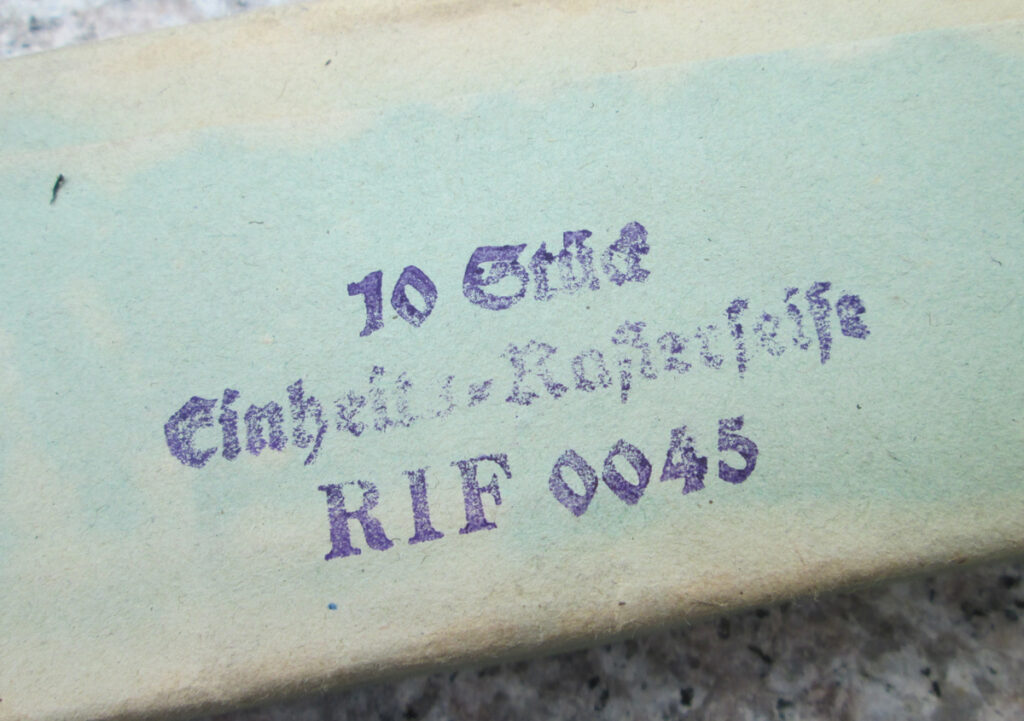
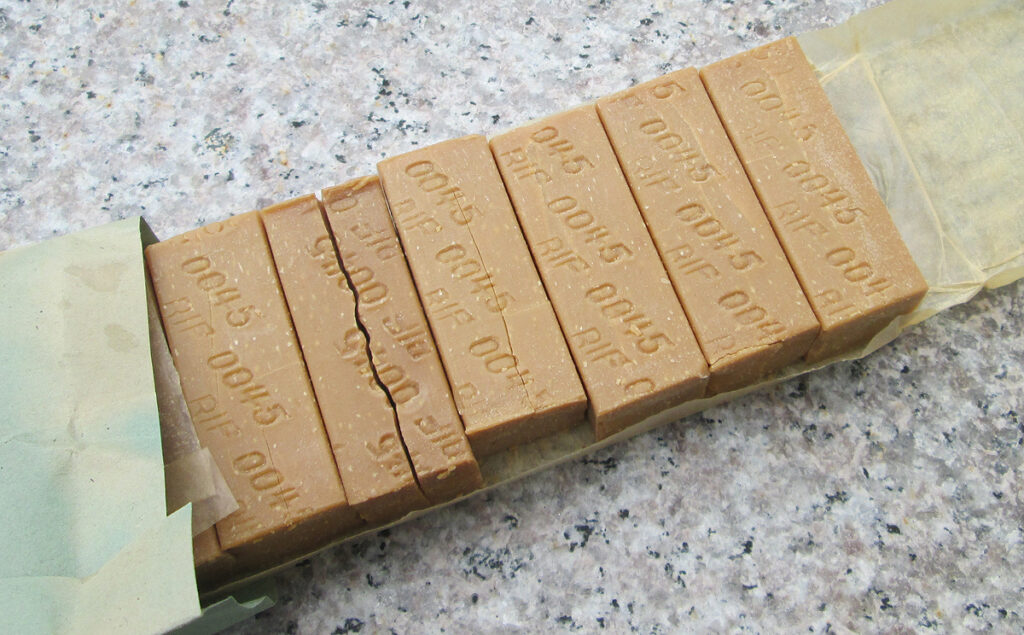
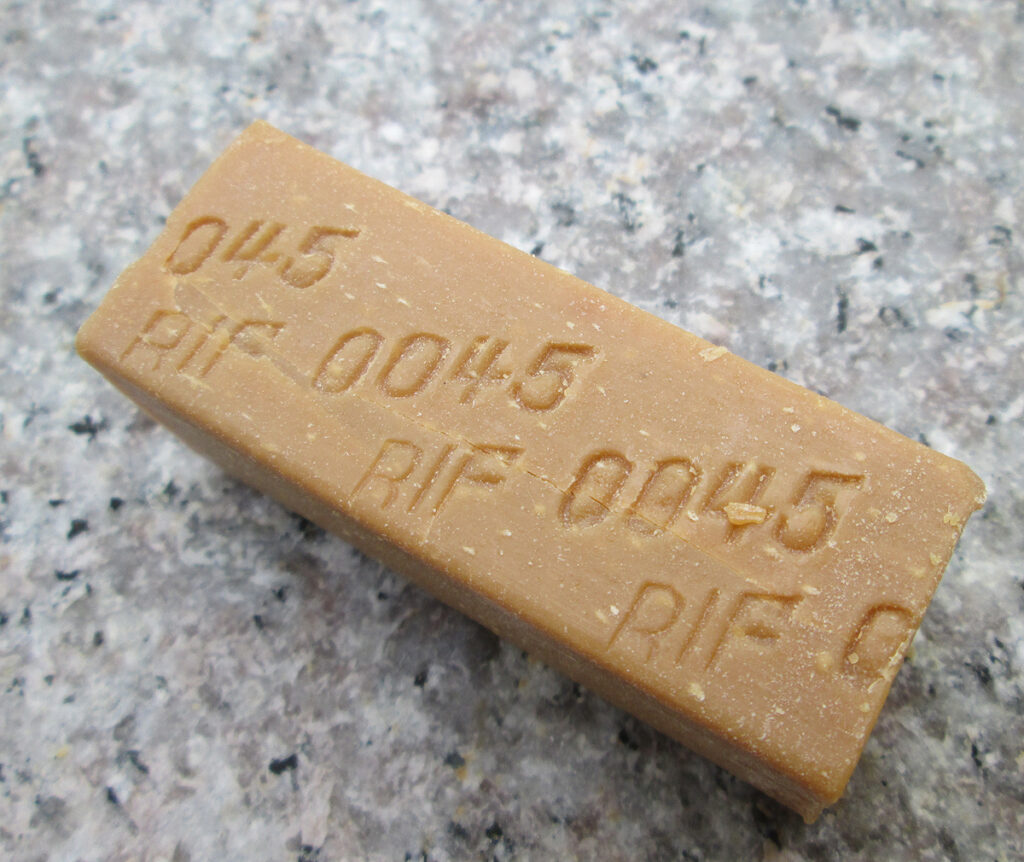
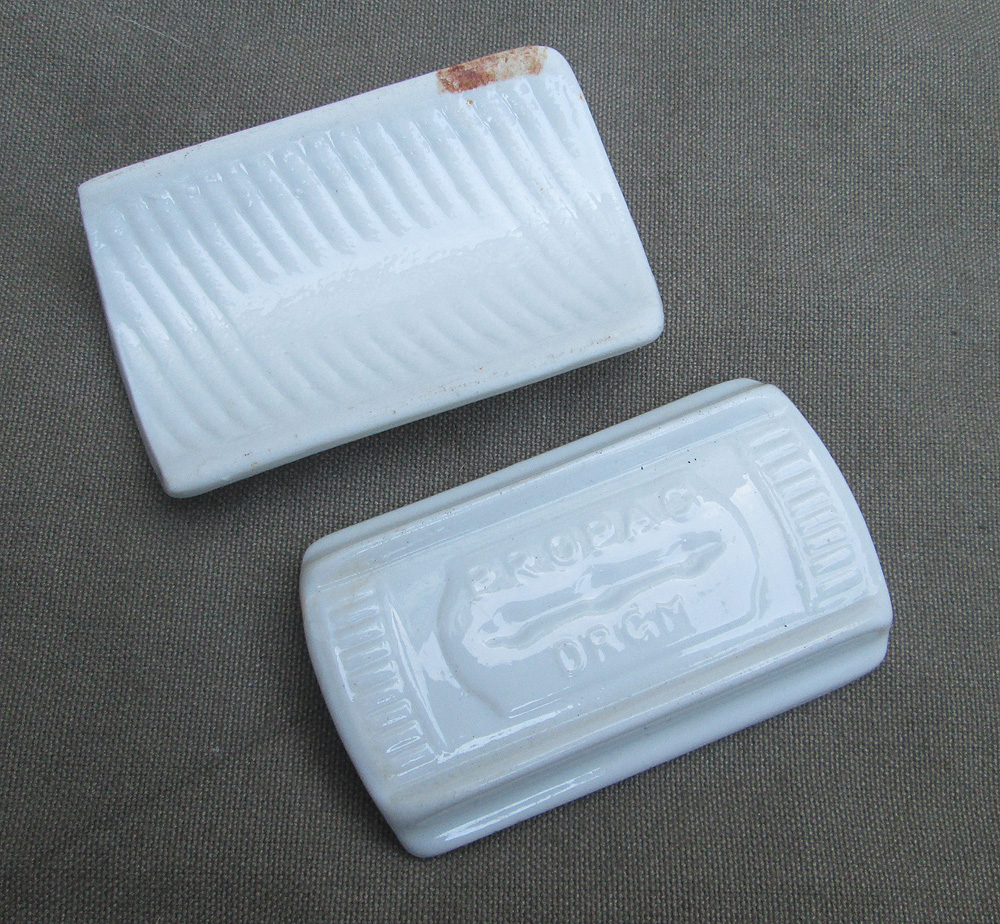
Of course, a decent shave requires more than a razor alone. German soldiers were issued soap to shave with. The shaving soap sticks were rectangular and each bar was stamped with a code assigned by the “Reichsstelle für industrielle Fettversorgung.” Here is an original package of 10 bars of issue type shaving soap.
These ceramic hones were used to sharpen razor blades to prolong their life. These were excavated from former German positions on what was once the Eastern Front. These would have been private purchase rather than issue items.
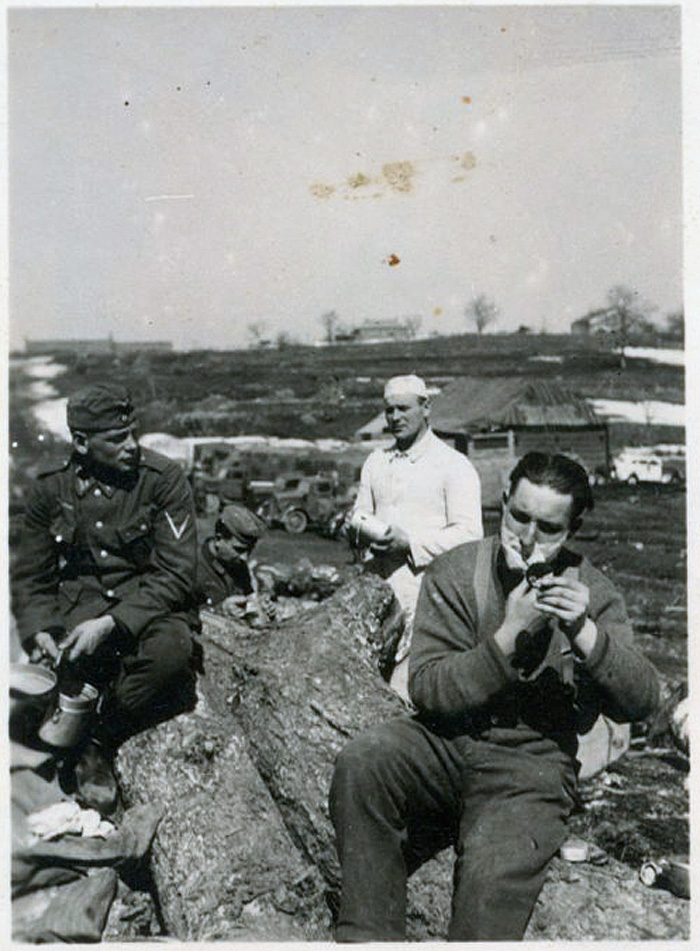
Soldiers in the field also had to fend for themselves when it came to shaving mirrors. Here, a soldier shaves with a small, round pocket mirror.
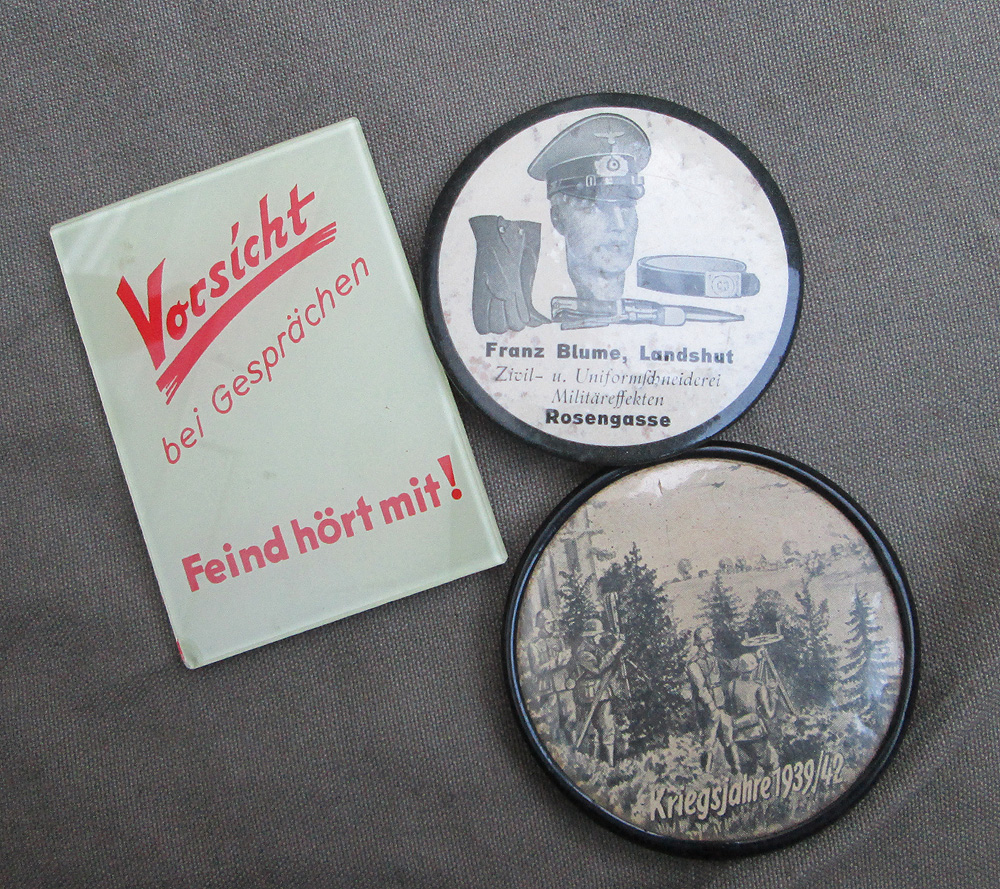
Here is a selection of wartime era pocket mirrors with military themes.
With some creativity, it is not hard to put together a convincing representation of a WWII German soldier’s shaving kit using modern items, that can actually be used today. Shown below is a careful recreation of a kit that could have been used by a soldier in the field. The razor is a modern Merkur 33c, everything else is reproduction- the shaving mirror and leatherette case, the RIF-marked soap bar, the razor blade packaging. All fits inside a wooden box with a reproduction Camembert cheese label.
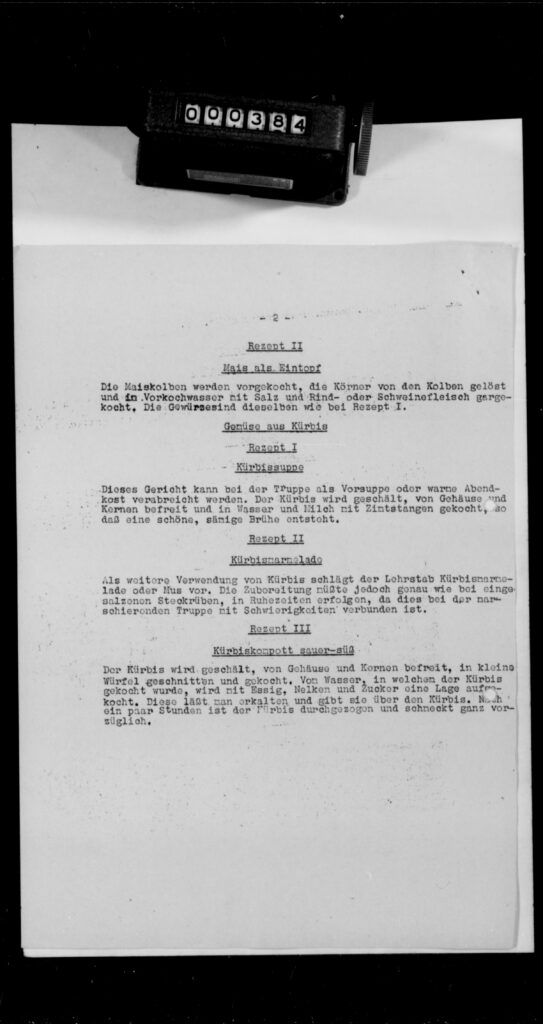
When German troops invaded the Soviet Union in 1941, the people in charge of logistics had to find ways to make use of locally available foodstuffs. One of the vegetables that they encountered lots of, was the pumpkin. Recipes were distributed to field kitchens, to allow the cooks to use this vegetable in a variety of ways. Here are recipes from two wartime Wehrmacht sources.
From the war diary of the 281. Sicherungs-Division, in the US National Archives:
Recipe 1: Pumpkin Soup This recipe can be distributed to the troops as an appetizer or as a warm evening meal. The pumpkin is peeled, the exterior and core are removed, and then it is boiled in water and milk with cinnamon sticks, to form a nice, creamy stock.
Recipe 2: Pumpkin Marmalade As a further use of pumpkin, the Lehrstab recommends pumpkin marmalade or puree. The pumpkin is peeled, washed, and sliced into thin slices using a slaw cutter, so that it can be salted in barrels, just like how white cabbage is made into sauerkraut, for 6-8 weeks. This can only be done in times of rest, as it is too difficult for a unit on the move.
Recipe 3: Sweet and Sour Pumpkin Compote The pumpkin is peeled, the exterior and core are removed, it is diced into small cubes and boiled. The water in which the pumpkin is cooked is then boiled down with vinegar, cloves and sugar, to form a sauce. This is allowed to cool and poured over the pumpkin. After a couple of hours, the pumpkin is soaked through and tastes exquisite.
From the Wehrmacht cookbook “Östliche Speisen nach deutscher Art”
Pumpkin is well-suited for a compote, but can also be cooked together in goulash, stews, Milchreis etc. Before use, pumpkin has to be cut up, peeled, the core removed, and cut into small pieces.
Pumpkin as a vegetable: Boil the prepared pumpkin until done. Fry in fat with roasted onions and bacon. Season well with salt and spices. Serve mashed or thickened with a roux.
Brown pumpkin vegetable dish: Boil the prepared pumpkin in a little water. Add salt and a clove and cook until done. Prepare a brown roux. Add pumpkin broth to form a thick sauce. Add the pumpkin pieces to this sauce. Season sweet/sour- add some browned sugar and cook through with vinegar or water. Note: instead of vinegar you can also use lemon juice but do not boil it together with lemon juice. If it’s not possible to take the pumpkin pieces out of the broth, bind the pumpkin together with the broth, with the roux.
Pumpkin Puree with Rice: Boil the pumpkin in a little water, puree by using a sieve or machine. Boil 1 part rice in 2 parts pumpkin water and 2 parts milk, then cook over gentle heat until done. Add the cooked pumpkin and mix well. Season with salt and grated nutmeg. Serve whenever possible with brown butter poured over it. Instead of rice, corn grits, barley, buckwheat groats, or millet can be used. This recipe can also be switched for a sweet recipe; instead of salt, use sugar, and instead of nutmeg, use cinnamon.
Pumpkin, Hungarian Style: The prepared pumpkin pieces are sprinkled with salt and caraway seeds and allowed to sit for a few hours. In a little fat, fry 1 diced onion and some flour. Add a little water, stir until smooth and bring to a boil. Add the pumpkin pieces and cook until done. Season with some paprika and let the pumpkin soak up the sauce. Season with condensed milk and lemon juice.
Pumpkin for Gulasch and stews: Dice the prepared pumpkin and add to Gulasch or stews about 30-45 minutes before the stew is done, and cook together.
Pumpkin as compote: The prepared pumpkin is cooked in sugar water together with some vinegar, ginger or cloves until done.
To dry pumpkin: Peel the pumpkin, remove the core and cut into very thin slices. The slices can be threaded onto a string using a needle, and dried in the sun. If not threaded, the pumpkin slices can be dried on frames, in the air, ion the stove top, or in a not-too-warm baking oven.
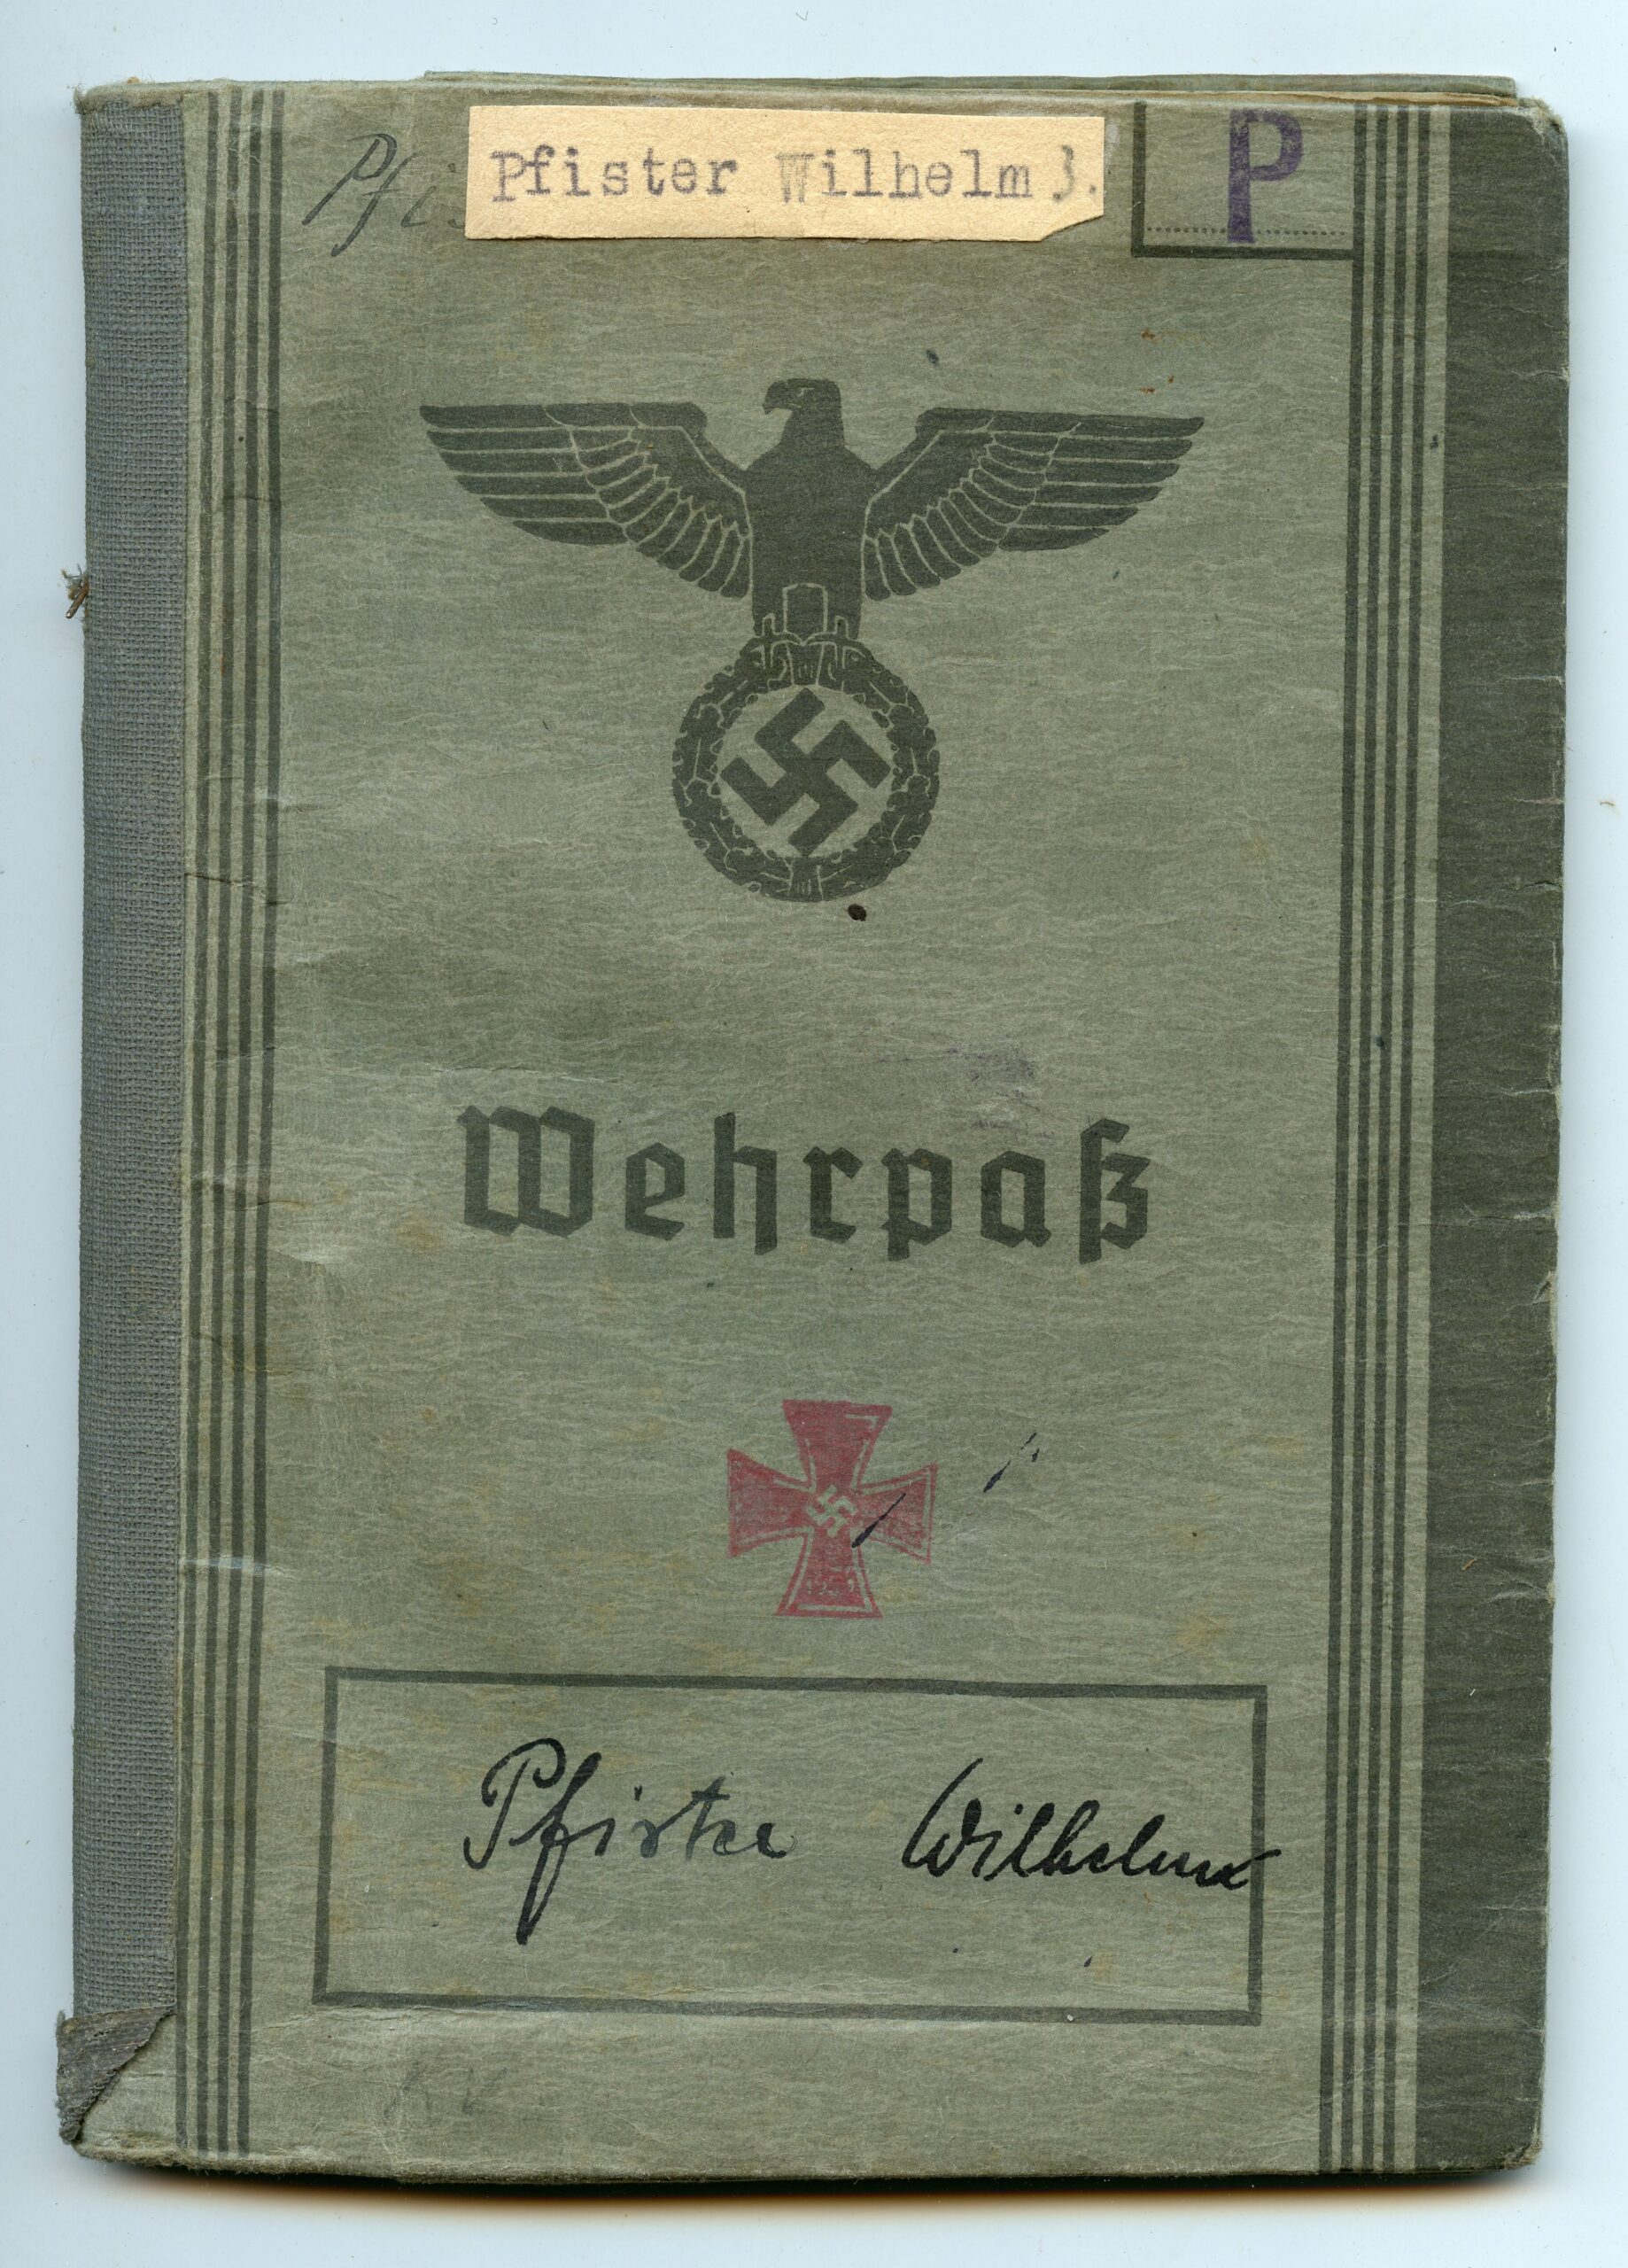
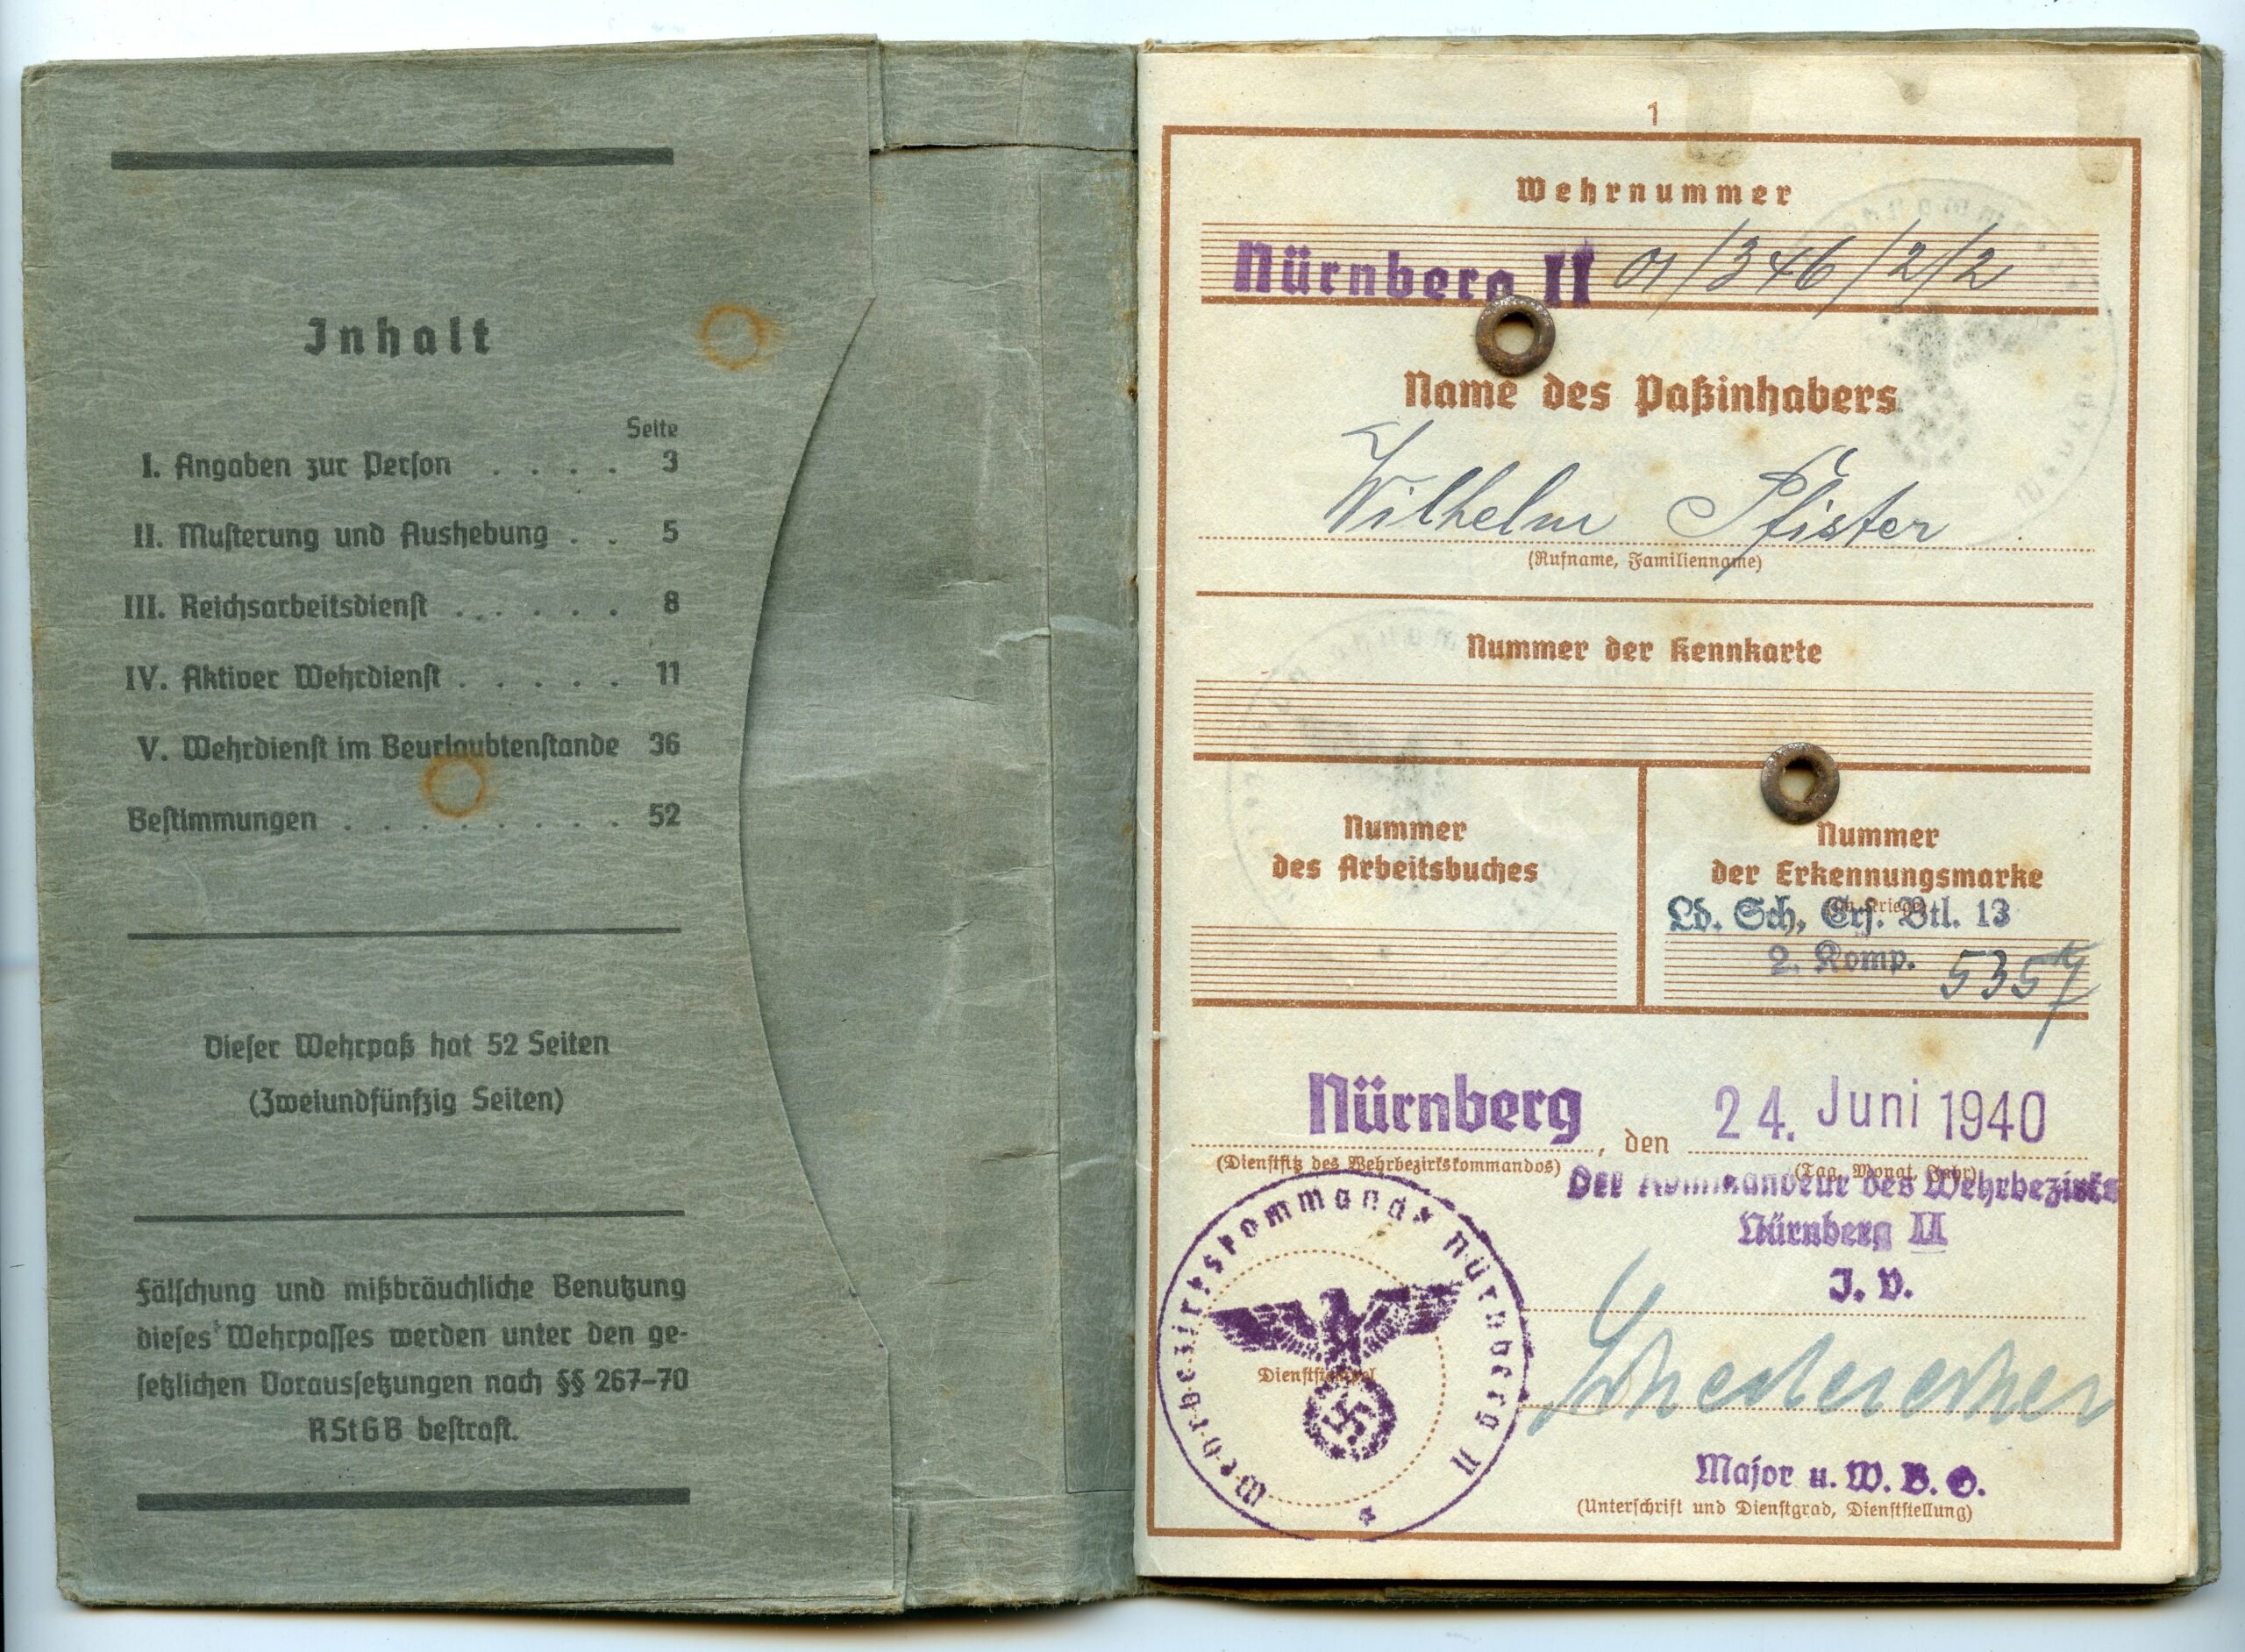
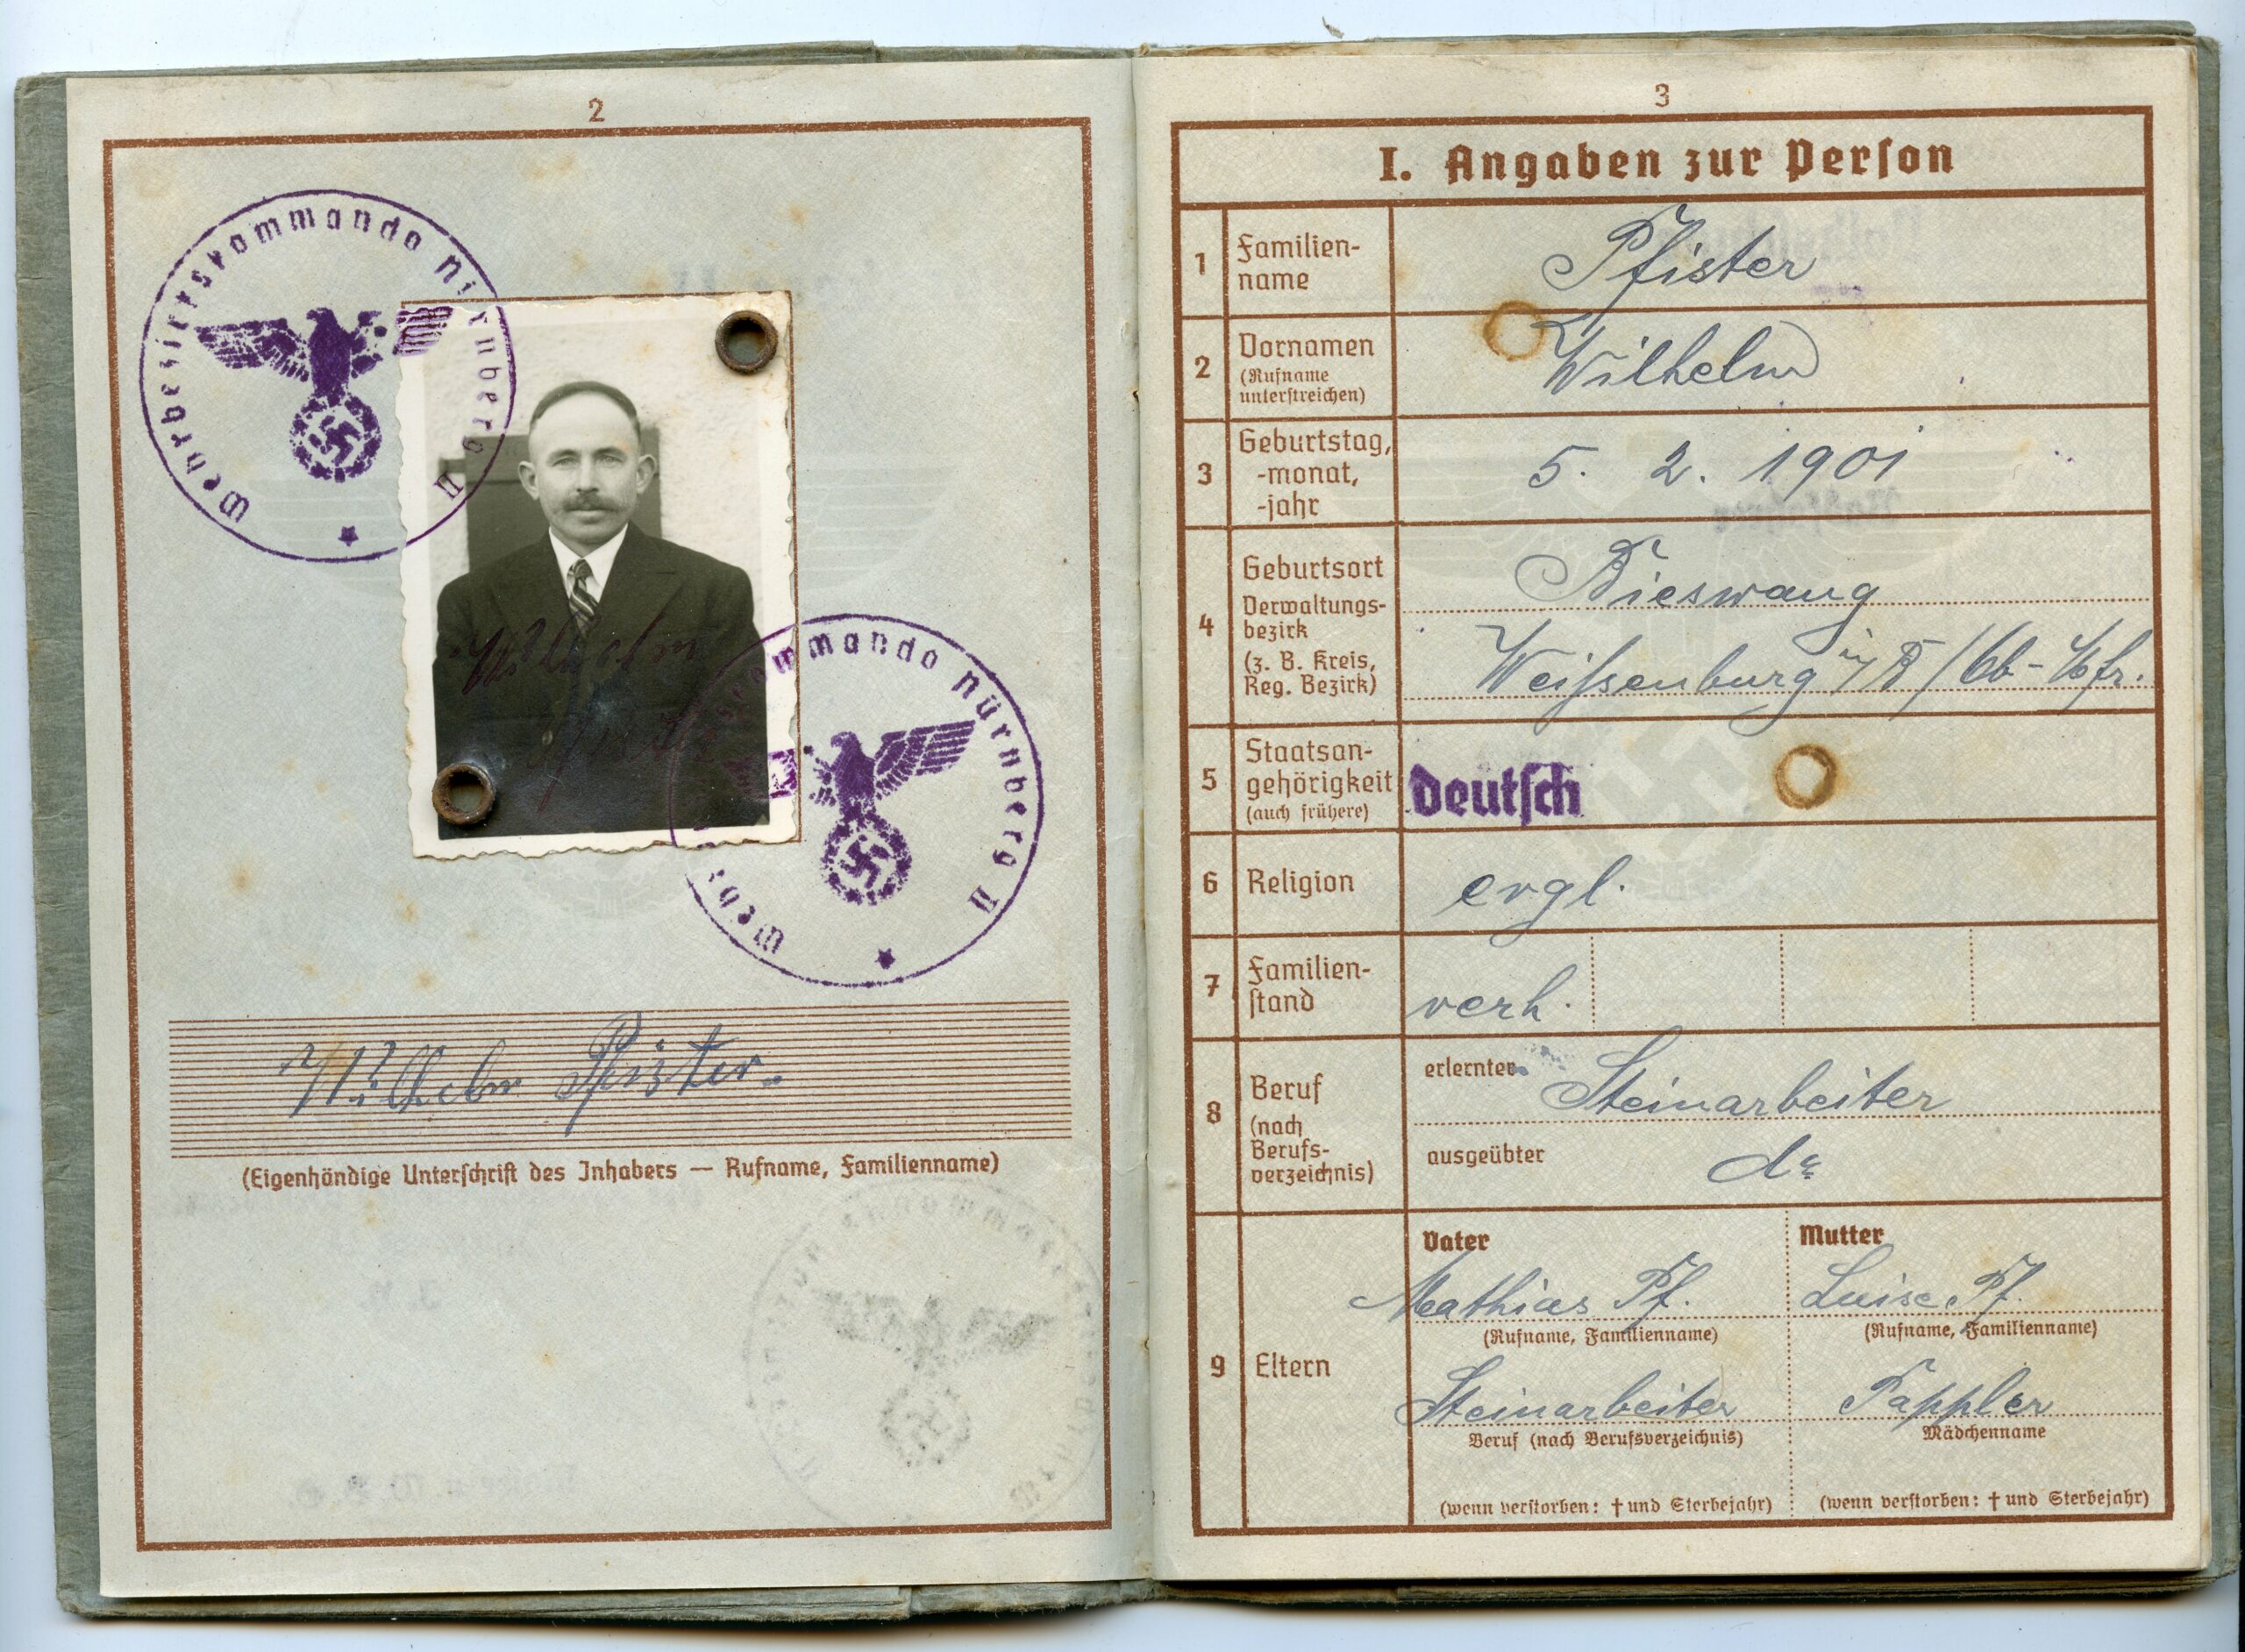
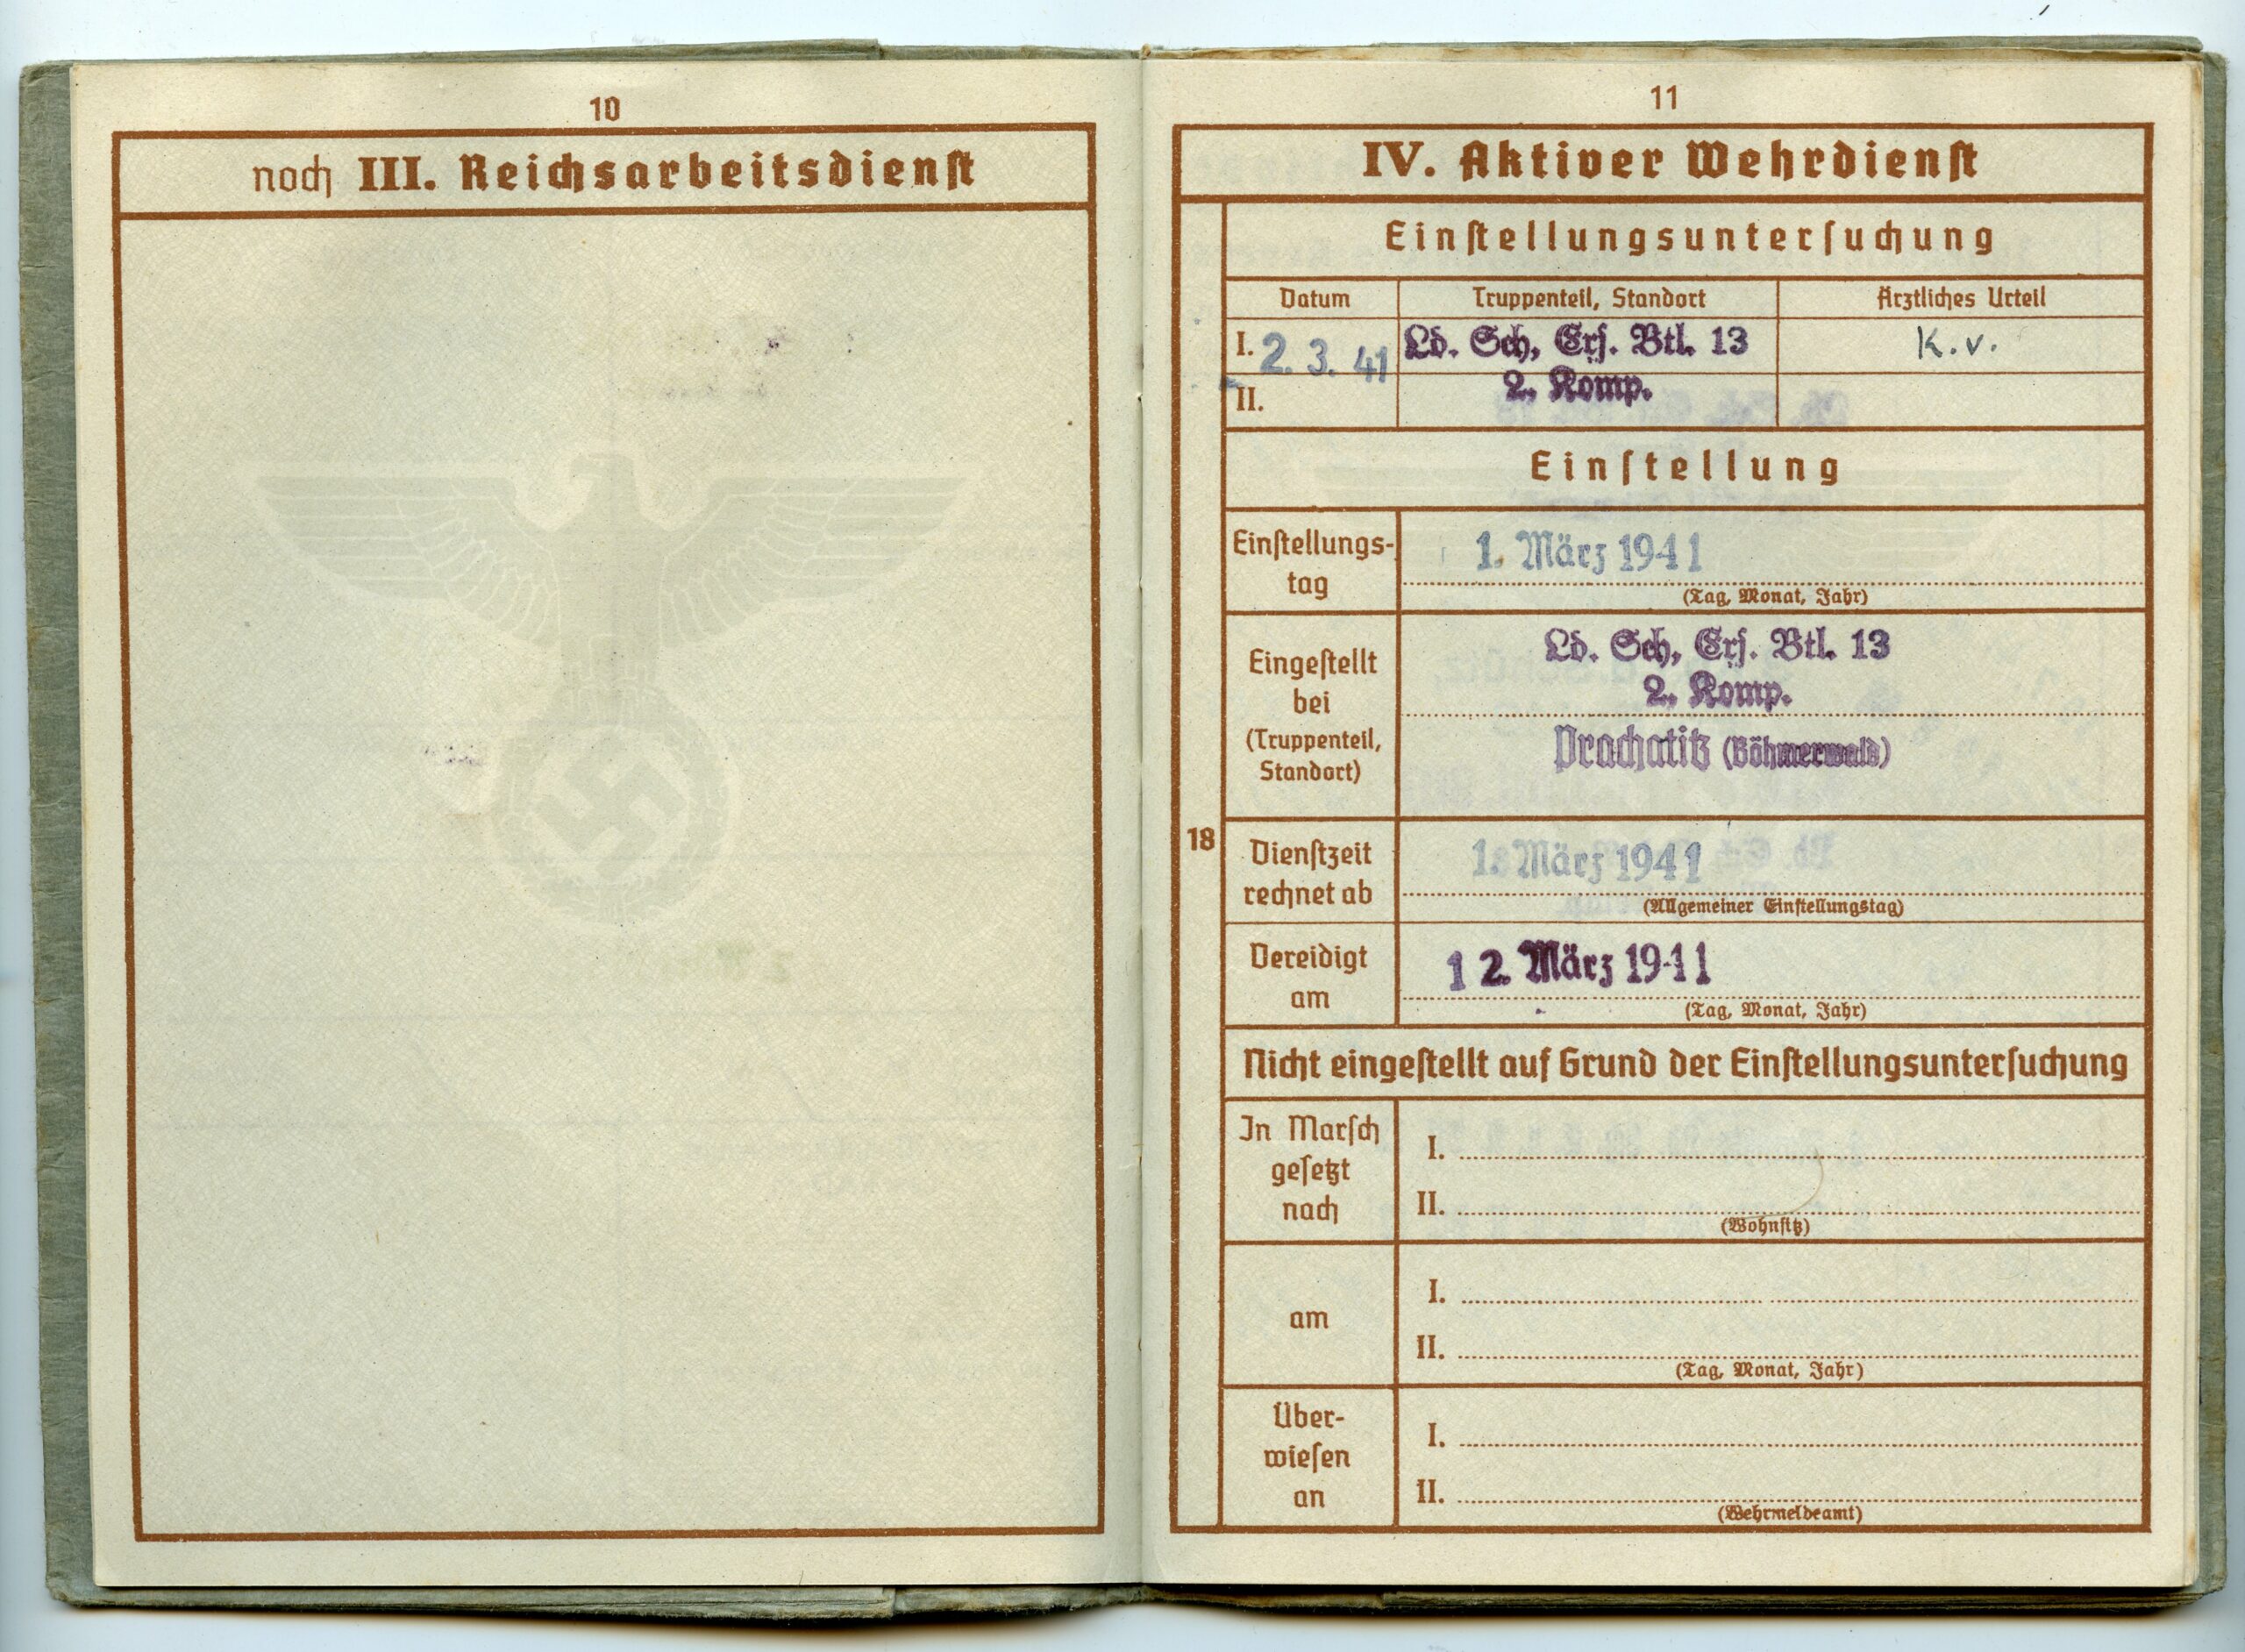
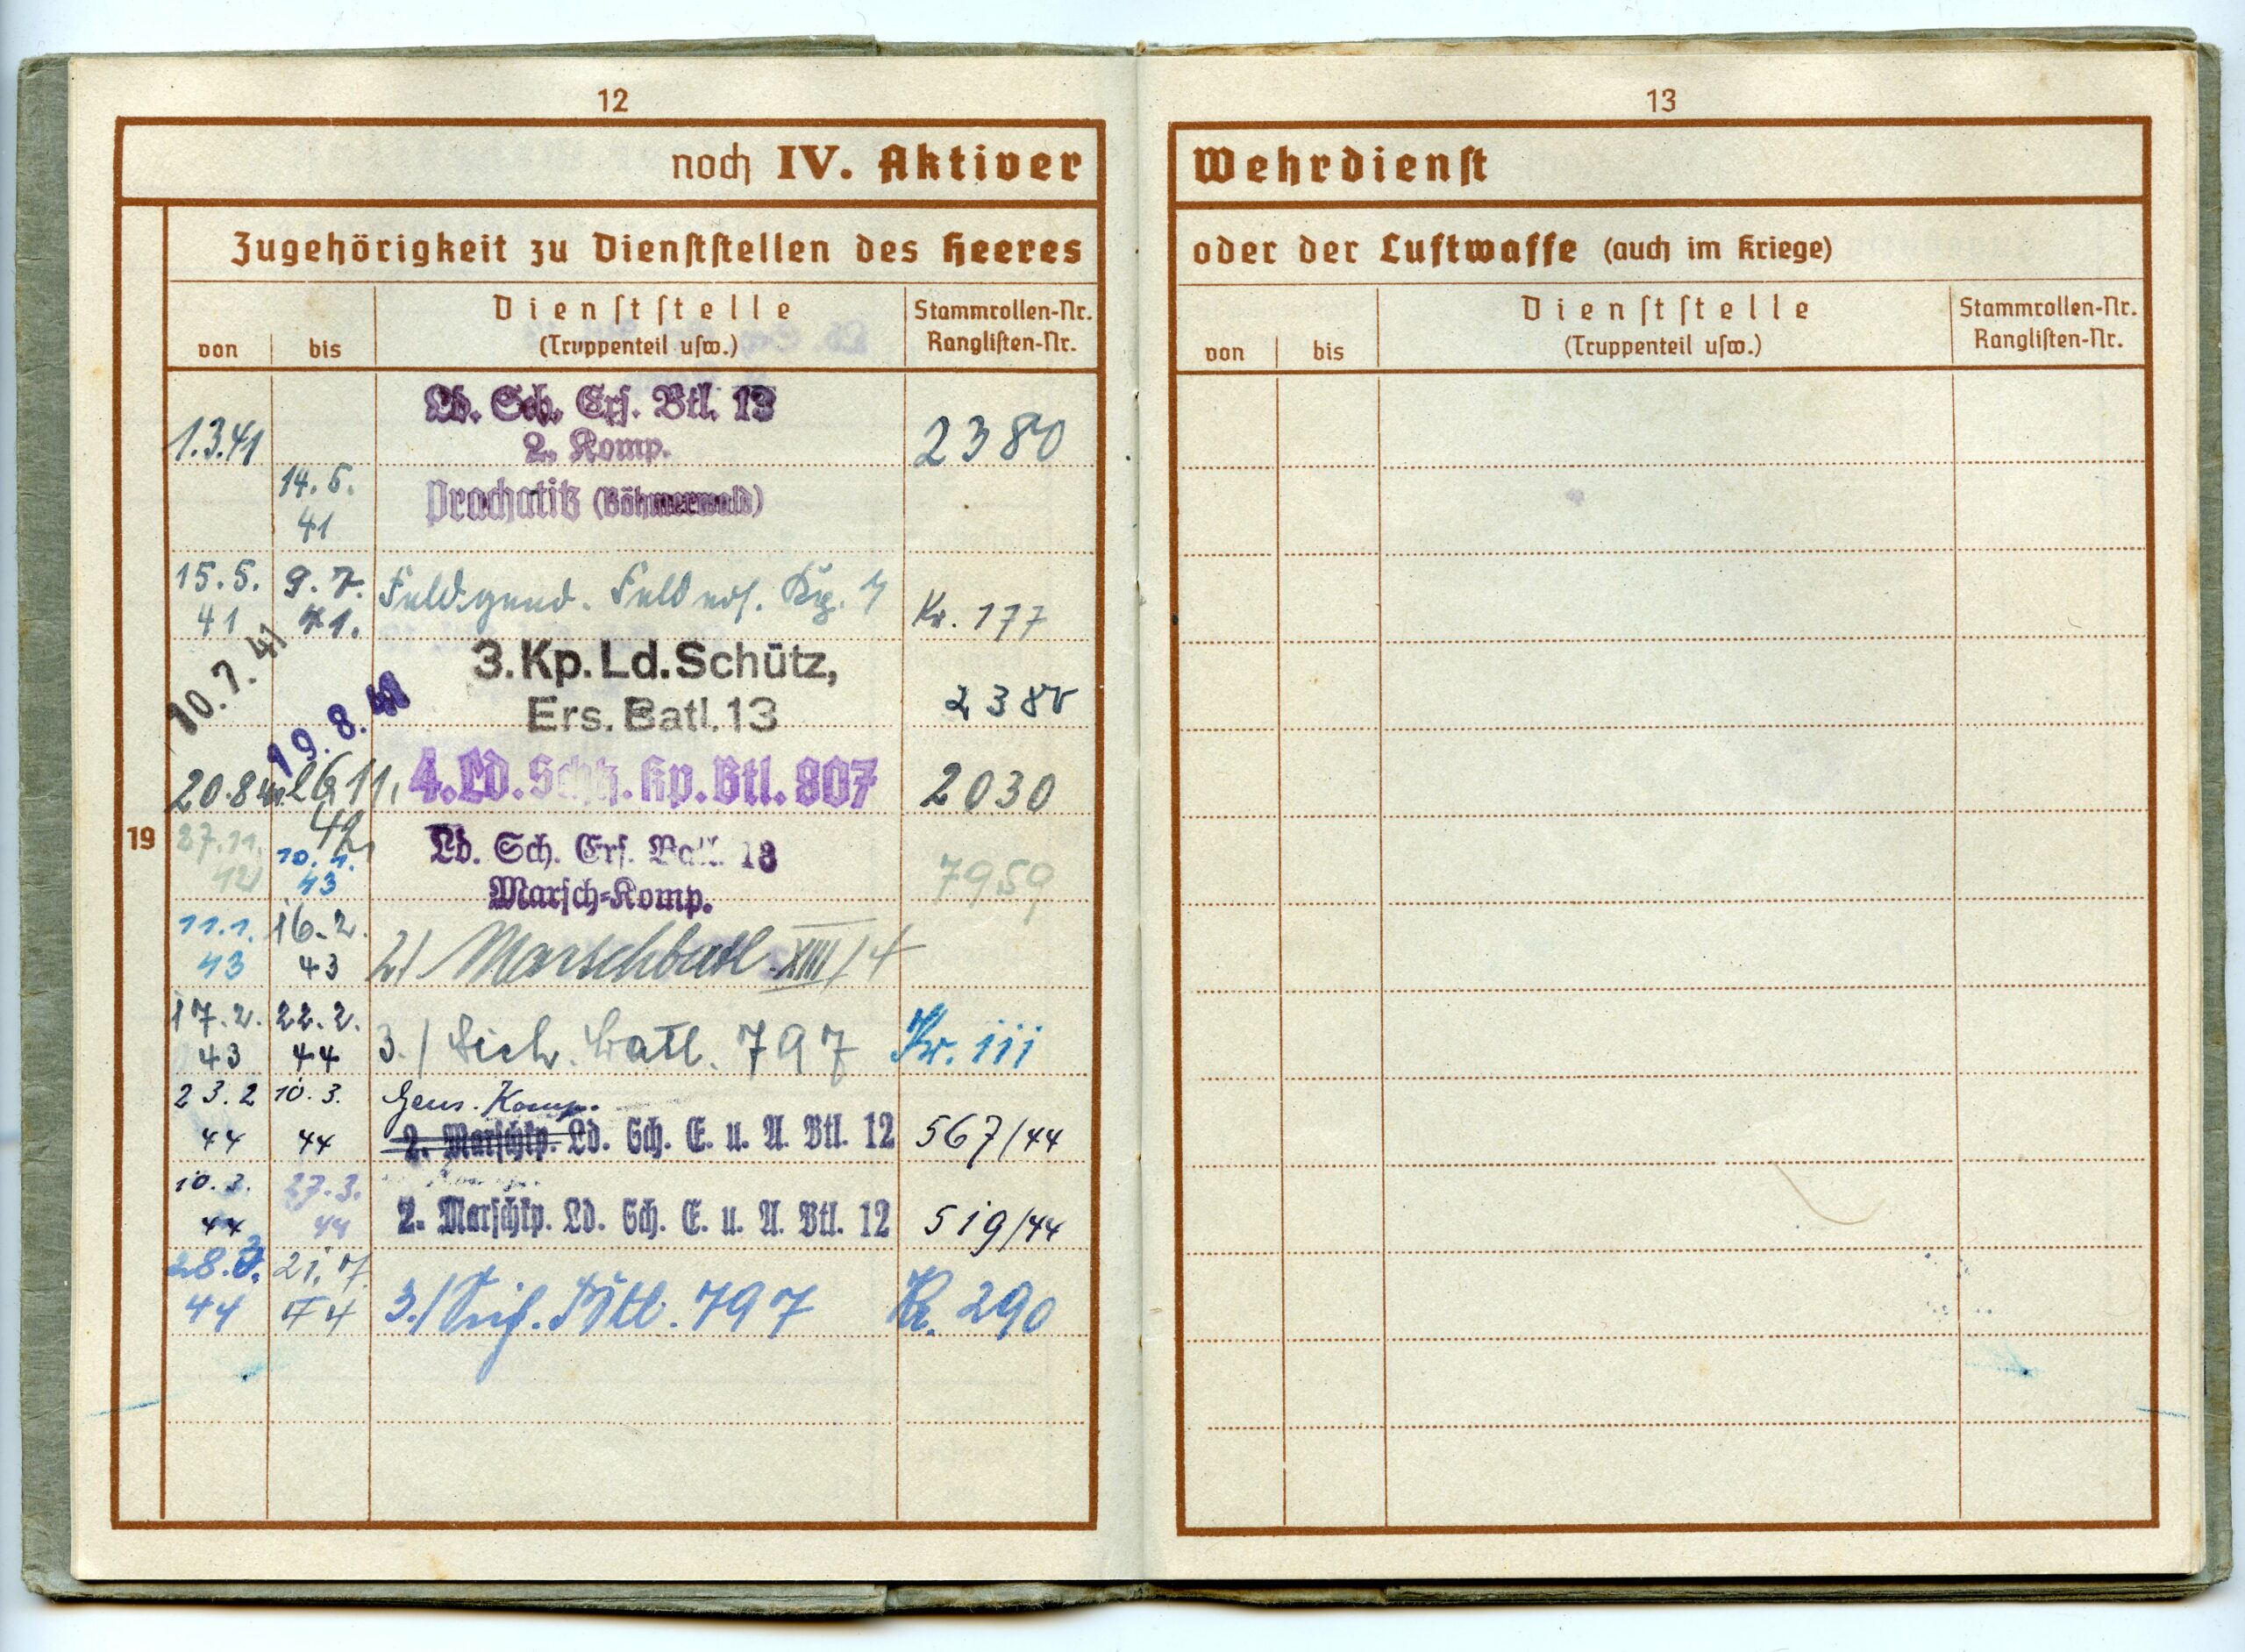
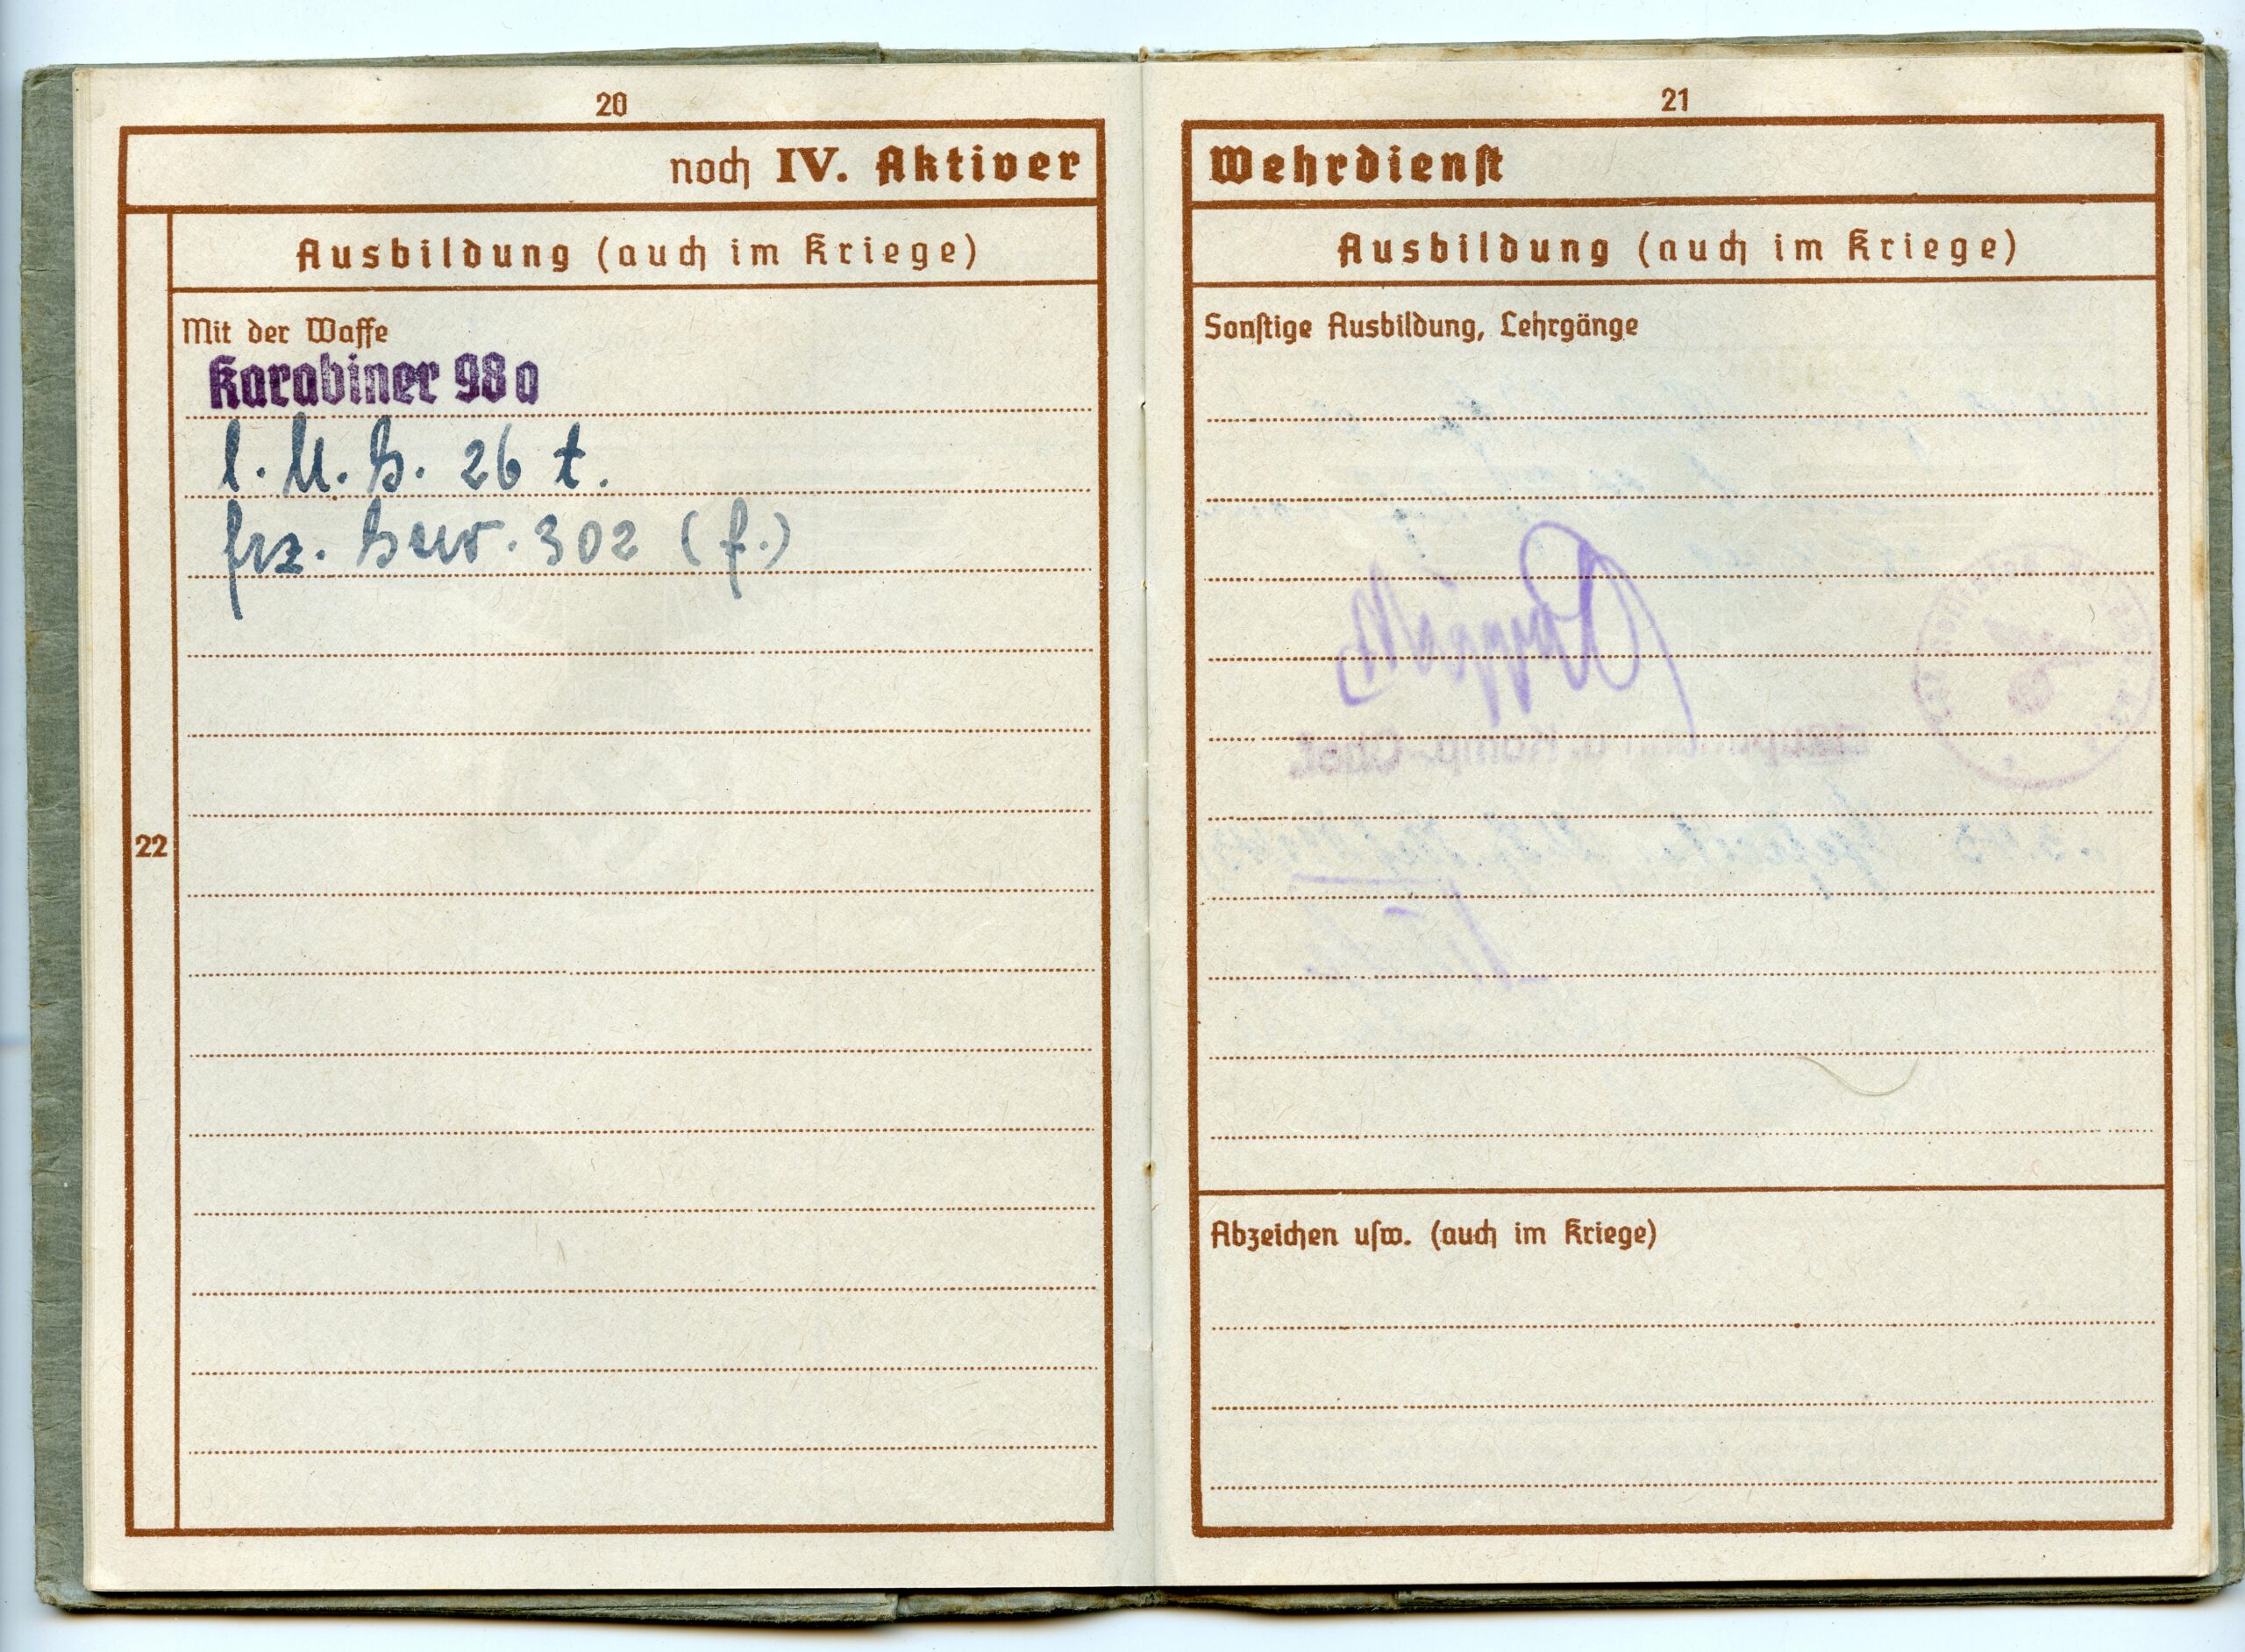
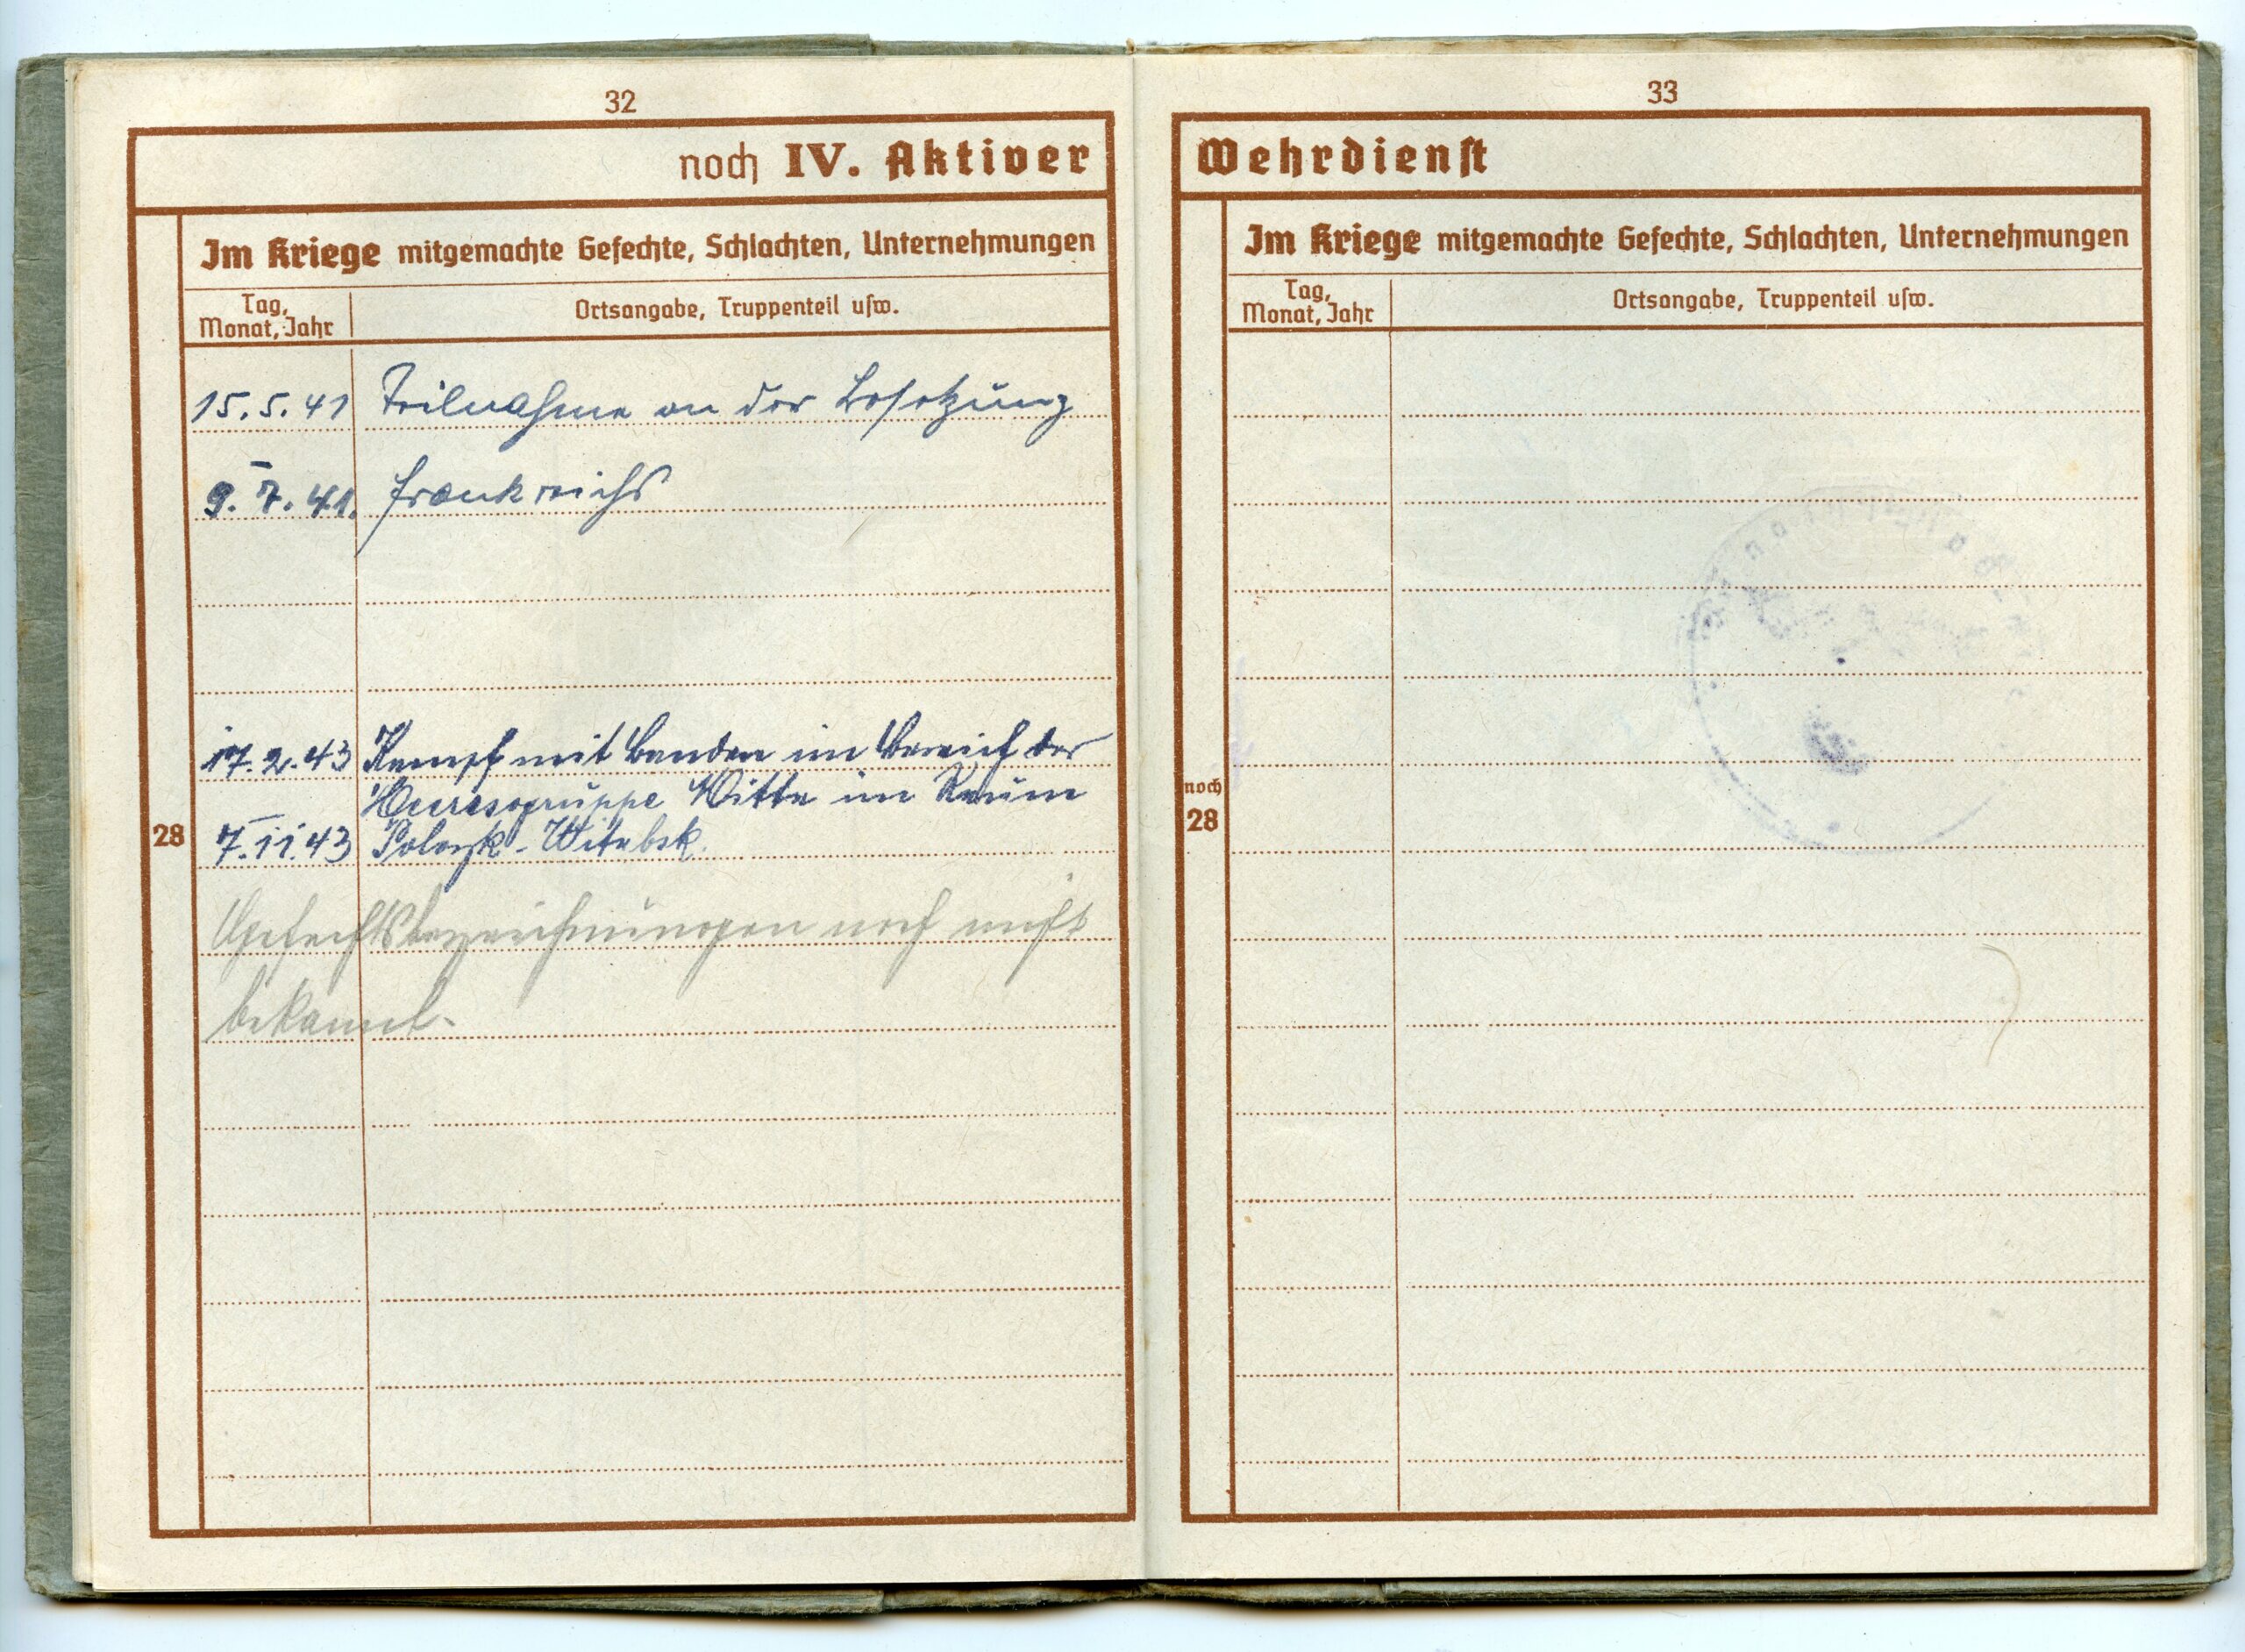
Wilhelm Pfister was born in Bieswang in 1901. He was married and was employed as a stone worker. In March of 1941, when he was 40 years old, he was drafted and sent to a training unit, Landesschützen-Ersatz-Bataillon 13, in Prachatitz (Prachatice in the Czech Republic, annexed by the German Reich in 1938). After a couple of months he was sent to France, to Feldgendarmerie-Feld-Ersatz-Kompanie 7, where he spent two months on occupation duty before returning to his former training unit in Prachatitz. During his training, he was instructed on the use of the German K98 rifle, the French Berthier rifle Fusil 07/15 (Gewehr 302(f)) and the Czech ZB26 machine gun (MG 26(t)). In August 1941, he was assigned to Landesschützen-Bataillon 807, in Nuremberg, where he remained for over a year. After more than a year in the Army, he finally got a new rank, Oberschütze, in April 1942. Eventually, in February 1943, Pfister was deployed outside Germany once again, this time as part of Sicherungs-Bataillon 797. This unit was at that time in the occuped USSR, as part of Army Group Center. Pfister’s Wehrpass indicates that from February through November, 1943, he was engaged in combat against partisans in the area around Polozk and Witebsk, in what is now Belarus. In March, after 2 years of service, he was promoted to the rank of Gefreiter. In February 1944, Pfister became ill and was sent back to Germany to convalesce with Landesschützen-Ersatz und Ausbildungs-Bataillon 12. After a month, he had recovered and was sent back to his field unit, Sicherungs-Bataillon 797, now active as part of the 16th Army. The Red Army reached the border of Latvia on July 17, 1944. A week later, on July 21, Pfister was killed in action in Latvia. It’s not clear if his unit was at that time engaged again in combat with partisans, or (perhaps more likely) fighting defensive actions against Soviet regulars. Such details probably didn’t matter much to the family Pfister left behind. He was 43 years old.
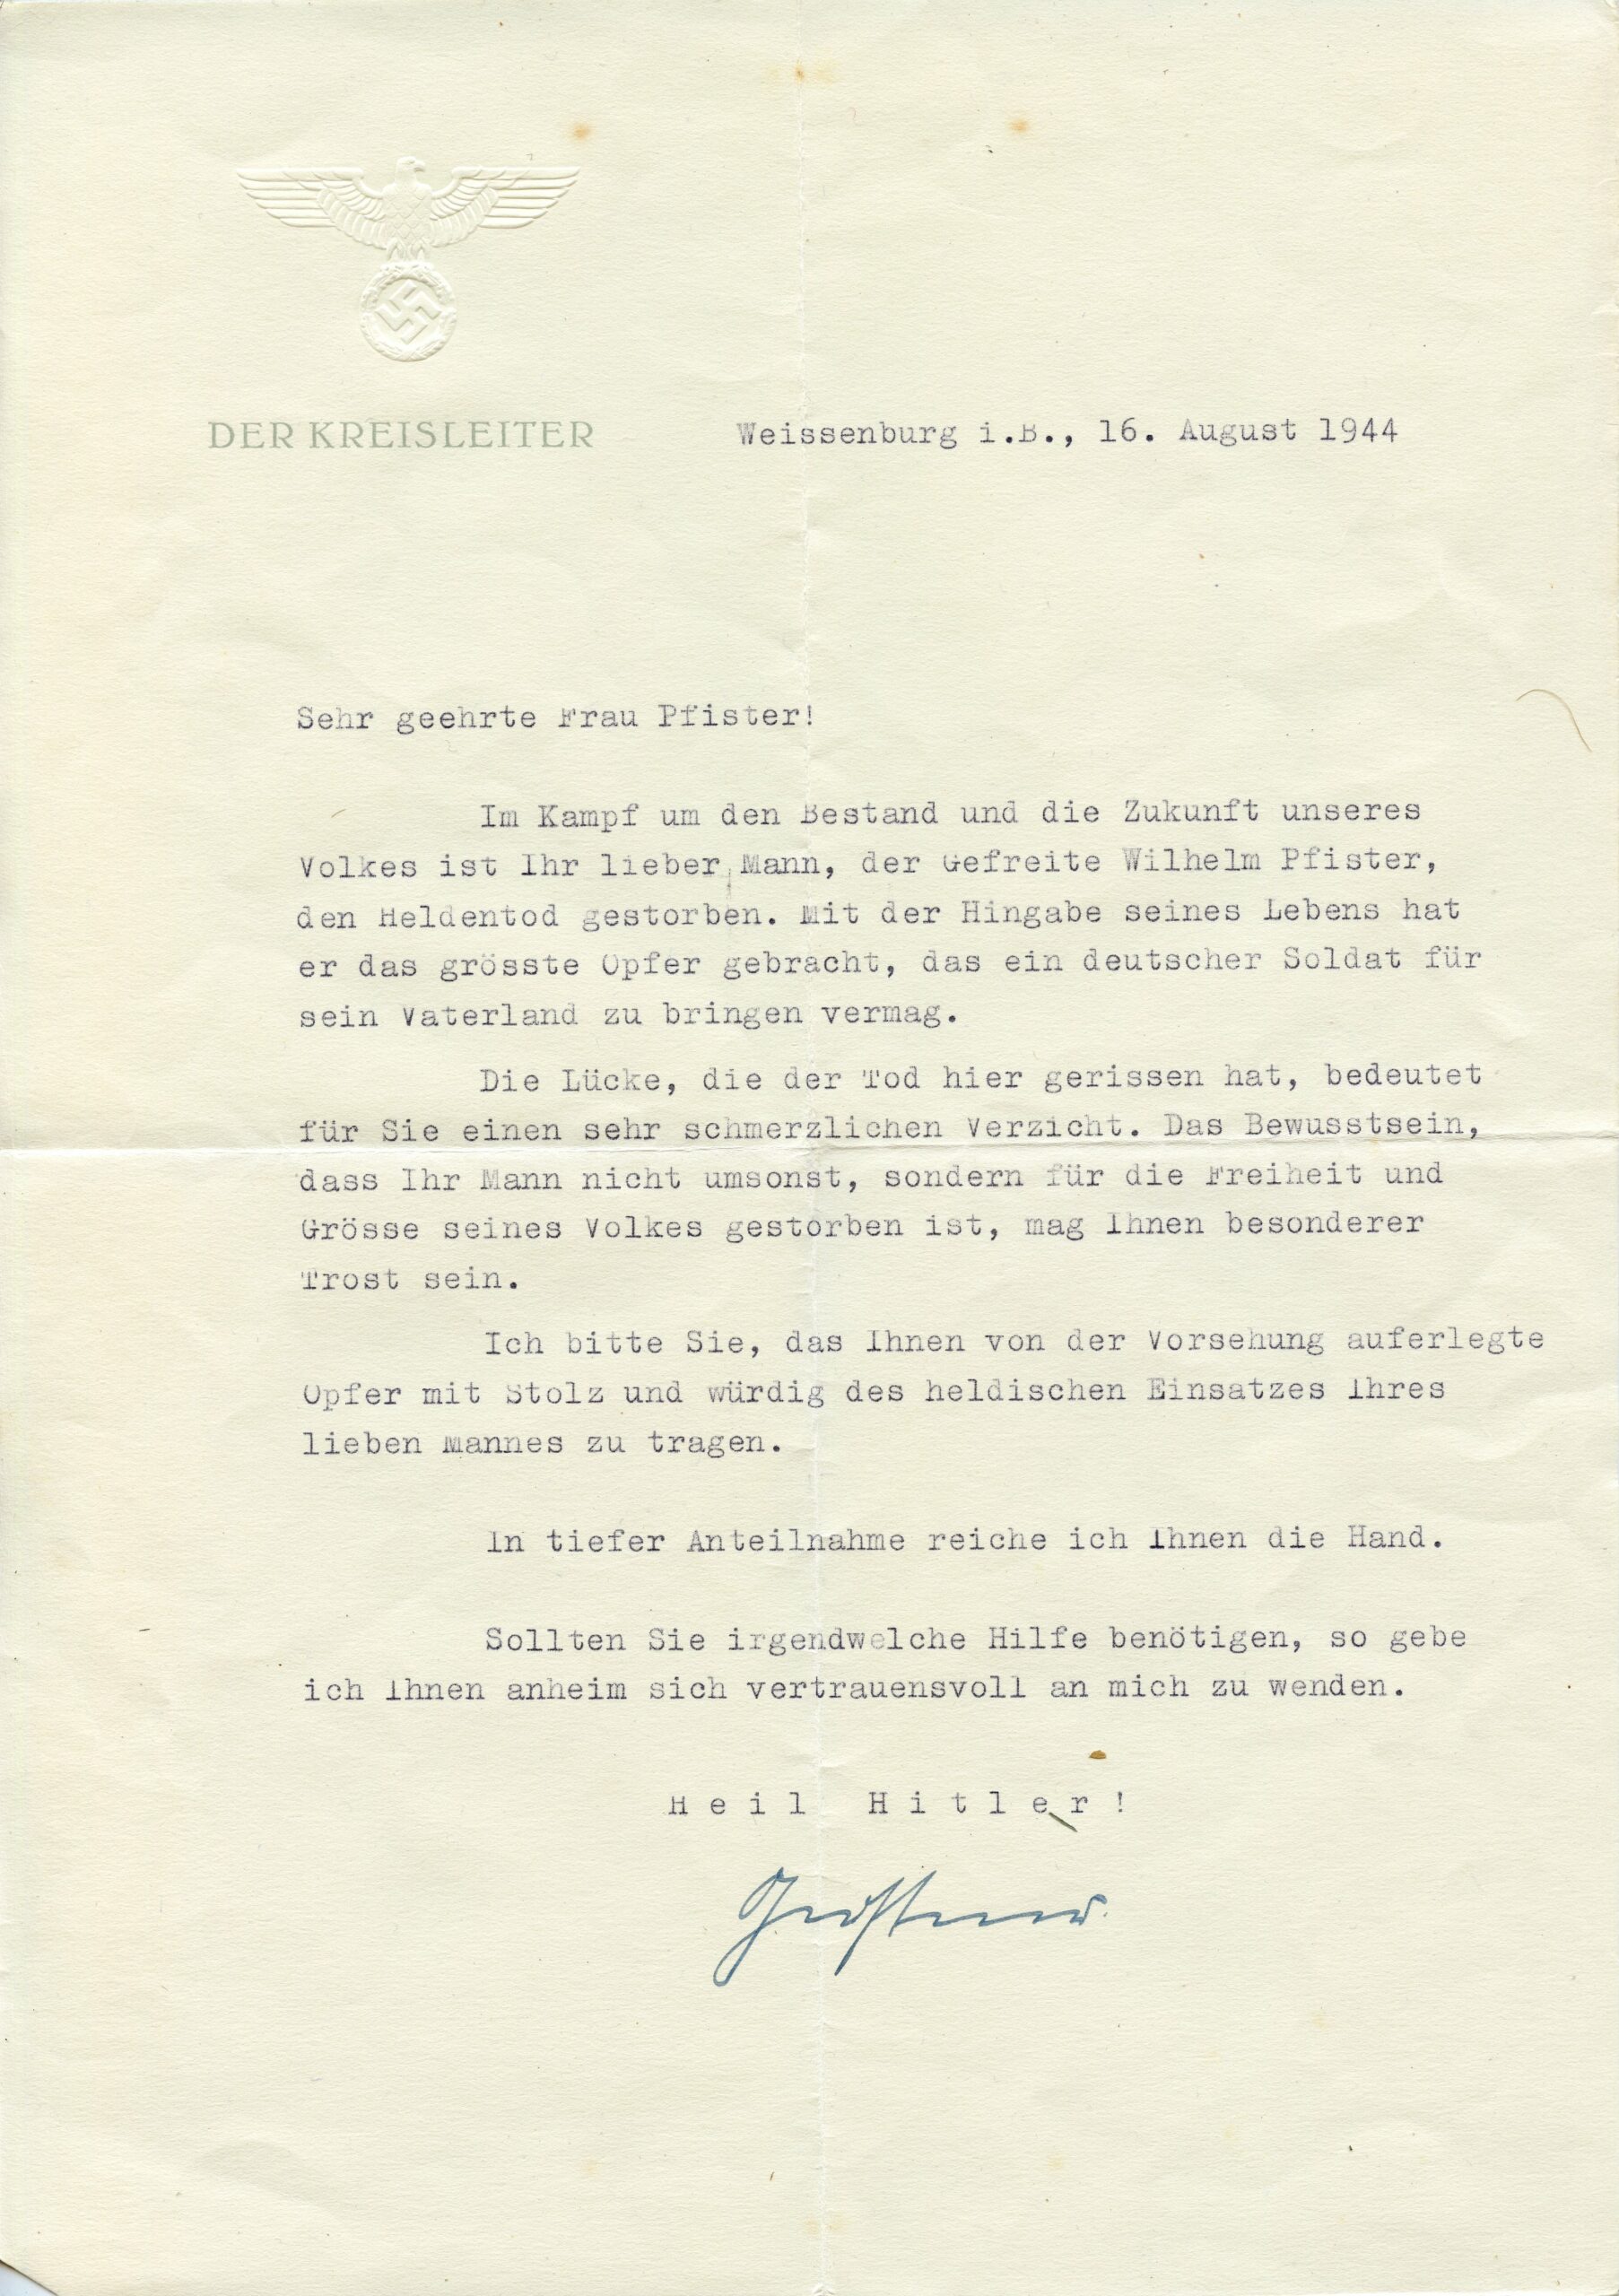
The local Nazi Party district leader sent a letter of condolence to Pfister’s widow, full of patriotic jargon.