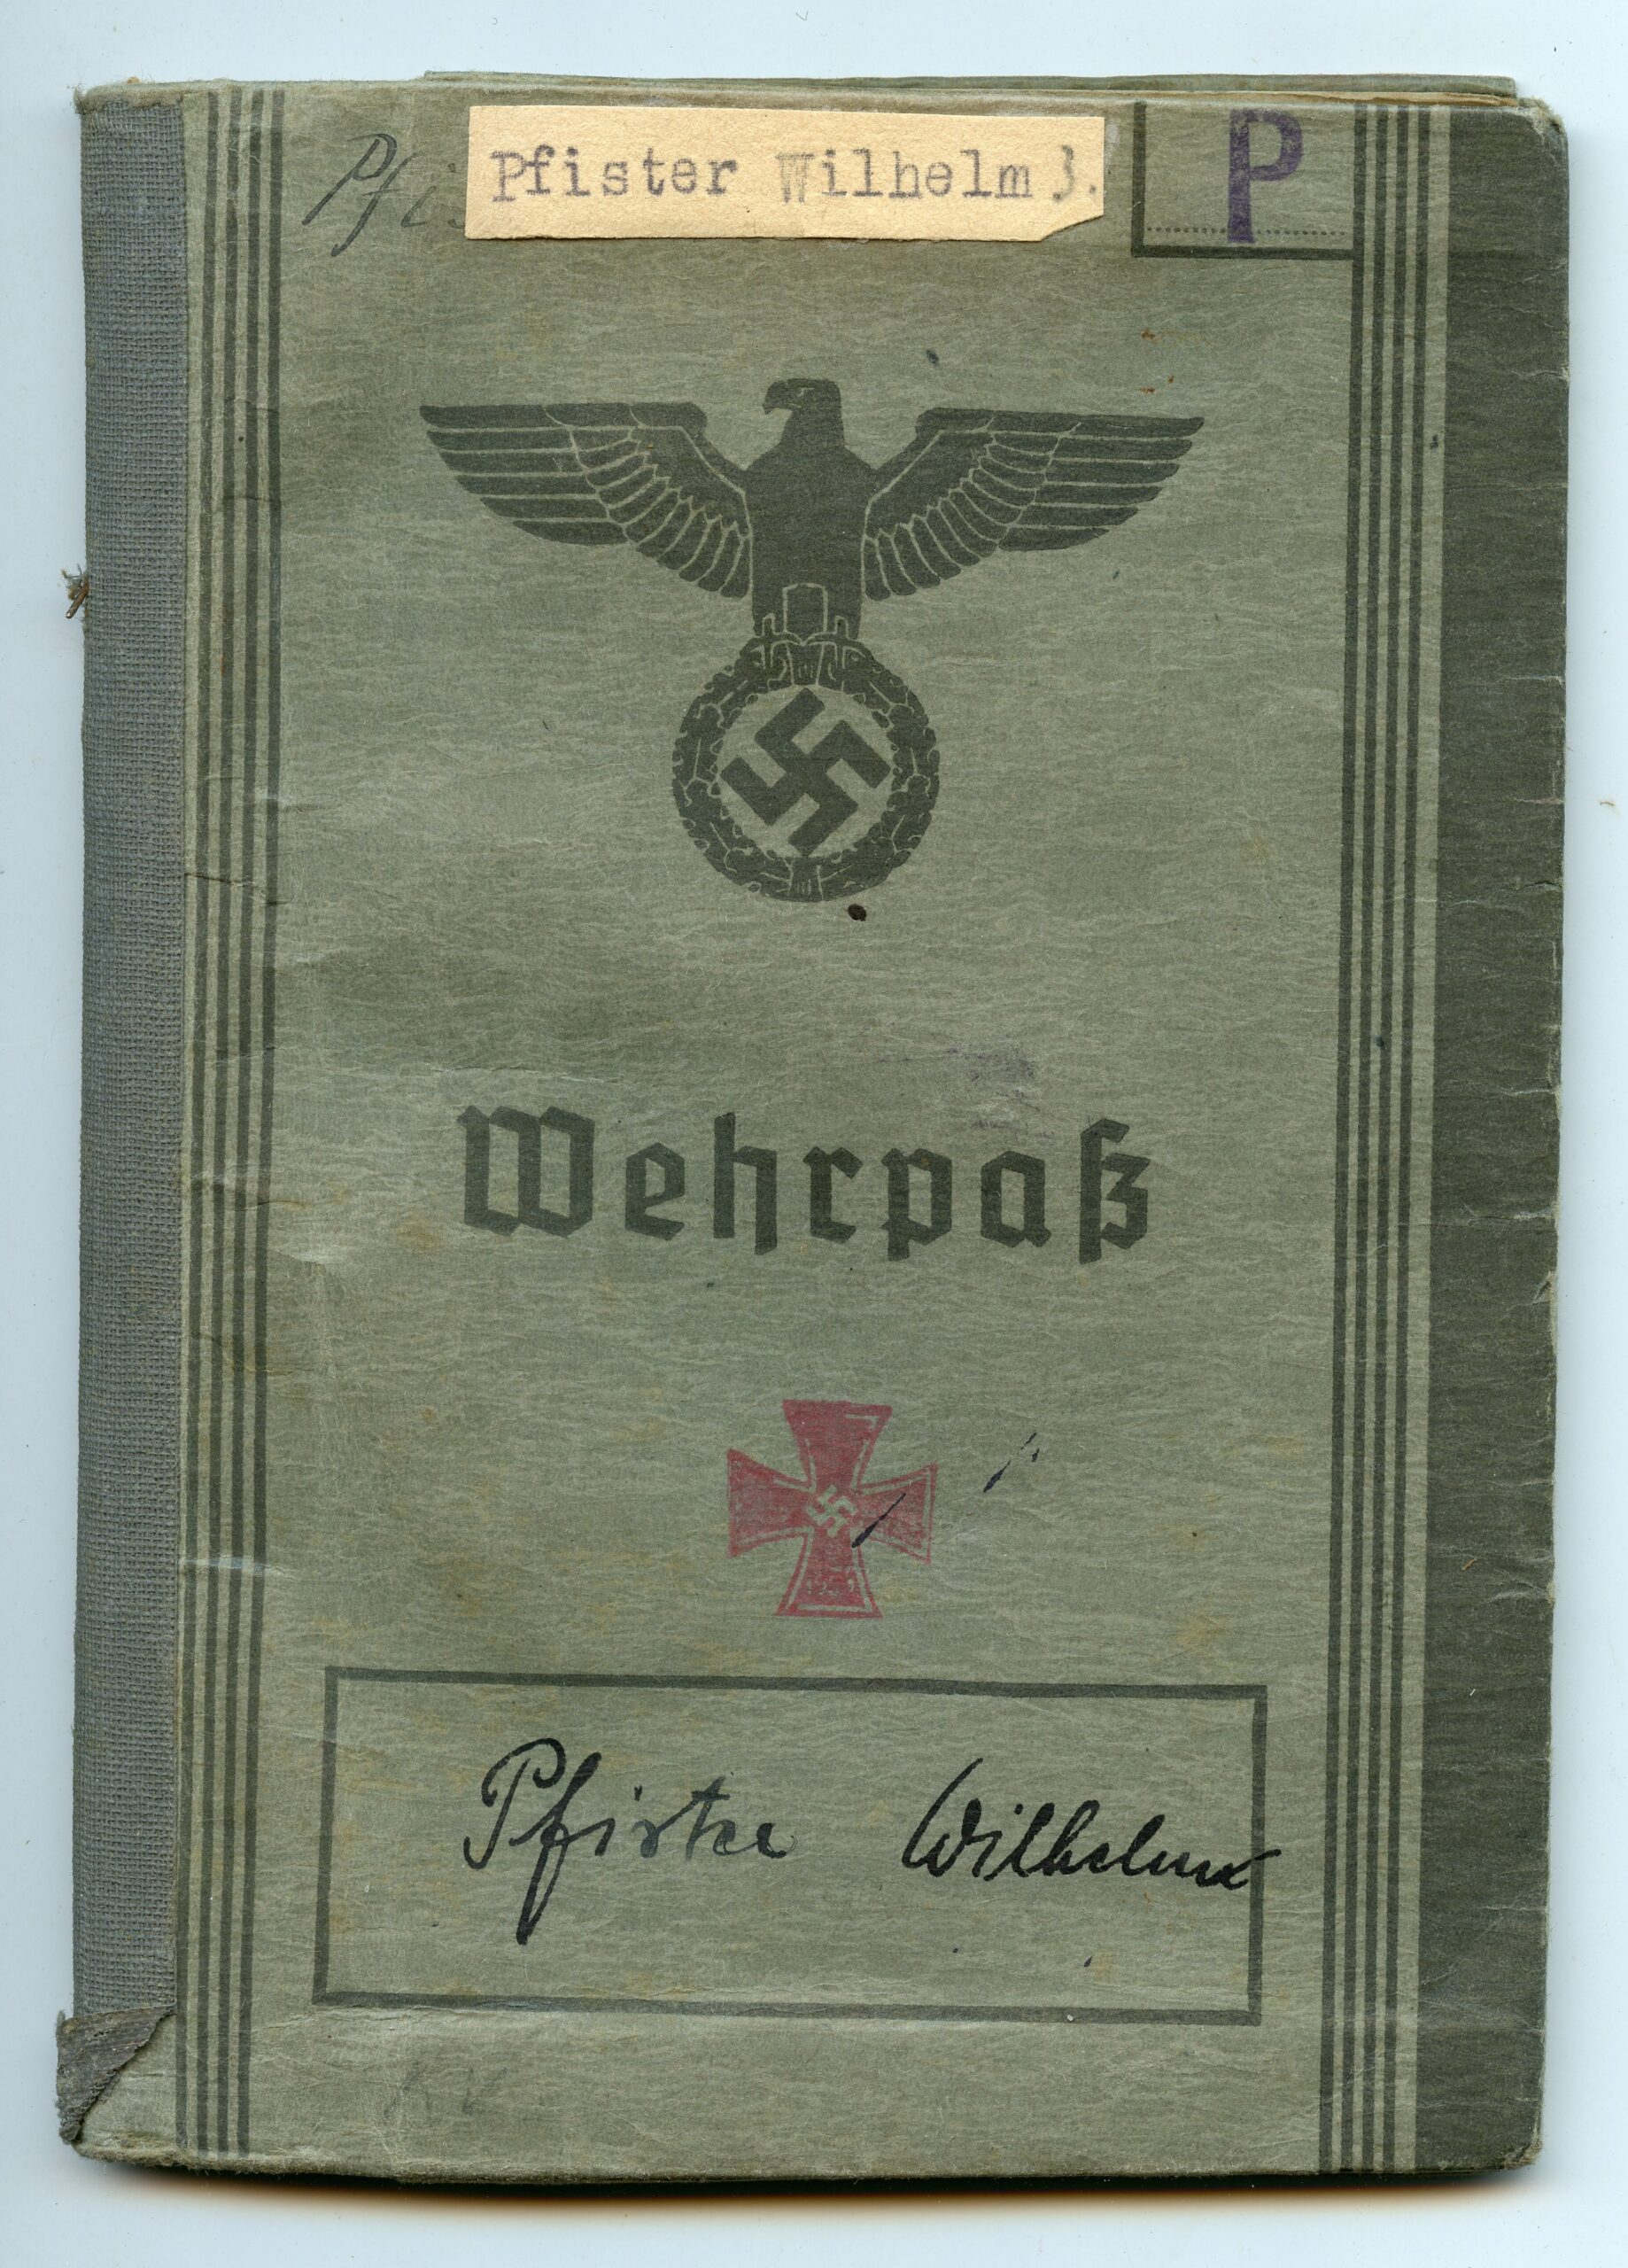
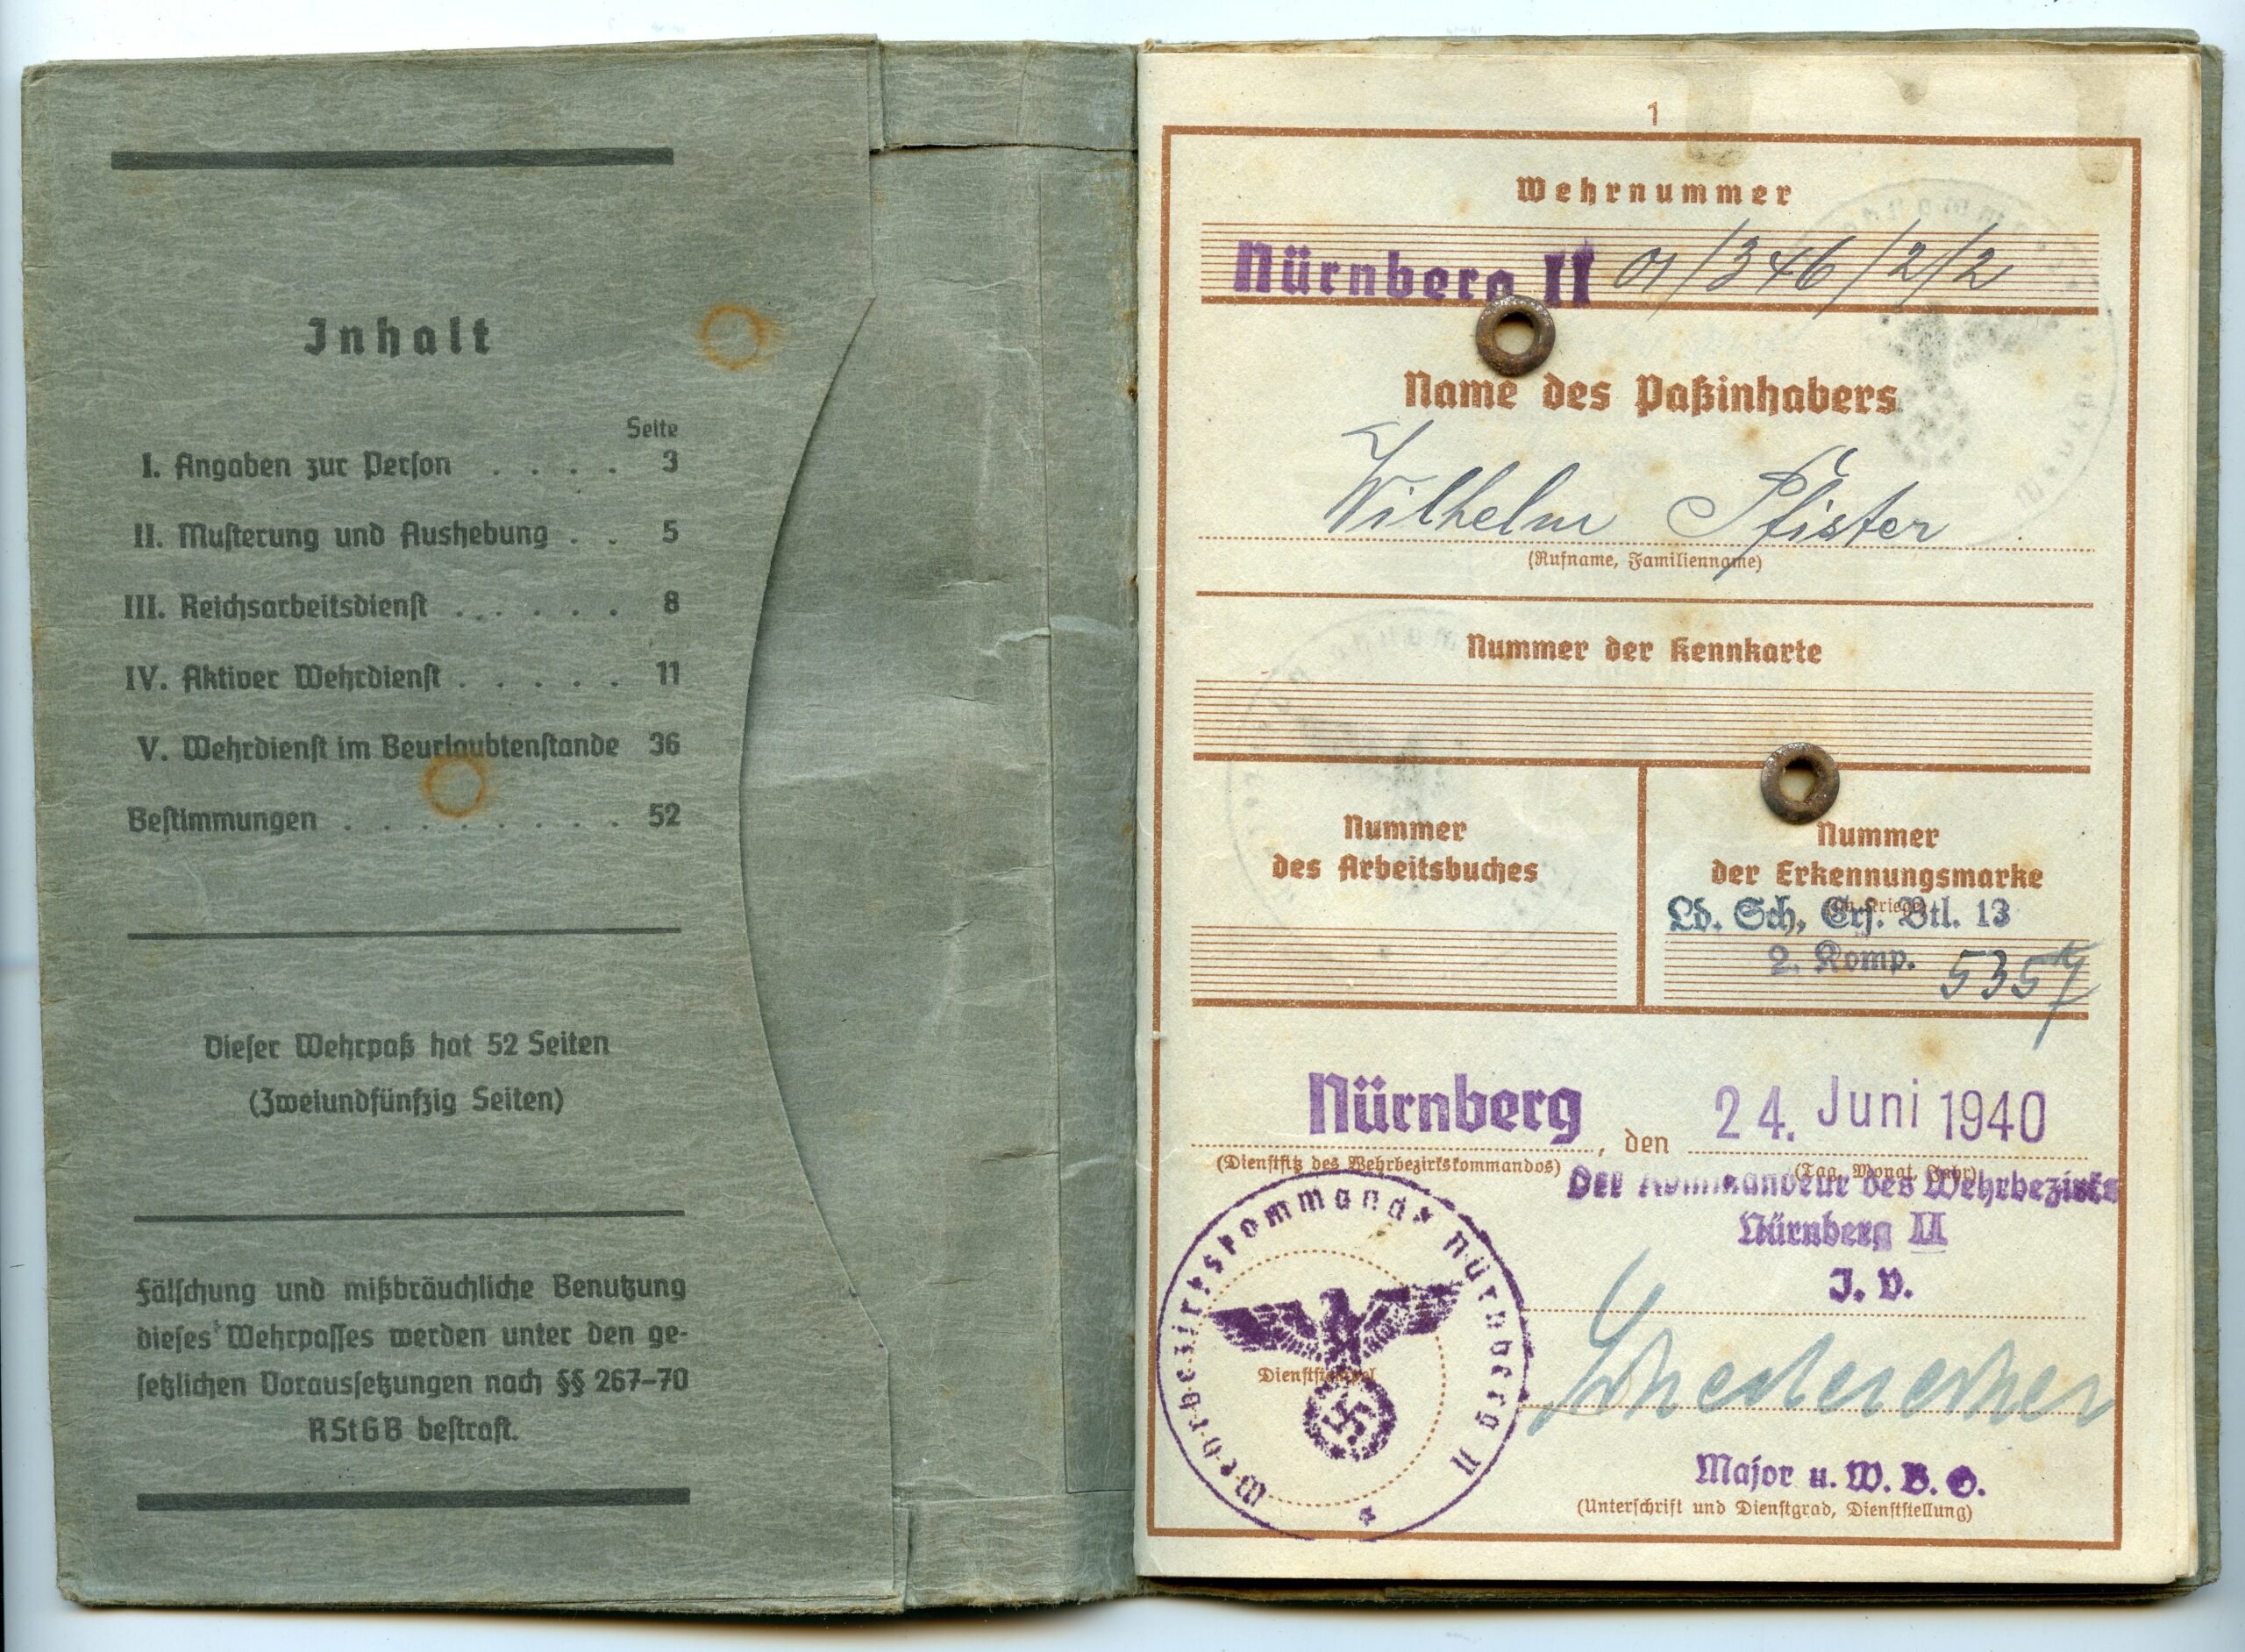
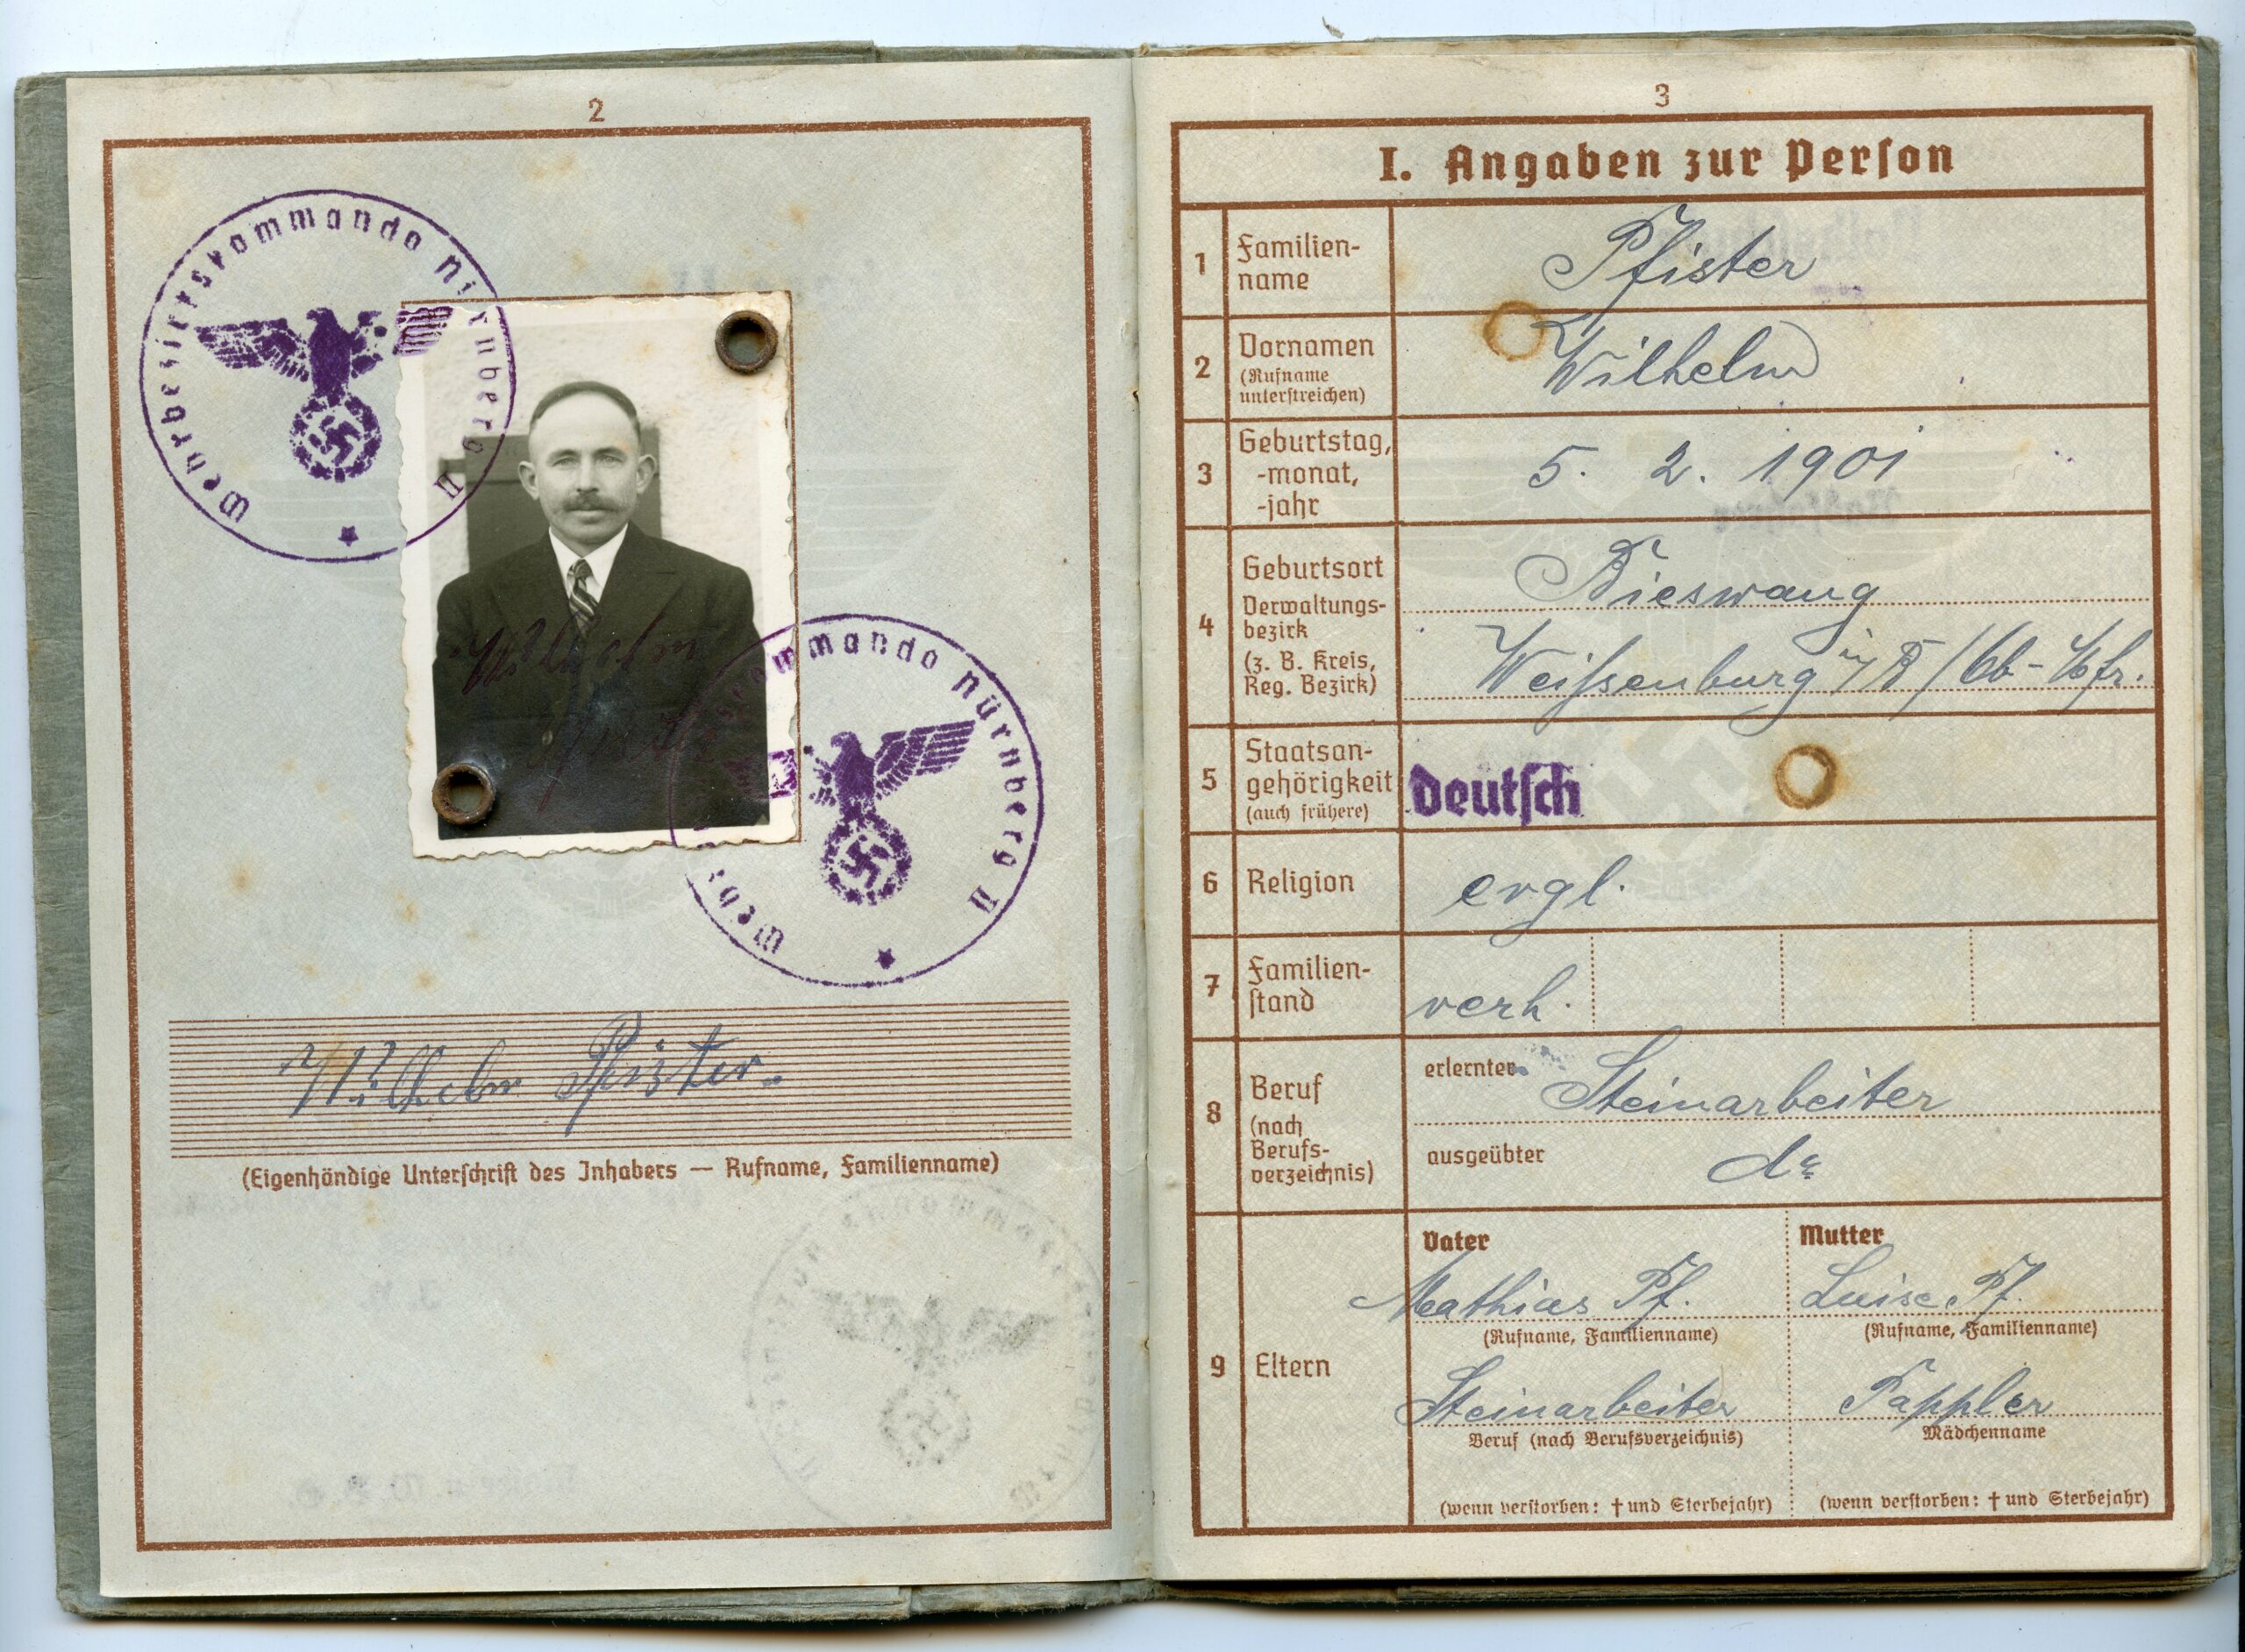
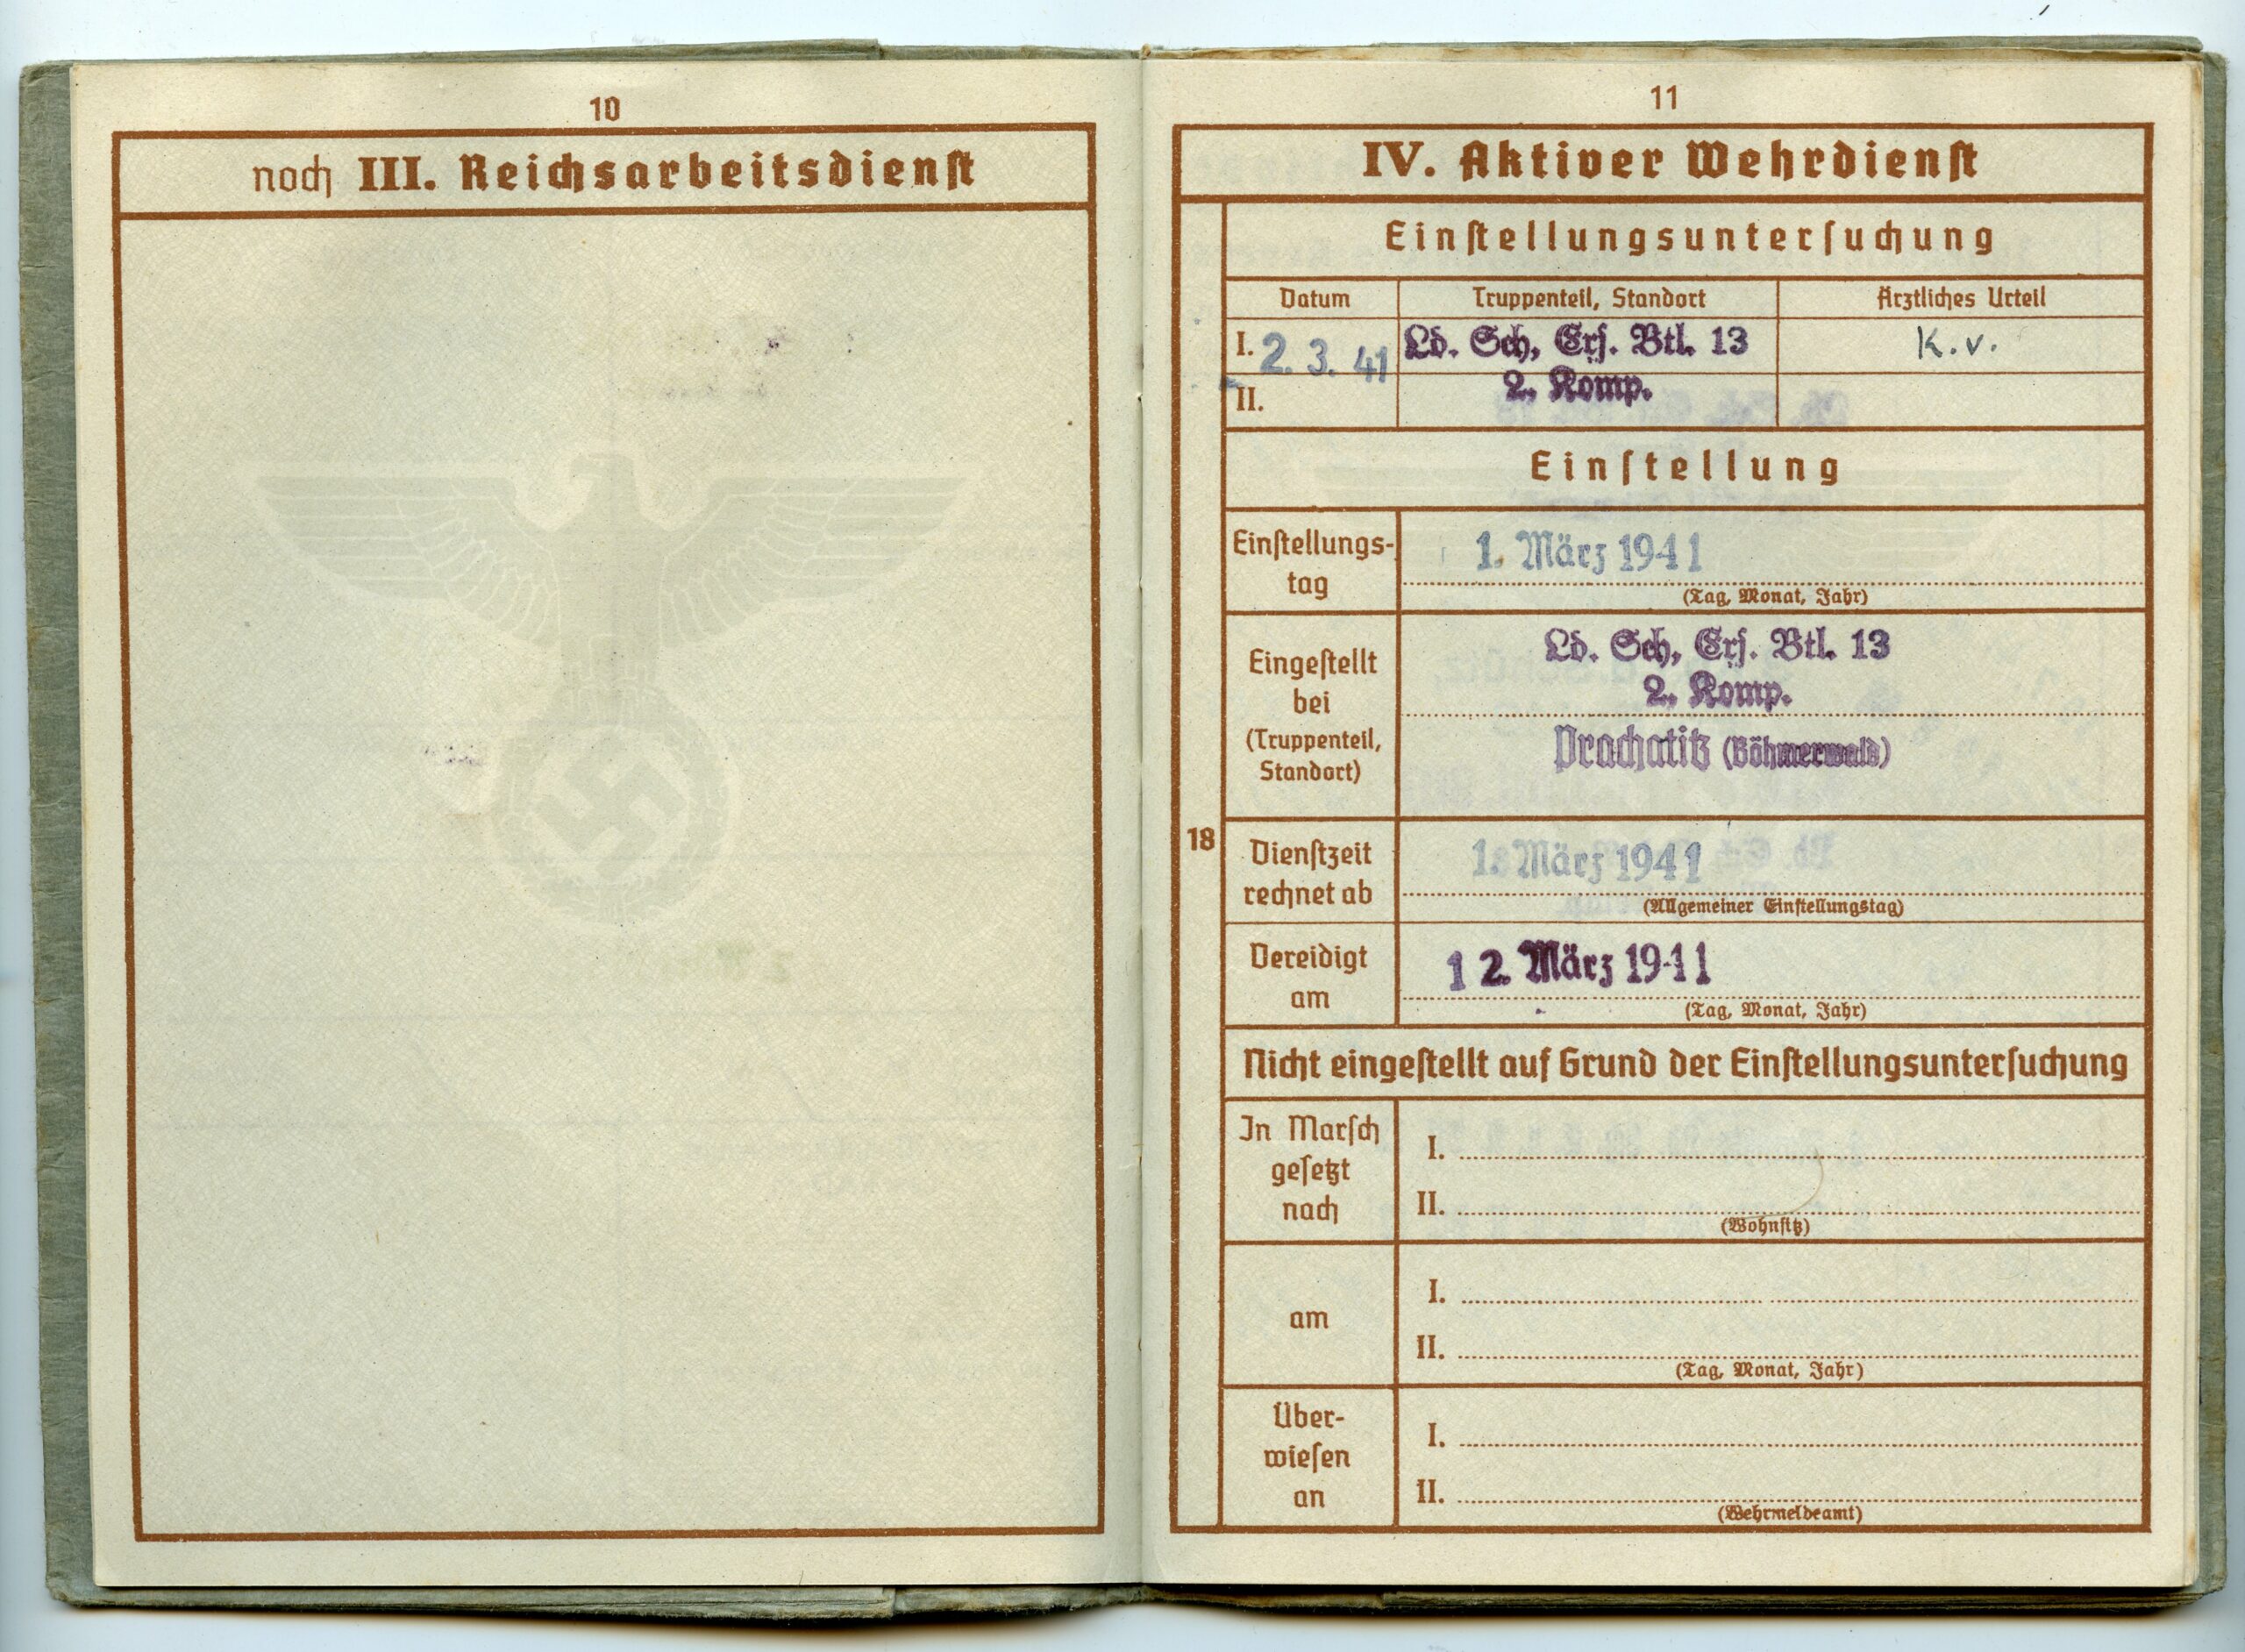
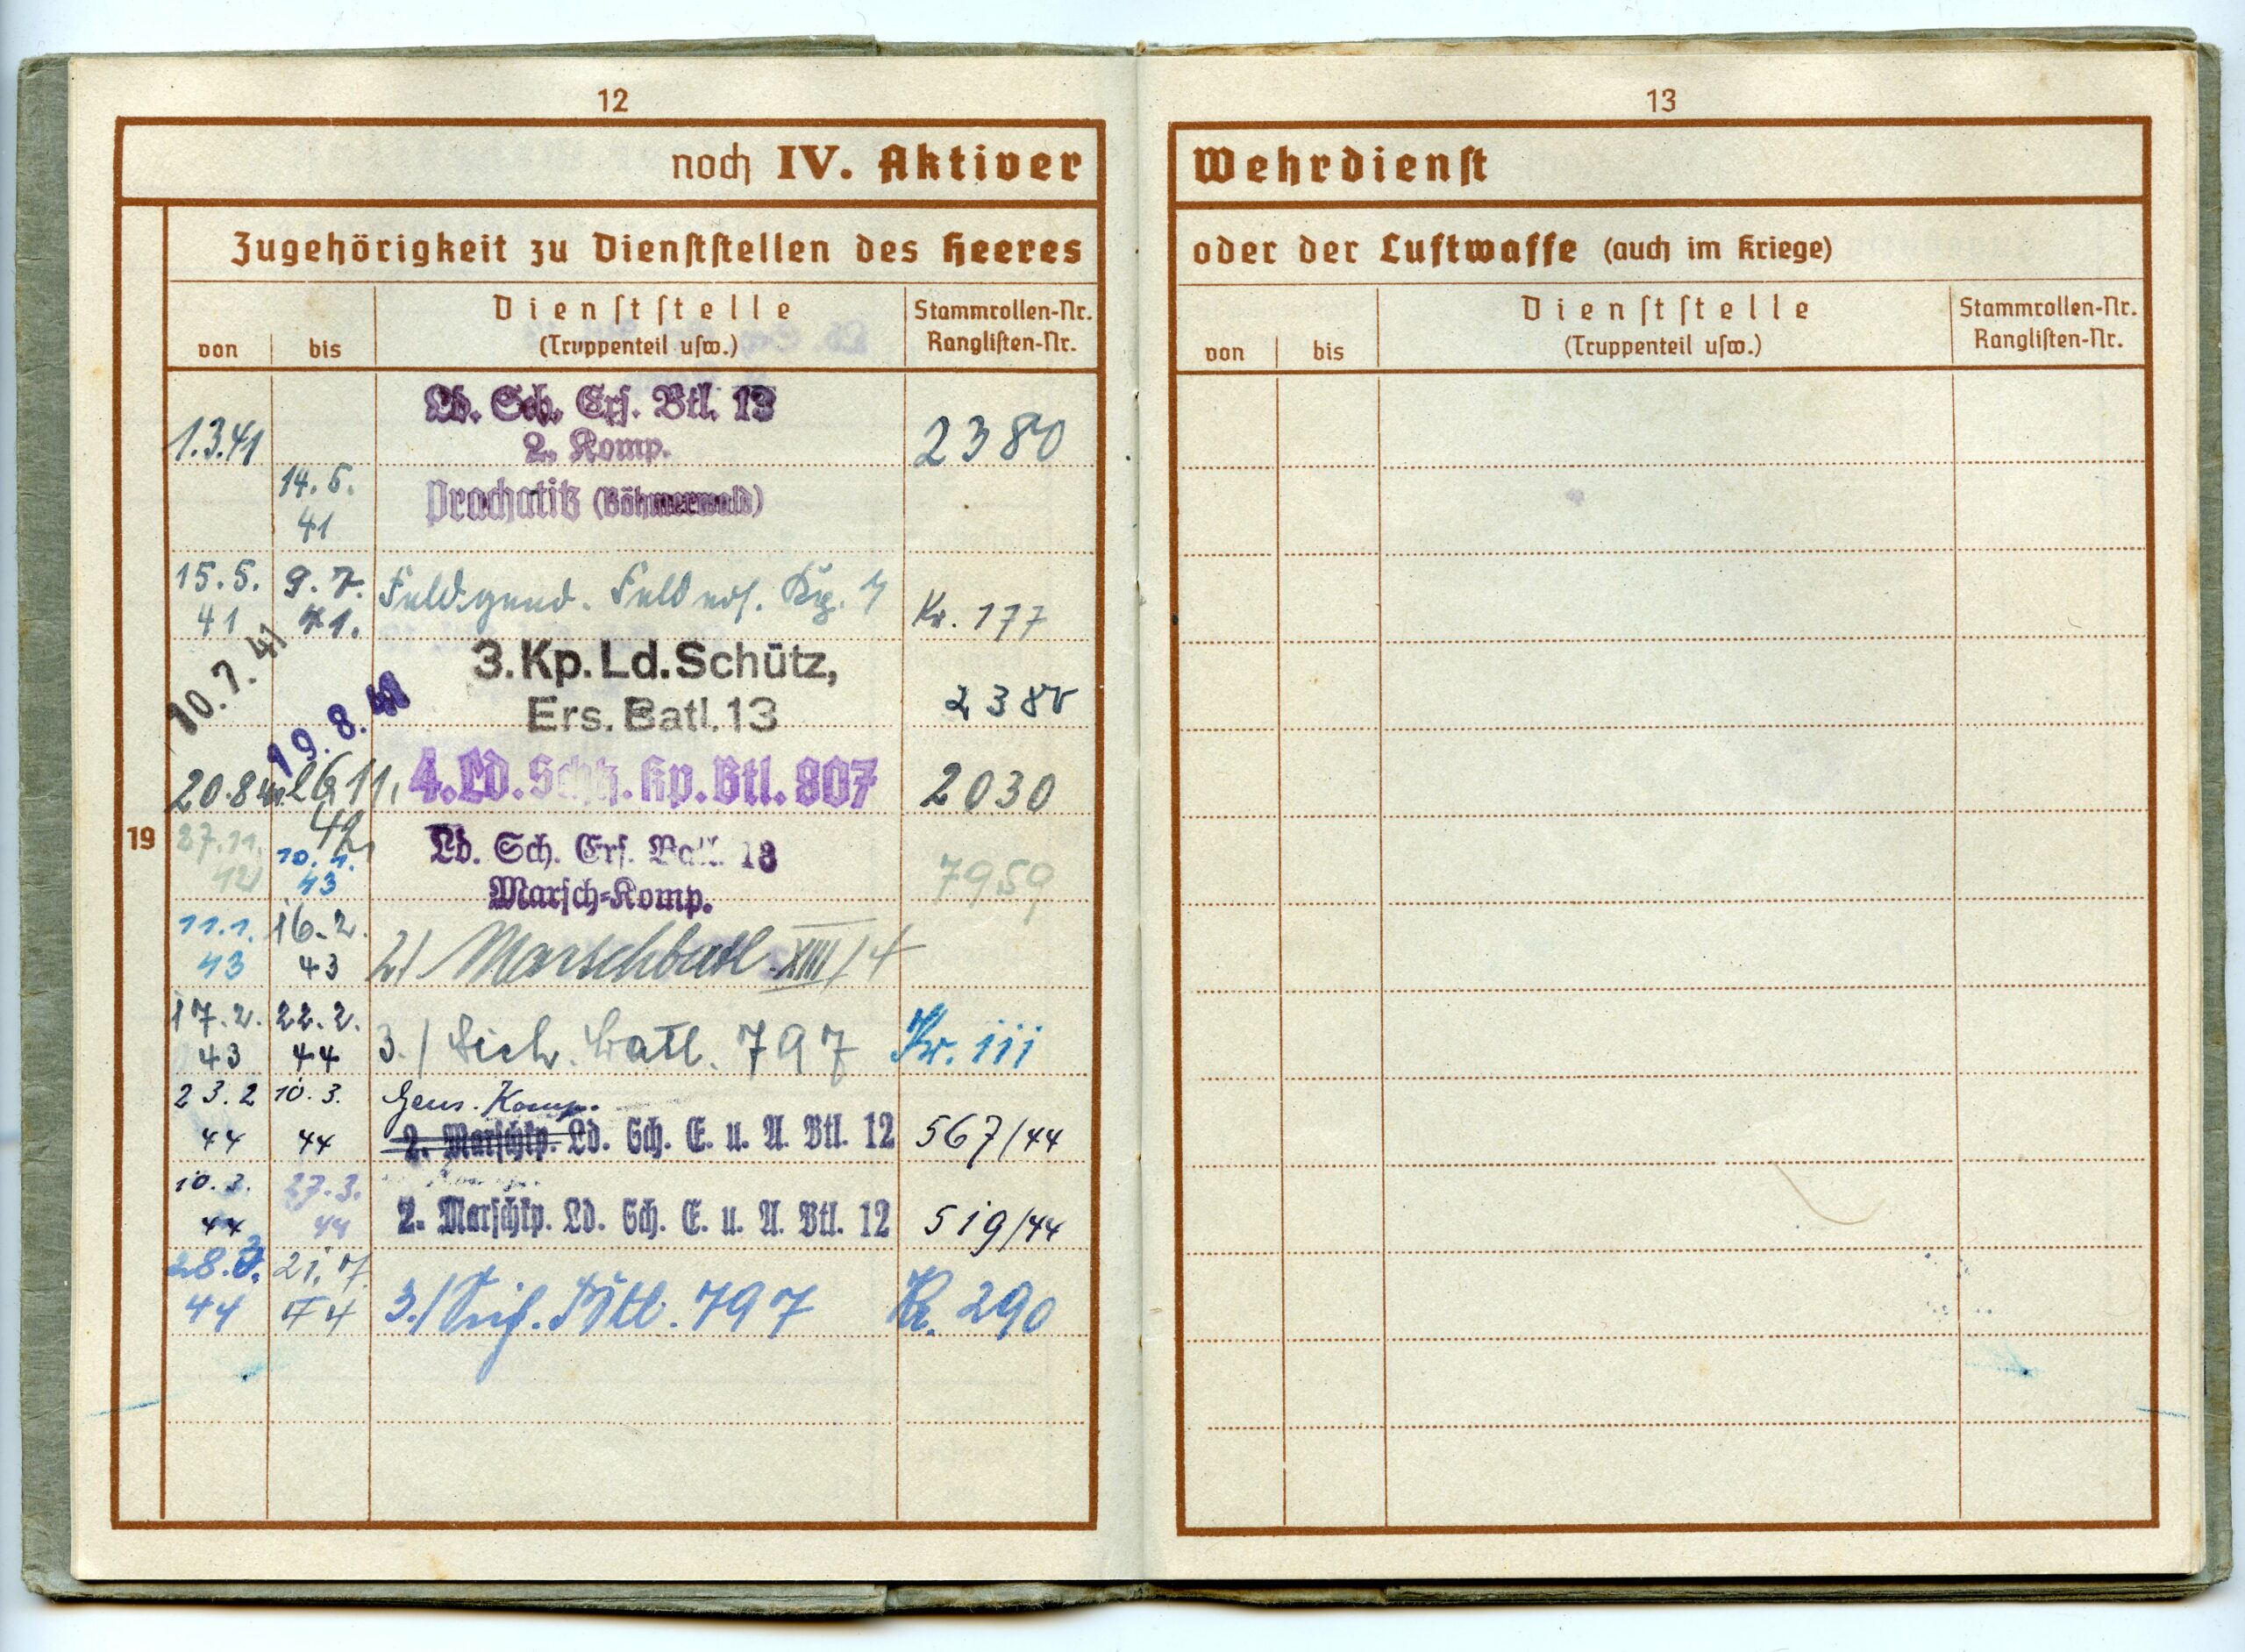
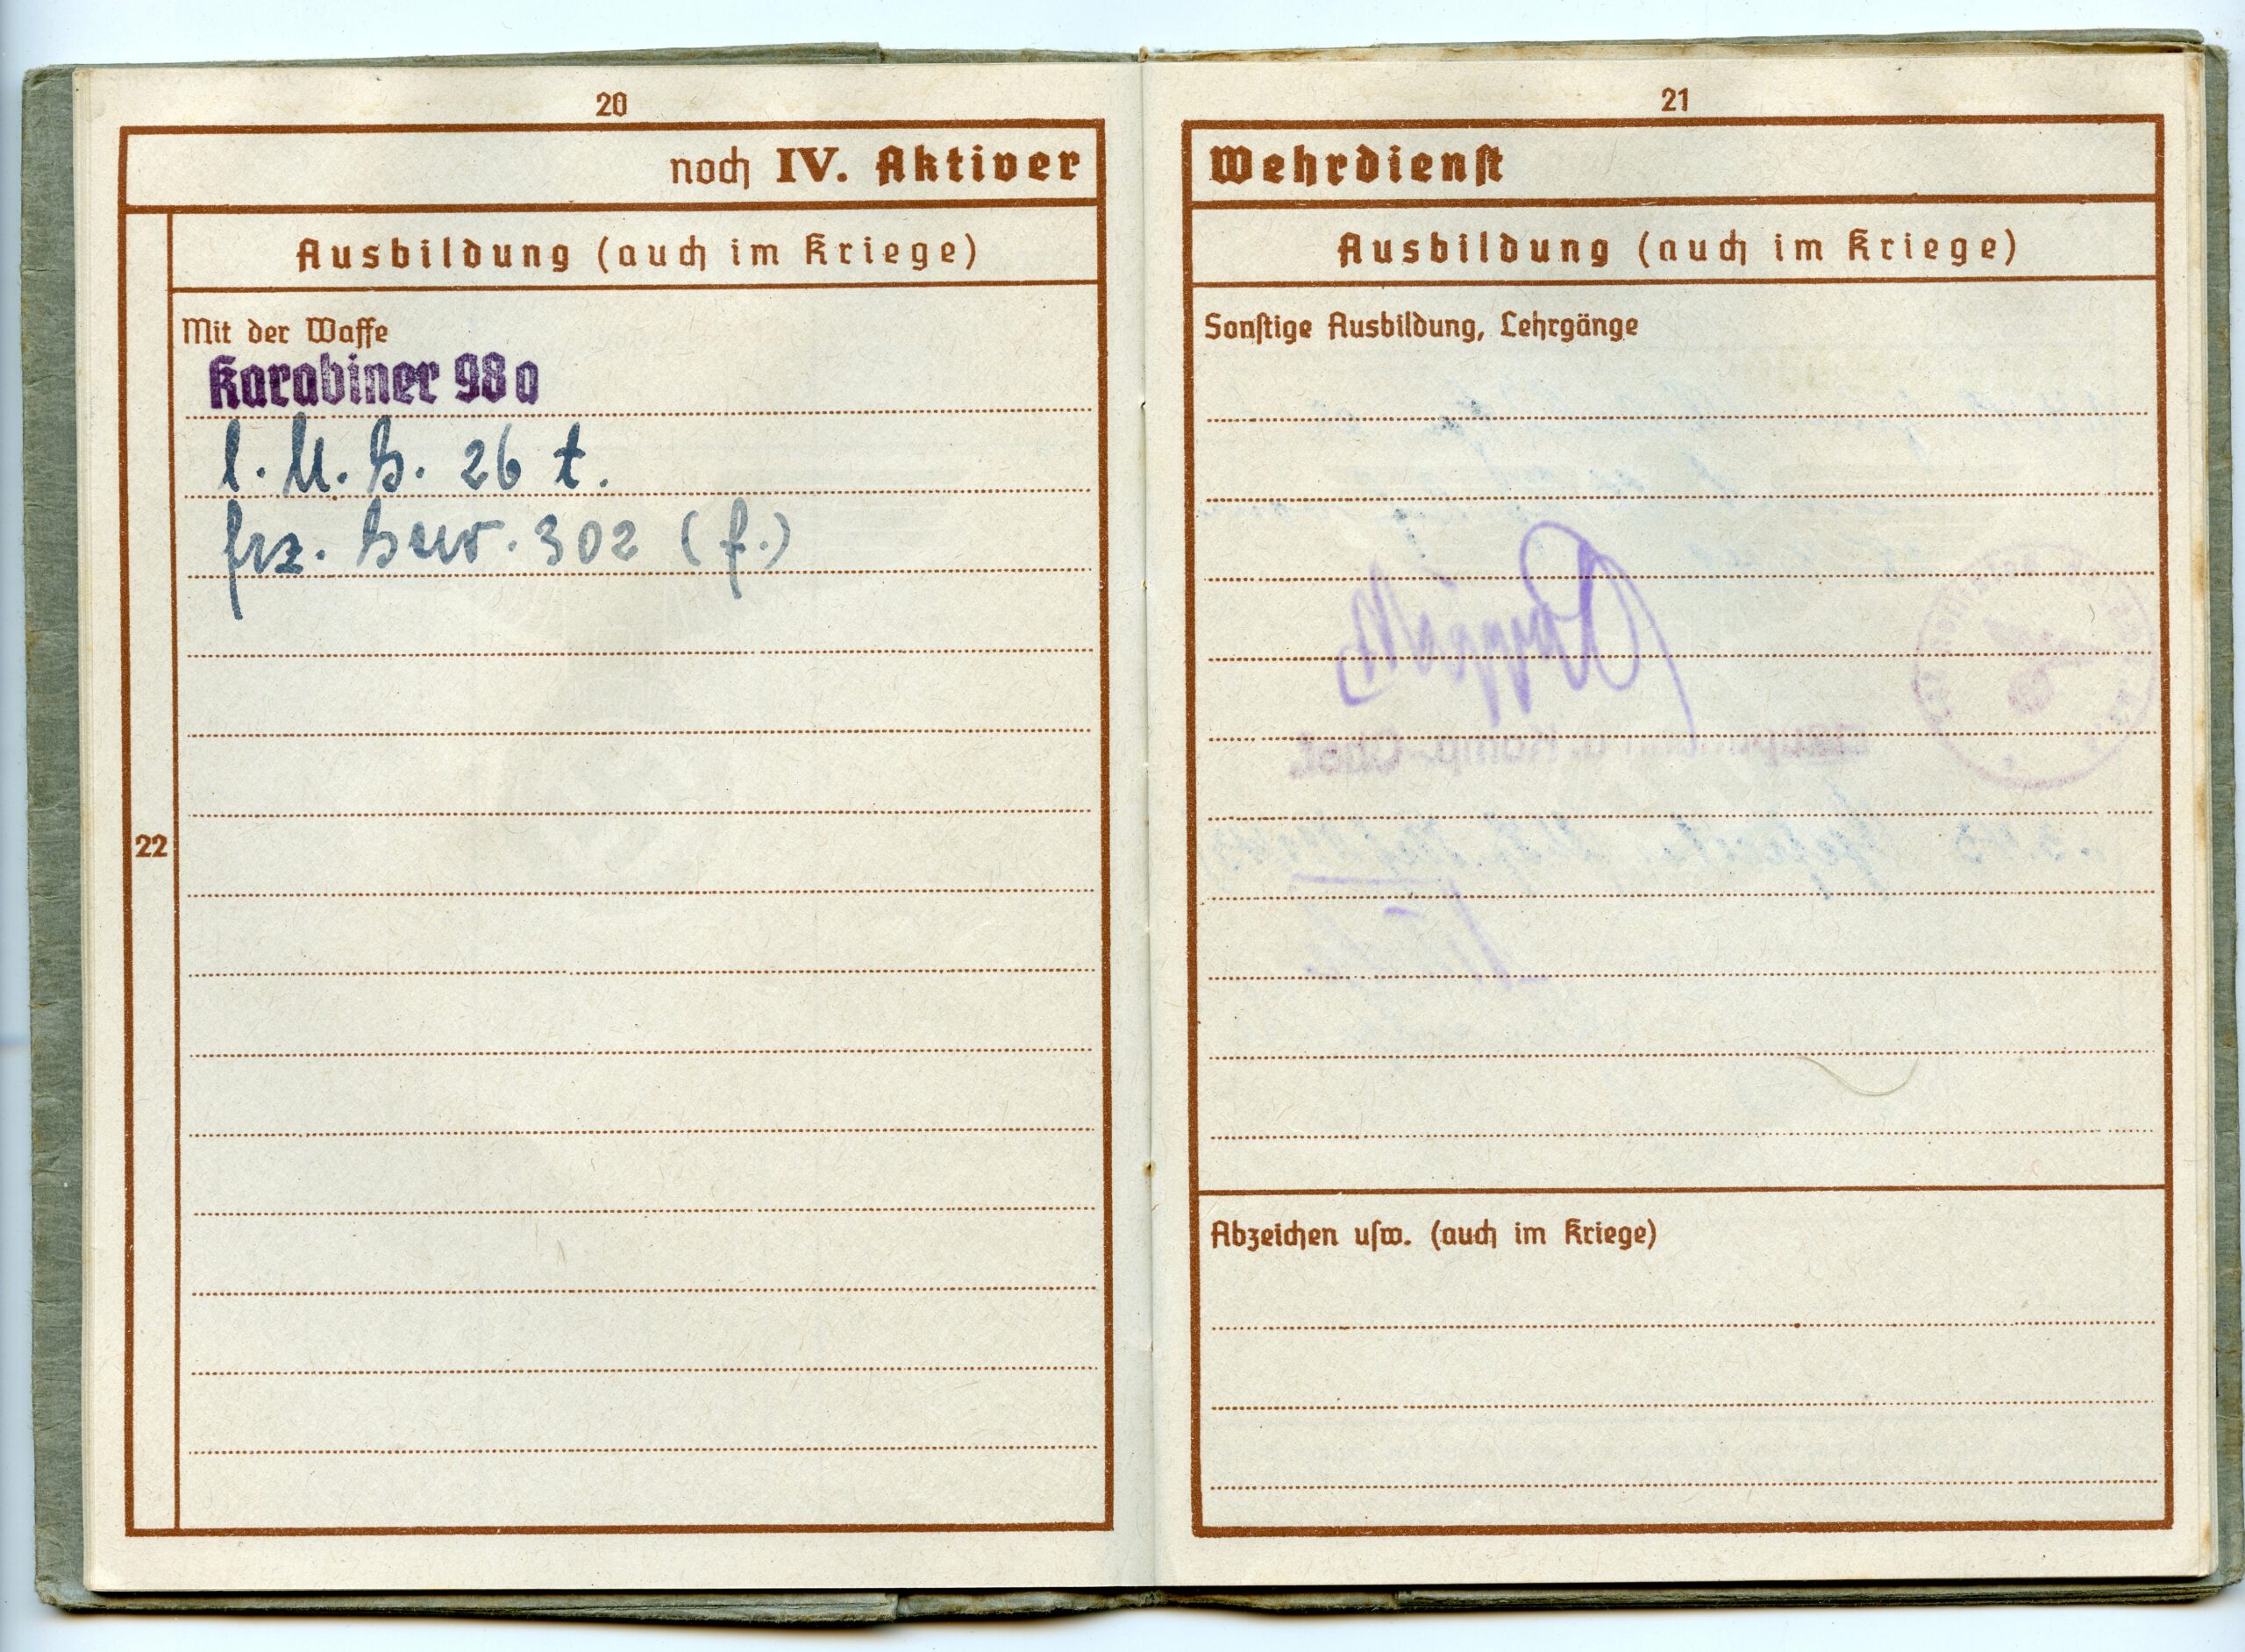
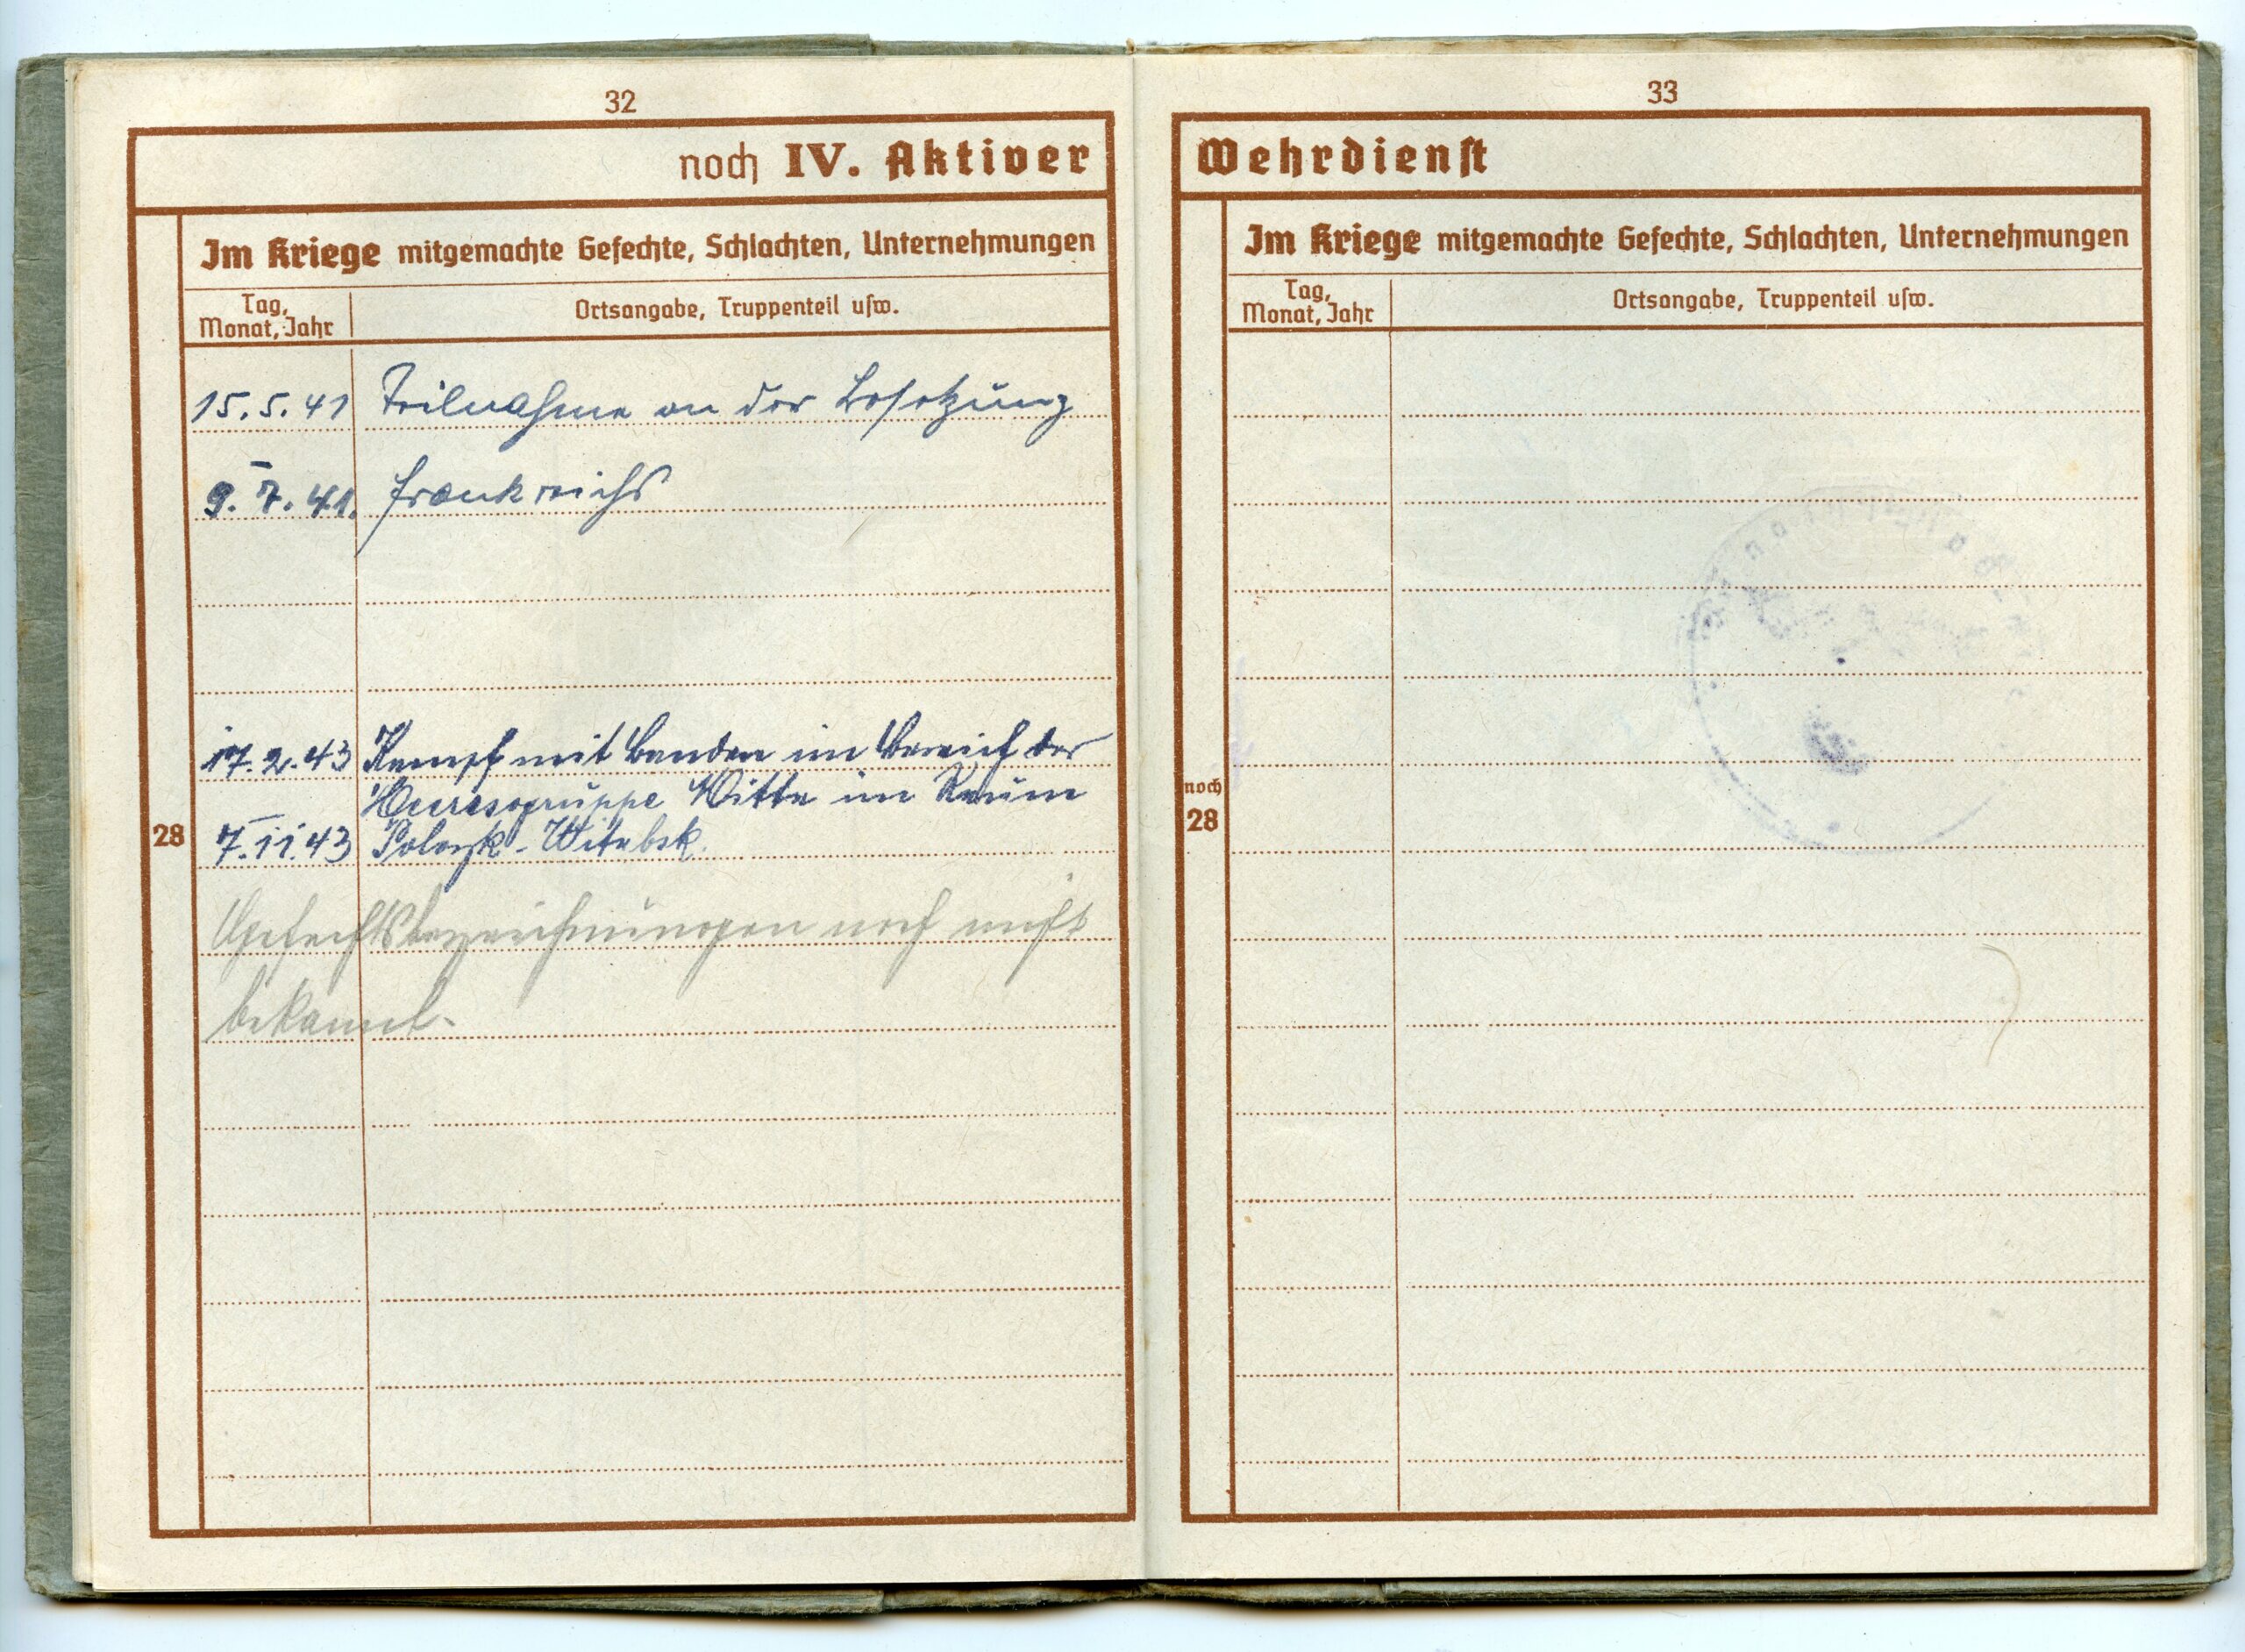
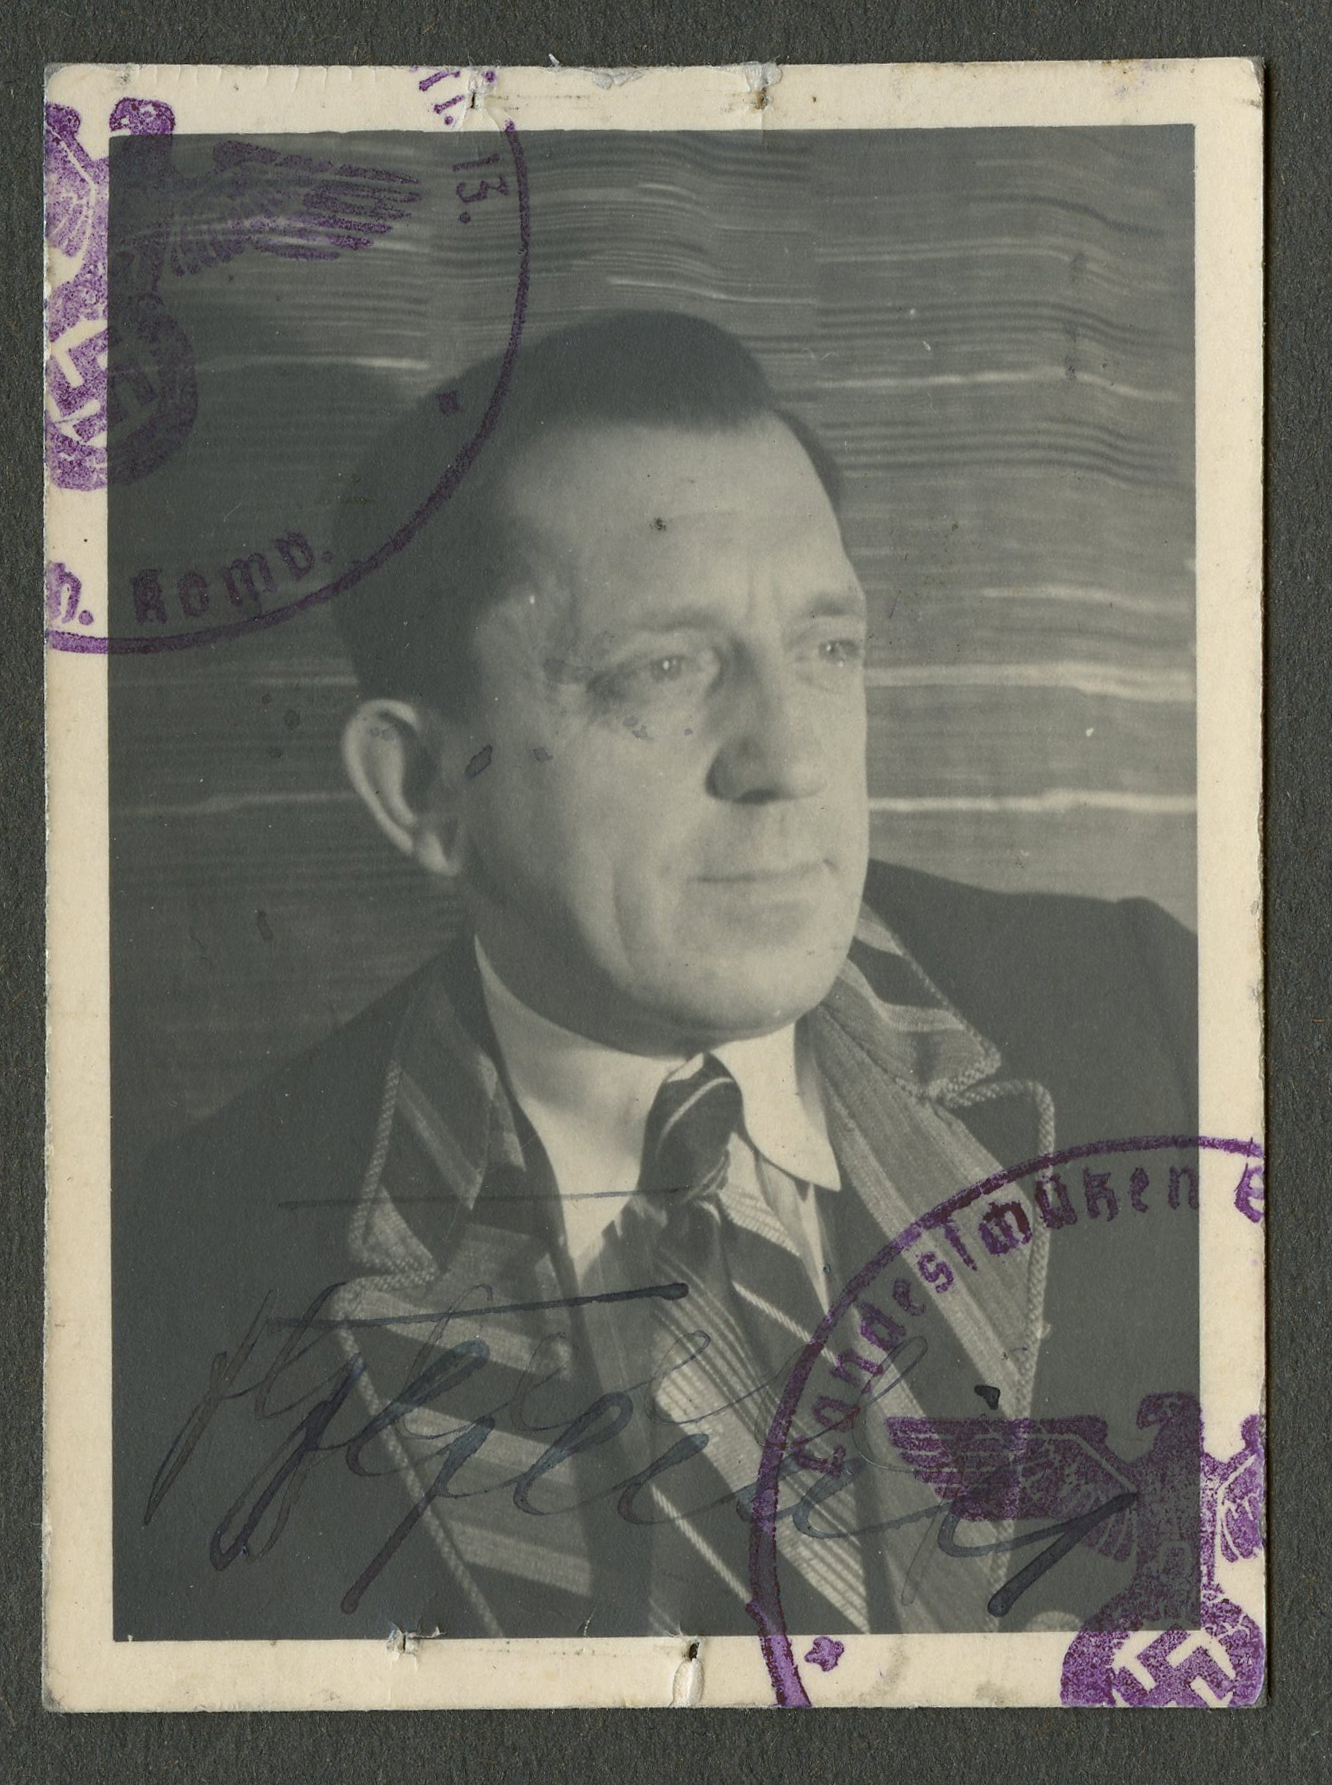
Wilhelm Pfister was born in Bieswang in 1901. He was married and was employed as a stone worker. In March of 1941, when he was 40 years old, he was drafted and sent to a training unit, Landesschützen-Ersatz-Bataillon 13, in Prachatitz (Prachatice in the Czech Republic, annexed by the German Reich in 1938). After a couple of months he was sent to France, to Feldgendarmerie-Feld-Ersatz-Kompanie 7, where he spent two months on occupation duty before returning to his former training unit in Prachatitz. During his training, he was instructed on the use of the German K98 rifle, the French Berthier rifle Fusil 07/15 (Gewehr 302(f)) and the Czech ZB26 machine gun (MG 26(t)). In August 1941, he was assigned to Landesschützen-Bataillon 807, in Nuremberg, where he remained for over a year. After more than a year in the Army, he finally got a new rank, Oberschütze, in April 1942. Eventually, in February 1943, Pfister was deployed outside Germany once again, this time as part of Sicherungs-Bataillon 797. This unit was at that time in the occuped USSR, as part of Army Group Center. Pfister’s Wehrpass indicates that from February through November, 1943, he was engaged in combat against partisans in the area around Polozk and Witebsk, in what is now Belarus. In March, after 2 years of service, he was promoted to the rank of Gefreiter. In February 1944, Pfister became ill and was sent back to Germany to convalesce with Landesschützen-Ersatz und Ausbildungs-Bataillon 12. After a month, he had recovered and was sent back to his field unit, Sicherungs-Bataillon 797, now active as part of the 16th Army. The Red Army reached the border of Latvia on July 17, 1944. A week later, on July 21, Pfister was killed in action in Latvia. It’s not clear if his unit was at that time engaged again in combat with partisans, or (perhaps more likely) fighting defensive actions against Soviet regulars. Such details probably didn’t matter much to the family Pfister left behind. He was 43 years old.
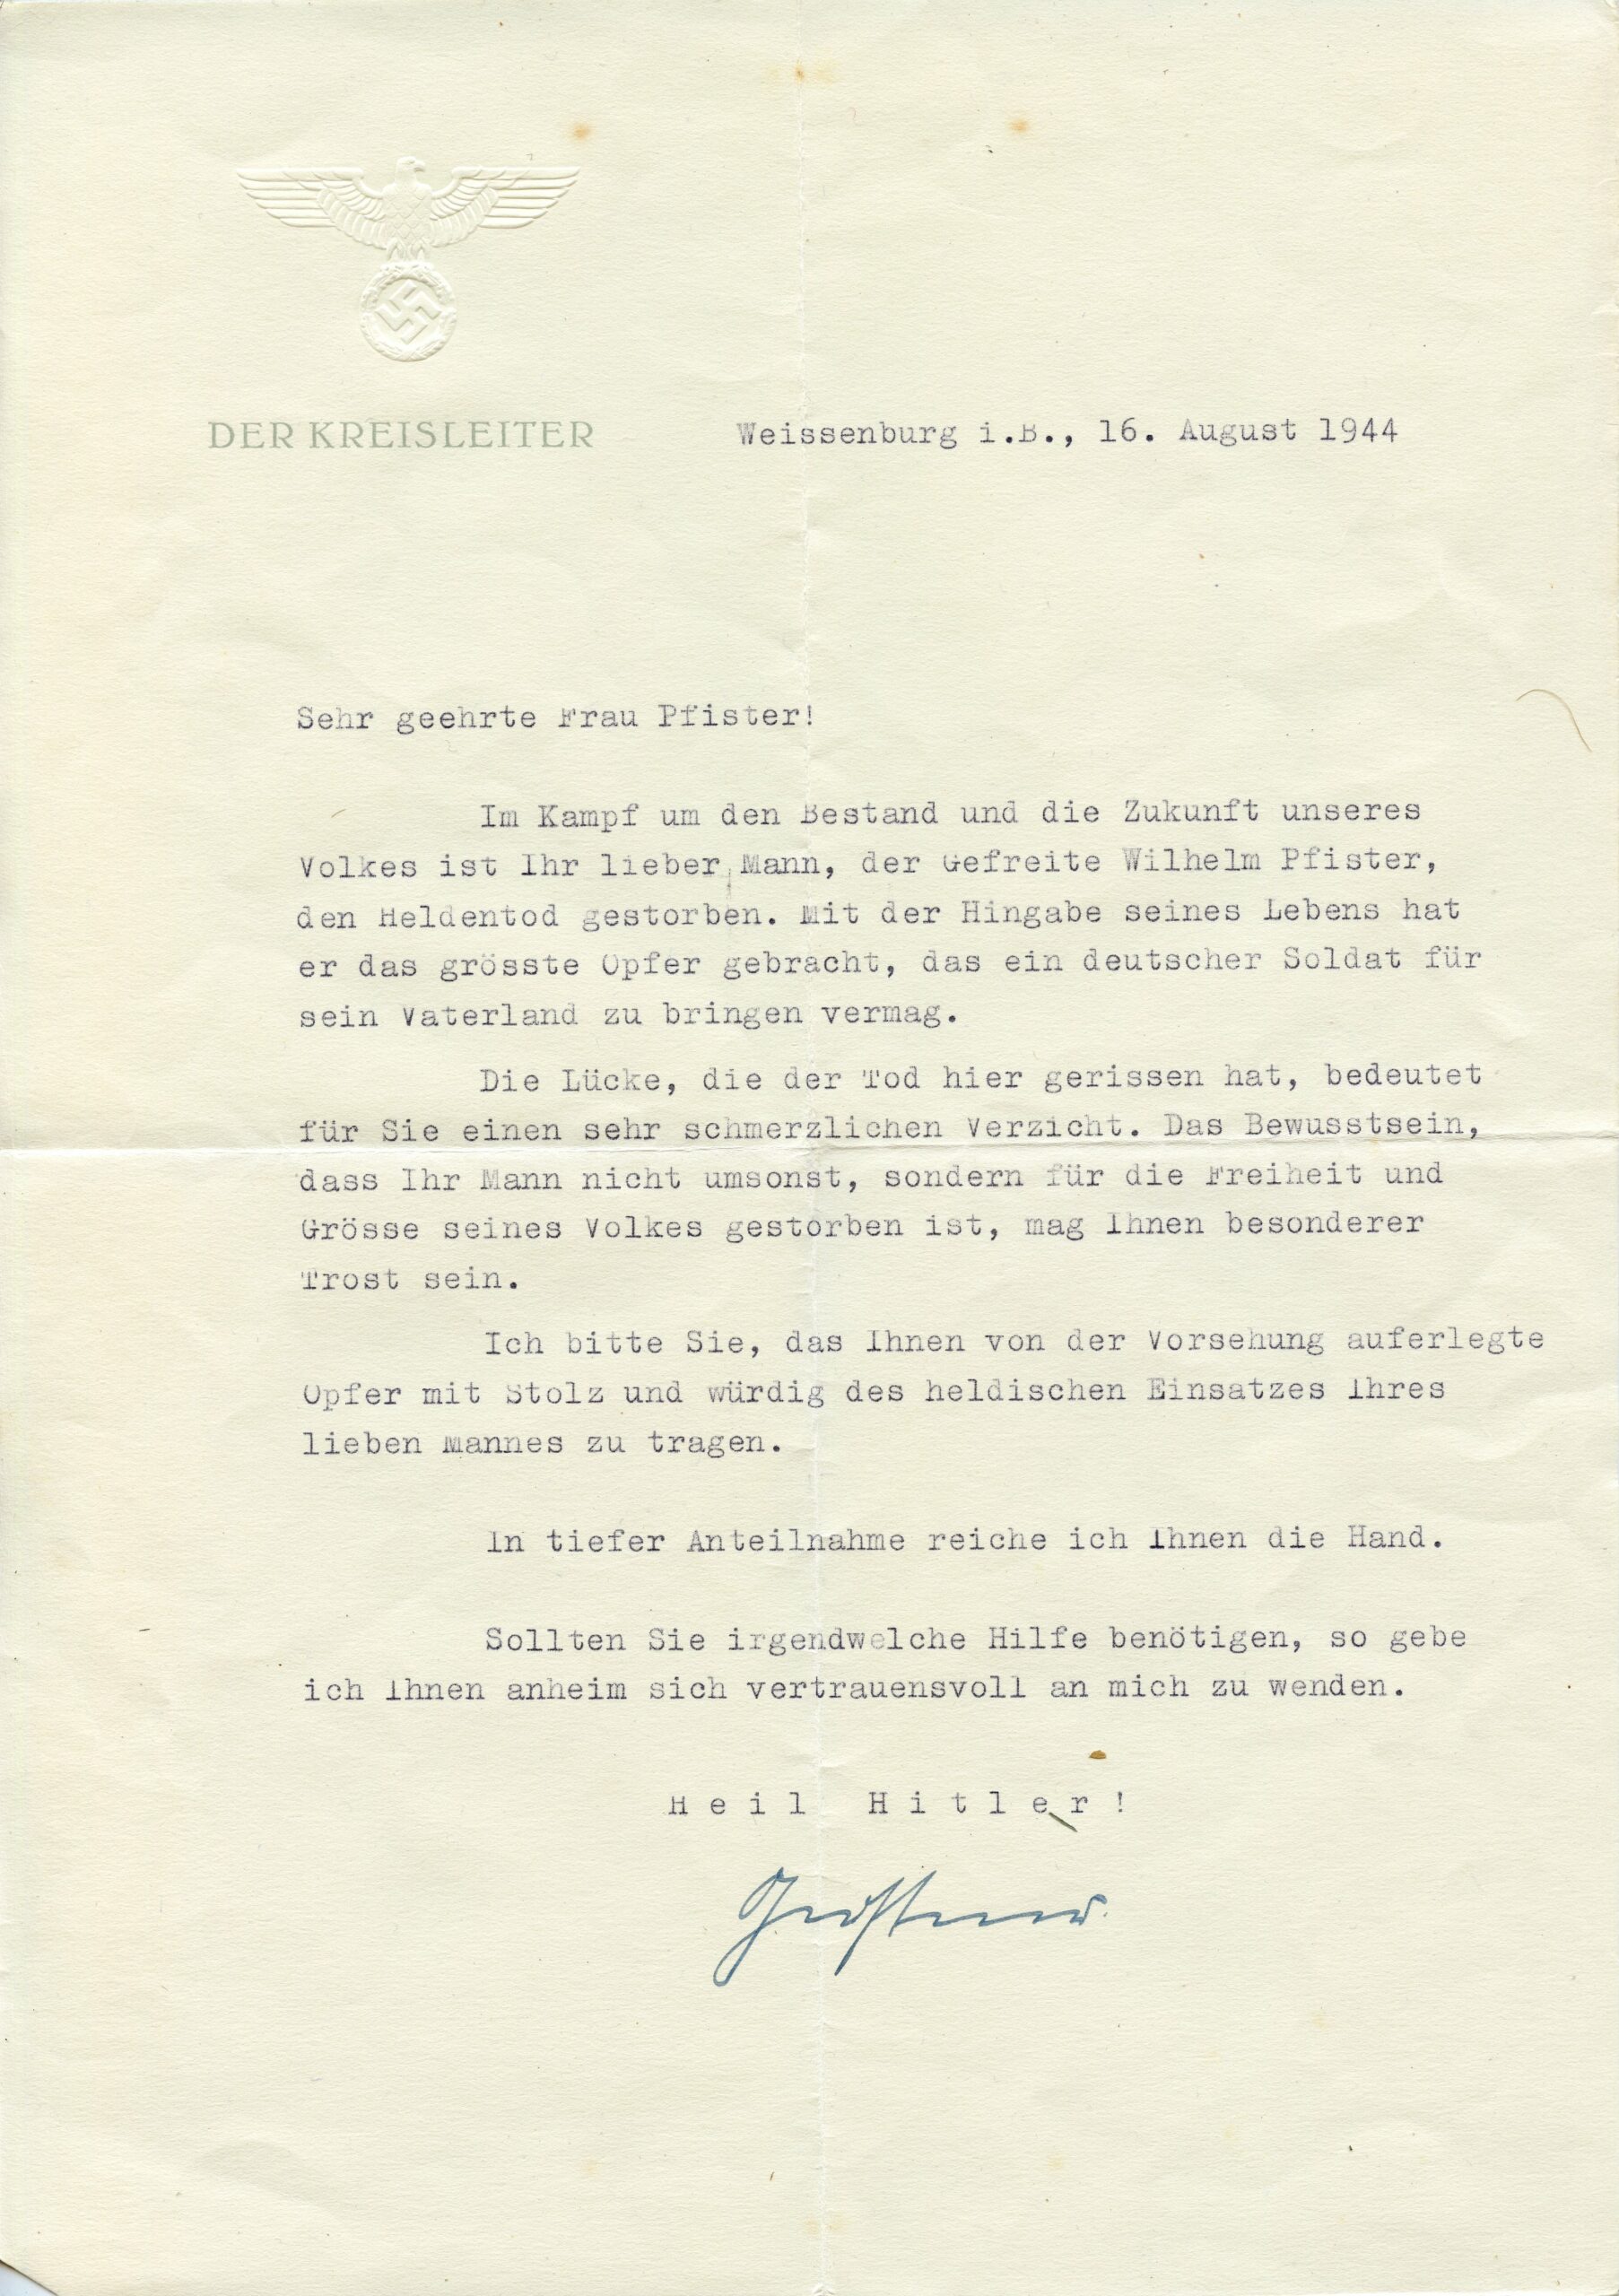
The local Nazi Party district leader sent a letter of condolence to Pfister’s widow, full of patriotic jargon.
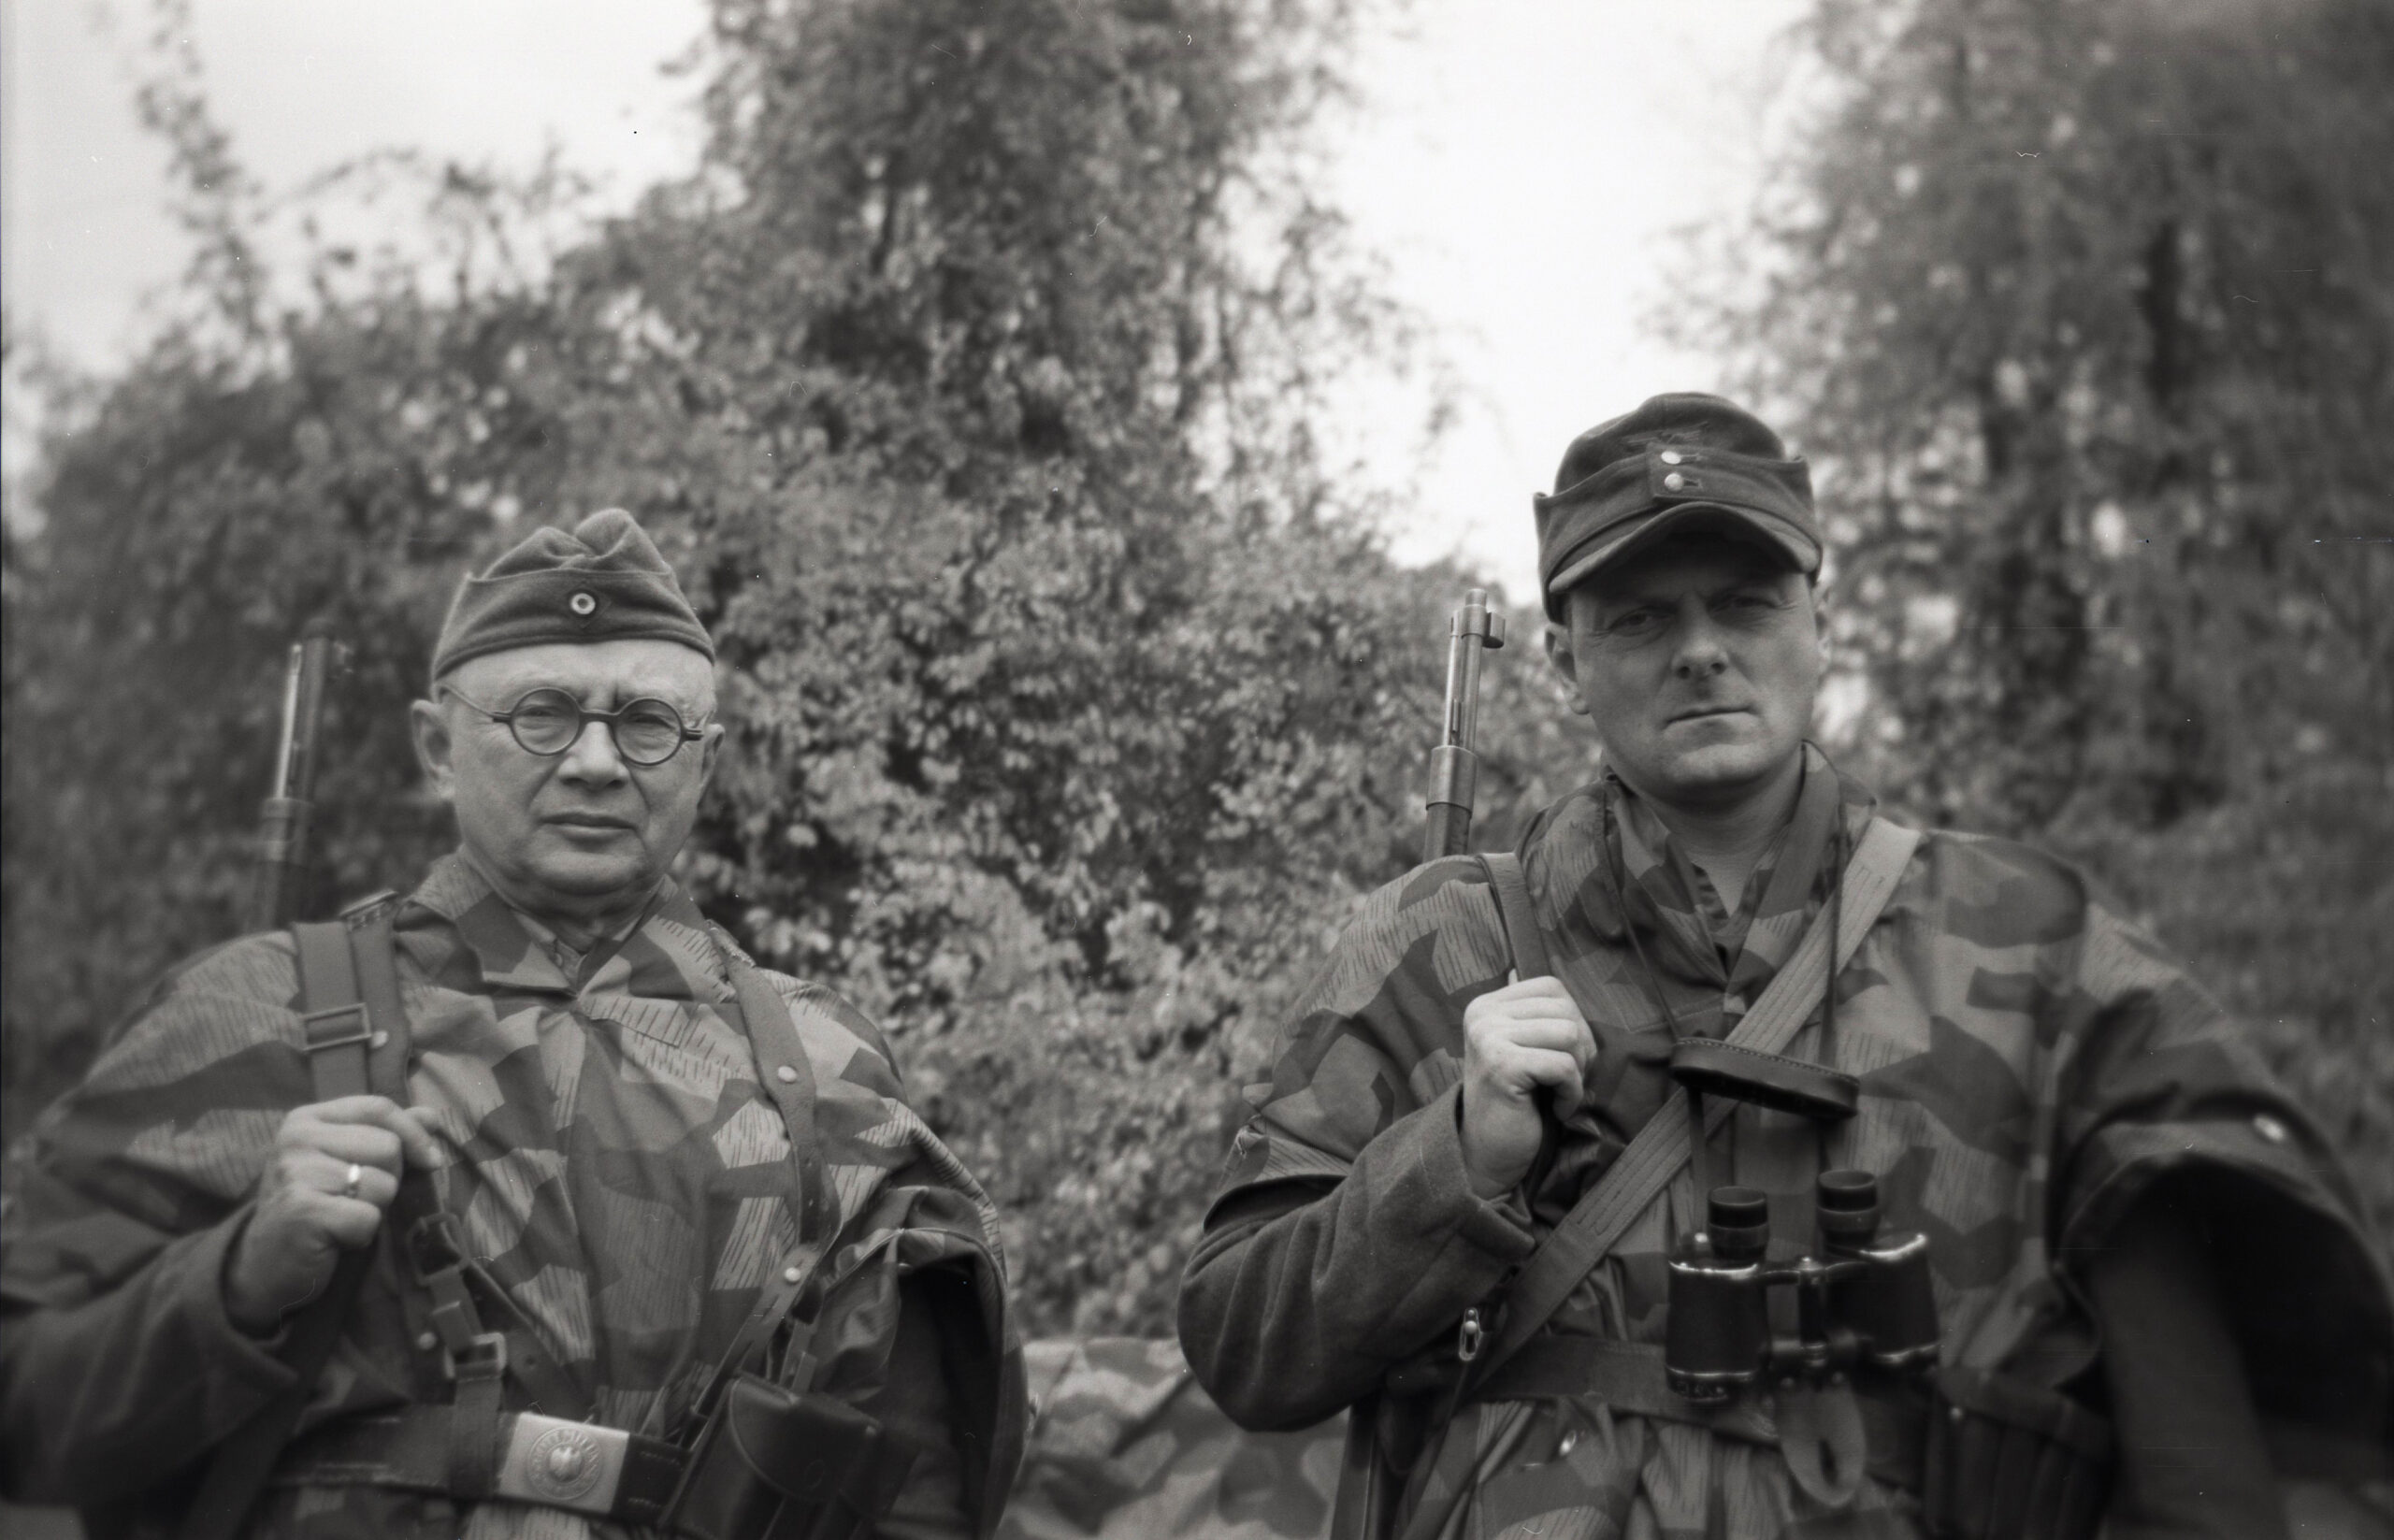
Is it possible to reenact as a WWII German soldier, alone?
If so- what is the minimum that would be needed, what is the minimum it would cost to get started?
Many people live in areas of the Earth where there are no WWII reenactment groups or events. It’s possible that more people will be in this situation in the future, if reenacting as a hobby declines in popularity. Is it still possible for people in that situation to reenact? I think it is. To me, reenacting is an experience-based hobby. Collecting gear items just to have or display them, or assembling kits to take pictures for Instagram, are, for me, not reenacting. I am convinced that the best way (by far) to participate in reenacting, is to be part of a group that does events, as there is a certain scale required for the sake of realism, for many scenarios. Reenacting as part of a group offers tremendous advantages. But joining a local group to do local events simply is not an option for everyone.
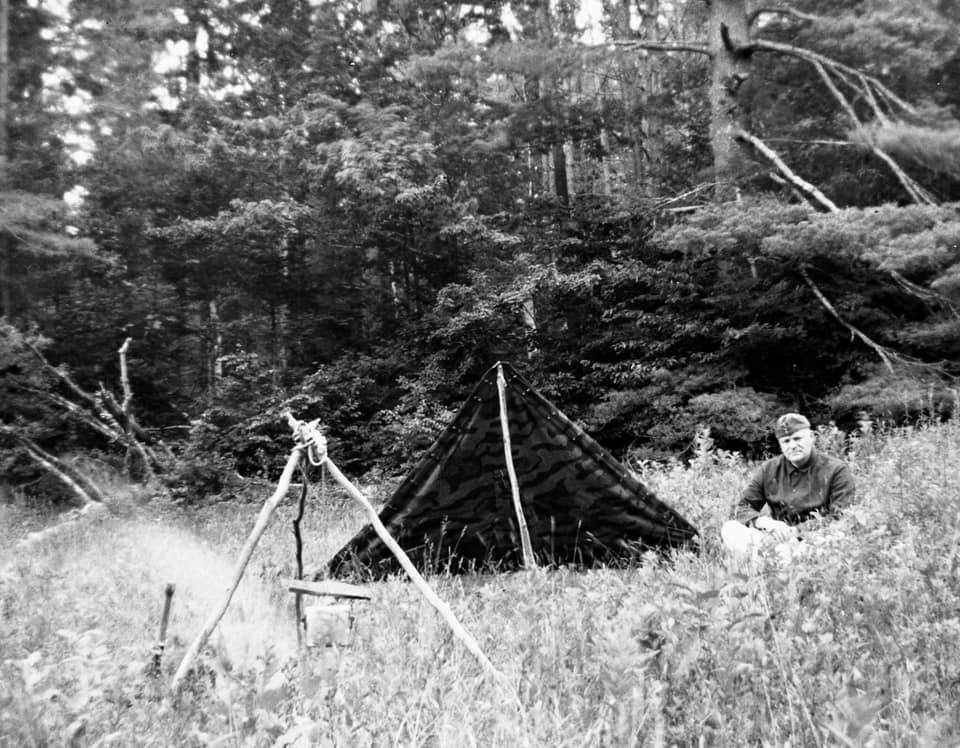
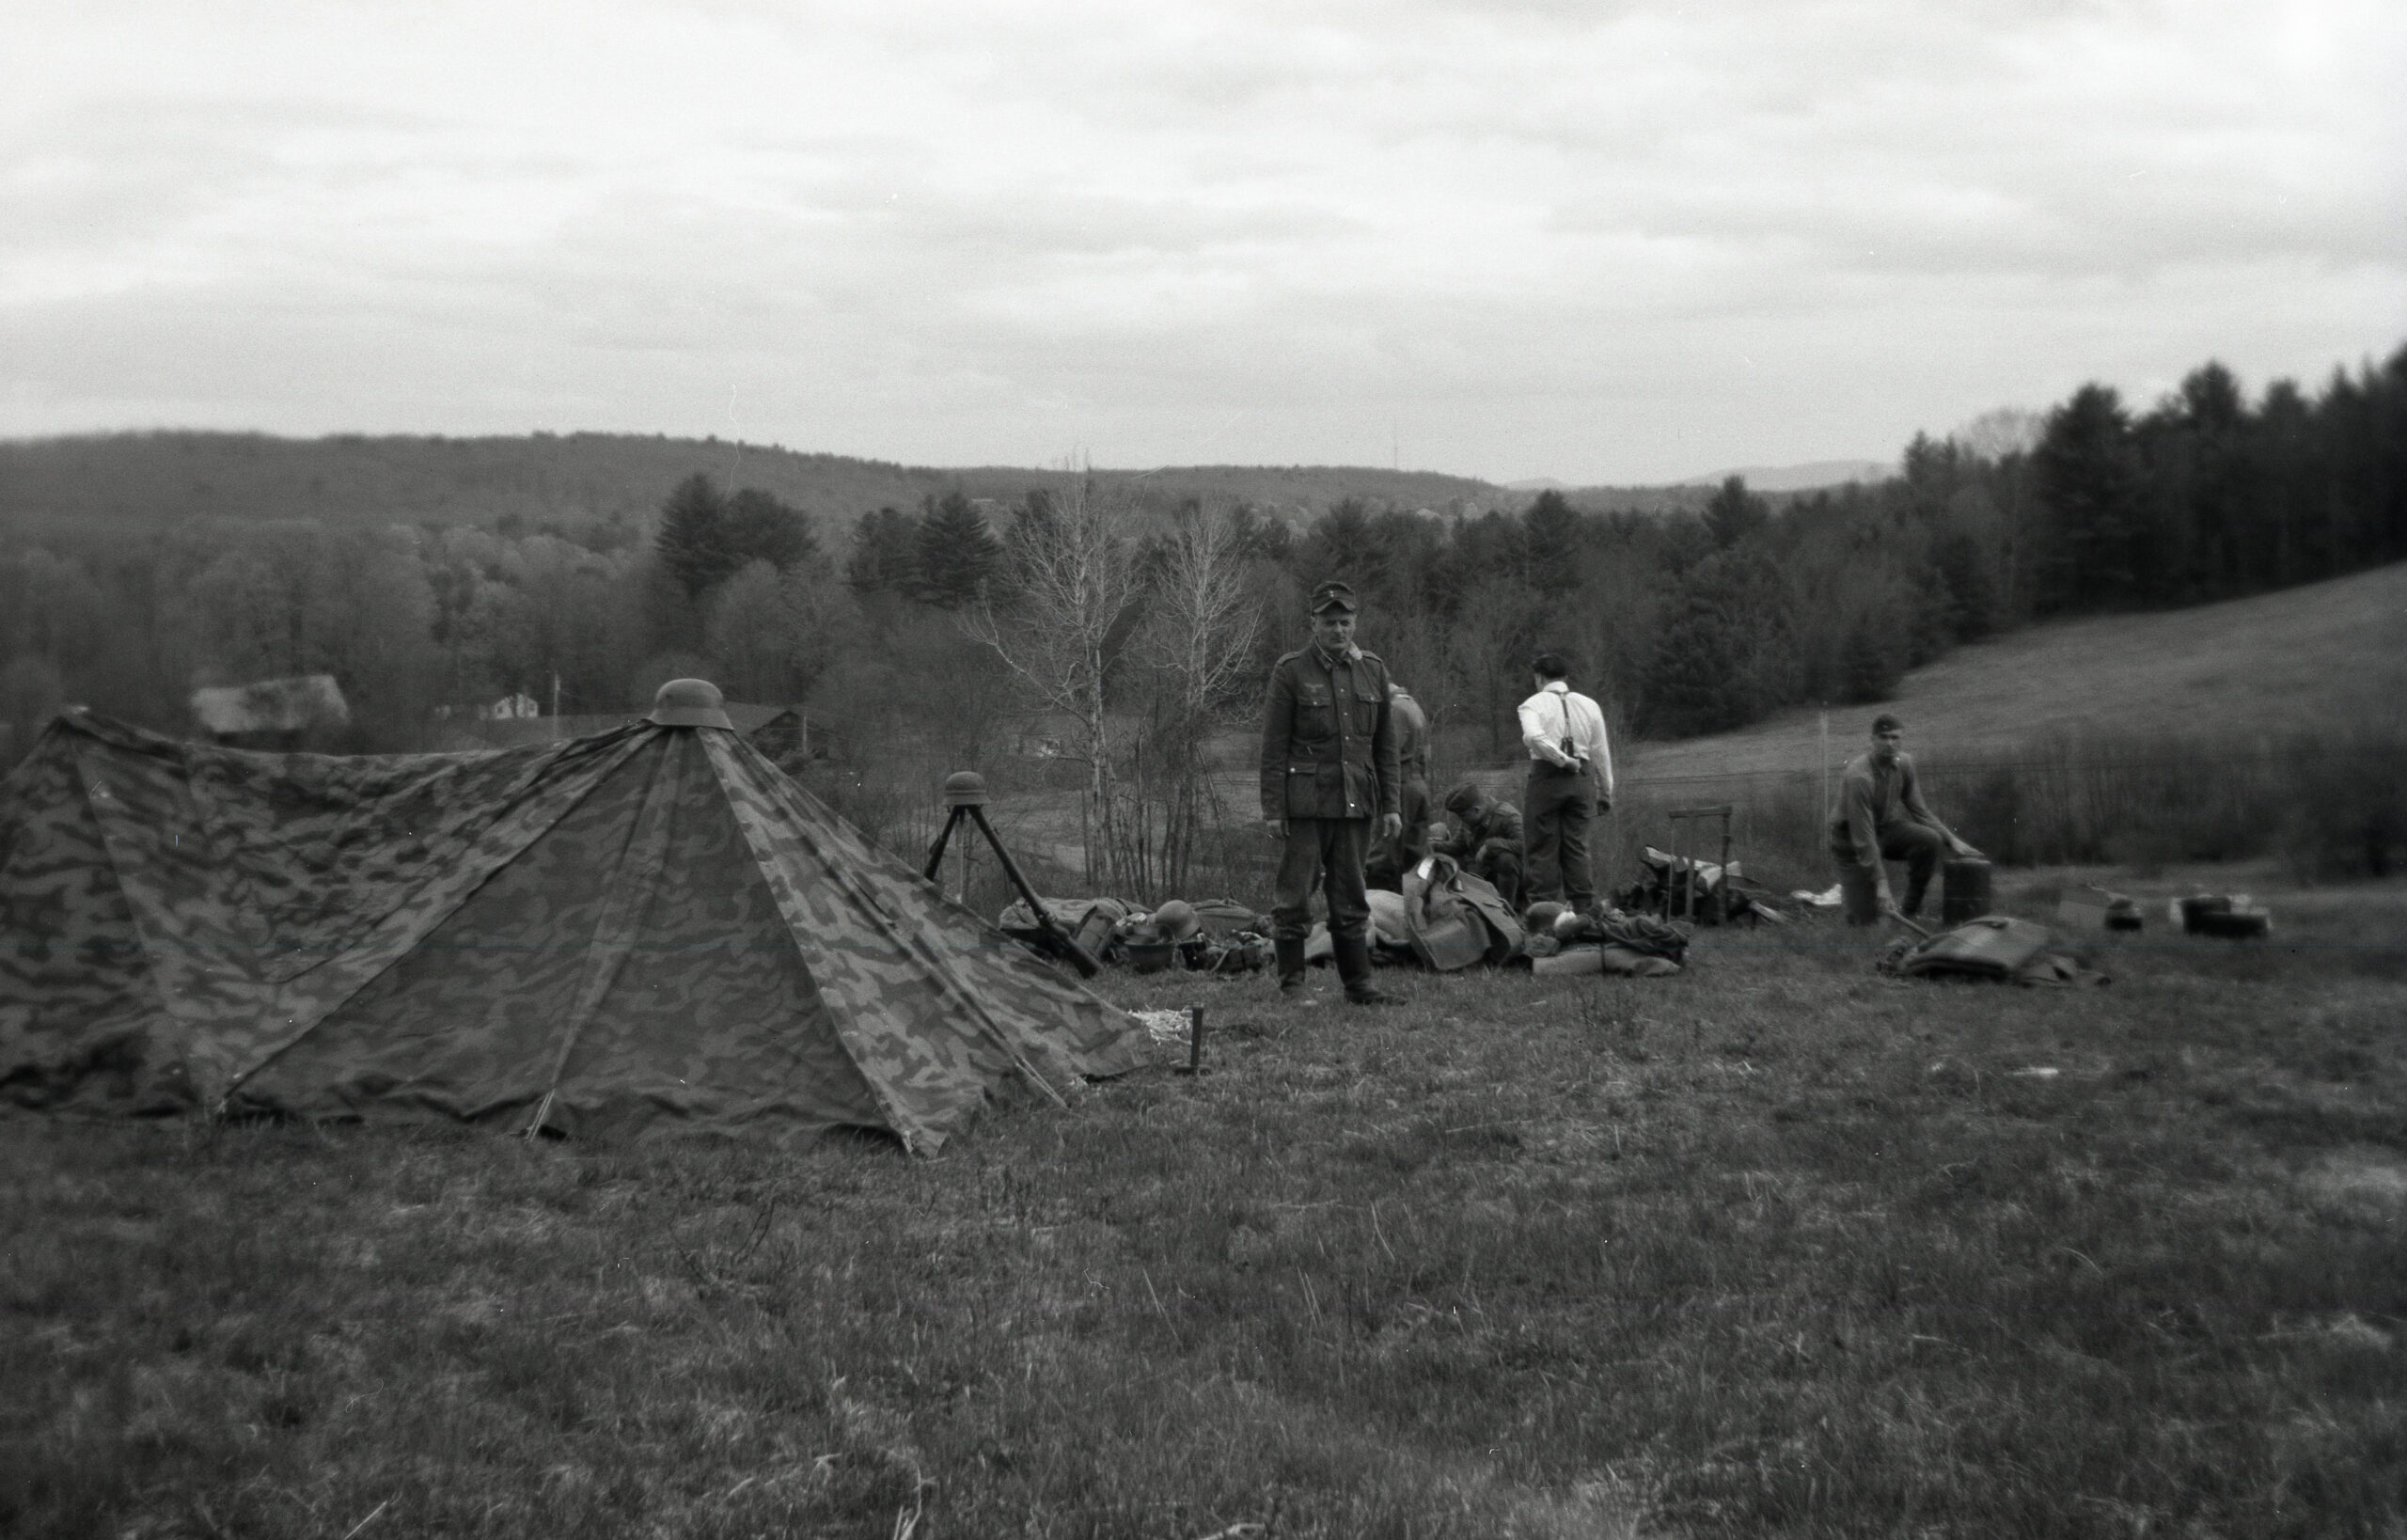
There are many types of experiences that may have been typical for wartime soldiers, that one could replicate on some level, alone. -Marching with a pack -Sleeping with minimal shelter or comforts -Living outdoors -Living with only what you can carry -Eating/drinking/cooking with issue type equipment -Making use of issue type uniform and daily use items, and maintaining these
To do this sort of activity, the exact impression being portrayed may not be important. It wasn’t common or typical for a soldier to be alone and not part of a larger group. Participating in a one-man combat reenactment is essentially not possible. Being alone is already a compromise; a person in this setting could perhaps choose a minimal kit geared to experiencing those things which can be experienced, in a realistic way.
-Reproduction Zeltbahn $70 -3 reproduction Zeltbahn stakes $18 -Postwar Romanian surplus German-style mess kit $20 -Reproduction Wehrmacht canteen and cup $45 -Reproduction Wehrmacht issue folding fork and spoon $9 -Current production vintage military style wool blanket $26 -Reproduction small Wehrmacht Rucksack $34 -3 leather equipment straps $19 -Reproduction Wehrmacht entrenching tool $30
I haven’t tried this, but I believe all the gear would fit on or in the pack.
This would represent a set of things that would enable one to do a weekend type event (or even a day hike) alone, with period and issue type supplies; it would be a functional kit for experiencing some of the things a wartime soldier may have endured. Total price for this would be $271 plus shipping. These are not necessarily the best or most correct items but I regard them as usable. Some could be upgraded for more money.
This set of things could be augmented with generic period type items like a pocket knife, hand towel, can opener etc. An Esbit stove would also be a handy addition.
In a previous post I showed what I regard to be the cheapest possible uniform that would be usable and applicable for a variety of settings. The cost for that was just over $300. It is sobering to realize that the very most minimal kit one could assemble would cost someone over $600 and that would not be sufficient to participate in most groups or in battle reenactments.
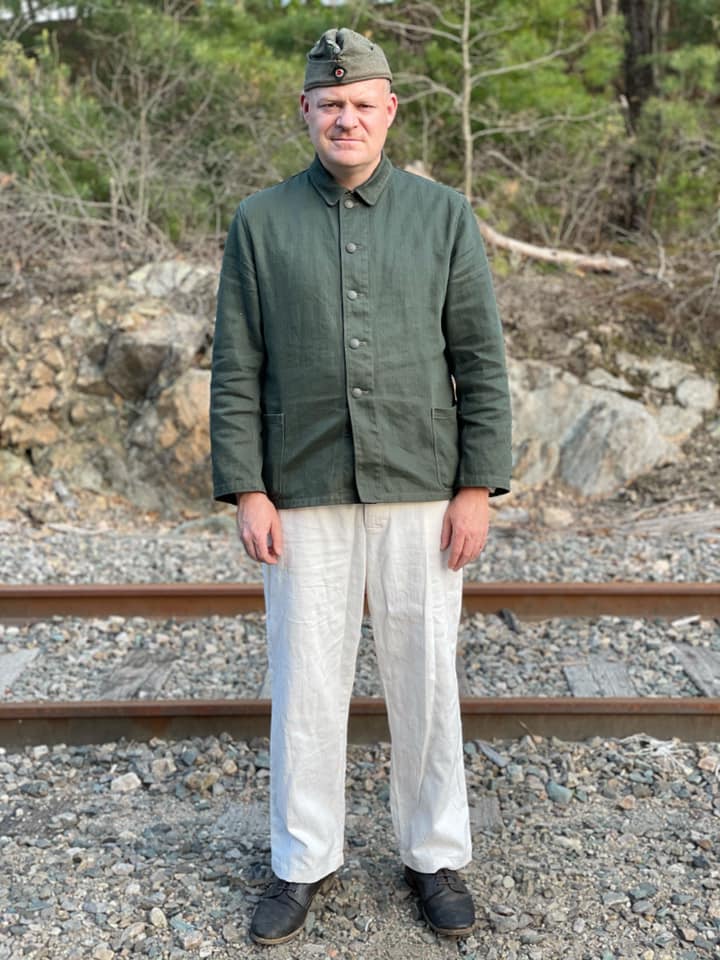
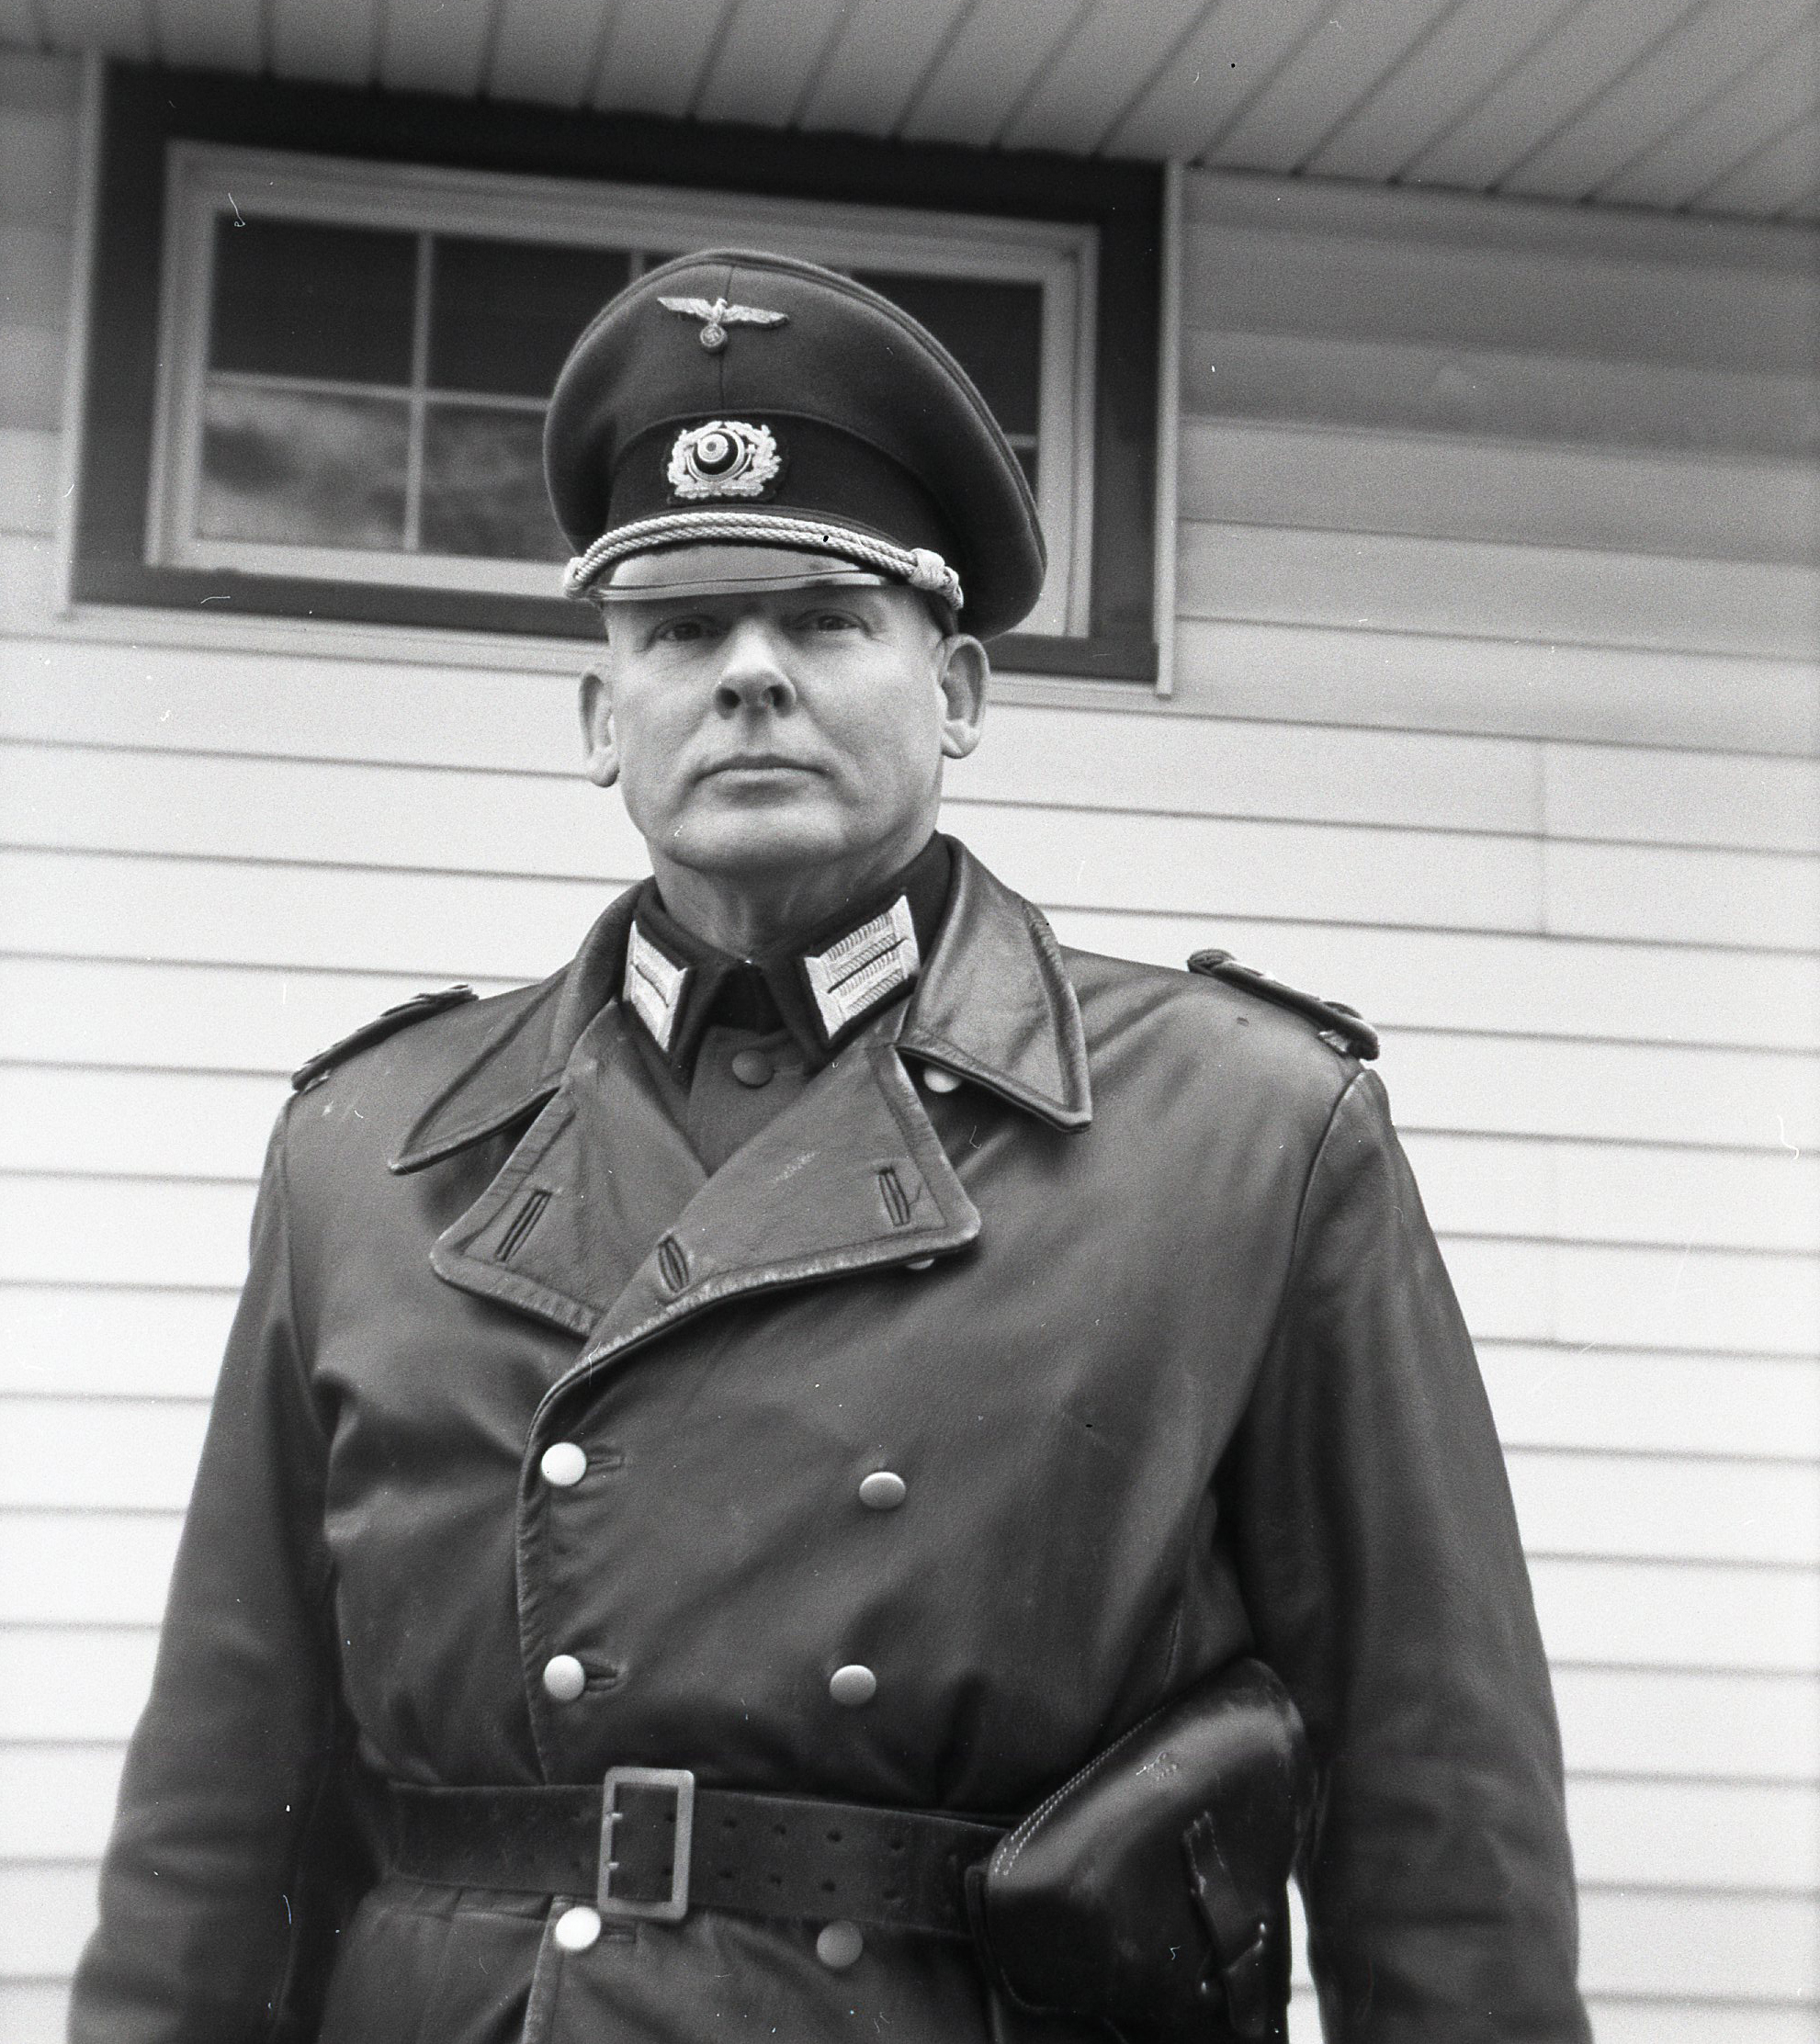
This uniform setup would be appropriate for July 1942 through the end of the war in many settings. It could be used to represent a soldier in training, in a barracks or garrison, or in many field situations doing various camp tasks such as work details, cleaning weapons, field training etc. A whole group of people attired the same way could be a very convincing and correct appearance that would apply to many types of training and immersion events, or public displays of Wehrmacht camp life, particularly in warm weather. This is probably the cheapest uniform that one could acquire that would be versatile enough to be used in so many situations. A group could mix and match white and green uniform parts as was commonly seen.
Cost breakdown: M34 field cap $25 Cap insignia $10 Linen Henley shirt $28 M40 HBT jacket $70 Suspenders $20 M33 HBT trousers $56 Low boots $95 Gray wool socks $4
Total price $308 plus shipping costs
Add soutache to the cap and this could represent 1940-42.
One could customize and upgrade these items with name tags, correct size stamps and maker marks, different buttons, etc. One could also upgrade this kit with better boots and/or a better shirt.
Obviously, someone who wants to participate in combat events would have to focus on the (more expensive) wool uniform and field gear, rather than this more daily life oriented setup.
German Army enlisted field blouses and greatcoats were adorned with shoulder insignia called Schulterklappen (literally translated, “shoulder flaps”). These pieces of insignia are usually referred to in English as shoulder straps, or shoulder boards. I have adopted the collector convention of referring to Schulterklappen as “shoulder straps” to distinguish them from officer “shoulder boards” (Schulterstücke, literally “shoulder pieces”).
During the 1930s, the German Army used several different shoulder strap styles in different colors and styles, finally settling in 1938 on a new pattern with rounded ends, piped around the edges with colored piping that indicated the branch of service to which the wearer belonged. The top of these straps was made from dark green wool. In 1940, these were replaced with straps made of the same field gray wool from which uniforms were made. 1940 was a time of massive mobilization and expansion in the German armed forces. Millions of these field gray branch piped shoulder straps were made. This shoulder strap pattern remained in use until 1945, with some construction variations. The field gray branch piped shoulder strap became the most widely issued German Army shoulder strap of the war.
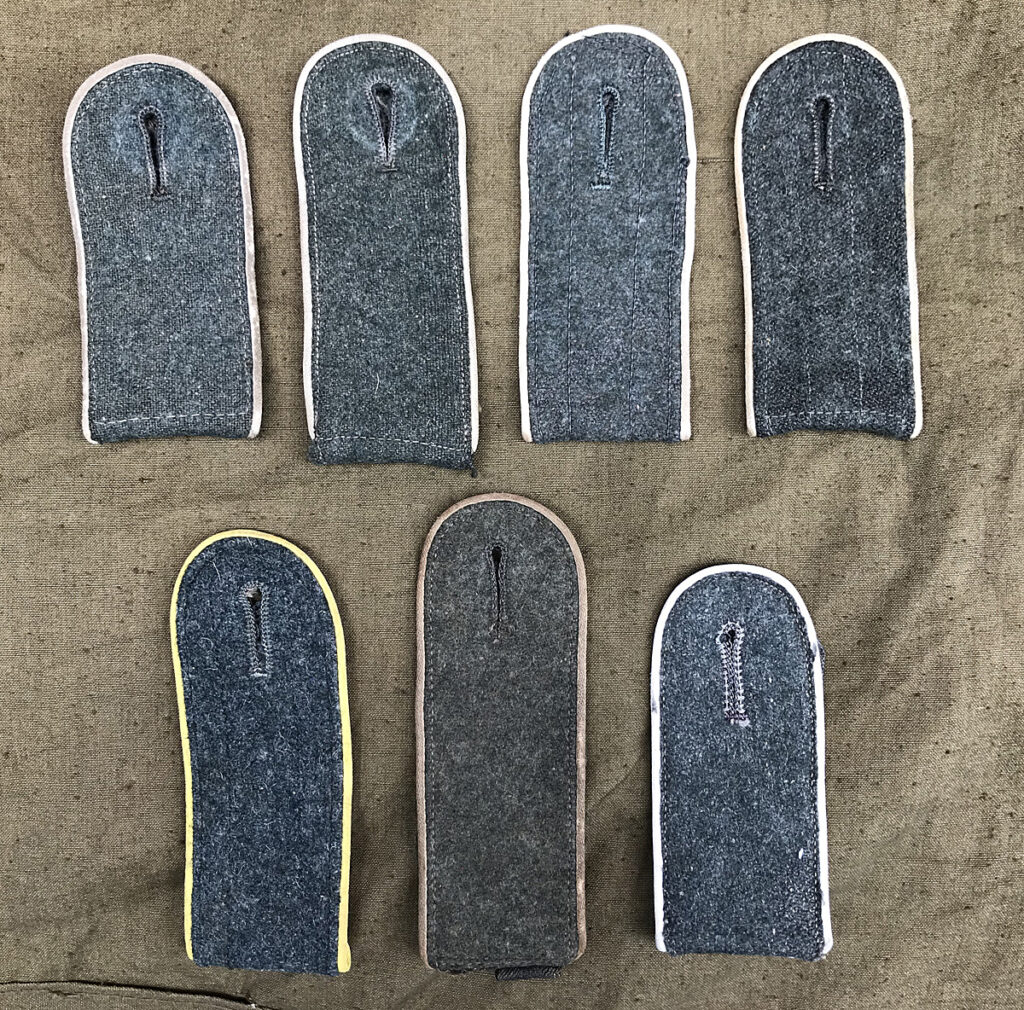
Let’s take an in-depth look at the construction and materials details of some typical wartime factory made enlisted issue straps. I chose these straps as typical representative examples.
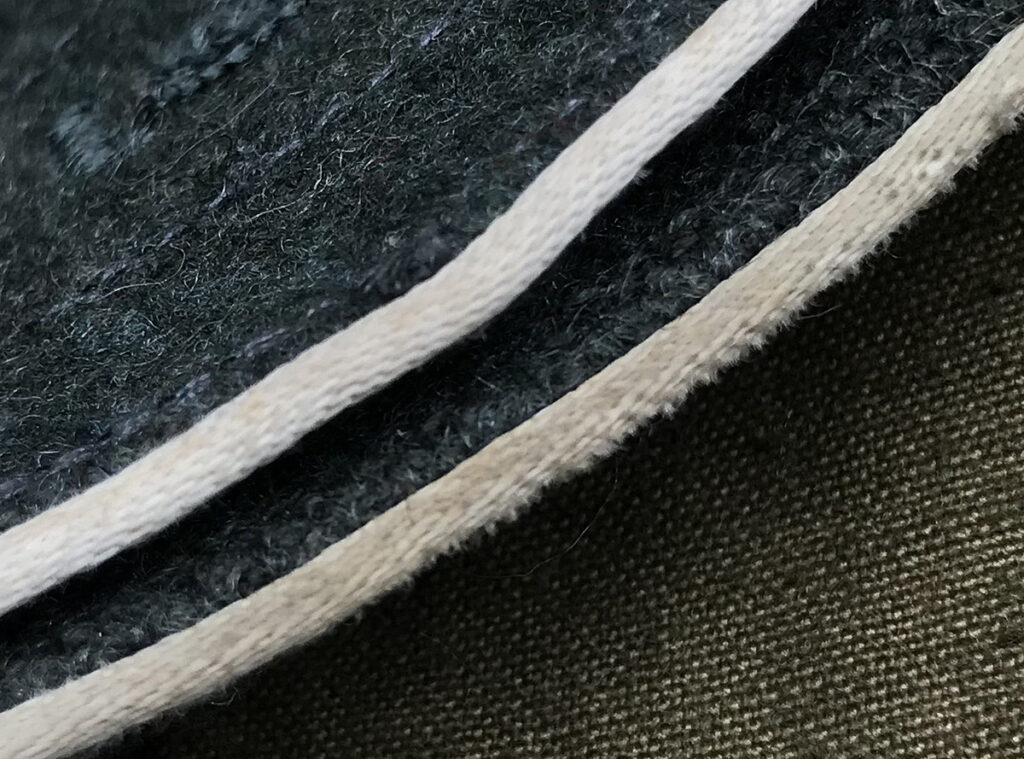
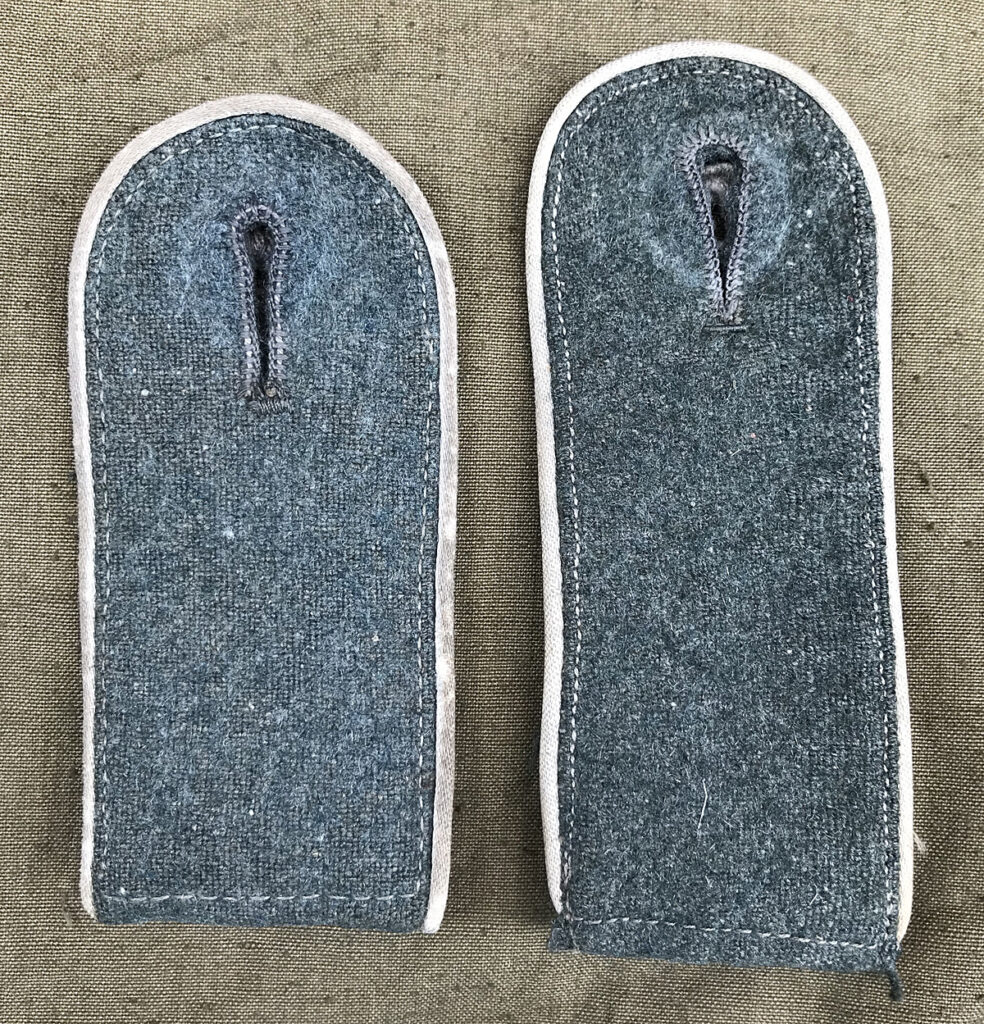
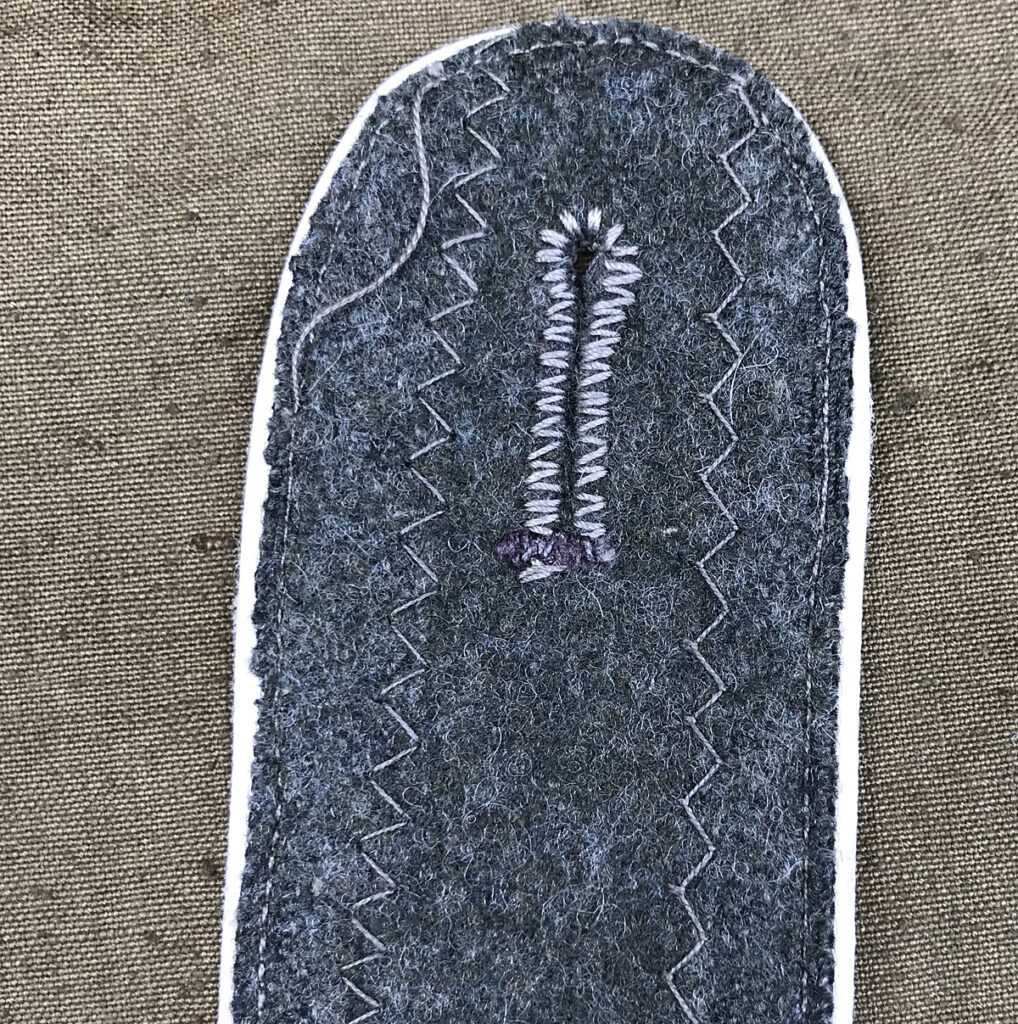
All of the straps in this photo are piped with rayon piping. Wool piping was typically used on 1930s straps. During the war, most factory made enlisted issue straps were piped with rayon. Here are two different variations in the knit of the rayon piping used. The piping on the top has a simple knit. The piping on the bottom is twill, with diagonal bands.
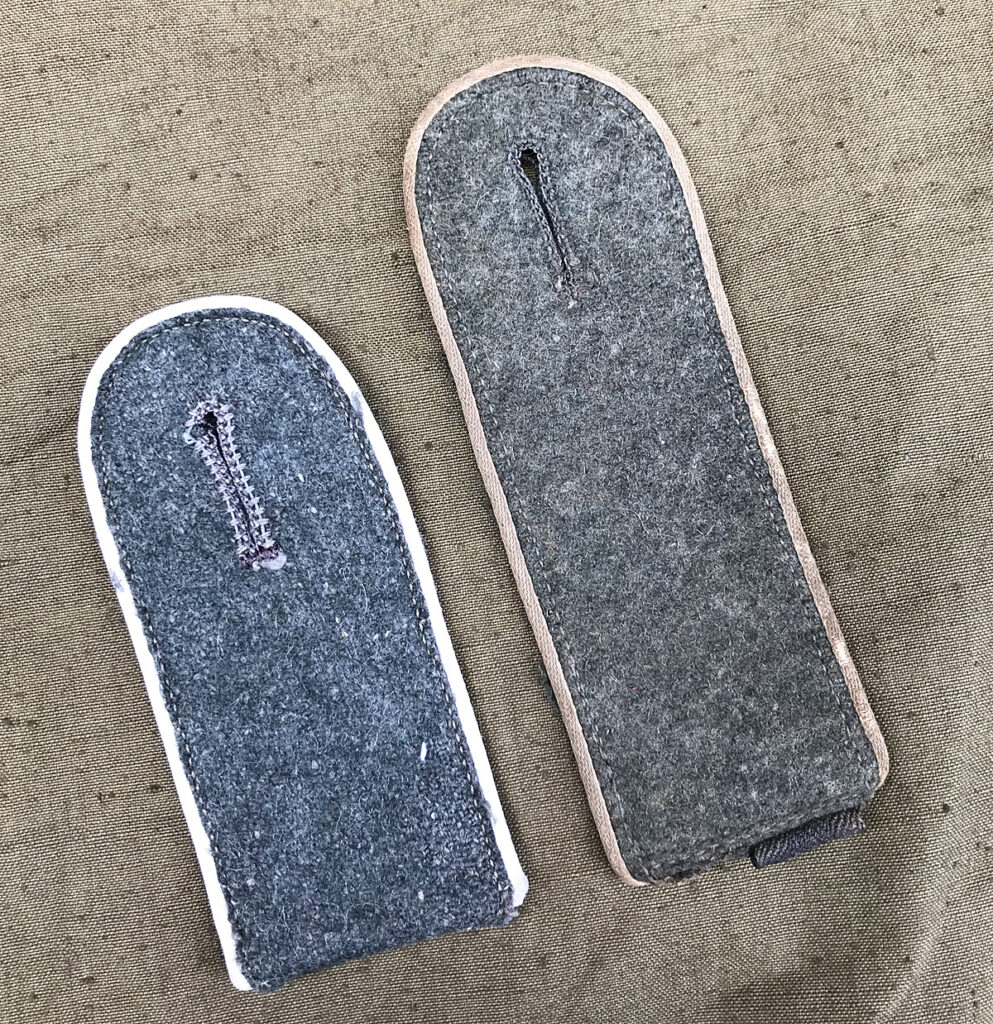
Here are two 1940 pattern straps. These are probably early or mid-war production, and are made from a fairly tightly woven field gray wool, with a small yarn size. The color and type of thread used to make these are the same as the thread used to construct the uniforms- these were made at the same factories, out of the same materials as the uniforms themselves. The buttonholes are the same as those used on the uniforms. You will see that these are two different sizes. I don’t have any documentation at hand to clearly explain why shoulder straps were made in different sizes.
The reinforcement fabric under the tongues of these straps, is a tan twill cotton material, the fabric most commonly used for lining field blouses and overcoats through the midwar period.
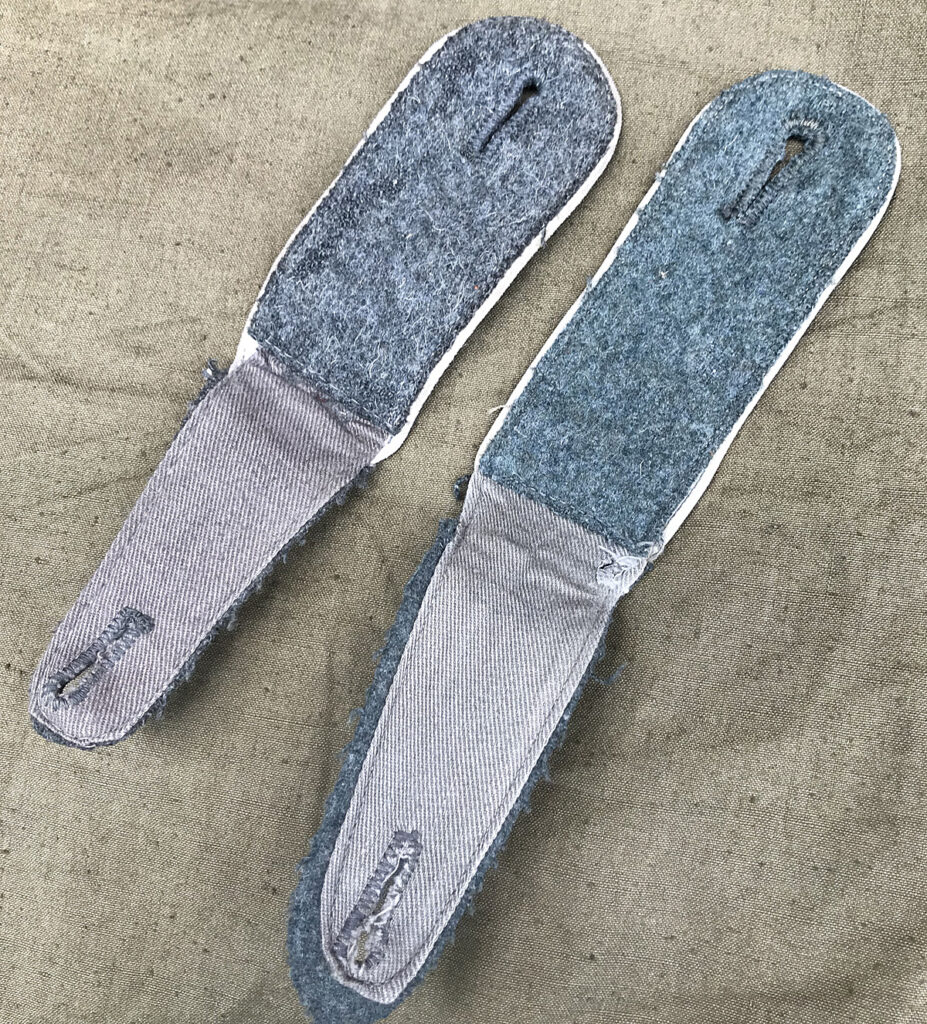
Later in the war, a new construction style appeared. These are referred to by collectors as “M44” shoulder straps although I have not seen any documentation specifying when this style appeared. This was a simplified pattern. The tops were made from a single piece of wool, without the backing piece that had been used previously. Instead of being fully lined, these had a simple reinforcement strip down the middle of the underside. The stitching for this reinforcement strip is visible on the tops of the boards. These shoulder straps are made of later war materials. The strap on the right has nap wear, which reveals the larger yarn size as compared to the earlier straps above. The stitching on the left strap shows that the tension on the sewing machine used to produce it was not properly adjusted- a sign of hasty manufacture.
The undersides of these straps show details of the reinforcement. With no backing fabric, all of the piping can be seen, not just the edge. The strap on the right has the most common reinforcement style, a strip of rayon (artificial silk) which was the typical uniform lining fabric in 1944-45. The strap on the left is reinforced with a piece of HBT woven gray tape.
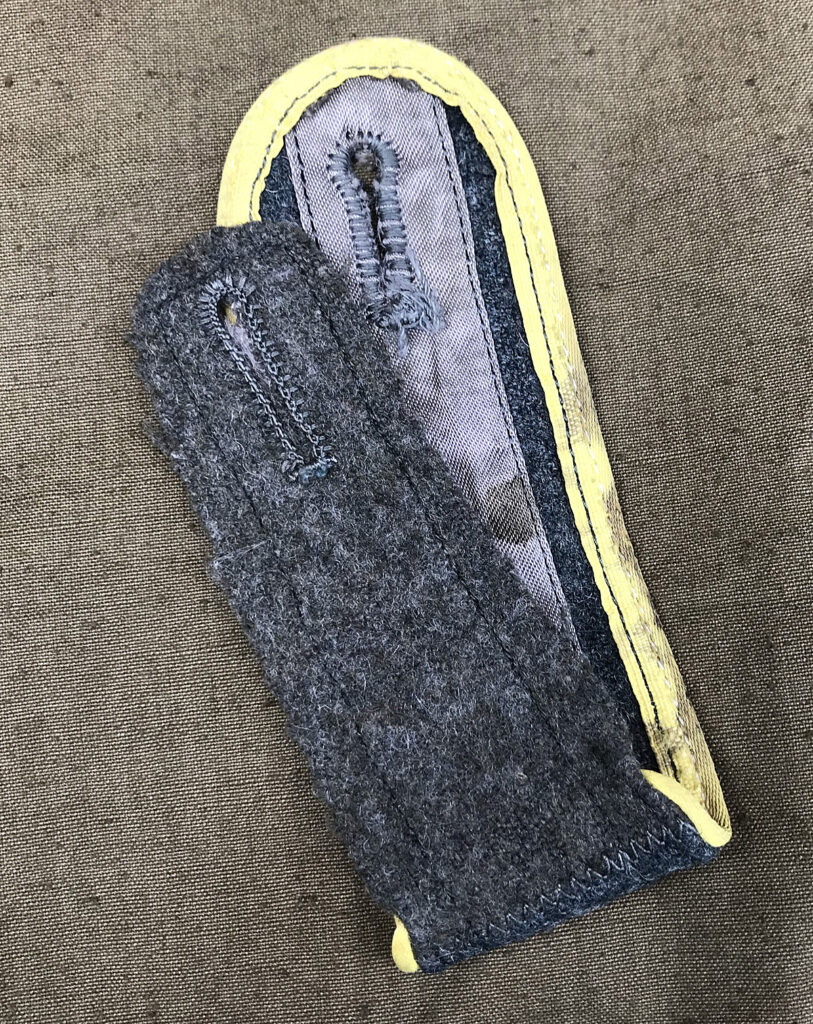
This “M44” strap is piped in lemon yellow, indicating membership in a Nachrichten unit. It’s made out of Italian wool, a coarse, bluish fabric widely used for German uniforms in 1944-45.
The “tongue” of this strap is made of “Feldgrau 44” wool. This was a brownish field gray shade introduced in 1944. The reinforcement is the typical rayon uniform lining fabric. It’s likely that the blue Italian wool and the brownish German wool used to construct these straps, were scraps left over from uniform production.
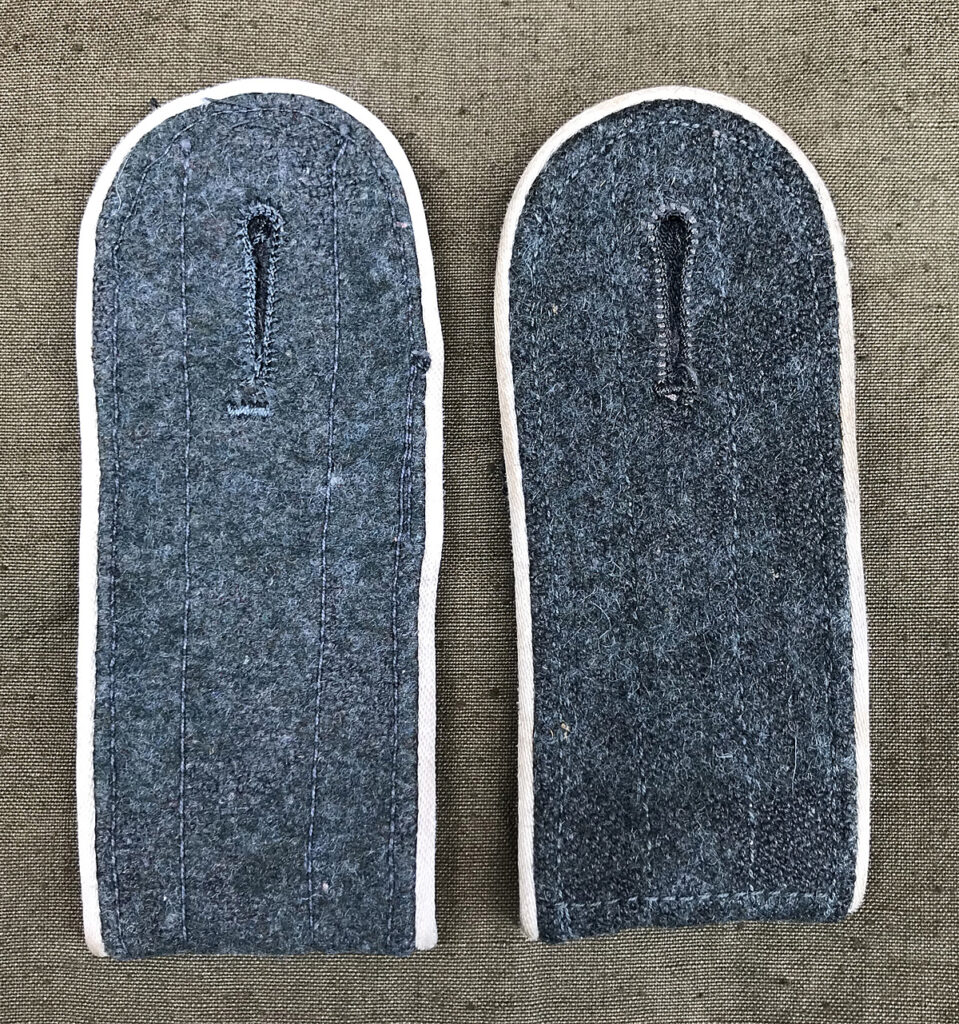
There was also a style of shoulder strap that used simple tape loops rather than the “tongue” for uniform attachment. I have not seen any documentation to indicate when this style appeared, whether it was just a manufacturer variation or perhaps intended for some specific purpose. These are generally regarded as late war pieces, with some speculating that these may have been introduced later than the “M44” style. The example on the left here is made out of a typical late war coarsely woven wool.
One of these boards is heavily worn, and the HBT woven tape attachment loop is broken. The other shows only light wear and has the attachment loop intact.
The underside of the left board is made of three pieces of scrap wool that have been pieced together. German uniforms made use of pieced-together scrap fabric for hidden areas of uniforms, even before WWII.
Factory made enlisted issue shoulder straps are interesting and helpful to study, as the materials used and construction details are all the same as what was used on other types of uniforms.
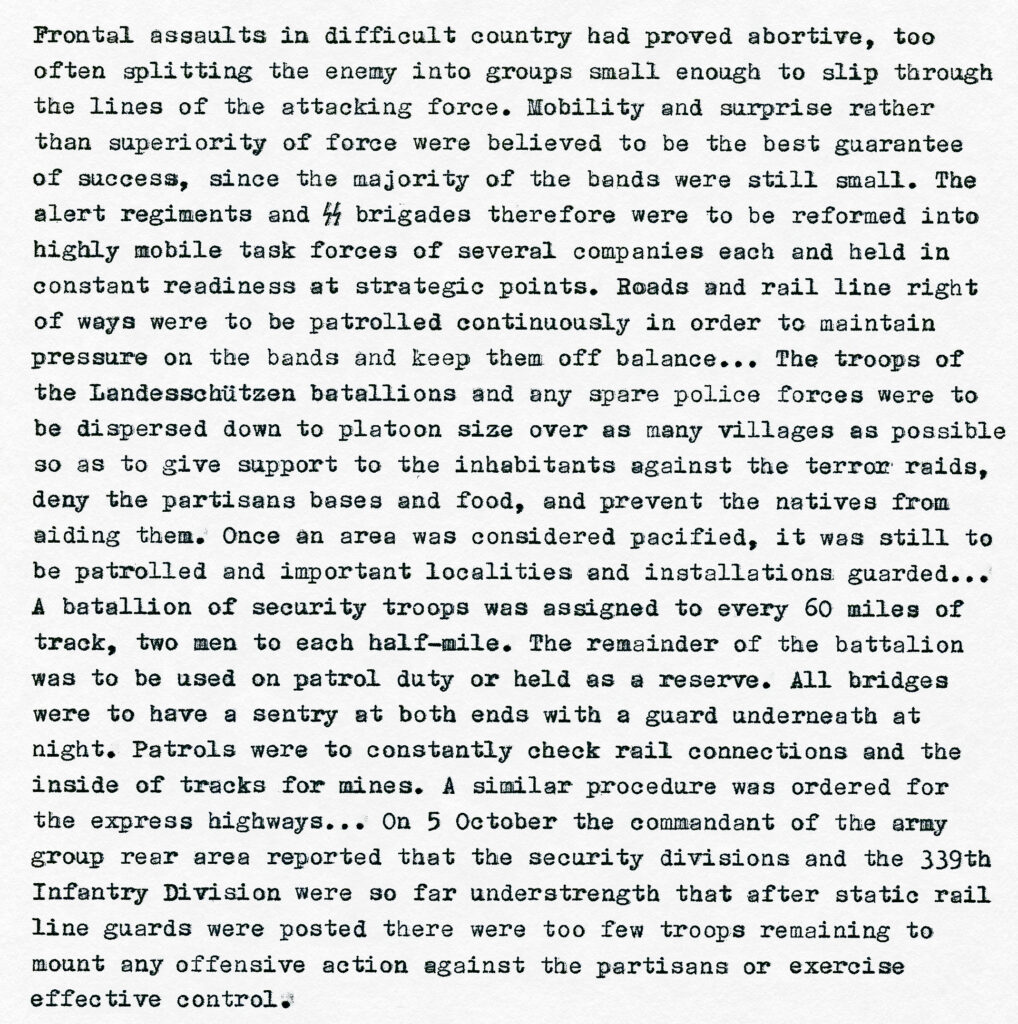
It may be easy to look at the desultory combat performance of Landesschützen units and conclude that they were completely ineffective. But as this document from the files of Sicherungs-Division 207 reveals, these units did serve an important role. Landesschützen units were trained to guard important objectives and, it seems, were better at this task, than units without this specialized training. The war demanded constant observation in the vast occupied lands.
Translated from “Hilfsbuch für den Hauptfeldwebel” by Hans Rödel, 1942.
On the March.
Every Kompanie wants to have as few people as possible drop out of the march due to injury. This can be achieved by: -Instructing the enlisted men on taking care of their feet; -Checking the fit of footwear; -Distributing powder and foot sweat salve.
On the march, the Hauptfeldwebel has a bicycle available to him, his place is with the field kitchen. In peacetime marches, though, he will always find the opportunity to march with his Kompanie. Here, he supports the Kompaniechef in inspecting the march discipline. If the unit is to rest, whenever possible he reconnoiters the resting place, which he travels to in advance on the bicycle. If the unit is to receive rations, he inquires at the right time and gives his instructions to the field kitchen. During the rest he takes care of the receipt of rations and checks that everything is in order with marching injuries.
In Camp.
In reconnoitering a camp place, it must be ensured: -That water is available for the horses to drink, for the enlisted men to wash up, and for filling the field kitchen; -That the ground is not too soft and damp, even when it rains; -That a latrine can be set up. Constructing the tents is mostly carried out by the Zugführer according to the instruction of the Kompaniechef. When orders are given out, which takes place as soon as possible, the following should be mentioned: -Additional duties (cleaning weapons, etc.); -Assignment of guards, the password; -Uniform and conduct in camp; -Location of the latrine, and the vehicles; -How far and for how long it is permitted to leave the camp; -Curfew; -Conduct during alarms; -Wakeup and departure on the next day: -Exact time.
Through proper conduct and good singing, the Kompanie can win over the heart of the cantonment host as soon as they enter the quarters. The person in charge of the quarters will almost always approach the Kompanie and report on the accommodations of the Kompanie and where they will be staying. It is practical, when the Kompanie arrives at the quarters for the first time. Here the rations and the packs of the enlisted men will be given out. The Hauptfeldwebel assigns the guards, gives the time and location of the foot inspection, the next location and exact time is made known. On rest days he proposes a weapon inspection to the Kompaniechef. Before he seeks out his own quarters, he inspects the accommodations of the Tross and a part of the Kompanie. Through the foot inspection, he determines the state of march injuries.
If there is to be a ball at the end of maneuvers, the Hauptfeldwebel is to attend and to check on the orderly conduct of his people.
In the field.
The tasks of the Hauptfeldwebel in wartime will be carried out under much more difficult circumstances. But if he has constantly worked to care for his Kompanie in peacetime, he will also master these difficulties.
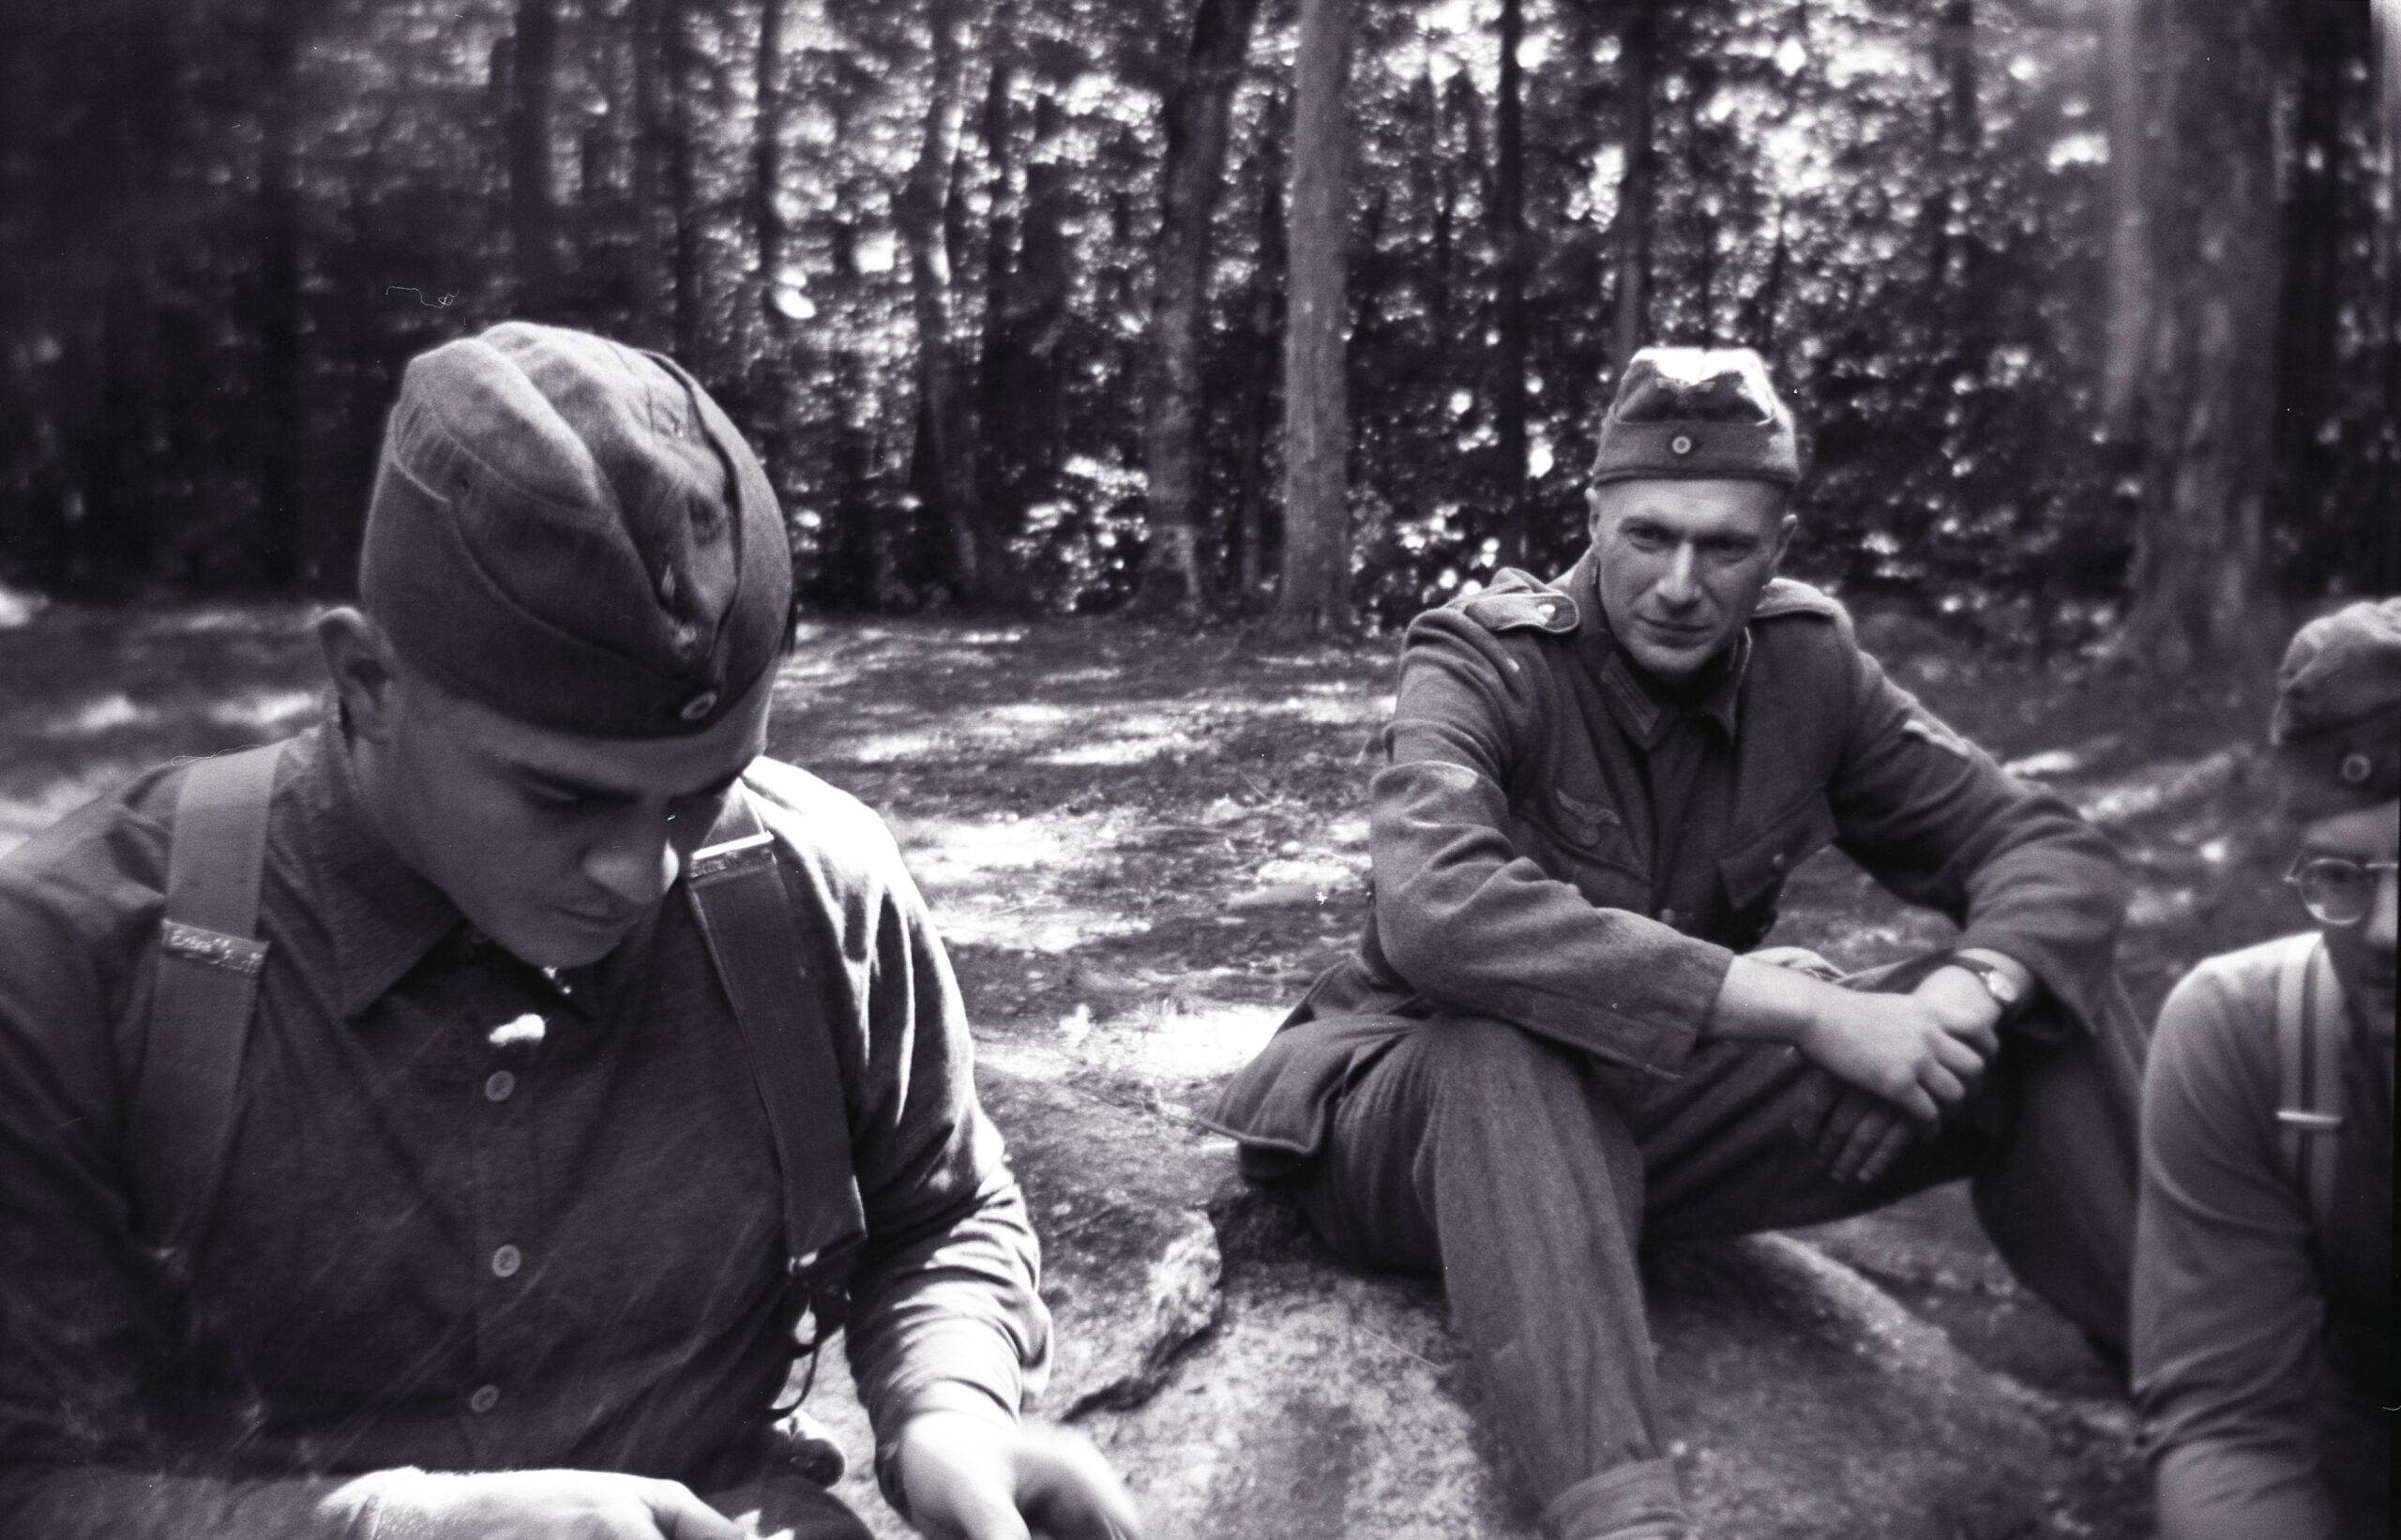
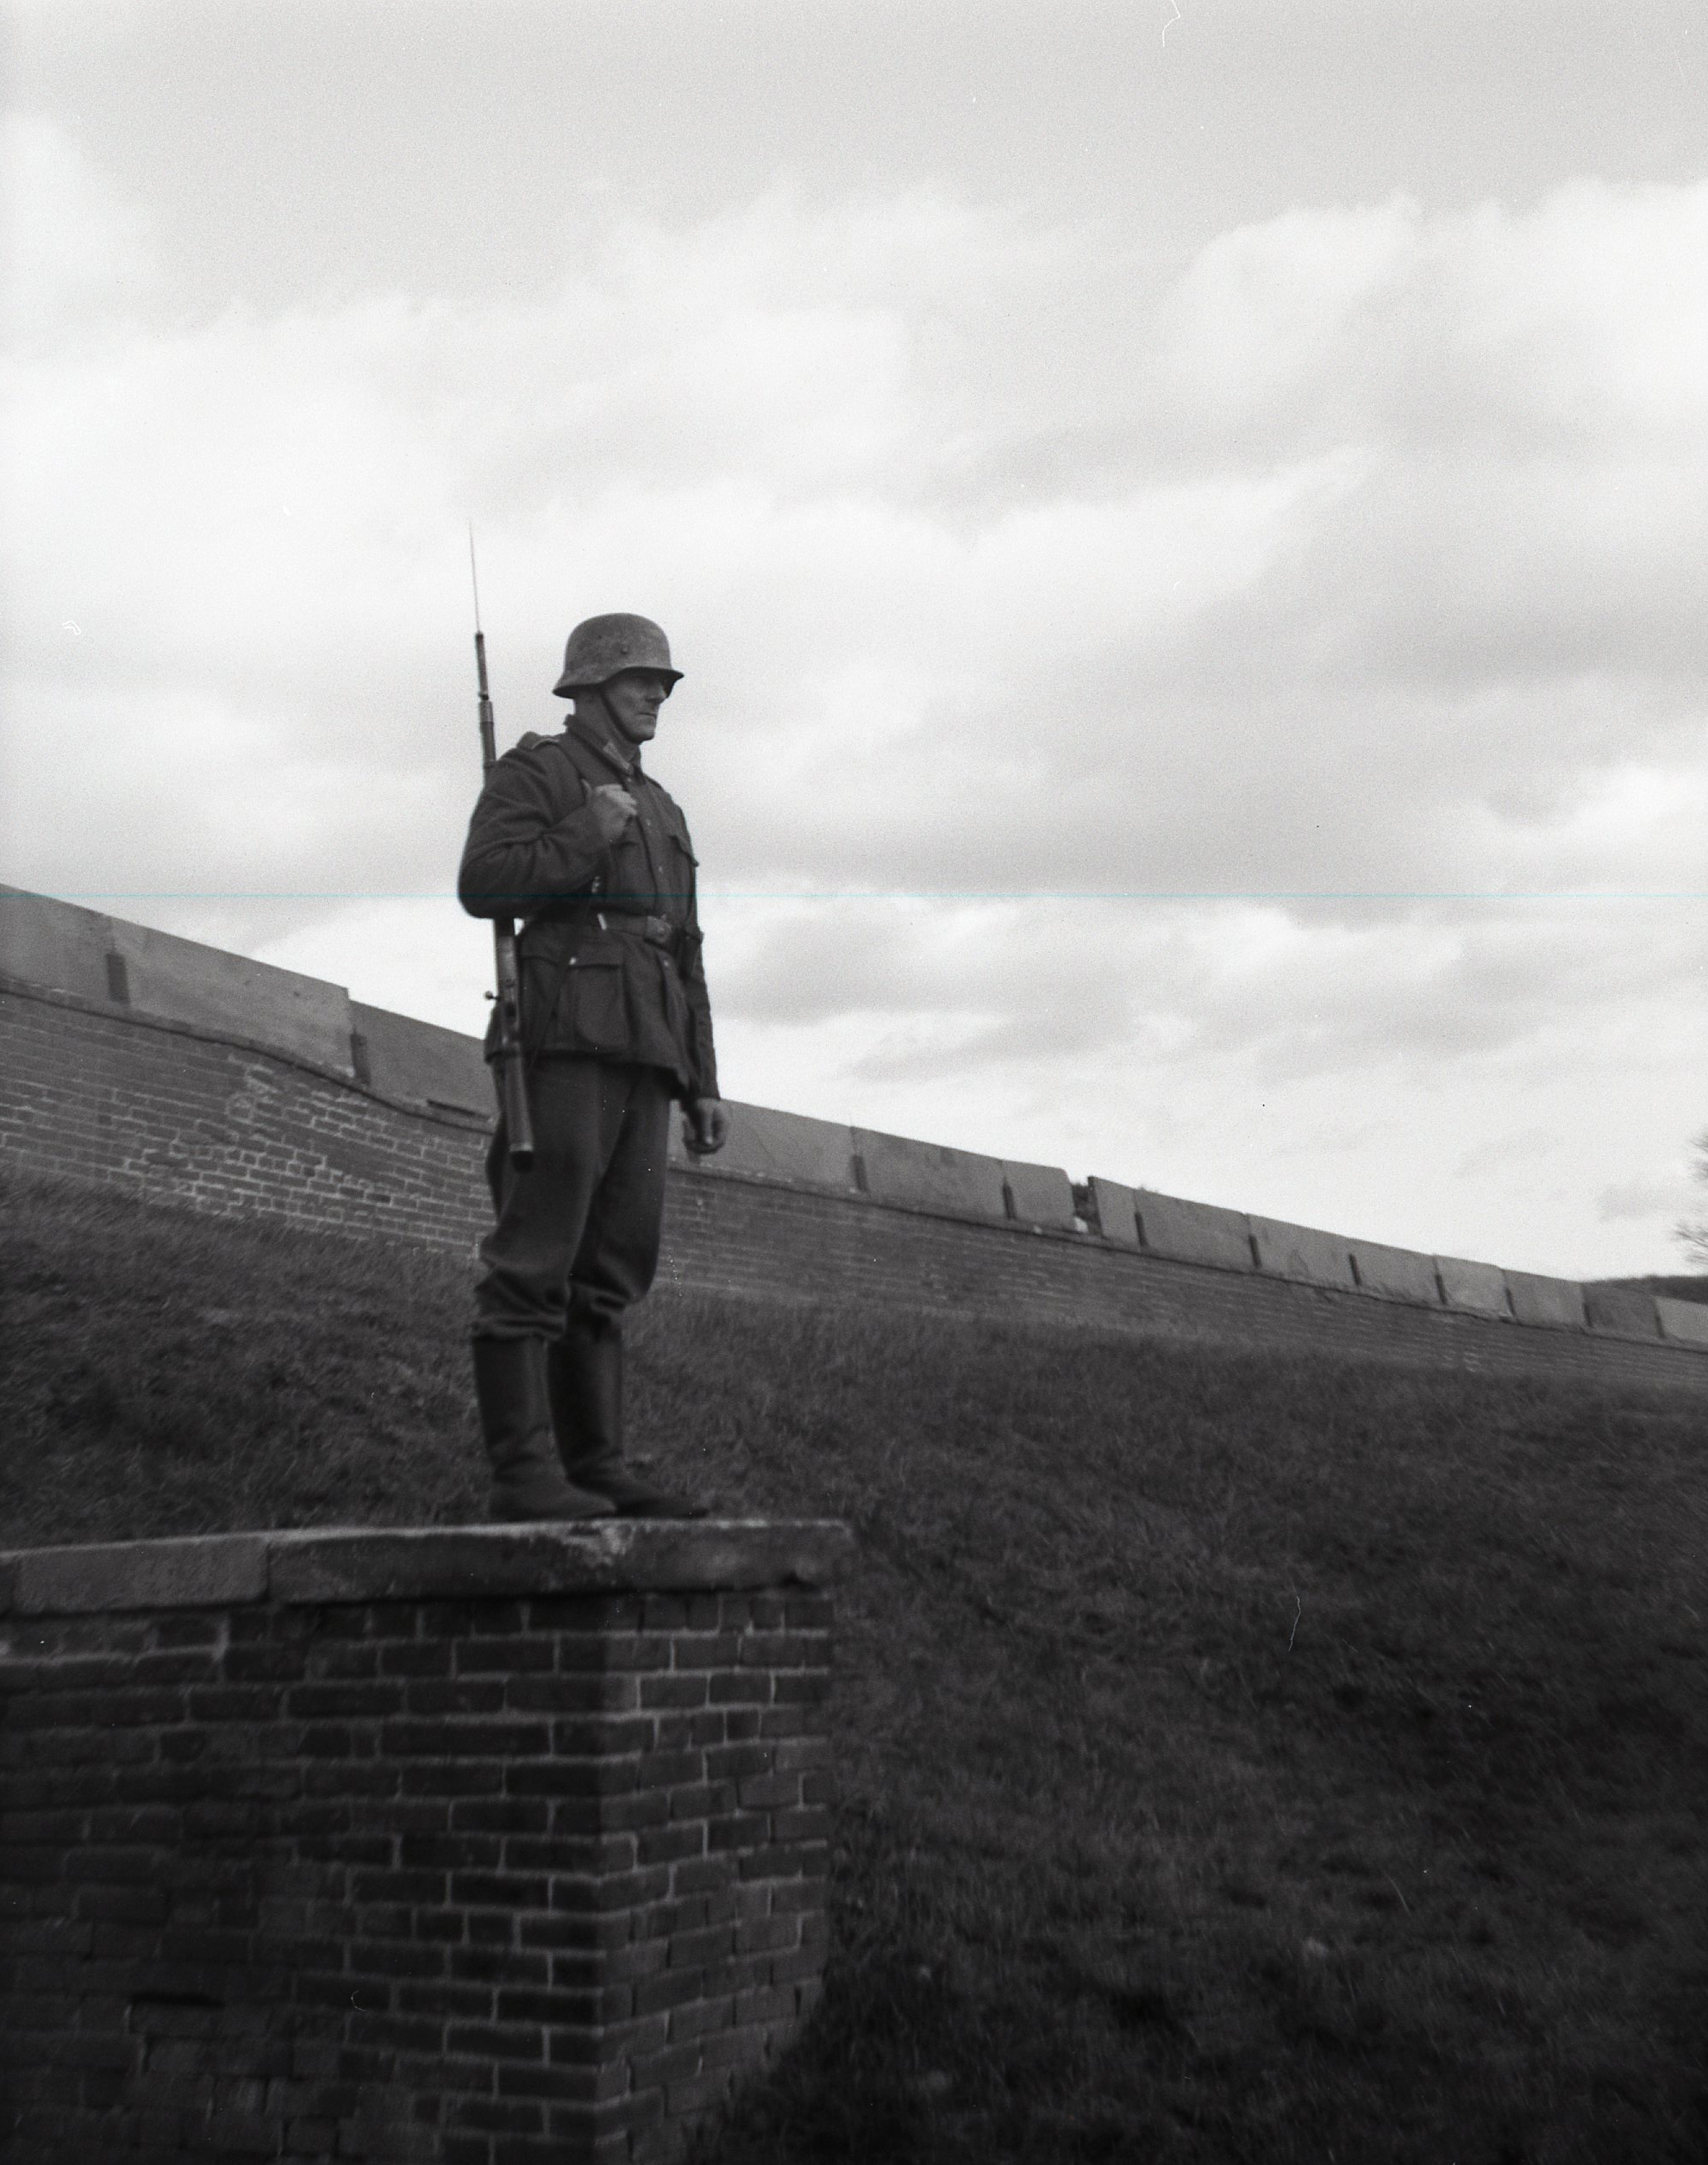
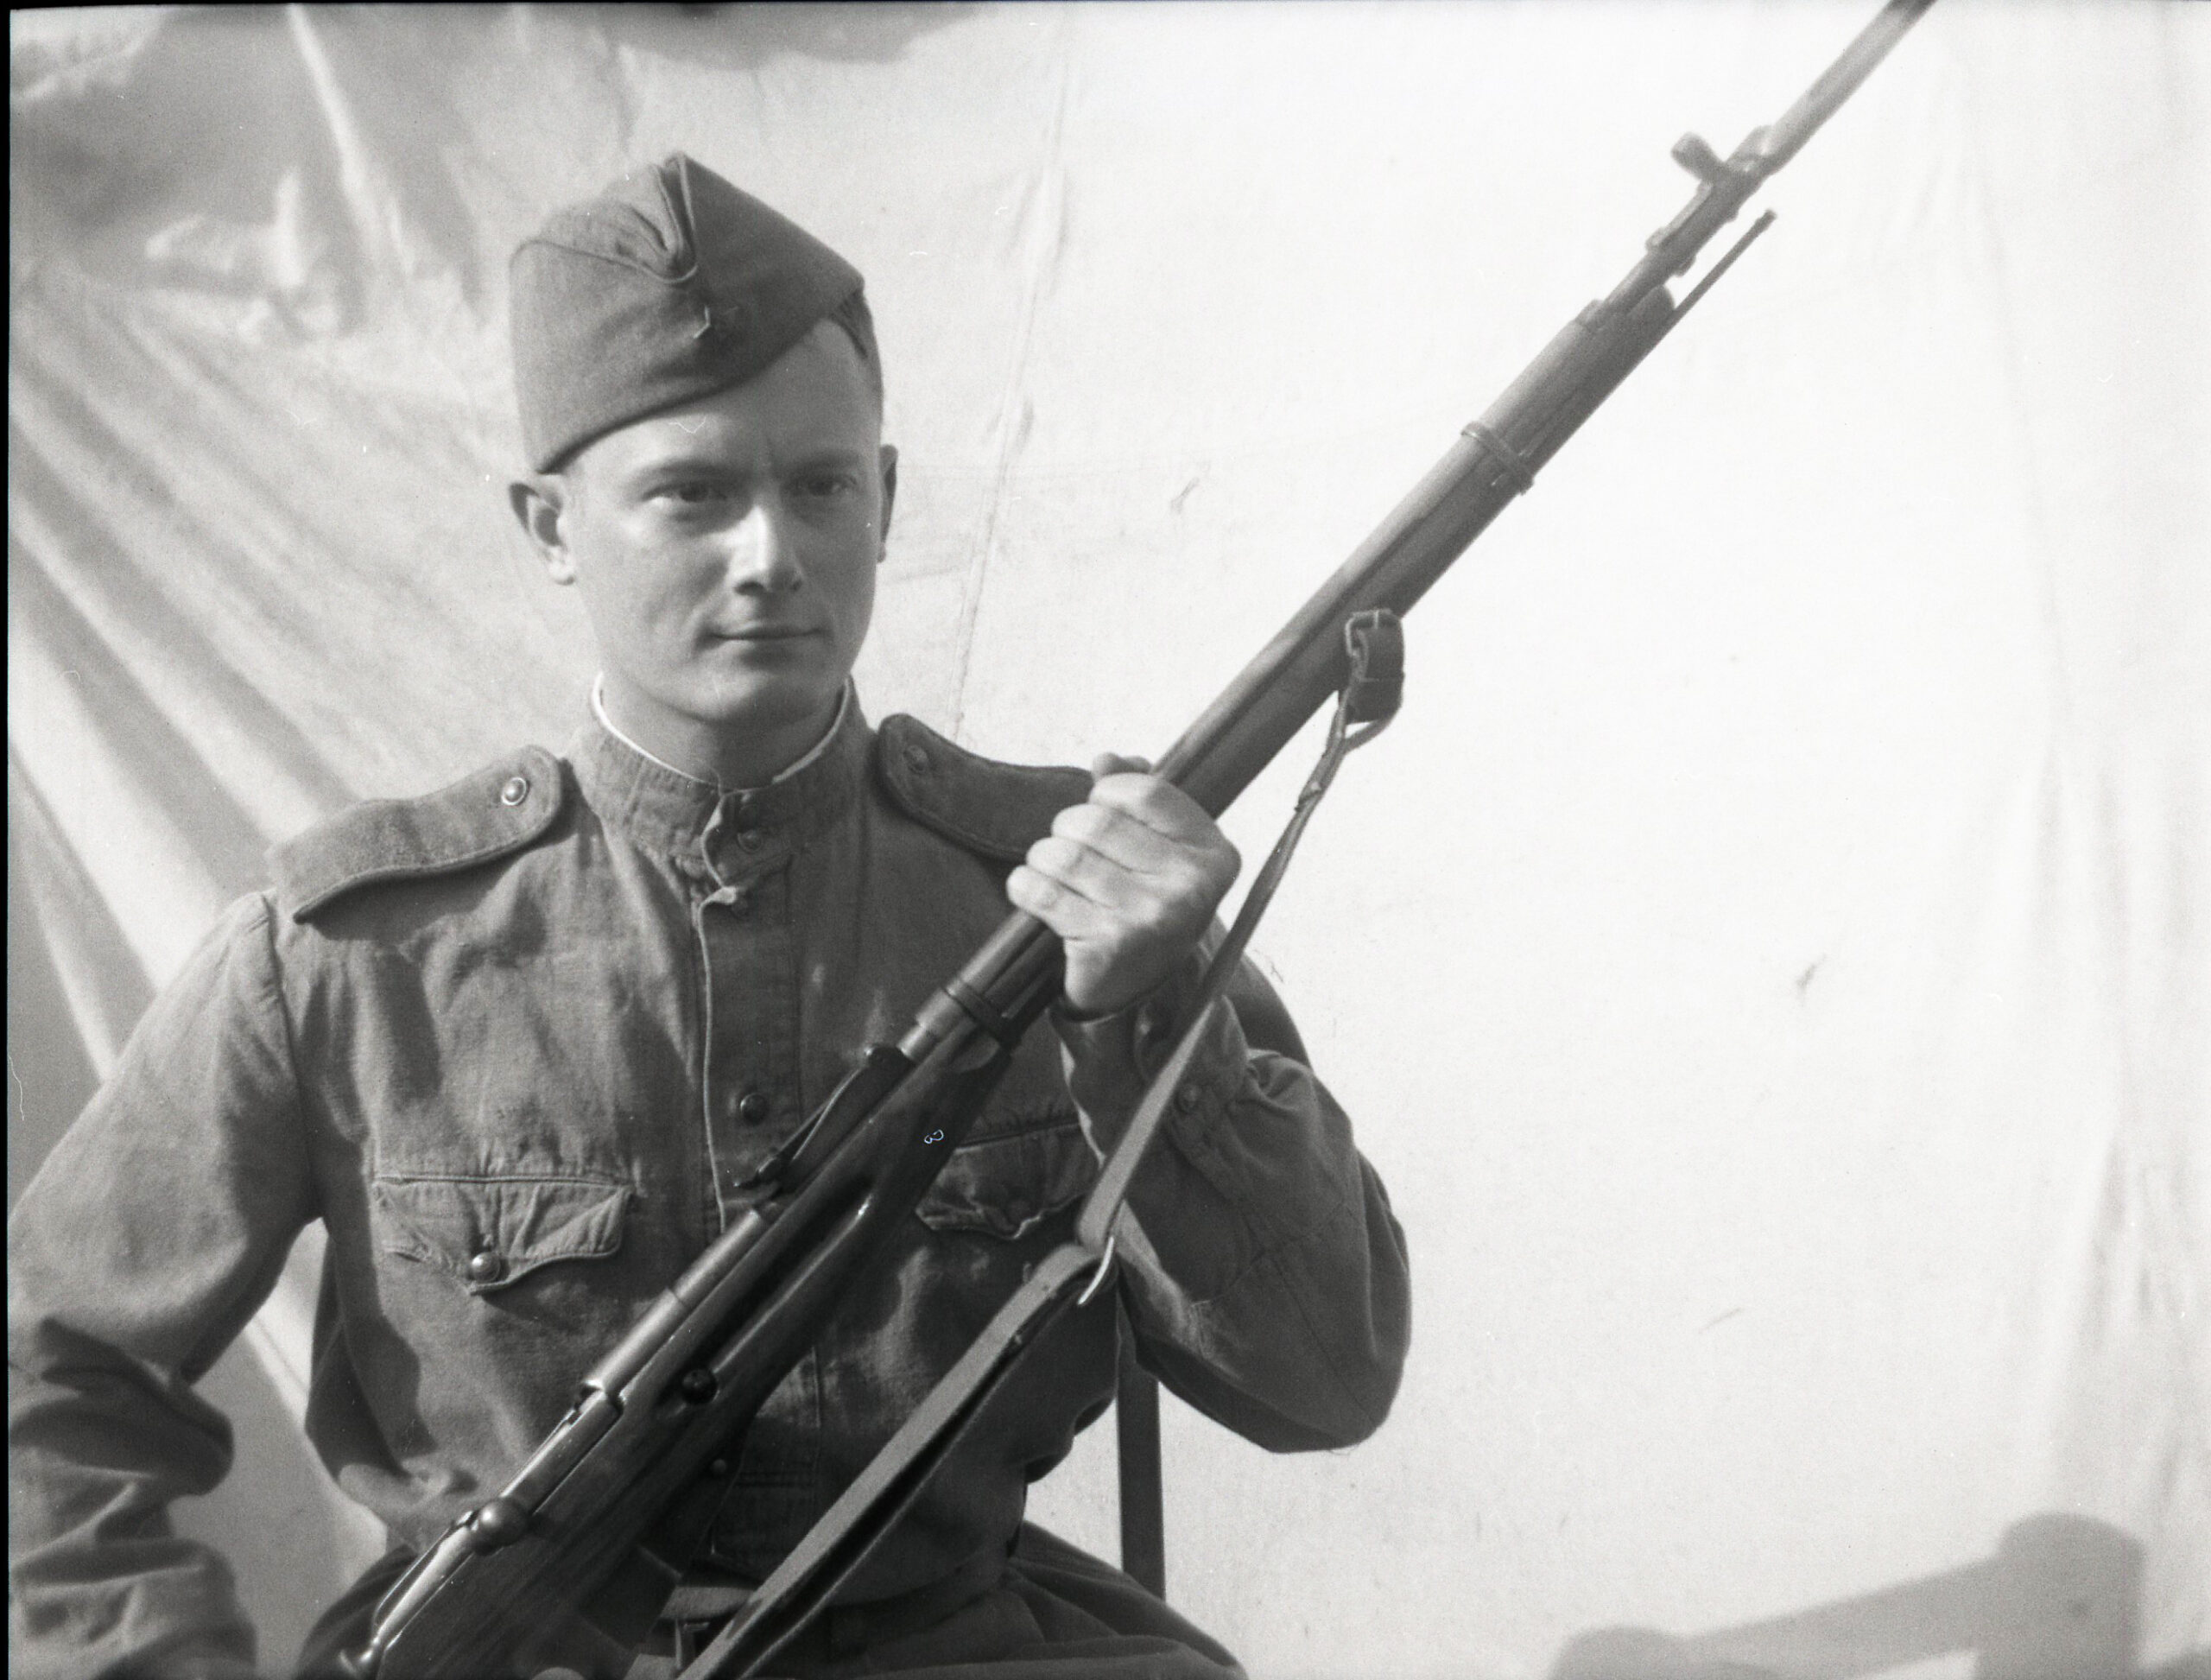
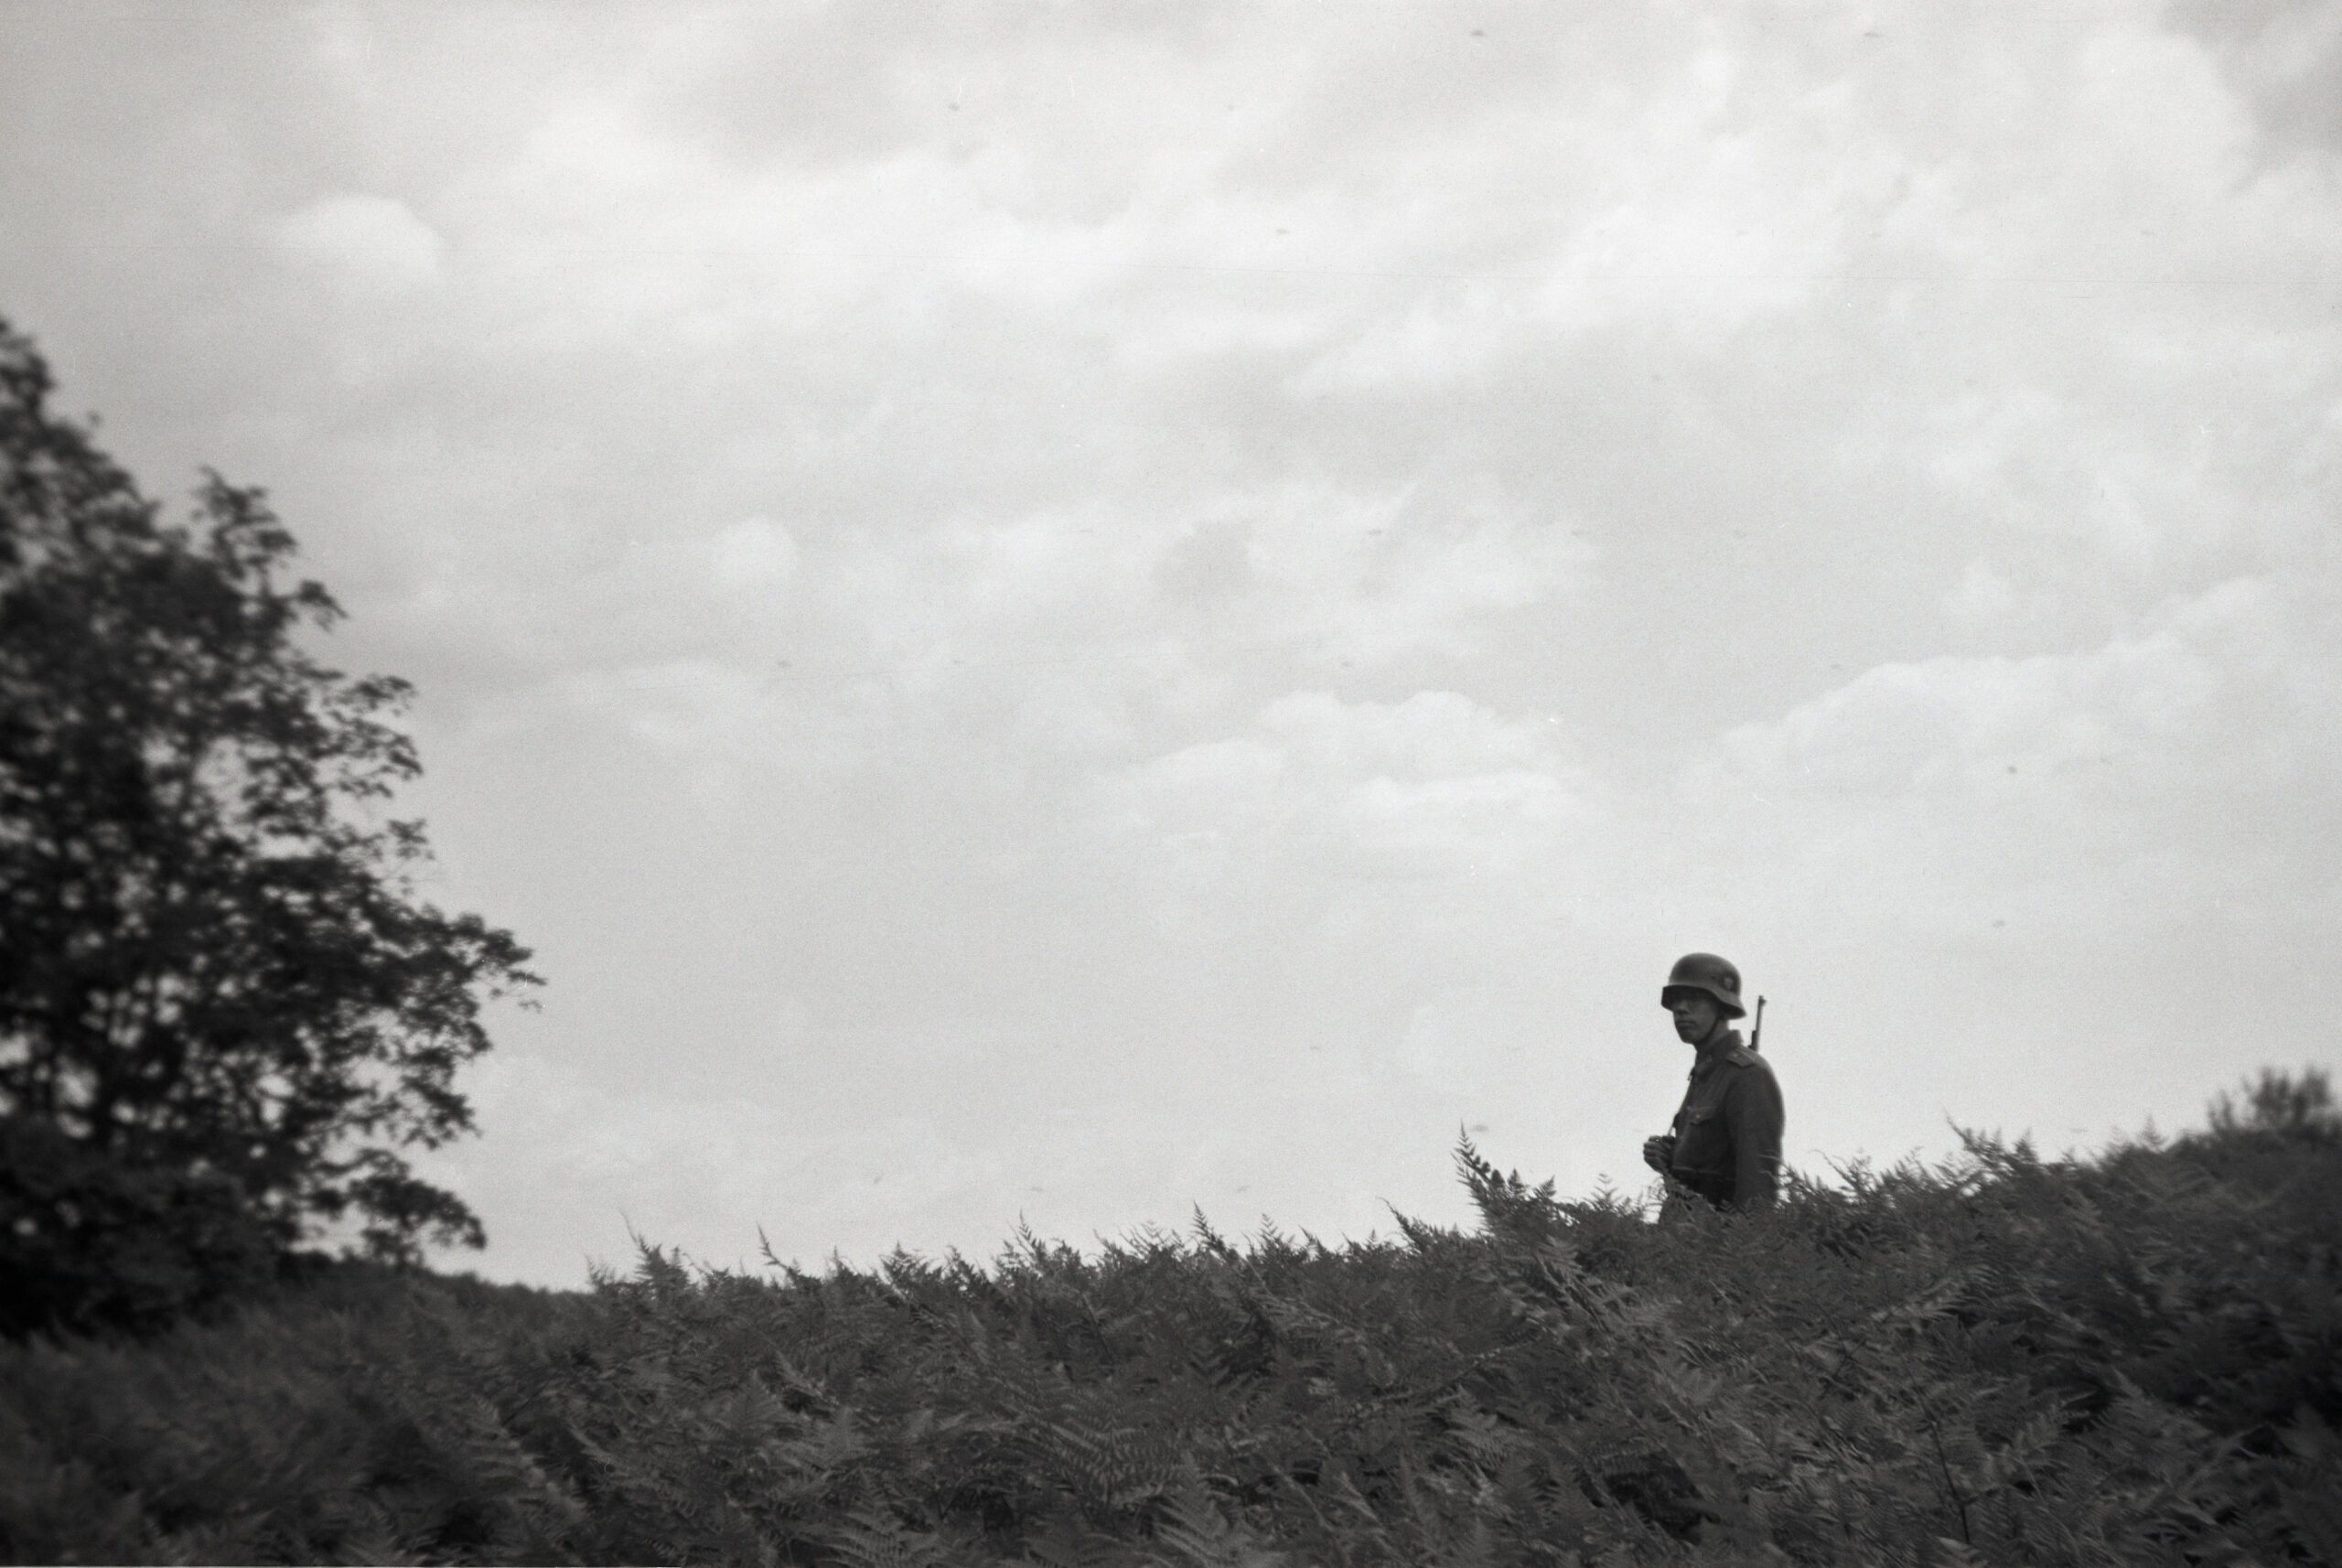
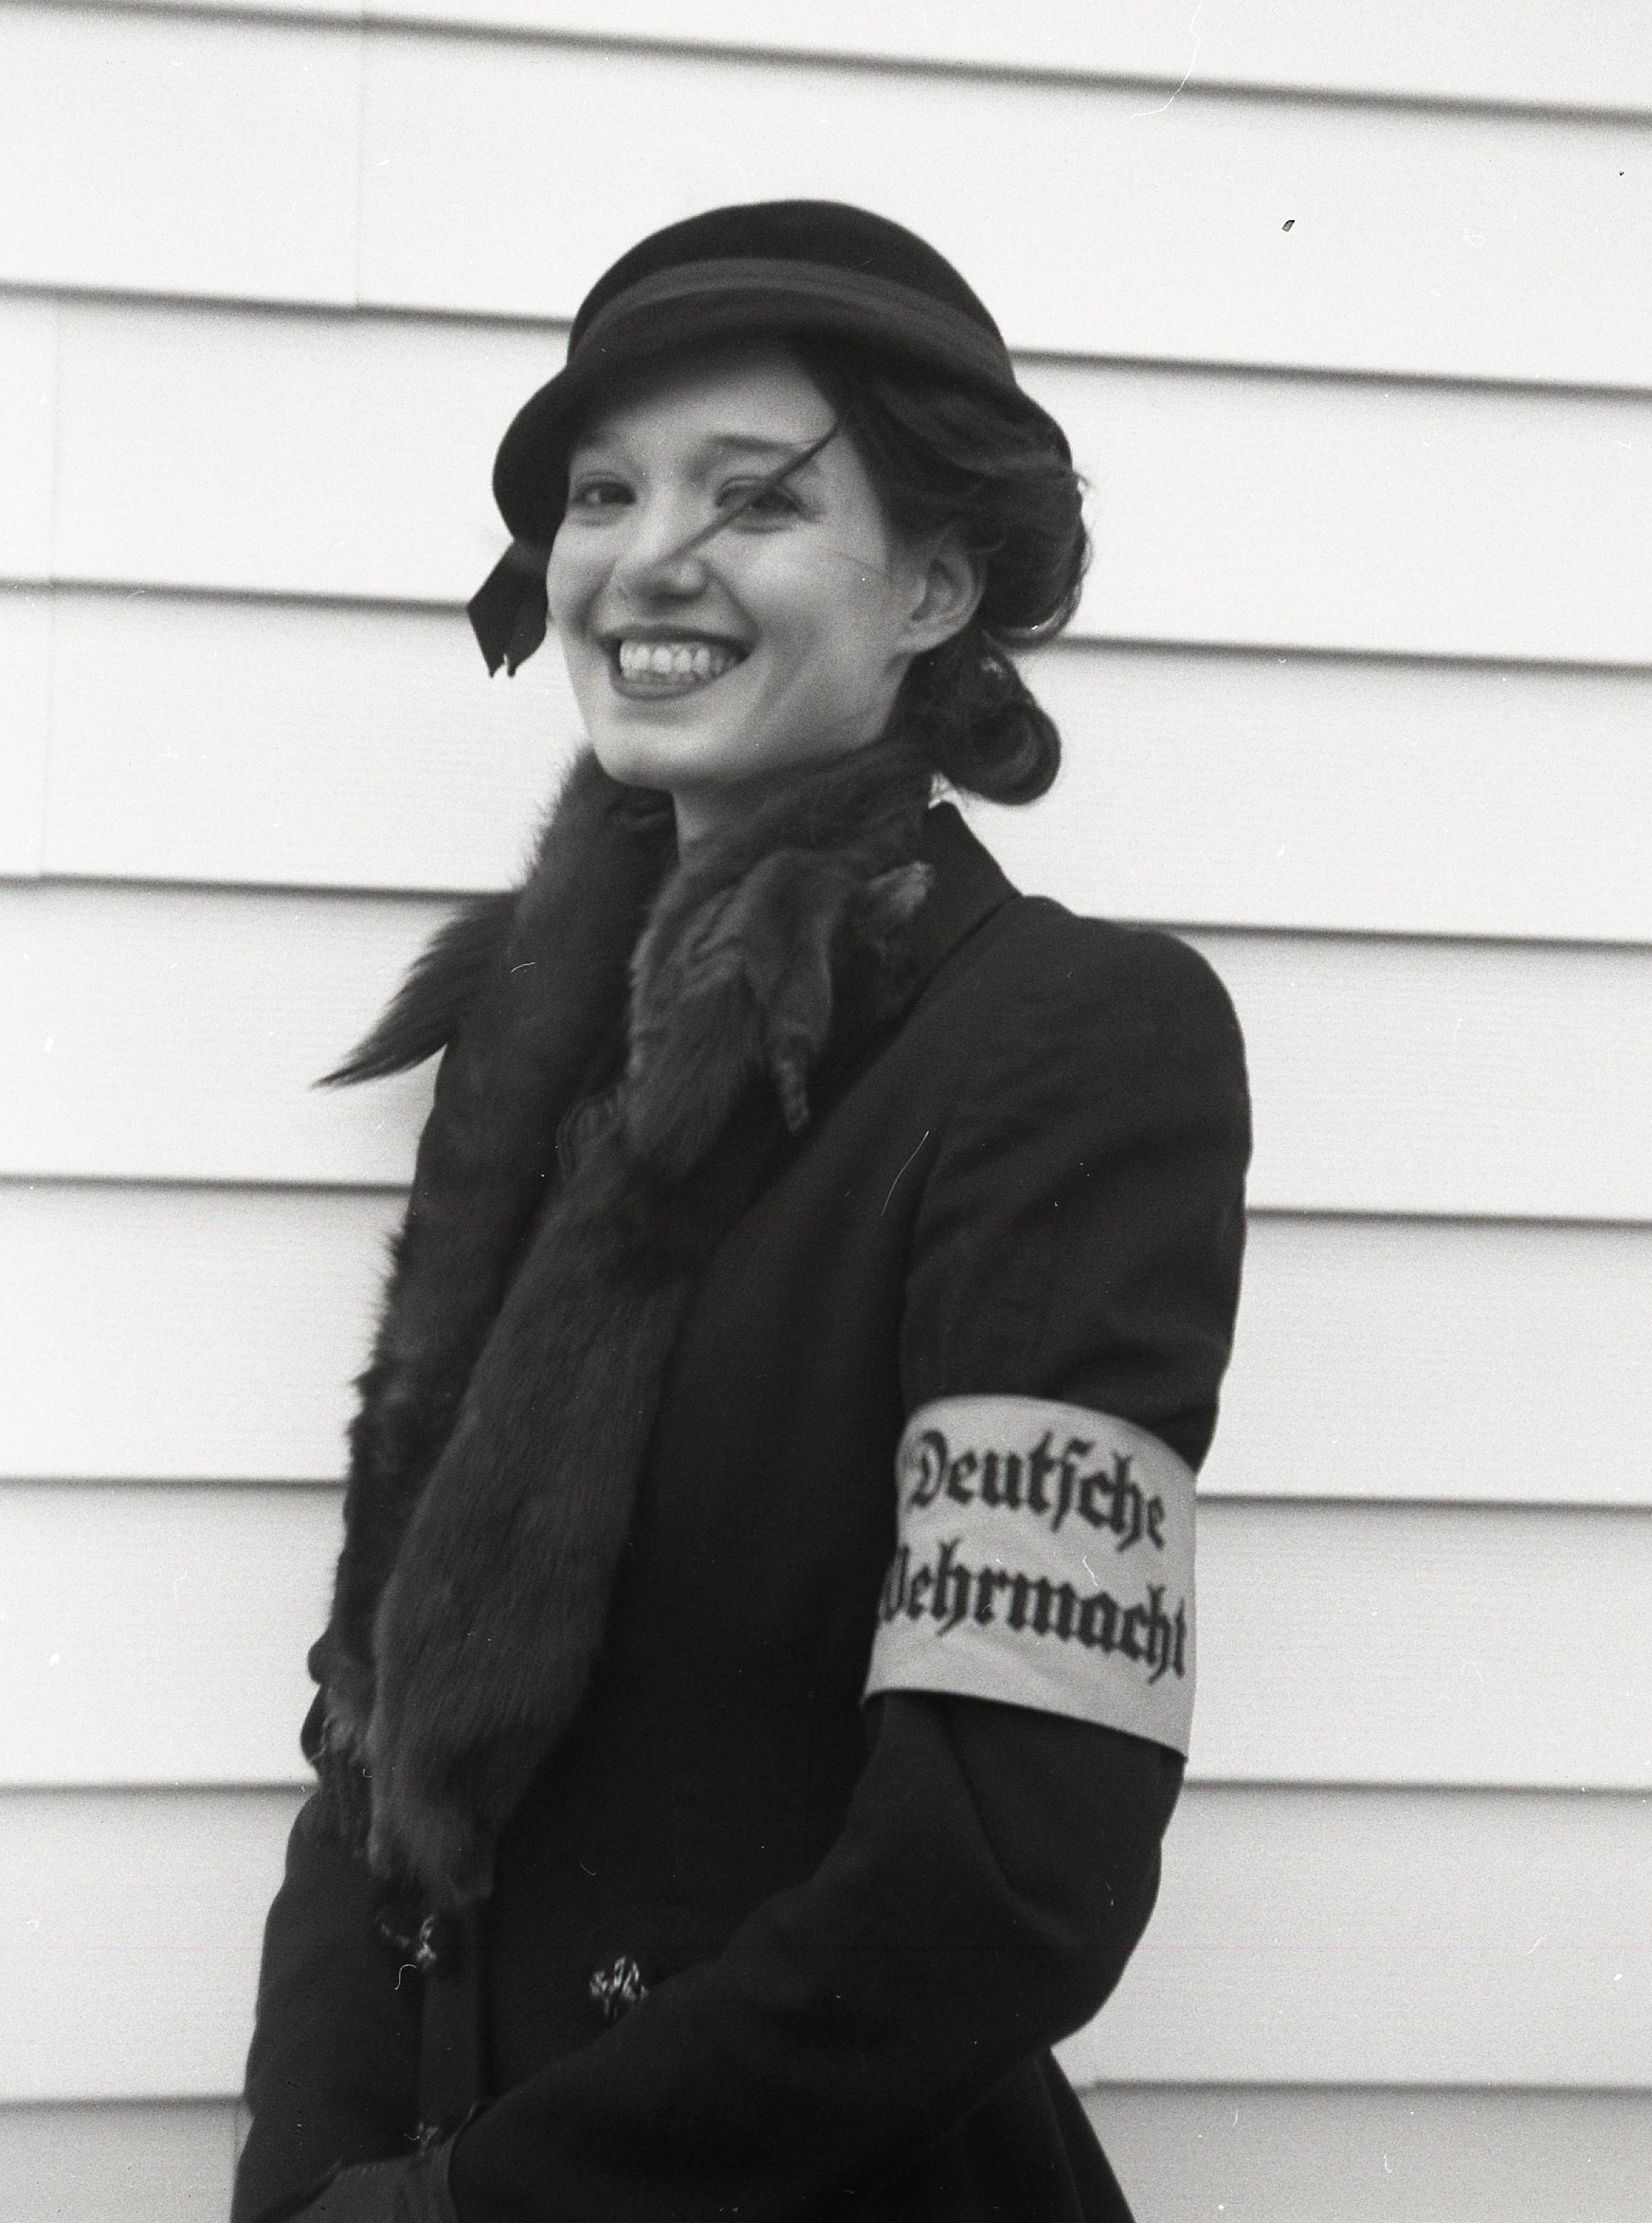
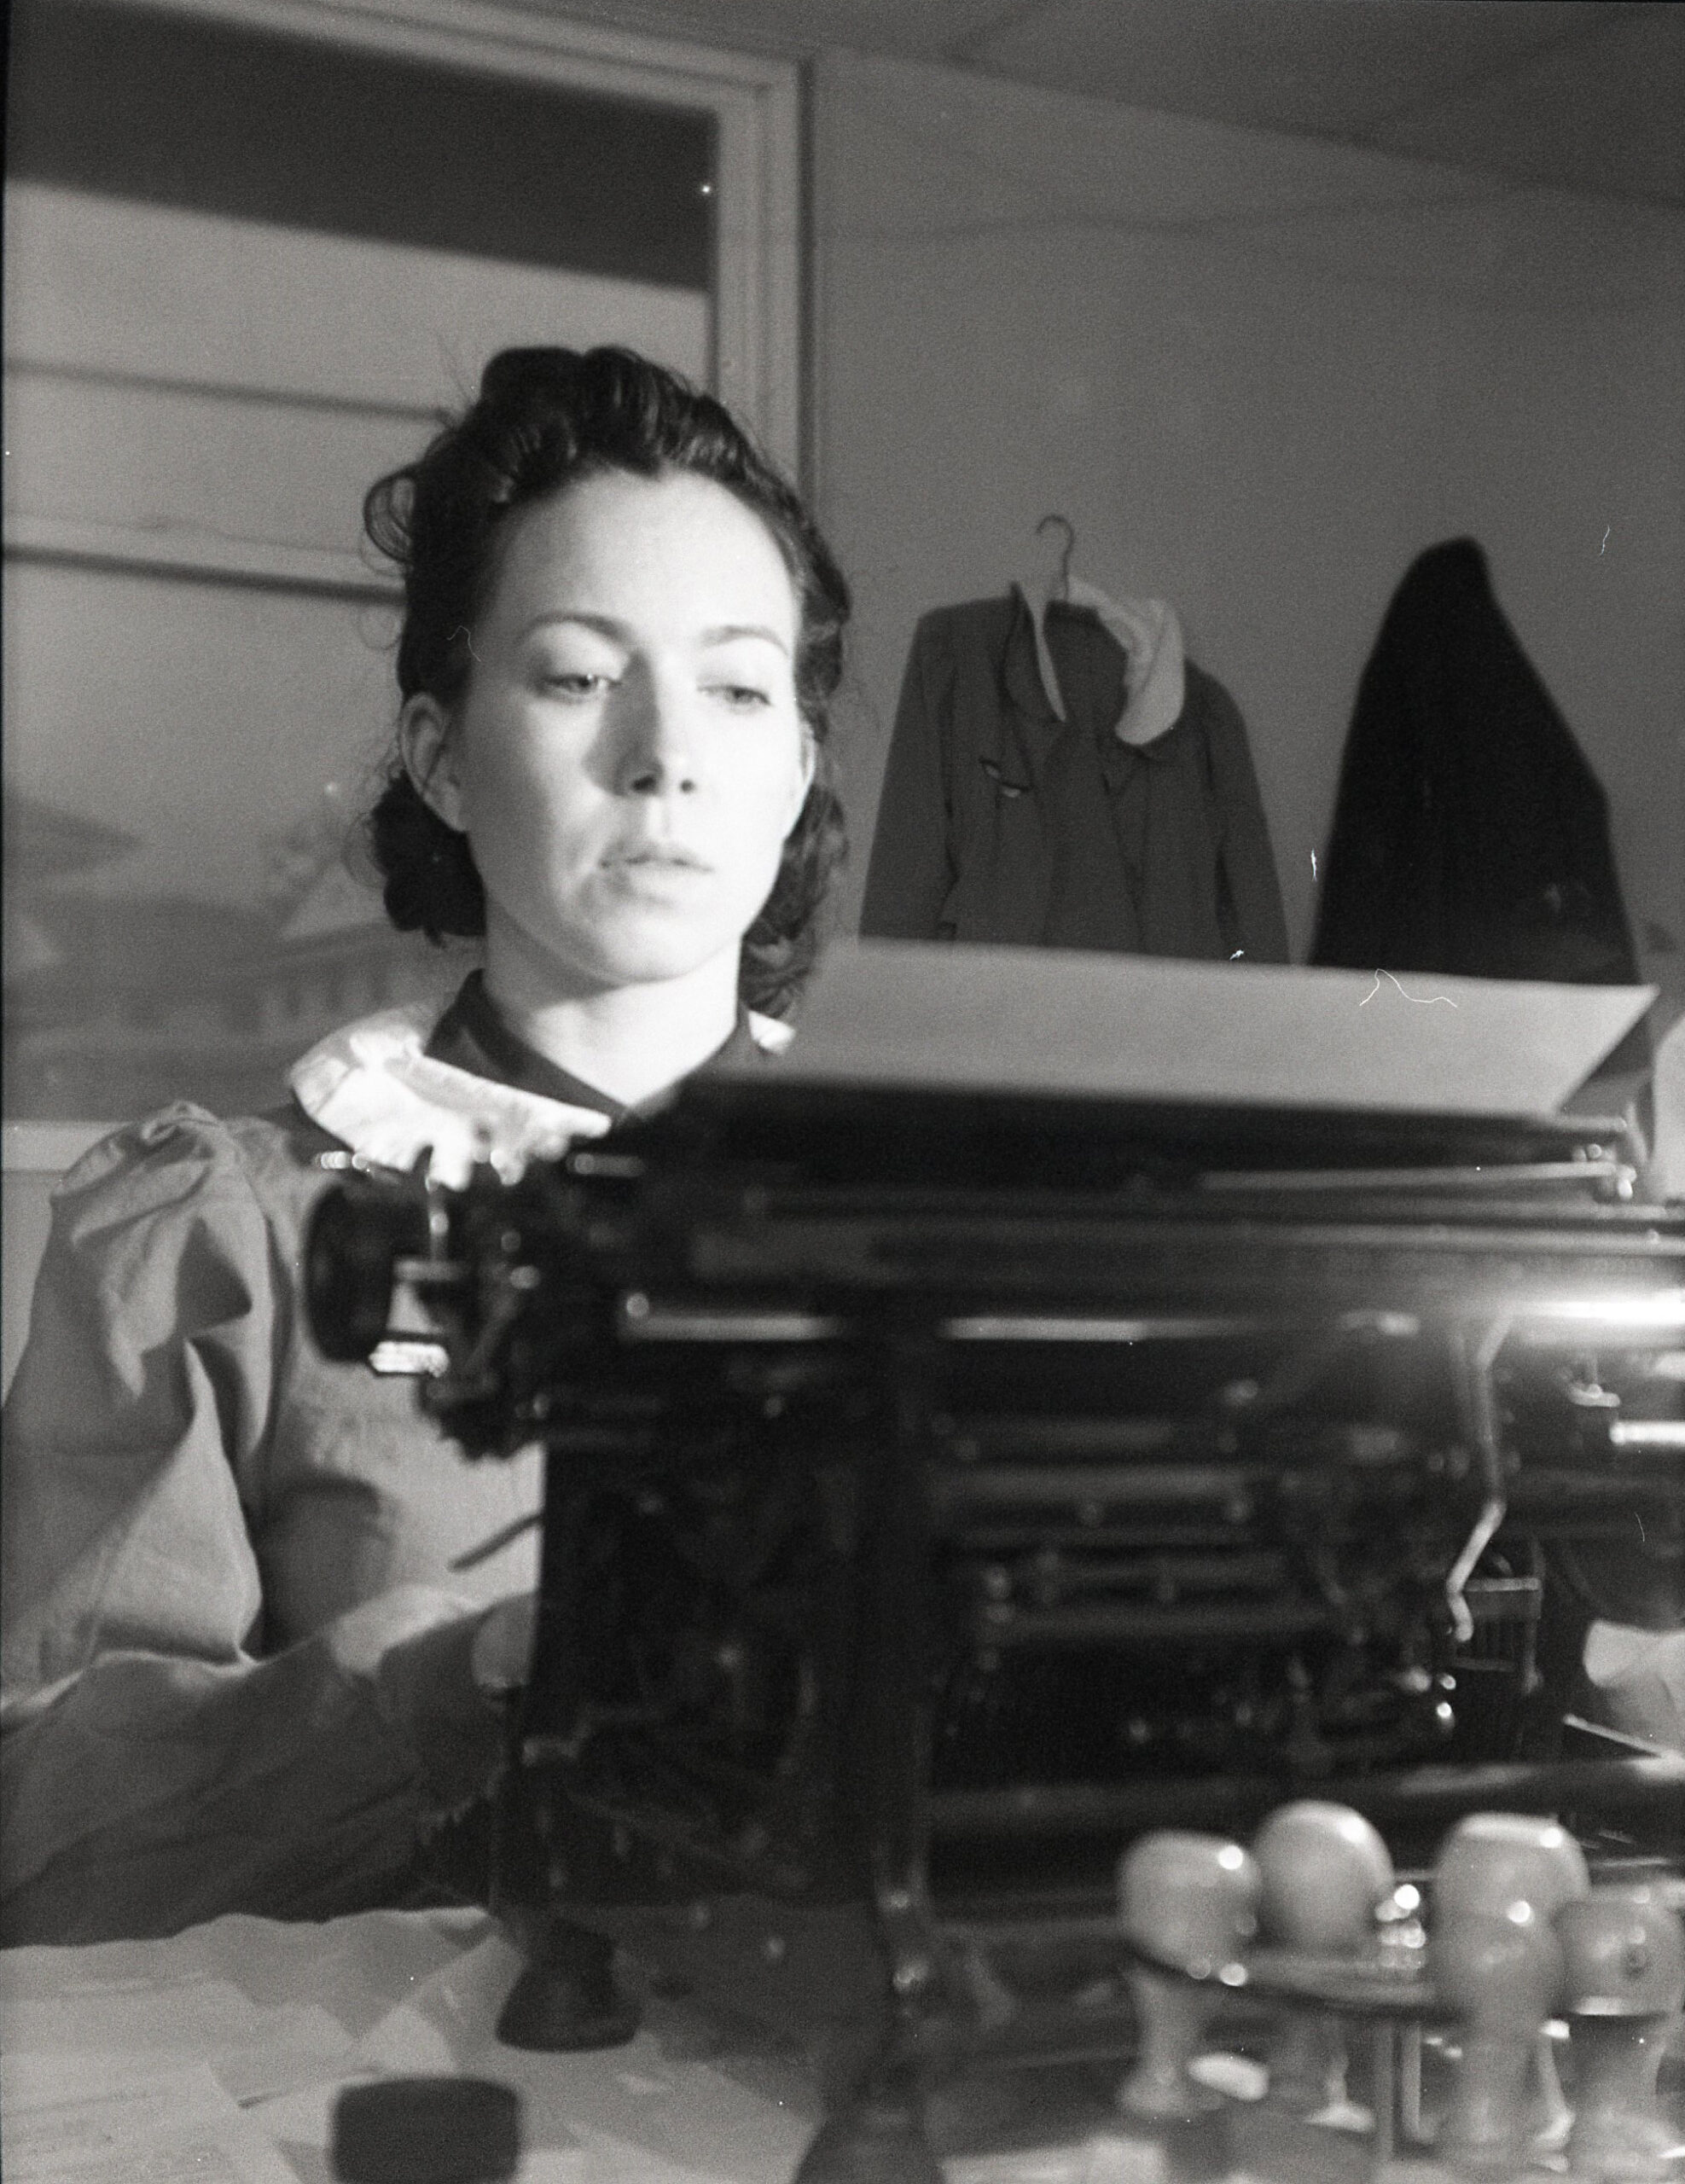
The purpose of this post is to share my process for taking reenactment photos using prewar box cameras and 120 film. It is my opinion that no digital reenactment photo can compare to the realism of a photo taken on film, especially a photo taken with an original camera.
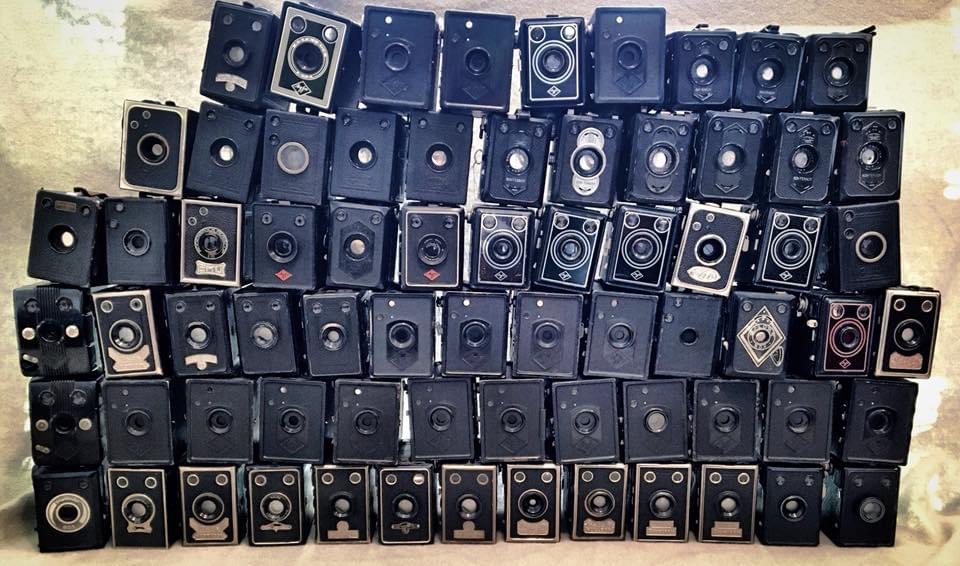
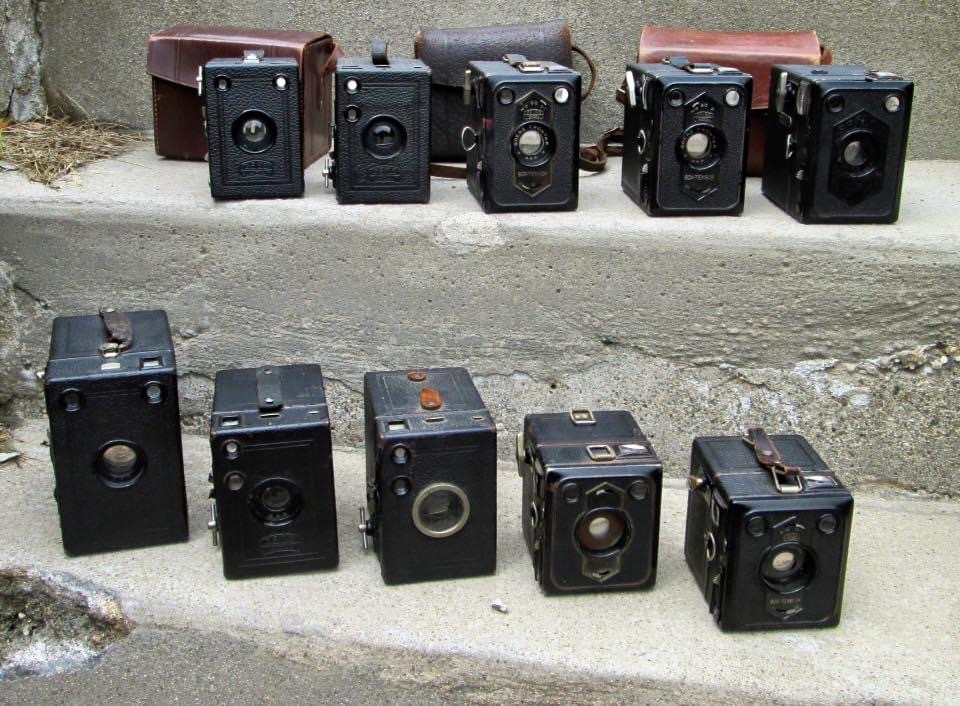
Pre-1945 German box cameras
I choose to use box cameras for a number of reasons. Box cameras were perhaps the most common cameras in prewar Germany, as they were the only cameras that could be had for less than a day’s pay for an average worker. Millions were made. Folding cameras that used 120 film were also common in that era, but these cameras can be more difficult to use today, as they are prone to light leaks in the fragile old bellows, and the lenses can be difficult to access for cleaning. Rangefinder cameras that used 35mm film, such as Leicas, were very expensive and mostly used by professional photographers. The simplicity and ease of use of box cameras is part of their appeal for me. Most box cameras from that era had simple, uncoated meniscus lenses. These simple lenses often resulted in soft focus at the edges of the frame, and this focus vignetting is an instantly recognizable feature of many wartime and prewar private snapshot type photos. Some box cameras did have better lenses and more features, allowing for somewhat more sophisticated photography as well. While better cameras are more appropriate for people portraying military photographers, and may be better at reproducing propaganda type photos, it’s my experience that box cameras cannot be beat when it comes to replicating the look of private snapshots from WWII. All of the reenactment photos used on this page were taken with box cameras.
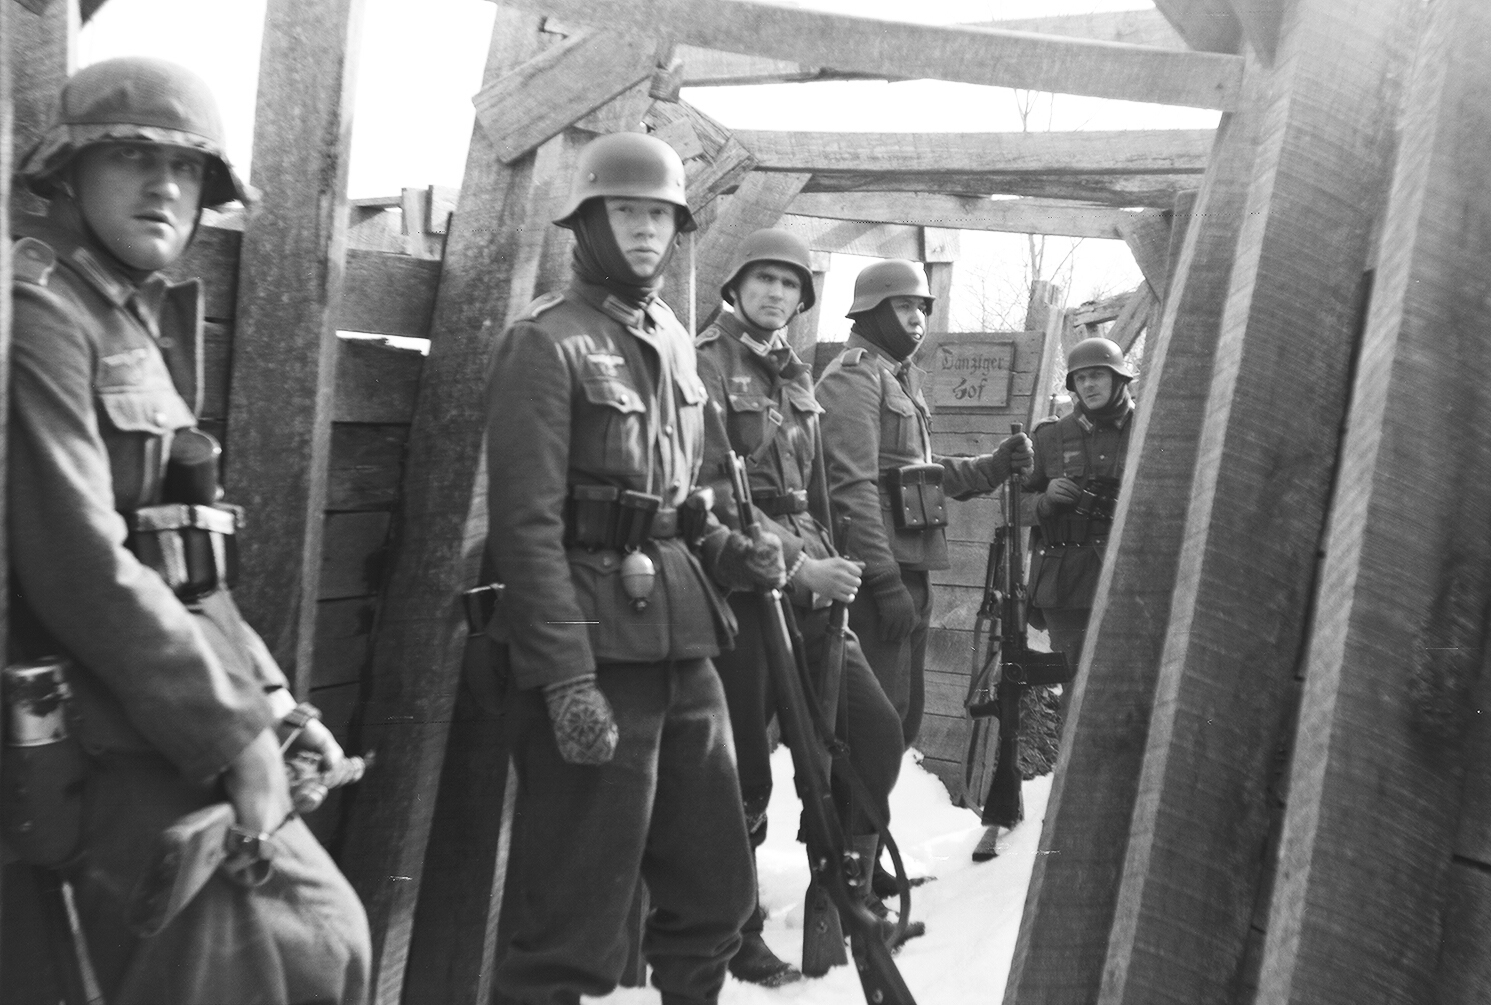
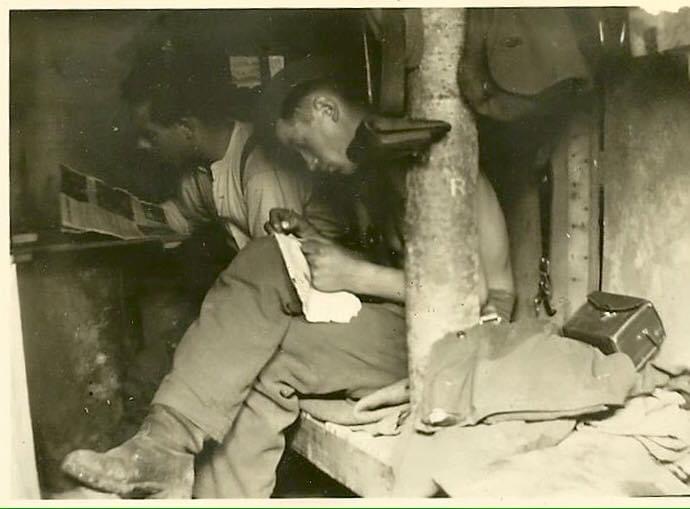
There are drawbacks to using box cameras. They are bulky, too big to carry in a uniform pocket. Soldiers in the field would likely have found it difficult to carry and store box cameras, and use of these cameras in a wartime combat setting can of course be ruled out. Despite this, there is documentation that some Wehrmacht soldiers did carry and use box cameras during the war. In his memoir “Condemned to Live,” Panzer artillery soldier Franz Fritsch recounts using a Kodak box camera to take the wartime snapshots used to illustrate the book. And this wartime bunker photo shows the leather case of a box camera, perhaps the very camera used to take this private snapshot.
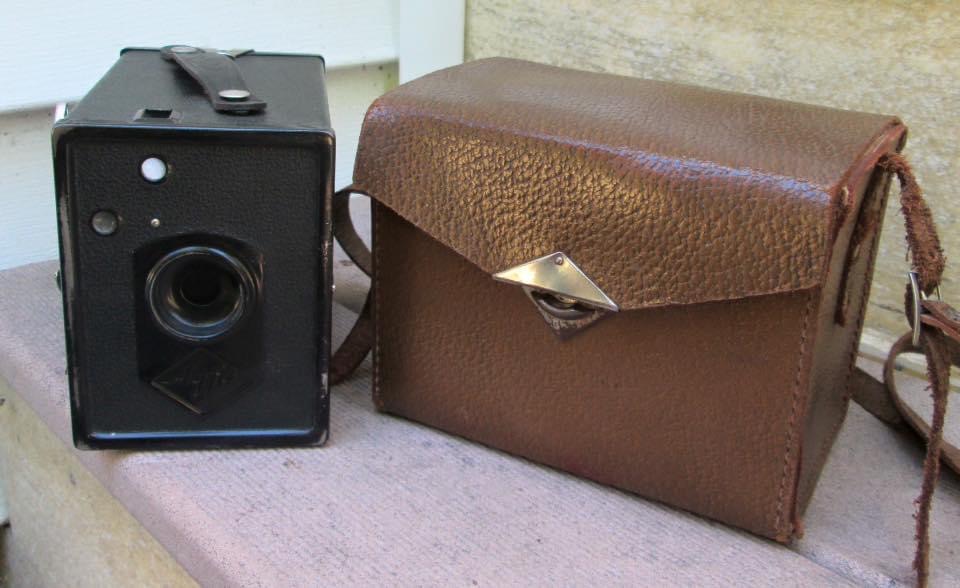
There were many manufacturers of box cameras in prewar Germany. Before WWI, most cameras sold in Germany were Kodak cameras, made in the USA. Kodak had its own dealer network in Germany before 1914. Kodak returned to the German market in 1924, eventually selling cameras including the Brownie No. 2 and Hawk-Eye No. 2 Model C box camera models, but now they were facing competition from some German manufacturers. By 1931, German firms including Agfa, Zeiss-Ikon, Balda, and a number of smaller companies were making cameras (including boxes) for the domestic market. In 1932, Agfa introduced the Box 44, a simple box that sold for the unheard-of low price of 4 Marks (by comparison, the cheapest Kodak box cost 10 Marks in 1926). The Agfa Box 44 was a huge success, that popularized amateur photography in Germany.
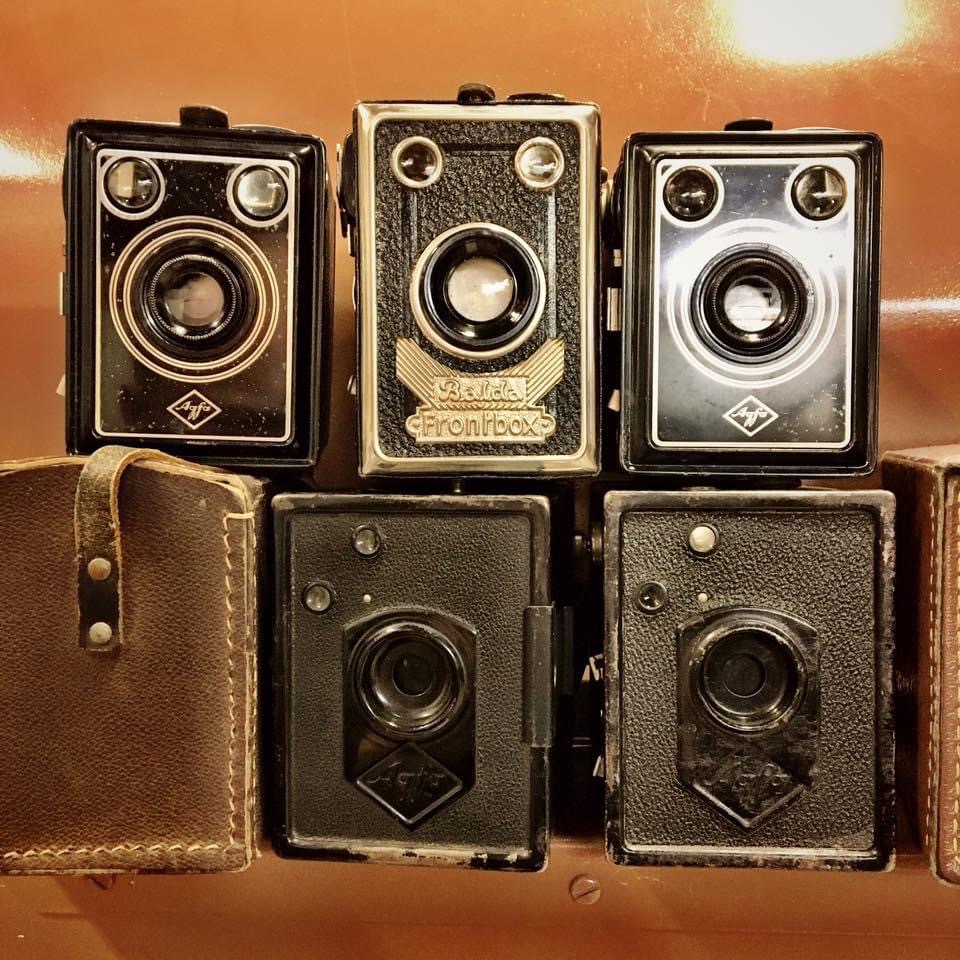
1930s Agfa and Balda cameras
Prewar German and American cameras were made to use a number of roll film formats. Today, all of these formats are obsolete with the exception of 120 film, which was introduced by Kodak for their Brownie No. 2 box camera in 1901. 120 film remains widely available, being made by a number of film manufacturers, and can be found at any real camera store, or online. If you are buying your first box camera, it is easiest if you make sure that the camera you are buying takes 120 film. Some camera models, such as the Agfa Box 44, were only made in the 120 format; if you look up any camera model online, you can probably learn if it was made in just 120 or in other formats also. Kodak cameras are likely to be marked somewhere with “Use 120 film,” while German cameras may be marked with “B2” or “B II,” a German designation for 120. Many Kodak cameras were made to use 620 film, which is the same as 120 but uses a different spool that may not be compatible. If this sounds confusing: just look for a camera that says it takes 120 film, or buy from a seller who knows what film format a camera uses.
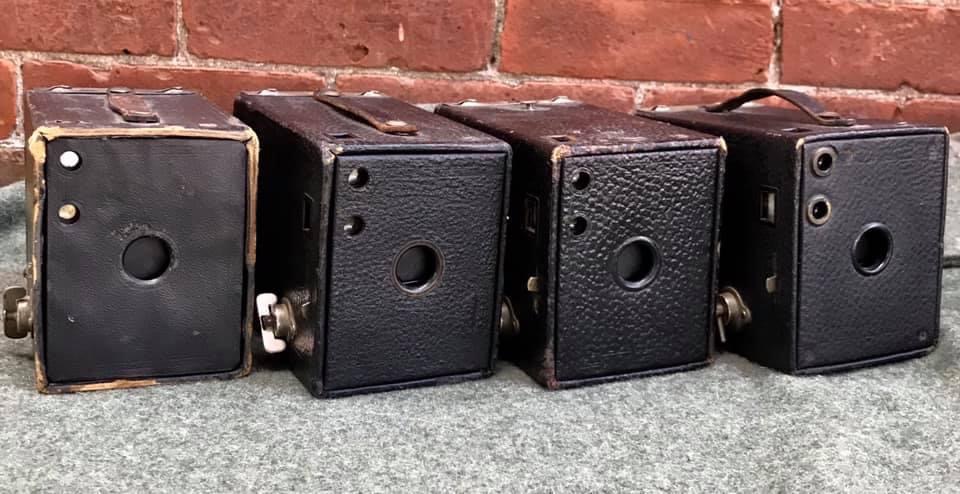
Kodak Brownie No. 2 cameras, made in the USA between 1902 and 1915. Cameras like this were still in use in WWII and beyond, all over the world.
It may be hard to find a box camera that has been cleaned, tested and works. You might have to test and clean the camera yourself. If the shutter fires, it’s likely that the camera can be cleaned up and made to work, but not all sellers will be willing or able to test even that basic function. If you get a camera with a working shutter, the lens will almost always need to be cleaned before the camera will take good photos. Use cotton swabs and glass cleaner to very gently clean the lens. Don’t scrub, wipe carefully. You can use an old T-shirt or a lens wipe at the end to do a final wipe.
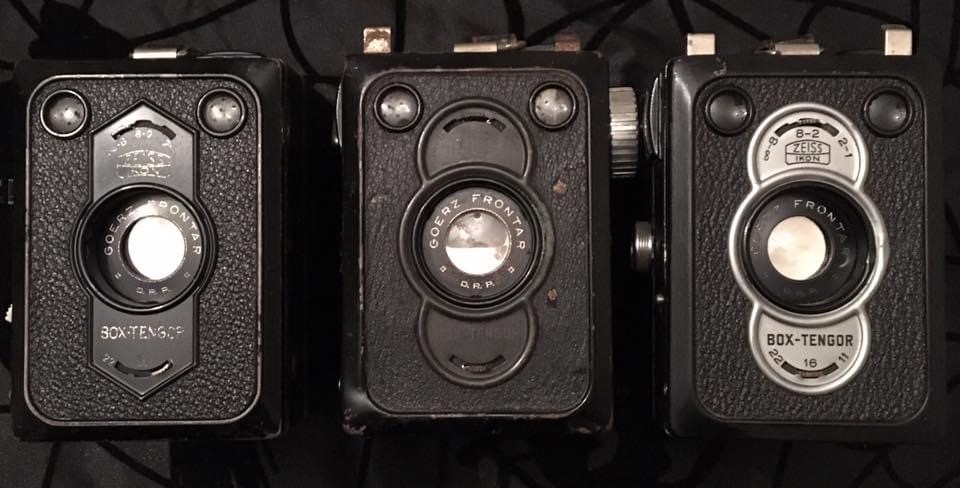
Zeiss-Ikon box cameras, made in Germany
Manuals for many prewar cameras can be found in PDF format online. There are also many YouTube videos showing how to use box cameras, even specific box camera models. For example, here is a video I made showing the Kodak Hawkeye No. 2 Model C. Most box cameras function similarly to this.
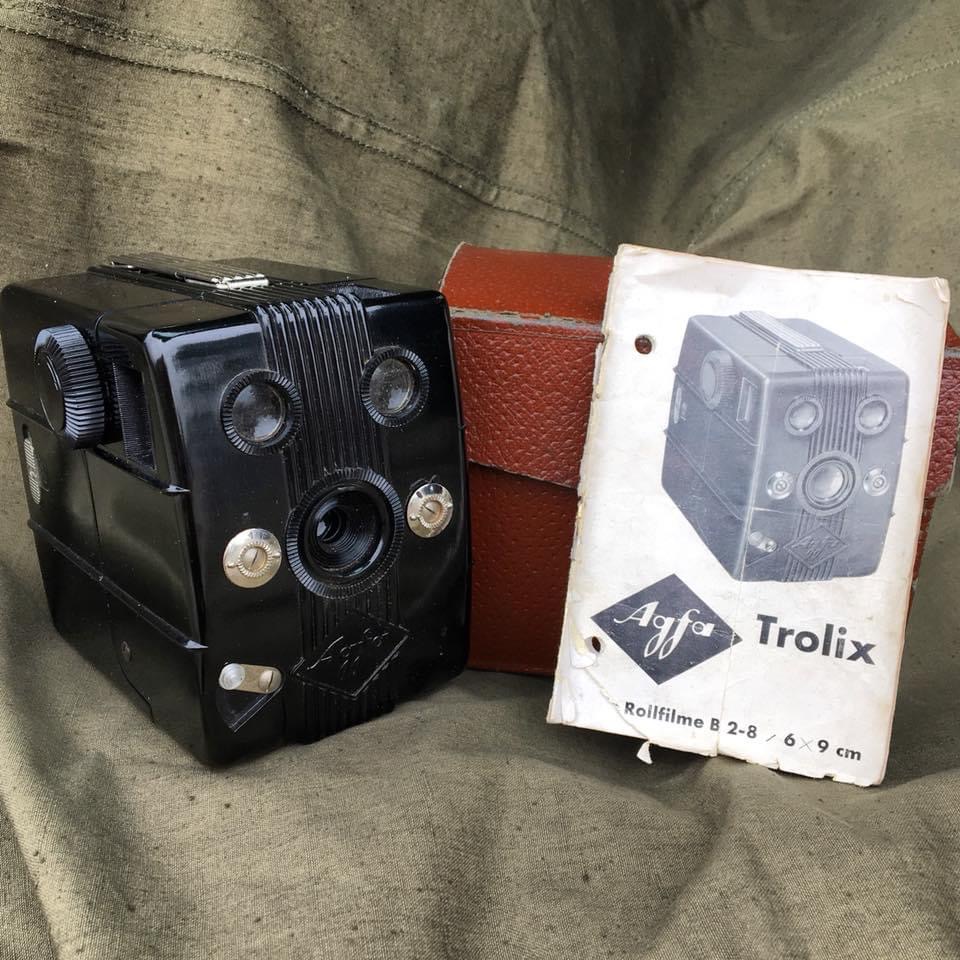
Agfa Trolix, made of an early plastic material, 1936
Here are the most important things to keep in mind when shooting with box cameras. The shutters are slow by modern standards, so if you are not holding the camera still, the images will come out blurry. Press the camera against your body to steady it, breathe out, hold your breath, and smoothly fire the shutter. You also need to make sure you are a proper distance from your subject. While some box cameras offer different focus zones, most box cameras are fixed focus. With a Box 44, everything six feet and further from the camera will be in focus. Kodak manuals indicated that subjects eight feet and further away would be sharp, while objects as close as six feet, while not as sharp, would be sharp enough for practical purposes. You may need to experiment a bit to get a sense for how close, is too close, with your camera.
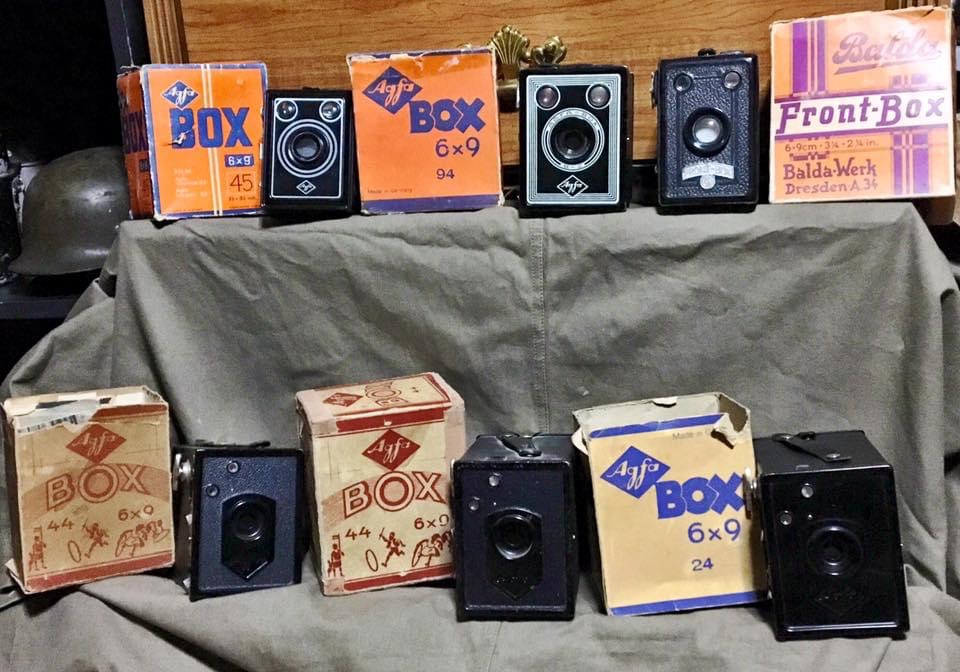
Prewar German box cameras with original packaging
With most box cameras, you will get 8 exposures per roll of 120 film. It’s my experience that the brand or even the speed of the film won’t make a big difference in most situations. My favorite all-purpose film for box cameras is Ilford FP4 Plus, which at the time of writing (2021) can be found for $6-$7 roll. I have also used cheaper film, with very good results. Ilford FP4 Plus is ISO 125 (125 speed). The higher the speed number, the faster the film is exposed when light hits it. As I mentioned above, box cameras have shutters that are slow by modern standards. You will want a film with a fairly low speed, so that the photos are not overexposed. In bright sun, I will use 100 speed film. In lower light (a cloudy day) I will use 400 speed film; I haven’t used anything faster than that. If you are going to take photos indoors, or in low light conditions, you need to take a time exposure, if that is a setting your camera has. Film has a lot more latitude and flexibility with exposures, than you might think.
The Zeiss-Ikon Box Tengor was a fairly sophisticated model. These have three focus zones and three aperture settings.
Once you have taken your photos, the next step is developing your film. There are many labs all over the world that still develop film, and you may be able to find a place local to you. Most places that develop film will develop 120 film, and they may be able to make prints or scans for you, depending on how you want to view and share your photos. If you can’t find a local place, you can send the film out to a place that will develop, print or scan for you. I used to send my film to The Darkroom in San Clemente, CA. They would develop my film, scan my negatives, and upload them to the Internet so I could download and share them. But I was taking a lot of film photos, and at $12/roll, it got kind of expensive. I found that I could save a lot of money over time by developing and scanning my black and white film myself.
Sending my film out for development and scanning cost me more than $2 per photo I took. The same photo now costs me less than $1. I had to spend a bit of money up front, but have since enjoyed cheap photos for a long time. Developing black and white film yourself at home is super easy. You need the following supplies to develop your own film: -Developing tank and reel for 120 film -Chemicals. You need developer and fixer. I used Kodak powdered chemicals because they are inexpensive and they always work for me. The developer I use is Kodak Professional D76 Developer and the fixer is Kodak Professional Fixer. You also need a bucket to mix the chemicals. -A measuring cup (ideally with gradations in milliliters) and thermometer -Containers for chemicals. I bought cheap gallon water jugs at the grocery store, dumped the water out, and I use those bottles for my developer and fixer. You can use any kind of bottle. -Something to weigh the bottom of the film roll when hanging to dry. I use clips for documents. This is EVERYTHING I use to develop film. I go in a darkened room and sit under 2 or 3 wool blankets and a Zeltbahn shelter quarter, and tuck the blankets around me so no light can get in, and I load the film into the tank. I measure the developer, make sure the temperature is in the 68-75 degree F range, and pour the developer in the tank. I use a stopwatch to time the developing, agitating the tank every minute until the developing is done. Then I dump the developer, put water in the tank and dump it out twice, then I pour in the fixer, timing it and agitating just as I did with the developer. When the time is up, the fixer goes back into the bottle, I rinse the film and hang it to dry. The total time is about 20 minutes and it is so easy. I found lots of great YouTube tutorials on every aspect of the process, from mixing the powdered chemicals, to loading the tank and developing the film. The cost for all the supplies needed to develop film is less than $100, an amount you might spend having someone else develop your pictures from 5-6 reenactment events. Doing the developing yourself cuts the cost of developing to less than $1 per roll.
I share my reenactment photos online. To do this, you need to scan your negatives; this requires a scanner that can handle film. The film has to be backlit to get a good scan. A document scanner uses reflected light, and won’t give good results. Some people use a light table and a DSLR digital camera on a stand to photograph the negatives, then rework the photos to create the images; I have never attempted this. I find it easy to use a film scanner and I am very happy with the results I get. At this time, I think the best scanner for this purpose is the Epson V600. The list price for this scanner is $230, and you can get it on Amazon with free shipping. You can likely find a refurbished one from a reliable seller for under $170. The scanner that I use is an Epson V550, which was cheaper than the V600 but is now discontinued. You may be able to get a good deal on a used V550 or V600.
After scanning my negatives, I will crop them and add contrast or otherwise edit the lighting to make the images look their best. A photo print may have more contrast than a scan from a negative, and lab techs have always been able to crop negatives and adjust lighting when making prints. I feel the digital edits I make are analogous to these analog processes. The scanner makes its own adjustments before I even see the scan; I don’t see any reason to be a “straight from the scanner” purist when I am making digital images from negatives, to share online. I mostly use Photoshop Elements for this. Sometimes I will e-mail the photos to myself, download the photos to my phone, and then use the basic photo editing tools or a photo editing app, before sharing them from my phone to a social media platform.
Once you have bought the developing supplies and the scanner, you are all set to develop your own black and white film. The total start-up cost is around $300-$350. As a reenactor, you might pay this much for a helmet or some other uniform or gear item. Processing your own film, you will spend $5-$7 per roll, plus less than $1 in chemicals to develop, every time.
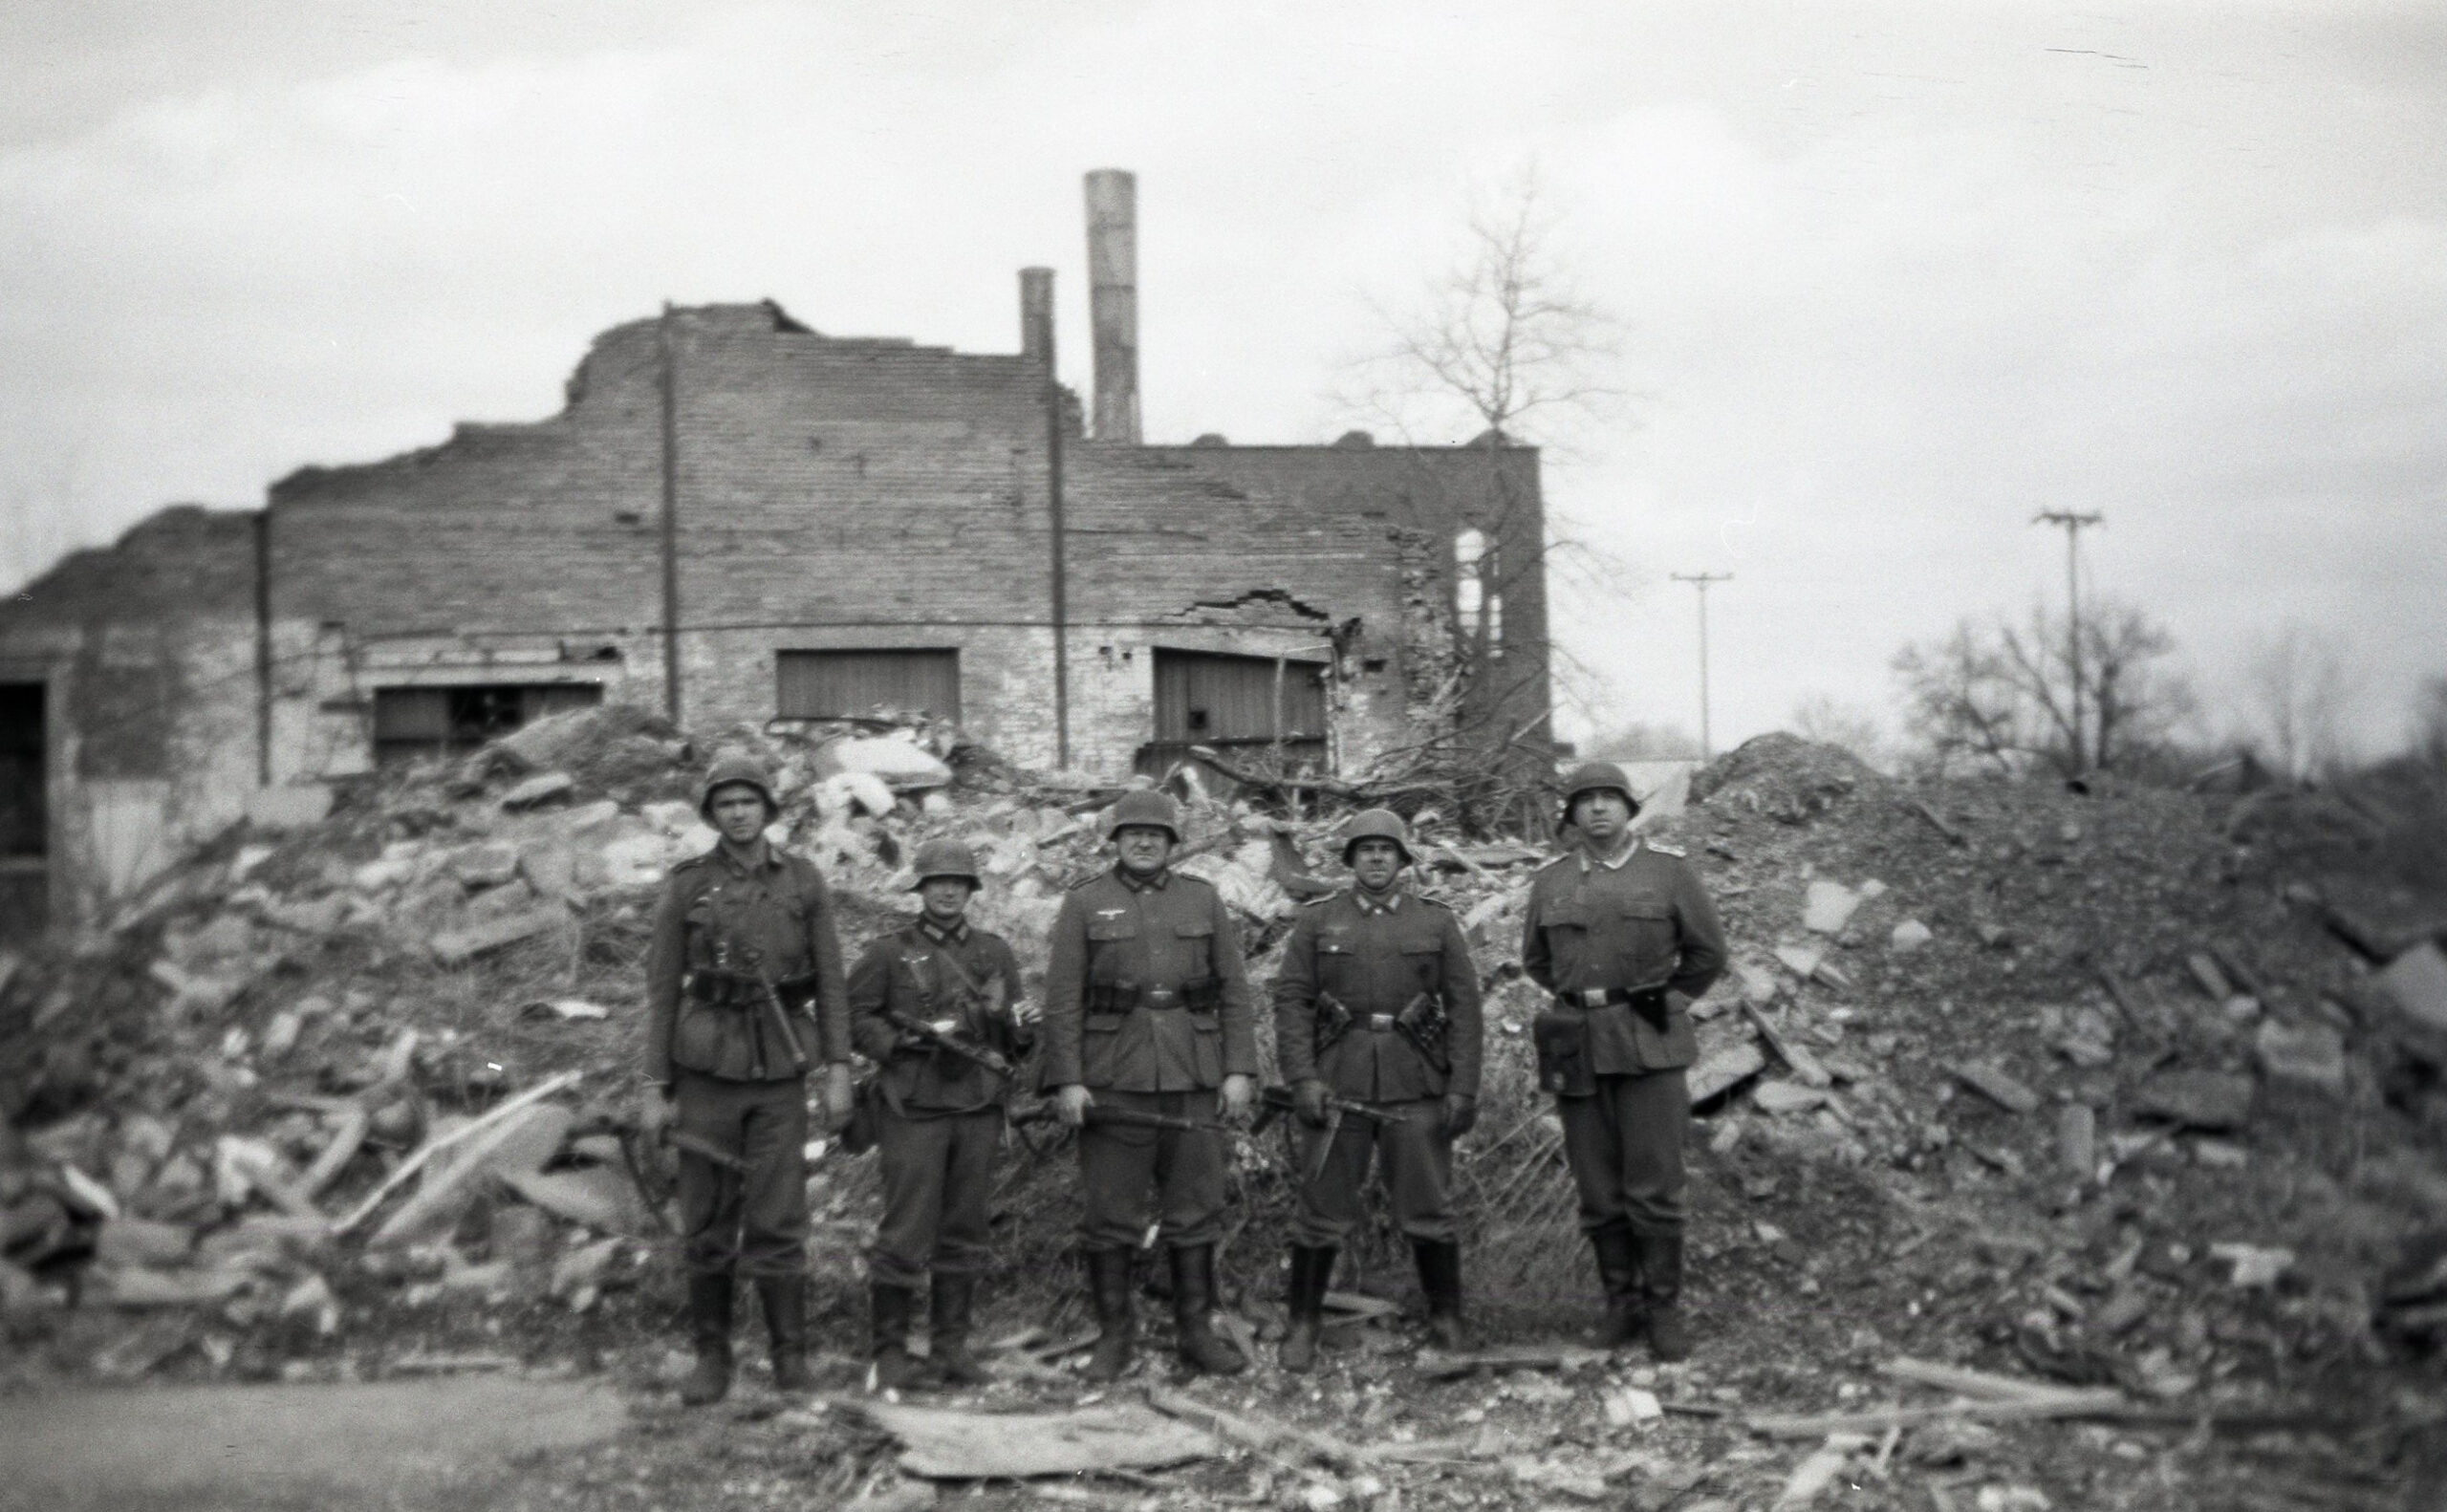
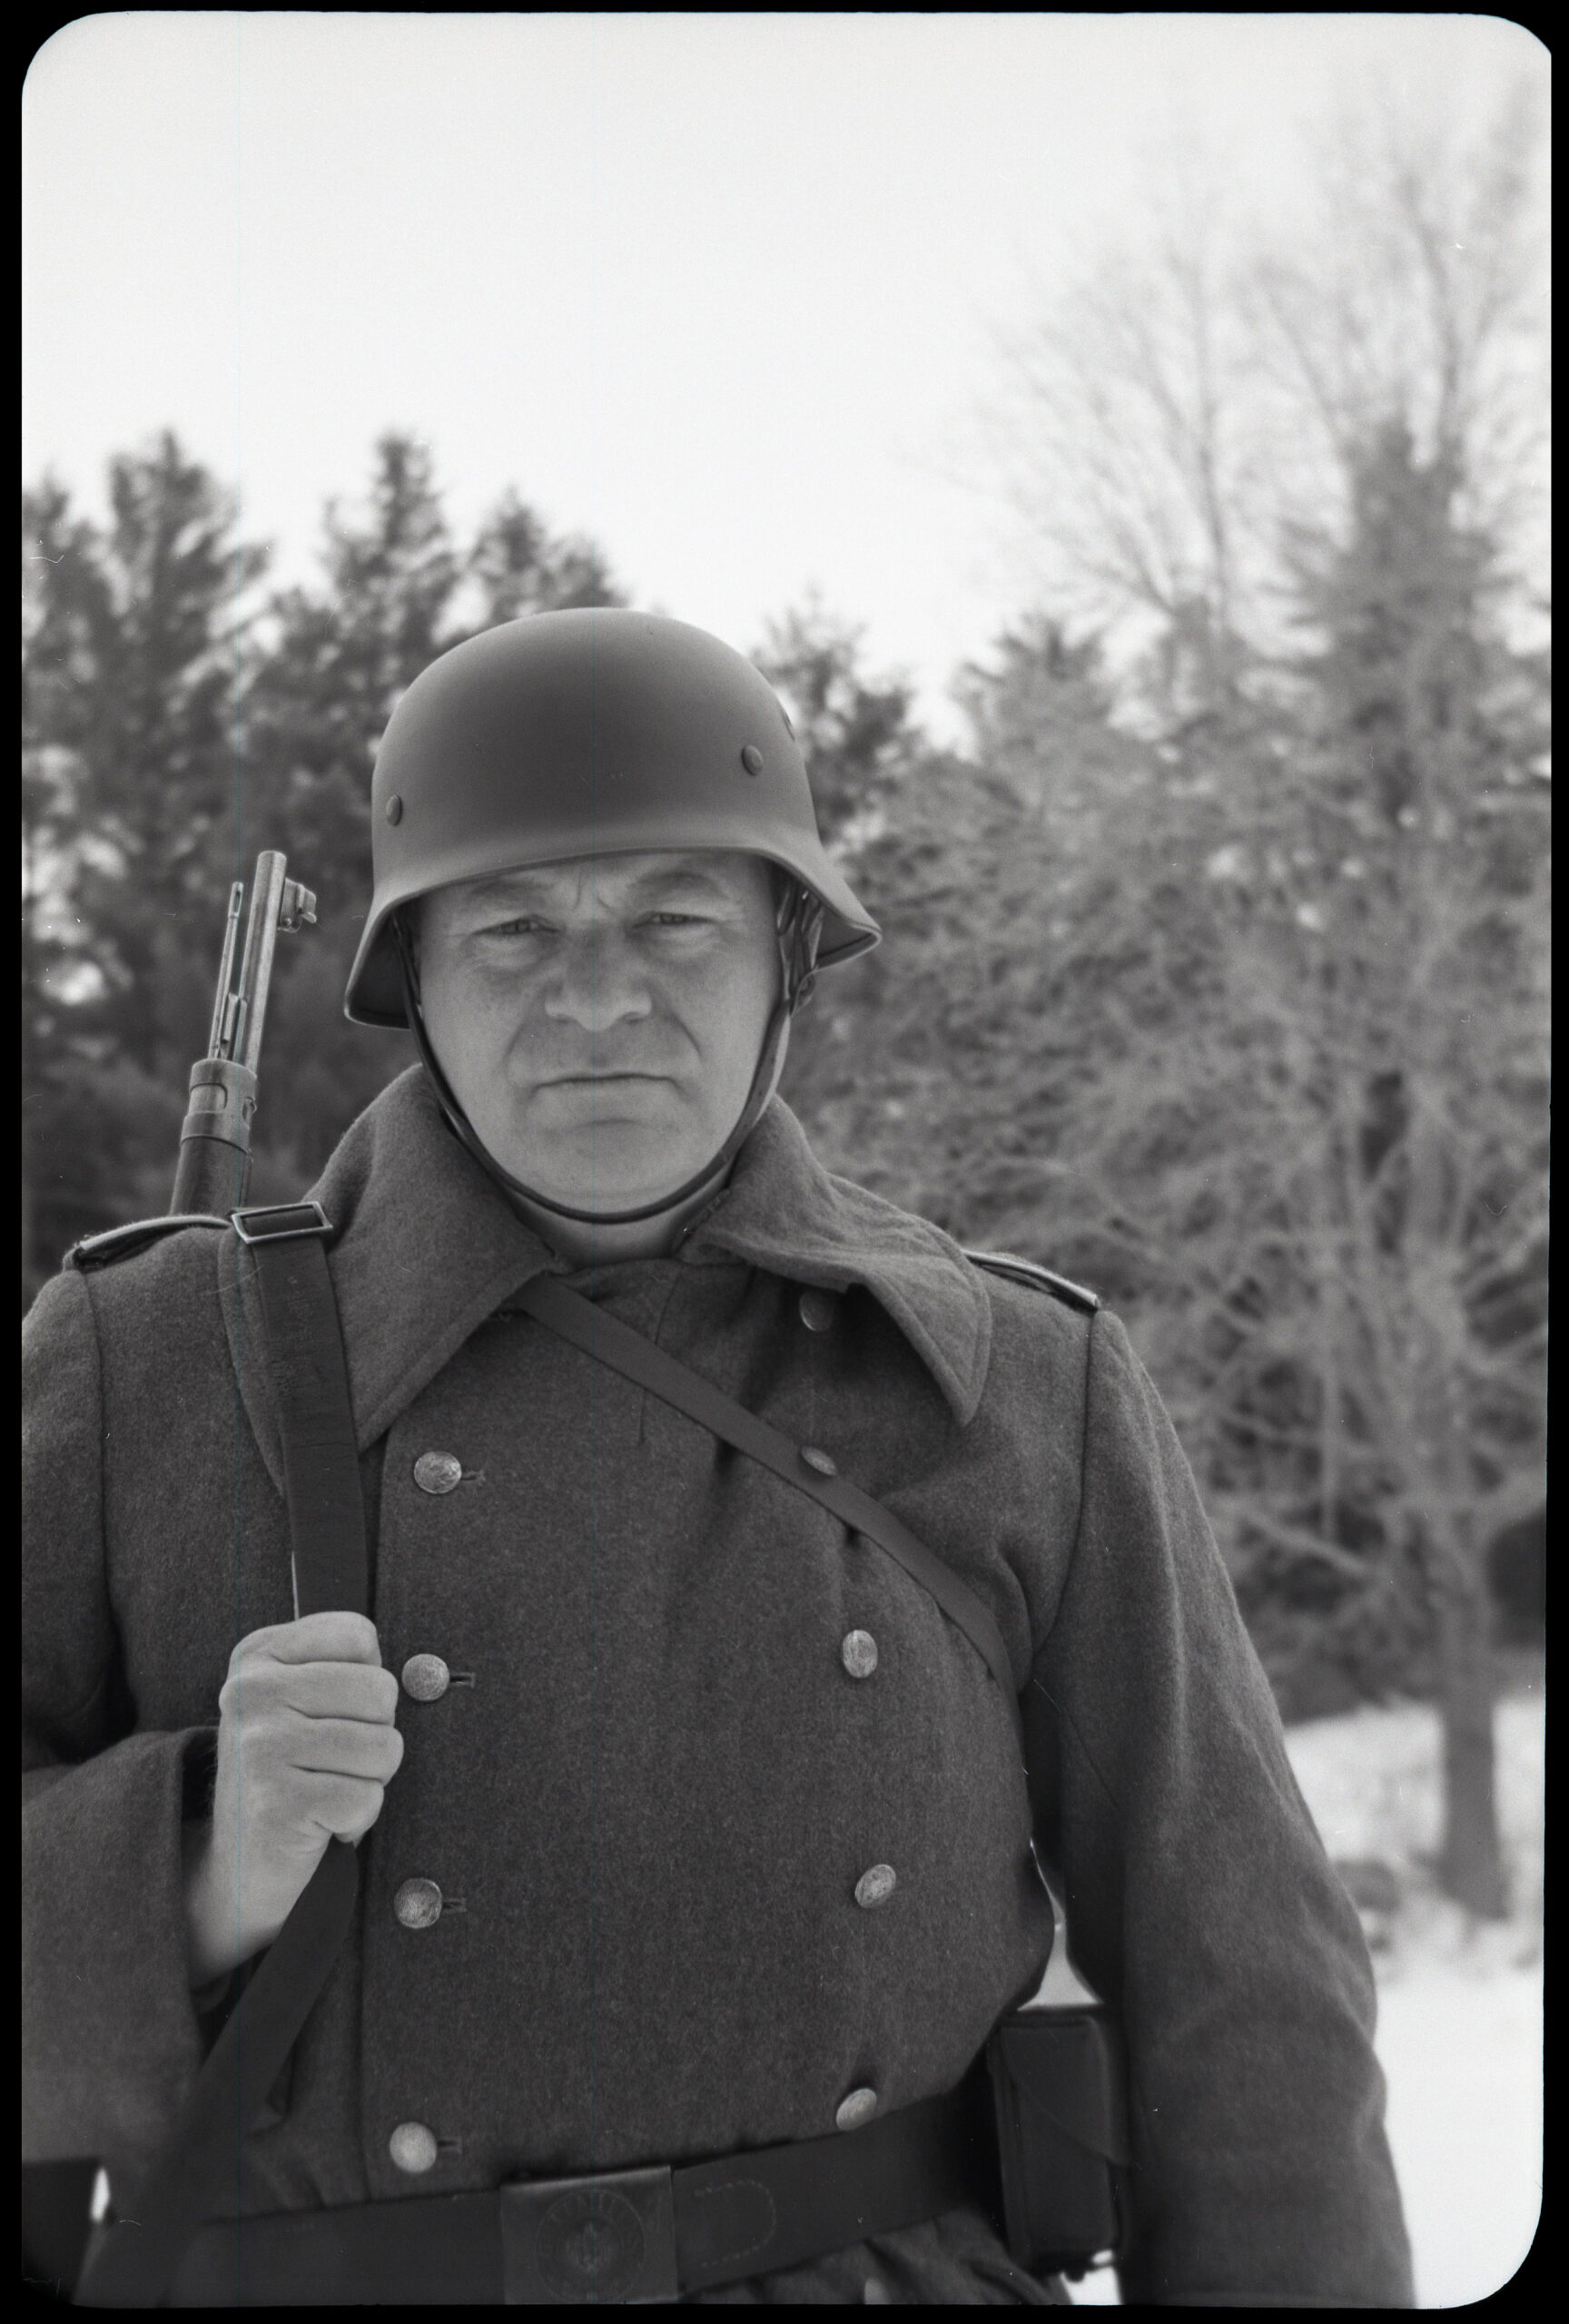
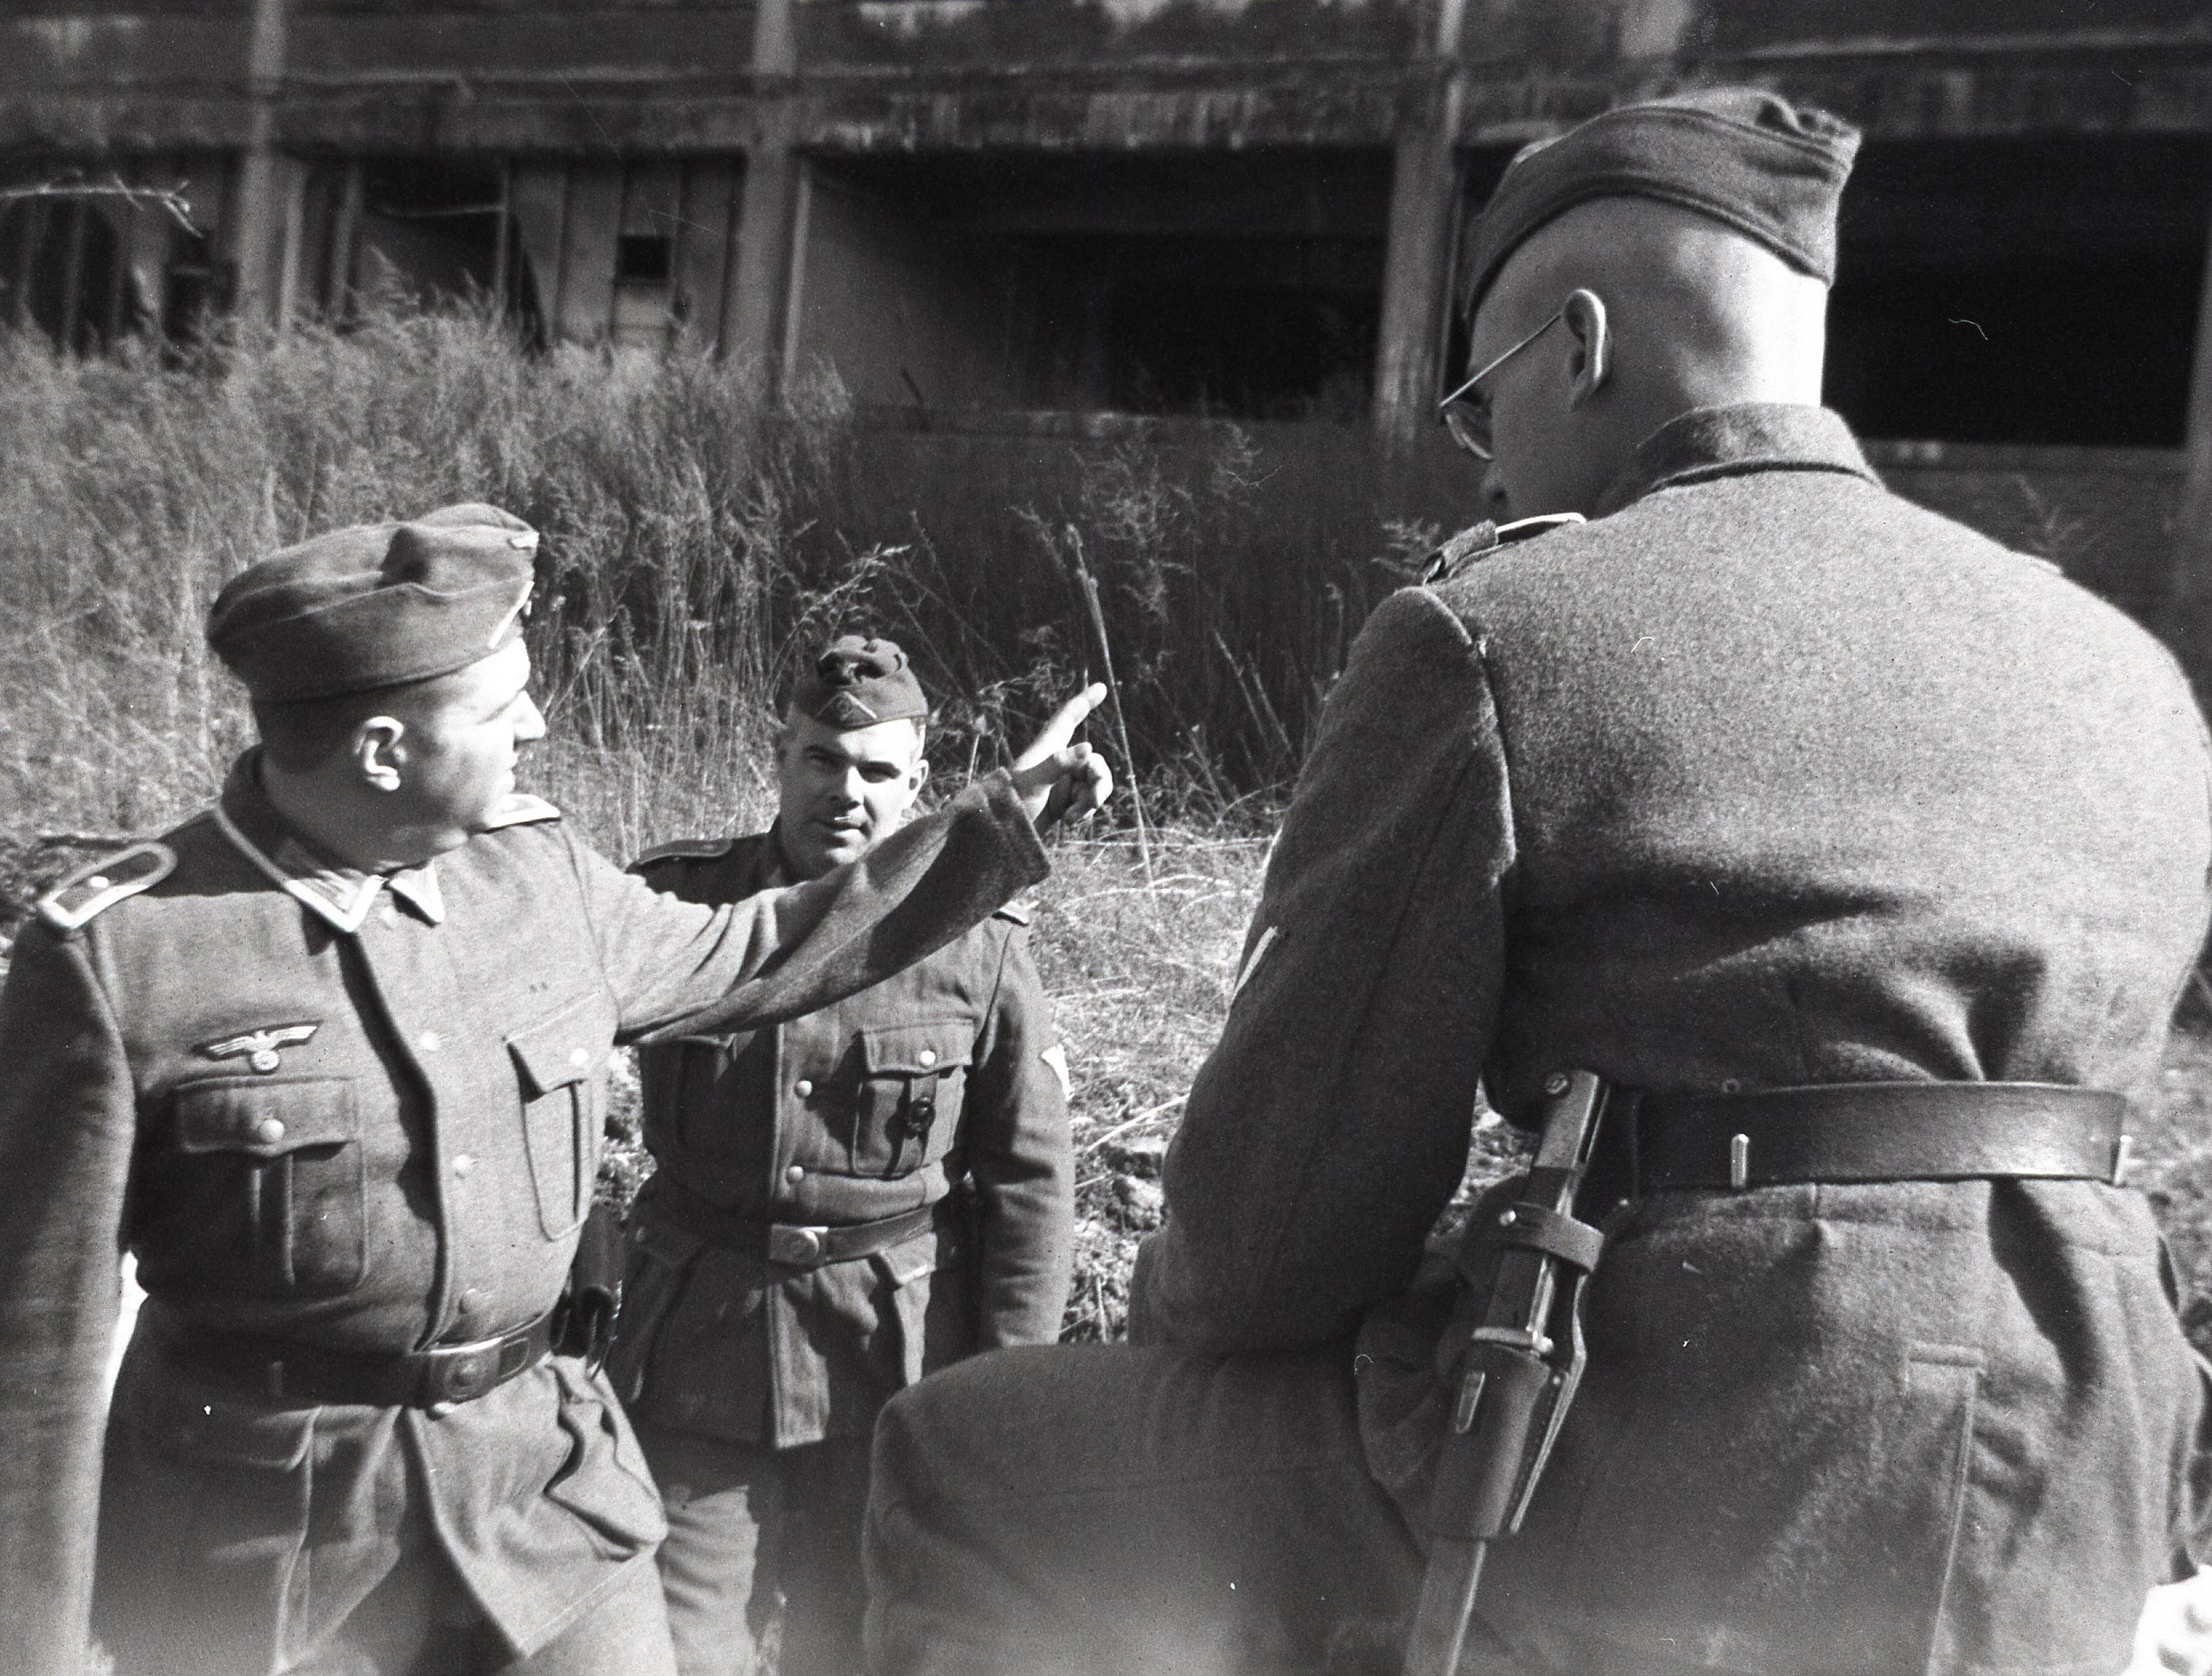
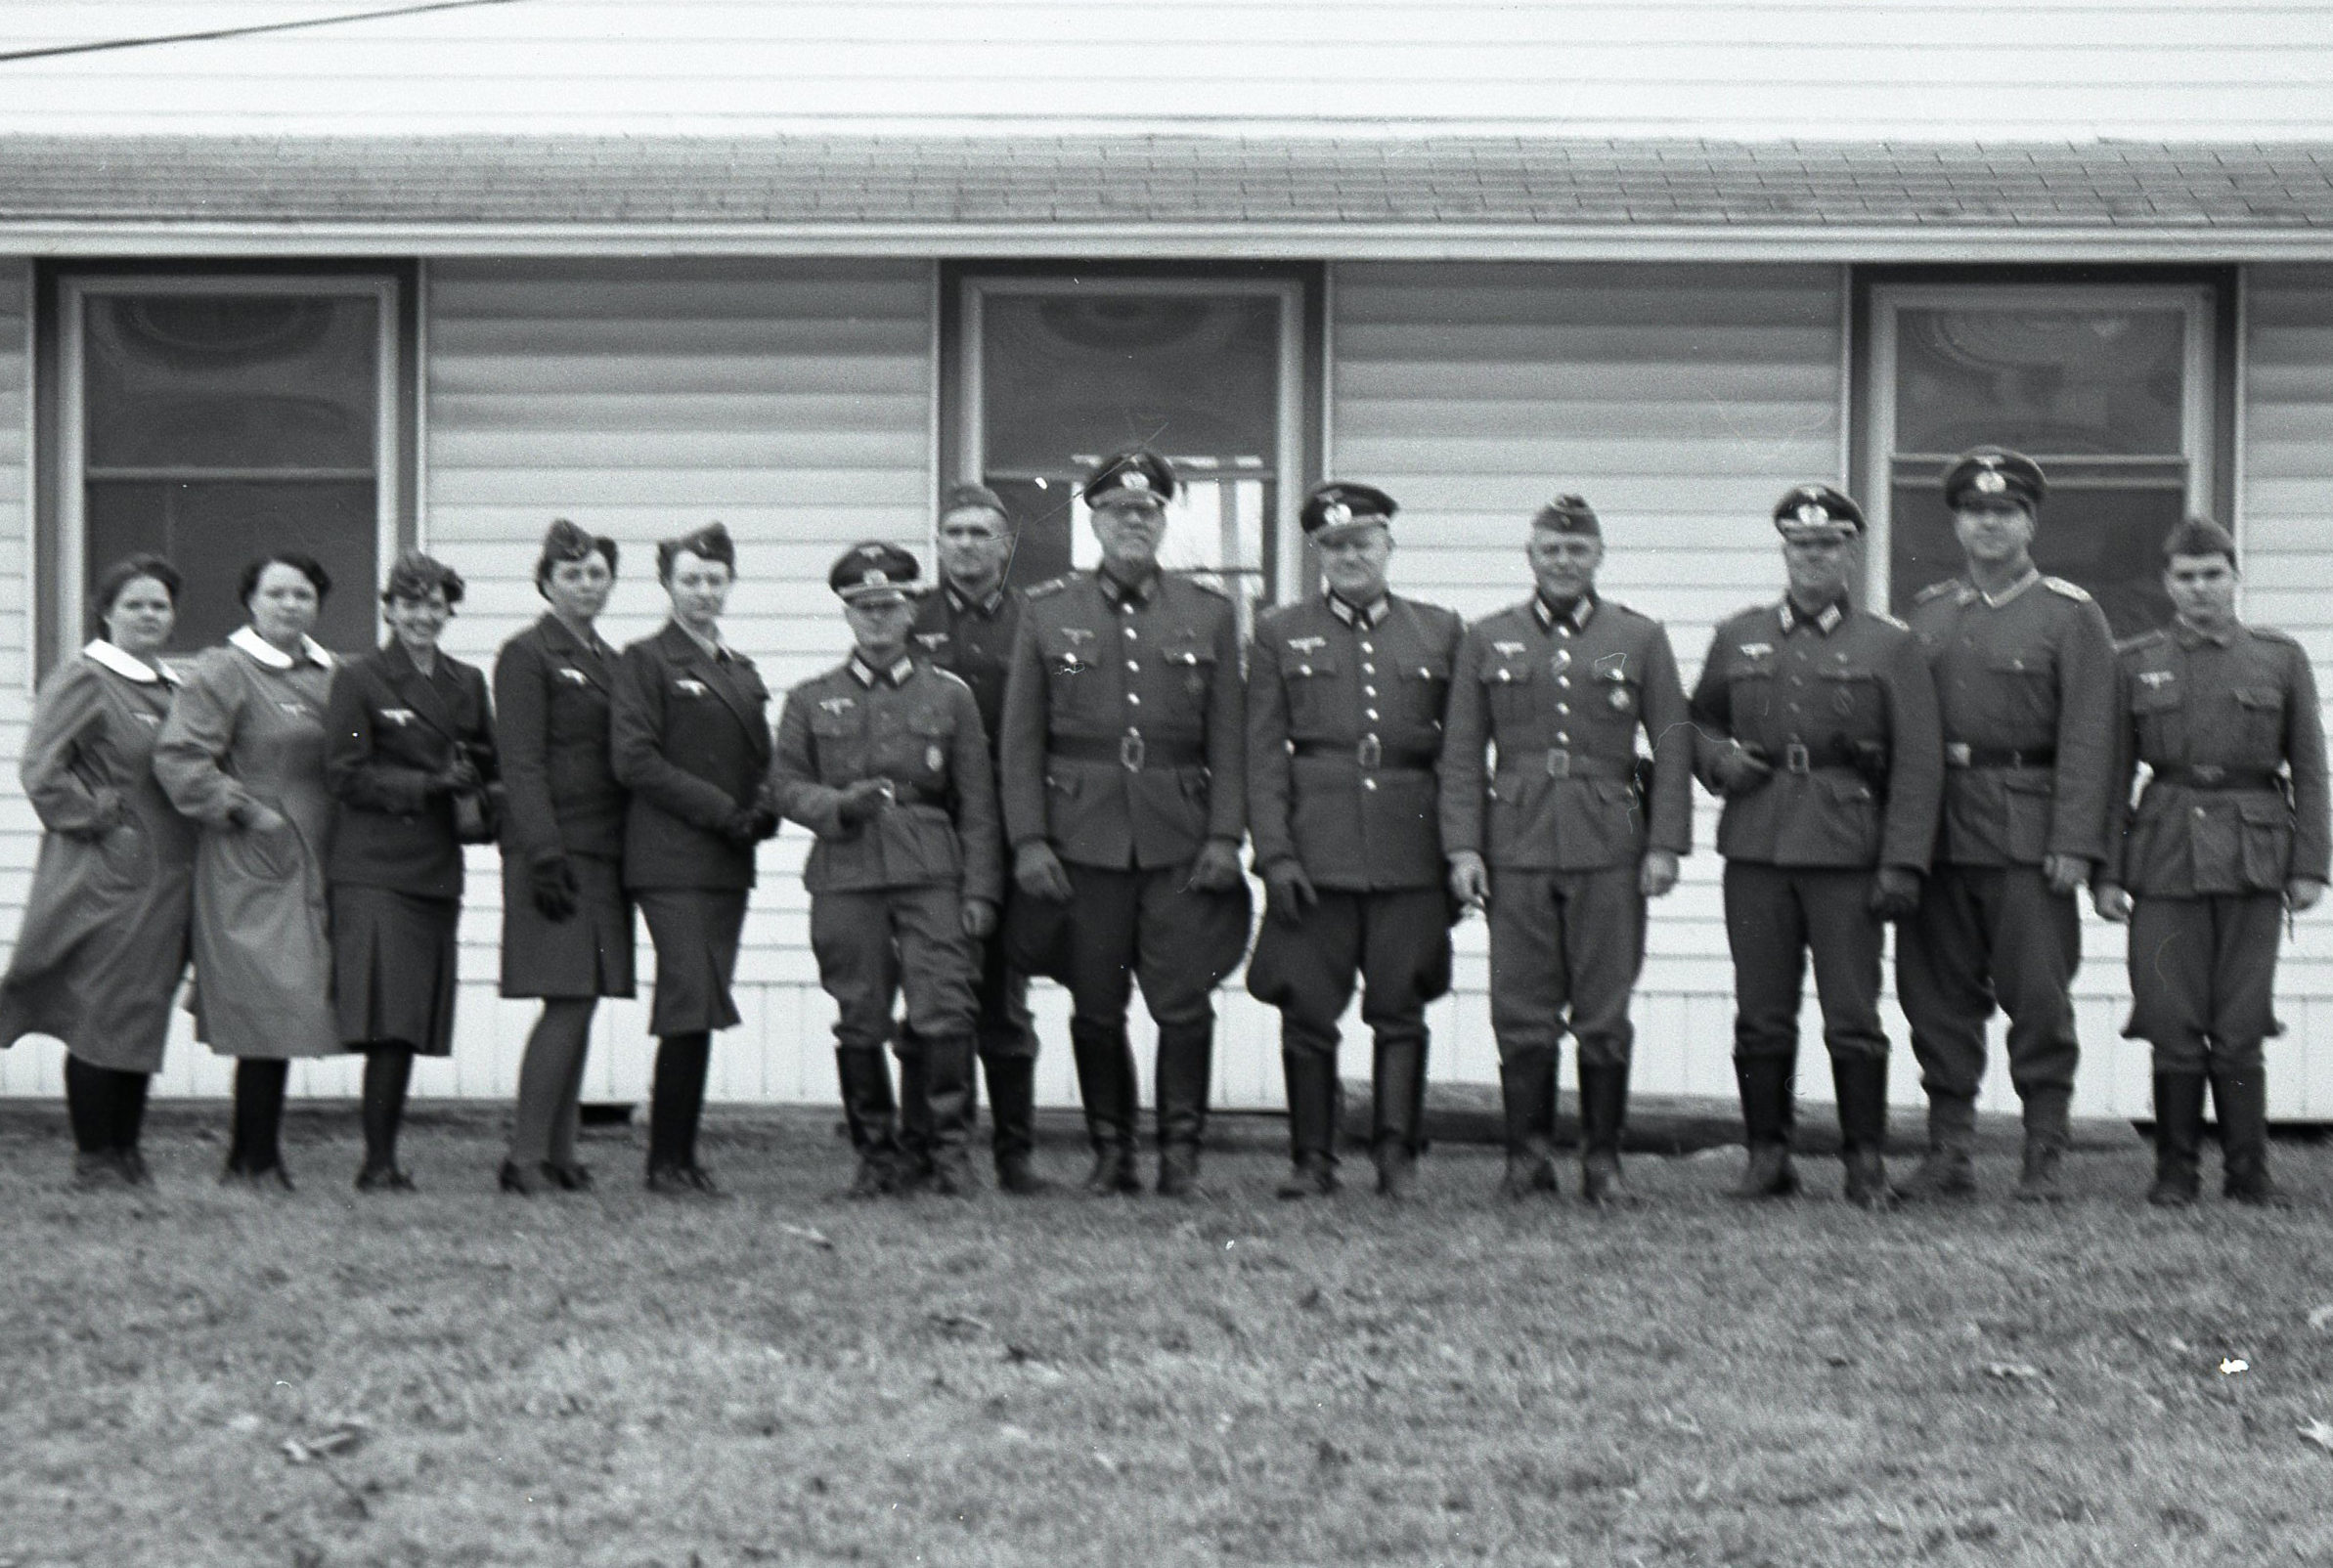
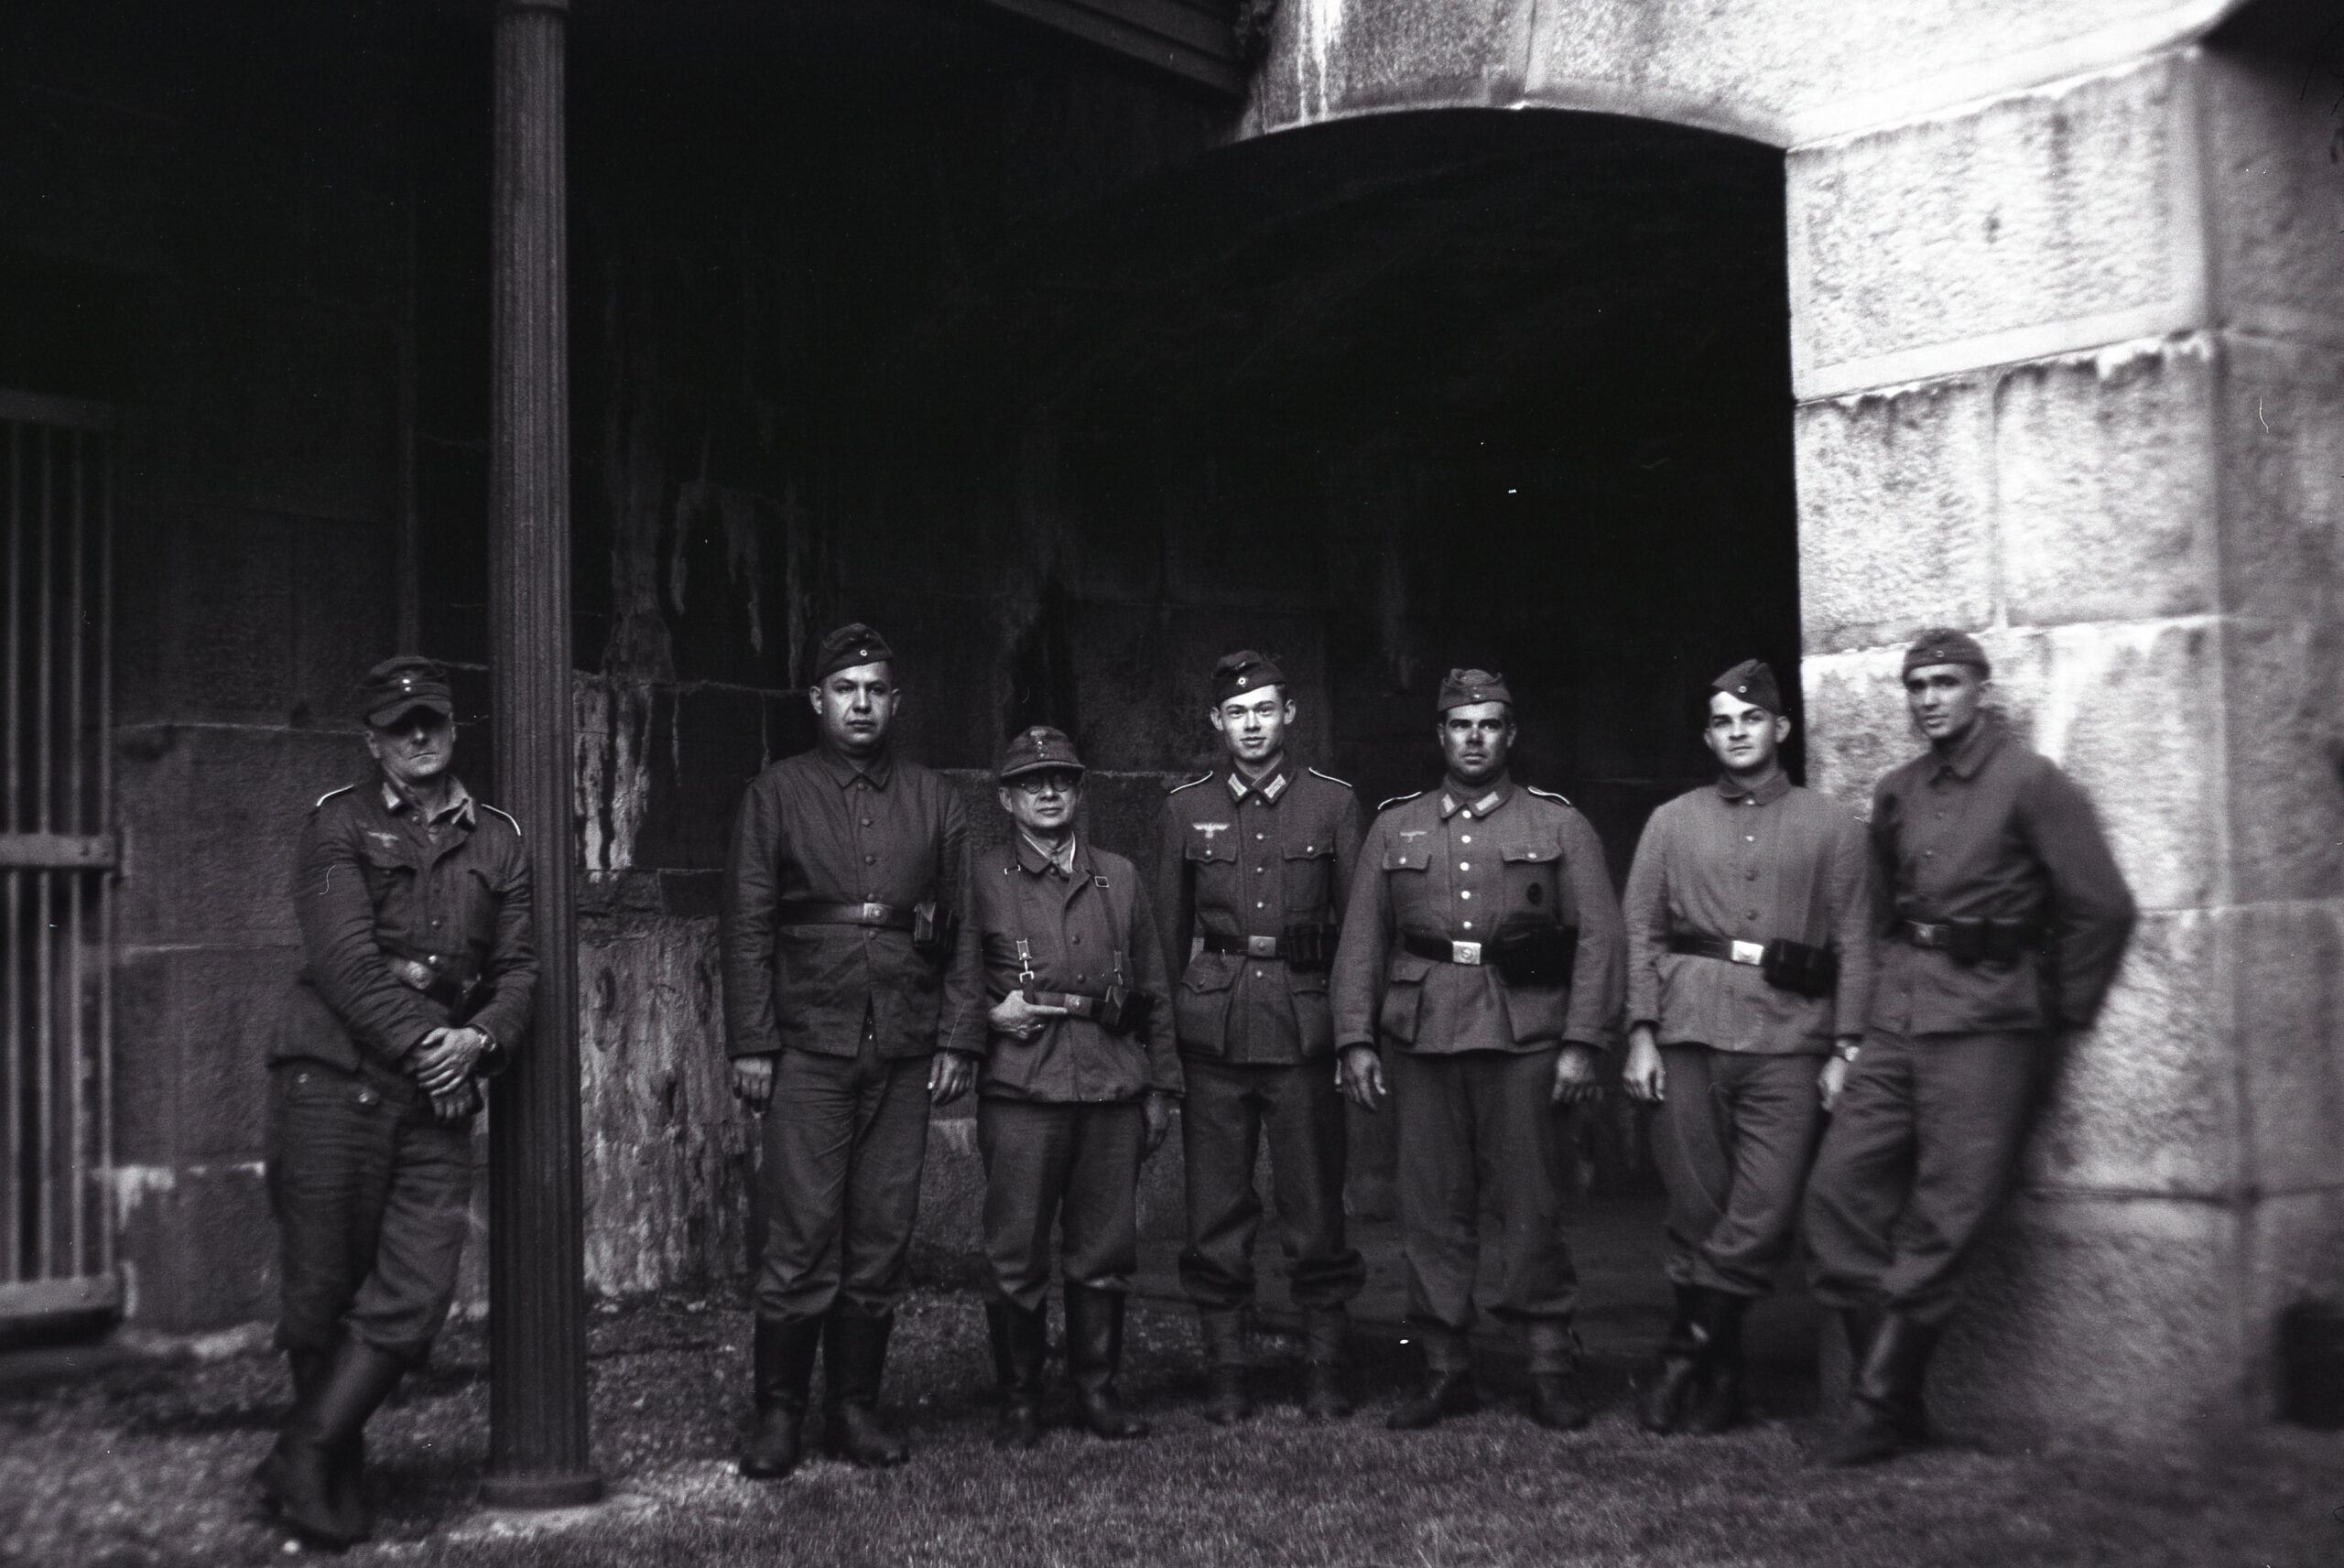
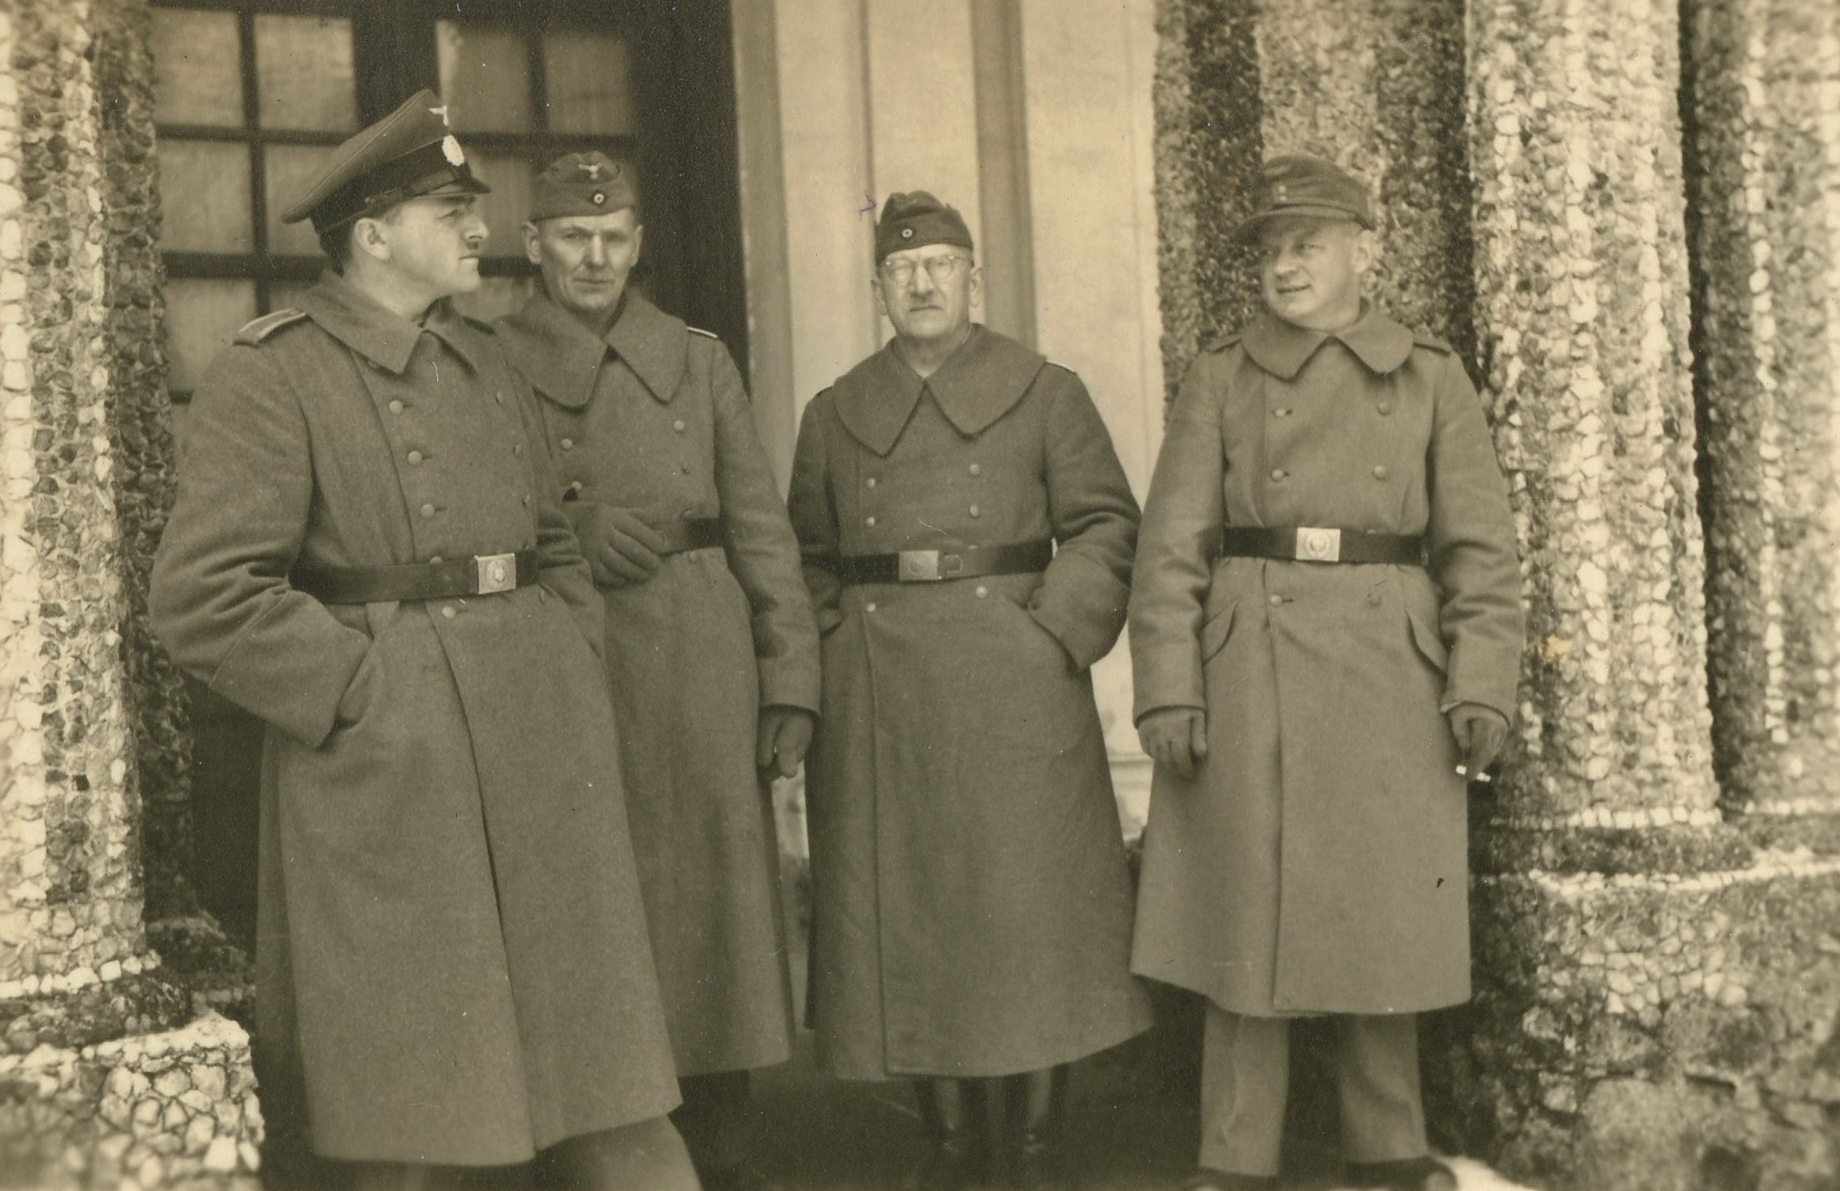
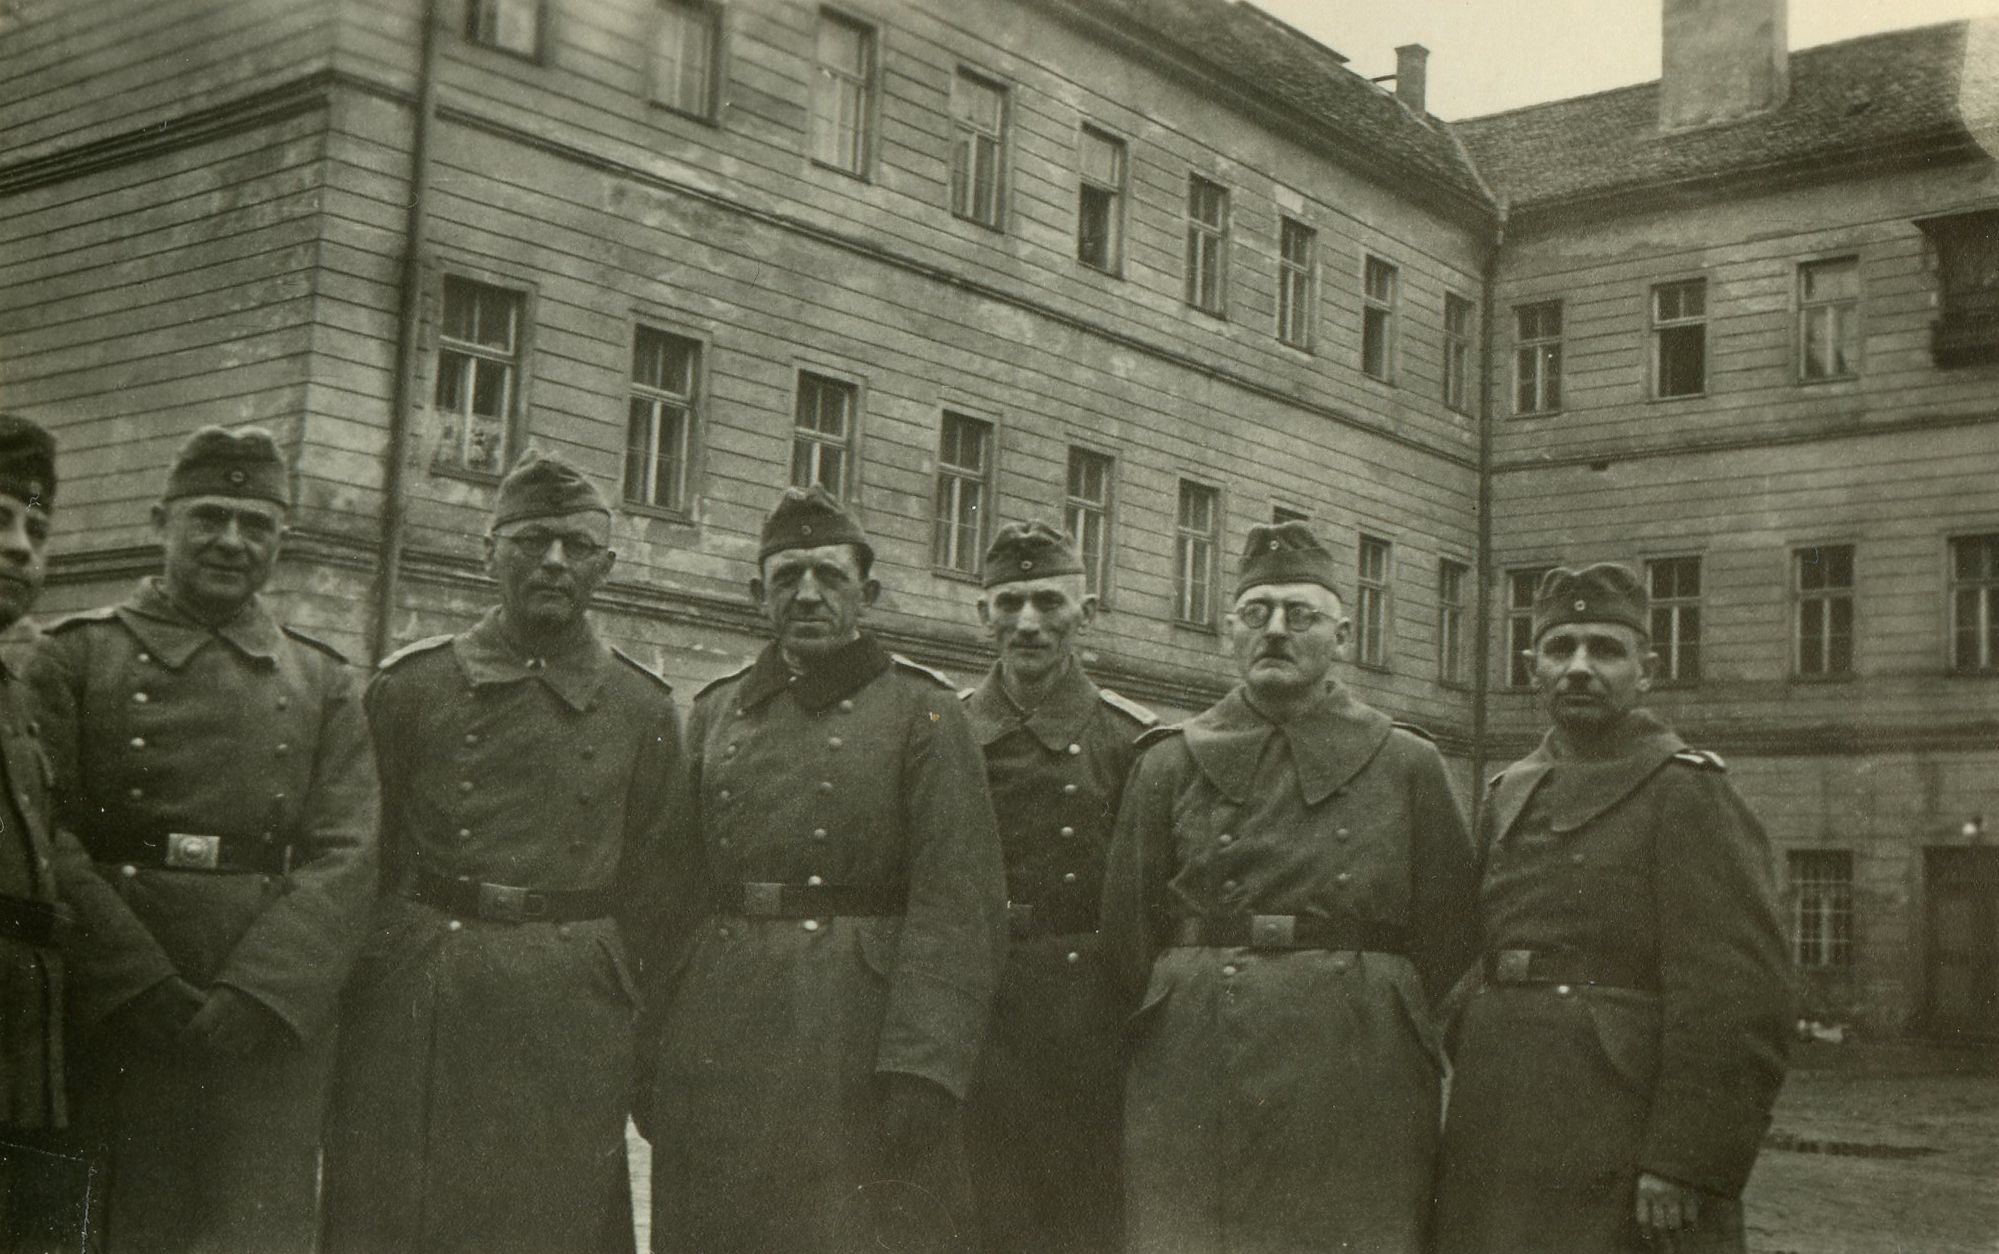
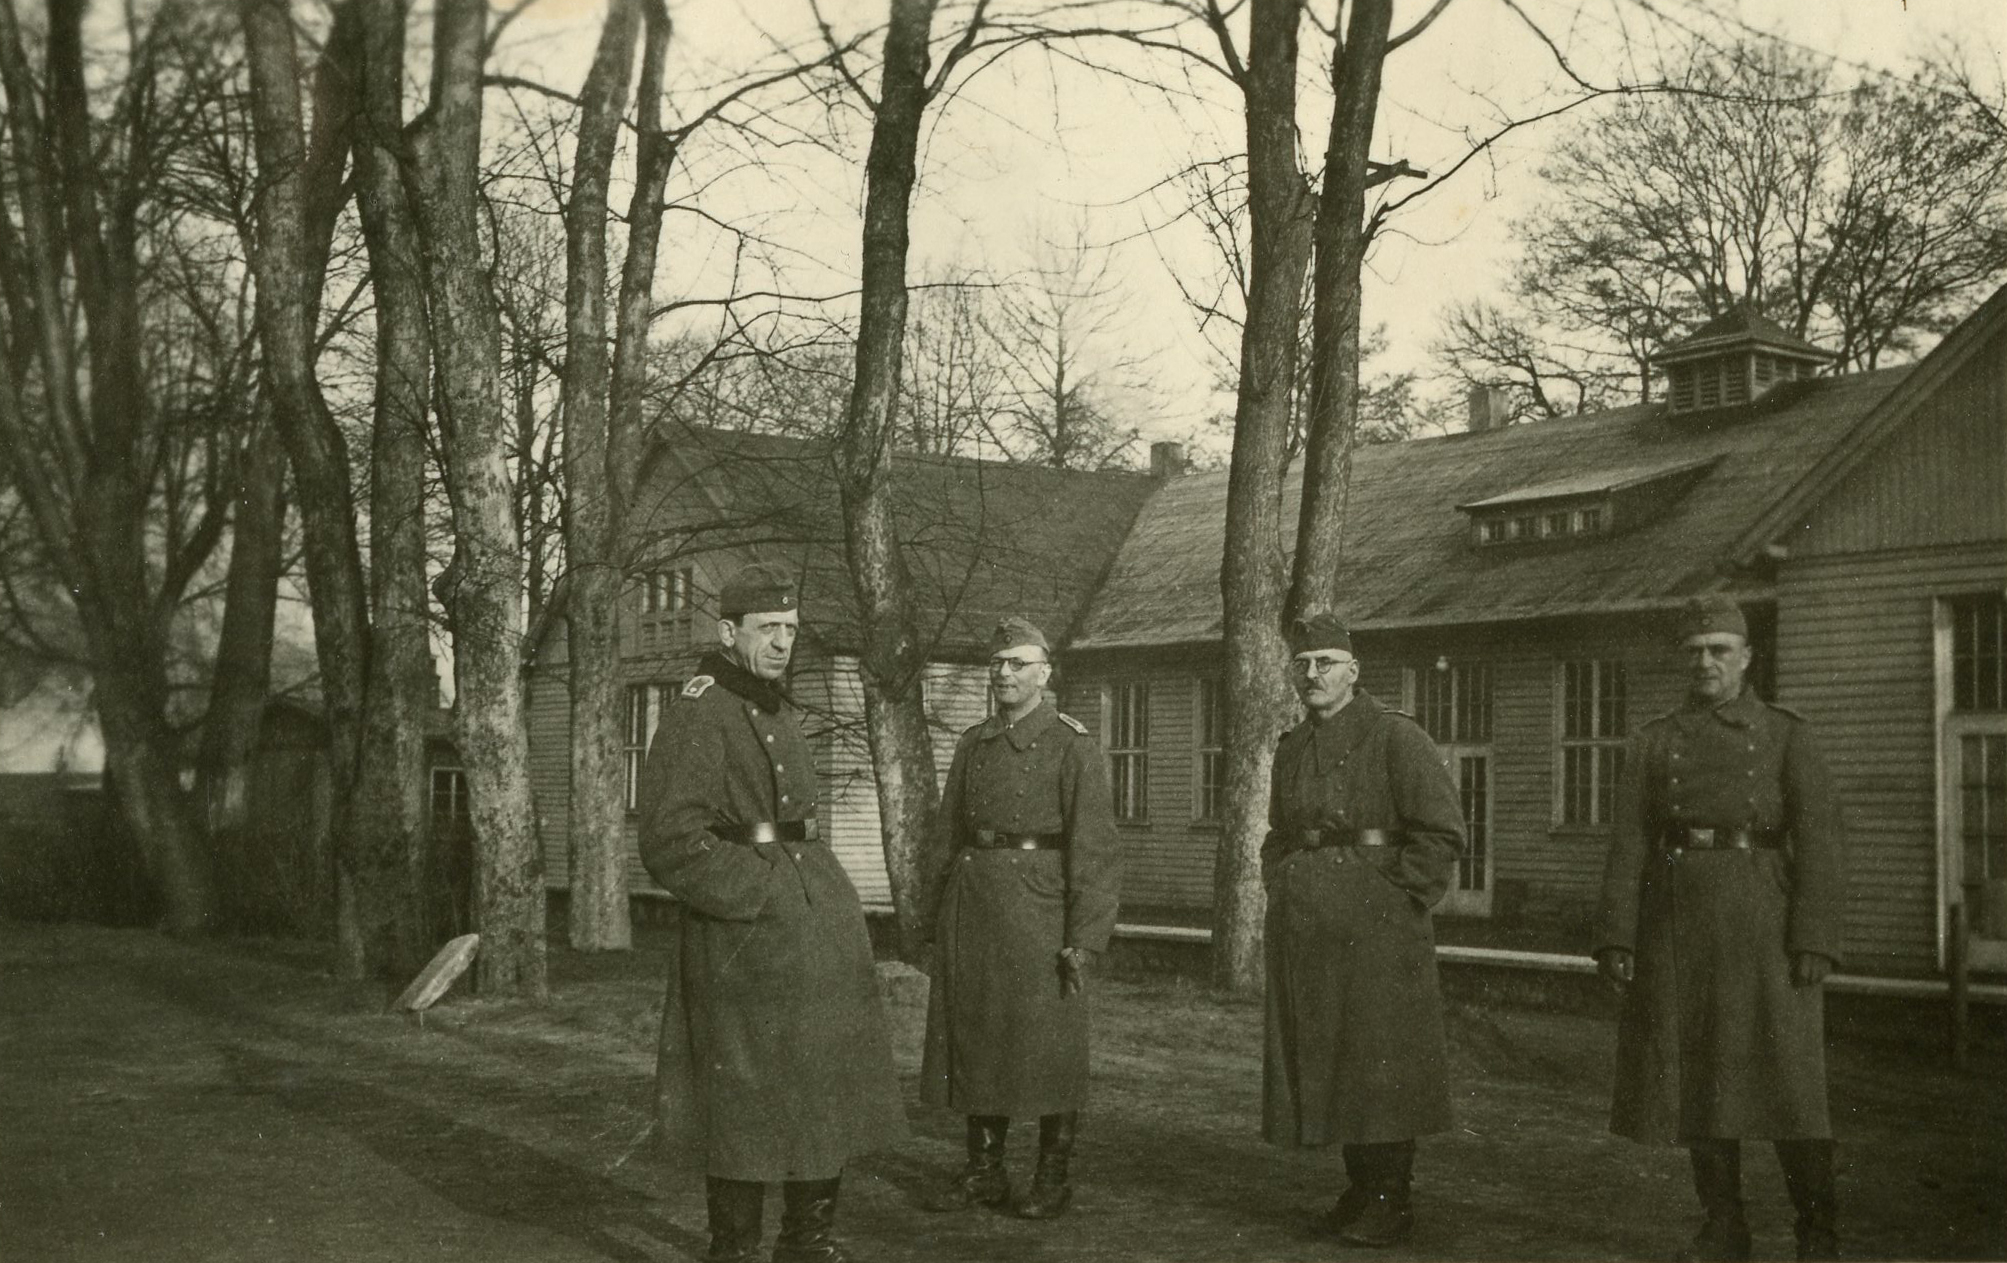
Fritz Gleich fought in WWI. In 1944, he was called up again, and assigned to a Landesschützen unit in Eger. By this period of the war, film was scarce, an relatively few soldiers were able to take photos. Gleich, however, did have film; these photos are from his album.
These photos offer interesting insight into uniforms in use at that time. For example, in the “recruit training” group photo with visor caps and Waffenrock dress tunics, it can be seen that most of the tunics have been converted by removing the piping and adding field type insignia, while other tunics remain unconverted. The mix of obsolete an new pattern kit in these photos in general is also notable. Reichswehr-era M33 boots seem predominant.
Fritz Gleich survived the war and assembled his album after 1945.
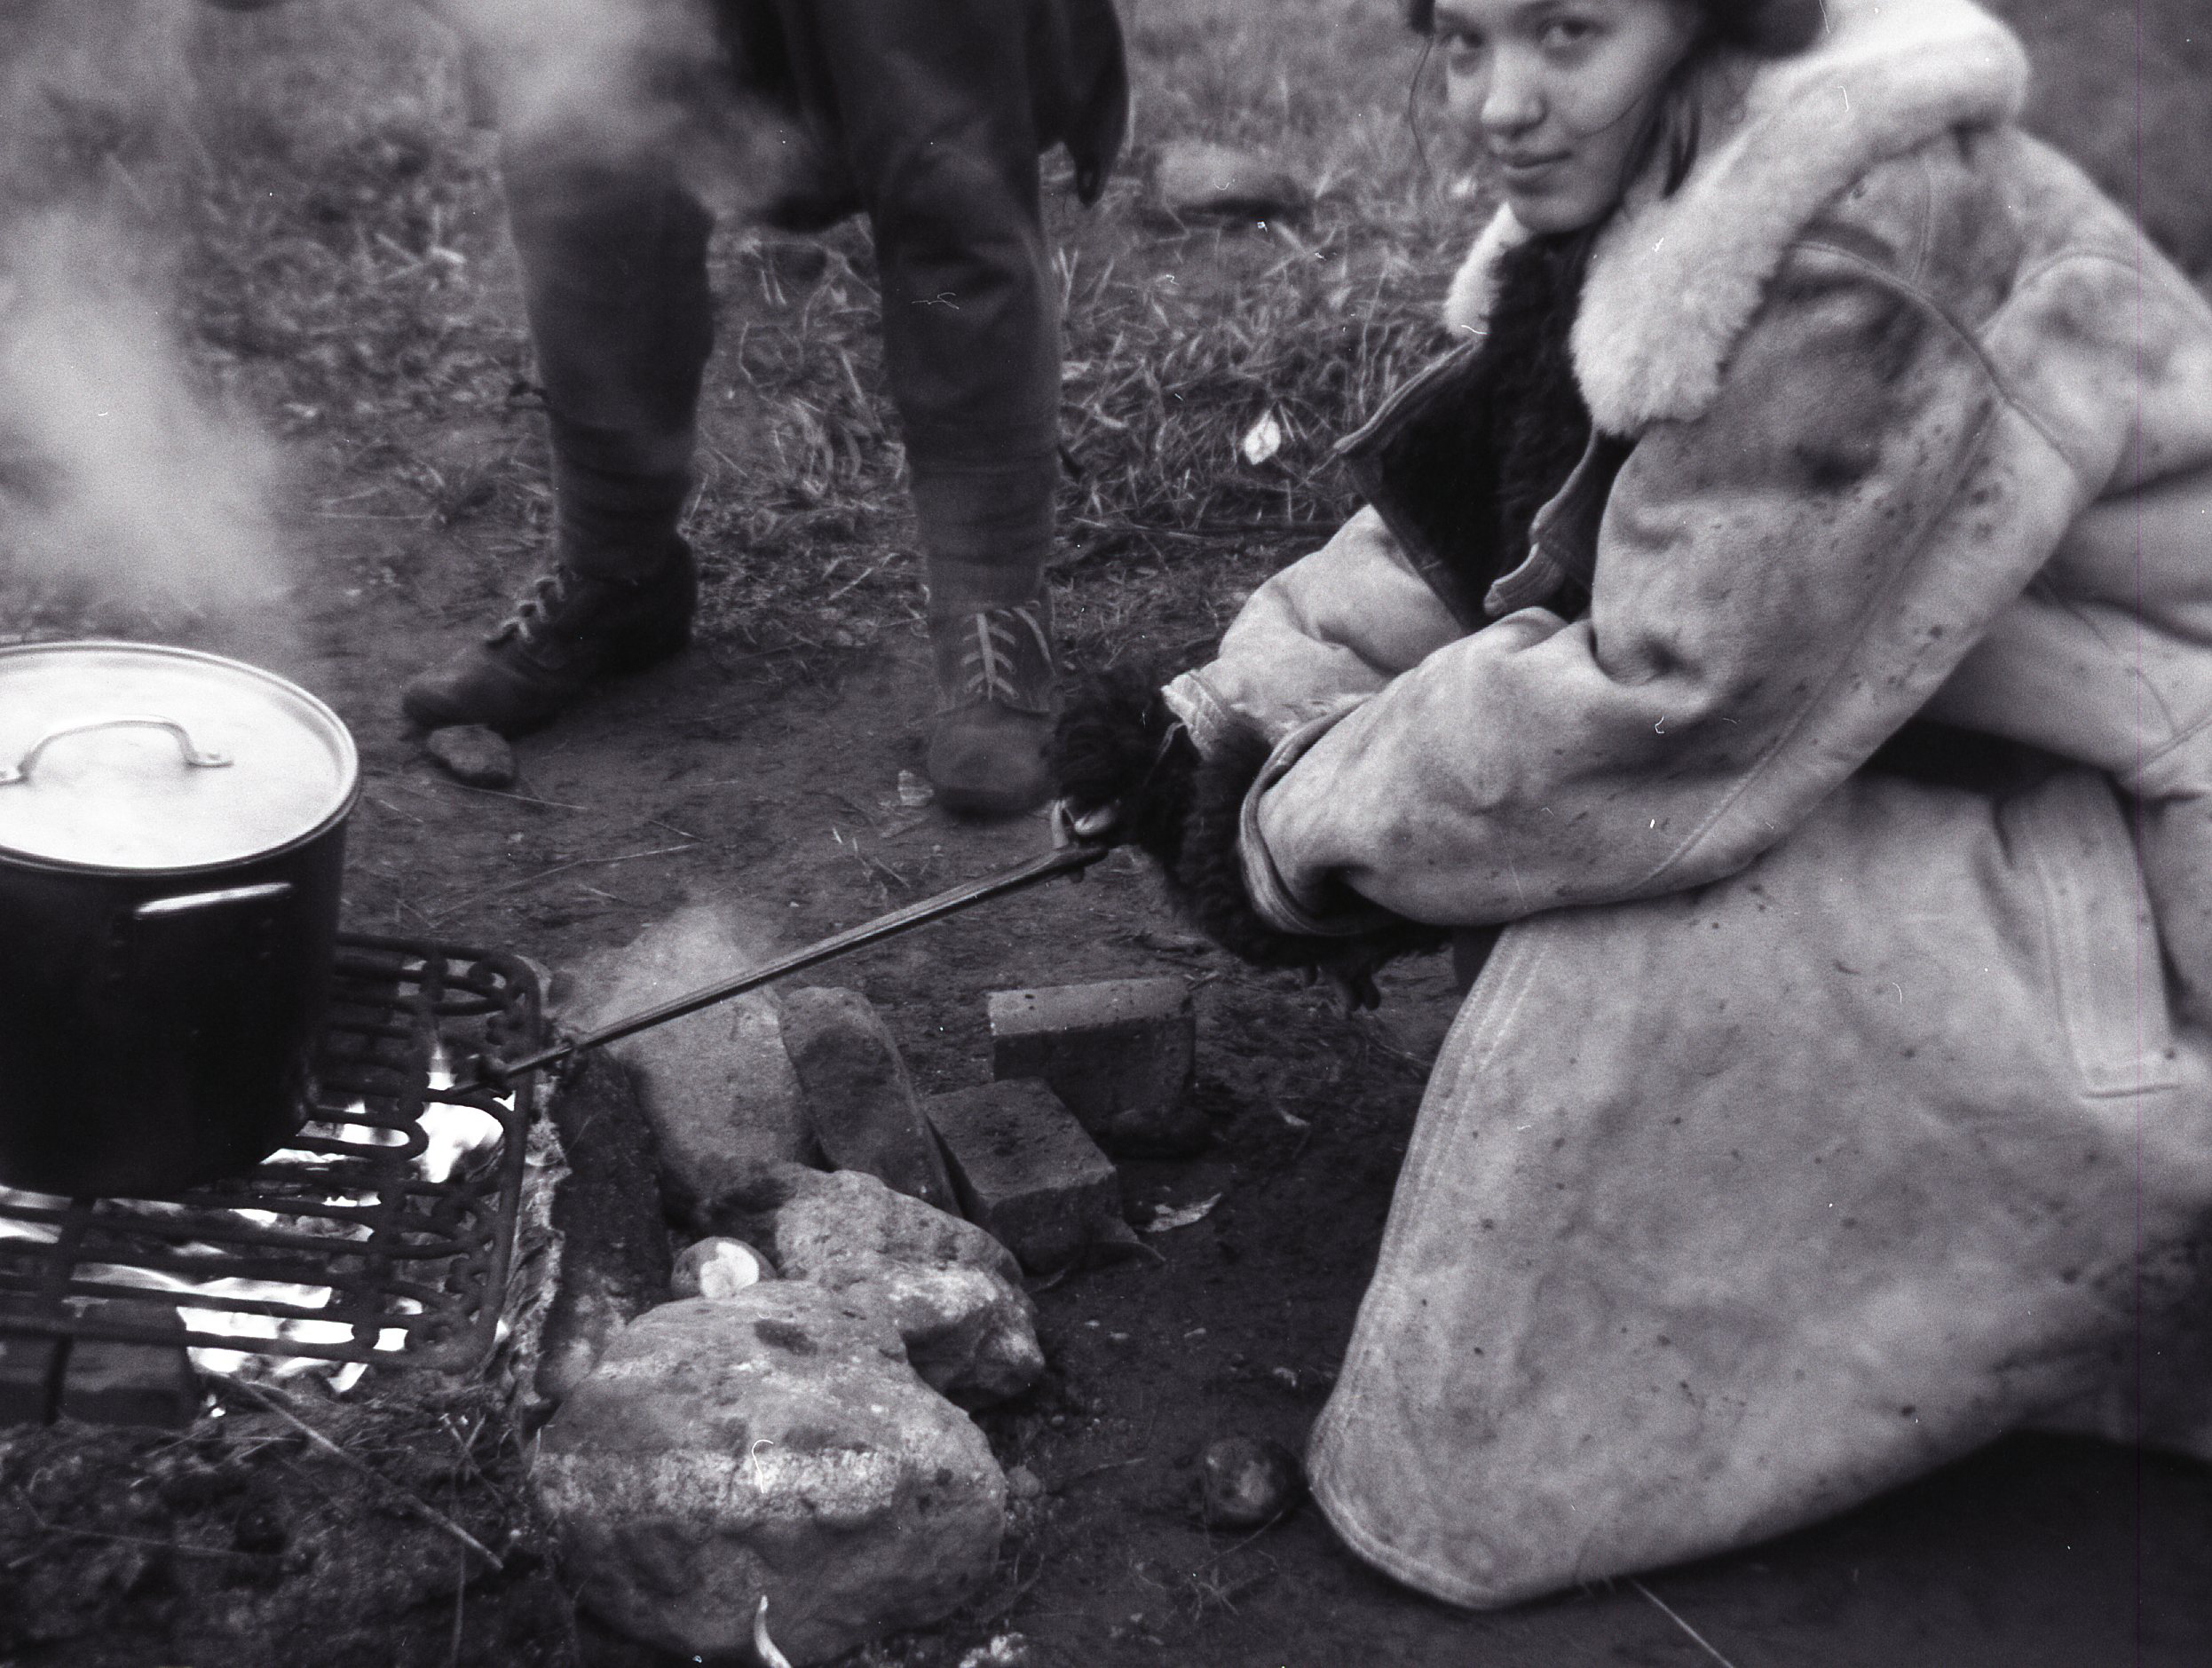
What follows is translated from an original cookbook titled “Östliche Speisen nach deutscher Art” (Eastern Dishes in German Style), with recipes tested and compiled by the Oberkommando des Heeres. It was published during the war by Alfred H. Linde Verlag in Berlin and was intended to be used as a field cookbook for German soldiers in the East. This section entitled “Improvement of Cold Fare” is particularly interesting and useful for living historians, as it gives insight into some easy ways that German soldiers may have prepared canned meat and other field rations.
“Improvement of Cold Fare
To stimulate the appetite, and especially during the warm season, cold fare should be prepared in a flavorful way.
The following instructions can be combined with each other to be adapted in various ways.
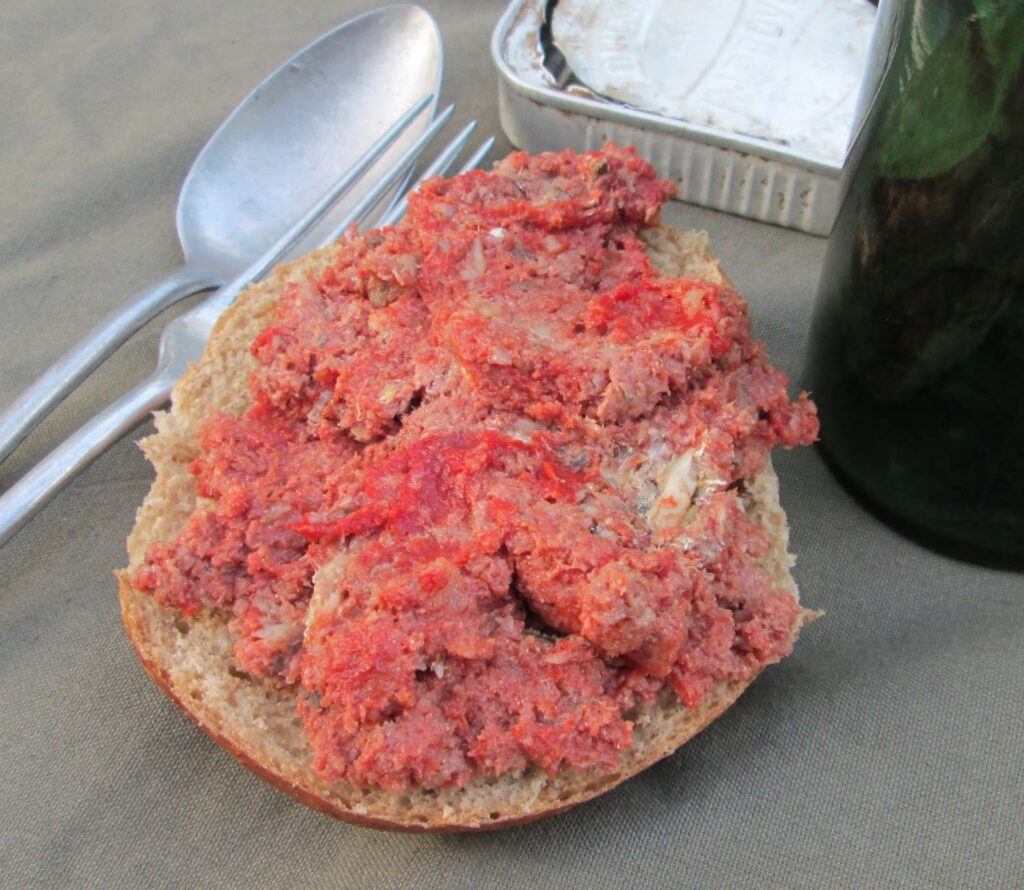
Bread spread from canned meat
300 g beef (canned) 100 g sardines 100 g tomato paste
Finely chop the beef and sardines, add the tomato paste and prepare as a pate.
Note: If the mixture is too dry, add some butter, margarine or oil.
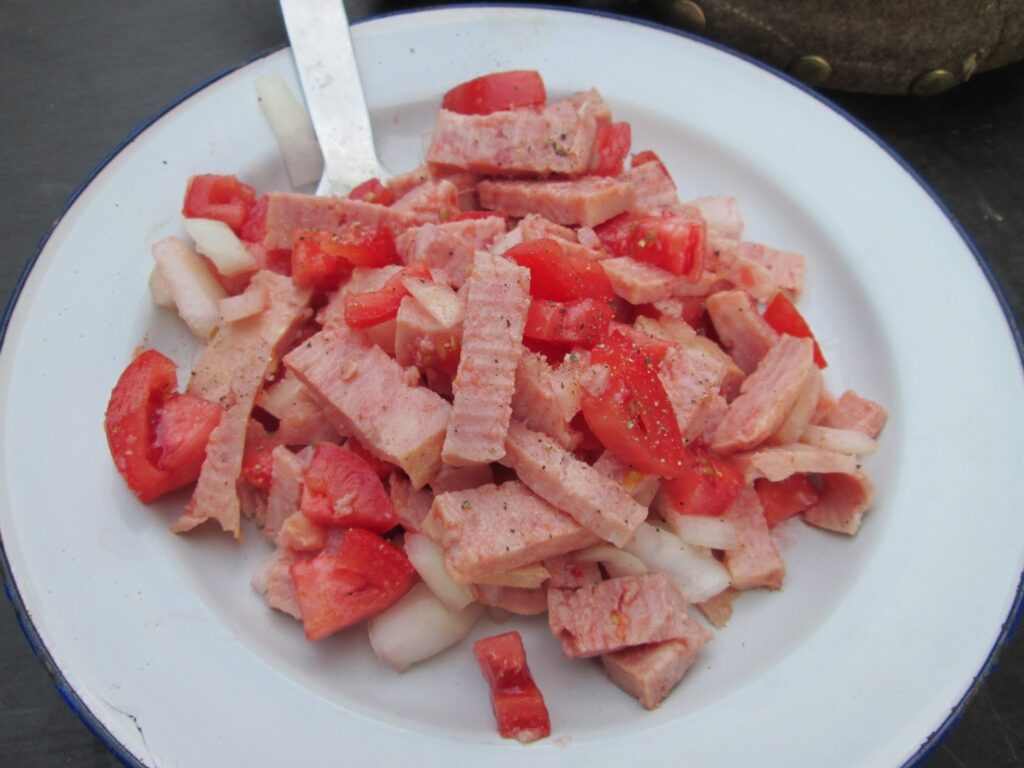
Fleischsalat (Meat Salad)
400 g canned meat 200 g diced tomatoes (fresh or canned) 100 g finely chopped onions Vinegar, oil, salt, pepper
Cut up the meat, gently combine with the tomatoes and onions. Mix with a marinade of the oil, vinegar, salt and pepper.
Note: Bell peppers can be used as a substitute for the tomatoes.
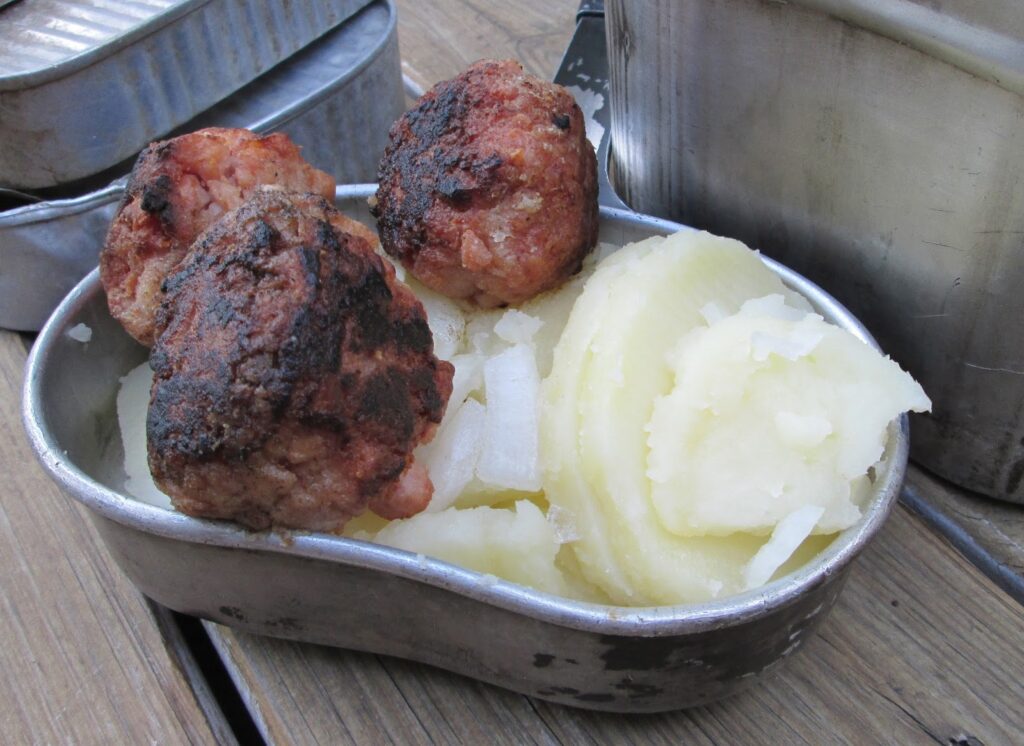
Cold Meatballs with Potato Salad
To make fried meatballs from canned meat, the meat must be finely chopped and then air dried for a time. The meat is then seasoned with salt and pepper and well-mixed with flour. This can also be mixed with bread crumbs, soaked bread, finely chopped onions, egg or only egg white, or egg substitute. Mix everything well together and form into meatballs. Coat with flour or bread crumbs and fry in hot oil until cooked through.
For the potato salad, boil the potatoes with the skin on, peel while hot and slice. Immediately mix with a marinade of water and vinegar brought to a boil and seasoned with salt, pepper and finely chopped onions. Pour this over the hot potato slices and either shake or carefully mix until the salad is bound together.
Note: The salad can be refined with oil, finely chopped herbs or diced pickles.
Canned meat and sausage
Canned meat and sausage are particularly appetizing when fried and roasted together with finely chopped onions and tomatoes.
Canned sardine salad
Mix sardines for five potions with 200 g sliced tomatoes. Marinate with the oil from the sardines, 200 g finely chopped onions and lemon juice.
Note: If tomato paste is used, it should be mixed in to the marinade.
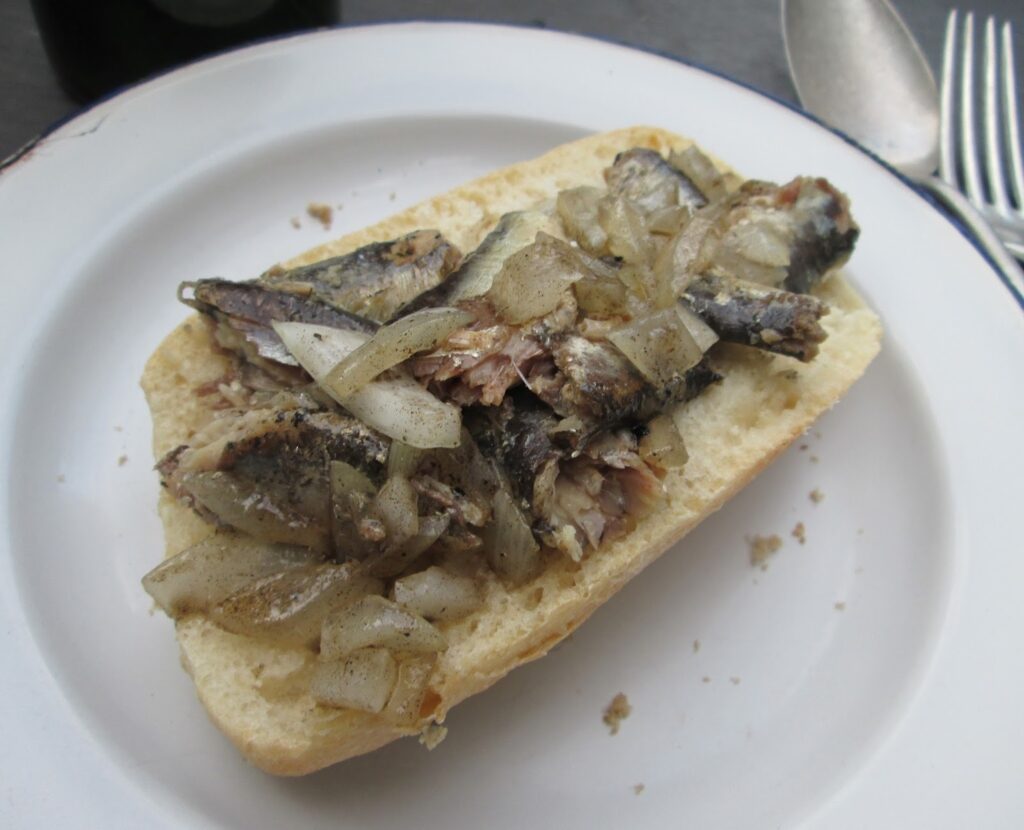
Ölsoldaten
Fry the sardines in their own oil while adding finely chopped onions. Drizzle with lemon juice as a dressing.
Canned sardines in the style of fried herring
Fry the sardines and lay them in a pot. Make a marinade from vinegar, onions, salt, pepper, bay leaf and allspice, allow to cool and pour over the sardines.
Tuna fish in oil
Tuna fish in oil can be prepared just as the canned sardines.”
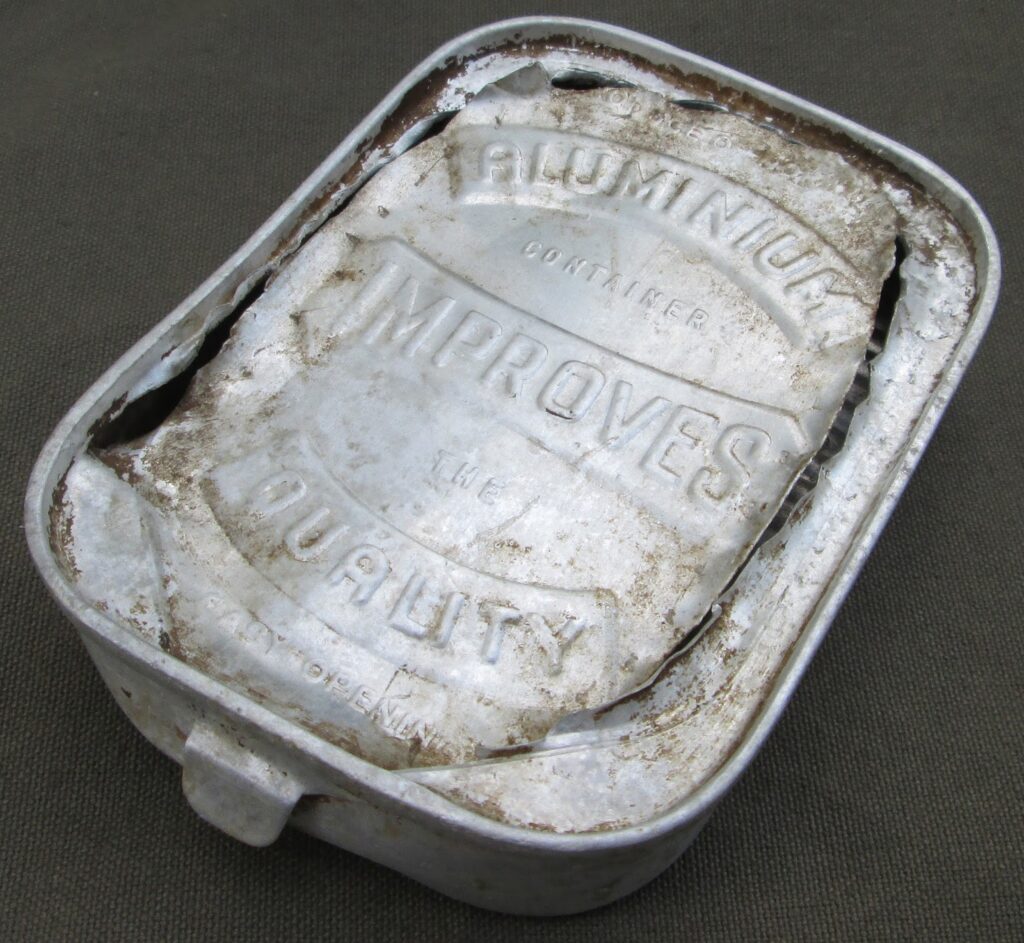
Note: For reference, a couple of pictures of original Wehrmacht-issue aluminum food cans. Here are two variations of a can that held fish or perhaps some other kind of meat. The one in front is stamped with a 1944 date code.
Here is a tin of Norwegian sardines, these are commonly recovered from former German positions. This one was found at Stalingrad.
For more information about steel and aluminum food cans issued to Wehrmacht soldiers, check out the fantastic reference “Rations of the German Wehrmacht in WWII” by Jim Pool and Tom Bock. Thanks to Peter Speiser for providing the original cookbook mentioned above.