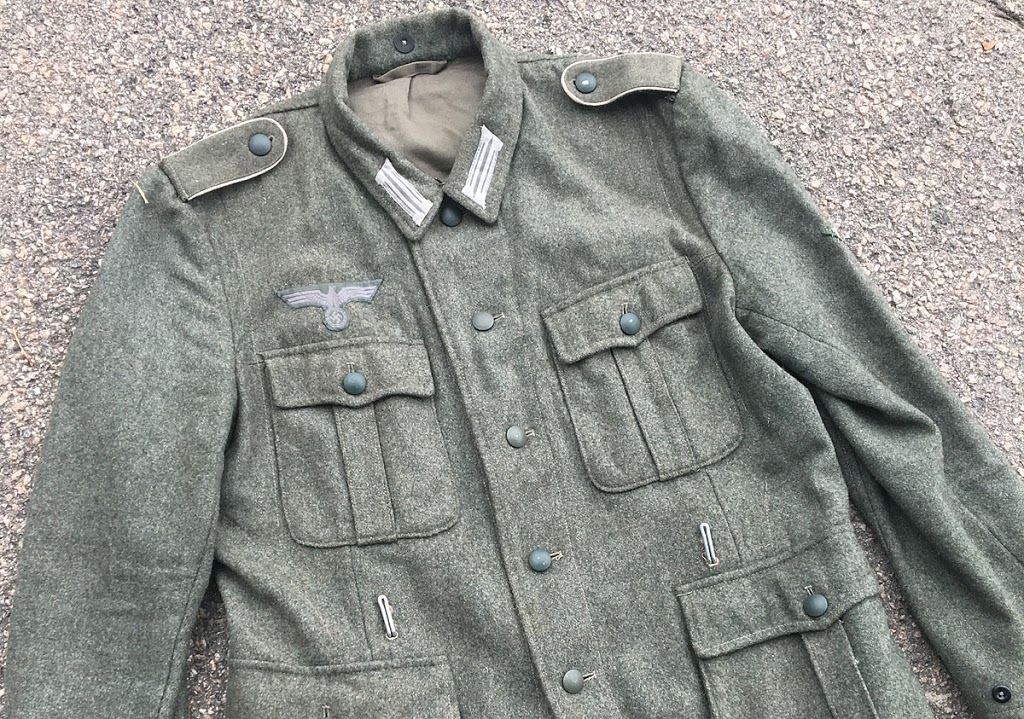
At the time of writing (2019) reproduction WWII German field blouses have been reproduced by many manufacturers for more than 20 years. There are many options for new made uniforms and a wide variety of uniforms may be available on the secondhand market. This guide contains ideas for how to make any reproduction of a wool enlisted issue field blouse as realistic as it can be.
The first thing to evaluate is the insignia (if any) and how it is applied. Not all reproduction insignia are equal, and there are some terrible copies out there. Original issue-type shoulder straps were generally made out the same types of fabrics used for constructing uniforms. Pre-war straps were dark green and made out of a tightly woven, fairly smooth wool, the same stuff used for M36 tunic collars. Wartime straps were field gray. Pre-war shoulder strap piping was mostly wool, while rayon was predominant during wartime, though some wool piped wartime straps were produced. Look at photos of original straps to get an idea of what the piping should look like and how thick it should be. It was generally fairly narrow. If your shoulder straps have rope-thick piping, or are made out of a loosely knit wool/synthetic blend fabric, you should replace them.
Collar Litzen, in general, should be neatly machine applied. Der Erste Zug has a great guide on typical period application styles. Pay attention to the shape of the applied Litzen. See here for some wartime examples. The final pattern generic Litzen appeared in May, 1940, and are ideal for most wartime field blouses. The earlier generic Litzen from 1938, with dark green stripes, were normally factory applied on M36 and some M40 field blouses. The pre-1938 branch piped Litzen were usually only seen factory applied on M36 and earlier field blouse models.
Factory applied breast eagles were generally Bevo (machine woven) and were generally machine applied on wartime field blouses. Hand sewn eagles were common on pre-war uniforms, and some later field blouses did still have hand sewn eagles. Machine embroidered eagles on rayon backing appeared late in the war. Avoid eagles embroidered on wool or felt, these were a private purchase type, never applied at the factory, rarely seen on field tunics. Again, the 1940 pattern insignia (gray on field gray eagle) is ideal for most wartime field blouses. See this guide to determine what pattern of breast eagle would be most appropriate for the year in which your field blouse would have been made.
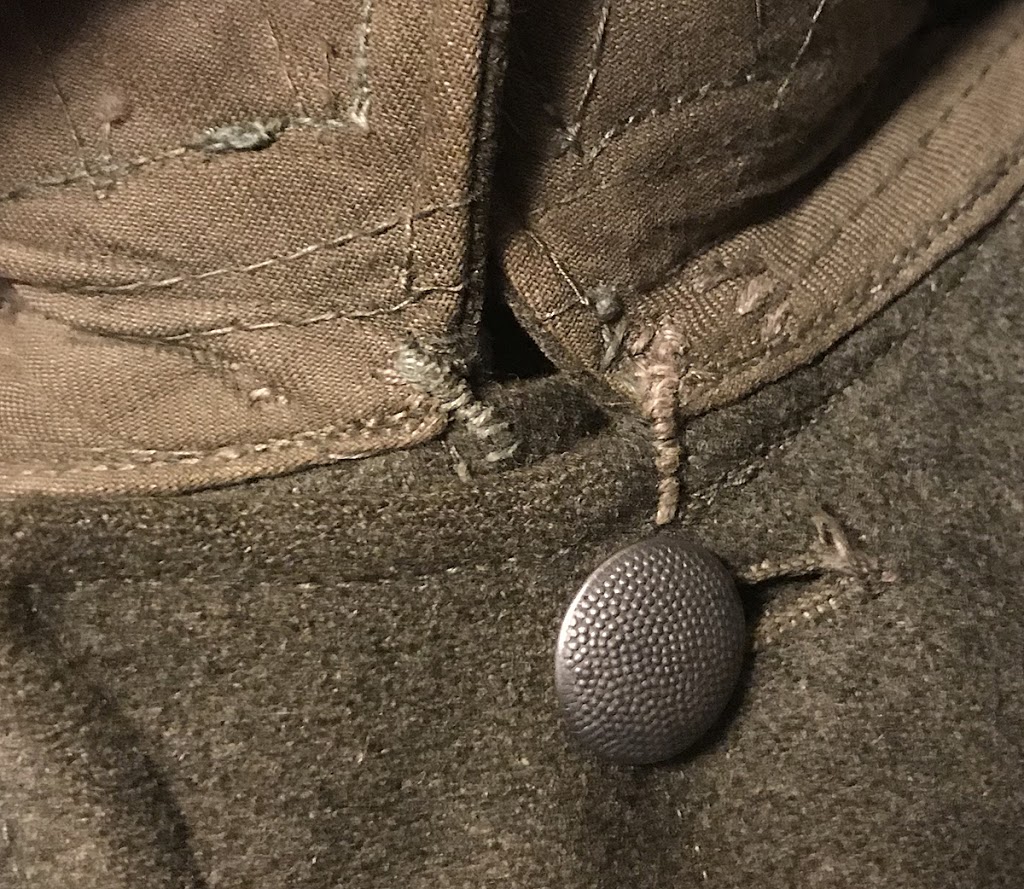
The next thing to look at is the buttons. The large pebbled buttons used for the front placket and pocket closures were made by many manufacturers and countless variations exist. They were made in aluminum, steel, zinc, and even Bakelite, and were painted in various shades. The size and appearance of the pebbling varied from manufacturer to manufacturer. Here are some typical worn wartime examples.
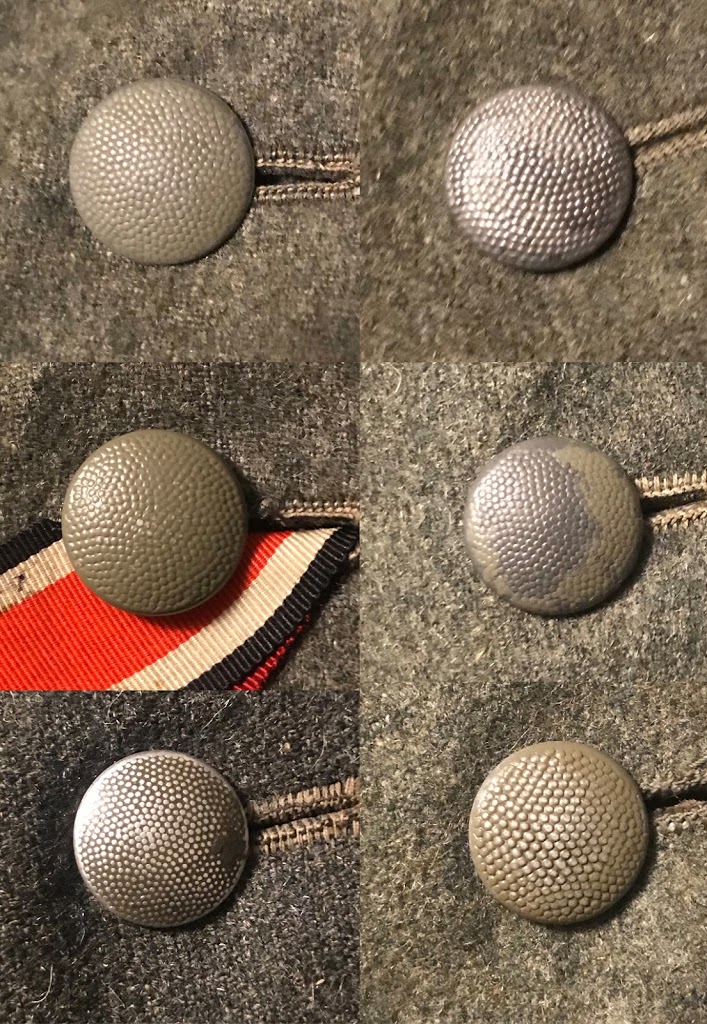
There are extremely good copies of original aluminum buttons currently being manufactured. Many reproductions being made today have pebbled buttons that are virtually perfect. But if your buttons are made of brass, or the pebbling is totally unlike that of originals, they should be replaced, either with originals or with better quality reproductions. Original buttons used on enlisted issue field blouses had a convex reverse with a shank for stitching to the uniform. Buttons with solid or flat backs should be replaced.
Look also at the small buttons. Here is some information about the types of small buttons originally used. Replace any colorful plastic buttons or plastic buttons molded to look like pressed paper buttons. Reproduction horn buttons are available, but small round black plastic buttons in the correct size may also be available at a local fabric store.
Look at the thread used to affix the buttons. Original button thread was thick stuff, here are some examples. If your buttons are sewn with thin garment thread, you need to re-stitch them with something that is more accurate and also stronger.
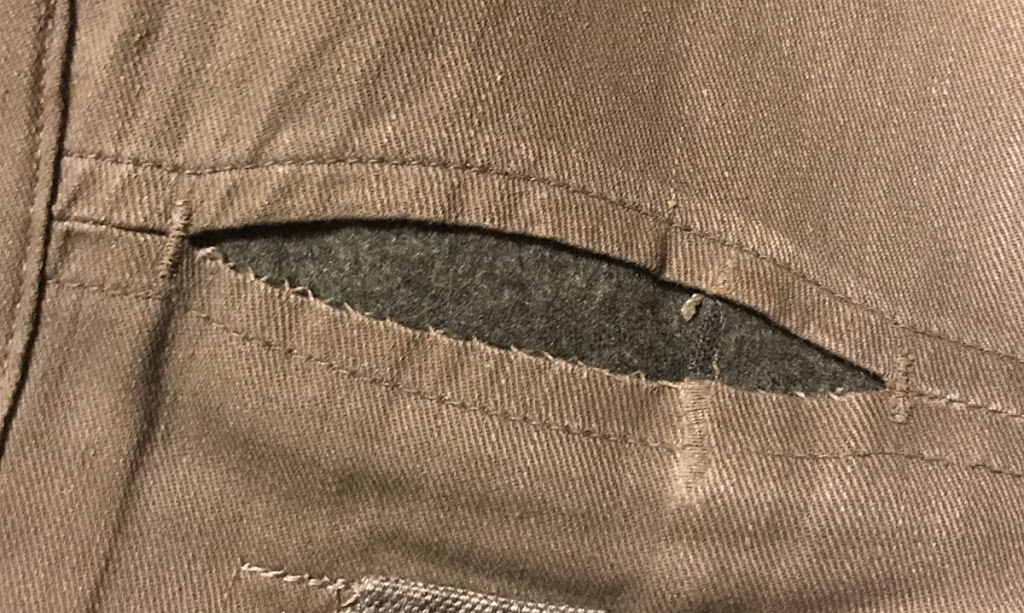
Look inside the front placket closure, behind the buttons, for size and manufacturer stamps like this.
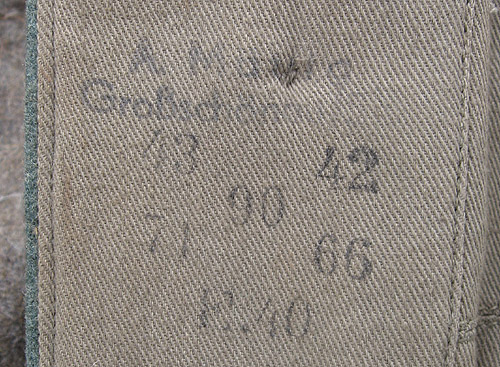
All field blouses had these stamps when they were made. If they are absent, they can be added for extra realism. To measure your field blouse to determine the sizes with which it should be stamped, see here.
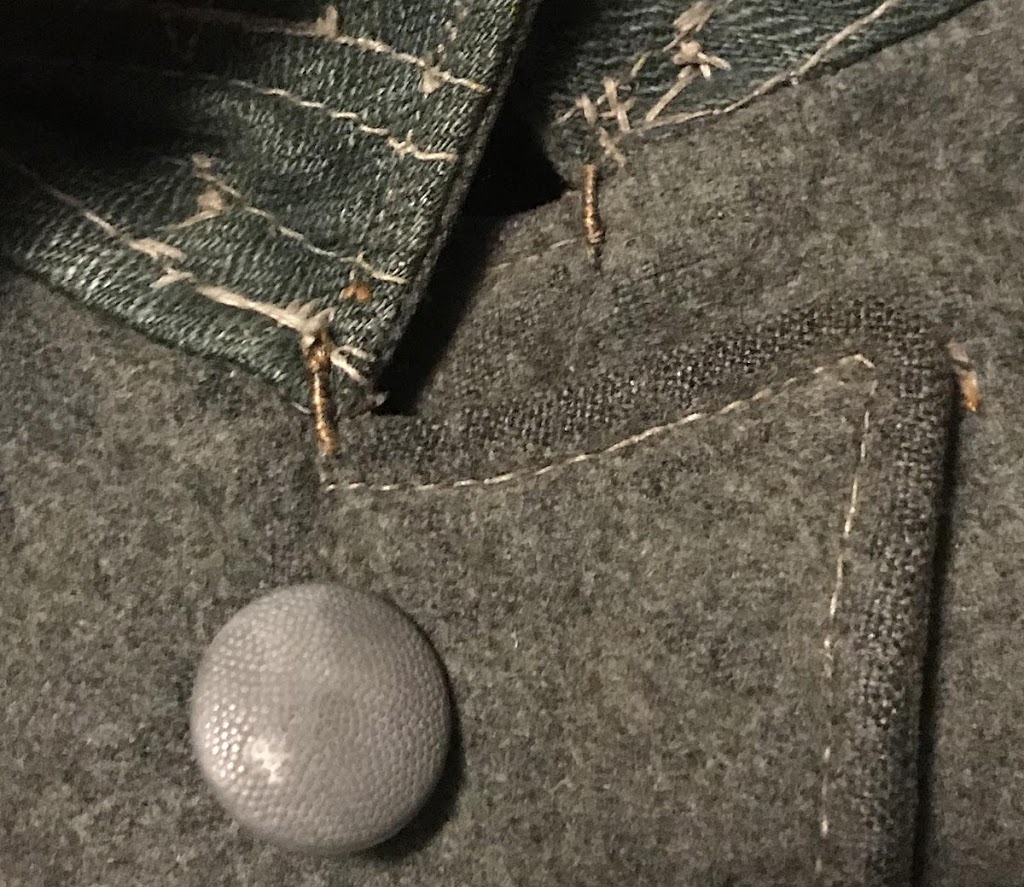
Some but not all field blouses had thread reinforcement stitches at the collar. These were hand done. It is easy to add this detail, if desired. Here are two different examples of these reinforcement bars, on an M40 and a M43 field blouse.
If you have an M36 or M40 field blouse, you may have to add the small hooks inside for the ends of the internal suspenders. There were two of these, one on each side, in front. See here for information on these. You may also add additional thread reinforcements on either side of the openings for the internal suspenders used with these field blouse models, you can see the reinforcement stitching in this photo.

Any field blouse, regardless of how close it is to an original, can be let down by bad insignia or buttons. And making sure that all the small details are as they should be, can help elevate even a lesser quality copy. Once you have all the details correct, the next step is just to wear it, or weather it if you prefer.