1940 pattern generic Heer Litzen (collar tabs)

1940 pattern generic Heer Litzen (collar tabs)

This final pattern of generic Heer Litzen was introduced in May, 1940. These photos show an assortment of original examples. These were made in varying sizes, with central stripes in light gray, dark gray, tan, or blue-gray, with similar variations to the background color as well, and variation in the relative sizes of the graphic elements. These photos don’t show the entire original range of variation. The many manufacturers who made these were simply not able to make them all the same, for all the millions that were made 1940-45.

Some drinking cups of the Eastern Front

Left to right:

-German interwar paramilitary canteen cup, same as WWI style, holds 300 mL
-Pre-WWII and early war Wehrmacht aluminum canteen cup, holds 375 mL
-WWII Soviet enameled steel cup, holds 380 mL

All of these are metal and can be used to heat water for warm beverages or for shaving.

In the reality of war, German soldiers used Soviet cups and vice-versa.
Postwar or reproduction equivalents of all of these exist.

From a utility perspective, the WWII German canteen cup gets my vote for being most useful, with the best combination of volume and durability. As of 2020, Hessen Antique has good reproductions for a cheap price.

WWII German Army M43 Tunic Collar and Sleeve Shapes

Comparison photos showing 5 unaltered original enlisted issue wool Heer M43 tunics. This first photo shows the collar and lapel shape. To take these photos I unbuttoned the top button and held the collar open as if it were pressed open. Many differences are readily apparent. Sometimes the collar extends past the lapel, sometimes the lapel is wider than the collar. The relative widths of the collar and the angles of the various shapes are very visibly different.

This photo shows the sleeve shapes. I laid the sleeves as flat as I could to show the shape. They are not all the same. There is a persistent reenactor legend about “curved sleeves.” I’m not sure what is meant by that- but see for yourself.

WWII German field blouse button sewing and wool detail

A small sample of wartime enlisted issue tunics were examined to look at the button stitching and wool material, as part of an ongoing study of details of original uniforms. Previous articles in the series:

Wehrmacht Feldbluse Measurements
Internal Suspender Retaining Hooks
Small Buttons on the German Army Field Blouse

These photographs show original factory applied buttons. The thread used to apply the buttons is a thick button thread. The buttons appear to be hand sewn. The thread itself generally has a sheen that likely indicates linen content. The color varies, but is generally within the wide range of “Feldgrau.” Some of the thread may have shifted in color with time due to aging of the dyes. There are also variations in the stitching style, with some of them showing thread wrapped around the stitching, parallel to the wool surface; others lack this feature. All of these buttons are on dated garments, the year of manufacture of each field blouse is indicated in the photo.

The photos above also provide some details about the wool nap and weave. For comparative purposes, here are some photos of the wool used for garments dated in different years. The 1943 image only shows one garment, the other photos compare two different field blouses.

Wehrmacht Feldbluse measurements

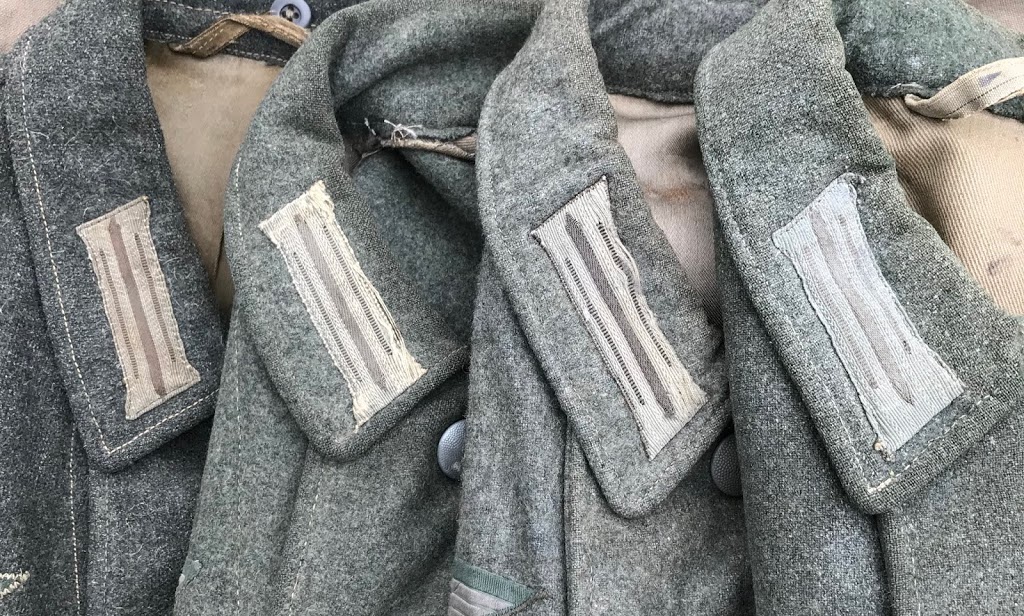
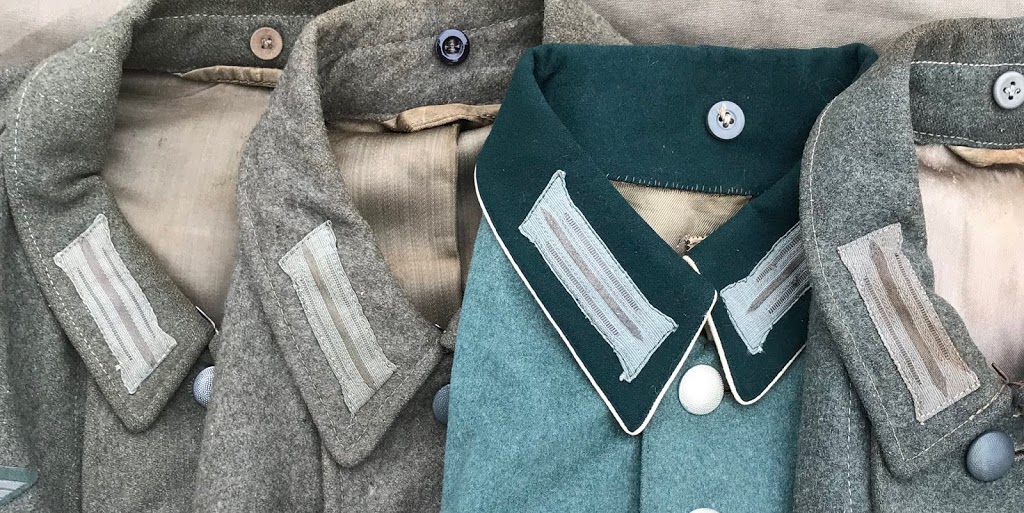
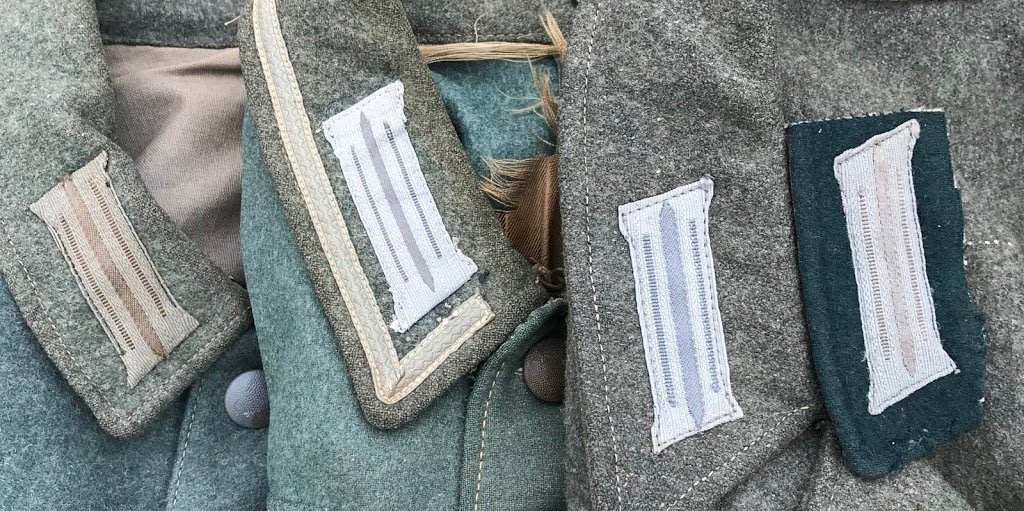
Seven original unaltered wartime enlisted issue tunics were examined and measured to look at similarities and differences in the cut and tailoring.

Some aspects of the cut of each garment appear to be constant. The rear skirt is always shorter than the front skirt, between 1 inch and 2.5 inches shorter. The waist measurement across the front is always smaller than the armpit-to-armpit measurement, though this difference is small as .75″ and as big as 2.5″.

Other measurements vary widely from one example to the next. This should be no surprise. These garments were not sized as small, medium and large. Each garment was sized five different ways: the length of the tunic back, the collar size, the chest size, the overall length, and the sleeve length. These numbers varied independently of each other, as we can see looking at the original marked sizes on these examples. There is no direct correlation between the various sizes; a tunic could have a larger chest size but a shorter overall length. There is also no readily observable correlation between sleeve length and overall length. Two of the garments are stamped with a height range indicating they were suited for people who were 171-175 cm tall. These garments have different stamped sleeve lengths.

Some of the variation is surprising. Variation in pocket size and shape is remarkable. The proportions are not consistent. Some lower pockets are wider than they are tall. On others, it is the opposite. Futhermore, the measurement from shoulder to shoulder seems to vary in a way that does not correlate with chest size. I do not believe that wear and stretching or shrinkage could account for all of these variations. I believe that they were different when made, and that some of these differences are either unintentional, or were manufacturer variations.

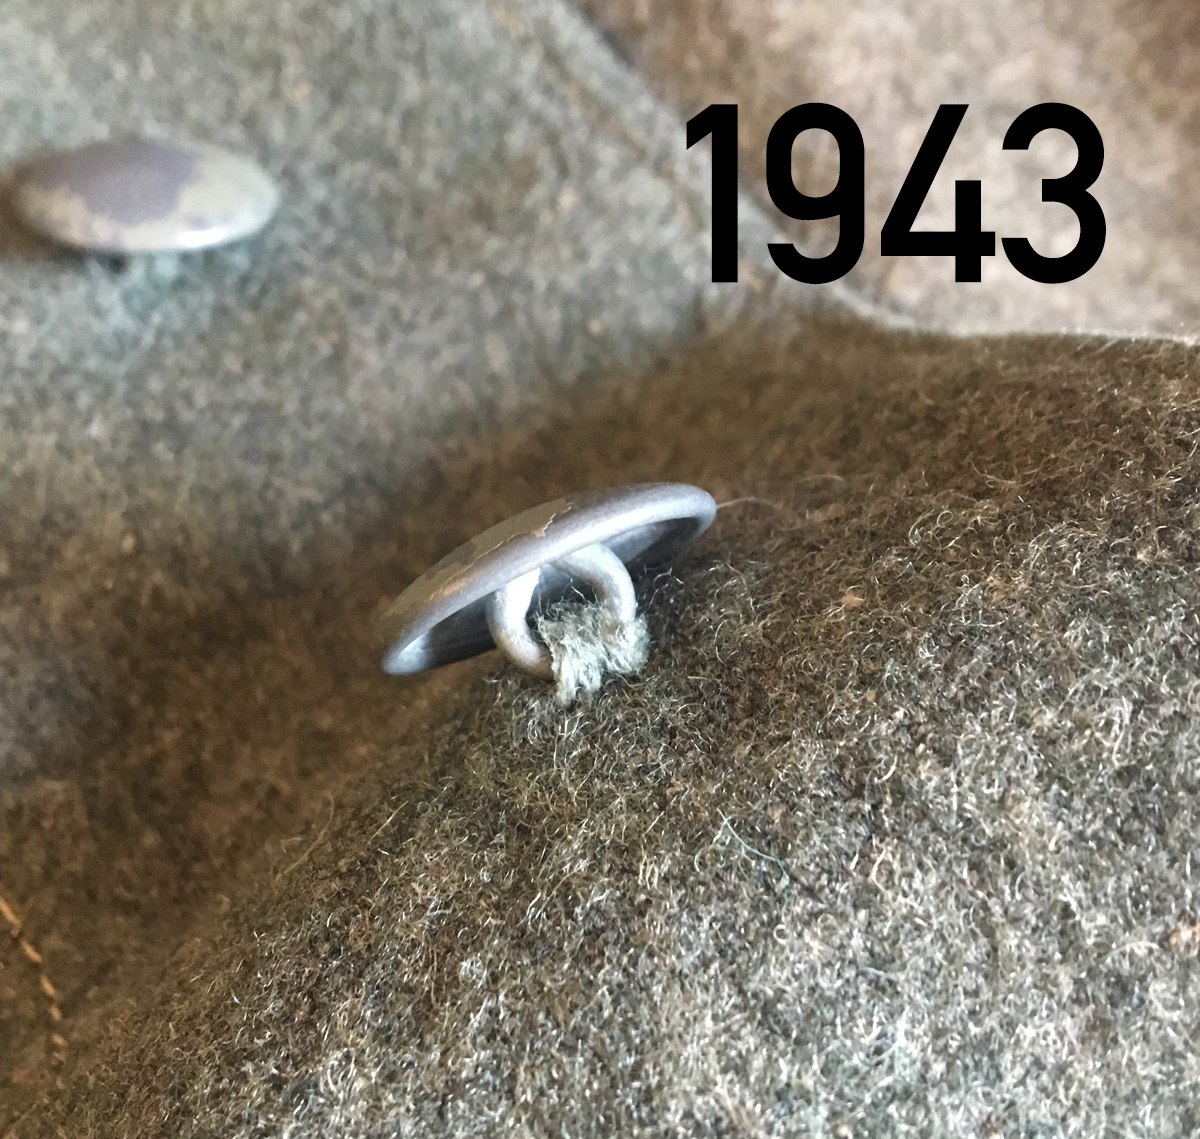
Here are the numbers for each garment. Measurements were rounded to the nearest quarter inch. The numbering is arbitrary and doesn’t correspond to the photo. I have included the original stamped sizes for reference only. The sleeve length was measured on the M43 models only. Both of the worn M40 tunics had repairs to the sleeve ends that might have altered the original length.

Field blouse #1
Model: M40
Stamped tunic back length: 41 cm
Stamped collar size: 40 cm
Stamped chest size: 90 cm
Stamped overall length: 88 cm
Stamped sleeve length: 61 cm
Stamped height range: none
Measured shoulder width (seam to seam at the top): 16.75″
Measured arm hole height (top of shoulder to armpit): 8″
Measured armpit-to-armpit: 19.5″
Measured waist (across the front at the lowest belt hook hole): 18.75″
Measured chest pockets: 5″ wide, 6.25″ high
Measured lower pockets: 8.5″ wide, 8″ high
Measured sleeve length: N/A (repaired)
Measured front length (top of shoulder at collar to skirt end): 27″
Measured back length (base of collar to skirt end): 25.25″

Field blouse #2
Model: M40
Stamped tunic back length: 41 cm
Stamped collar size: 41 cm
Stamped chest size: 90 cm
Stamped overall length: 68 cm
Stamped sleeve length: 61 cm
Stamped height range: none
Measured shoulder width: 16″
Measured arm hole height: 9″
Measured armpit-to-armpit: 19″
Measured waist: 17.5″
Measured chest pockets: 5″ wide, 6.75″ high
Measured lower pockets: 8.75″ wide, 8.25″ high
Measured sleeve length: N/A (repaired)
Measured front length: 27.5″
Measured back length: 26.25″

Field blouse #3
Model: M43
Stamped tunic back length: 43 cm
Stamped collar size: 62 cm
Stamped chest size: 104 cm
Stamped overall length: 72 cm
Stamped sleeve length: 45 cm
Stamped height range: none
Measured shoulder width: 18″
Measured arm hole height: 9.5″
Measured armpit-to-armpit: 22″
Measured waist: 20.5″
Measured chest pockets: 5″ wide, 6.25″ high
Measured lower pockets: 7.75″ wide, 8″ high
Measured sleeve length: 23″
Measured front length: 27.5″
Measured back length: 26.25″

Field blouse #4
Model: M43
Stamped tunic back length: 43 cm
Stamped collar size: 43 cm
Stamped chest size: 96 cm
Stamped overall length: 72 cm
Stamped sleeve length: 62 cm
Stamped height range: 171-175 cm
Measured shoulder width: 16.5″
Measured arm hole height: 9″
Measured armpit-to-armpit: 21″
Measured waist: 18.5″
Measured chest pockets: 5.25″ wide, 7″ high
Measured lower pockets: 8.25″ wide, 8.75″ high
Measured sleeve length: 24″
Measured front length: 29″
Measured back length: 28″

Field blouse #5
Model: M43
Stamped tunic back length: 43 cm
Stamped collar size: 40 cm
Stamped chest size: 88 cm
Stamped overall length: illegible
Stamped sleeve length: 64 cm
Stamped height range: none
Measured shoulder width: 14.75″
Measured arm hole height: 9″
Measured armpit-to-armpit: 18″
Measured waist: 16″
Measured chest pockets: 5″ wide, 7.5″ high
Measured lower pockets: 8.25″ wide, 8″ high
Measured sleeve length: 25.5″
Measured front length: 29″
Measured back length: 28″

Field blouse #6
Model: M43
Stamped tunic back length: 43 cm
Stamped collar size: 42 cm
Stamped chest size: 92 cm
Stamped overall length: 72 cm
Stamped sleeve length: 64 cm
Stamped height range: none
Measured shoulder width: 16.5″
Measured arm hole height: 9.25″
Measured armpit-to-armpit: 19″
Measured waist: 17.25″
Measured chest pockets: 5.25″ wide, 7.25″ high
Measured lower pockets: 9.5″ wide, 9″ high
Measured sleeve length: 25.5″
Measured front length: 30″
Measured back length: 27.5″

Field blouse #7
Model: M43
Stamped tunic back length: 43 cm
Stamped collar size: 40 cm
Stamped chest size: 88 cm
Stamped overall length: 72 cm
Stamped sleeve length: 64 cm
Stamped height range: 171-175 cm
Measured shoulder width: 15″
Measured arm hole height: 9.5″
Measured armpit-to-armpit: 17.25″
Measured waist: 16.5″
Measured chest pockets: 5.25″ wide, 7.5″ high
Measured lower pockets: 8″ wide, 8.75″ high
Measured sleeve length: 25″
Measured front length: 29.25″
Measured back length: 28.25″

Small buttons on the German Army field blouse

A small sample of original WWII German Army enlisted issue uniform jackets was examined to assess what kind of small buttons were applied at the factory. M36, M40, M42 and M43 jackets were examined, as well as one factory converted Dutch reissued field blouse.

M36, M40, M42 and M43 field blouses each had ten small buttons in addition to the larger pebbled metal front placket and pocket closure buttons. These small buttons measured approximately 14 mm in diameter. Five were used in the collar to affix the collar bind, one closed the internal bandage pocket, and two were used to secure each cuff closure. The following types of buttons were observed in this small sample.

Horn
Horn buttons were the most common in this small sample. Here are two on an M36 field blouse. These buttons vary in color from a pale gray to nearly black, sometimes (as here) on the same garment.

 On an M40 field blouse:

 On an M43 field blouse made in 1944:

Glass

Glass buttons were observed in this sample on M42 and M43 field blouses.

 This was on an M43. A different color shade.

Pressed Paper

Pressed paper buttons were factory applied on two of the jackets examined.

 Plastic

Gray and black buttons made of an apparently synthetic material that appears to be similar to modern plastic were also found. This is an M43 jacket made in 1944.

Black plastic button on the converted Dutch jacket. The collar and buttons were added for Wehrmacht issue.

This M40 field blouse had black plastic buttons inside but horn buttons for the cuff closures. Two jackets had different button types for the cuffs as for the buttons inside this garment. It was not possible to determine if these left the factory in this configuration, or if the cuff closure buttons were replaced.

This M43 field blouse made in 1944 has glossy black buttons that appear to be some painted synthetic material.
Most of the buttons examined that appeared to be factory sewn had been hand stitched with field gray or taupe colored thread.

Insert pages for the Soldbuch

Every soldier in the Wehrmacht was issued a paybook and identification document called the Soldbuch. Original Soldbücher commonly had additional pages pasted in to record things for which the book had no space. Here are a few which we have reproduced and used.

EQUIPMENT ISSUE

The first pattern of Soldbuch as made and issued in 1939 had a very limited amount of space on pages 6 and 7 to record the items a soldier was issued. The pre-printed item list omitted many basic items issued to nearly every soldier, such as ammunition pouches, clothing bags, or the Zeltbahn, and there was very little space provided to add these in, and no space for the many other items often recorded on these pages, such as Gamaschen or special clothing items. To fix this problem, later patterns of the Soldbuch had many more items pre-printed on these pages, along with more space to record items not present in the list. However, very many books were made and issued with the first batches in 1939, and stocks of these early books continued to be issued throughout the war. To update these books, and also to add more space in cases where these pages were filled with entries after years of service, a wide variety of inserts were made to be pasted into the Soldbuch. Some were fairly close copies of the equipment issue pages in later pattern books, others were more elaborate fold-out inserts. The equipment issues and checks were fairly frequent for many soldiers, these were conducted when a soldier was transferred, deployed to the field, or at various times when equipment reissues took place. In any Soldbuch that was carried for a few years by a soldier who saw field service, it is typical to find at least one of these inserts
 
 
This page would be pasted at the top onto the top of page 7 in the Soldbuch, then folded in the middle with the lower half folded up and over the upper half, to enable it to fit neatly in the book (you can see the crease from the fold on the line that says “Portepee” in the scan). This particular insert shown in the scan was issued in 1945 and was the last of multiple inserts pasted onto these pages of a Soldbuch issued in 1939. I have reproduced this insert and attached it as a PDF, it is sized to be printed on A4 paper as it is slightly more than 11 inches long. If you want to print it out but don’t have A4 paper, you can get some larger sized sketch pad paper and trim it to size, 8.3″ x 11.7″.
 
SOAP RATION 
 
Soap was carefully rationed and controlled in WWII. It fell under the auspices of an authority called the “Reichsindustriestelle fuer Fettvrsorgung” that controlled soap production and supply. Soldiers in the field may not have been issued soap and if they were it may not have been recorded. But soldiers in the rear- in training, garrison troops, convalescents, etc.- were issued soap and very often these issues were recorded in the Soldbuch, either with a myriad of stamped or handwritten entries, or as here, with a special insert page. This particular soldier was serving as a POW camp guard in Germany during the time indicated on this soap issue insert. 

The insert is printed on both sides and folded in the middle to make four pages. It is loose in the book, it may have been glued in at one time. Only one of the four pages has entries. Both sides are exactly the same.

 
Soap ration insert PDF

To fill this out please refer to the scan of the original. The first column is the date of issue, the next column is to indicate the month for which the samp was issued. The next three columns are for different types of soap: “Einheitsseife” which was an all-purpose soap suitable for whatever purpose, shaving soap, and “Kernseife” which was a type of soap with no natural glycerin that could have been used for washing. The last column, “Zusatzmenge,” was for recording additional soap issued. The last two columns are used here for the signature and rank of the soldier receiving the soap, in this case “Mauermann Gefr.”

This insert can be used in any Soldbuch for any branch. One exception might be officers as presumably they had to buy their own soap. Virtually every soldier at one time or another was stationed in the rear even if only during recruit training. The original was printed on thin natural-colored paper.

 
SCHIESSLISTE
Since at least WWI if not earlier, marksmanship training was recorded in a document called the Schiessbuch. During the war, the Schiessbuch was at least partially supplanted by a number of inserts intended to be pasted in the Soldbuch.  


This example was printed on typical wartime paper and had a sort of green overprint that was probably intended to serve as an anti-counterfeit measure. The purpose of this insert was to record the “shooting class” of the soldier for each training session but as you can see, here, it was just used to record scores. We have reproduced this document, but without the green overprint.
 

Blank stationery for Feldpost military mail

     The link between German soldiers serving in the Wehrmacht and loved ones at home during the war years was the military mail system, Feldpost. Feldpost was regarded as crucial for morale and in Wehrmacht supply lines, it was regarded as a higher priority than any form of supply with the exception of ammunition. Many millions of letters were sent through the Feldpost system during the war. Writing and sending letters and receiving news from home through the mail was an experience common to virtually every Landser.
     An immeasurably vast array of paper and envelopes were used for Feldpost during the war. By 1944 paper was often in short supply and old envelopes were being turned inside out for reuse. Stationery from occupied countries like France and Italy was used, in all sizes and colors. Most envelopes were made from a rough natural-colored paper, brown and blue paper was also common. Soldiers were issued or could buy plain paper and envelopes and also pre-printed letters and cards formatted for Feldpost mailing. We have reproduced a number of these, below are links where these can be downloaded in PDF format, ready to print.
     These first two are simple postcards. They were printed on one side only, the address side. The other side was blank and would be used for the message. These were printed on thin, flimsy card stock that was easily creased.

     Here are 3 folding letters. These were generally gummed around the edges so they could be sealed, like the flap of an envelope. This first one was printed on thin, light brown paper.
     This one was printed on thin gray paper. The area that was gummed was marked on the front, to open the letter the recipient could trim off the gummed part.
     This last one was probably a type that soldiers had to purchase. There is a motivational quote from the author Ernst Jünger on the back: “Courage is the living fire that armies weld.” It was printed on better paper than the others, smooth, with a slight blue tint.
     Of course, printing out the blank stationery is the easy part of having realistic mail for living history. Filling out the letters is more of a challenge. To help with this, here is a quick guide on how the addresses were written on Feldpost letters. The images are scans of letters in a member’s collection. Firstly, some letters written from home to soldiers.

     These letters were sent to soldiers by other soldiers serving in different units.

     Here are some letters home, written by soldiers. Note that in the addresses, the town or city name is the second line in the address, the street address is the third line- the reverse of the way this is done today.

     People in the 1940s wrote with fountain pens or with simple dip pens. Ink was in short supply and people used what was available, mostly black, blue or blue-black, sometimes watered down to save ink. For soldiers in the field, the most common writing instrument was probably a simple pencil.

What color were Heer wool uniforms?

     Wool uniforms issued to most soldiers in the wartime German army were to be made of “Feldgrau”-colored wool uniform cloth. The actual range of fabric color used for wool uniform fabric was vast. Early in the war, bluish-green predominated for field blouses. As the war progressed, this color shifted to grayish-green, to greenish-gray and eventually to brown. But there was always a lot of variation in these shades and there were countless exceptions to these generalities. Blue and steel-gray Italian fabrics were also widely used after 1943.
     Below is a photograph of uniform jackets from a member’s collection. With the exception of the tailor-made NCO field blouse at top left and the officer service blouse directly below it, all of these are issue uniforms.

Zeltstock 01

     The Wehrmacht “Zeltbahn” shelter quarter was issued as part of a set of gear called Zeltausrüstung- tent equipment. According to the German military regulation HDv 205/1, the Zeltausrüstung consisted of one Zeltbahn 31, one Zeltleine 92 (tent rope), one Zeltstock 01 (tent pole) and 2 Zeltpflöcken 29 (tent stakes).
     The Zeltausrüstung does not include a bag for the pole and stake. The 1895-pattern Tornister as used in WWI and then through the 1930s by civil, political and paramilitary organizations did have a bag for tent accessories. This bag had integral straps with buckles, that were intended to be fastened to two leather loops inside the pack. Tornister packs intended for issue in WWII (the 1934 and 1939 models) did not have these loops inside and did not include a tent accessory bag- these were not general issue items in the Wehrmacht. Presumably it was not considered necessary to issue a bag for the purposes of holding the rope, 1 pole and 2 stakes.
     Here are some original examples of the Wehrmacht-issue Zeltstock 01 tent pole.

          The poles are marked with various maker markings and dates. This maker used a script logo inside a triangle, these are from 1940 and 1941.

     This early pole is faintly stamped “WEGA 35.”

     These are stamped “W.T.E. 42” and “ggl 41.”

Another typical marking. “H.W.H. 1938.”

     Each pole is 37 centimeters long. It takes four poles to make a tent. Four poles together measure approximately 134 centimeters long. There is some variation in how the poles fit together, with these original examples. The poles in the pictures below are fit snugly together. You can see that much more of the blued steel ferrule fits into the socket in the top picture.

These photos show the issue type pole sections in use.

These poles were copied by other armies after the war and these post-war copies may be available as surplus today. Both Norwegian and French poles can be found that look almost identical to the Wehrmacht type. The length of these poles is not exactly the same as the German originals. The Norwegian poles (which are often marked “Haeren”) are slightly longer; the French poles (unmarked) slightly shorter. Here is a comparison.

     For reenactment use I avoid using original wartime items which are in most cases now fragile and no longer suitable for field use. At the current time (2023) quality reproduction poles that are very close copies of the Wehrmacht-issue originals are available from vendors of reenactment kit items. In the past, when reproduction tent pole sections were not available, we used poles consisting of 3 Norwegian poles and one French pole. When the poles were assembled, the fact that one is slightly shorter is virtually unnoticeable. Here are some pictures of how an original tent looks erected with original poles.

     In the reality of WWII, the Zeltstock 01 was not always used. Sometimes the soldiers would simply cut a sturdy branch to the correct length. The last photo shows something of an anomaly- what appears to be a bamboo pole.