WWII German board games – “Melder Vor!” and “Stosstrupp greift an!”

WWII German board games – “Melder Vor!” and “Stosstrupp greift an!”

“Spiel mit!” (Play along!) was a set of games introduced during WWII and packaged in a small, flat box that was well-suited to being mailed. It was available for anyone to buy, soldiers could have bought it, or people could have bought it and mailed it to soldiers in the field using the military mail system. It was a set of 5 games: chess, checkers, Nine Men’s Morris, and two military-themed games, “Melder vor!” (Messenger forward!) and “Stosstrupp greift an!” (Assault troop attacks!). The game board were packaged together with cardboard and wood or plastic game pieces.

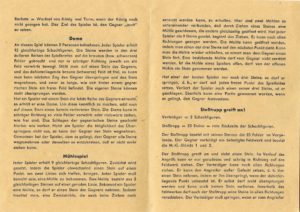
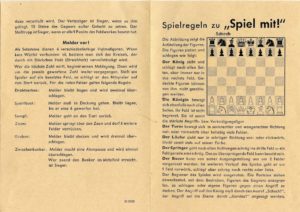
Here are the instructions for the games in “Spiel mit!” The instructions are printed on one double-sided sheet, folded in the middle.

The two military-themed games are played on one double-sided game board, with one game printed on each side. The board is made of lightweight card stock, folded in the middle. These games were intended to be played with the game pieces that came in the box, but they can be played with any kind of small tokens or markers- four different pieces for “Melder vor!” and 25 pieces for “Stosstrupp greift an!” (23 of one type and two of another).

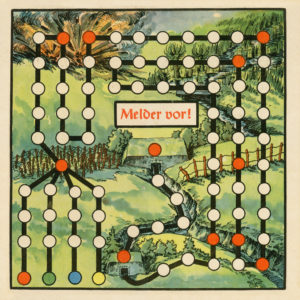
“Melder vor!” is a game for up to four players.

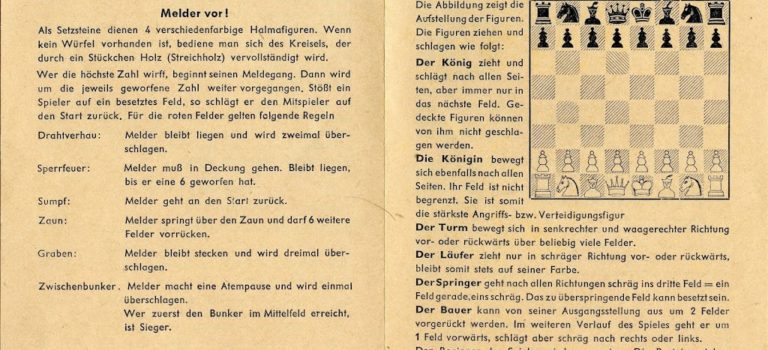
The game is played as follows:

“As game pieces, use 4 different colored pieces. If no die is available, you can use the spintop, which is made complete with a little piece of wood (like a match stick).

Whoever rolls the highest number, begins his trip as messenger. He advances the number of spaces that he rolled. If the player lands on an occupied field, he sends the other player back to the start. For the red spaces, the following rules apply:

Wire entanglement: The messenger remains where he is and his turn is skipped twice.

Blocking fire: The messenger must take cover. He stays where he is, until he has rolled a 6.

Swamp: The messenger goes back to the start.

Fence: The messenger jumps over the fence and advances 6 spaces.

Trench: The messenger is stuck in the trench and his turn is skipped three times.

Intermediate bunker: The messenger takes a break to catch his breath, and his turn is skipped once.

Whoever is the first to reach the bunker in the center, is the winner.”

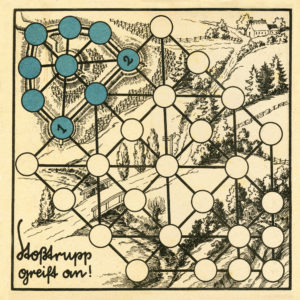
“Stosstrupp greift an!” is a game for two players.

Translated rules:

Defender = 2 chess pieces
Assault troop = 23 pieces = red underside of the chess pieces

The assault troop occupies the 23 spaces in the foreground with his pieces. The opponent defends his fortified field position and occupies machine gun positions 1 and 2.

The assault troop attacks and moves one piece. In the course of the attack he can only move straight ahead and diagonally, in the direction of the field fortification. The defender can move in any direction. He can take the attacker out of the battle, meaning taking a game piece from him, by jumping over him, when the space behind him is unoccupied. The defender cannot be jumped over and cannot lose a piece. Within the field fortification the attacker may also move his pieces in any direction. The defender must move, if he is forced to by the attacker. The defender is the winner, if he is able to take 15 of the attacker’s pieces out of action. The assault troop is the winner, if he occupies all nine spaces in the field fortification.”

I scanned the original board and edited the graphics to remove the folded crease at center. It is very easy to make a reproduction of this board, and coins, buttons, stones or any kind of small objects can serve as expedient game pieces. To make the game board, print out the files in the links below on 11″ x 17″ paper. I went to a local office supply store and had them print the graphics on their color copier, so the ink is waterproof. Then, glue the prints to either side of a 9 inch square piece of card stock. Trim the card leaving a narrow border around the printed black border on one side or the other, and fold it in half, horizontally, with “Melder vor!” on the outside when it is folded. Here are the .pdf files:
Melder vor!

Stosstrupp greift an!

Pebbled buttons used on Heer and Waffen-SS issue wool field blouses

Pebbled buttons used on Heer and Waffen-SS issue wool field blouses

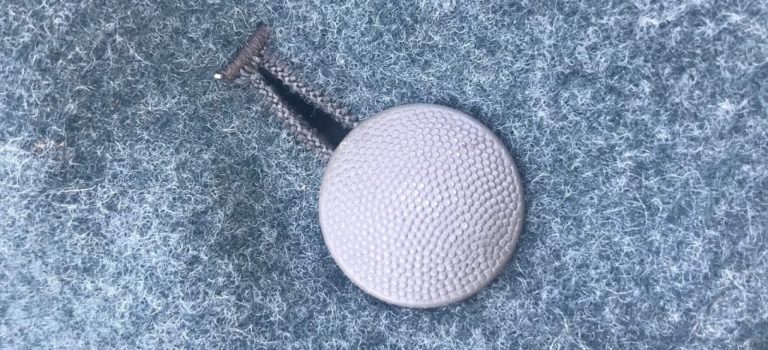
With very few possible exceptions, every issue type wool field blouse made for the Heer and Waffen-SS in World War Two was made with 19mm pebbled buttons for the front placket, shoulder straps and pocket closures. The buttons used for the shoulder boards and pockets and front placket were all the same size, and all field blouses were made and issued with the same size of button. The issue type field blouse buttons were all convex, with a hollow reverse.

Before WWII, the Wehrmacht used aluminum pebbled buttons. At some point near the start of the war, zinc replaced aluminum in production. Near the end of the war, steel buttons began to be produced. This same progression can be seen with dished equipment buttons and some other types of uniform and equipment hardware: aluminum before the war, then zinc, and steel in 1944-45.

The Reichswehr used buttons made of nickel silver, which is a nickel alloy with a slight yellow cast. It is possible that some early Wehrmacht uniforms may also have used nickel silver buttons, with a field gray painted finish if used on field uniforms. Some pebbled buttons were also produced in Bakelite, though these are not common and are not typical on any uniform type from any period.

These same hollow backed field gray 19 mm pebbled buttons (among other types) were also used on other types of clothing, including camouflage clothing and HBT uniforms.

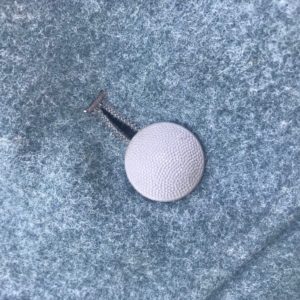
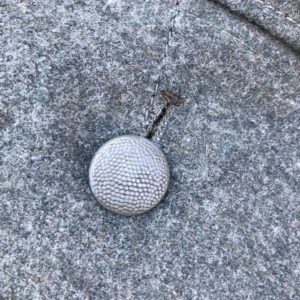
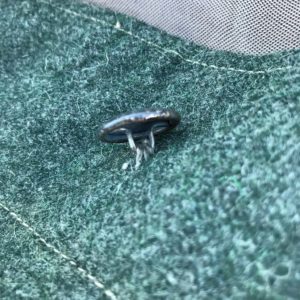
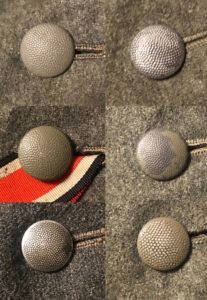
This is an early aluminum button on an overcoat from the 1930s. You can see that it has a very thin, very smooth field gray finish. This may be paint or it may be a type of anodized finish.

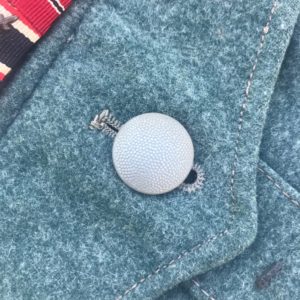
This is an early field gray painted aluminum button on an M36 field blouse. The Germans were not able to standardize color shades for their uniforms and equipment. Buttons used on the field blouse were painted “Feldgrau” which initially was a rainbow of green shades ranging from pale yellowish green, to dark forest green.

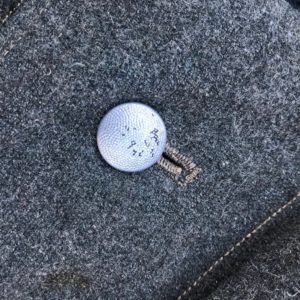
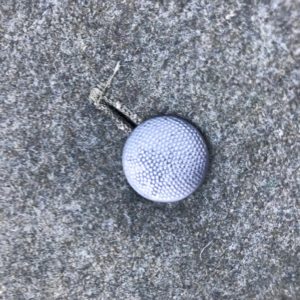
This is an aluminum button, with traces of a dark-colored painted finish, factory sewn on an M43 field blouse made of captured Italian uniform wool, probably in 1944. Pre-war patterns of uniforms, insignia and equipment were issued and re-issued as needed, as long as stocks existed, until the end of the war; the same was true with buttons.

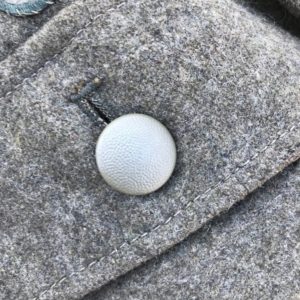
Zinc buttons became very common during the war. This one is on an M43 tunic from 1944.

This zinc button on a worn M44 tunic has very large pebbling. If you look closely at these photos you will note many variations in the size and detail of the pebbling. This was simply manufacturer variation.

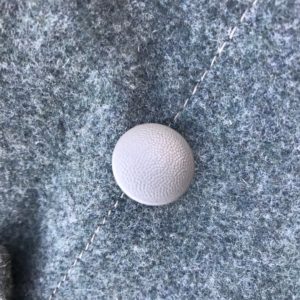
A pristine zinc button with a light-colored paint finish, on a barely used M42 overcoat from 1942.

This well-worn M43 tunic has steel buttons, with nearly all of the original field gray paint worn away. These buttons are magnetic.

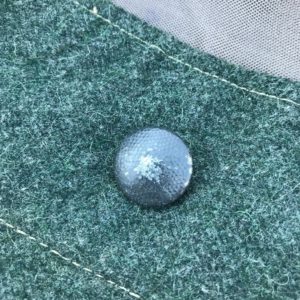
Starting some time in 1943, some types of equipment including some belt buckles and some pebbled buttons began to be produced in a blue color called “Einheitsblau.” Supposedly, this was to simplify production by enabling items for all branches of the military to be finished with the same blue paint. This is an Einheitsblau button on an M43 tunic. Note the lack of detail to the pebbling.

The button above is an example of what was likely the final variation of wartime button. On typical buttons, the pebbled metal face is crimped onto a convex metal plate, which is fitted with a shank. This button is a late war type with the pebbled part crimped onto an S-sing of the type previously used to affix buttons to HBT and tropical uniforms.

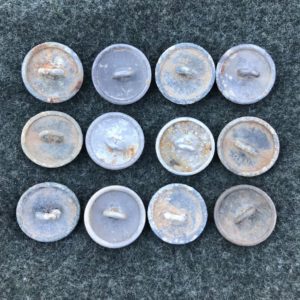
These aluminum and zinc buttons, of the standard type, were recovered from the Stalingrad battlefield and are representative of the mix of materials one would expect to see in the mid-war period. Many of the buttons bear manufacturer markings. Among those pictured here are products of Assmann & Söhne in Lüdenscheid, Berg & Nolte in Lüdenscheid, Brüder Schneider in Wien, Richard Sieper & Söhne in Lüdenscheid, and Funke & Brüninghaus in Lüdenscheid. These were all companies that made other metal bits for the Wehrmacht, including badges, belt buckles and metal insignia.

Different types of buttons with different finishes were used on other types of uniforms, such as parade uniforms, which had buttons with a bright silver finish. Buttons with a solid reverse were sometimes used on tailor made officer uniforms that were not intended for field use.

At the time of writing (2020) near-perfect copies of the standard 19mm hollow back pebbled metal buttons used for Wehrmacht field blouses, have been manufactured for years. Reproductions offered by a number of suppliers are visually identical to the originals, especially on the front. The very wide range of colors and shades used on original buttons makes it hard for the makers of the reproductions to get this wrong. At this time, applying original buttons to a reproduction field blouse cannot reasonably be stated to add visual realism, from a living history perspective.

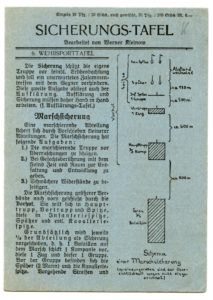
Sicherungs-Tafel

Sicherungs-Tafel

Sicherungs-Tafel
 
Arranged by Werner Kleinow
 
6. Wehrsporttafel
 
The Sicherung protects the entire unit from enemy ground observation and hinders unexpected encounters with the enemy. This second task also falls to the Aufklärung. Aufklärung and Sicherung must therefore work together hand in hand. (see Aufklärungs-Tafel)
 
Marschsicherung
 
A marching detachment provides for its own security by advancing a smaller detachment. Security on the march has the following tasks:
 
1. Protecting the marching unit from surprises
2. In contact with the enemy, giving time and space for expansion and deployment
3. Crushing weak resistance
 
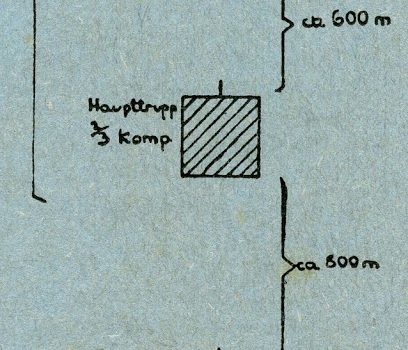
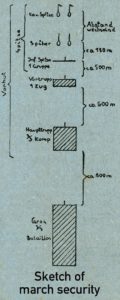
The forward march security of larger units is achieved by the Vorhut. The unit divides itself into the Haupttrupp (main unit), the Vorhut (forward unit), and the Spitze (foremost elements), this is divided into the Infantry Spitze, Späher (reconnaissance troops), and if applicable, the cavalry Spitze.
 
As a rule, one third of the detachment is dedicated to security, meaning that 1 Bataillon on the march sends forward one Kompanie, this Kompanie sends forward one Zug and the Zug sends forward one Gruppe. In front of this Gruppe is situated the Späher (2 men) and the cavalry Spitze. Advancing patrols and Gruppen are secured by Späher, their own external attentiveness and well covered advance. Detachments in open order (contact with the enemy) are secured by an extended network of Späher.
 
 
The distances in the sketch are just an indication. They can vary depending on time, situation and terrain. At night, in terrain with poor visibility (forest, very hilly) or close to the enemy, they will be shorter; units will determine this themselves. During the day, in flat terrain with good visibility, they can be longer (about 150 – 500 – 1000 – 1800 m).
 
Connections between the elements (also for distribution of reports and orders) is correctly achieved by connecting detachments (not individual people). For this are used, circumstances permitting, cyclists and motorcyclists. The connecting detachments make sure that the connections are maintained. They therefore must use caution at bends in straight roads, in woods, in towns, and at night; they must signal to the next connecting detachment (always maintain visual contact). The connecting detachments follow each other at a distance of about 50 meters.
 
The Infantry Spitze is equipped with flare pistols and other signaling equipment (flags, report poles) for reporting suddenly appearing enemy units (motorized and armored units).
 
Every marching unit (also on trucks) sends Späher forwards, to the sides and also for aerial observation (binoculars!).
 
Späher units that are sent to the sides cover the flanks of the marching unit. The distance between the units is determined here also by time, situation and terrain. (Visual contact!) Strengthen the security at the sides depending on the situation (even arranged sideways like a flight of wild geese).
 
In reverse order the troop is protected from the rear. (Nachhut (rear guard): Haupttrupp, Nachtrupp, Nachspitze.)
 
Security of a resting unit
 
A resting unit arranges a fan-shaped security towards the enemy: the Vorposten.
 
Tasks:
1. Protecting the resting unit from surprises
2. In the case of enemy attack, giving time for deployment.
 
Arrangement:
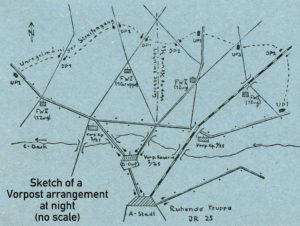
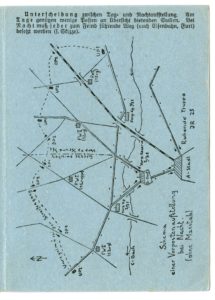
Vorposten reserve with pushed-forward Vorposten Kompanien. Every Vorposten-Kompanie protects itself with Feldwachen (1 Gruppe – 1 Zug), these send forward Doppelposten and Unteroffizierposten (see sketch).


Distances: Resting unit to reserve Vorposten, about 4 km; Vorposten reserve to Vorposten Kompanien about 1500 m; Vorposten Kompanien to Feldwache about 700 m; Feldwache to Doppelposten or Unteroffizierposten, about 200-300 m. (Only an indication, depends on situation and terrain.)
 
As a rule: As few Vorposten as possible, in order to give the maximum number of people the necessary rest.
 
Differences between daytime and nighttime arrangements. In the day it is sufficient to have just enough sentries to observe the positions. At night, every road leading to the enemy (also railways and river fords) must be occupied (see sketch).
 
The Feldposten are numbered within the Kompanien from right to left using Roman numerals. The Doppelposten or Unteroffizierposten are numbered the same way within each Feldwach, in Arabic numerals.
 
Doppelposten: 2 man sentry teams, relieved by the Feldwache.
 
Unteroffizierposten: has in addition to the sentries (always 2 men!) also their own relief with them (6-8 men).
 
Connection forward is maintained by cyclists, connection between the Feldwachen and between the further pushed forward Vorposten is maintained by irregular patrols.
 
Detachments in closed order in rest positions additionally place outposts in the vicinity of their quarters. The Feldwachen similarly position sentries with rifles.
 
Aerial security: Every detachment positions aerial guards and gas guards (binoculars, sunglasses, alarm equipment), larger detachments are protected by defensive weapons (machine guns, anti-aircraft cannons).
 
Notes: The Vorposten must camouflage themselves well, are equipped with binoculars (also flare pistols for reporting enemy armored vehicles); roadblocks are deployed in front of the sentries. In case of strong enemy attack, report or alarm by shooting, retreat from the Feldwachen or ordered positions (see special sentry instructions). The line of the Vorposten-Kompanien is in general the main battle line (preparation of rifle and MG positions, roadblocks).
 
Battle Vorposten (Gefechtsvorposten): In contact with the enemy Gefechtsvorposten pushed forward 2-300 m (strength up to 1 Gruppe) make up the first line of resistance (frequent change of positions, mobile, tough).
 
General Sentry Instructions: No open light, no sounds or strong movements, sitting and laying down only when ordered. Exchange observations with friendly passing patrols. Wagons and vehicles are to be stopped and searched, unknown persons and enemy negotiators (blindfolded, no conversation!) are brought to the Feldwache. (The second man continues to observe!) At night, any person who does not stop after being ordered “Halt!” 3 times is to be shot.
 
Special Sentry Instructions:
1. Furnish information about the general situation and enemy.
2. Designation of their own sentries, the neighboring sentries and pushed forward detachments (patrols, etc.) password (1 word) and field password ( 2 words, call and response).
3. Exact information about the area, the terrain ahead and landmarks. (Passes, bridges etc. leading to the enemy).
4. Stopping of enemy attacks.
5. Location of the Feldwache, Vorposten-Komanien, the neighboring friendly units and the routes there.
 
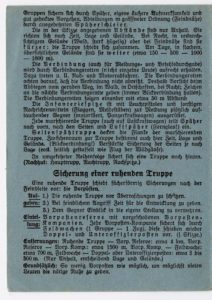
[Below: the complete original text of the Sicherungs-Tafel, in its original format. For more detail on this subject from a military manual refer to The Gruppe as Feldwach.]

Original WWII German Esbit stoves and fuel, and postwar substitutes

Original WWII German Esbit stoves and fuel, and postwar substitutes

     “Esbit” is a type of hexamine-based solid fuel invented in Germany in 1936. The name is an acronym for the initials of the inventor, Erich Schumm, and “Brenstoff in Tablettform” (Fuel in Tablet Form). The Erich Schumm company (later the Esbit company) also made small, portable stoves for use with this fuel. They were advertised as a way to warm food and beverages for sport and hiking, for travel, and for workers to use on their breaks. Prior to 1945 there were a few different types of these stoves offered, of which the most commonly encountered today is the Model 9. Esbit stoves were issued to German soldiers in WWII and were also available for soldiers to buy. They are mentioned in memoirs written by Wehrmacht soldiers and also in memoirs of American troops who served in Europe and use these as captured items. It’s reasonable to conclude that they must have been fairly common among Wehrmacht troops, and they are very handy and practical items to use for living history.
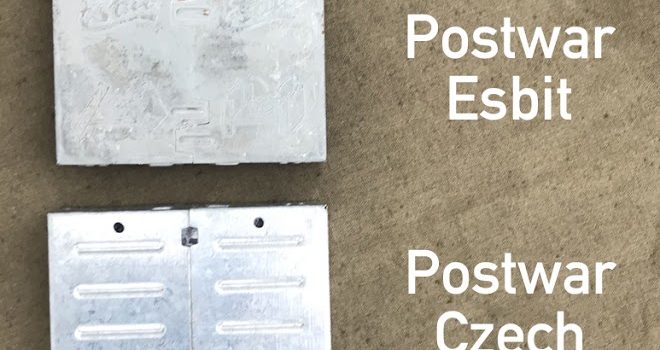
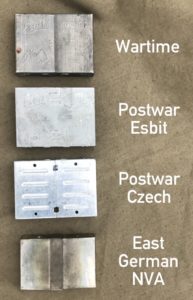
     The wartime Model 9 Esbit stove is made of zinc-coated steel. With use, the zinc coating is worn away or possibly burned off by the heat of the burning fuel. The bare steel is extremely susceptible to rust, and black residue from the burned fuel will build up on the inside of the stove. These are not things that were intended to be used forever, they were cheap and have a limited lifespan with extensive use. The original wartime Model 9 is now collectible and not extremely common. From a living history perspective, I think it is better to preserve the originals than to consume them and further reduce the finite number of surviving original examples. Production of the Model 9 continued after the war, with some design updates. Other nations and armies also made different types of similar stoves for their own troops, after the war. Here is a comparison showing the wartime Model 9 Esbit, and various postwar types that can be found today.

     The postwar Esbit stove shown, is very similar to the wartime one. The biggest difference on the top of the folded stove, is that the wartime one has straight edges on the central closure, while the postwar one has “teeth.”

     The bottom of the pre-1945 Model 9 is solid, and the postwar one has vents.

     For reenactment, I personally have always carried this postwar Model 9 version, as I use my Esbit a lot and do not want to destroy collectible originals. You will notice that the “Esbit” script logo on both is identical. In the 1980s the company switched to a different logo.
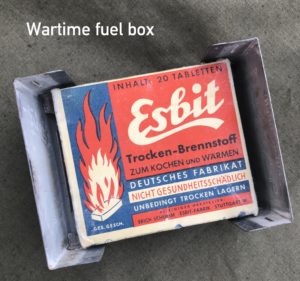
     The Esbit fuel was packaged in a cardboard box that fit inside the stove. Reproductions of this box are available from some reenactment vendors.

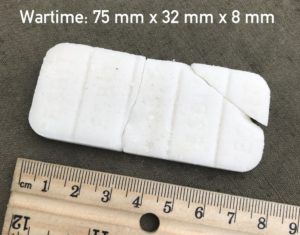
     The box claims to contain 20 fuel tablets, but that isn’t really true. It contains 4 large tablets, that are scored so that you could break each tablet into 5 parts. I opened this wartime box, which probably had never been open. The tablets in the box are broken, perhaps due to inherent instability of the fuel tablets over time.

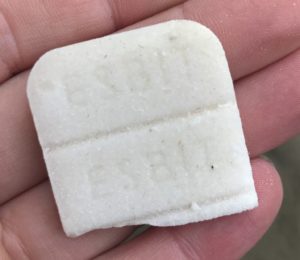
     Each of the 5 sections of the original tabs is marked “ESBIT.”

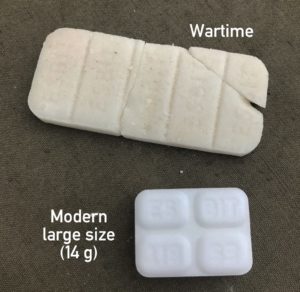
     Esbit currently offers fuel in two sizes, neither of which are the same as the 75 mm x 32 mm x 8 mm wartime slabs. They make a small 4 gram size, and a larger 14 gram cube. The smaller, 4 gram tablets are similar to the sections of the original tablet, and 20 will fit in the wartime box. 6 of the larger tablets fit perfectly in the wartime box. Other types of hexamine fuel are available today and may function more or less the same as the Esbit product. I once ordered “Esbit” fuel from a seller on Amazon but got a generic, made in China product that did not function as well, in my opinion. Generally, I prefer to purchase Esbit fuel at a local shop where I can see exactly what I am buying. The modern Esbit fuel cubes come individually blister packed and when you open them, there is a smell that is quite strong. I unpack the cubes and load them into a reproduction box, the smell vanishes after a day or so.

     In my opinion, the Esbit is best at heating prepared food, rather than actually cooking. Esbit stoves and fuel are great at warming soup or other canned foods. For reenactment, if you plan to eat out of cans, you can consult this list of Wehrmacht steel ration can contents for some meal ideas.
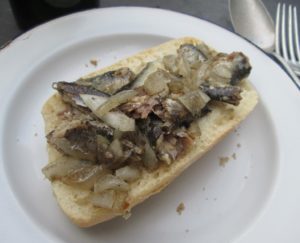
     It is also possible to actually cook meals with the Esbit as well. With enough fuel and time, you can boil water and keep it boiling. One recipe I like to prepare with my Esbit stove is “Ölsoldaten” (Oil Soldiers), from the wartime Wehrmacht cookbook “Östliche Speisen nach deutscher Art.” The recipe in the book: “Fry sardines in their own oil while adding finely chopped onions. Drizzle with lemon juice as a dressing.” It is further noted that “Tuna fish in oil can be prepared just as the canned sardines.” I find the tuna version of this to be delicious.

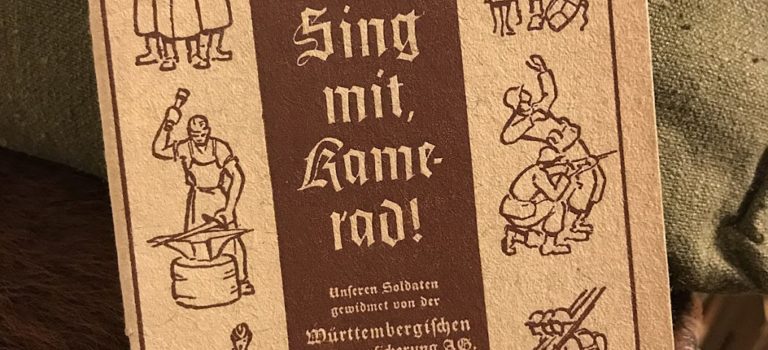
Wartime German songbook “Sing mit, Kamerad!”

Wartime German songbook “Sing mit, Kamerad!”

This is a wartime German songbook that was distributed as a promotional item by an insurance company in Stuttgart. It’s about 50 pages long. The stamp and notation on the title page of this book indicates it was property of a German Army unit during the war.

PDF Download

 There are 72 songs in this book. Of interest here is the fact that only the lyrics are included, there is no musical notation. Whoever compiled these songs assumed that soldiers would be familiar with them and know the melodies. Perhaps this may offer some insight into songs that were common and well-known to Wehrmacht soldiers.

 
The book includes the lyrics to the following songs:
 
A list of the 72 songs:

Als wir nach Frankreich zogen
Als wir jüngst in Regensburg waren
Am Brunnen vor dem Tore
An der Nordsee, an der Donau (Jawoll – das stimmt – Jawoll)
Argonnerwald
Auf dem Berg so hoch da droben
Auf der Heide blüht ein kleines Blümelein (Erika)
Auf der Lüneburger Heide
Auf die schwäb’sche Eisenbahne
Auf, hebt unsre Fahnen
Auf Wiederseh’n, mein Schätzelein (Heut’ stechen wir ins blaue Meer)
Burschen heraus
Das ist nun einmal so (Wenn ein Soldat ein Mädel liebt)
Das schönste Blümelein, das ich kenn
Der Gott, der Eisen wachsen liess
Des morgens, wenn ich früh erwach’
Die blauen Dragoner
Die Ganze Kompanie (Stolz marschieren wir zu drei’n)
Drei Lilien, drei Lilien
Drunten im Unterland
Ein Heller und ein Batzen
Ein Schifflein sah ich fahren
Ein Tiroler wollte jagen
Engelland (Heute wollen wir ein Liedlein singen)
Es ist so schön, Soldat zu sein (Rosemarie)
Es steh’n drei Birken auf der Heide
Es war ein Edelweiss, ein kleines Edelweiss
Es wollte sich einschleichen
Flieg’, deutsche Fahne, flieg’!
Frühmorgens wenn die Hähne kräh’n
Frühmorgens wenn die Sonn aufgeht (Tschingta, tschingta Bummtara!)
Hab mein Wage voll gelade
Heiss ist die Liebe
Heute geht’s an Bord
Heute wollen wir’s probieren (Westerwald-Lied)
Hoch auf em gelben Wagen
Ich bin ein freier Wildbretschütz
I bin Soldat
Ich sing mir ein Lied
Ich trag in meinem Ranzen…
Jetzt gang I ans Brünnele
In Sanssouci am Muhlenberg (Veronika)
Im Feldquartier auf hartem Stein
Im schönsten Wiesengrunde
Kennt ihr das Land
Liebchen ade! (Annemarie)
Liebling, wenn ich traurig bin
Lippe-Detmold, eine wunderschöne Stadt
Märkische Heide, märkische Sand
Mein Regiment, mein Heimatland
Morgen marschieren wir in Feindesland
Muss i den zum Städtele naus
Nur der Freiheit gehört unser Leben
Schwarzbraun ist die Haselnuss
Soldat sein, heist true sein
Soldaten sind immer Soldaten
Steh’ ich in finst’rer Mitternacht
Tirol, du bist mein Heimatland
Und die Morgenfrühr, das ist unsere Zeit
Von den Bergen rauscht ein Wasser
Was glänzt dort vom Walde
Weit last die Fahnen wehen
Wenn alles grunt und blüht
Wenn alle Brünnlein fliessen
Wenn all untreu warden
Wenn die bunten Fahnen wehen
Wenn wir marschieren
Wilde Gesellen, vom Sturmwind durchweht
Wir marschieren alle in gleichem Schritt
Wo e’ Klein’s Hütt’le steht
Wohlan, die Zeit ist kommen
Wohlauf, Kameraden, aufs Pferd

Internal stiffener material on German M43 field cap visors

Internal stiffener material on German M43 field cap visors

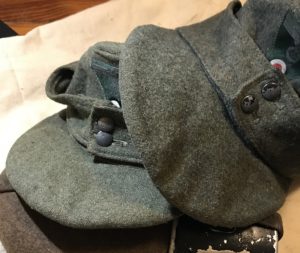
Here are two well-used original M43 field caps. Authentication of these hats in general has become difficult for me but both of these came from  highly regarded dealers more than 10 years ago and were positively reviewed on WAF; I am extremely confident in stating that these are original wartime Wehrmacht field caps.

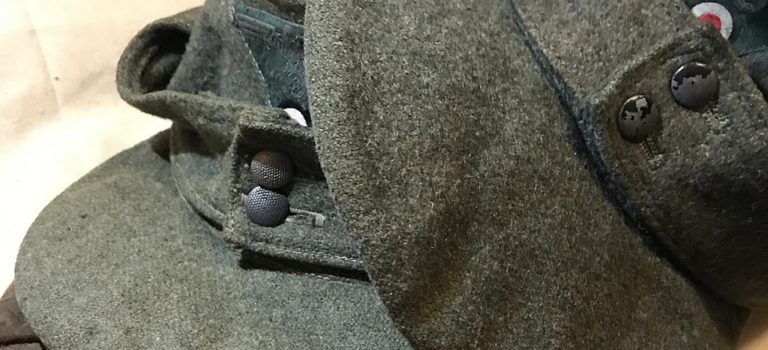
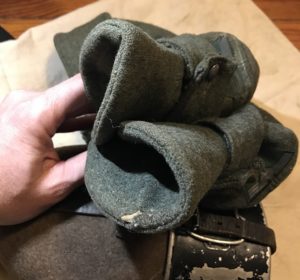
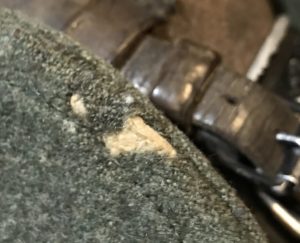
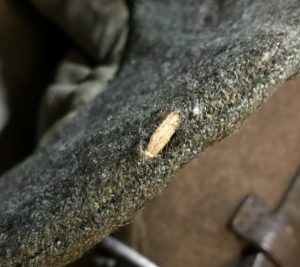
Both of these have cardboard internal stiffeners inside the visors. Through wear and use, the cardboard has broken up/crumbled and become very soft and pliable. It can be bent into any shape desired and will not hold its shape, returning to a generally flat, floppy, droopy position.

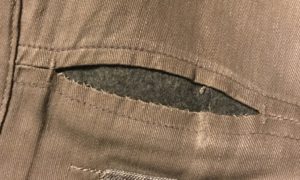
One of these caps has some insect damage to the underside of the visor, revealing some of this cardboard in the brim. It is a light tan color.

The typical coarse, loose texture of this type of wool is also noticeable here.

Evaluating and Upgrading a Reproduction WWII German Field Blouse

Evaluating and Upgrading a Reproduction WWII German Field Blouse

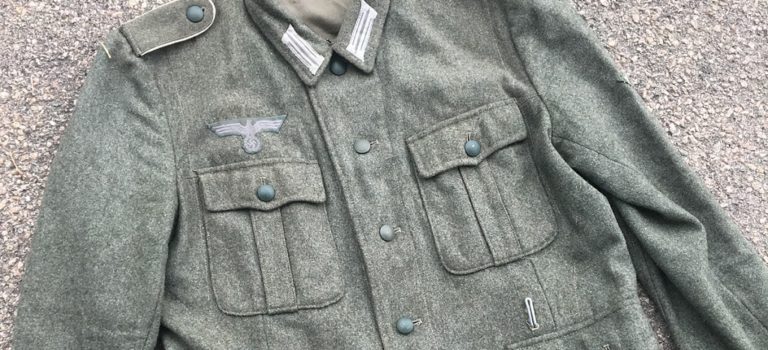
At the time of writing (2019) reproduction WWII German field blouses have been reproduced by many manufacturers for more than 20 years. There are many options for new made uniforms and a wide variety of uniforms may be available on the secondhand market. This guide contains ideas for how to make any reproduction of a wool enlisted issue field blouse as realistic as it can be.
 
The first thing to evaluate is the insignia (if any) and how it is applied. Not all reproduction insignia are equal, and there are some terrible copies out there. Original issue-type shoulder straps were generally made out the same types of fabrics used for constructing uniforms. Pre-war straps were dark green and made out of a tightly woven, fairly smooth wool, the same stuff used for M36 tunic collars. Wartime straps were field gray. Pre-war shoulder strap piping was mostly wool, while rayon was predominant during wartime, though some wool piped wartime straps were produced. Look at photos of original straps to get an idea of what the piping should look like and how thick it should be. It was generally fairly narrow. If your shoulder straps have rope-thick piping, or are made out of a loosely knit wool/synthetic blend fabric, you should replace them.
 
Collar Litzen, in general, should be neatly machine applied. Der Erste Zug has a great guide on typical period application styles. Pay attention to the shape of the applied Litzen. See here for some wartime examples. The final pattern generic Litzen appeared in May, 1940, and are ideal for most wartime field blouses. The earlier generic Litzen from 1938, with dark green stripes, were normally factory applied on M36 and some M40 field blouses. The pre-1938 branch piped Litzen were usually only seen factory applied on M36 and earlier field blouse models.
 
Factory applied breast eagles were generally Bevo (machine woven) and were generally machine applied on wartime field blouses. Hand sewn eagles were common on pre-war uniforms, and some later field blouses did still have hand sewn eagles. Machine embroidered eagles on rayon backing appeared late in the war. Avoid eagles embroidered on wool or felt, these were a private purchase type, never applied at the factory, rarely seen on field tunics. Again, the 1940 pattern insignia (gray on field gray eagle) is ideal for most wartime field blouses. See this guide to determine what pattern of breast eagle would be most appropriate for the year in which your field blouse would have been made.
 
The next thing to look at is the buttons. The large pebbled buttons used for the front placket and pocket closures were made by many manufacturers and countless variations exist. They were made in aluminum, steel, zinc, and even Bakelite, and were painted in various shades. The size and appearance of the pebbling varied from manufacturer to manufacturer. Here are some typical worn wartime examples.
There are extremely good copies of original aluminum buttons currently being manufactured. Many reproductions being made today have pebbled buttons that are virtually perfect. But if your buttons are made of brass, or the pebbling is totally unlike that of originals, they should be replaced, either with originals or with better quality reproductions. Original buttons used on enlisted issue field blouses had a convex reverse with a shank for stitching to the uniform. Buttons with solid or flat backs should be replaced.
 
Look also at the small buttons. Here is some information about the types of small buttons originally used. Replace any colorful plastic buttons or plastic buttons molded to look like pressed paper buttons. Reproduction horn buttons are available, but small round black plastic buttons in the correct size may also be available at a local fabric store.
 
Look at the thread used to affix the buttons. Original button thread was thick stuff, here are some examples. If your buttons are sewn with thin garment thread, you need to re-stitch them with something that is more accurate and also stronger.
 
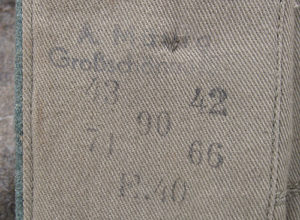
Look inside the front placket closure, behind the buttons, for size and manufacturer stamps like this.
All field blouses had these stamps when they were made. If they are absent, they can be added for extra realism. To measure your field blouse to determine the sizes with which it should be stamped, see here.
 
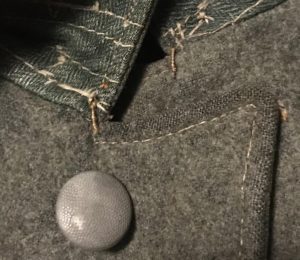
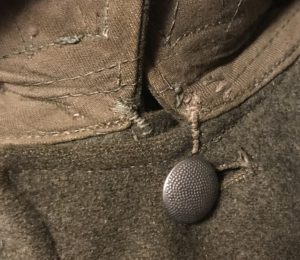
Some but not all field blouses had thread reinforcement stitches at the collar. These were hand done. It is easy to add this detail, if desired. Here are two different examples of these reinforcement bars, on an M40 and a M43 field blouse.

If you have an M36 or M40 field blouse, you may have to add the small hooks inside for the ends of the internal suspenders. There were two of these, one on each side, in front. See here for information on these. You may also add additional thread reinforcements on either side of the openings for the internal suspenders used with these field blouse models, you can see the reinforcement stitching in this photo.

Any field blouse, regardless of how close it is to an original, can be let down by bad insignia or buttons. And making sure that all the small details are as they should be, can help elevate even a lesser quality copy. Once you have all the details correct, the next step is just to wear it, or weather it if you prefer.
1940 pattern generic Heer Litzen (collar tabs)

1940 pattern generic Heer Litzen (collar tabs)

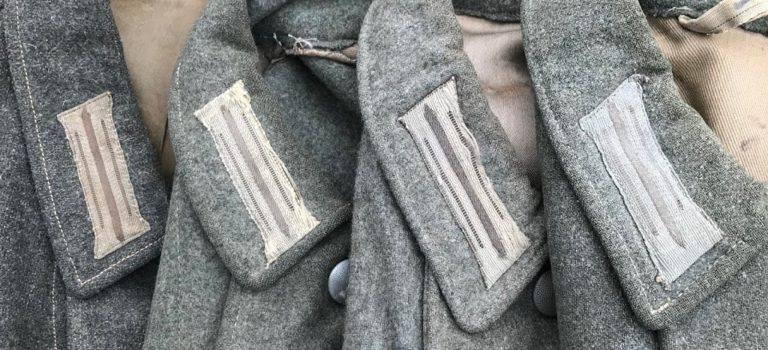
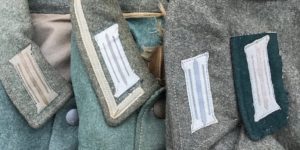
This final pattern of generic Heer Litzen was introduced in May, 1940. These photos show an assortment of original examples. These were made in varying sizes, with central stripes in light gray, dark gray, tan, or blue-gray, with similar variations to the background color as well, and variation in the relative sizes of the graphic elements. These photos don’t show the entire original range of variation. The many manufacturers who made these were simply not able to make them all the same, for all the millions that were made 1940-45.

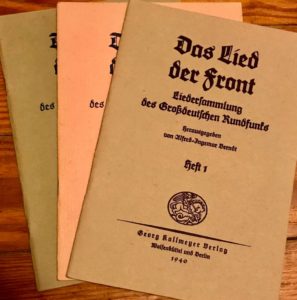
Songbook “Lied der Front” (Song of the Front) 1940

Songbook “Lied der Front” (Song of the Front) 1940

“Foreword

Anyone who has ever worn the gray tunic knows the power of the soldiers’ song. He knows, what mysterious power is hidden in such a song that can, for a whole Kompanie, a Bataillon, after great exertions, lift them back up again and prepare them for new achievements. But he also knows how the soldiers’ song, powerful and yearning, funny and serious, can improve so many nice evenings in barracks or in quarters, in the field or in the training area. The whole many-sided life of a soldier is reflected back in these songs. And then he might grab paper and sheet music and forge lyrics and melody together, that arise from soldierly experience. Many such songs have been carried over into the body of songs of the German people, and become collective property. We remember the many soldiers’ songs of the World War, when often nobody knew who wrote them or who gave them melody. They were sung and carried on from one end of the front to the other. This one or that one would add something to them, set them to one or another tone, and in this way such songs became true communal products of the front.

It is for this reason that, a few weeks after the beginning of this war, I made the decision to request soldiers to submit the songs and melodies of this war to the greater German broadcast agency, so that they wouldn’t be lost, and over the etherial waves could very quickly become communal property of all German soldiers and the homeland. This request was met with surprising success, and once again showed how much musical power is in the German people. There are again great composers, and great poets, who nevertheless understand how to sing in the spirit of the people.

The continually surprising success of this request proved me right. There were not thousands, rather tens of thousands of submissions, all of which were seen and checked by the editors and our coworkers. And the results, that were added to German song in this way, has contributed some very valuable achievements to the treasury of songs of the German people.

Volume 1 of this song book has already achieved record sales of more than a million copies. Volume 2 is not far behind, and the publishers and printers have their hands full trying to fill all the requests. Now volume 3 and others in the series will be sent out, so that the new soldiers’ songs can be carried in every bunker and trench, every airfield and patrol boat, and so that you, Kameraden, can truly take part in these songs.

On behalf of the greater German broadcast agency:

Alfred-Ingemar Berndt
Principal and Leader of the Broadcast Department of the Reich Propaganda Ministry
currently a Leutnant in a schweren Panzerjägerabteilung”

Three volumes total were produced, the link is to a PDF of all 3 volumes.

Lied der Front

Evaluation of Reproduction WWII German Wool Uniform Items- Cut and Tailoring

For some years, I evaluated reproduction WWII German wool uniform items, and reenactor claims and opinions about them. In the end, my conclusion was that at the time of writing (2019), the products of any of the major suppliers generally fall within the wide original range of size and manufacturer variation seen on surviving original uniforms. In this sense, it is my opinion that with regard to cut and tailoring, virtually any of these products (generally speaking) are usable for reenactment purposes that require uniforms that are extremely close to the originals. The only currently manufactured uniforms that I regard as completely unusable are those made out of incorrect materials- specifically, those made by a manufacturer or manufacturers in China from a thin, almost shirt weight wool/polyester blend fabric with a noticeable synthetic sheen. To explain how I came to this conclusion, I will elaborate on my methods of evaluation.

1. Challenges of Evaluating Reproduction Uniforms

Firstly, I should note that there exist many challenges to evaluating reproduction uniforms. Foremost among them, when it comes to field blouses, is the matter of sizing. Original field blouses were sized five different ways, so a field blouse with a given chest length could be long or short, with longer or shorter sleeves, a bigger or smaller collar, and the length from the collar to the belt hook holes could vary independently of the total length. Most manufacturers of reproduction field blouses size these based on chest size only. This fact makes it very hard to make exact 1:1 comparisons between any single original field blouse, and a reproduction counterpart. Even if the chest sizes are the same, the collar could be bigger or smaller, the sleeves longer or shorter, and that could still be perfectly OK as it is simply a sizing feature.

Another major challenge is the range of variation seen on original examples with regard not only to materials, but also cut and tailoring. There was a time when I strongly believed that all wartime uniforms were subject to very strict tailoring controls. This is in fact not the case, and I came to this completely wrong conclusion based on reviewing a sample size of originals that was too small, and also on original documentation that indicated how things should have been- though this was not as things actually were. I believe that the wide observable range of variation seen on original uniforms is largely a result of simple manufacturer variation although there may have been other variables as well.

A further challenge to evaluating reproduction uniforms is the fact that most of the larger manufacturers have produced various runs of garments over time and these runs are different from each other. As an example, the maker At the Front started off making their own uniforms, then sold Sturm uniforms with added insignia and size/maker markings, then offered in-house made “Texled” uniforms in both custom and off-the-rack versions, then finally had their own proprietary brand of imported uniforms. So when someone describes an At the Front field blouse, it could be any of a number of garments that differ from each other in very significant ways. Similarly, the manufacturer Sturm/Mil-Tec released many discrete runs of uniforms with different tailoring details, materials, hardware, etc. And smaller makers, who may have made items on a cottage industry or even totally bespoke custom basis, may have made one garment that is dimensionally perfect, and another that I would judge to be short of the mark, based on a number of factors including customer specifications.

2. The Original Range of Variation

It is immediately apparent to even a casual observer with access to even a very small sample of original uniform pieces of the same type, that there exists a tremendous range of variation among them. One can see major differences in the size and shape of pockets, the size and shape of collars and lapels, the waist taper and sleeve shapes. Even small details such as buttonhole size, the size and construction of belt hook holes, or the stitch count of seams, can vary dramatically from one example to the next. I have previously shared some information on these variations, some specific examples:
M43 Tunic Collar and Sleeve Shapes
Pocket Sizes and Stamped versus Actual Measurements

In truth I really can’t say with absolute certainty that these variations are not the result of different patterns being supplied to various manufacturers of the same item. But in any case there can be no doubt that these variations exist, and need to be accounted for when evaluating reproductions.

3. 1:1 Comparisons with Originals, and “What is Best”

As mentioned above, simple 1:1 comparisons between original and reproduction uniform components may be of far less value than one would assume, because a single original example cannot take into account the range of variation. If someone had access to, for example, 10 or 20 original M43 field blouses, he could buy two very different-looking reproductions from different manufacturers, and make the case that one or the other is correct, and the other not, or the other way around, by selecting the original that happened to most closely resemble one or the other- when in fact, both garments could be equally right! The wide range of original variation makes it nearly impossible to say that one maker or another is “the best.” If one maker is offering a near-perfect copy of one style, and another is offering a near-perfect copy of another style of the same garment, there is no way to say which is “best.” In fact, many original photos show men in the same unit wearing a range of subtly different versions of the same stuff. For a reenactment group, it may be regarded as important to reflect these subtle variations in order to appear more realistic. In such a scenario, using items from a range of suppliers will achieve the desired result far more than looking for a “best” which can never really be said to exist, as criteria for evaluation are largely subjective.

4. Objective Measures of Evaluation

There are, of course, ways to create objective criteria for evaluation as well. When measuring original uniforms and comparing them to originals, I have chosen to look at ratios and proportions, as these are what constitute the “cut” of the garment. For example, we can look at breast pocket size as a ratio of the chest size and this will enable us to determine if the proportions of the chest pockets are within the original range no matter what size reproduction tunic is being evaluated. Over time, I made dozens or hundreds of measurements of very many aspects of a range of original uniform items and looked at proportions and ratios of various measurements as compared with reproductions from a variety of suppliers. Even though I could never claim that the small sample of originals that I worked with, was in any way representative of the full and total original range of variation, I could not find any measurements on the reproductions that I studied, that fell outside of the measured original range by more than a tiny percentage that amounted to a small fraction of an inch.

5. Evaluating Reenactor Consensus Opinions, Myth and Lore

I will give an example of an oft-repeated piece of reenactor lore that could not be proven by comparison with originals, and that is the assertion that Sturm/Miltec field blouses have “suit coat shoulders.” I measured very many aspects of the shoulders and arm holes including the shoulder size compared to the chest size, the diameter of the arm holes, the distance across the upper back at the narrowest point, etc., then compared all of these numbers to the other measurements, then compared the resulting ratios to the measurements of a number of Sturm/Miltec reproduction field blouses- and found no measurable difference. There is a lot of reenactor myth and lore about collars and sleeves and other aspects of cut and tailoring and I was not able to verify ANY of these claims. I believe that some of them were rooted in dealer sales pitches and some of them were just things people made up, that sounded believable.

6. Conclusion – A Correct Uniform

So what then is the reenactor to do, if consensus opinions are worthless and no “best reproduction” can be said to exist? The reality is that the fit of a reproduction garment, and the type of insignia and quality and manner of insignia application, in almost all cases will have greater bearing on the realism of a uniform part, than who made the garment. Different makers of off-the-rack uniforms offer different interpretations of the original cut- some are longer, some have more waist taper, etc. Reenactors should either seek out well-fitting uniforms,* or get uniforms that they can have tailored to fit properly. Ordering a custom garment made to your own size specifications is also possible. Insignia application is a large subject of its own but all reproduction insignia are absolutely not created equal, and clumsy or improper application can spoil the look of even perfect reproduction insignia. In the end, it’s my opinion that a hyper-focus on tiny facets of material culture tends to detract from what I feel are more important understandings of the human beings who wore these things, their culture, language, and the history of what they were a part of.

* For information on how these things were supposed to fit the wearer, please refer to Wehrmacht Regulations on the Fit of Uniform and Equipment Items